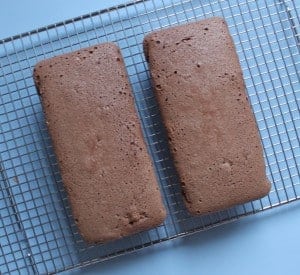
 We just finished moving into our new home and we've only been here one week. Initially, we had no plans to host a Housewarming Party so soon. However, the opportunity for us to do so came up sooner than anticipated because all our family members happened to be in town, including my favourite aunt who was visiting from Asia. Amongst all the packing, unpacking and cleaning, cooking a three-course meal for a party surely seemed like an ambitious task. Luckily, I had just learnt how to make a descent ribs and pasta dinner so my mains were covered. As for the dessert, it was very important to work with a no-fail recipe since I had very little time to spare. I chose this delicious Japanese style chocolate cheesecake that was deceptively easy to put together and turned out wonderfully.
The only part of this dessert that may be of concern for some bakers would be the presence of an unpleasant crack in the cake. In the recipe below, I've included all the techniques you should use to eliminate this if you're like me and picky with the aesthetics:
- Baking the cake in a water bath to keep oven moisture high while maintaining a gentle heat
- Reducing drastic temperature changes by keeping the cheesecake in the oven at the end.
- Baking it slowly with low heat instead of quickly with high heat
- Using a small amount of corn starch in the recipe
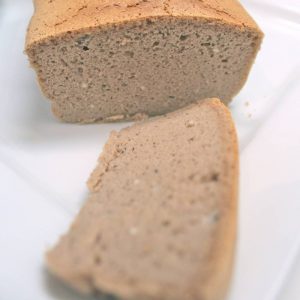
Compared to the creamy and dense New York style cheesecake, the spongy body of a Japanese style cheesecake is both light and fluffy. The chocolate really satisfies the palette while the subtle cheesecake flavour adds a nice savoury element. I hope you will give this amazing cake a try this weekend or maybe even save it for a special occasion ♡
XOXO,
Mimi
♥ INGREDIENTS:
Makes 2 Medium Sized Cheesecakes in two 8X4 rectangular cake pans
For the Batter:
180 grams cream cheese (block cream cheese, NOT cheese spread)
180 grams milk
75 grams butter
6 egg yolks
40 grams cake flour
15 grams corn starch
25 grams cocoa powder
For the Meringue:
¼ teaspoon cream of tartar
105 gram granulated sugar
6 egg whites
♥ INSTRUCTIONS:
Prep Work:
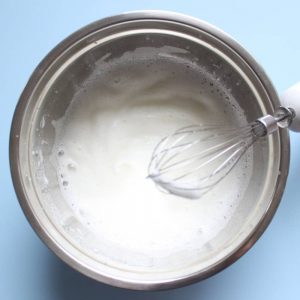
You can use some white vinegar to wipe down the bowl to remove any leftover oils. Meringues do not like any type of oil!
♥ Separate the egg and put the whites into the clean bowl, leave the egg whites on the counter at room temperature for (around 20 minutes).
Make sure there are no traces of yolk since this will make your meringue harder to beat into stiff peaks. Starting with room temperature whites will help you achieve a stiffer meringue in a shorter period of time.
♥ Cut up the cream cheese into cubes, place it inside a heat safe bowl, microwave it for 15 to 20 seconds to bring to room temperature
♥ Cut up the butter into cubes, leave at room temperature to soften up
♥ Sift the dry ingredients of 40 grams cake flour, 15 grams cornstarch, 25 grams cocoa powder into a large mixing bowl
♥ Line the 2 rectangular cake pans with parchment paper. This will help the cake lift off easily from the pan and prevent cracks due to over-handling.
Step by Step:
• Heat up the milk in a heat safe bowl over a boiling pot of water, add the softened cream cheese, stir with a spatula until well incorporated, then add the butter
Ensure that your cream cheese is totally blended and there are no large lumps left. Your cake won't rise properly if there are large clumps of dry ingredients holding it back.
• Put the cream cheese mixture aside and let it cool down before adding the egg yolks to avoid cooking it at this stage
• Once the mixture has cooled off, add the egg yolks and incorporate it well with the spatula.
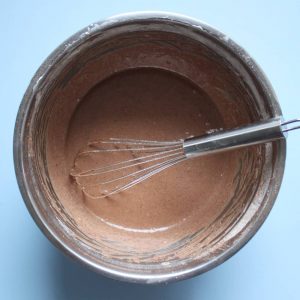
You don't have to stir too vigorously as this will toughen up your cake. Stop as soon as it becomes homogenous.
• Start working on the meringue, whip, add cream of tartar and sugar, stop when you reach stiff peaks.
Using a hand blender, whip the egg whites until foamy, then add the cream of tartar. Once the whisk starts leaving tracks in the egg whites, add one third of the granulated sugar at a time. Keep beating until stiff peaks.
• Test the meringue stiffness
It should have reached stiff peaks and should not fall or slip when you turn the bowl upside down. Remember, stiff peaks means that the meringue can stand straight up when you pull the whisk out.
• Pre-heat oven to 300F
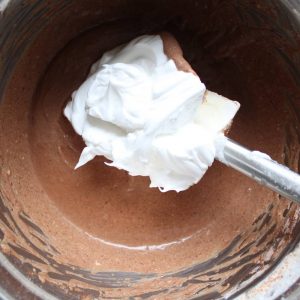
You should not be able to see any more clumps of white meringue in the mixture.
• Pour the batter into a small loaf pan, place in a water bath.
For the water bath: place this small loaf pan inside a larger pan filled with hot water. Water baths keeps the moisture level in the oven high and the heat gentle. It helps bake the cheesecake more slowly and evenly to prevent cracking.
• Bake for 50 to 60 minutes at 300F. Bake until a skewer pulls out clean when inserted.
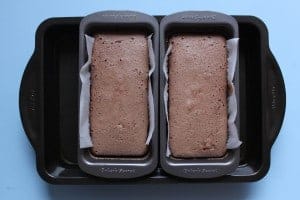
This will help prevent shrinkage and cracking from the sudden change in temperature.
• Release the cake out of the pan after 5 minutes. Peel off paper and cool off on a cooling rack.

Anne says
Hello! This recipe looks amazing and I’m excited to try it out! But I have a small family and two cakes might be too much for us to finish, will the recipe still work if I cut the ingredients in half and just use one pan instead of two? Would the baking time/oven temperature need to be adjusted as well? Thank you for your yummy recipes!!
Mimi says
Hi,
Yes, you can definitely cut the recipe in half, the oven time and temp will remain the same 🙂
XoXo,
Mimi
Helen says
Hi Mimi,
I am one of your follower for the Baking. I have known you through Debra Moore from Fair Child Radio. I am from Calgary but always heart to Vancouver, my dream city.
I have followed your recipe for over 20 times in Macarons. I am still failing (Hollow mostly) since my oven temperature isn't correct. It's a very old one. Steel box with Knob to control the temperature and no convection Fan. Hahaha.
But I just tried to make this recipe and my cheesecake turn out ok I hope. I have some pictures of it but wonder how can I send it to you so you can be the judge and tell me what my mistakes and some advices would be appreciated.
Mimi says
Hi Helen,
Thank you so much for listening to our segment. You can send it to the email address I provided in my contact page.
XOXO,
Mimi
Jo says
Mmmmm...I'm still reminiscing this cake!
xo Jo
http://www.whiterosesandcoffee.com/