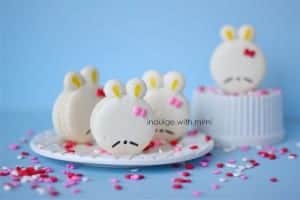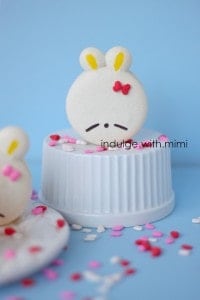
Okay, so technically, these guys aren't smiling but my friend sure was when I presented these to her and her child. So, you get the point.. hehe
Without further ado, let's discuss the techniques you'll be using and the tools you'll need for these cute little bunnies.
❤ Tools Needed:
♥ all the same tools from my regular macaron recipe
♥ silpat mat
♥ edible pen
♥ yellow gel colouring
♥ heart sprinkles for bow
♥ tweezer to apply sprinkle bow
♥ small round piping tip (ex. Wilton 12 tip)
❤ TECHNIQUES TO MASTER
All techniques below are in addition to using my regular French Macaron Recipe
Correct Oven Temperature and Rack Position:
The most challenging part of these Moshi Maro macarons is being able to use your oven correctly in order to bake snowy white shells. When using bright vibrant colors, Macaron shells can be somewhat forgiving if it has browned from being over baked. With white shells, all the browning will be clear as day so you'll need to know how to adjust your oven accordingly. I would err on the side of caution - lower the temperature and increase bake time. If the tops are browning, place an empty pan above the tray to shield the shells from the heat. On the other hand, if the bottoms are browning, place an extra pan below the tray. Click here for a full post on how to use your oven correctly to bake macarons.

Prepare your template accordingly with a round circle for the face and 2 dots in the centre for ears. Make sure you provide enough clearance between each little animal. I like to make these faces a little bit bigger than my regular round macarons. I find the bigger they are, the easier it will be to pipe. Trust me, when you get to the ears, you'll see how easy they run into the face and you'll end up with a big bad blob! I pipe the face first, let them dry slightly, then I go on to pipe the ears. This will prevent it all from running into each other. Using a small round tip also helps control how much batter comes out at once. I prefer the Wilton 12.
I also like to use a Silpat mat for piping all my unique shapes because it works wonders to keep the shapes round and provides great control when piping. The batter doesn't spread as easily as it would on parchment paper.
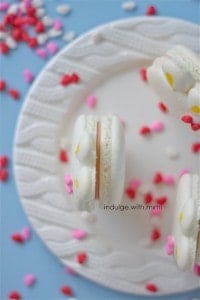
These shells are pretty asymmetrical so its still pretty easy to match them up once you're ready to fill them. One easy way to ensure that you'll get a perfect match is to pipe half of your batter into faces and the rest into regular round shapes. Match the face macaron in the front with the round macaron in the back. It's the easy way out but hey, if your reciepient isn't a macaron snob, then they won't know you took a shortcut. And if they are a macaron snob, they don't deserve your awesome macarons in the first place!

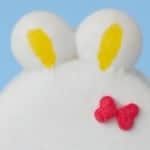
Using an edible pen is pretty self explanatory. Go get yourself one and the macaron decorating fun will be endless! In terms of the yellow ears, I don't like to buy too much unnecessary ingredients. I mix a little bit of gel color with water and use a paint brush to paint on the ears. It's soo easy and you'll find a huge array of color possibilities when you do this as opposed to the ugly primary colors of edible pens.
Application of the Sprinkle Bow:
Hopefully your fingers are not as fat as mine because I had a really hard time placing these tiny hearts in the correct position to mimic a bow. But if you've got a pair of tweezers at home, it will be very easy to pick one up and apply it accordingly. Apply the edible glue directly onto the face and then use the tweezers to move the heart into the correct position.
How to Make a Small Batch of Edible Glue
♥ 20 grams icing sugar
♥ 1 ½ tsp. of meringue powder
♥ water in a spritzer
Combine the dry ingredients in a glass bowl. Spritz the water onto the dry ingredients a little at a time and then blend everything together until you reach a thick consistency. When you pick it up, it should not flow easily off the spatula. If it's too runny, add more sugar. A spritzer is great for controlling the amount of water you are adding at one time.
I hope these macaron tips work out for you and let me know how you did! Join me on Instagram and let's talk baking! XOXO, Mimi
[srp post_limit='5' post_random='yes' category_include= 24 widget_title = 'Other #MacaronArt You Might Like']


Erin Pitts says
Does anyone sell animal shaped macarons??
Mimi says
Hi Erin,
Oh there are a lot of places! Here in Vancouver, I only know of a 1 or 2 but there are lots in other cities. Where do you live?
XOXO, Mimi
Lisa | THINK LIKE A BOSS LADY says
I totally did not realize you were using round macarons for the back/bottom of the cookie. So smart and one less thing to worry about!
I kind of like the effect it gives too. These are almost too cute to eat (not that it would stop me...)!
Lisa | THINK LIKE A BOSS LADY
Mimi says
That's the easy way out but hey no one will fault you for it!