
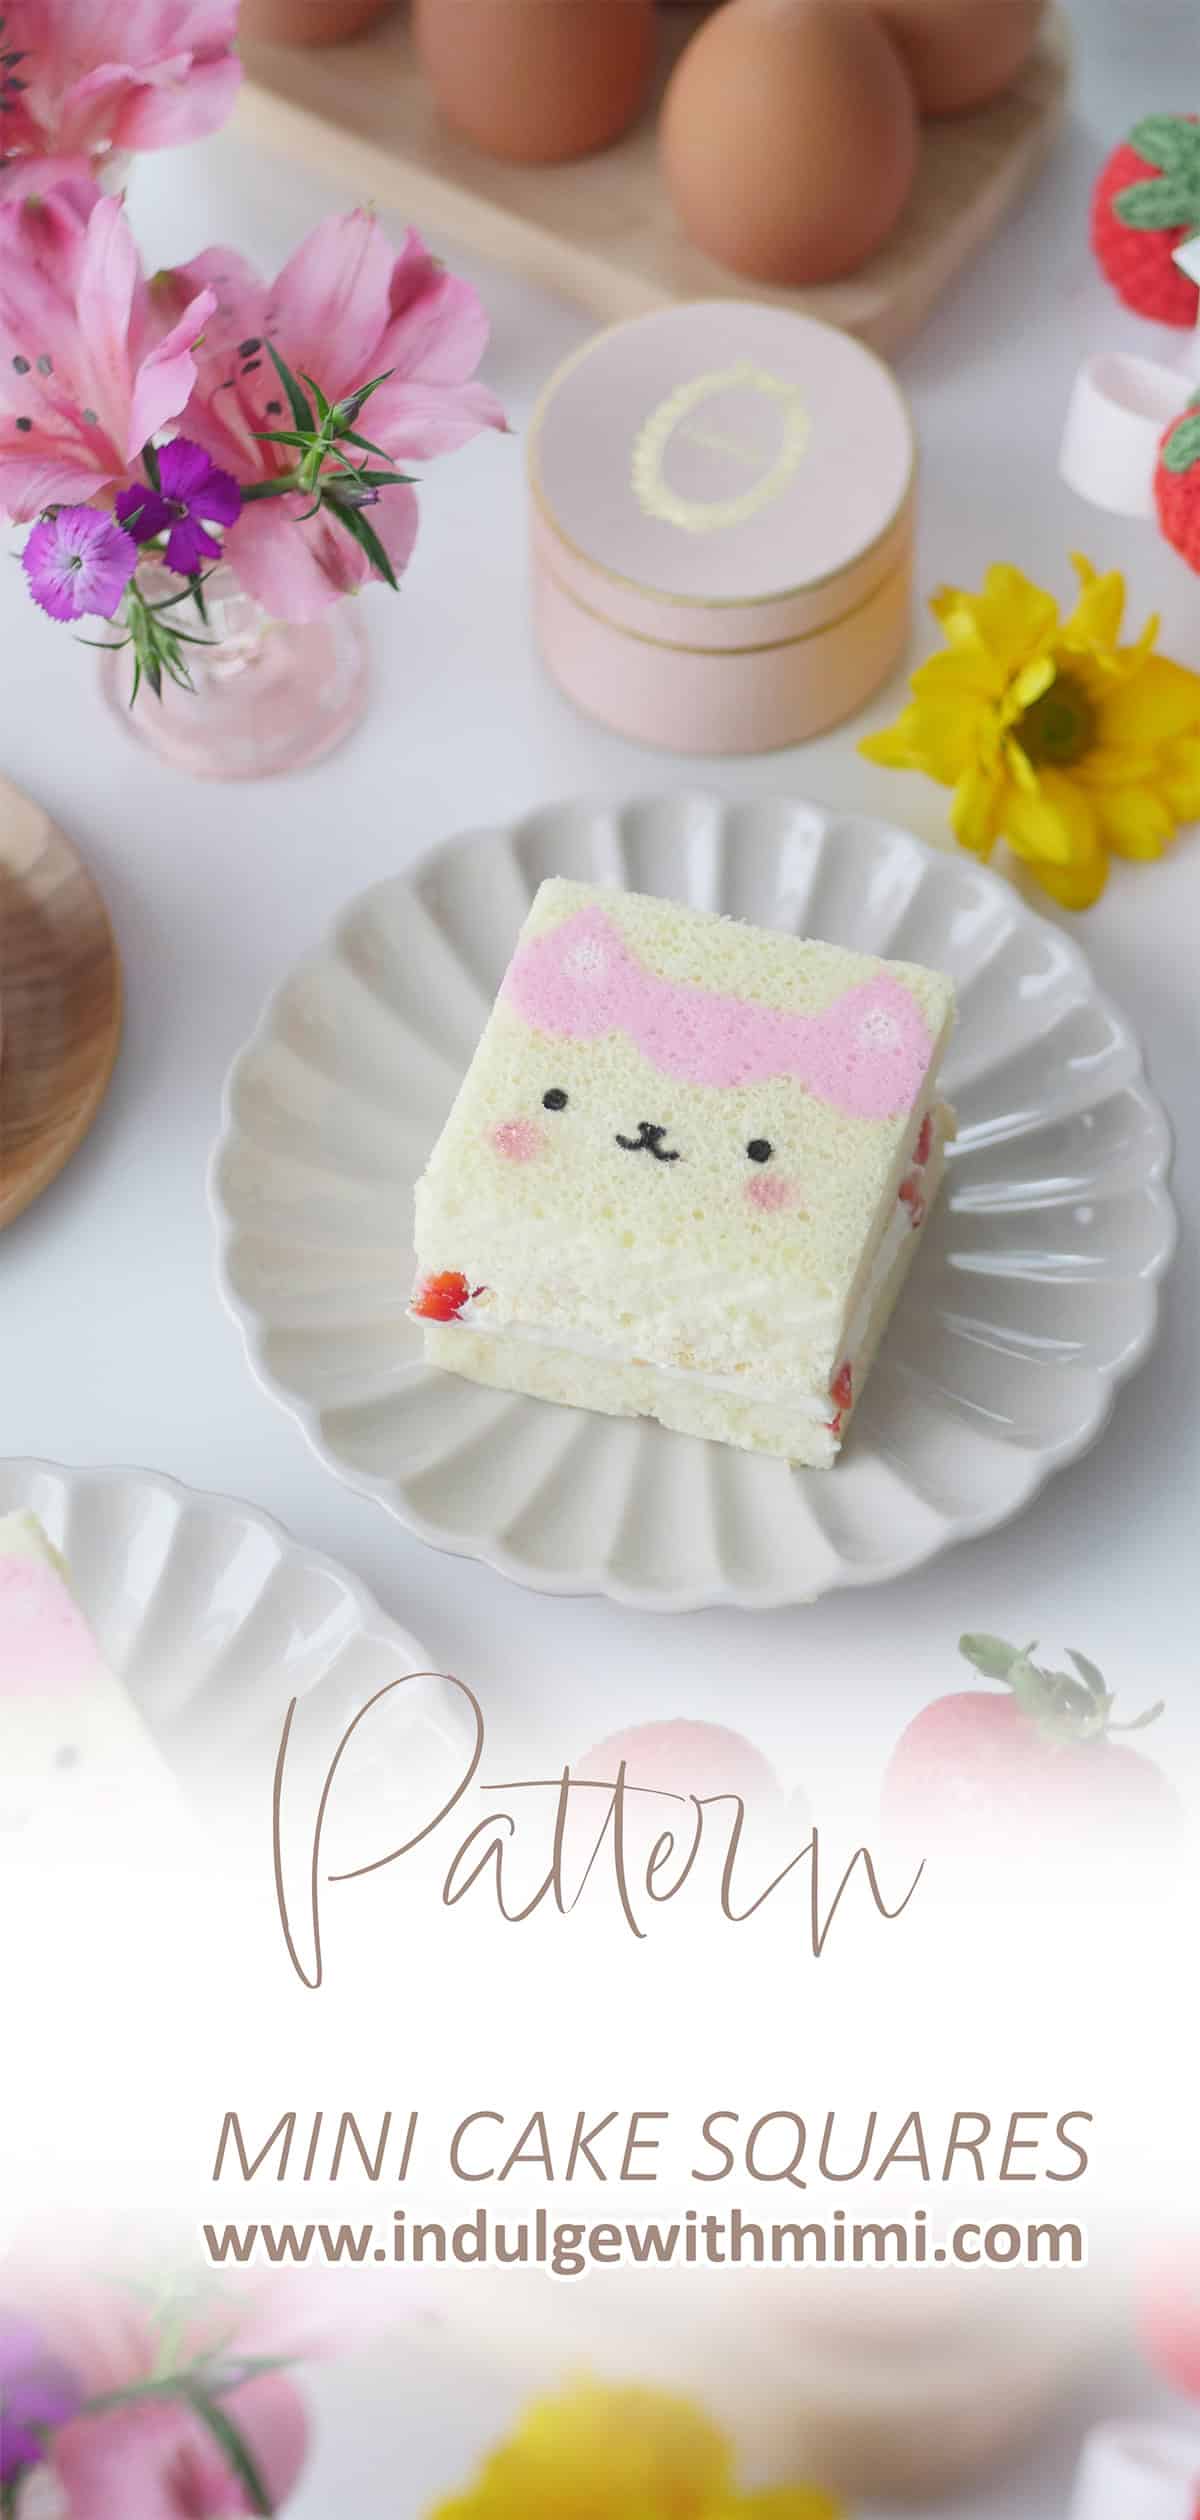
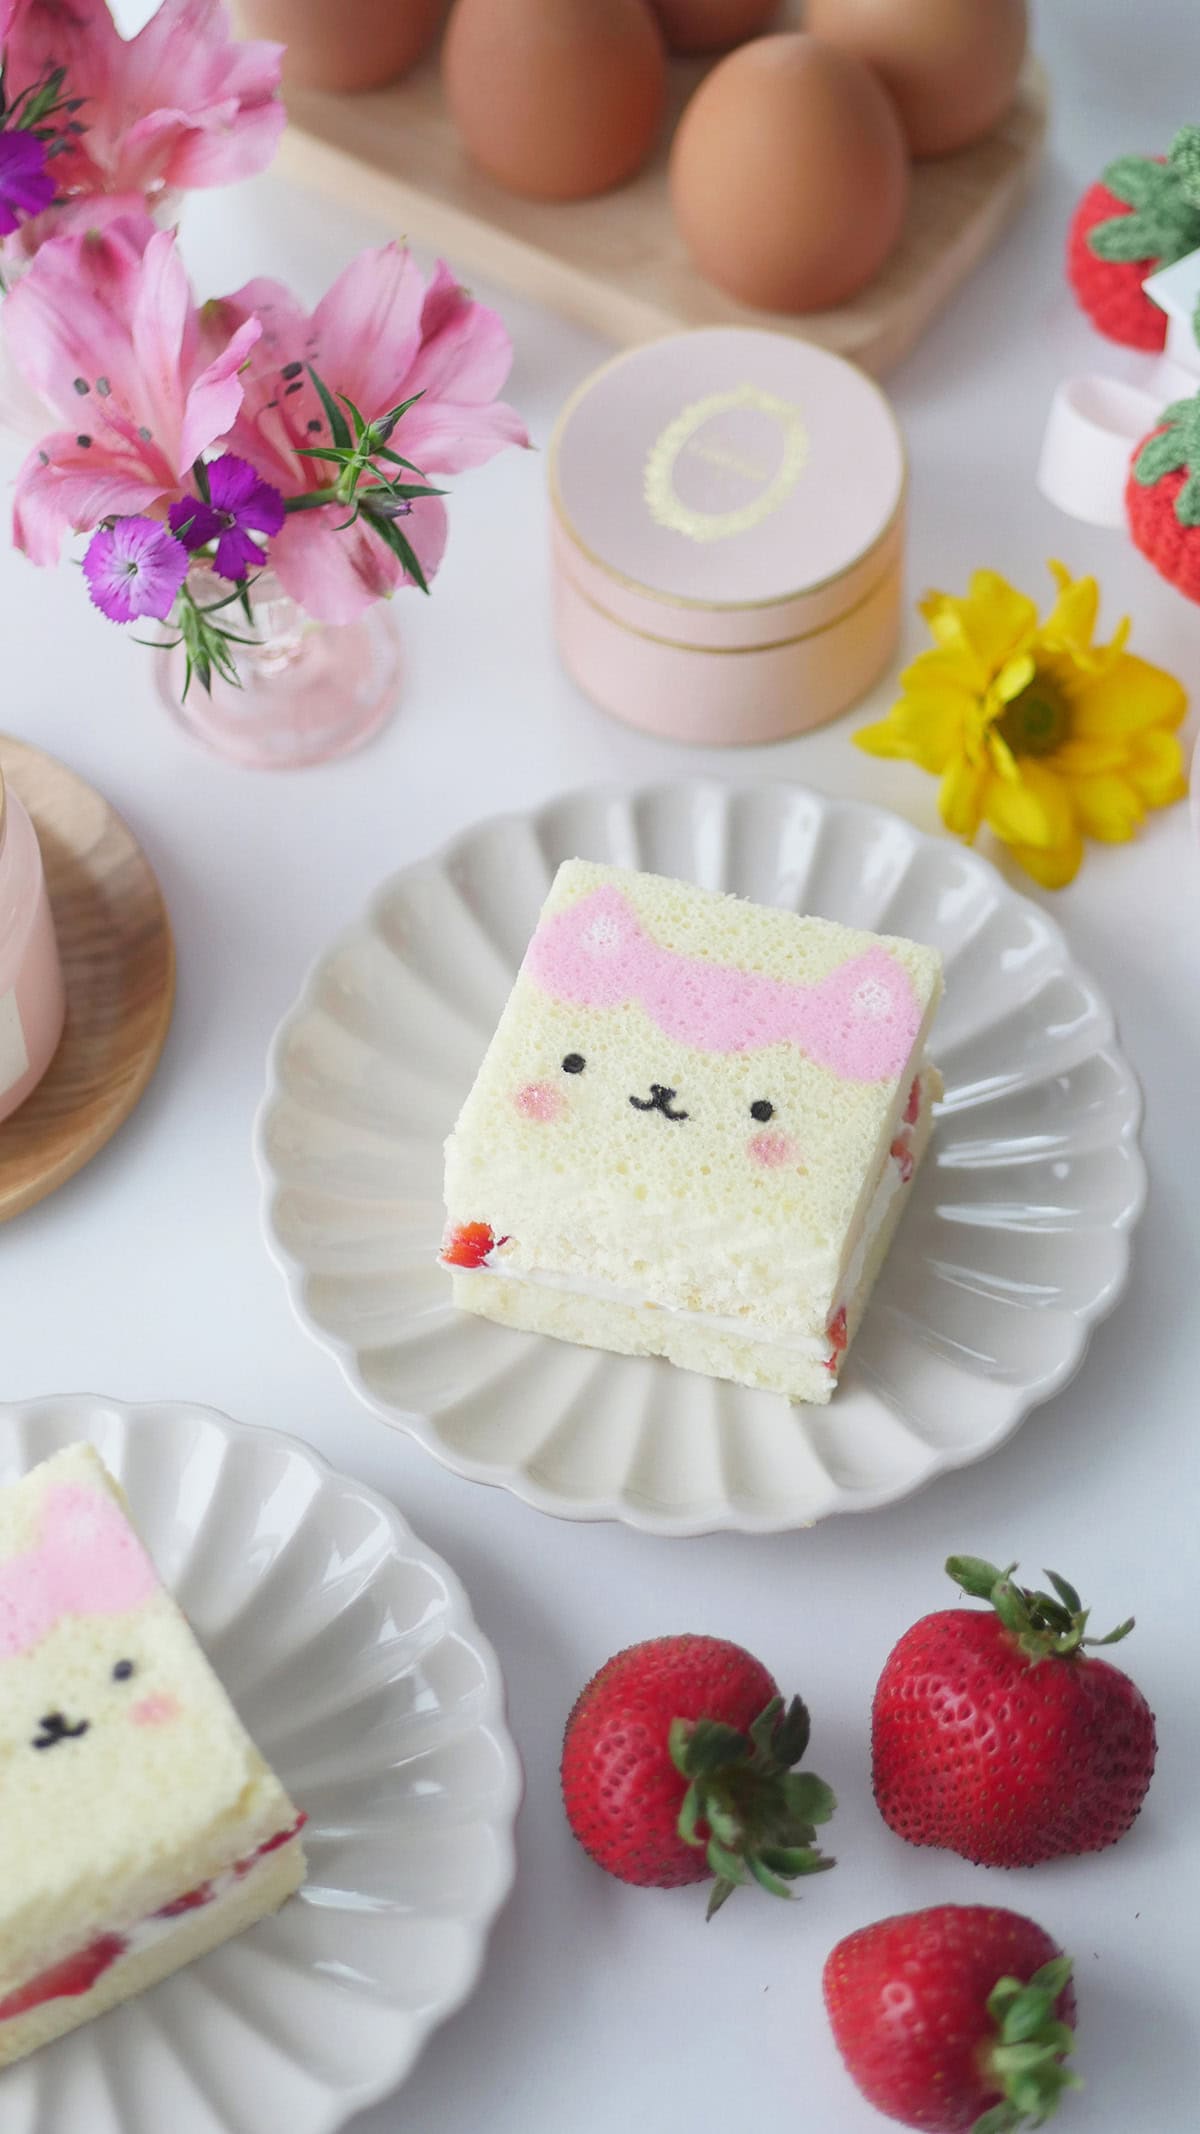
Make endless printed pattern cake designs without an edible printer! Small individually portioned cake squares are perfect for parties and celebrations.
Jump to:
- Why You'll Love This Recipe
- How Does This Cake Taste?
- Tips For the Fluffiest Chiffon Cake
- Ingredients & Substitutions
- Do I Really Need a Separate Pattern Paste?
- Can I Bake This Cake in a Different Sized Pan?
- Why Doesn't the Skin on the Cake Come Off Neatly?
- How to Add Fine Details to the Pattern?
- Step By Step Photos
- Baby Box Inspired Pattern Cake Template
- Recipe
We just watched the new Gabby's Dollhouse movie in the theatres so I thought it would be the perfect time to finally post these Baby Box pattern mini cakes. I had actually held onto the digital assets for this project since my first-born's Kindergarten graduation party in June. Her classmate invited her to a year-end Gabby Dollhouse themed celebration to commemorate the completion of their first year of school (I still can't believe how quickly time passed this year).
It was a good opportunity to adapt my popular pattern cake roll recipe, to make the process more approachable and to make the presentation more party-friendly. If you've made pattern roll cakes before, you will fully understand the benefits of this recipe - you get the beauty of the pattern cake design without the complexity of rolling the cake into a log form. It makes the process more predictable in advance of important events. I really love how these turned out. Enjoy!
XOXO,
Mimi
Why You'll Love This Recipe
- Easy to follow for beginners.
- Yolk-less white pattern paste is easy to color.
- Neutral flavor is a great base for flavored extracts.
- No-rolling low-stacking cake.
- Individual portions are conveniently party-ready.
How Does This Cake Taste?
The cake body is composed of a chiffon cake that is light, springy and semi-sweet. Chiffon cake is a type of foam cake that relies on meringue as the leavening agent. It's springy and soft with flavors of vanilla and eggs. It's pairs wonderfully with fresh cream and a variety of fruits. Instead of butter, chiffon cakes use oil which makes this type of cake tender and soft, and doesn't harden after refrigeration. In fact, this cake is so fluffy, moist and flavorful that it can be eaten unfrosted. This makes it perfect for afternoon tea, lunch boxes, picnics or travelling.
Tips For the Fluffiest Chiffon Cake
Unlike a sponge cake which uses no or little butter, the pillowy soft chiffon cake base in this roll uses oil instead. The secret to this Asian bakery-style roll cake is its super fluffy cake base. Here are some tips:
- Use cake flour instead of AP flour.
- Always sift cake flour to prevent clumps.
- Gently incorporate the dry-mix and wet-mix together until no lumps of flour can be seen. Do not over mix as it will result in a tough cake.
- For the meringue, use room temperature egg whites for better volume.
- Whip the egg whites in a clean non-plastic bowl free of oil and water.
- Whip the egg whites until stiff peaks stage.
- Gently fold the meringue into the cake batter, retaining the air that you've built into the meringue. Do not stir.
- Use parchment paper to line the bottom of the cake pan for a clean release.
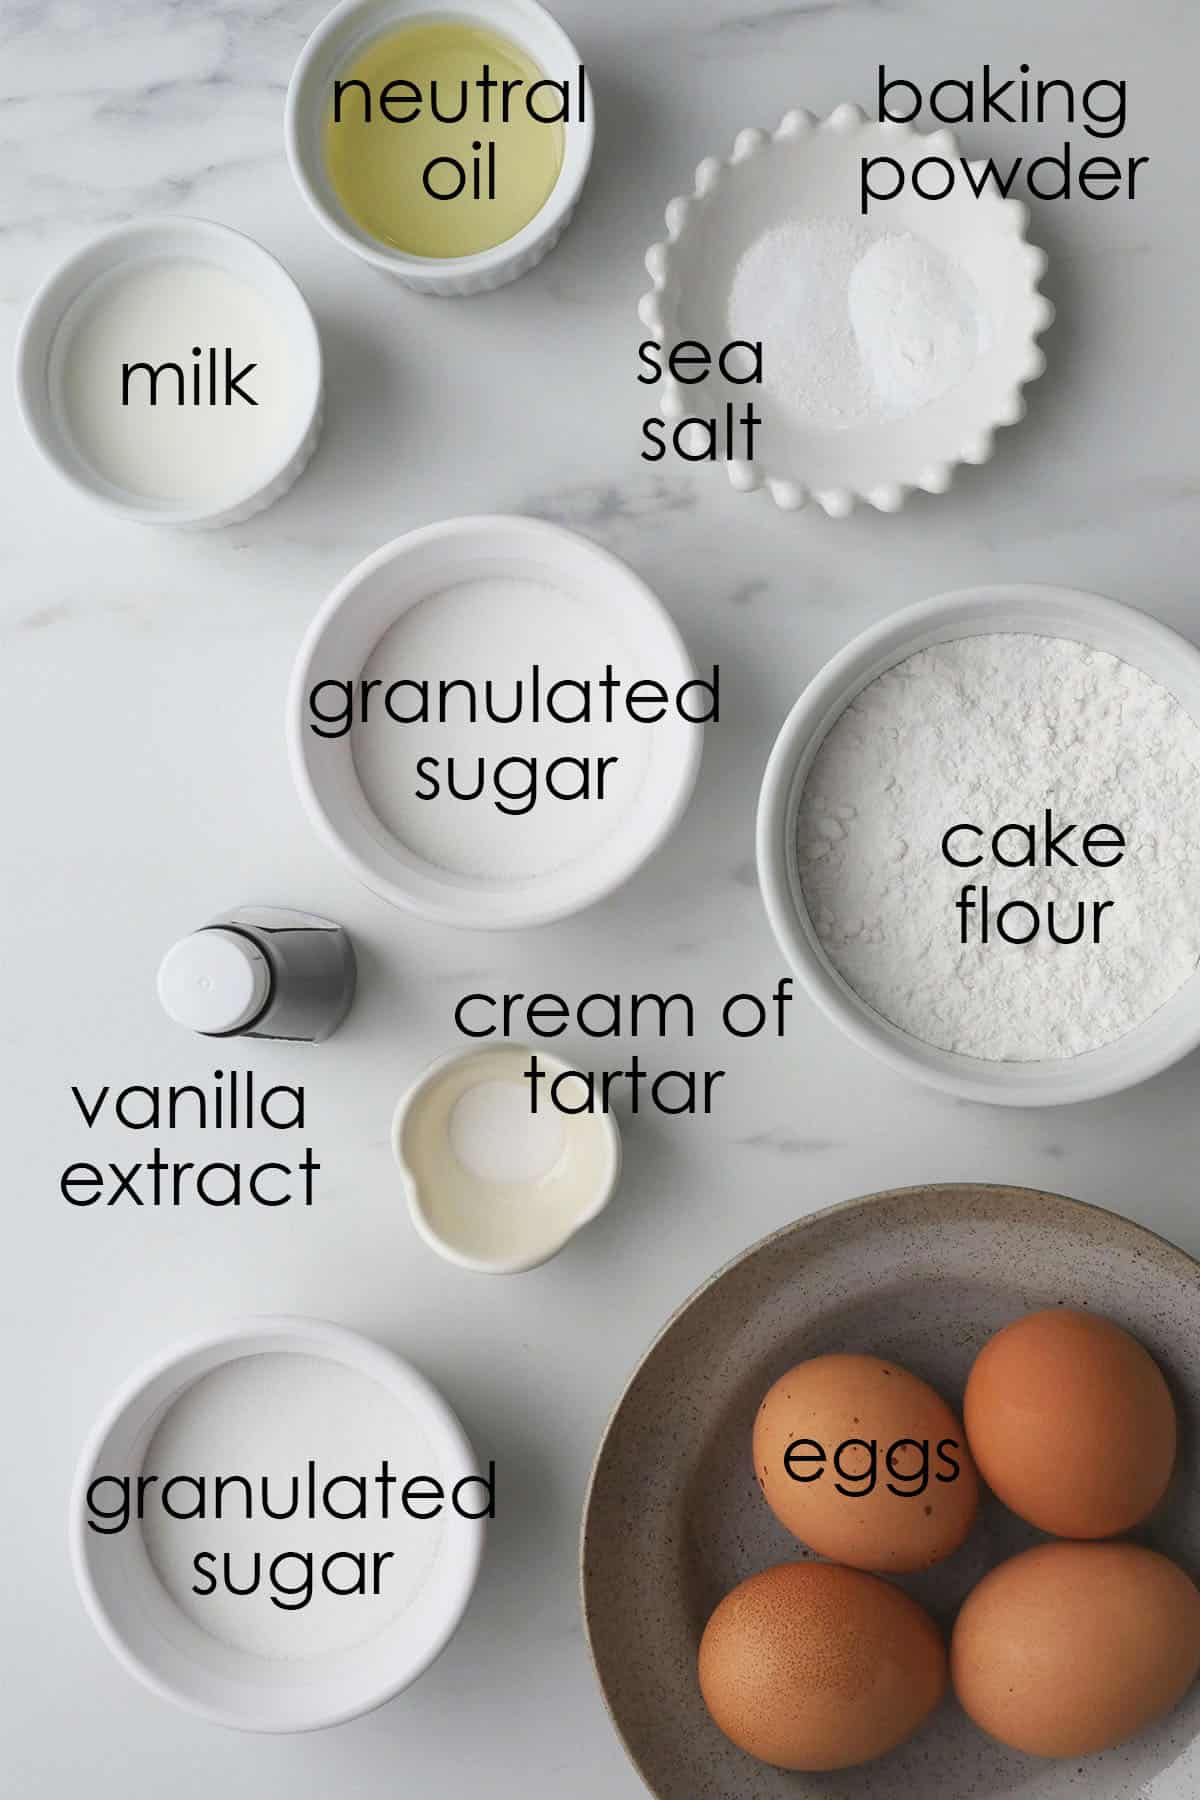
Ingredients & Substitutions
Dry Mix for Chiffon Cake Base
- Cake Flour - cake flour is a low protein flour which will help make this cake lighter and softer than if using all purpose flour. Cake flour needs to be sifted before use to prevent clumps. You can also use "cake & pastry flour" which many stores sell, This is a blend of both flours with a lower protein than AP. It's ok to use AP flour if that is all you have.
- Baking Powder - it acts as a leavening agent in case there is any weaknesses in the meringue.
- Salt - brings out the flavors in the cake and acts as a contrast to the sweetness.
Wet Mix for Chiffon Cake Base
- Granulated sugar - this first set of sugar is added into the wet ingredients to help add moisture and separate the grains. If you have it on hand, berry sugar or extra fine granulated sugar is a better substitute. It dissolves and mixes more easily for a finer textured cake.
- Neutral oil - adds moisture to the cake base. Canola, grapeseed, avocado are all good choices.
- Milk - adds extra flavor.
- Vanilla extract - rounds out all the flavors in the cake.
- Egg Yolks - tenderizes the cake, adds structure and emulsification of the cake batter.
Meringue for Chiffon Cake Base
- Egg whites - use fresh egg whites from large size eggs. Eggs separate more readily when it's cold and whip better when it has come to room temperature.
- Granulated sugar - use only granulated sugar, powdered sugar does not work for whipping meringue.
- Cream of tartar - is an acid that helps to stabilize the meringue. It can be substituted with double the amount of lemon juice or vinegar.
Stabilized Whipped Cream
- Heavy cream - is a cream with a minimum milk fat content of 36% and above (labelled as M.F. %36). On the other hand, whipping cream has milk fat content between 30-35%. Heavy cream yields a more stable whipped cream but whipping cream will work just as well in this recipe since gelatin is being added.
- Unflavored gelatin powder - when added to the cream, it creates a super stable whipped cream that will not easily deflate. The Knox brand is pretty standard and can be found in most grocery stores in the baking aisle.
- Granulated sugar - adds sweetness. It can be increased or decreased to taste.
- Vanilla extract - adds flavor to the cream, this can be substituted with other flavors of extract.
Supplies
- Regular Kitchen Tools PLUS:
- Handheld mixer
- 8X12" cake pan
- Silicone mat or parchment paper
- Piping bag
- Piping tip round #1,2,3,1A
Do I Really Need a Separate Pattern Paste?
I understand that creating a separate pattern paste can be time consuming. While it's possible to take some of the cake batter and use it as a pattern paste like in this recipe for a 2-color tiger striped pattern cake roll, I do not recommended it unless you're working really fast and only using 1 or 2 colors. For the cake to achieve a good rise, almost all cake batters need to be baked right away after mixing because leavening agents become activated and natural leavening processes start to degrade, for example, the air beaten into a meringue will begin to deflate. If we take that precious time after mixing the cake batter to use for piping the cake design, the resulting cake will have a less ideal texture. Additionally, the pattern paste is ideally suited for piping designs and contains no yolks for better color matching.
Can I Bake This Cake in a Different Sized Pan?
Yes, you can also bake this cake in two 8" round cake pans or two 7" square cake pans.
Why Doesn't the Skin on the Cake Come Off Neatly?
For the skin to peel off neatly revealing the beautiful pattern cake design, it's important to use the correct temperature and tools. Keep the temperature low and consistent. We're using 325F here to start but you may need to adjust it if you find that the skin is sticking. You can either lower the temperature or pull out the cake a bit earlier. Next, using the right tools help the skin to peel off more readily. Line the cake pan with parchment paper or better yet, a silicone baking mat. You might have to find a heavy duty paper brand and do not use wax paper.
How to Add Fine Details to the Pattern?
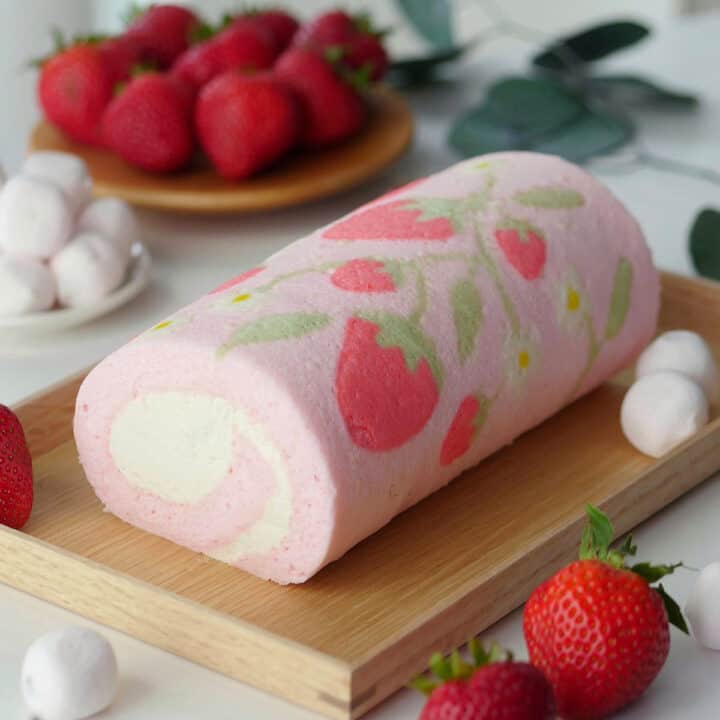
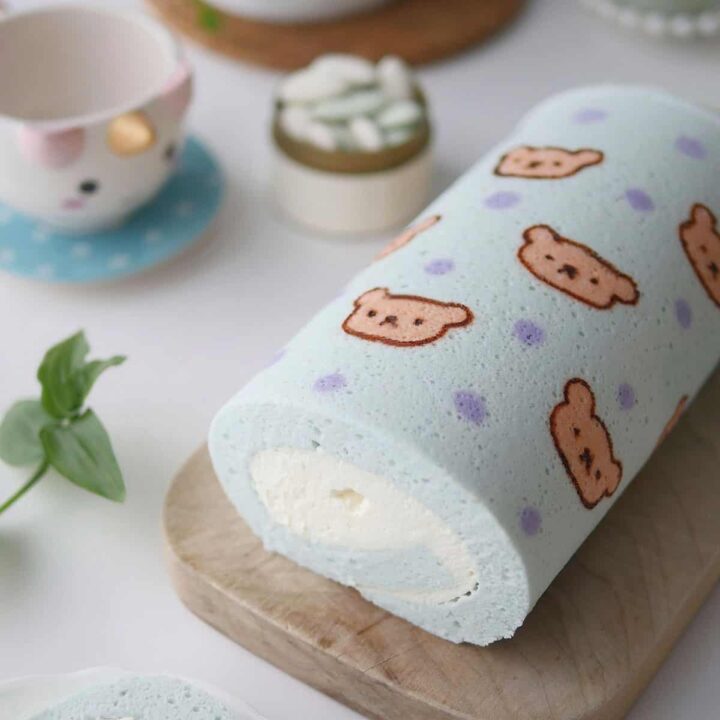
To add even more finer details and make this pattern cake even "fancier" (I know, is that even possible? lol), take a look at the cake painting techniques in these other tutorials Bear Cake Roll & Silent Night Christmas Cake Roll. Pro tip: I have since discovered that this cake paint is a really great product for adding final details, it dries fast with minimal bleed.
Step By Step Photos
Pattern Paste & Piping Design
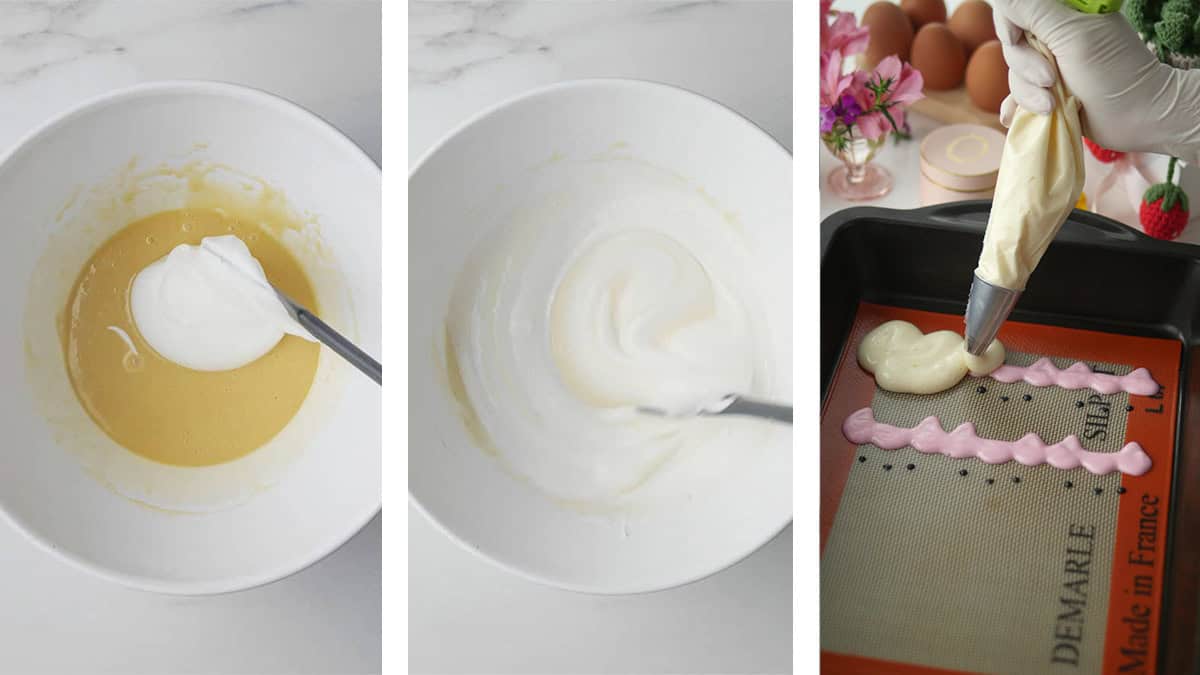
Print out desired cake templates from post. Determine how much pattern paste you need. (For example, you can halve the pattern paste ingredients if you are using 2 colors or less.) In a small bowl, combine 1st set of sugar, milk and oil together. Sift in flour, stir until combined.
In a mixing bowl, whip 2nd set of sugar and egg whites together until stiff peaks form. Gently fold meringue into the wet flour mixture until just incorporated. Don't overdo it as you can fold a bit more later.
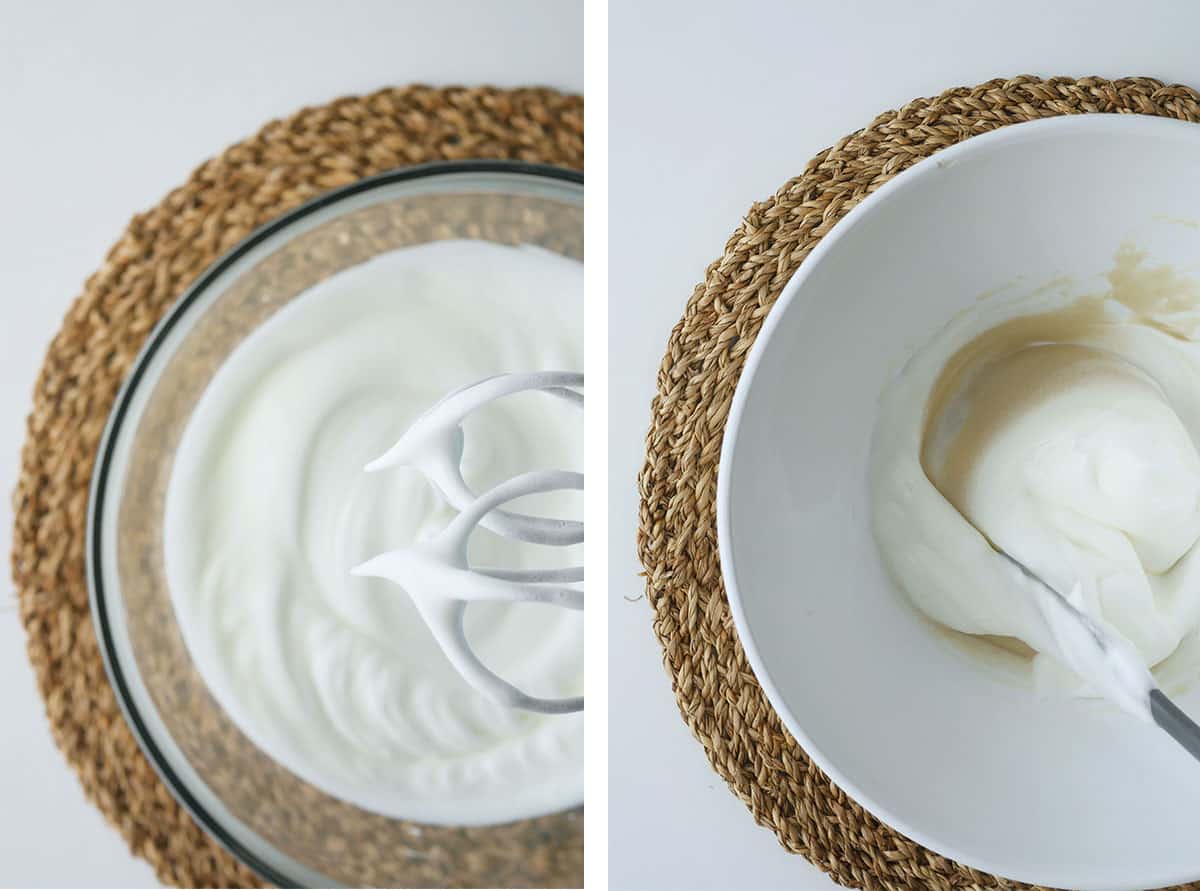
Split the pattern paste into separate bowls and add desired color. Gently fold again to incorporate color. Transfer into piping bags fitted with small round tips (#1,2,3) and pipe desired design onto silicone mats with templates placed underneath as guide. Discard leftover pattern paste. Place mat in the freezer to set small details while making the cake batter.

Prepare Cake Batter
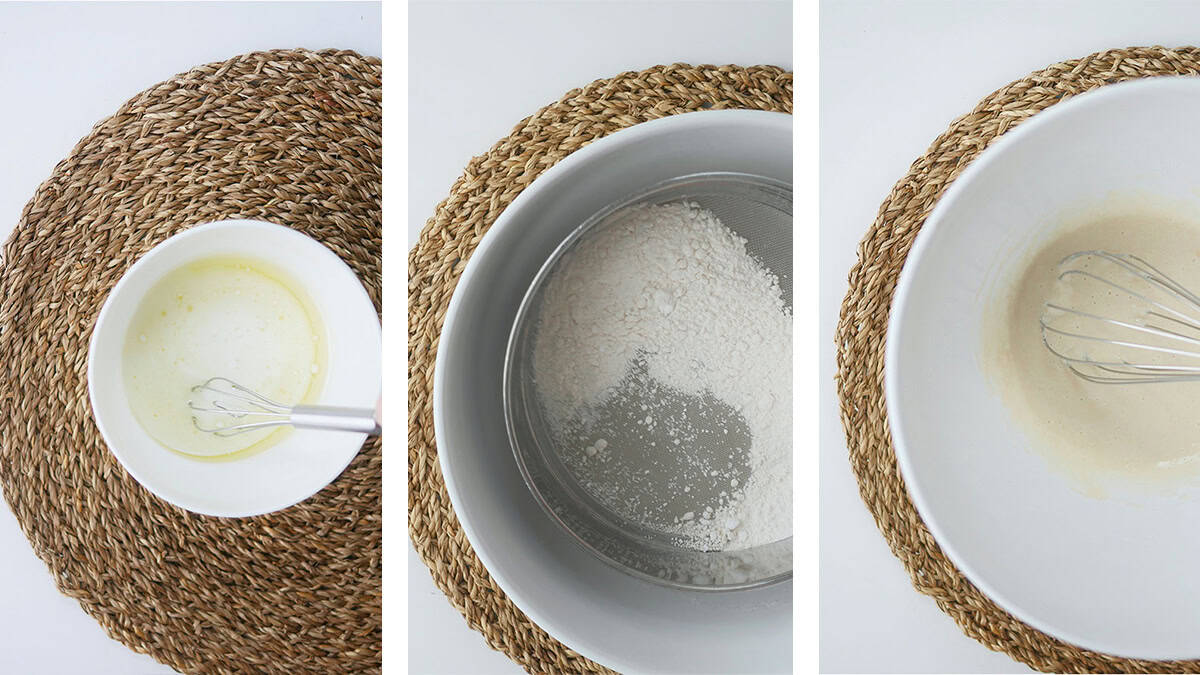
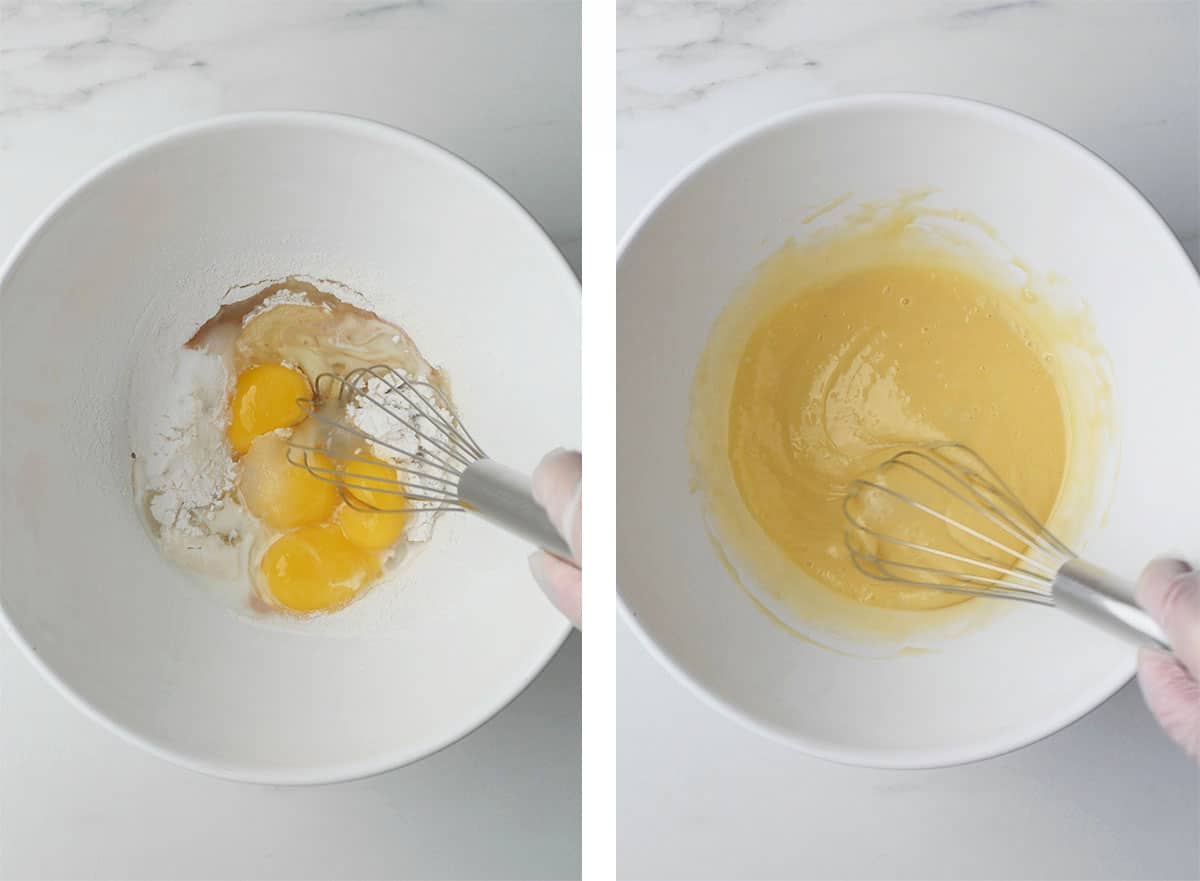
Line the bottom of the cake pan with parchment paper. Preheat oven to 325 F. In a large mixing bowl, sift in dry mix. Stir to combine. Create a well in the center. Inside it, add the wet mix. With a whisk, stir to combine until fully incorporated with no visible lumps, do not over mix. Set this milk-flour mixture aside.
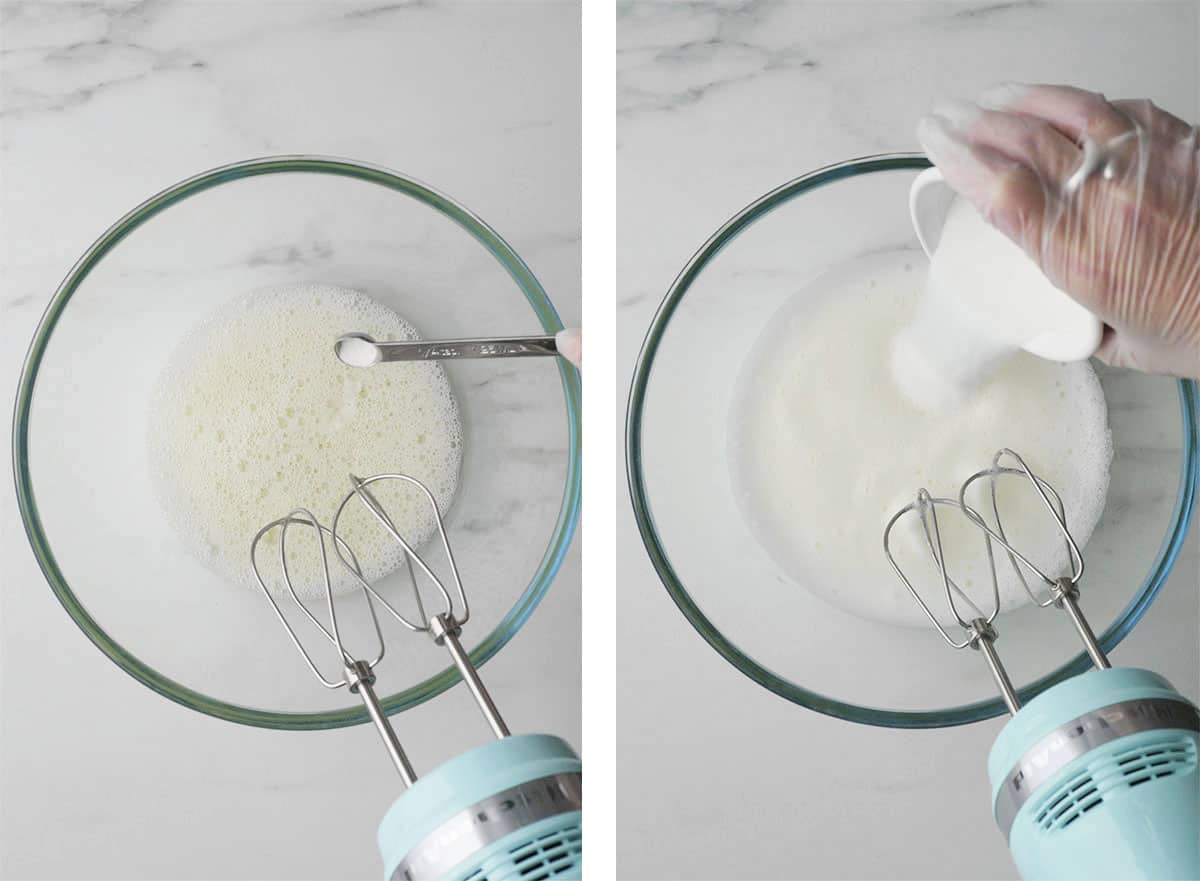
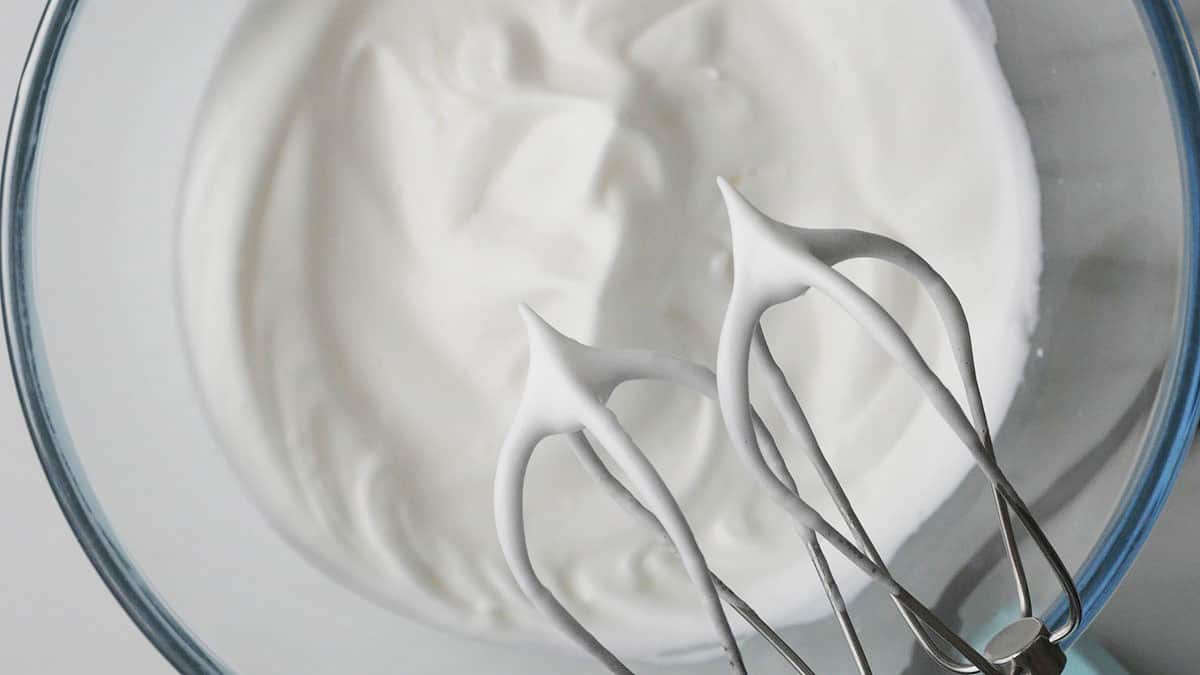
Now make the meringue. In a clean and dry, non-plastic mixing bowl, whip egg whites on slow speed until frothy, add cream of tartar. Increase speed to medium, once the whites become opaque and bubble size have decreased, add sugar a little bit at a time. Increase speed to med-high, whip until stiff peaks.* This is the meringue.
Gently fold ⅓ of the meringue into the milk-flour mixture to get it moving. Once incorporated, fold in the rest of the meringue. Do not stir. Transfer the batter into a piping bag fitted with a large round piping tip (e.g. #1A). Use batter immediately. Remove the pattern paste design mat from the freezer and place it inside the cake pan. Gently pipe cake batter around the design and then to the rest of the cake. Make sure the batter is eventually even and levelled. Gently, tap the pan on the counter to release large air pockets. Bake for 25-28 min. until the cake is light golden, a skewer pulls out clean and the cake springs back in the center. Flip the cake pan upside down on the cooling rack and let cool for 30 min. before removing cake from pan. Use an offset spatula to gently release the sides of the cake from pan. Remove mat, let the cake cool completely while you make the fresh cream.
Stabilized Whipped Cream
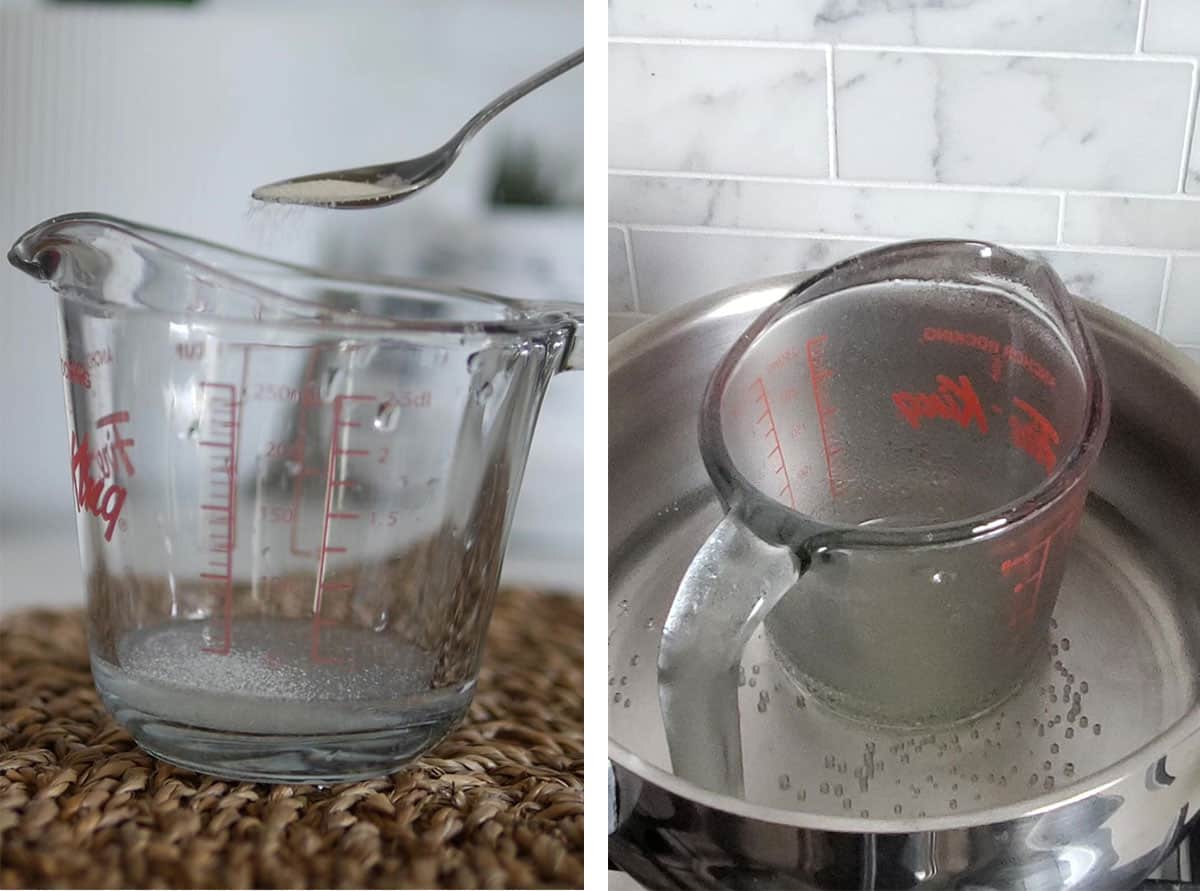
Place beaters, bowl and cream in fridge to chill. It's important for these tools and ingredients to be completely chilled before whipping. Place water in a heatproof cup and sprinkle gelatin on top to bloom. Wait 5 minutes. Place cup in a small sauce pan filled with simmering water. Once gelatin becomes liquid, take it out of the water. Let cool on the counter.
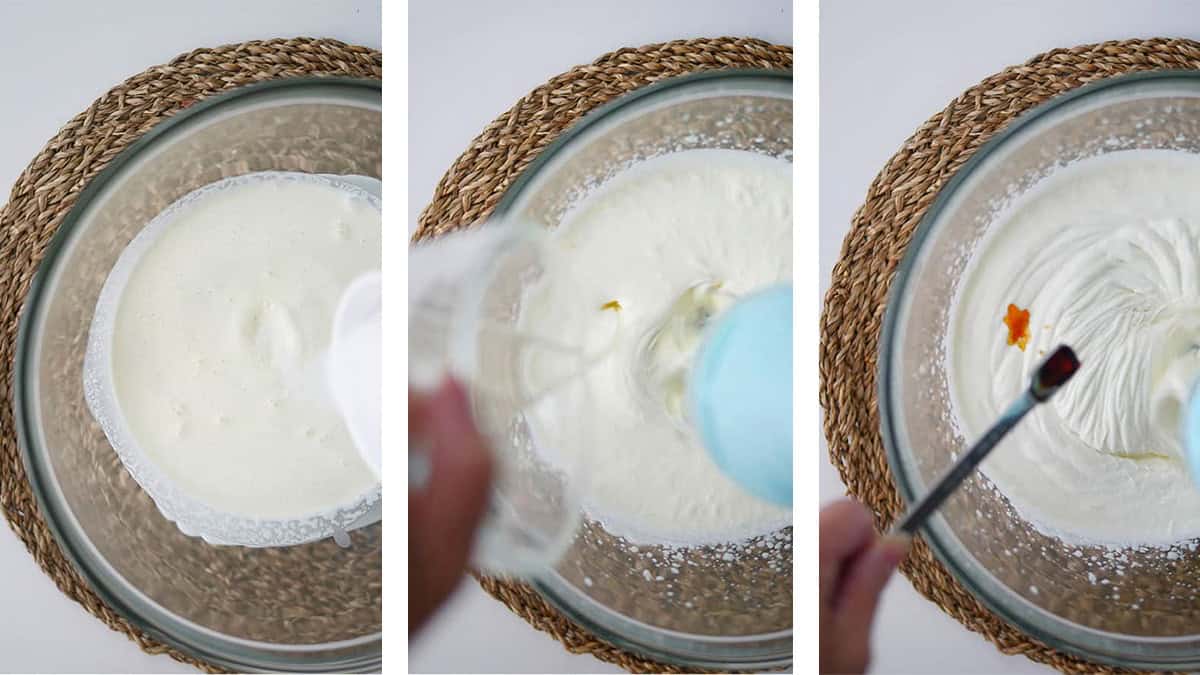
Immediately start whipping the cream and sugar on medium speed. Whip until the beater starts leaving tracks inside the cream, pour the cooled gelatin into the bowl slowly and steadily. Aim for the area in between the whisk and the bowl while continuing to whip. Add extract. Increase speed to medium-high. Stop beating once the cream turns stiff. Do not over whip. Use cream to assemble the cooled cake immediately.
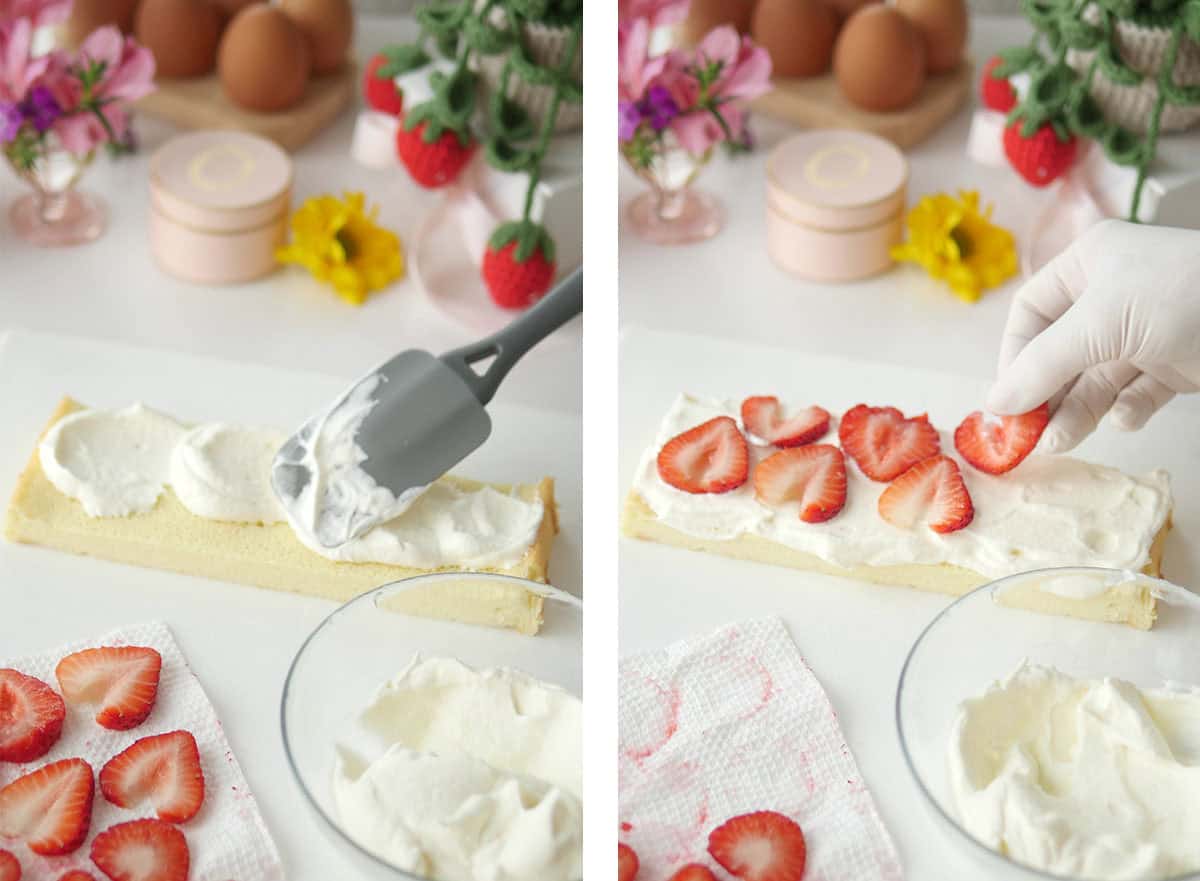
Assembly
Cut the cake in half (depending on your own particular design). Add an even layer of cream onto the unprinted cake. Add sliced strawberries if using. Then, lay the printed cake on top. Let assembled cake set in the fridge before cutting for neater cuts. Using a very sharp non serrated knife, cut the cake into 6 equal squares. Tip: soak the knife in hot water and wipe it clean after each cut. Optional: use cake paint and fairy dust to add finishing touches to your design.

Baby Box Inspired Pattern Cake Template
Sign up for the newsletter, confirm your email and receive the password to enter the Subscriber's Area for this Baby Box inspired pattern cake template and a huge variety of other cake and macaron templates.

Recipe
Mini Pattern Cake Squares - Gabby Dollhouse
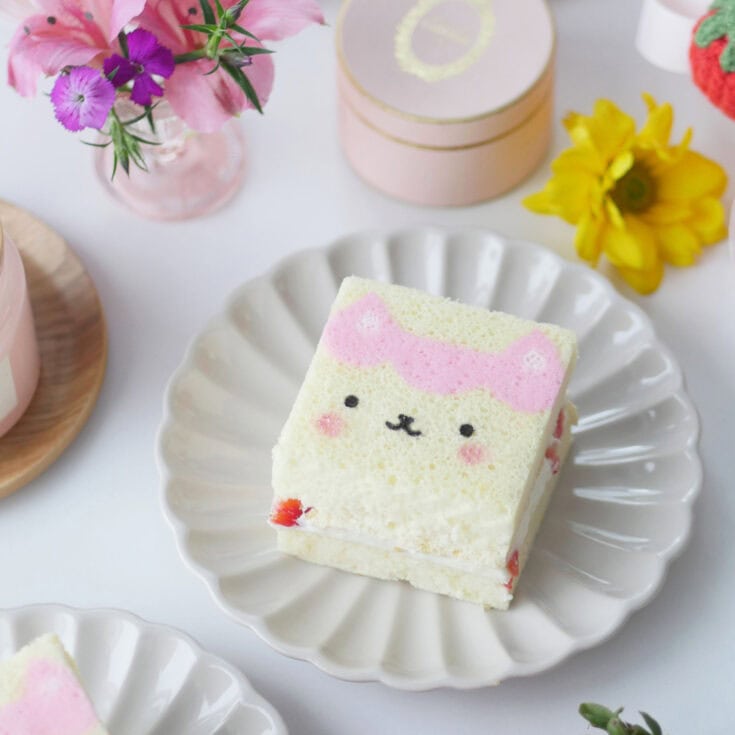
Make endless printed pattern cake designs without an edible printer! Small individually portioned cake squares are perfect for parties and celebrations.
Ingredients
Pattern Paste
- 20 grams cake flour
- 2 teaspoon granulated sugar (1st set)
- 1 tablespoon + 1 teaspoon milk
- 1 teaspoon neutral oil
- 2 egg whites
- 1 tablespoon granulated sugar (2nd set)
- Gel food coloring
Dry Mix for Cake Batter
- 112 grams cake flour*
- 1 teaspoon baking powder
- ¼ teaspoon fine sea salt
Wet Mix for Cake Batter
- 85 ml whole fat milk
- 75 ml neutral oil*
- 75 grams granulated sugar*
- 4 egg yolks
- 1 teaspoon vanilla extract
Meringue for Cake Batter
- 5 egg whites
- ½ teaspoon cream of tartar*
- 75 grams granulated sugar*
Stabilized Whipped Cream
- 2 ½ cup heavy cream, chilled*
- 3 tablespoon granulated sugar, to taste
- 2 teaspoon vanilla extract
- 2 teaspoon unflavored gelatin powder
- 2 tablespoon +2 teaspoon water
- Optional: fresh strawberries, sliced
- Optional: cake paint for final touches
Supplies
- Regular Kitchen Tools PLUS:
- Handheld mixer
- 8X12" cake pan
- Silicone mat or parchment paper
- Piping bag
- Piping tip round #1,2,3,1A
Instructions
Pattern Paste
- Print out desired cake templates from post. Determine how much pattern paste you need. (For example, you can halve the pattern paste ingredients if you are using 2 colors or less.)
- In a small bowl, combine 1st set of sugar, milk and oil together.
- Sift in flour, stir until combined.
- In a mixing bowl, whip 2nd set of sugar and egg whites together until stiff peaks form.
- Gently fold meringue into the wet flour mixture until just incorporated. Don't overdo it as you can fold a bit more later.
- Split the pattern paste into separate bowls and add desired color. Gently fold again to incorporate color.
- Transfer into piping bags fitted with small round tips (#1,2,3) and pipe desired design onto silicone mats with templates placed underneath as guide. Discard leftover pattern paste.
- Place mat in the freezer to set small details while making the cake batter.
Cake Base
- Line the bottom of the cake pan with parchment paper.
- Preheat oven to 325 F.
- In a large mixing bowl, sift in dry mix. Stir to combine.
- Create a well in the center. Inside it, add the wet mix.
- With a whisk, stir to combine until fully incorporated with no visible lumps, do not over mix. Set this milk-flour mixture aside.
- Now make the meringue. In a clean and dry, non-plastic mixing bowl, whip egg whites on slow speed until frothy, add cream of tartar.
- Increase speed to medium, once the whites become opaque and bubble size have decreased, add sugar a little bit at a time.
- Increase speed to med-high, whip until stiff peaks.* This is the meringue.
- Gently fold ⅓ of the meringue into the milk-flour mixture to get it moving. Once incorporated, fold in the rest of the meringue. Do not stir.
- Transfer the batter into a piping bag fitted with a large round piping tip (e.g. #1A). Use batter immediately.
- Remove the pattern paste design mat from the freezer and place it inside the cake pan. Gently pipe cake batter around the design and then to the rest of the cake. Make sure the batter is eventually even and levelled (refer to process photos and video in post).
- Gently, tap the pan on the counter to release large air pockets.
- Bake for 25-28 min. until the cake is light golden, a skewer pulls out clean and the cake springs back in the center.
- Flip the cake pan upside down on the cooling rack and let cool for 30 min. before removing cake from pan.
- Use an offset spatula to gently release the sides of the cake from pan. Remove mat, let the cake cool completely while you make the fresh cream.
Stabilized Whipped Cream
- Place beaters, bowl and cream in fridge to chill. It's important for these tools and ingredients to be completely chilled before whipping.
- Place water in a heatproof cup and sprinkle gelatin on top to bloom. Wait 5 minutes.
- Place cup in a small sauce pan filled with simmering water. Once gelatin becomes liquid, take it out of the water. Let cool on the counter.
- Immediately start whipping the cream and sugar on medium speed.
- Whip until the beater starts leaving tracks inside the cream, pour the cooled gelatin into the bowl slowly and steadily. Aim for the area in between the whisk and the bowl while continuing to whip.
- Add extract.
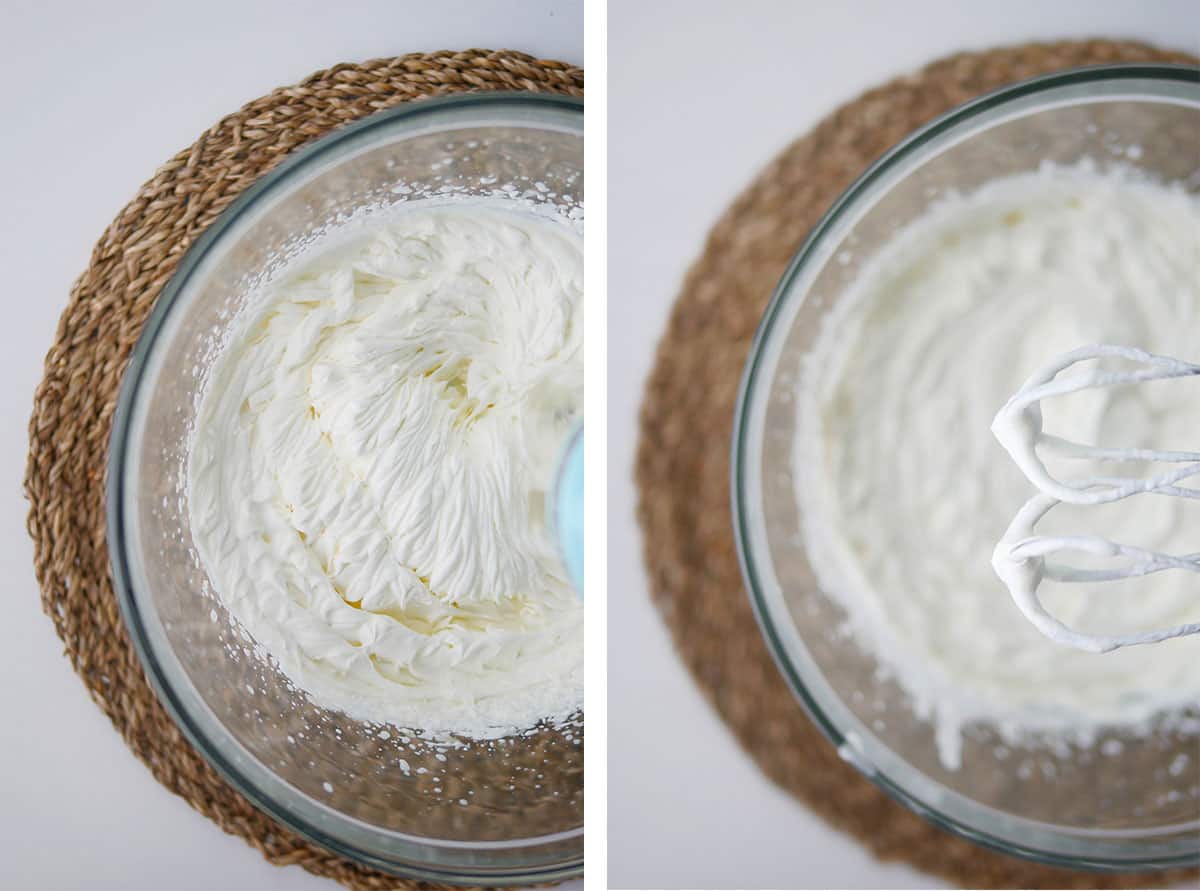
- Increase speed to medium-high. Stop beating once the cream turns stiff. Do not over whip.
- Use cream to assemble the cooled cake immediately.
Assembly
- Cut the cake in half (depending on your own particular design). Add an even layer of cream onto the unprinted cake. Add sliced strawberries if using. Then, lay the printed cake on top.
- Let assembled cake set in the fridge before cutting for neater cuts.
- Using a very sharp non serrated knife, cut the cake into 6 equal squares. Tip: soak the knife in hot water and wipe it clean after each cut.
- Optional: use cake paint and fairy dust to add finishing touches to your design.
- Pattern cake squares needs to be refrigerated where it will stay fresh for up to 4-5 days. Do not leave out at room temperature for longer than 2 hours. In hotter climates, keep it in the fridge until serving.
Notes
- Cake flour is a low protein flour which yields soft fluffy cakes. It is preferred but can be substituted with AP Flour.
- Neutral oil choices: canola, grapeseed, avocado.
- Granulated sugar can be substituted with extra fine granulated sugar a.k.a berry sugar for a finer textured cake.
- Cream of tartar in the meringue helps stabilize it. It can be substituted with double the amount in lemon juice or vinegar.
- Heavy cream has a milk fat content of 36% (labelled as M.F. 36%) and above. It can be substituted with whipping cream (33%) but heave cream will produce a more stable whipped cream.
- Stiff peaks in characterized by the egg whites having pointed peaks that point upwards without drooping when the whisk is pulled out.
- The timing and temperature provided for this recipe is based on a medium-dark pan. For lighter pans, you might need bake it a few minutes longer. Use appearance to gauge doneness: light golden color, springy center and skewer inserted into cake comes out clean.
- Heavy cream is cream with milk fat content of 35%+ (also labelled as 35% M.F.) It can be substituted with whipping cream which has milk fat of 30%+. Heavy cream is preferred for it's stability.
Recommended Products
As an Amazon Associate and member of other affiliate programs, I earn from qualifying purchases.
-
 Wilton Decorating Tip-1A Round Carded, Package May Vary
 -
Ateco 810 - 10 Piece Plain Tube Set, Stainless Steel Pastry Tips, Sizes 0 - 9
-
Ateco Disposable Decorating Bags, 21-Inch, Pack of 100
-
Silpat Half Size 11.6 x 16.5 Inch Nonstick Baking Mat for 13 x 18 Inch Pans, Set of 2
-
Fat Daddio's POB-8122 Sheet Cake Pan, 8 x 12 x 2 Inch, Silver
-
Chefmaster - Liqua-Gel Food Coloring - Fade Resistant Food Coloring - 12 Pack - Vibrant, Eye-Catching Colors, Easy-To-Blend Formula, Fade-Resistant
-
Sweet Sticks Edible Art Decorative Cake Paint 0.5 Ounce (15 Milliliters), Metallic Black


Nutrition Information
Yield
6Serving Size
1Amount Per Serving Calories 674Total Fat 45gSaturated Fat 20gTrans Fat 1gUnsaturated Fat 22gCholesterol 214mgSodium 270mgCarbohydrates 57gFiber 1gSugar 39gProtein 11g
This information is provided as a courtesy and is an estimate only. This information comes from online calculators. Although indulgewithmimi.com attempts to provide accurate nutritional information, these figures are only estimates.

Camilla says
This looks absolutely adorable! Will the base cake freeze? And will the thawed cake still be fluffy and good to eat?
Mimi says
Hi Camilla,
Thank you very much for the feedback! The cake base freezes perfectly fine. I do this often with this cake in advance of special occasions. I also use this cake base for my mousse cakes, I'm not sure if you know, mousse cakes require freezing before unmolding, and it is still fluffy after thawing. Make sure not to add any additional food coloring details onto the cake before freezing. You can do that after the cake has been fully thawed. Let me know if you have any other questions.
XOXO,
Mimi