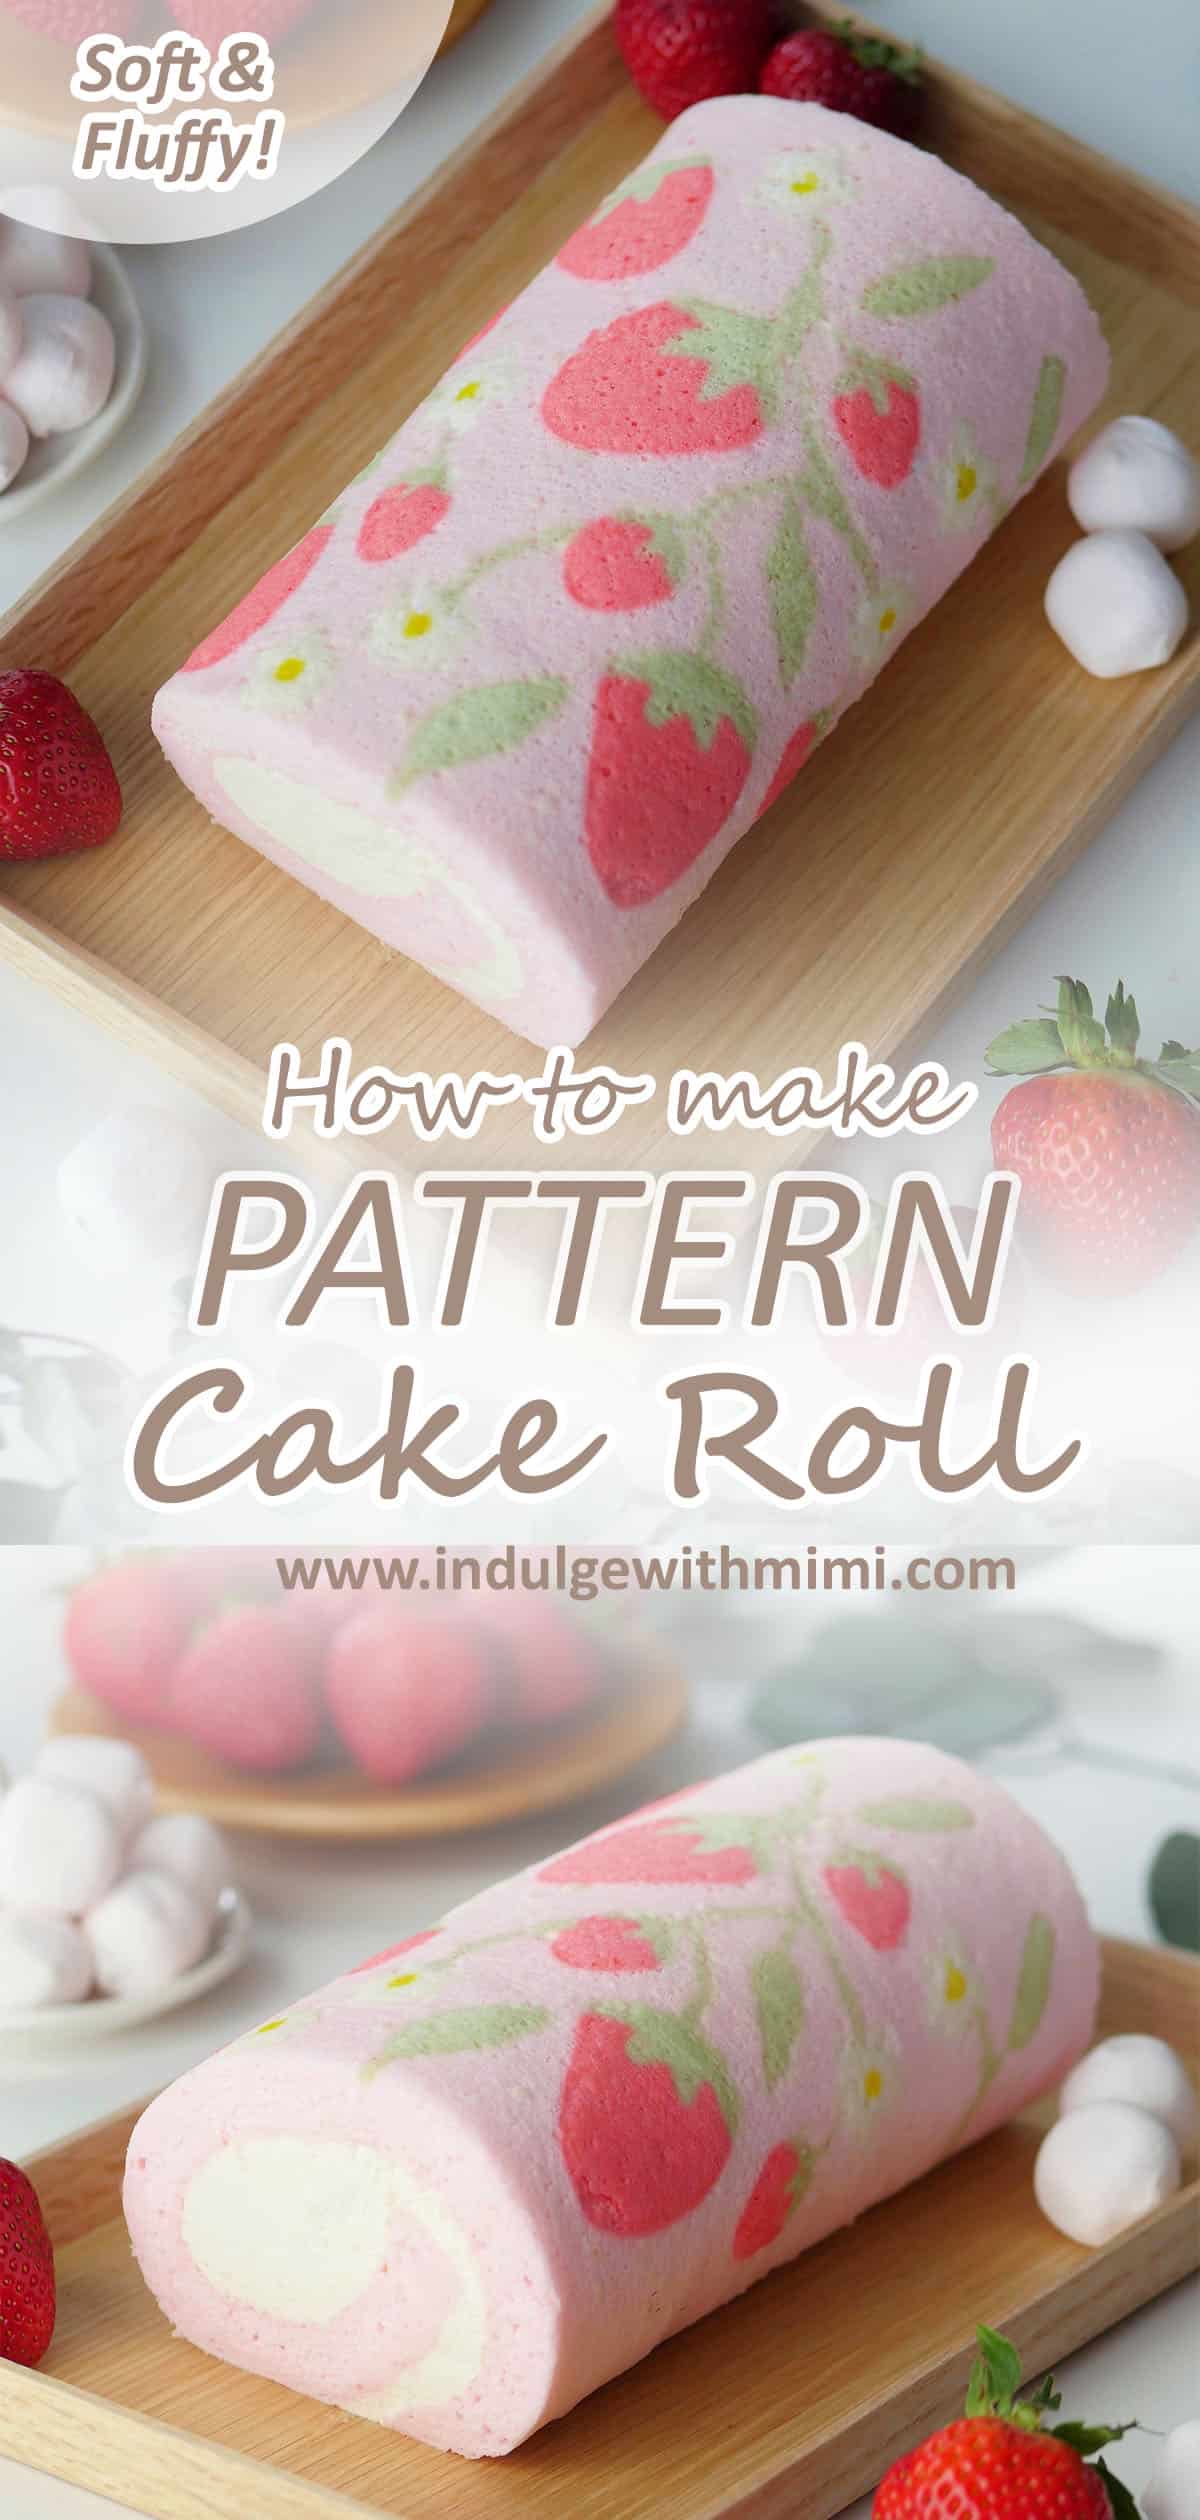
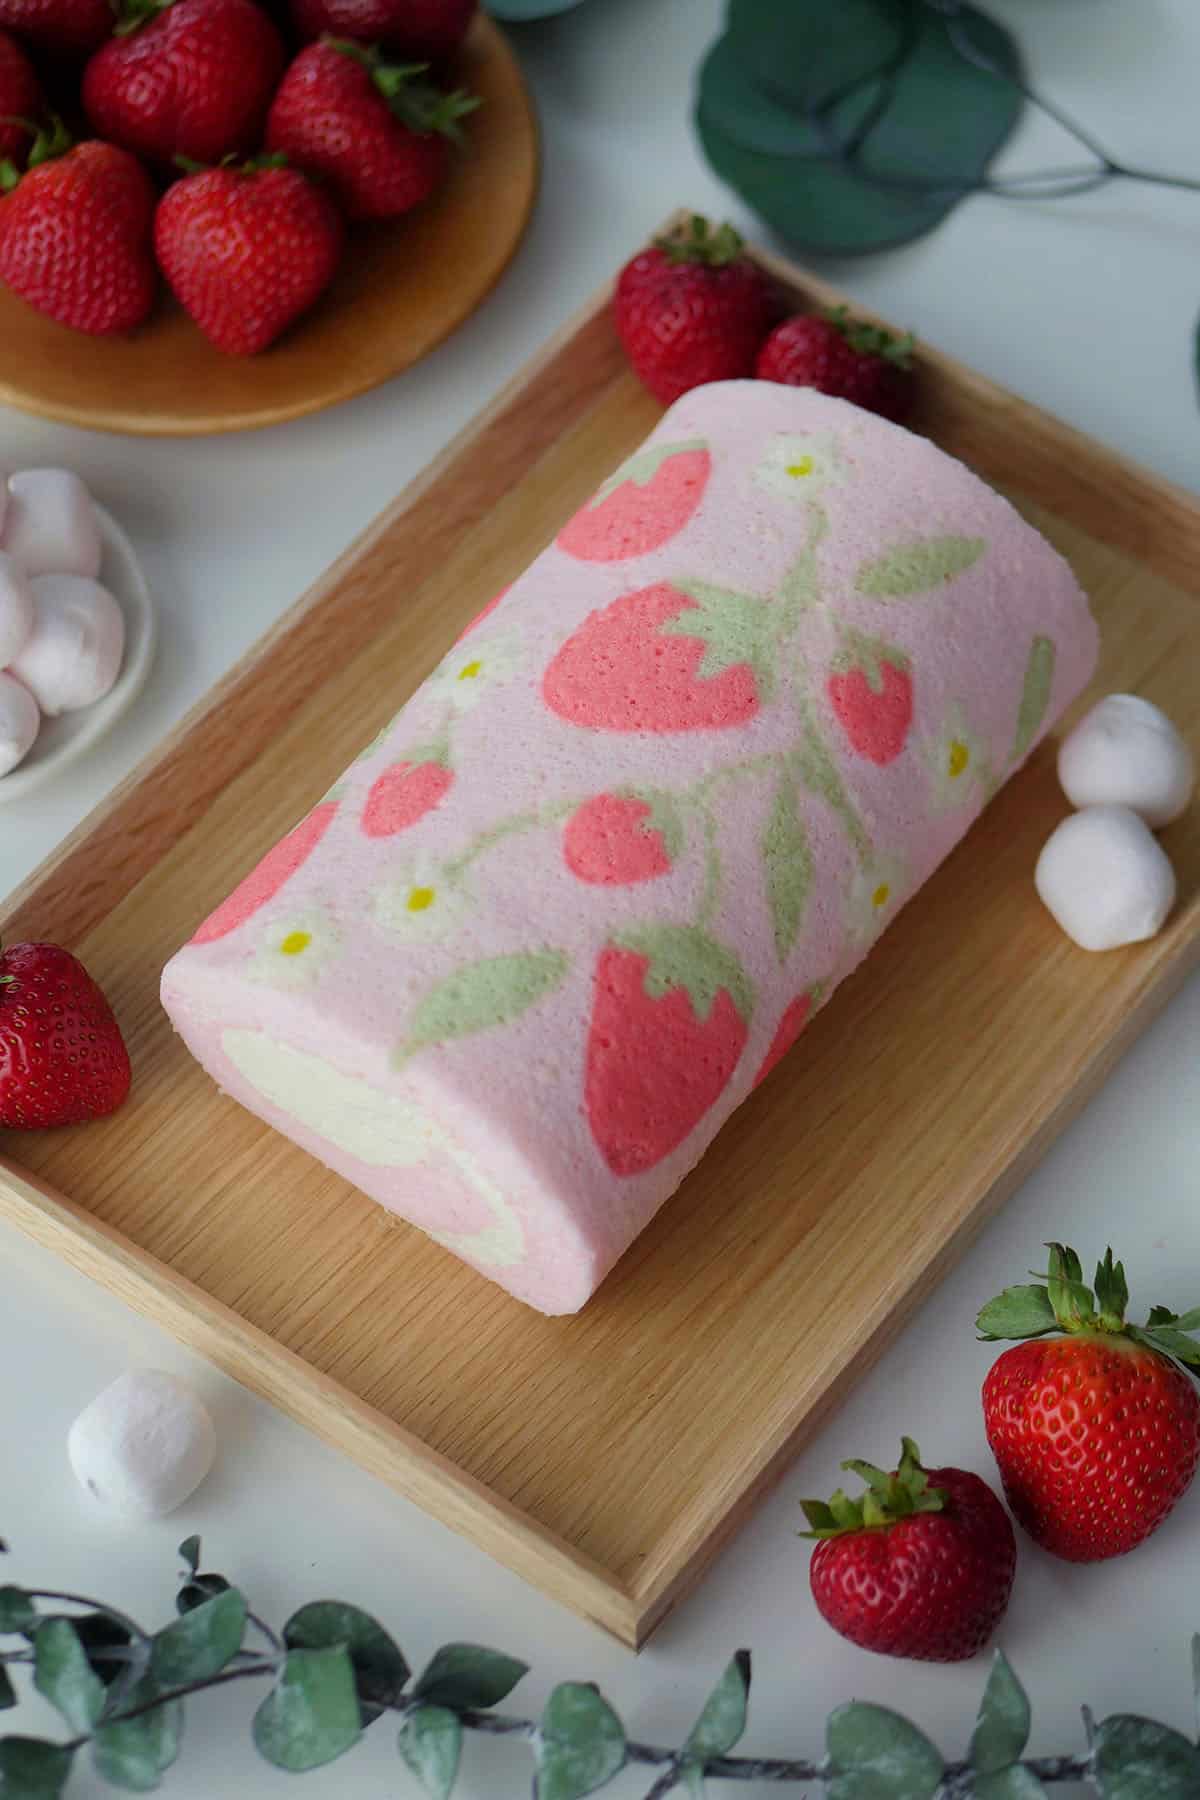
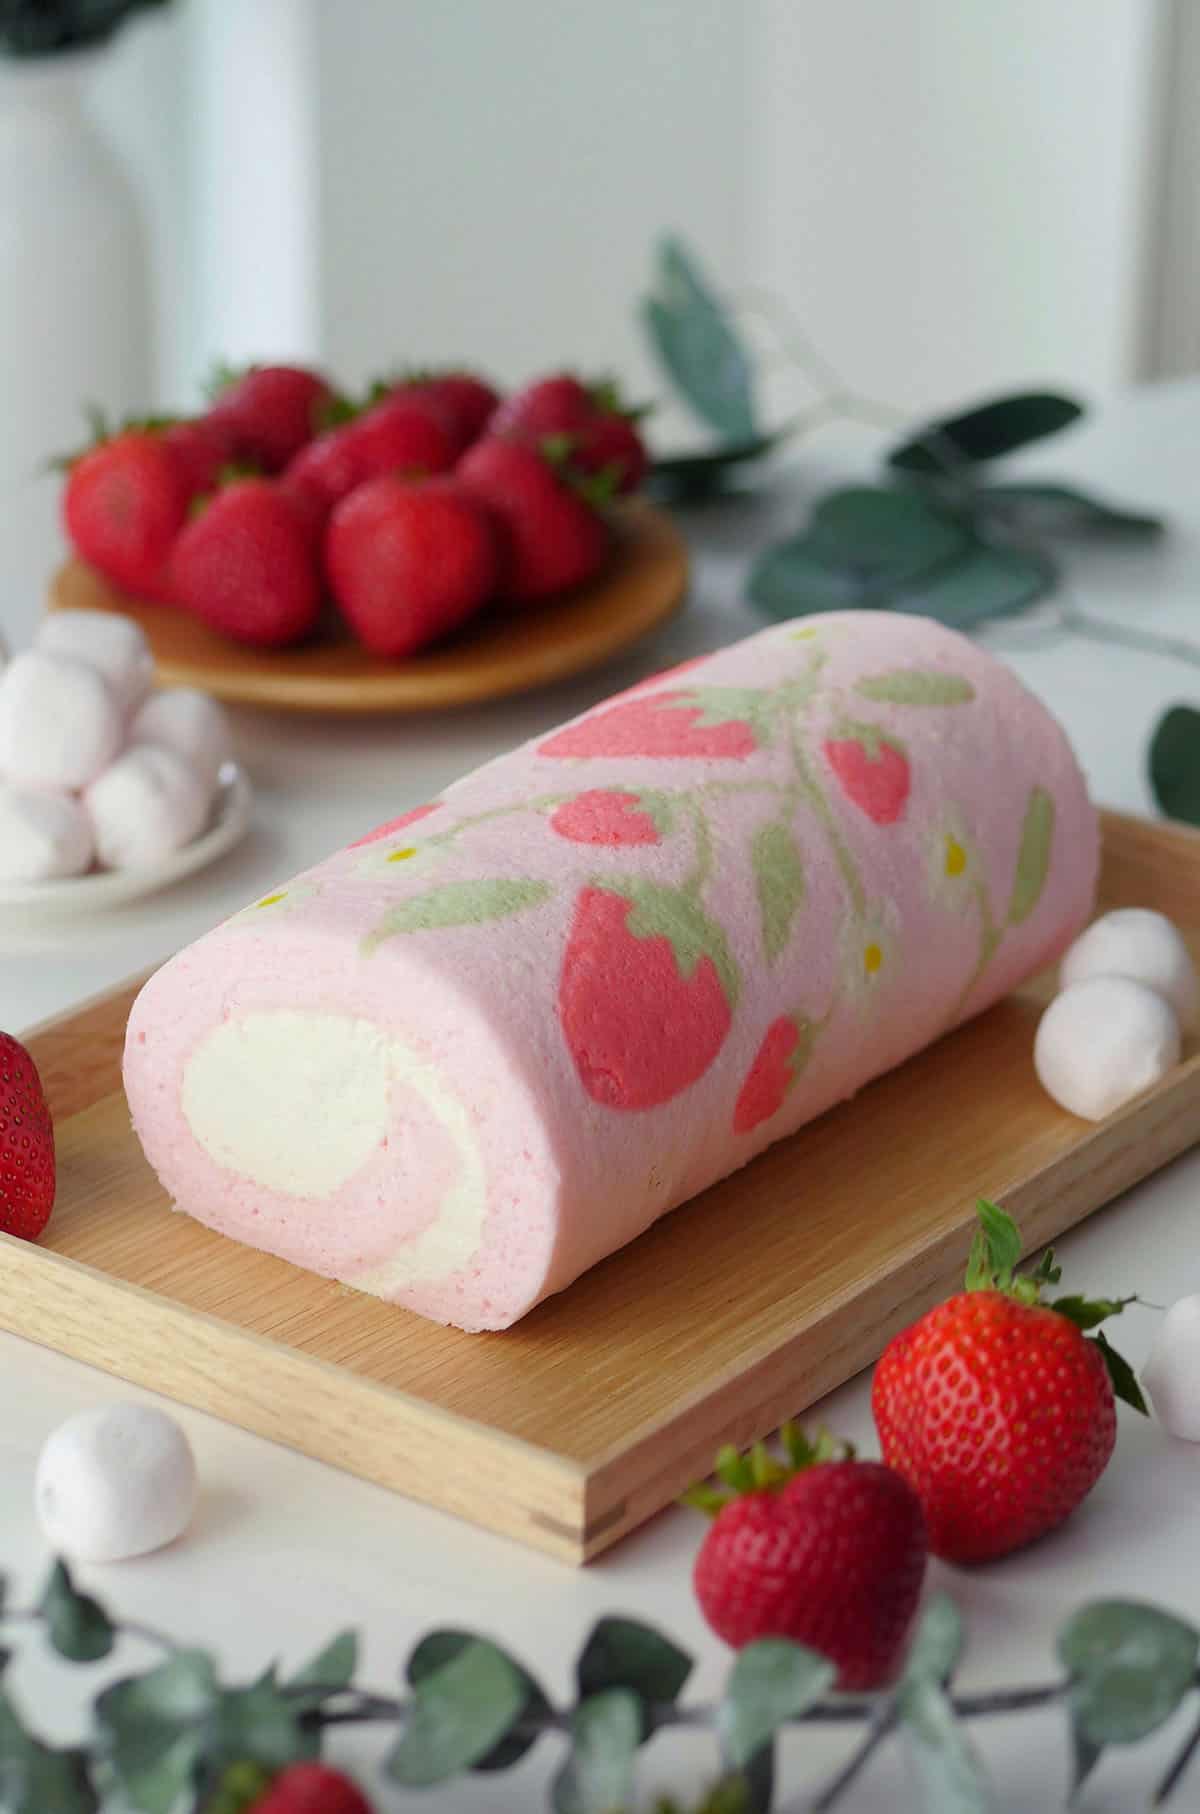
The best pattern cake roll made from a flexible cake base that is easy to roll without cracking. Tastes delicious and looks amazing! Perfect base recipe for every holiday or theme.
Jump to:
- Why You'll Love this Recipe
- How This Cake Roll Differs From My Previous Recipes
- Is There an Easier Way to Make Pattern Cake?
- How to Prepare Ingredients & Substitutions
- Tips For Baking a Great Cake Roll
- Tips to Make Pattern on Cake without Cracking and Using a Thick Paste
- Step By Step - Pattern Paste
- Step By Step - Chiffon Cake Base
- Step By Step - Stabilized Whipped Cream
- Step By Step - Assembly
- How to Make Swiss Cake Roll Look Neat and Round
- Why Does My Cake Roll Crack?
- Can I Bake This Cake in a Different Sized Pan?
- Why Doesn't the Skin on the Cake Roll Come Off Neatly?
- How Do I Make Cake Rolls in Different Flavors?
- How to Add Fine Details to the Pattern?
- Pattern Cake Roll Templates
- Reader's Results with This Recipe
- Recipe
This is a dedicated post on how to make detailed pattern cake rolls without it cracking and breaking. It's based off of my first pattern cake, tiger cat cake roll, which is easier for beginners. In that recipe, it's not necessary to create a separate pattern paste but the design possibilities are more limited due to the time constraints of having to bake the cake batter/pattern paste immediately.
In this recipe I use different techniques to find a balance between using a soft and pliable pattern paste for the design while ensuring it stays in place as you pipe. The elimination of a thicker pattern paste, commonly used in other swiss cakes, makes it easier to roll without cracking, plus its more aesthetic with a better texture. I decided to use a fruit theme in this tutorial but I can think of endless ways to play with patterns on cakes - celebratory messages, cute characters or special occasion themes like Christmas, Thanksgiving, Valentine's Day etc.
I hope you find this tutorial useful! If you have a chance to make it, please tag me on Instagram so I can share your work.
Xoxo,
Mimi
Why You'll Love this Recipe
- - Easy to follow for beginners
- - Pattern paste is stretchy making it easy to roll
- - Flexible cake base prevents cracking
- - White cake base uses no yolks - perfect for adding colors
- - Neutral flavor is a great base for flavored extracts
How This Cake Roll Differs From My Previous Recipes
You might have already made some swiss rolls using my previous recipes like: strawberry cake roll, chocolate cake roll, matcha cake roll and wonder how this new recipe compares. This recipe contains no egg yolks so the cake base is whiter and easier to color making it perfect for pattern cakes. It also has a more neutral flavor profile and takes on extracts and certain flavorings wonderfully. Lastly, the "skin" peels off more readily to reveal the beautiful design on the roll. I used a basic vanilla flavor in this recipe but you can use the techniques in my other posts to create different flavored cake bases and fillings (see: coffee cake roll, carrot cake roll, peach cake in a cup.)
Is There an Easier Way to Make Pattern Cake?
Yes! If making a separate pattern paste seems like a lot of work for a simple design that you have in mind, then check out this tutorial for Tiger Cake Roll. It is better suited for pattern cakes utilizing only 2 colors and minimal piping time.
This current recipe is better suited for designs using multiple colors, long piping time and intricate patterns that needs time to set. Having a separate pattern paste prevents the main cake batter from deflating as you take your time with the design.
How to Prepare Ingredients & Substitutions
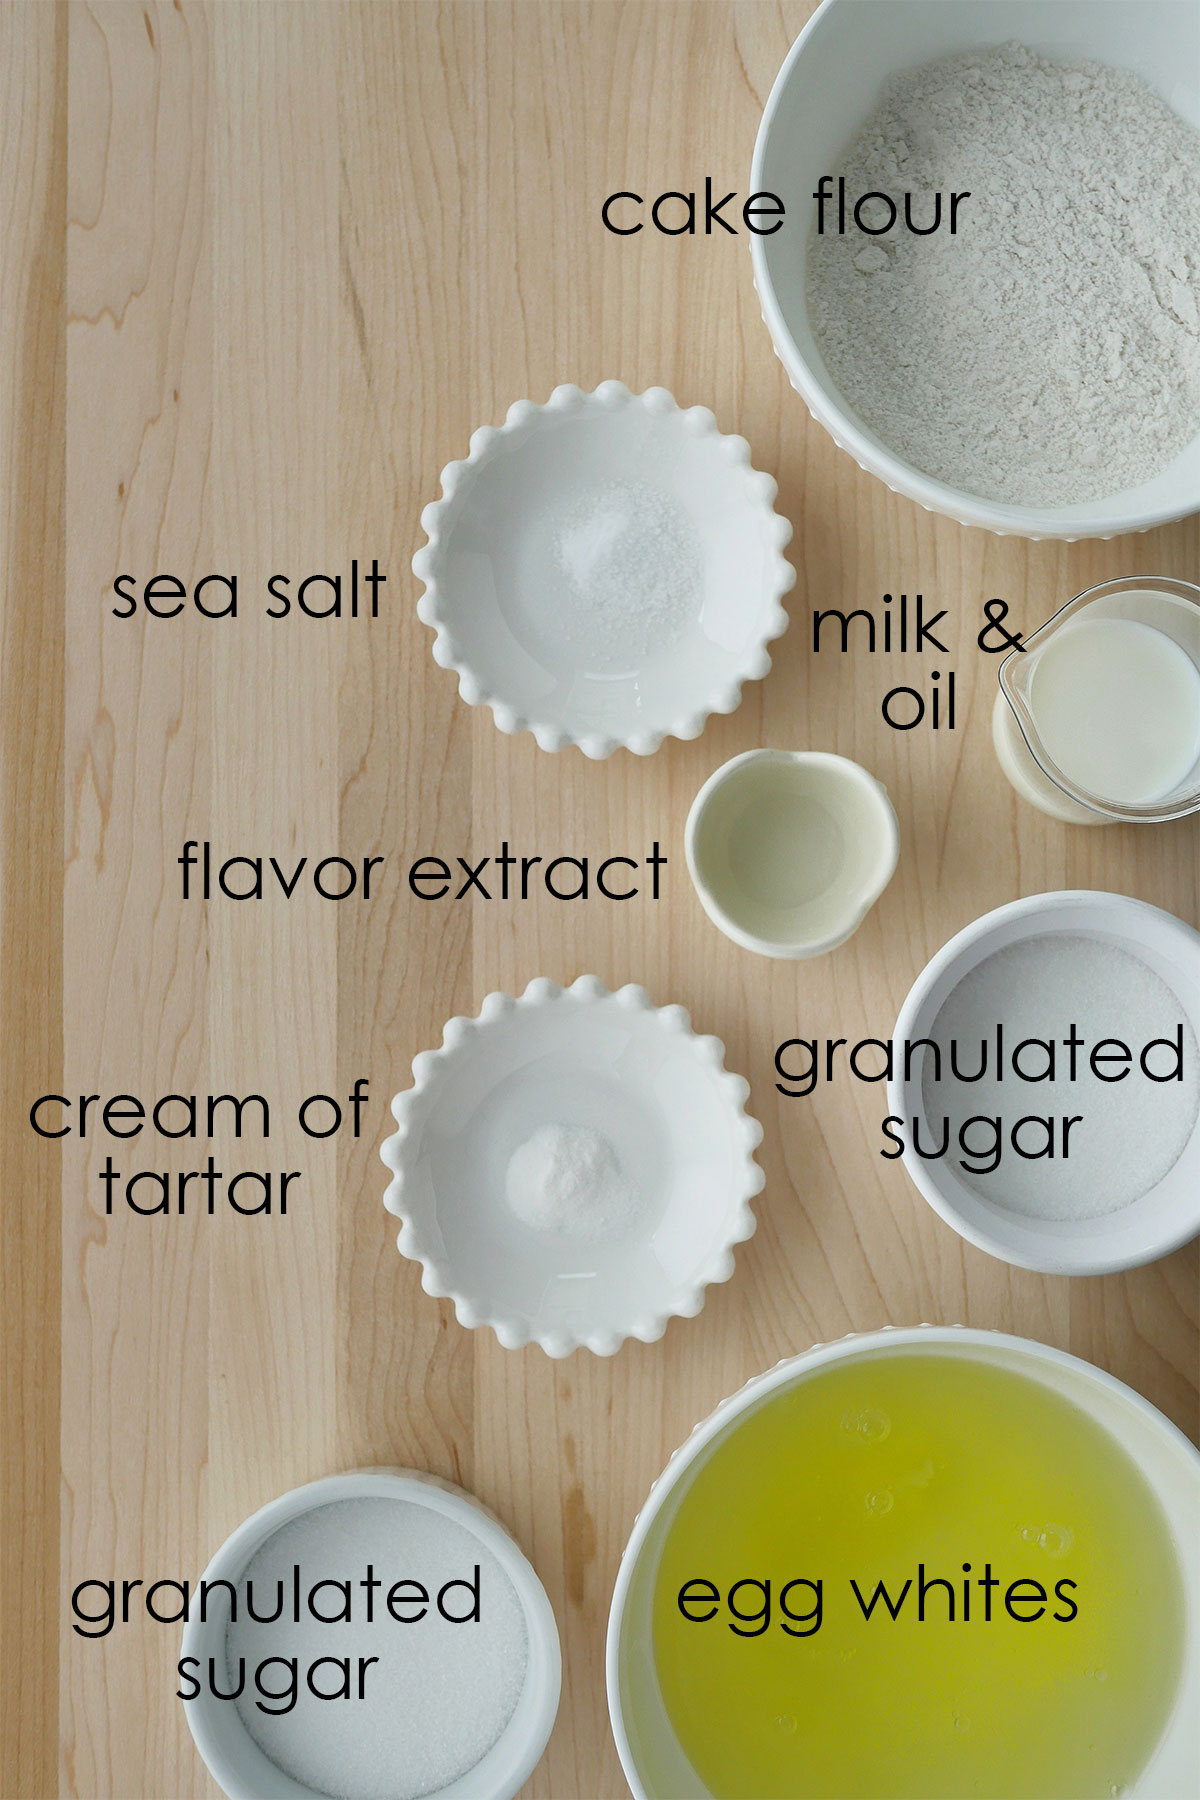
Dry Ingredients
- Cake flour - a low protein flour which will help make this cake softer than if using AP flour. It usually has a protein content between 6-8% while pastry flour, also a lower protein flour, has a protein content between 8-9%. Grocery stores usually sell a combination of cake and pastry flour at 7-9% protein. It can be substituted with all-purpose flour but the cake will be a little tougher than if using cake flour.
- Sea salt - provides a nice contrast to the sweet taste in the cake and brings out the flavors. Use half the amount if using table salt.
Wet Ingredients
- Whole fat milk
- Vegetable oil - neutral tasting oils like canola, grapeseed and avocado are all good choices.
- Granulated sugar - this first set of sugar is added into the wet ingredients to help add moisture and break up the grains when the dry ingredients are added.
- Vanilla extract - adds flavor to the cake, this can be substituted with other flavors of extract.
Meringue
- Egg whites - from large eggs. Egg whites whip better at room temperature so keep it out on the counter for about half hour before whipping.
- Cream of tartar - is an acid that helps to stabilize the meringue. It can be substituted with double the amount of lemon juice or vinegar.
- Granulated sugar - adds stability to the meringue and tenderizes the cake.
- Gel color - gel colors are a potent form of food coloring that doesn't add excess moisture when added to baked goods.
Stabilized Whipped Cream
- Heavy cream - is a cream with a minimum milk fat content of 36% and above. Whipping cream has milk fat content of 30-35%. Heavy cream yields a more stable whipped cream but whipping cream will work just as well in this recipe since gelatin is being added.
- Unflavored gelatin powder - when added to the cream, it creates a super stable whipped cream that will prevent the cake from sagging.
- Granulated sugar
- Vanilla extract - adds flavor to the cream, this can be substituted with other flavors of extract.
Tips For Baking a Great Cake Roll
- A strong and healthy meringue (whipped egg whites with sugar) is needed to act as one of the leavening agents in this cake. Egg whites should be whipped in a clean and dry non-plastic bowl since plastic tends to trap oil. Egg whites don't whip well in the presence of oil and water. To further remove oils, use a paper towel and wipe down the mixing bowl with lemon or vinegar before you start.
- Carefully separate the egg whites and yolks when the eggs are cold. Make sure no yolks are present in the egg whites. An egg separator can come in handy.
- Bring the egg whites to a stiff peak. This is characterized by egg whites that have a beak that points upwards (instead of slumped over) when the whisk is pulled out.
- Once the liquid is introduced to the flour, do not over mix. This will produce more gluten, making the cake less tender.
- After pouring the batter into the cake tray, rap it a few times on the counter to get rid of large air pockets, this will make the design show on a smoother surface.
- Use a gentle folding movement with a spatula to incorporate the meringue into the wet flour mixture. Do not stir, this will prevent the air in the meringue from deflating.
- Add more cream along the short edge of the cake which is to be rolled first. This will prevent the cake from cracking due to large gaps in between the folds. These angled spatulas will come in handy for even frosting any time of cake. Instead of putting your hands directly onto the cake, use the parchment paper to push the cake onto itself as you roll.
- Fold gently and do not worry too much about rolling the cake very tightly. As long as the cream is spread out evenly (with a bit more along the short edge as per above), the amount of cream in this recipe will allow the sheet cake to hold up without cracking due to large gaps.
- Chill the bowl, beaters and whipped cream for optimal whipping volume. They should all be be very cold. Whipping in a stainless steel bowl placed on top of a bed of ice will help keep things nice and cool on a hot day.
- Gelatin is added to the whipped cream to help stabilize it. Many recipes do not include this step but I prefer it when using whipped cream in a cake roll. It prevents the cream from deflating so the roll stays rounder and looks nicer. You can leave this step out if you plan on serving the cake immediately. If you need further guidance on stabilizing the cream, please read my post on How to Stabilize Whipped Cream with Gelatin.
- If you find rolling the cake and stabilizing the whipped cream is too time-consuming, try this easy Japanese Peach Cake in a Cup, it has the same great chiffon base but doesn't require rolling or whipped cream stabilization and can be baked in a pan of any size.
Tips to Make Pattern on Cake without Cracking and Using a Thick Paste
In creating this recipe, I experimented with several pattern paste techniques. I found that it wasn't ideal to use a separate "thicker" paste for the pattern because it made the cake harder to roll and was prone to cracking, erasing all that hard work. In this recipe, we use the same cake batter throughout the entire cake. Here are some tips on making the pattern roll without a thick paste:
- To prevent cracking, use a proper cake roll recipe. Not all cake recipes are meant for rolling because the cake base is not flexible enough. I've tested this recipe many times with various designs and it works!
- After baking, there is no need to roll up this cake for "muscle memory". You can let it cool down on the wire rack while making the cream. Assembling it right away with the cream eliminates the amount of times the cake is handled.
- To help the design stay in place without the need for a thicker pattern paste, pipe the colored cake batter onto a silicone mat instead of on parchment. The Silpat toaster-sized silicone mat fits perfectly into my 8x12" cake pan.
- Optional: To further set small details, the design portion can be chilled before pouring the rest of the batter and baking. Take the silicone mat with the piped design and place it in the freezer for 15 minutes.
Step By Step - Pattern Paste
Print out desired cake roll templates from post. Determine how much pattern paste you need. (For example, you can halve the pattern paste ingredients if you are using 2 colors or less. For this particular design I used the entire amount of batter.) In a small bowl, combine sugar, milk and oil together. Sift in flour, stir until combined.
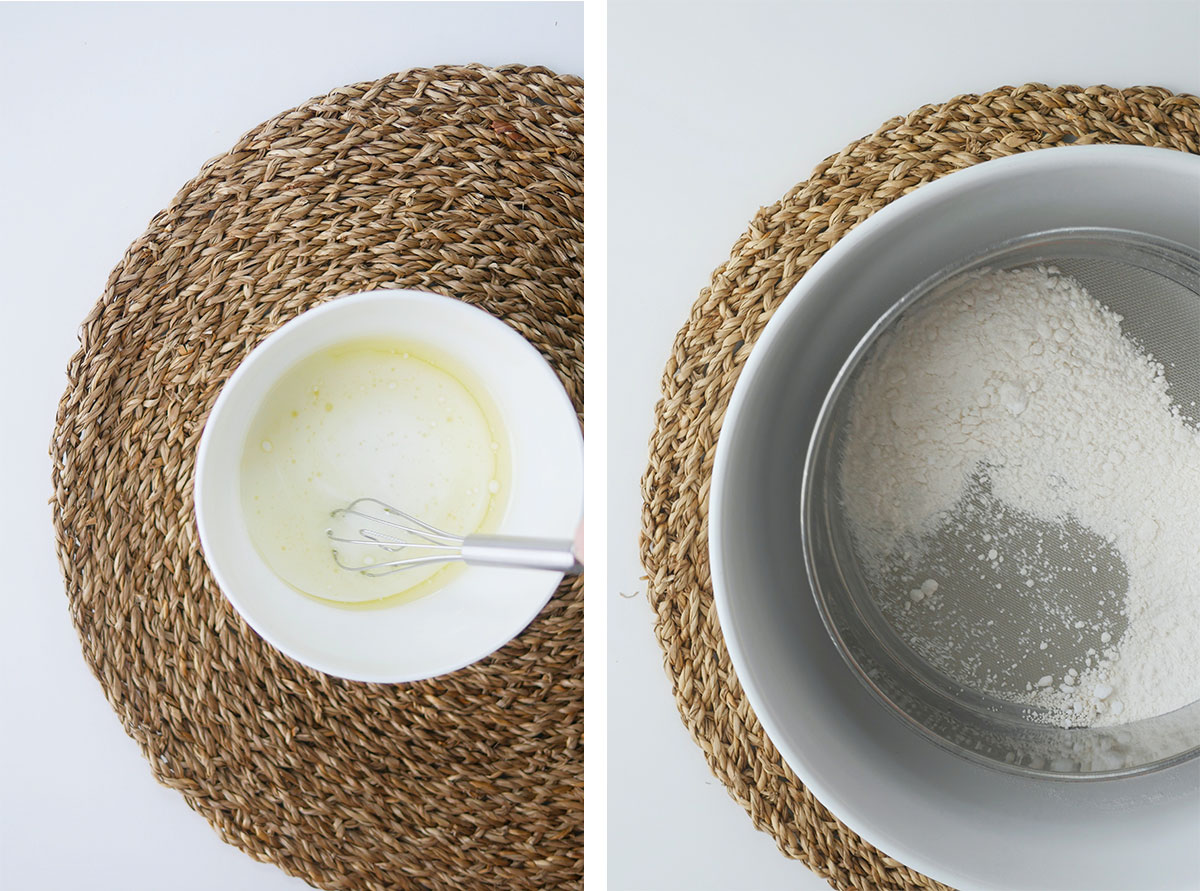
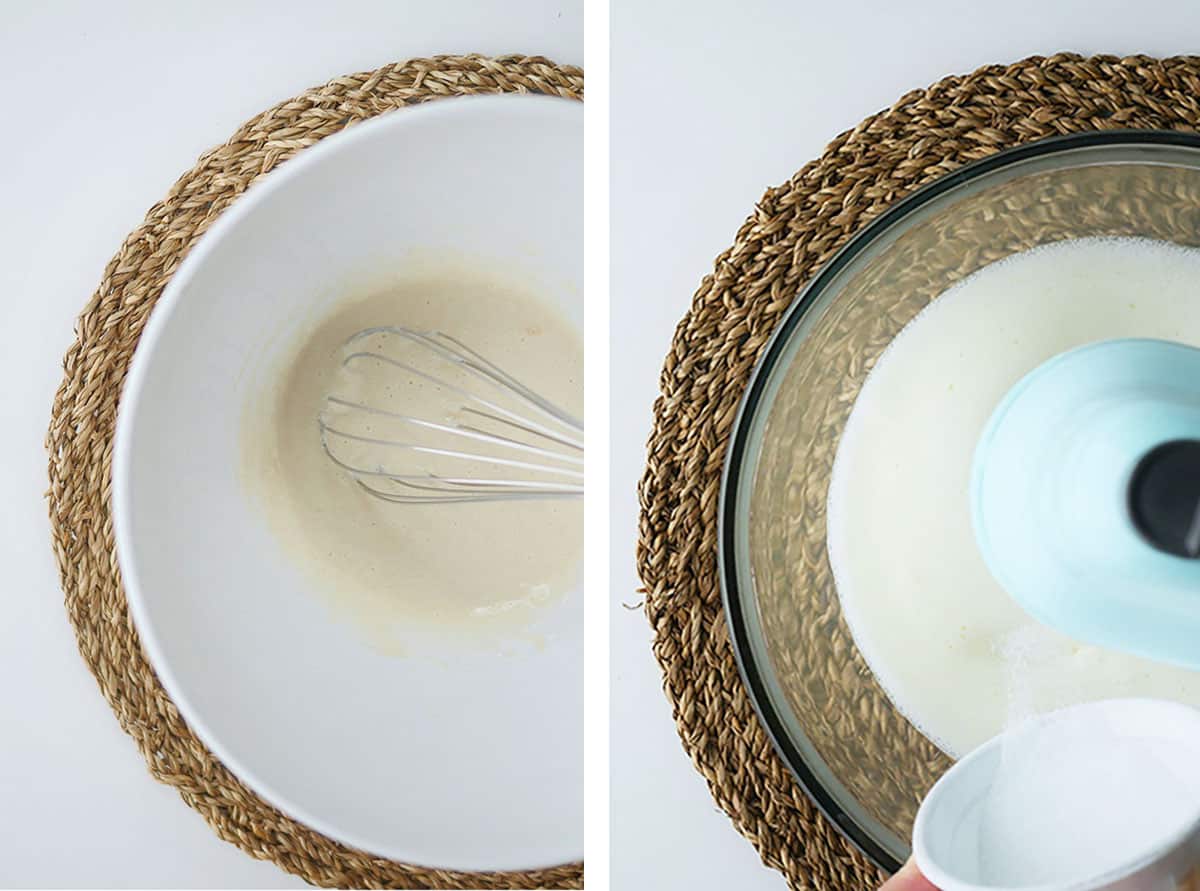
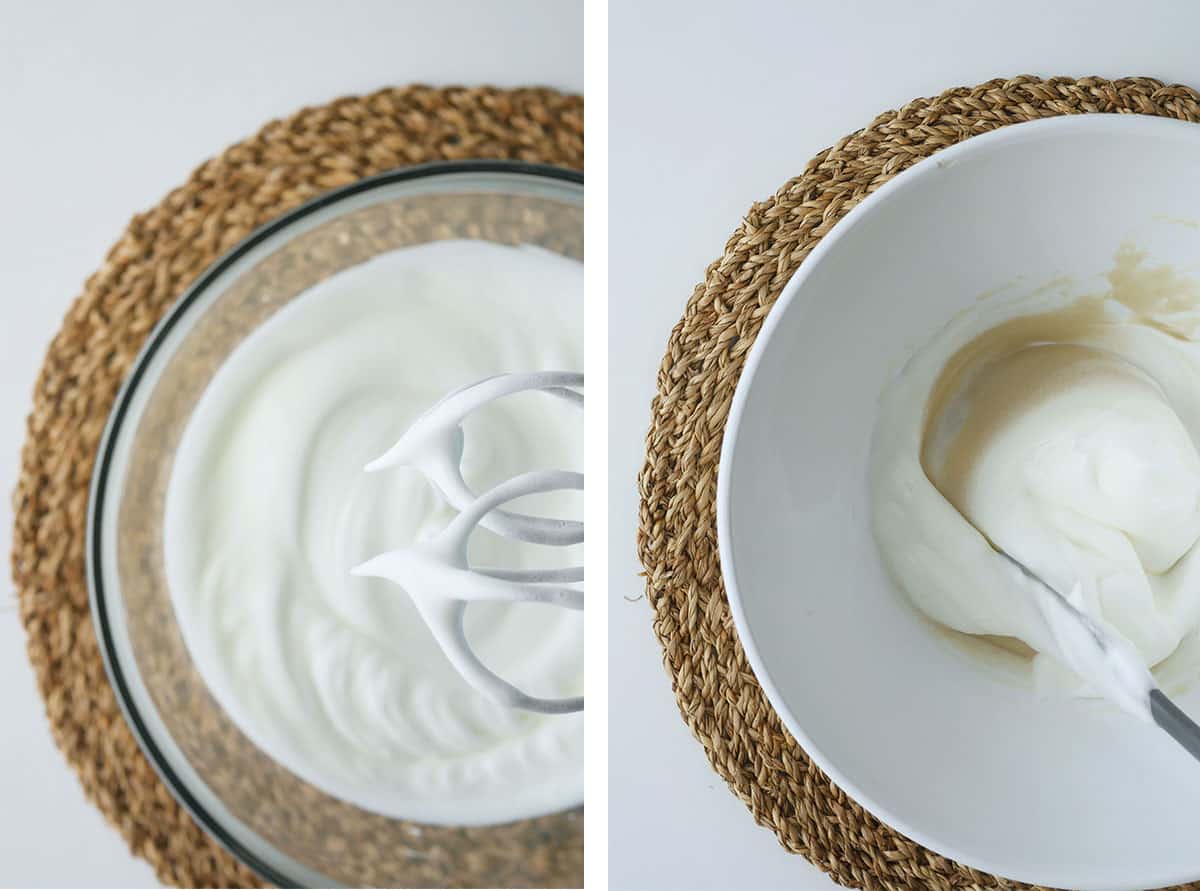
In a mixing bowl, whip sugar and egg whites together until stiff peaks form. Gently fold meringue into the wet flour mixture until just incorporated. Don't overdo it as you can fold a bit more later.
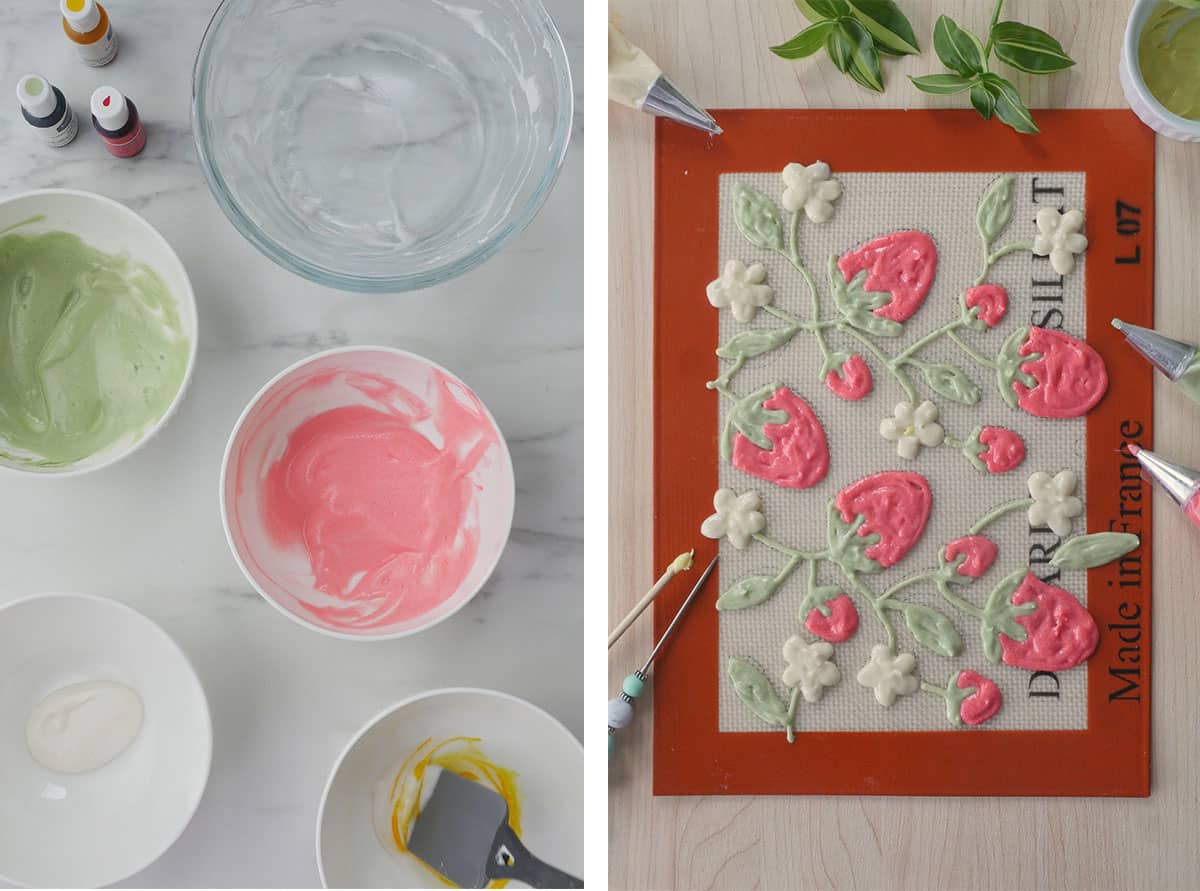
Split the pattern paste into separate bowls and add desired color. Gently fold again to incorporate color. Transfer into piping bags and pipe desired design onto silicone mats with templates placed underneath as guide. Discard leftover pattern paste. 5-10 minutes before pouring cake base over design, place it in the freezer to set small details.
Step By Step - Chiffon Cake Base
Preheat oven to 325 F. In a small bowl, combine all the "wet" ingredients together with a whisk and set aside (this includes first portion of sugar). In a large mixing bowl, sift in dry mix. Stir to combine. Create a well in the center. Inside it, add all the "wet" ingredients. Combine until just incorporated, do not over mix as it will result in a tough cake. Set this flour mixture aside. In a clean and dry, non-plastic mixing bowl, whip egg whites on slow speed until frothy, add cream of tartar.

Increase speed to medium, once the whites become opaque and bubble size have tightened up, add the second portion of sugar a little bit at a time. Increase speed to med-high, add gel color and keep whipping until stiff peaks have been reached. You've now made a meringue (Note 6). Gently fold the meringue into the wet flour mixture in three additions.

Take the silicone mat out of the freezer and place into cake pan. Fill a pastry bag fitted with a #10 round tip with some of the cake base. Pipe the batter onto the mat around the design. This eliminates any gaps between the design and main batter. Tap the tray on the counter to help settle the batter. Gently pour the rest of the cake batter into the cake pan over the design, spread out the batter evenly with an angled spatula. Tap the pan on the counter to release large air pockets.
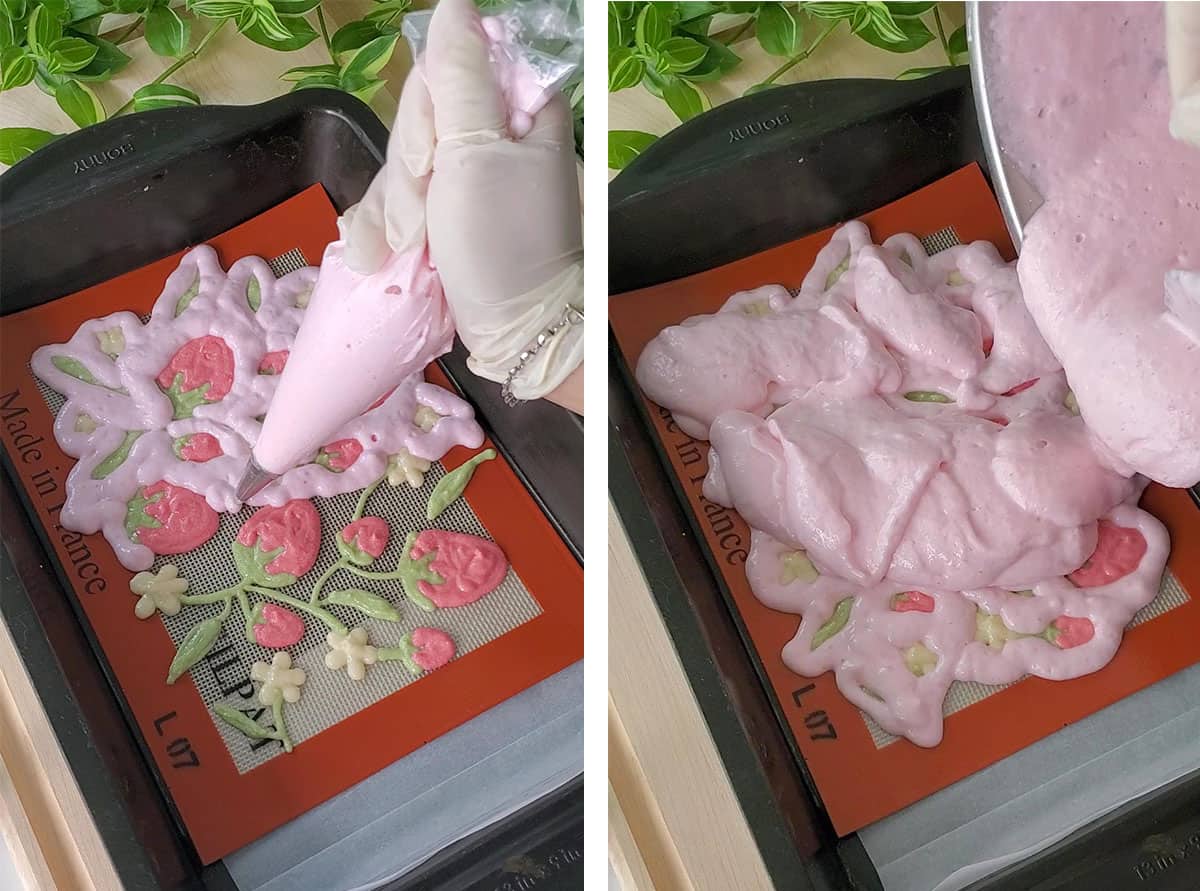
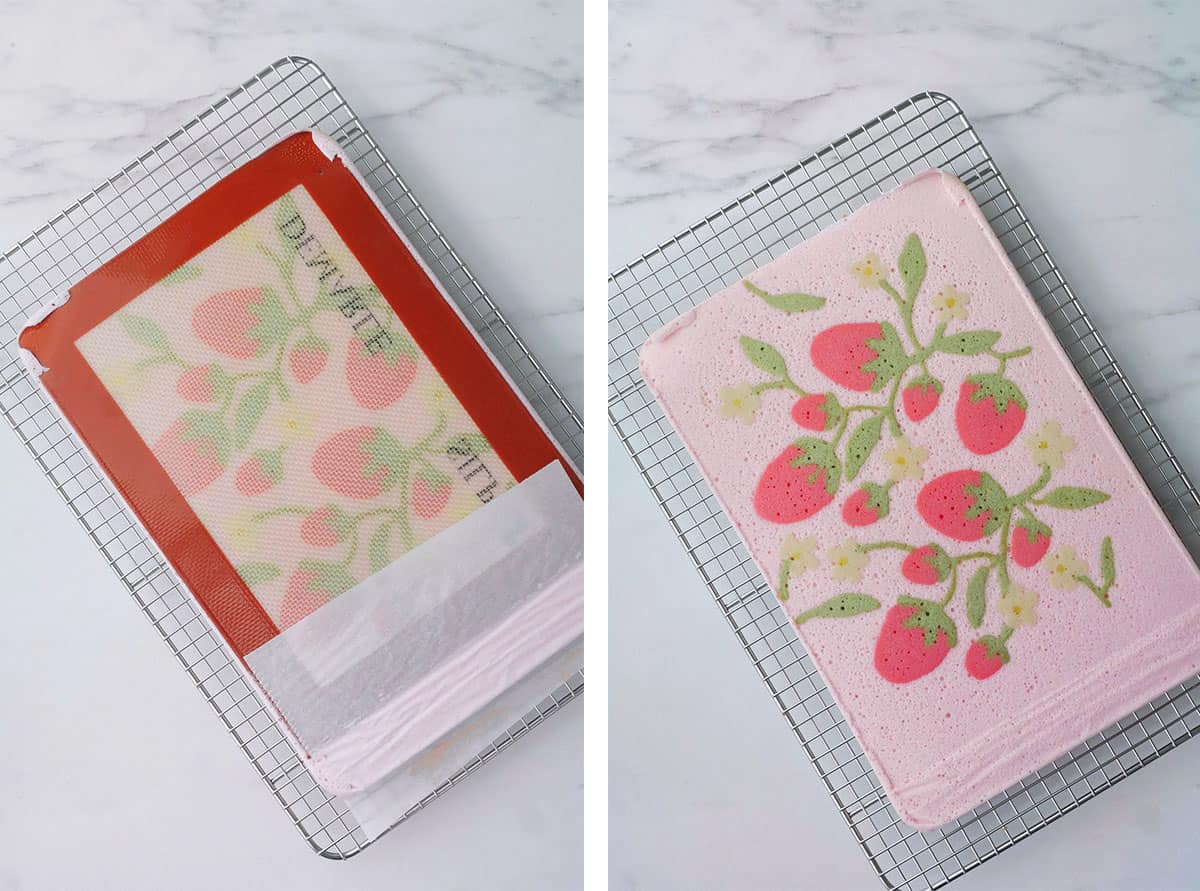
Bake for 10-12 min. at 325 F until a skewer pulls out clean and cake springs back in the center. Let cool in pan for 5 min. Place cooling rack over cake pan. Flip cake over onto the rack, gently remove paper or mat. The side facing up will eventually become the top of the cake roll. Let it sit on cooling rack while making the stabilized whipped cream.
Step By Step - Stabilized Whipped Cream
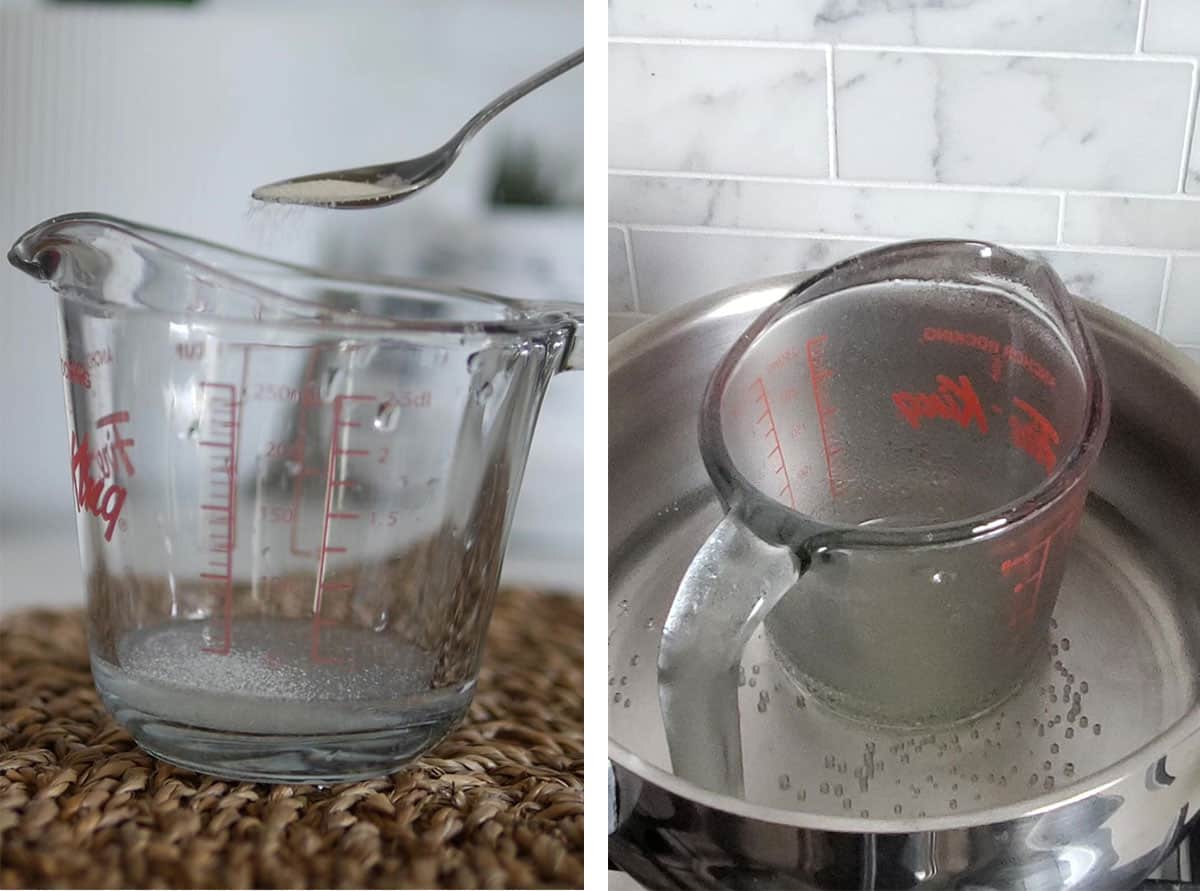
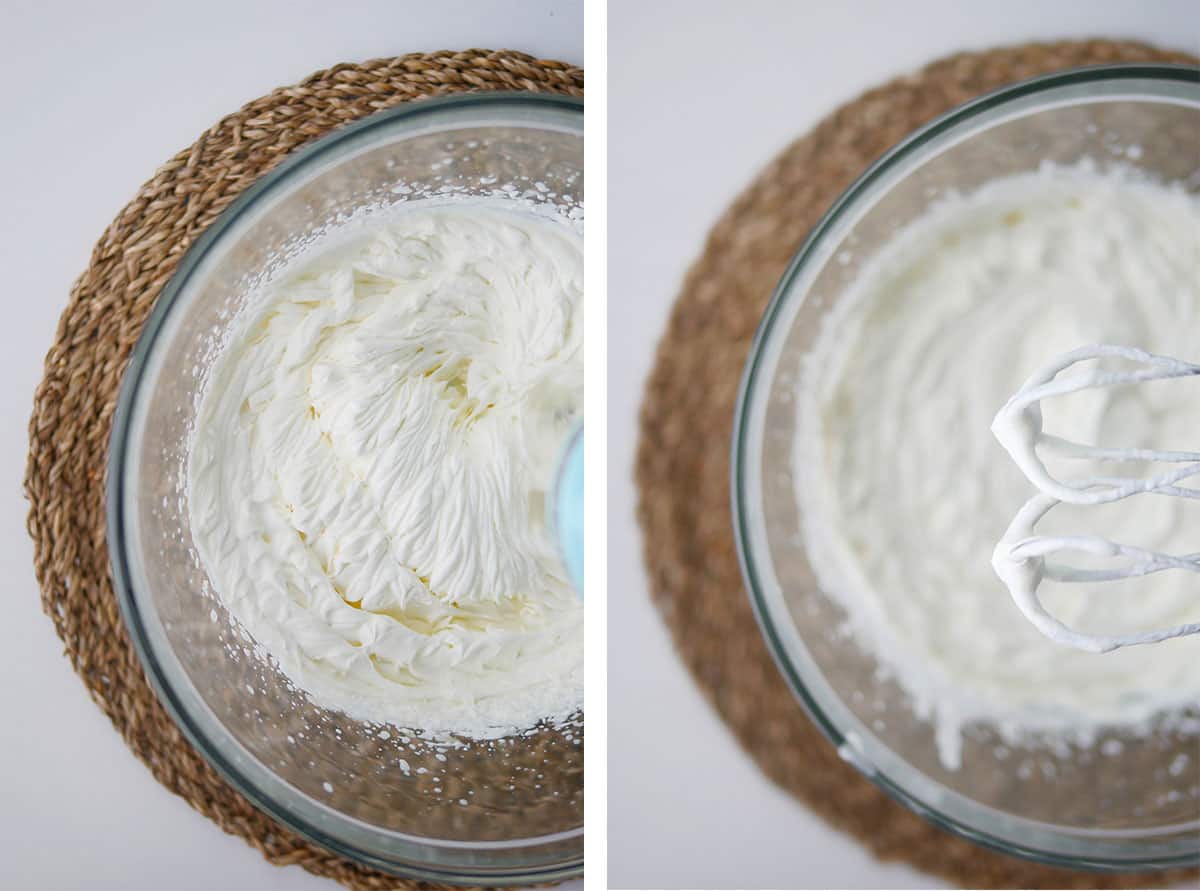
Place beaters, bowl and cream in fridge to chill. It's important for these tools and ingredients to be completely chilled before whipping. Place water in a heatproof cup and sprinkle gelatin on top to bloom. Wait 5 minutes. Place cup in a small sauce pan filled with simmering water. Once gelatin becomes liquid, take it out of the water. Let cool on the counter.
Immediately start whipping the cream and sugar on medium speed.
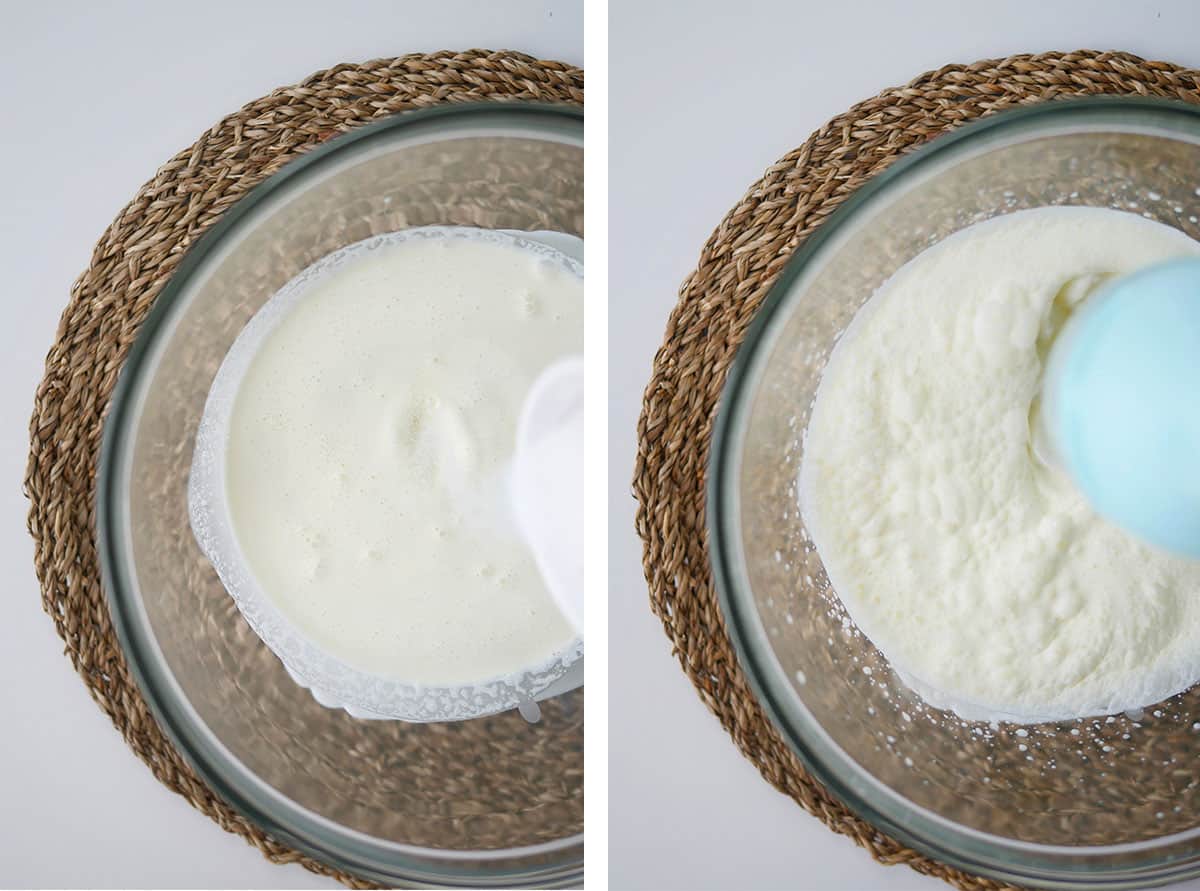
Whip until the beater starts leaving tracks inside the cream, pour the cooled gelatin into the bowl slowly and steadily. Aim for the area in between the whisk and the bowl while continuing to whip. Add extract.
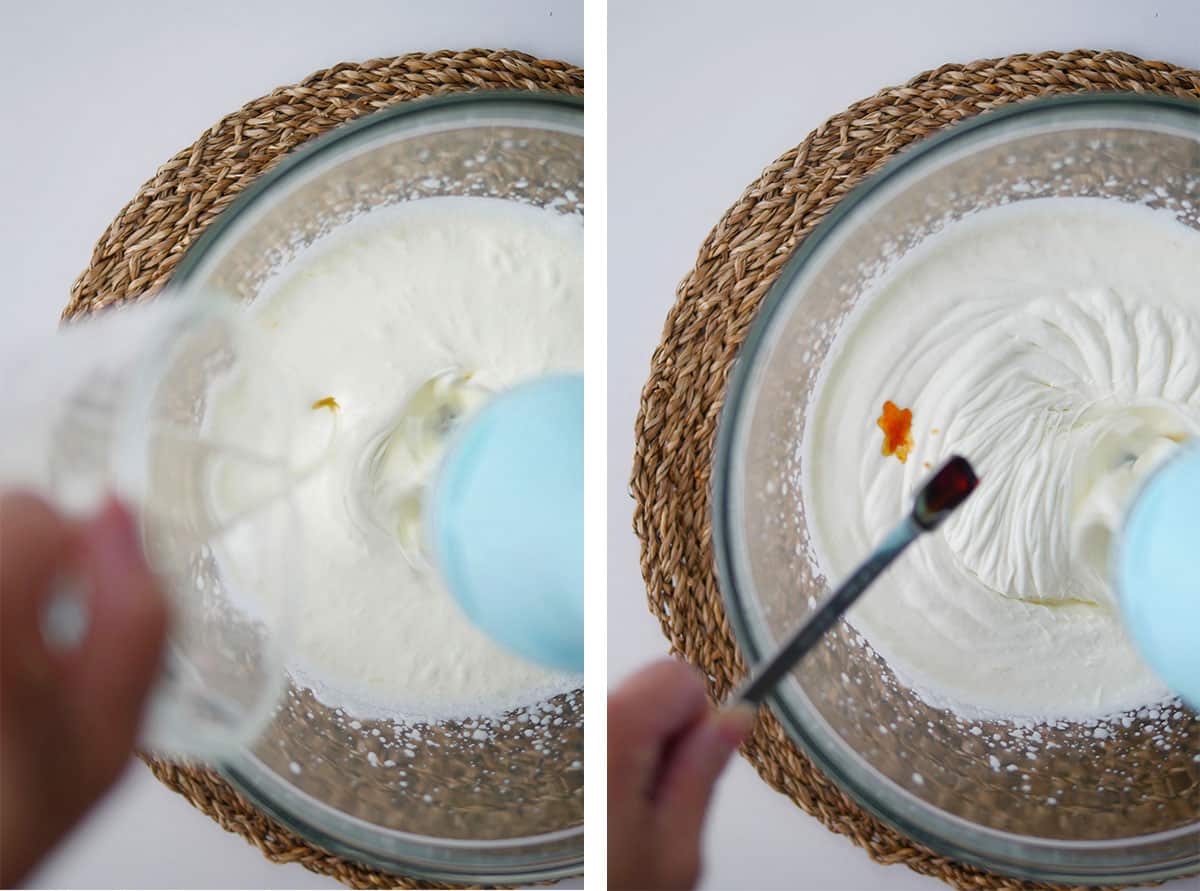
Increase speed to medium-high. Stop beating once the cream turns stiff (Note 6). Do not over whip. Use cream to assemble the cooled cake immediately.
Step By Step - Assembly
How to Make Swiss Cake Roll Look Neat and Round
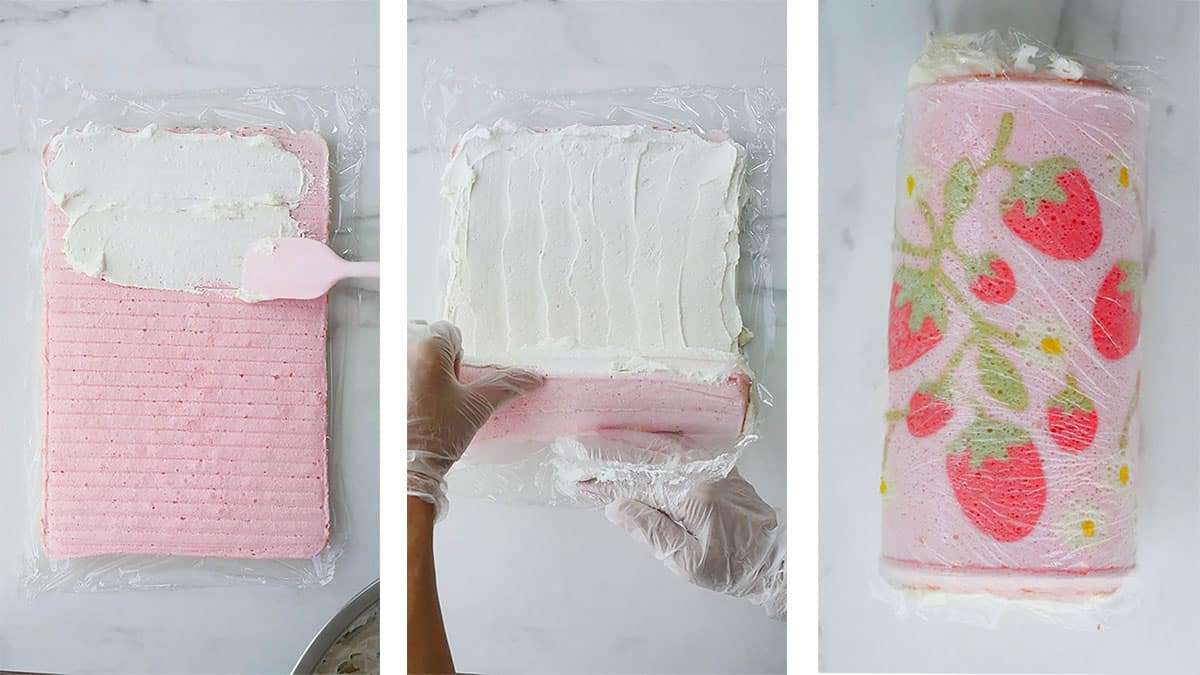
To prevent the cake roll from sagging, stabilization of the cream filling is key. After that, employing an extra rolling technique with plastic wrap will further guide the cake towards a round shape. After assembling the cake with the cream, wrap the assembled cake in plastic wrap. Once it's secured inside the first piece of plastic, place it on a new piece of plastic and start wrapping it again while gently rolling it away from you, making sure you are creating a log shape at the same time. Just use gentle pressure, we don't want to squish the fluffy cake base! Allow the assembled cake to firm up in the fridge for several hours before serving. Doing the above steps will give you a beautiful round cake log at home.
Why Does My Cake Roll Crack?
The main culprits of cakes that crack are: problems with the recipe, overhandling or incorrect rolling techniques. First, not all cake recipes are meant for rolling into a cake roll. I've tested all my cake roll recipes countless times and I can confirm that this cake base is indeed flexible enough for rolling into a cake log.
Second, overhandling can cause the cake to crack. Therefore, I've eliminated the extra step of rolling up the cake while warm for "muscle memory". This cake recipe is flexible enough that we can just leave the cake to cool on a rack to release moisture while we make the cream. Once the cream is completed, we can begin to roll the cake immediately.
Lastly, using the correct rolling technique will prevent the cake from cracking. Add a little bit more cream on the short edge that is to be rolled first. This will give the log more cushion in the center so it won't crack due to large gaps. Use gentle pressure and don't worry about rolling the cake too tight, you can shape the log into a round log later with the tip in the section above. Make sure to bake the cake in the correct sized pan, below.
Can I Bake This Cake in a Different Sized Pan?
The cake pan used in this recipe has been tested to provide the optimal amount of cake to cream ratio. The height of the cake is just high enough that it's light and fluffy but not so much that it needs to be folded into itself many times. If you don't have the proper pan size, you can use aluminum foil to make one or roll it up to create a dam inside your larger-sized cake pan. This post will show you how to bake this chiffon cake in any sized cake pan.
Why Doesn't the Skin on the Cake Roll Come Off Neatly?
It should be noted that not all cake roll recipes intend for the "skin" to come off, the ingredients play a part in whether or not the parchment paper peels off clean after baking. This particular recipe is formulated for use as a pattern cake roll so it should peel off neatly if you use the correct temperature and tools. Keep the temperature low and consistent. We're using 325F here to start but you may need to adjust it if you find that the skin is sticking. You can either lower the temperature or pull out the cake a bit earlier.
Next, using the right tools help the skin to peel off more readily. Line the cake pan with parchment paper or better yet, a silicone baking mat. You might have to find a heavy duty paper brand and do not use wax paper.
How Do I Make Cake Rolls in Different Flavors?
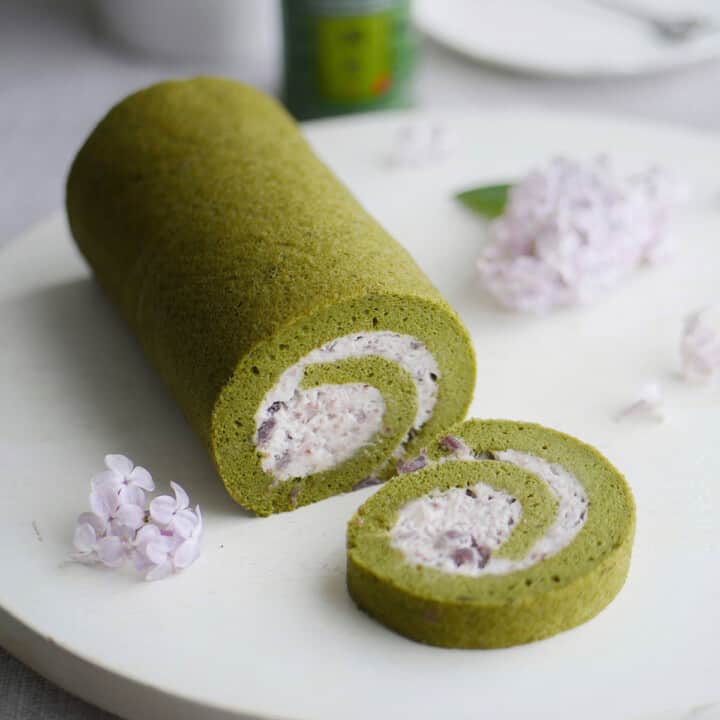
To make the cake roll in different flavors, powders, extracts and infusion-method can be utilized in either the cake base or the filling. Dry powders (like cocoa, matcha etc.) can be added into the cake base with the dry mix like in these recipes: matcha cake roll and gingerbread cake roll.
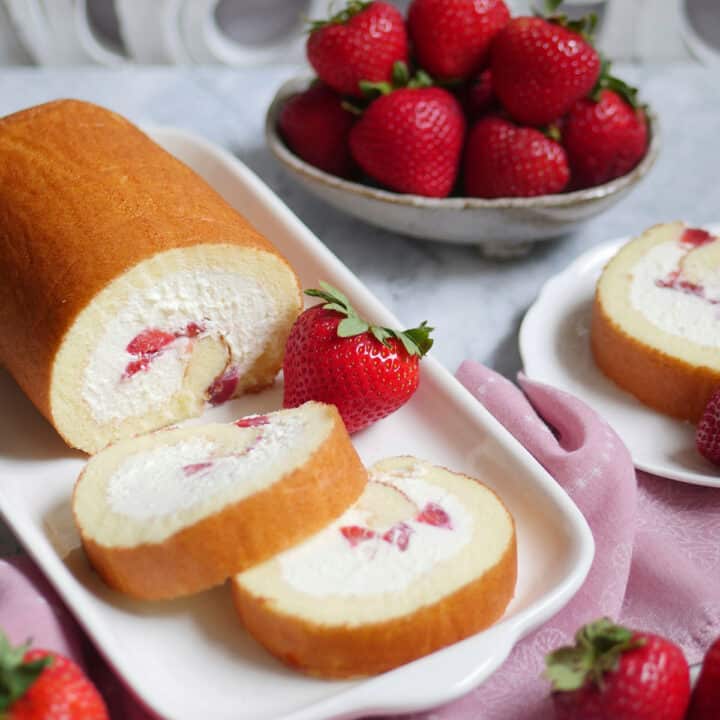
On the other hand, liquid extracts can be added into the wet mix like in this cotton candy cake roll or vanilla flavored strawberry cake roll). For added flavor and natural coloring, fruit/vegetable purees can be added like in this pumpkin spice cake roll, Tokyo Banana cake roll or carrot spice cake roll. Adding ingredients with more liquid composition will take more experimentation. If you want an easier method try the next method below.
Another way to add flavor is to simply add extracts into the cream filling during the whipping process. The flavors can also be infused into the cream by letting the flavored ingredients (like leave leaves) soak/steep inside the cream before using it for whipping (see Earl Grey Tea cake roll, instead of steeping the whipping cream, the leaves are steeped in the milk for the cake batter). Just make sure not to use ingredients with high acidity as it will cause the cream to curdle.
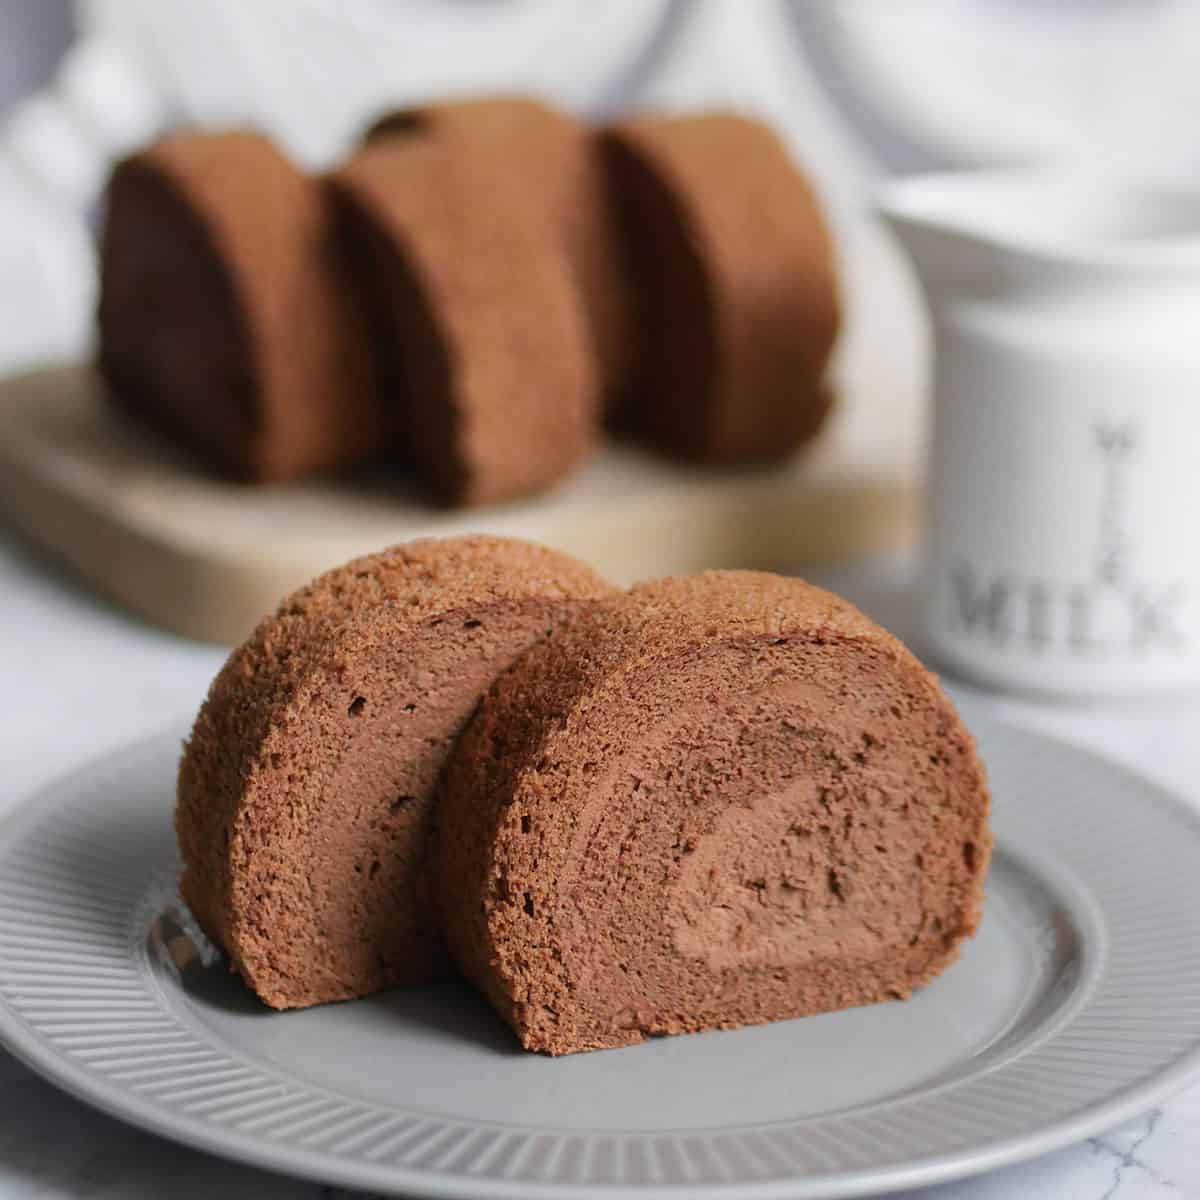
You can even try mixing and matching different flavored cake bases with different cream fillings using these recipes to guide you: chocolate cake roll, matcha cake roll, coffee cake roll, carrot cake roll, gingerbread man printed cheesecake roll and fresh mango cake roll.
How to Add Fine Details to the Pattern?
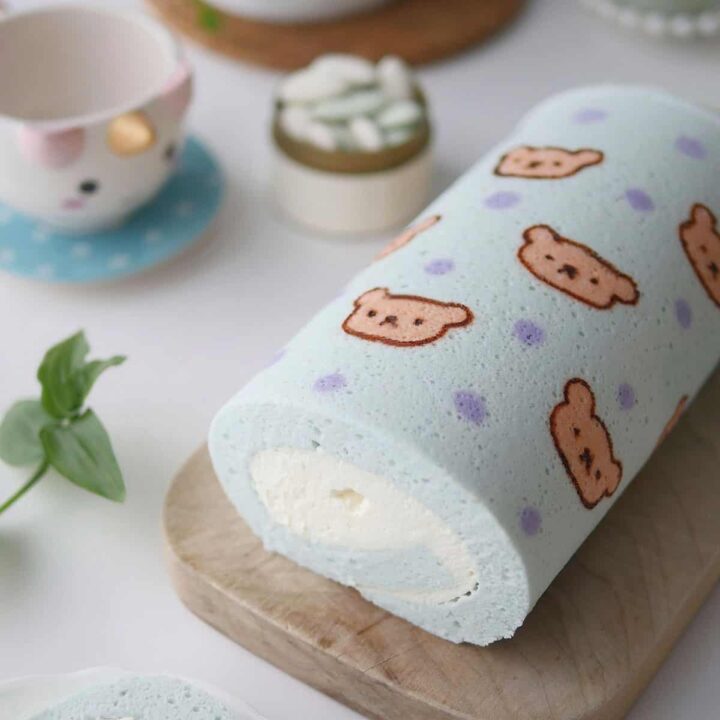
To add even more finer details and make this pattern cake even "fancier" (I know, is that even possible? lol), take a look at the cake painting techniques in these other tutorials Bear Cake Roll & Silent Night Christmas Cake Roll.
Pattern Cake Roll Templates
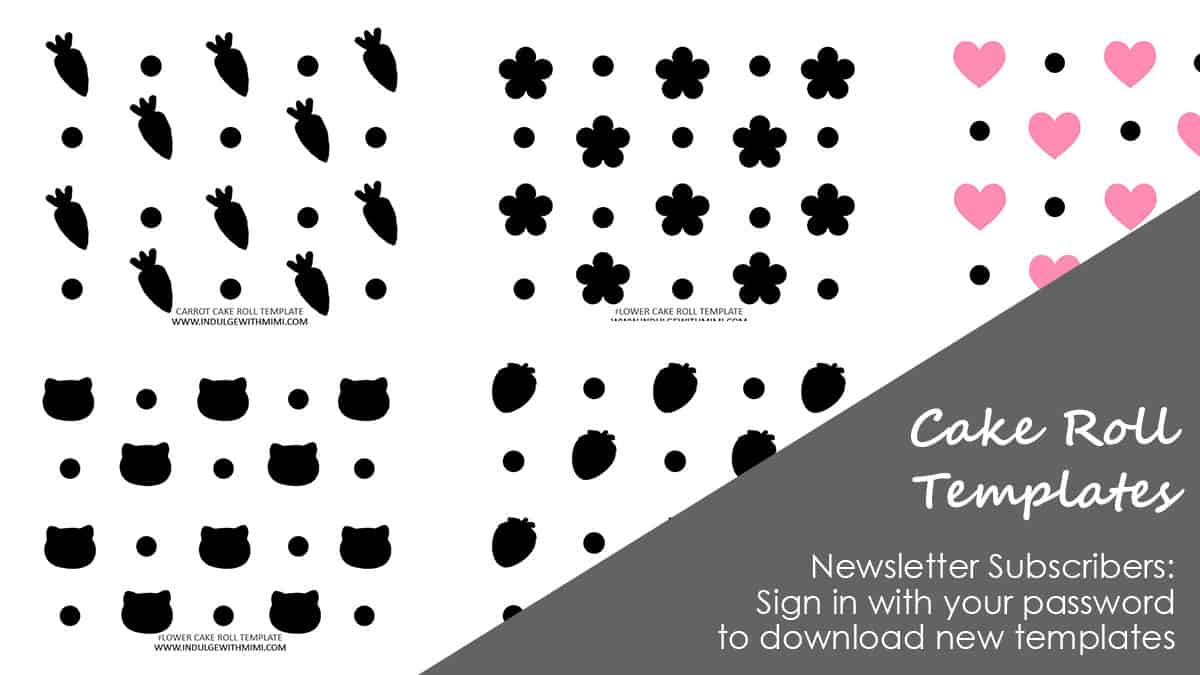
Here are some pattern cake roll templates I made for you. I'll be introducing more templates as I move along in my cake roll series. To download them, sign up for the newsletter and you will receive a welcome email with the password into the Subscriber's Area.
Reader's Results with This Recipe
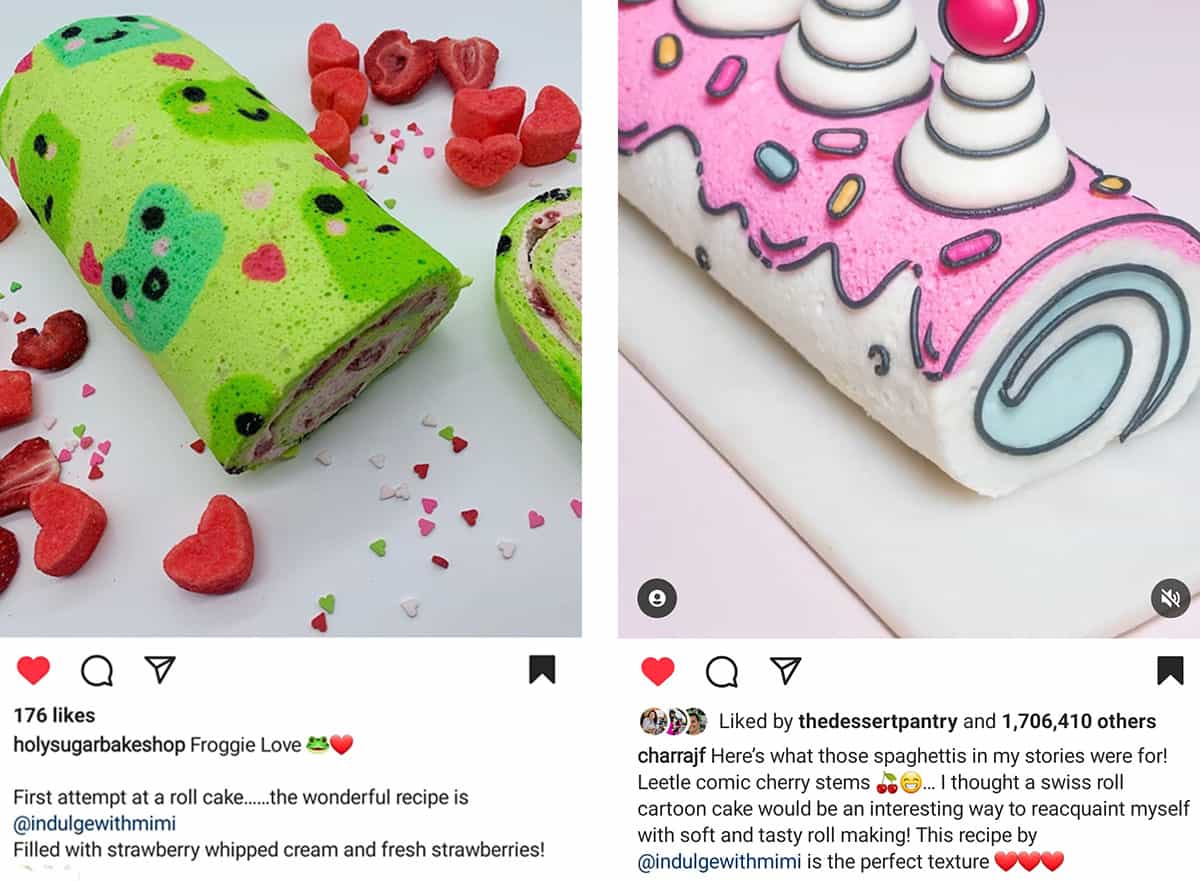
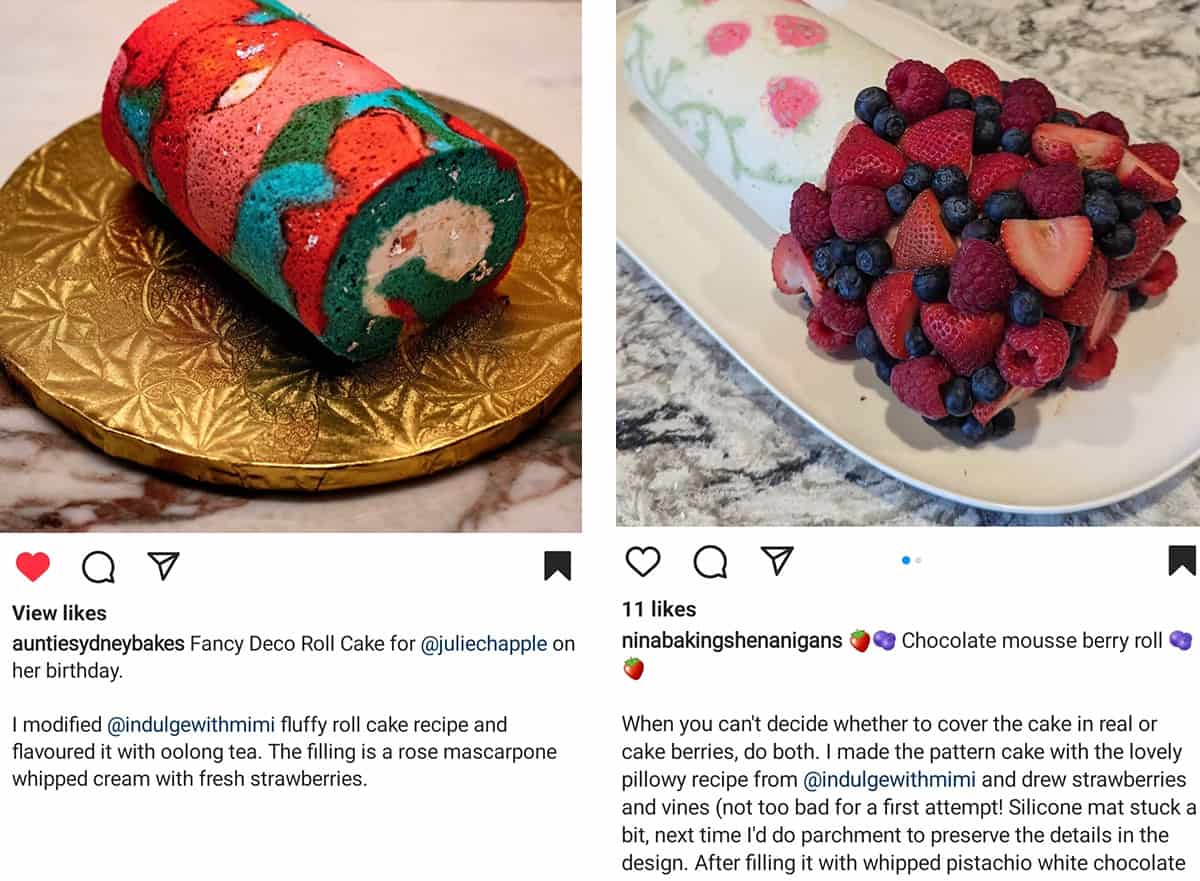
Here are some amazing examples of my reader's work using this recipe. Give them a follow over on Instagram.
Recipe
Fancy Pattern Cake Roll without the Cracks
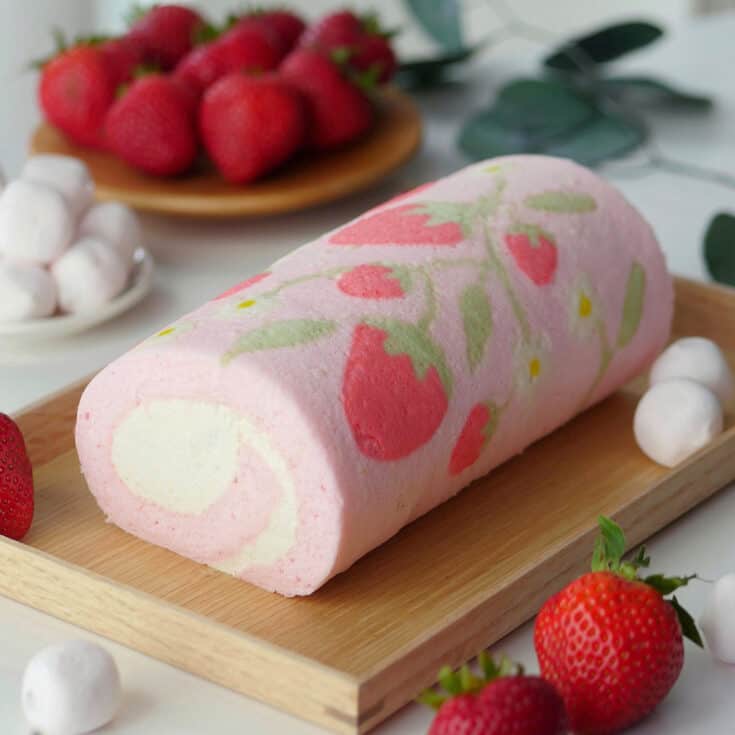
Pattern cake roll made from a flexible cake base that is easy to roll without cracking. Tastes delicious and looks amazing!
Ingredients
Flexible Pattern Paste
- 20 grams cake flour
- 2 teaspoon granulated sugar (1st set)
- 1 tablespoon + 1 teaspoon milk
- 1 teaspoon vegetable oil
- 2 egg whites
- 1 tablespoon granulated sugar (2nd set)
Dry Mix for Cake Base
- 70 grams cake flour (Note 2)
- ¼ teaspoon sea salt
Wet Mix for Cake Base
- 90 ml whole fat milk
- 20 ml vegetable oil (Note 3)
- 30 grams granulated sugar
- ½ teaspoon vanilla extract
Meringue for Cake Base
- 6 egg whites, room temperature
- 55 grams granulated sugar
- ¼ teaspoon cream of tartar (Note 4)
- Gel color in desired colors
Stabilized Whipped Cream
- 1 cup heavy cream (36% M.F.) (Note 5), chilled
- 1 tablespoon + 2 teaspoon granulated sugar to taste
- 1 teaspoon vanilla extract
- 1 teaspoon unflavored gelatin powder
- 4 teaspoon water
Instructions
Flexible Pattern Paste
- Print out desired cake roll templates from post. Determine how much pattern paste you need. (For example, you can halve the pattern paste ingredients if you are using 2 colors or less.)
- In a small bowl, combine 1st set of sugar, milk and oil together.
- Sift in flour, stir until combined.
- In a mixing bowl, whip 2nd set of sugar and egg whites together until stiff peaks form.
- Gently fold meringue into the wet flour mixture until just incorporated. Don't overdo it as you can fold a bit more later.
- Split the pattern paste into separate bowls and add desired color. Gently fold again to incorporate color.
- Transfer into piping bags and pipe desired design onto silicone mats with templates placed underneath as guide. Discard leftover pattern paste.
- 5-10 minutes before pouring cake base over design, place it in the freezer to set small details.
Cake Base
- Preheat oven to 325 F.
- In a small bowl, combine all the "wet" ingredients together with a whisk and set aside (this includes first portion of sugar).
- In a large mixing bowl, sift in dry mix. Stir to combine.
- Create a well in the center. Inside it, add all the "wet" ingredients.
- Combine until just incorporated, do not over mix as it will result in a tough cake. Set this flour mixture aside.
- In a clean and dry, non-plastic mixing bowl, whip egg whites on slow speed until frothy, add cream of tartar.
- Increase speed to medium, once the whites become opaque and bubble size have tightened up, add the second portion of sugar a little bit at a time.
- Increase speed to med-high, add gel color and keep whipping until stiff peaks have been reached. You've now made a meringue (Note 6).
- Gently fold the meringue into the wet flour mixture in three additions.
- Take the silicone mat out of the freezer and place into a 8"X12" cake pan. (Gently touch the pattern paste, if it doesn't transfer onto your fingers, it's ready.)
- Fill a pastry bag fitted with a #10 round tip with some of the cake base. Pipe the batter onto the mat around the design. This eliminates any gaps between the design and main batter.
- Tap the tray on the counter to help settle the batter.
- Gently pour the rest of the cake batter into the cake pan over the design, spread out the batter evenly with an angled spatula.
- Tap the pan on the counter to release large air pockets.
- Bake for 10-12 min. at 325 F until a skewer pulls out clean and cake springs back in the center.
- Let cool in pan for 5 min.
- Place cooling rack over cake pan.
- Flip cake over onto the rack, gently remove paper or mat.
- The side facing up will eventually become the top of the cake roll. Let it sit on cooling rack while making the stabilized whipped cream.
Stabilized Whipped Cream
- Place beaters, bowl and cream in fridge to chill. It's important for these tools and ingredients to be completely chilled before whipping.
- Place water in a heatproof cup and sprinkle gelatin on top to bloom. Wait 5 minutes.
- Place cup in a small sauce pan filled with simmering water. Once gelatin becomes liquid, take it out of the water. Let cool on the counter.
- Immediately start whipping the cream and sugar on medium speed.
- Whip until the beater starts leaving tracks inside the cream, pour the cooled gelatin into the bowl slowly and steadily. Aim for the area in between the whisk and the bowl while continuing to whip.
- Add extract.
- Increase speed to medium-high. Stop beating once the cream turns stiff (Note 6). Do not over whip.
- Use cream to assemble the cooled cake immediately.
Assembly
- Spread the cream onto the patter cake with a bit of extra on the side that is to be rolled first (Note 7).
- Carefully roll up the cake from the short edge using the parchment paper to help push the cake onto itself.
- Wrap with plastic wrap and place in refrigerator to set before cutting.
- Before serving, cut off sides for a cleaner presentation. Cake roll can be kept in the fridge in an air tight container for 2-3 days.
Notes
1. Some ingredients are repeated, use them in the same order as outlined in instructions.
2. Cake flour is preferable for a soft fluffy texture. It can be substituted with All-Purpose Flour.
3. Neutral oil choices: canola, grapeseed, avocado
4. Cream of tartar is an acid that helps to stabilize the egg whites, it can be replaced with double the amount of lemon juice or vinegar.
5. Heavy cream is cream with milk fat content of 35%+ (also labelled as 35% M.F.) It can be substituted with whipping cream which has milk fat of 30%+. Heavy cream is preferred for it's stability.
6. Stiff peaks are characterized by egg whites that have a pointed peak when the whisk is pulled out. It points upwards and doesn't droop on itself.
7. Depending on the volume your cream attains once whipped, not all of the cream may be needed. A layer about ½" is recommended, with bit more on the edge that will be rolled first.
8. If you're looking for a simpler way to make printed cake rolls, check out Tiger Cake Roll. It is better suited for pattern cakes utilizing only 2 colors and minimal piping time.
Recommended Products
As an Amazon Associate and member of other affiliate programs, I earn from qualifying purchases.
-
Wilton #10 Round Decorating Tip
-
Fat Daddio's POB-8122 Sheet Cake Pan, 8 x 12 x 2 Inch, Silver
-
Toaster Oven Size Silpat Non-stick Silicone Baking Mat
-
White Fondant Icing, Decorator Preferred, Ready to Use, 250g (8.8oz)
-
Gel Food Coloring AmeriColor Junior Kit, 8 Colors.75 Ounce Bottles
-
OXO Good Grips 3-in-1 Egg Separator
Nutrition Information
Yield
8Serving Size
1Amount Per Serving Calories 213Total Fat 13gSaturated Fat 7gTrans Fat 0gUnsaturated Fat 5gCholesterol 35mgSodium 127mgCarbohydrates 18gFiber 0gSugar 13gProtein 5g
This information is provided as a courtesy and is an estimate only. This information comes from online calculators. Although indulgewithmimi.com attempts to provide accurate nutritional information, these figures are only estimates.


Jill says
Can you possibly adapt the recipe for a standard jelly roll pan?
Mimi says
Hi Jill,
In this post, it will go over how to bake this cake in any sized pan. The trick is to make sure the height of the batter remains the same as the original recipe. Please take a look here: peach cake in a cup.
XOXO,
Mimi
Joy says
Hi Mimi,
Can this recipe be used for a flat design cake vs rolling? Or do you have a recipe for one?
Thank You!
Mimi says
Hi Joy,
I have another recipe that is more suited for a flat cake. This cake is soft and better suited for rolling, it has less structure for a flat cake. Try this Asian Bakery cake instead with the pattern paste here.
XOXO,
Mimi
SK says
Hi Mimi,
I've tried making this recipe twice. My pattern came out just fine, but I've been having trouble with the rolling.
The first time, I believed I'd overbaked it (it wasn't done after 12 minutes, and then I forgot to reset the timer), and I missed that I was supposed to take it off the pan and cool it on a rack after 5 minutes, and when I tried to roll it, it immediately collapsed.
The second time, I made sure to watch it closely and took it out after 16 minutes. I also cooled it as directed, but again, as soon as I went to roll it, it collapsed and broke in half. Now I'm wondering if I've actually under-baked it slightly? It still seems quite moist even after cooling, so not much structural integrity there. I was just nervous about how I'd baked it for 4 minutes more than dictated in the recipe.
Any insight you could offer would be excellent!
Mimi says
Hi!
I have baked this cake with varying degrees of doneness (abeit maybe not as well done as your first one), and I have not had it crack when rolling. First of all, are you using the right pan size? If the cake it too thick or too thin, that might make it harder to roll. The pressure you use is also important. There is no need to have a tight roll, especially when you first start. Just add more cream to the edge where you start rolling first and then gently push the cake on itself with the paper. Don't try to roll it with your fingers. Use the paper to just push it forward. Please take a look at the video in this strawberry cake roll recipe. It will show you how to do it gently. Pls. let me know if you have any other questions after viewing that.
XOXO,
Mimi
Anna says
I’ve been trying to make this recipe but the pattern paste just comes out as pure liquid. You cant get any detail with it it just falls straight out of the piping bag. I don’t understand and its very upsetting
Mimi says
Hi Anna,
I'm sorry you're having troubles. That doesn't sound right at all. I think there is a big chance that the egg whites haven't been beaten stiff enough before incorporating it with the other ingredients. The egg whites give the pattern paste the structure it needs, it needs to be stiff and white like the process photos shown. Please refer back to it, it will show the stiff peak stage of egg white beating, the whites will have points that stay completely upright without falling. Next, make sure the ingredients are weighed out using a scale so that you have enough of every ingredient. There are lots of readers who have made this cake successfully with this recipe as its written, I've included photos of them in the post, I'm sure your cake will get there as well. Please let me know if you have any other questions before you try it again. XOXO, Mimi
Bree says
Is it possible to use the pattern paste with one of your other swiss roll recipes (like the Fresh Strawberry Cream Japanese Cake Roll or Matcha Cake Roll) or is that not really recommended since those recipes are a little different? Also, do you have a go-to matcha powder that you like for baking? I'm a little overwhelmed by all the options on the internet.
Mimi says
Hi Bree,
You can use some of my other recipes to make pattern roll cake. Here, take a look at this hybrid cake roll I made called Silent Night cake roll. It uses the pattern paste from this cake but the cake base of my strawberry cake roll as you mentioned above. It also works in this gingerbread man pattern cake roll.
I have not personally tested it with my other cake bases but I feel like the bases with finer crumbs should be fine. I'm not sure how well it will do with carrot cake or banana cake as those have pulp in them.
AS for the powder, take a look at my matcha recipes. At the end of my recipes, I usually link the brands I recommend. This Jade one is a product of Japan and very popular.
Let me know if you have any other questions. XOXO, Mimi
Alanna Nguyen says
I just took my cake out of the oven and flipped it on to a cooling rack after 16 minutes of cooking. Yet when I took off the silicon mat on my design, the mat took off a layer of cake along with my pattern. The top layer was very moist and came off when I touched it. Do you have any tips to prevent this from happening the next time I try to bake this?
Mimi says
Hi Allana,
It sounds like the cake is a bit under baked. You might need to give the cake a bit more time in the oven or increase the temperature a bit. It also helps to gauge the doneness of the cake by its outer appearance. It should be golden and bounces back.
XOXO,
Mimi
Kathryn says
Hi mimi,
Can t see how to make a new comment!
Is it possible to freeze this one completed? Want to make it ahead.
Thanks
Kathryn, UK
Mimi says
Hi Kathryn,
I would only freeze the cake flat like a sheet when making in advance then defrost the night before to assemble fresh cream the next day. The whipped cream is not very good once defrosted. It won't be fluffy and airy and might separate. This is due to the whipped cream. If you must make it ahead, you can fill it with another frosting like Swiss buttercream (recipe here). It's not my preferred filling for this cake because it's heavier than the cake but this filling does freeze/defrosts wonderfully.
Any other questions, just come back and lemme know!
XOXO,
Mimi
Claudia says
Hi Mimi, I just made this pattern roll but with Pikachu as the main design. I followed every step as best as possible but when I went to go pull back the parchment paper, my Pikachu was all smudged and messed up. Why did this happen? Half of my Pikachu looked good and the other half melted all together. I messaged you on Instagram too so I could send you a picture of my mess up.
Mimi says
Hi Claudia,
Thanks for reaching out. I'm not sure why I didn't get the message on Instagram. My best guess on why your pattern is smudged is that it wasn't frozen for long enough to set. Test it by touching it with your fingers. It shouldn't transfer. Also carefully pouring the cake batter onto the design is key. Be gentle with that. If half of it looks good, then that means you did something right along the way, may just need to be a bit more careful. I really prefer the Silicone mats better for piping the design. It doesn't shift as easily and less of the quick heat transfer as with using paper.
Let me know how it goes next time!
Xoxo, Mimi
Steph says
Hi! What size pan do we use? I may have missed it but I read the recipe and post over and over and can’t seem to find it.
Mimi says
Hi Steph,
Thanks for reaching out, I also had to do a double take. You are correct, I don't see it on the recipe card. I think my readers must have gotten the correct pan size from all my previous cake roll recipes and also seen measurements from the recommended pan listing and the size of the toaster oven silpat mat. The pan size you need will be 8X12", that will fit a toaster sized oven silpat mat almost perfectly. The other popular cake pan size a bit bigger than this so you can create a dam with tin foil to stop it from going over. The post body will go over some methods you can use if you don't have the correct pan.
XOXO,
Mimi
Kim says
Are there any suitable alternatives for getting the pattern without a silicone mat? I have a jelly roll pan and I’d rather not cut a silpat down to size, so I’m wondering if it’s possible to use something like parchment
Mimi says
Hi Kim,
Yes you can use parchment. However, it might be a bit slick so you might find that some parts might stick. If you're not too picky, it's worth a try. I have used parchment before and if I'm careful with the temp (not too high for too long), it works well. The paper is more slick and also thinner so the heat can sometimes overbake the cake causing the browning and sticking of the pattern. Alternatively, if you want to use the silicone mat, you can make a bigger cake and cut down to size. Not ideal but both are options you can consider.
XOXO,
Mimi
Alice says
I can tell how much effort went into the making of this recipe and overall it's great, so I am tempted to only say good things; but unfortunately, there are some things that I did not enjoy so it is only right for me to give an honest review.
The texture of the cake is very nice and airy. It is super light and almost melts in your mouth. With the chiffon cakes that I usually make, egg yolks aren't completely omitted like they are in this recipe. I am not sure if this contributed to the slightly eggy aftertaste, or whether it was just the ratio of egg whites to the other ingredients. After overnight refrigeration (an entire night), the eggy aftertaste was pretty much unnoticeable so I would recommend that.
There was, however, still an aftertaste from the pattern paste. It's relatively minor and would probably be less noticeable if the cake had fruit in it, but I found that it tasted slightly unpleasant (once again, not extremely noticeable but it was off-putting for me). I gave the cake to somebody else who had absolutely no problem with the taste so I would like to think that I am just sensitive. Another point I'd like to make is that 5-10 minutes of freezing was probably not enough to set the paste in my freezer. Lightly touch the paste to make sure it is solid enough to not bleed when you cover it with batter.
Whipped cream fillings are very complementary to fluffy cakes so it was a good choice. Overall, it was an easy recipe to follow and it was a lot of fun. I would highly recommend this to people who have never made pattern cakes before and want to experiment around a bit. I will probably play around with this recipe and make some minor adjustments when baking this cake again, but I will surely be using it again as it is a good guide. Thanks!
Mimi says
Thanks so much for coming back and leaving me and my readers such helpful feedback. You have reminded me, my freezer is really cold. I tried scooping out ice cream from the container yesterday and it was hard as rocks. I will add a note into the recipe to check that the frozen pattern no longer transfers when touched. Thank you for this comment! Hope you continue to make many more cakes.
XOXO,
Mimi
Alice says
Update: Hi Mimi, thanks for the response.
Since posting my comment, I have put the aftertaste of my pattern paste down to the type of oil I used. I didn't realise until later that it was a winterised sunflower oil (quite bitter). If I could edit my original comment I would! It's a 5/5 recipe, and the minor issue that I had with the eggy taste was fixed with refrigeration so it was hardly an issue anyway. Thanks once again
Mimi says
I'm so happy to hear that and I love how you made it again and got great results yet again. Thank you so much for coming back to let me know.
XOXO, Mimi
Cheryl says
This is the mushiest, most flavorless cake. Add the whipping cream and it’s a pile of mush. Made it for my moms birthday and it’ll be going in the trash.
Mimi says
Hi Cheryl,
I hope this message gets to you in good order as I noticed you left comments with different emails. I'm sorry to hear about your experience and I can understand how frustrated you are since it's your mom's birthday. I would be upset as well if I had hopes to make her a beautiful cake for her special day. I know it doesn't help now but I do want you to know I would never ever post a recipe that I haven't tested numerous time in my own kitchen with successful outcomes. This recipe in particular has been made by many others who have tagged me on Instagram. They all look like the way I would expect: not mushy, not cracked with beautiful patterns. In fact, a popular creator uses only this recipe for her cake rolls and this particular one even garnered over 1 million likes and I've been told it tastes really good too.
In regards to your other question about the sugar, the first portion of sugar in the cake is in the "wet" mix.
You didn't provide any additional information on your baking process so I can't comment on what went wrong and I know you must be busy with your preparations. I do sincerely hope you have a good celebration with your family and hope you're able to make something better to your liking.
XOXO,
Mimi
nico says
this is rather mean to say especially with no constructive criticism. if you've had a problem with a recipe it's best to try and troubleshoot not only for yourself but other commenters instead of just intentionally trying to be mean
Jennifer Gorham says
This was the first time I made a patterned Swiss roll cake (I’ve made several plain). I liked that the pattern looks part of the overall cake and not just “on top” and tried to trust the process of not pre-rolling the cake when it was warm but it cracked horribly in 2-3 places. Not sure I will give this a try again.
Mimi says
Hi Jennifer,
Thanks for coming back and letting me know. I understand your frustration. I would be too after making the roll and seeing it crack. There can be many reasons why cakes crack after rolling like ingredients not properly weighed out, ingredient substitutions, technique, pressure, wrong pan size etc. Without seeing your process I can't give you specific advice to your situation but I do know this recipe has worked wonderfully for myself and many others who've tagged me in their pattern cake roll results on Instagram. Pre-rolling is not a requirement for this recipe as it's a very flexible base. I hope you can try it again one day, if not, I wish you luck in finding the right recipe for you.
XOXO,
Mimi
Jess says
Just one question. You don't roll this while it's still warm like other roulade style cakes? You let this one cool laying flat first ? I didn't see if you said to pre roll it first in the directions? Thanks. Just want to be sure before I make it!
Mimi says
Hi Jess,
The recipe instructions are correct. Pre-rolling is not necessary with this recipe. If you want to know more, I write about this in the body of the post. Good luck!
XOXO,
Mimi
Michelle Dellaperute says
I made your recipe. Love it. But for the decor paste can you just mix in egg whites instead of making a meringue. I’ve seen other recipes that have done that.
Mimi says
Lovely. Thanks so much for coming back to let me know. In the creation of this recipe, I tested many different methods to make it easier for my readers. This is something I have tried and no, it doesn't work with the measurements and my recipe ingredients. The batter will be too loose. I guess it's a balancing act to have a fluffy uniformed paste + cake combo.
XOXO,
Mimi
James says
This was one of the hardest recipes I've ever made, having never done piping or making meringue before. But I followed the recipe carefully and it looks beautiful and is very fluffy and did not crack. It is a gift so I cannot comment on the flavor.
I did use premade whip cream for filling because 2 things I had never done was enough and I vastly overestimated how much cream the cake could hold and made my kitchen really messy.
Thank you for this cute recipe I think it looks a lot better than some other patterned cakes, the pattern looks fully incorporated into the cake instead of lifting off.
Mimi says
I'm so happy to hear that! I'm also so proud of you for making this as a gift. It requires a few extra step but the results are so worth it. Lucky recipient! Thanks for coming back to let me know how you did with it. Happy new year!
XOXO,
Mimi