
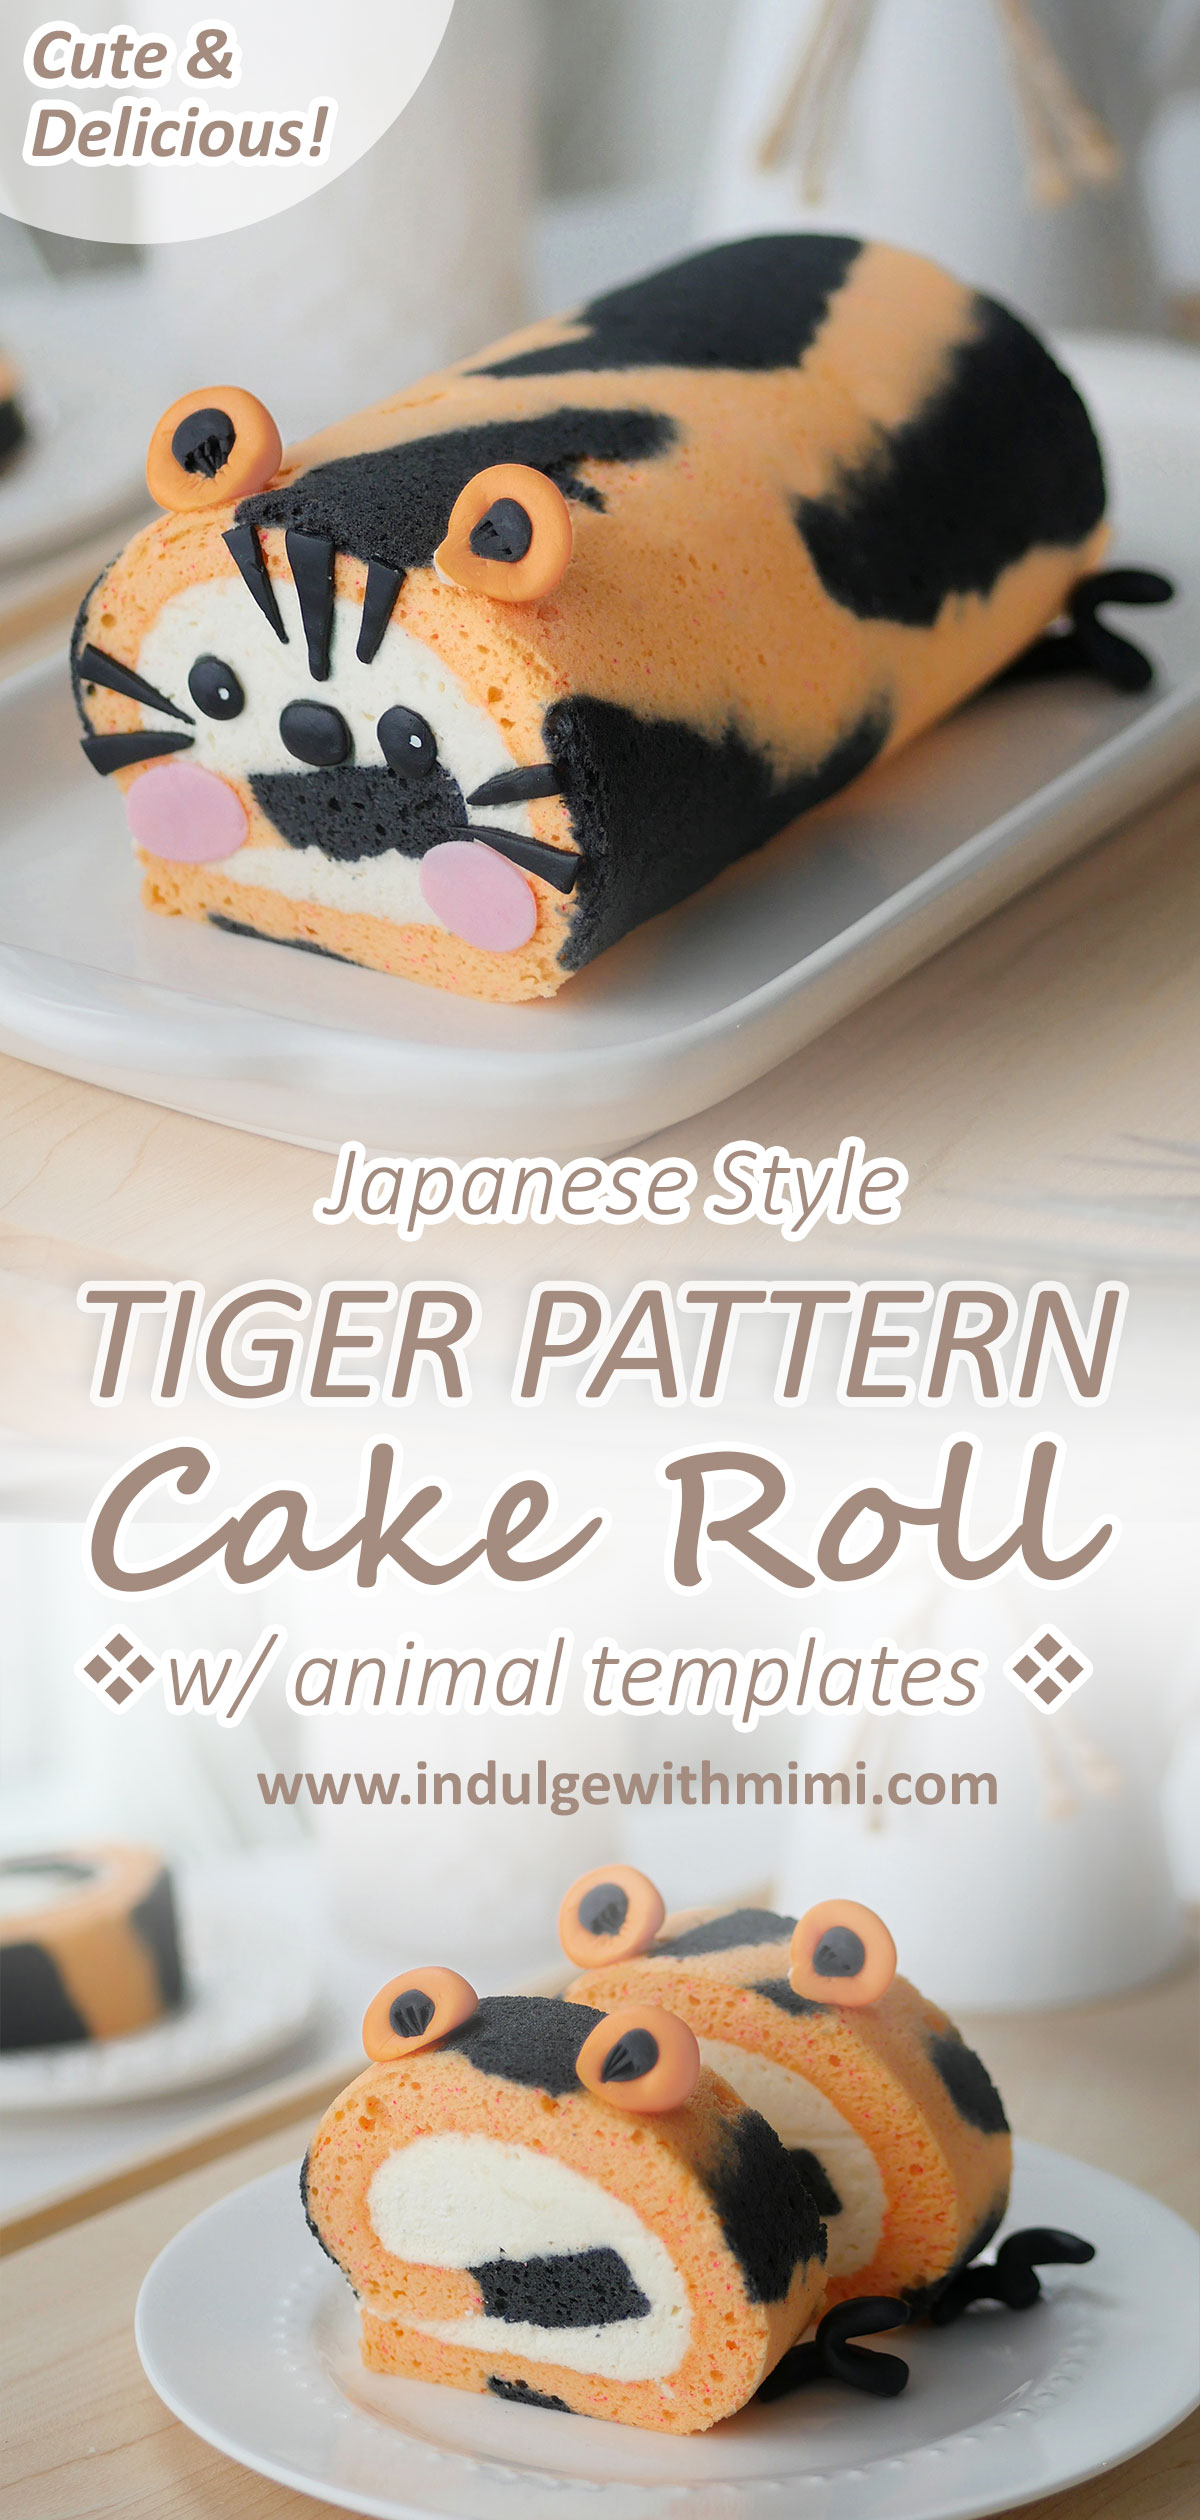
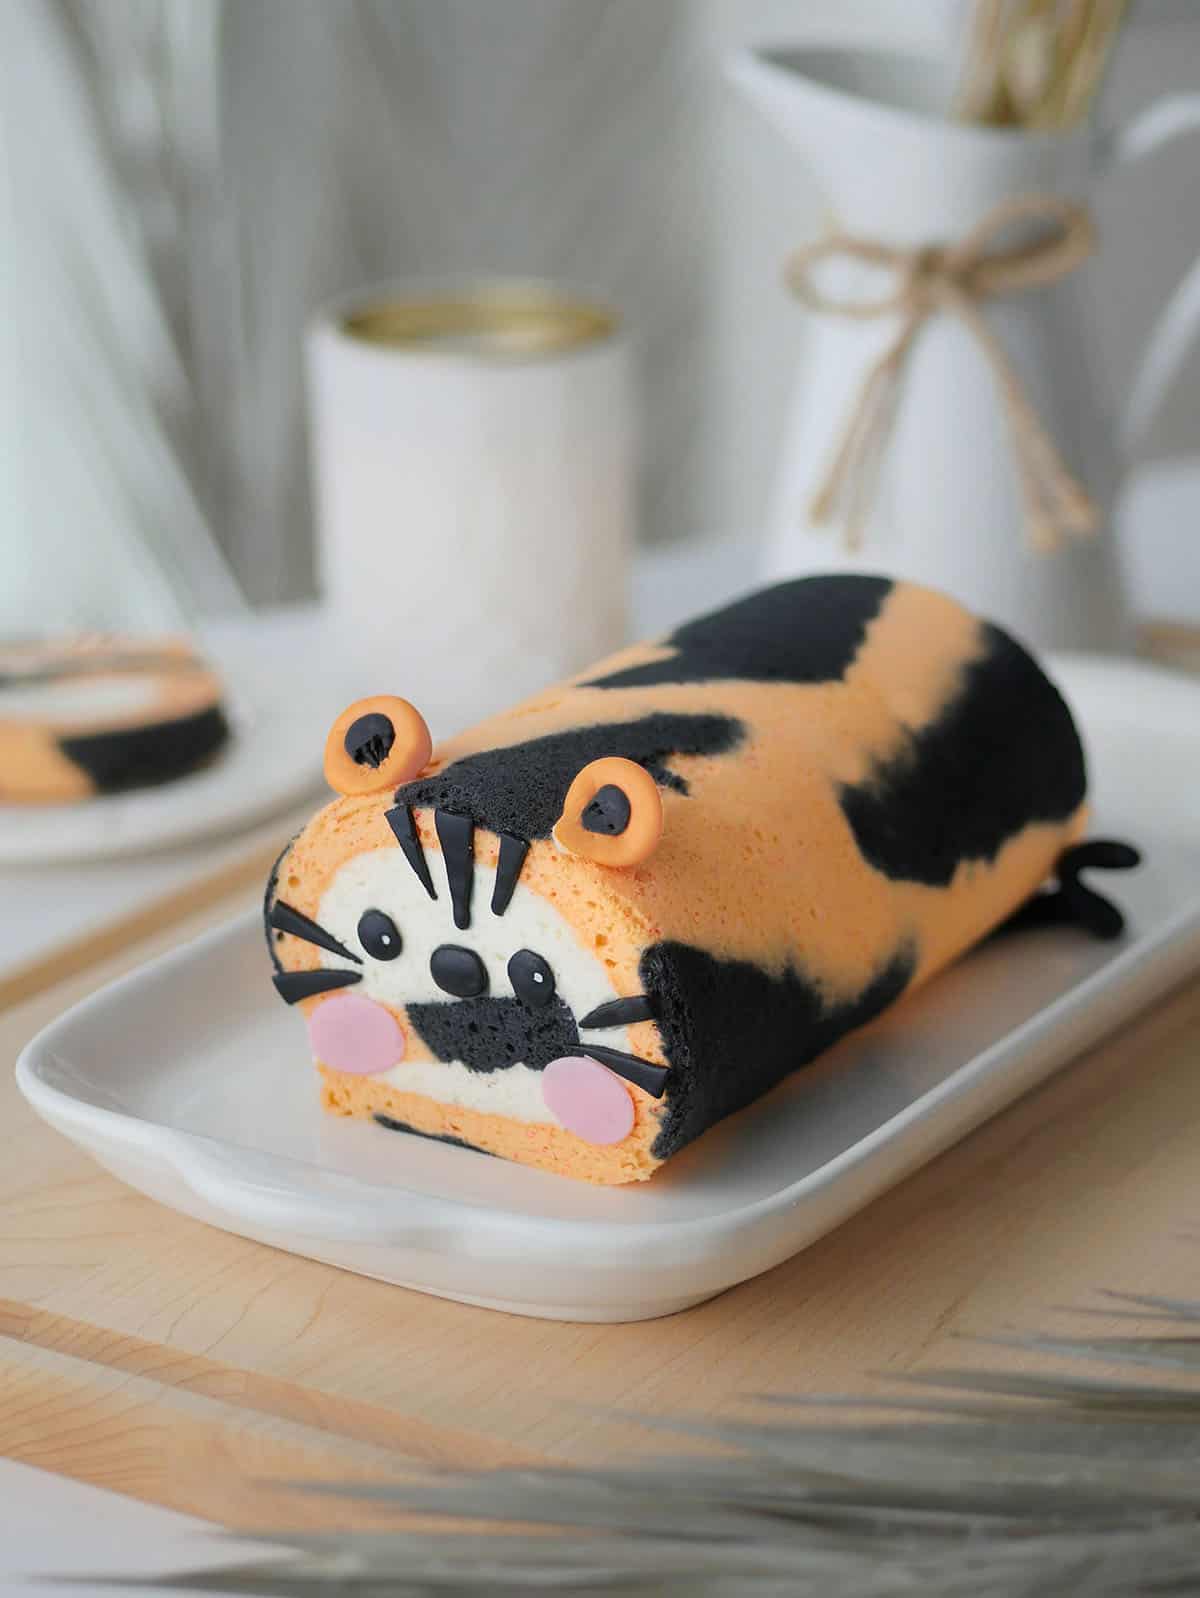
A fun tiger animal cake roll made from a flexible cake base that is easy to roll without cracking. Tastes delicious and looks amazing!
Jump to:
- Why You'll Love this Recipe
- How This Cake Roll Differs From My Previous Recipes
- Can I Use This Recipe for Intricate Patterns?
- How to Prepare Ingredients & Substitutions
- Tips For Baking a Great Cake Roll
- Tips to Make Pattern on Cake without Cracking and Using a Thick Paste
- Step By Step - Cake Roll
- Step By Step - Stabilized Whipped Cream
- Step By Step - Assembly
- How to Make Swiss Cake Roll Look Neat and Round
- How to Decorate the Tiger Cake
- Animal Cake Roll Templates
- Recipe
Today's recipe for patterned cake roll is a special one for me. It's the first new recipe I posted in a few months because I took some time off to give birth and take care of two new additions to the family.
If you've followed my other blog, Indulgewithbibi, you may remember that my journey towards motherhood was not a very straightforward one. A few years ago, I was so fortunate to have one sweet Bibi girl, then last year when I was lucky enough to become pregnant again, I was shocked and surprised to find out that we were going to have identical twin boys!
To celebrate their birth, I made these tiger pattern cake rolls for my two "year of the tiger" babies using this new recipe. I know many of you have had success with all the recipes in my Swiss Cake Roll Collection so I'm sure you will enjoy this new way to bring the appearance of your cake rolls up a notch. Now your cake rolls will taste delicious and look amazing too. Enjoy!
Xoxo,
Mimi
Why You'll Love this Recipe
- - Easy to follow for beginners
- - No separate pattern paste to create
- - "Pattern paste" is stretchy making it easy to roll
- - Flexible cake roll recipe prevents cracking
- - White cake base using no yolks - perfect for adding colors
- - Neutral flavor is a great base for flavored extracts
How This Cake Roll Differs From My Previous Recipes
This new recipe contains no egg yolks so the cake base is whiter and easier to color making it perfect for pattern cake rolls. It also has a more neutral flavor profile and takes on extracts and certain flavorings wonderfully. Lastly, the "skin" on the cake peels off more readily to reveal the beautiful design on the roll.
TIP: You can also use the techniques in my other cake roll recipes to create different flavored cake bases and fillings.
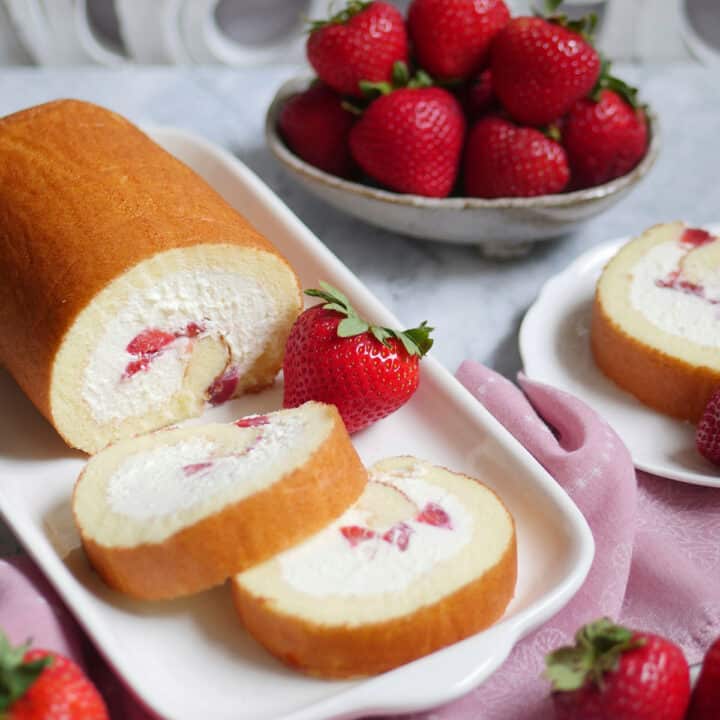
- Strawberry Cake Roll with Fresh Cream
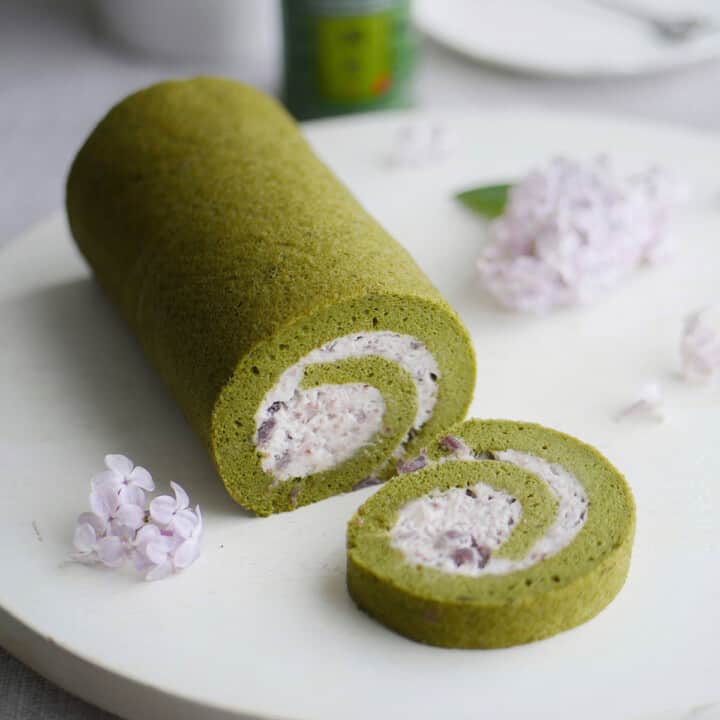
- Matcha Green Tea Cake Roll with Adzuki Bean Cream
- Chocolate Cake Roll with Real Chocolate Whipped Cream
- Coffee Cake Roll with Kahlúa Cream
- Carrot Spice Cake Roll with Marscapone Cream
- Gingerbread Cake Roll
- Pumpkin Spice Cake Roll
- Earl Grey Tea Cake Roll
- Pink Cotton Candy Cake Roll
- Peach Cake in a Cup
- Tokyo Banana Cake Roll
- Fresh Mango Cake Roll
Can I Use This Recipe for Intricate Patterns?
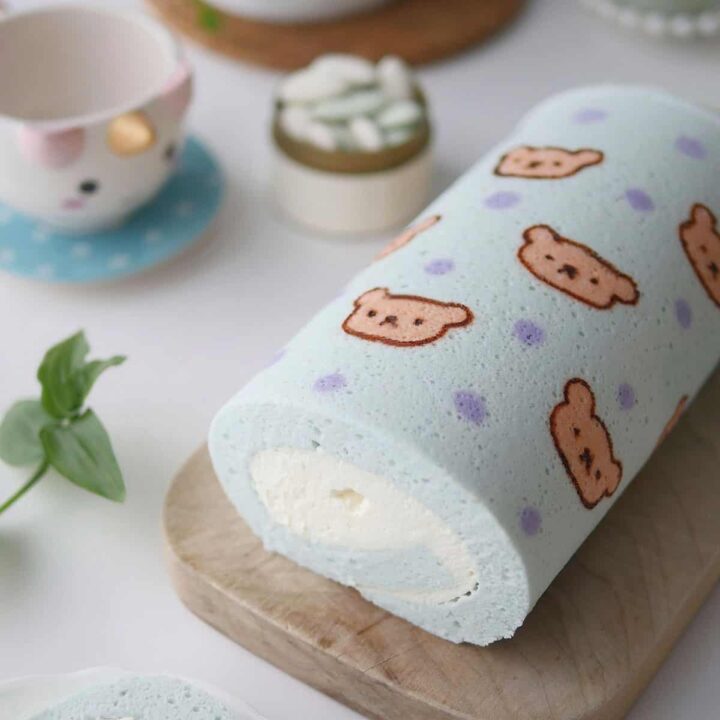
This is a good beginner's recipe which doesn't require preparation of a separate pattern paste. However, the different colored batters need to be piped and baked in a timely manner, limiting the design capabilities. I recommend using this Fancy Pattern Cake roll recipe instead. Here are other examples of other cakes using the "fancier" separate pattern paste method: gingerbread man pattern cake roll, bear pattern cheesecake roll and Christmas silent night pattern cheesecake roll.

How to Prepare Ingredients & Substitutions
Dry Ingredients
- Cake flour - a low protein flour which will help make this cake softer than if using AP flour. It usually has a protein content between 6-8% while pastry flour, also a lower protein flour, has a protein content between 8-9%. Grocery stores usually sell a combination of cake and pastry flour at 7-9% protein. It can be substituted with all-purpose flour but the cake will be a little tougher than if using cake flour.
- Sea salt - provides a nice contrast to the sweet taste in the cake and brings out the flavors. Use half the amount if using table salt.
Wet Ingredients
- Whole fat milk
- Vegetable oil - neutral tasting oils like canola, grapeseed and avocado are all good choices.
- Granulated sugar - this first set of sugar is added into the wet ingredients to help add moisture and break up the grains when the dry ingredients are added.
- Vanilla extract - adds flavor to the cake, this can be substituted with other flavors of extract.
Meringue
- Egg whites - from large eggs. Egg whites whip better at room temperature so keep it out on the counter for about half hour before whipping.
- Cream of tartar - is an acid that helps to stabilize the meringue. It can be substituted with double the amount of lemon juice or vinegar.
- Granulated sugar - adds stability to the meringue and tenderizes the cake.
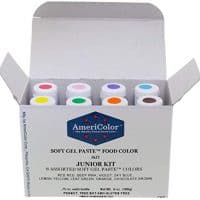
- Gel color - gel colors are a potent form of food coloring that doesn't add excess moisture when added to baked goods.
Stabilized Whipped Cream
- Heavy cream - is a cream with a minimum milk fat content of 36% and above. Whipping cream has milk fat content of 30-35%. Heavy cream yields a more stable whipped cream but whipping cream will work just as well in this recipe since gelatin is being added.
- Unflavored gelatin powder - when added to the cream, it creates a super stable whipped cream that will prevent the cake from sagging.
- Granulated sugar
- Vanilla extract - adds flavor to the cream, this can be substituted with other flavors of extract.
Tips For Baking a Great Cake Roll
- A strong and healthy meringue (whipped egg whites with sugar) is needed to act as one of the leavening agents in this cake. Egg whites should be whipped in a clean and dry non-plastic bowl since plastic tends to trap oil. Egg whites don't whip well in the presence of oil and water. To further remove oils, use a paper towel and wipe down the mixing bowl with lemon or vinegar before you start.
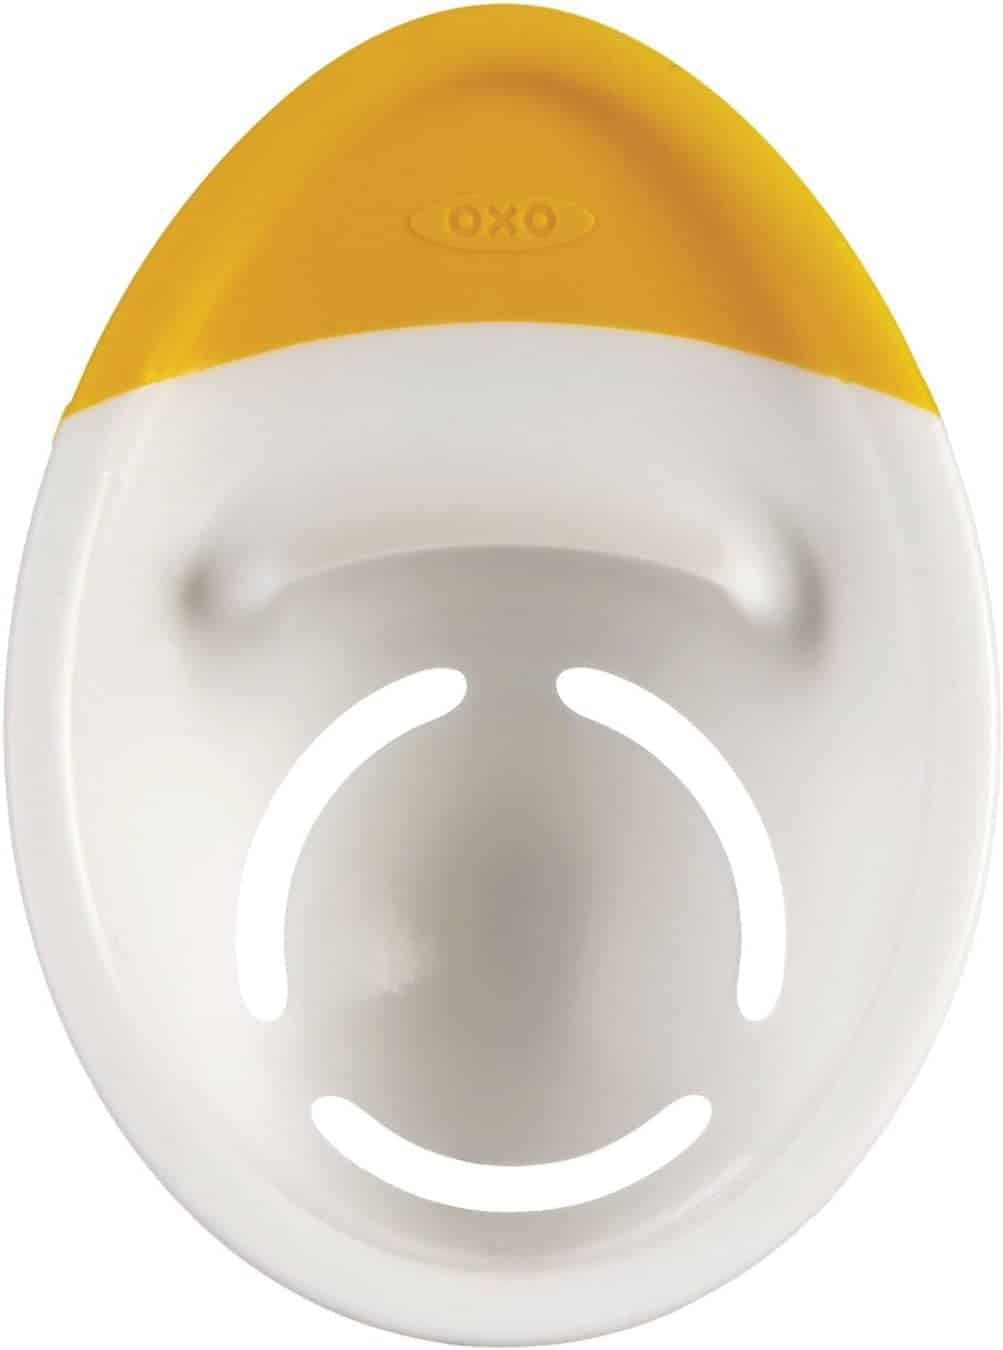
- Carefully separate the egg whites and yolks when the eggs are cold. Make sure no yolks are present in the egg whites. An egg separator can come in handy.
- Bring the egg whites to a stiff peak. This is characterized by egg whites that have a beak that points upwards (instead of slumped over) when the whisk is pulled out.
- Once the liquid is introduced to the flour, do not over mix. This will produce more gluten, making the cake less tender.
- After pouring the batter into the cake tray, rap it a few times on the counter to get rid of large air pockets, this will make the design show on a smoother surface.
- Use a gentle folding movement with a spatula to incorporate the meringue into the wet flour mixture. Do not stir, this will prevent the air in the meringue from deflating.
- Add more cream along the short edge of the cake which is to be rolled first. This will prevent the cake from cracking due to large gaps in between the folds. These angled spatulas will come in handy for even frosting any time of cake. Instead of putting your hands directly onto the cake, use the parchment paper to push the cake onto itself as you roll.
- Fold gently and do not worry too much about rolling the cake very tightly. As long as the cream is spread out evenly (with a bit more along the short edge as per above), the amount of cream in this recipe will allow the sheet cake to hold up without cracking due to large gaps.
- Chill the bowl, beaters and whipped cream for optimal whipping volume. They should all be be very cold. Whipping in a stainless steel bowl placed on top of a bed of ice will help keep things nice and cool on a hot day.
- Gelatin is added to the whipped cream to help stabilize it. Many recipes do not include this step but I prefer it when using whipped cream in a cake roll. It prevents the cream from deflating so the roll stays rounder and looks nicer. You can leave this step out if you plan on serving the cake immediately. If you need further guidance on stabilizing the cream, please read my post on How to Stabilize Whipped Cream with Gelatin.
- If you find rolling the cake and stabilizing the whipped cream is too time-consuming, try this easy Japanese Peach Cake in a Cup, it has the same great chiffon base but doesn't require rolling or whipped cream stabilization and can be baked in a pan of any size.
Tips to Make Pattern on Cake without Cracking and Using a Thick Paste
In creating this recipe, I experimented with several pattern paste techniques. I found that it wasn't ideal to use a separate "thicker" paste for the pattern because it made the cake harder to roll and was prone to cracking, erasing all that hard work. In this recipe, we use the same cake batter throughout the entire cake. Here are some tips on making the pattern roll without a thick paste:
- To prevent cracking, use a proper cake roll recipe. Not all cake recipes are meant for rolling because the cake base is not flexible enough. I've tested this recipe many times with various designs and it works!
- After baking, there is no need to roll up this cake for "muscle memory". You can let it cool down on the wire rack while making the cream. Assembling it right away with the cream eliminates the amount of times the cake is handled.
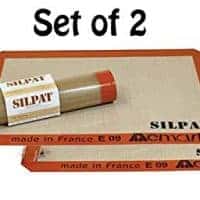
- To help the design stay in place without the need for a thicker pattern paste, pipe the colored cake batter onto a silicone mat instead of on parchment paper. The Silpat toaster-sized silicone mat fits perfectly into my 8x12" cake pan.
- To further set small details, the design portion can be chilled before pouring the rest of the batter and baking. Take the silicone mat with the piped design and place it in the freezer for 10-15 minutes. This step can be skipped when working with larger designs that don't need much definition. I did not use this step on this tiger cake roll and you can see that the colors bleed into each other a little bit, resulting in a blended effect.
Step By Step - Cake Roll
Line a 8 X 12" rectangular cake pan with toaster-sized silicone baking mat, place animal print template below. Preheat oven to 325 F. In a small bowl, combine all the "wet" ingredients together with a whisk and set aside (this includes first portion of sugar). In a large mixing bowl, sift in dry mix. Stir to combine.
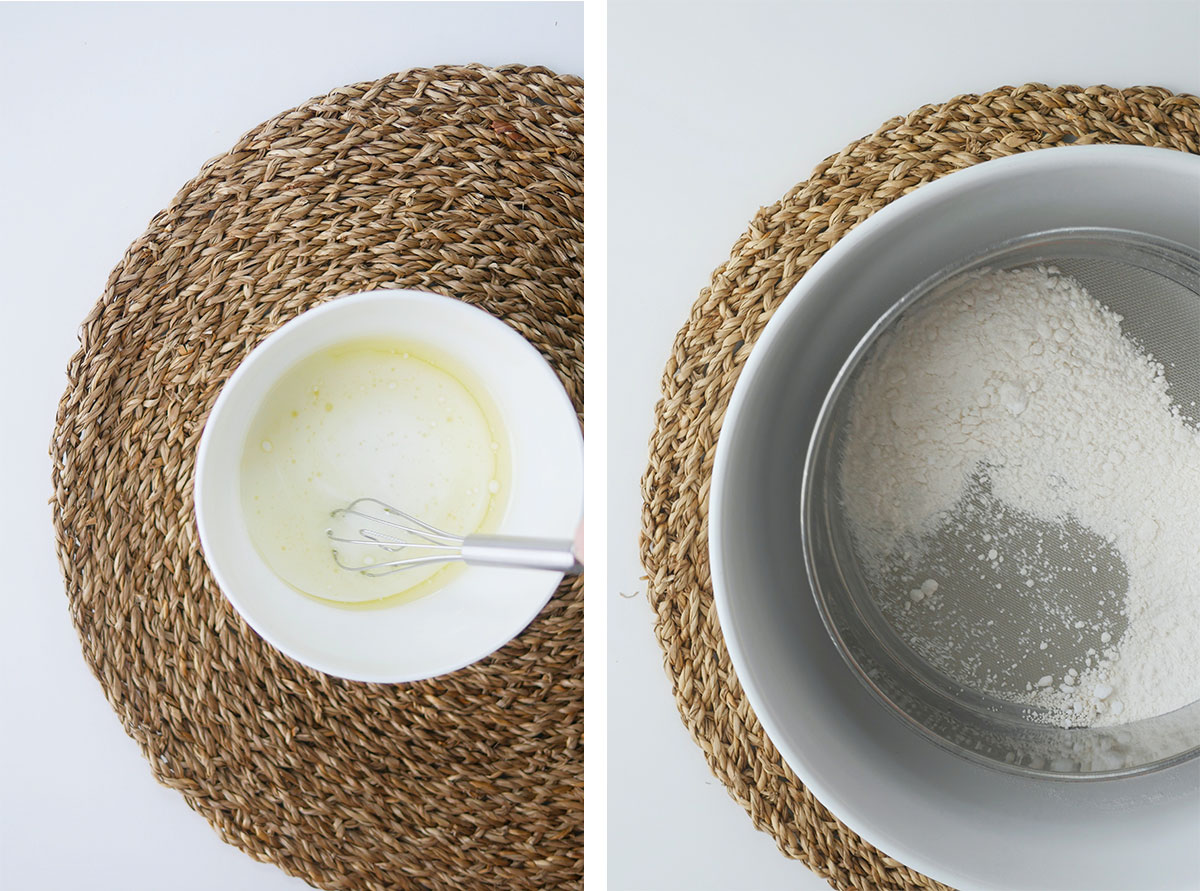
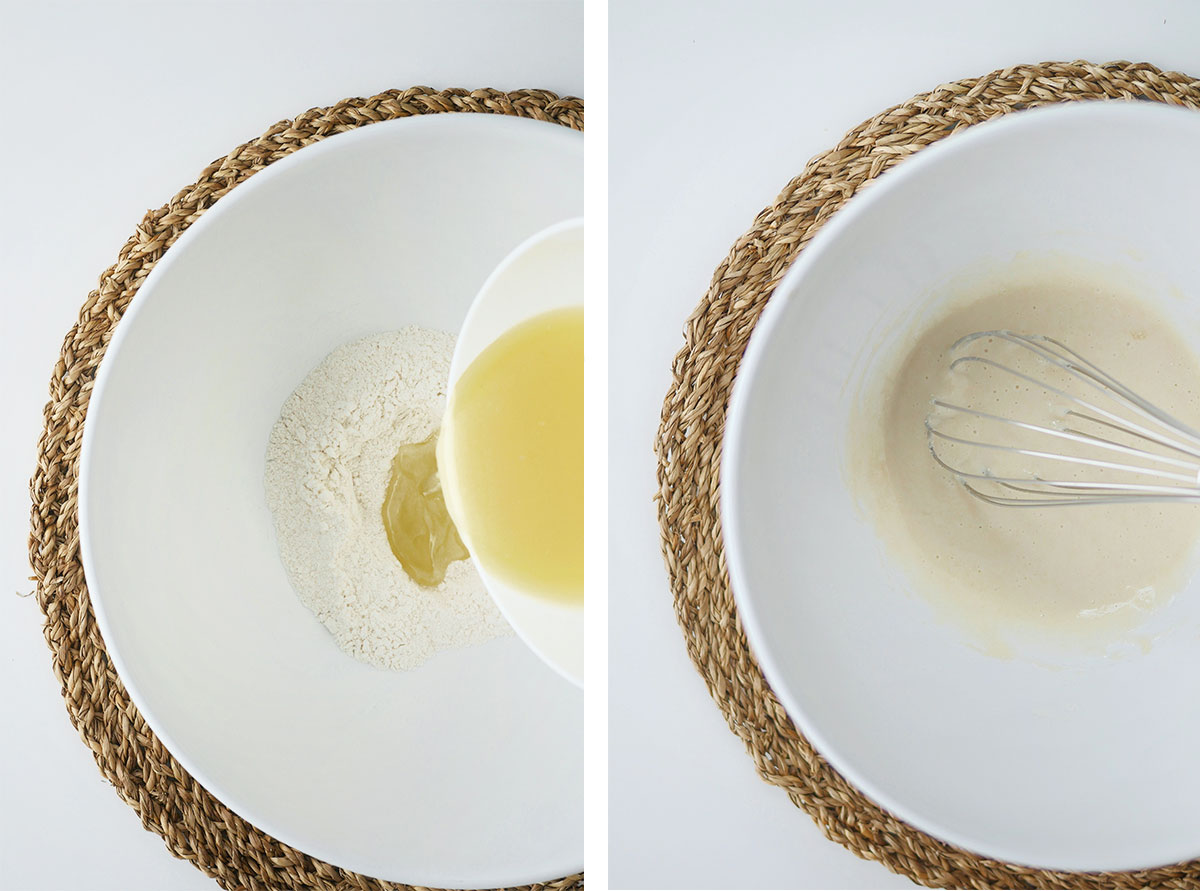
Create a well in the center. Inside it, add all the "wet" ingredients. Combine until just incorporated, do not over mix as it will result in a tough cake. Set this flour mixture aside.
In a clean and dry, non-plastic mixing bowl, whip egg whites on slow speed until frothy, add cream of tartar. Increase speed to medium, once the whites become opaque and bubble size have tightened up, add the second portion of sugar a little bit at a time.
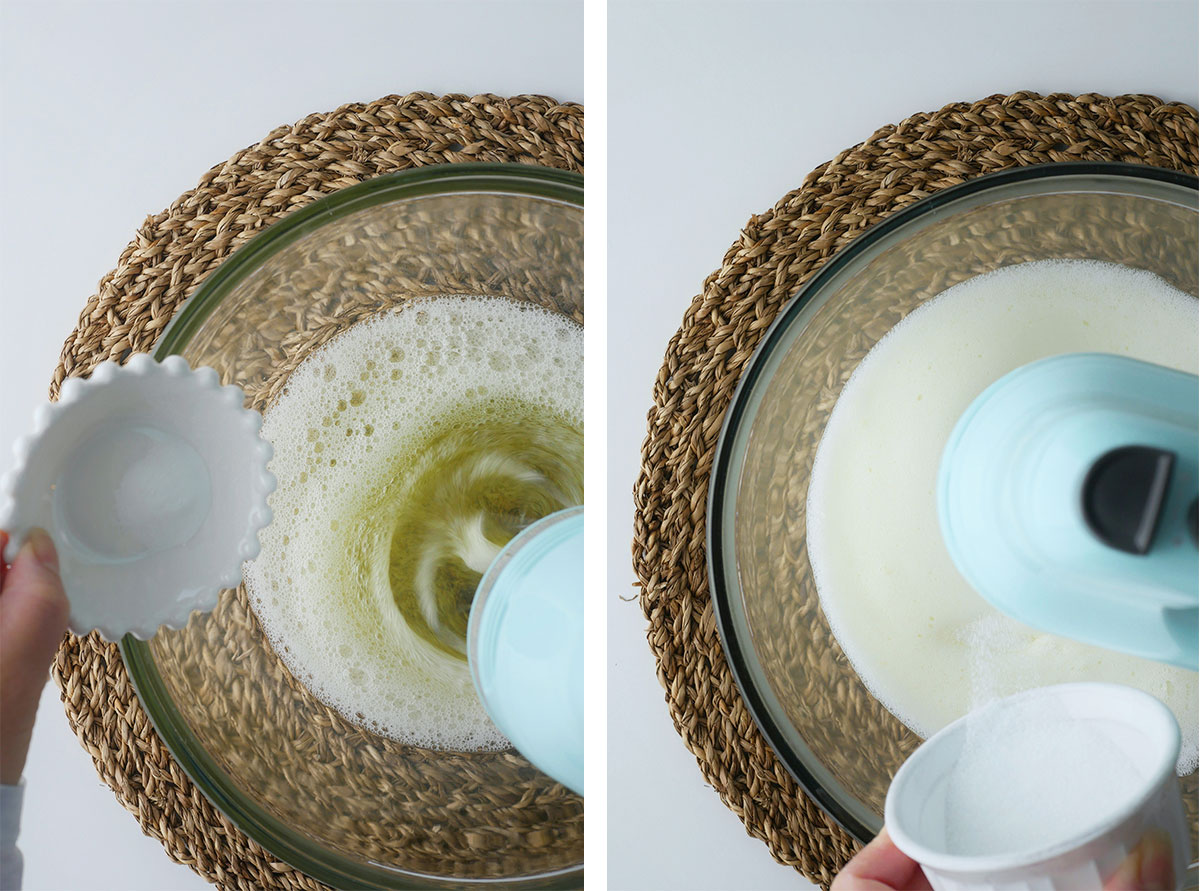
Increase speed to med-high, whip until stiff peaks (Note 6). You've now made a meringue.
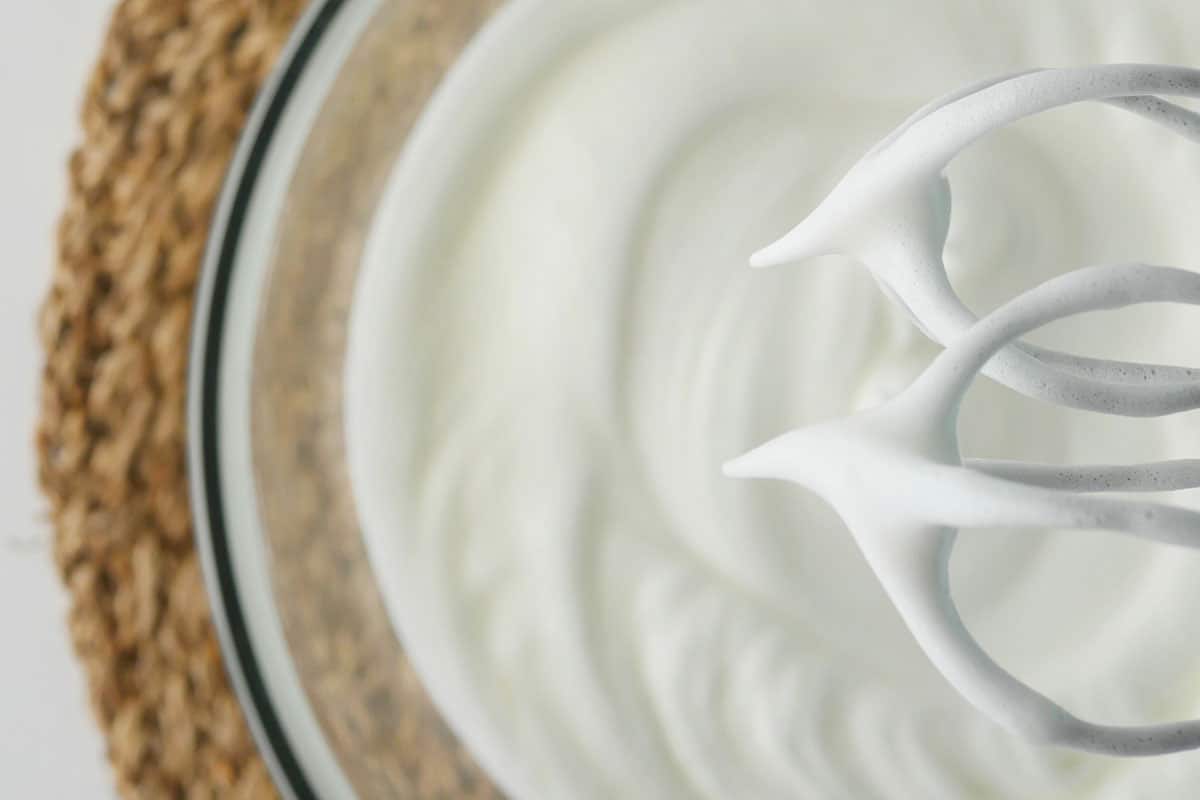
Stiff Peaks (pictured above): When the whisk is pulled out and the peaks hold their shape and points upwards.
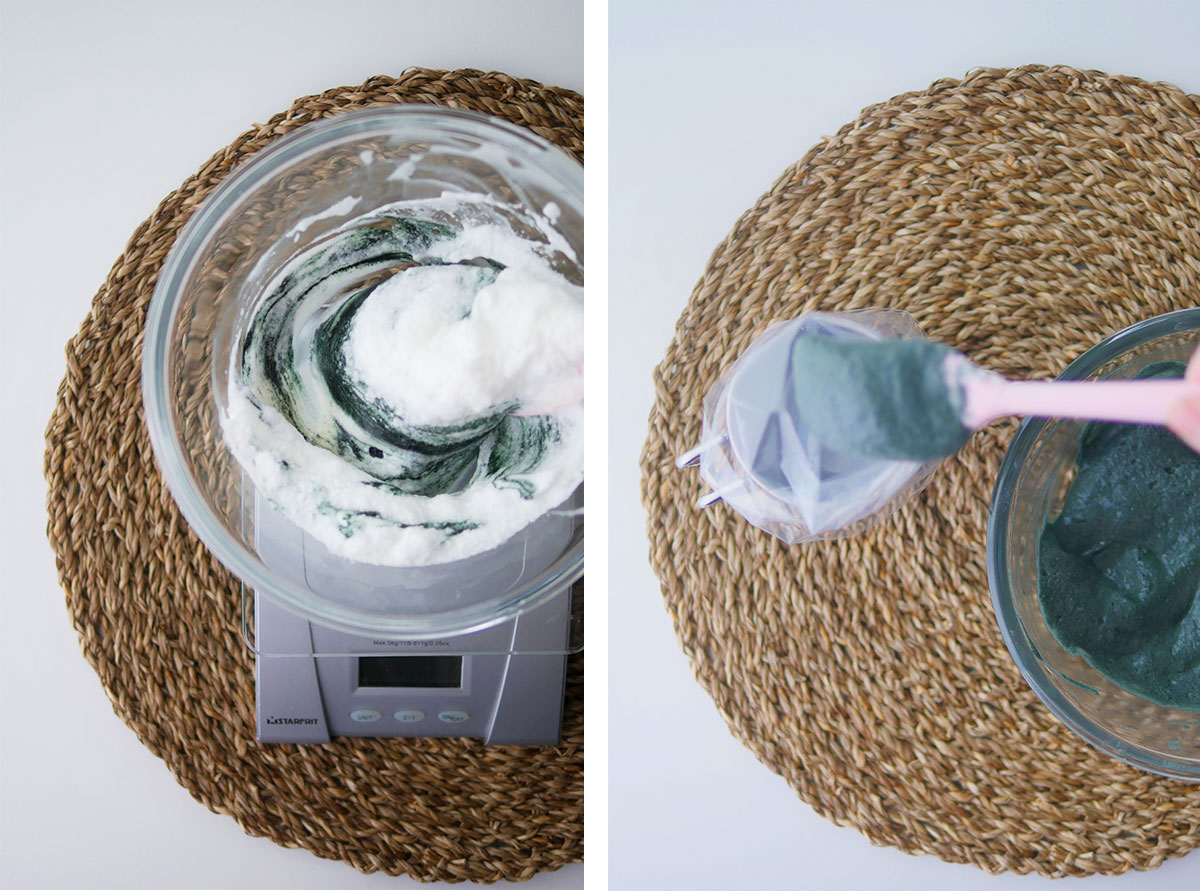
Weigh the meringue and portion out ⅙. Weigh the flour mixture and portion out ⅙. Add gel color into the flour mixture, black for the smaller portion and orange for the larger portion. Take the smaller portion of meringue and fold it into the smaller portion of wet flour mixture in three additions. Next, do the same with the bigger portion as well.
Fill a pastry bag fitted with a #7 round tip with the black batter. Pipe the desired animal print on top of the silicone mat. Remove template. Use a skewer or toothpick to spread out the batter into the desired design.
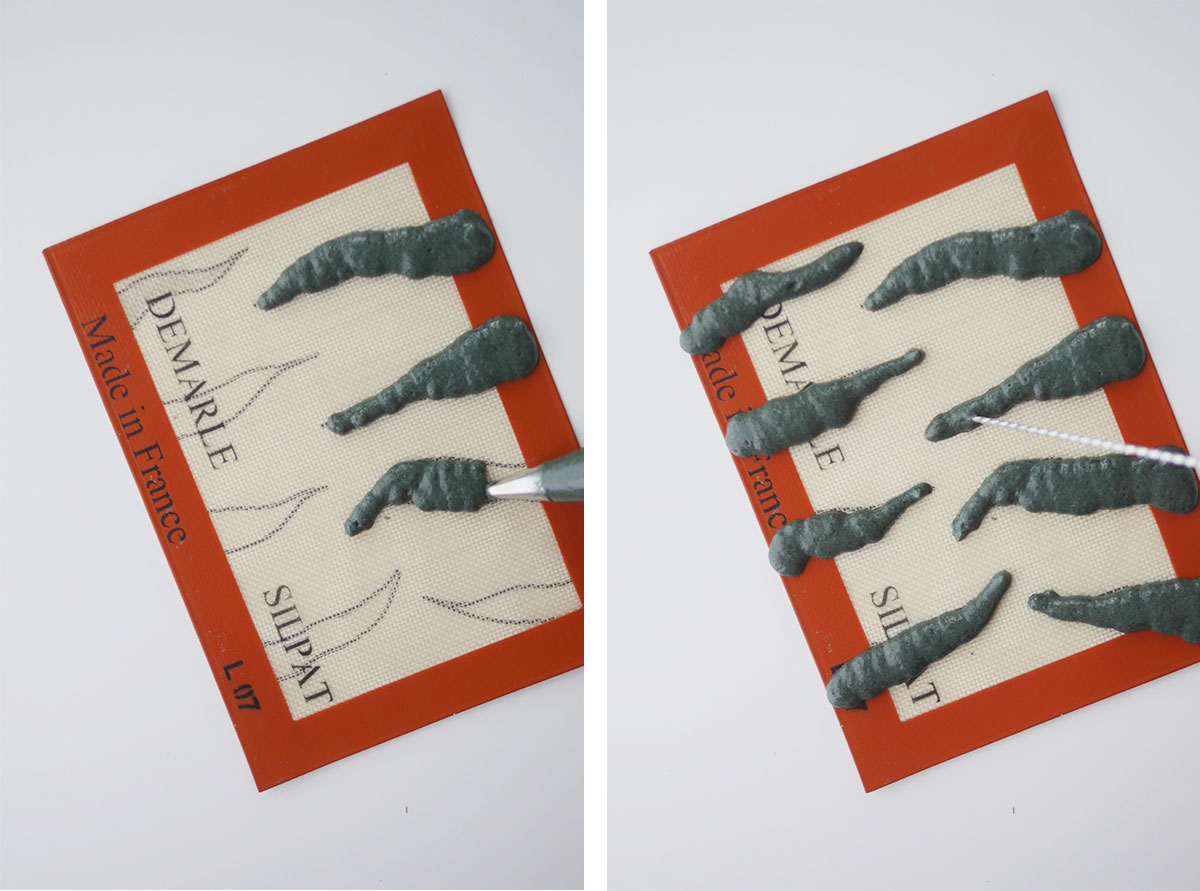
Fill another pastry bag fitted with a #10 round tip with some of the orange batter. Pipe the batter into all the areas without black batter. Tap the tray on the counter to help settle the batters.
Optional: To further set small details, the design portion can be chilled before pouring the rest of the batter and baking. Take the silicone mat with the piped design and place it in the freezer for 10-15 minutes.
Gently pour the rest of the orange batter into the cake pan over the design, spread out the batter evenly with an angled spatula. Tap the pan on the counter to release large air pockets. Bake for 10-12 min. at 325 F until a skewer pulls out clean and cake springs back in the center.
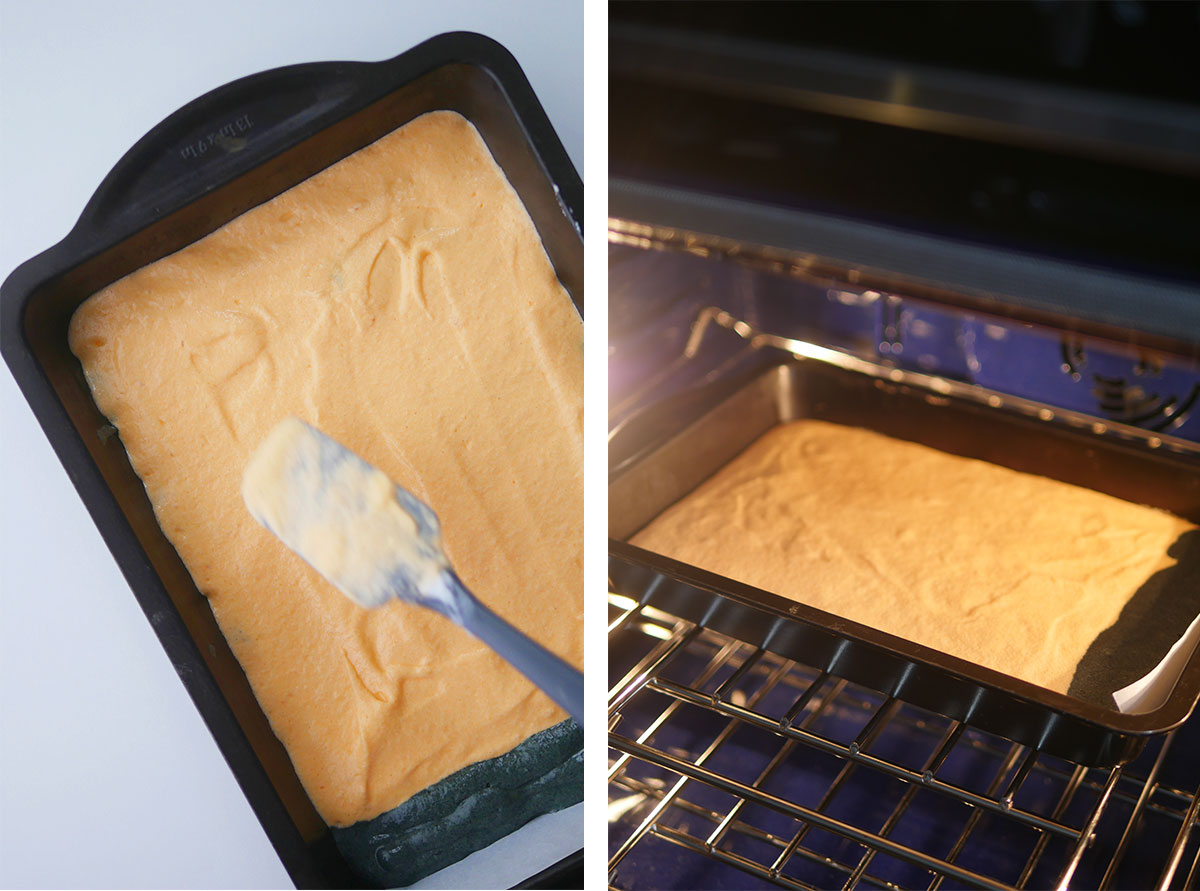
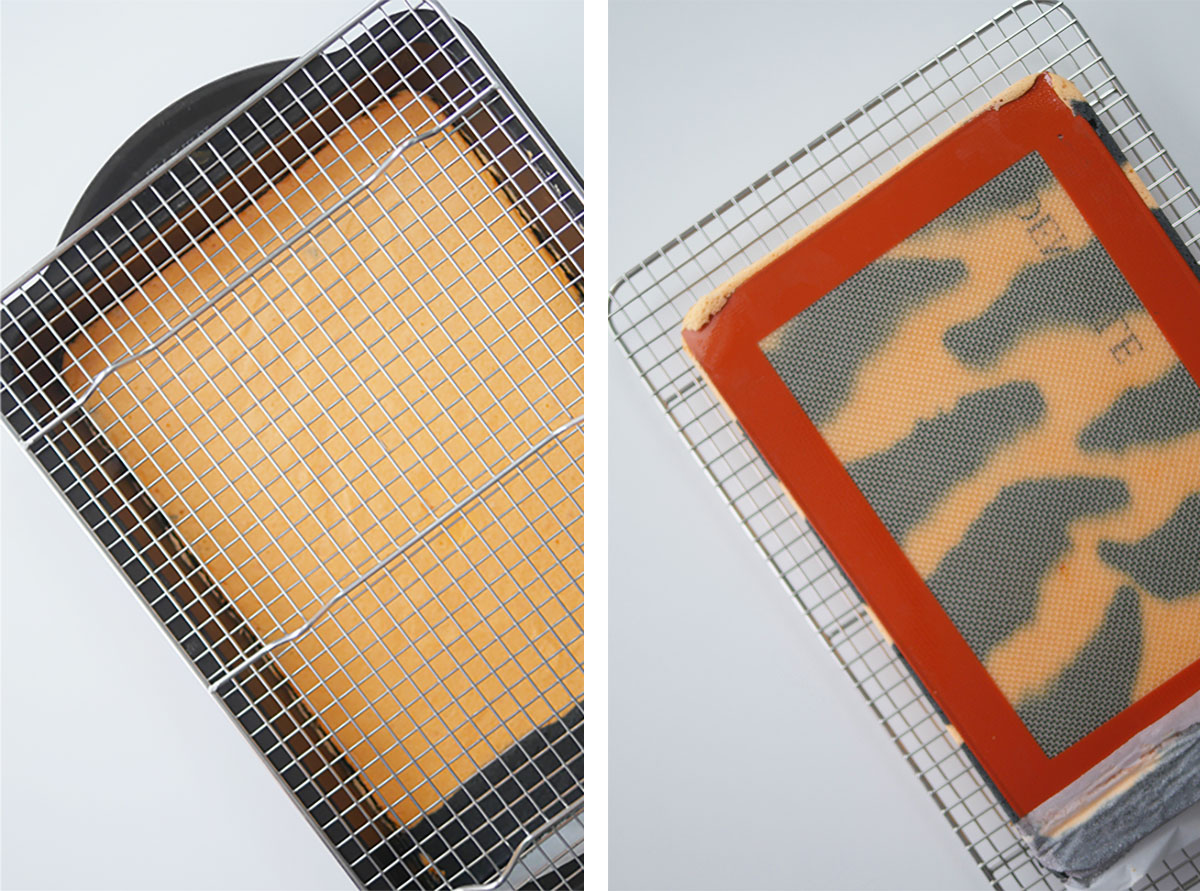
Let cool in pan for 5 min. Place cooling rack over cake pan. Flip cake over onto the rack, gently remove paper or mat. The side facing up will eventually become the top of the cake roll. Let it sit on cooling rack while making the stabilized whipped cream.
Step By Step - Stabilized Whipped Cream
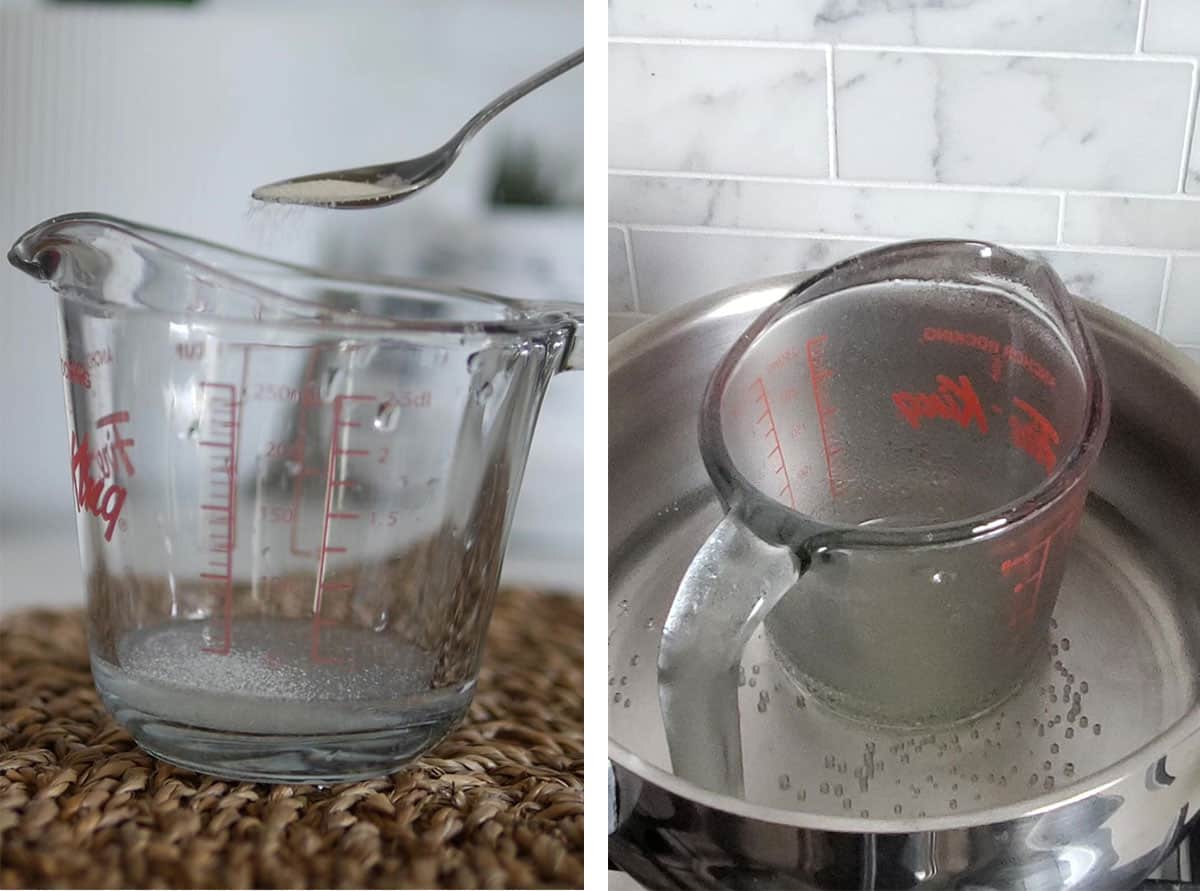
Place beaters, bowl and cream in fridge to chill. It's important for these tools and ingredients to be completely chilled before whipping. Place water in a heatproof cup and sprinkle gelatin on top to bloom. Wait 5 minutes. Place cup in a small sauce pan filled with simmering water. Once gelatin becomes liquid, take it out of the water. Let cool on the counter.
Immediately start whipping the cream and sugar on medium speed.
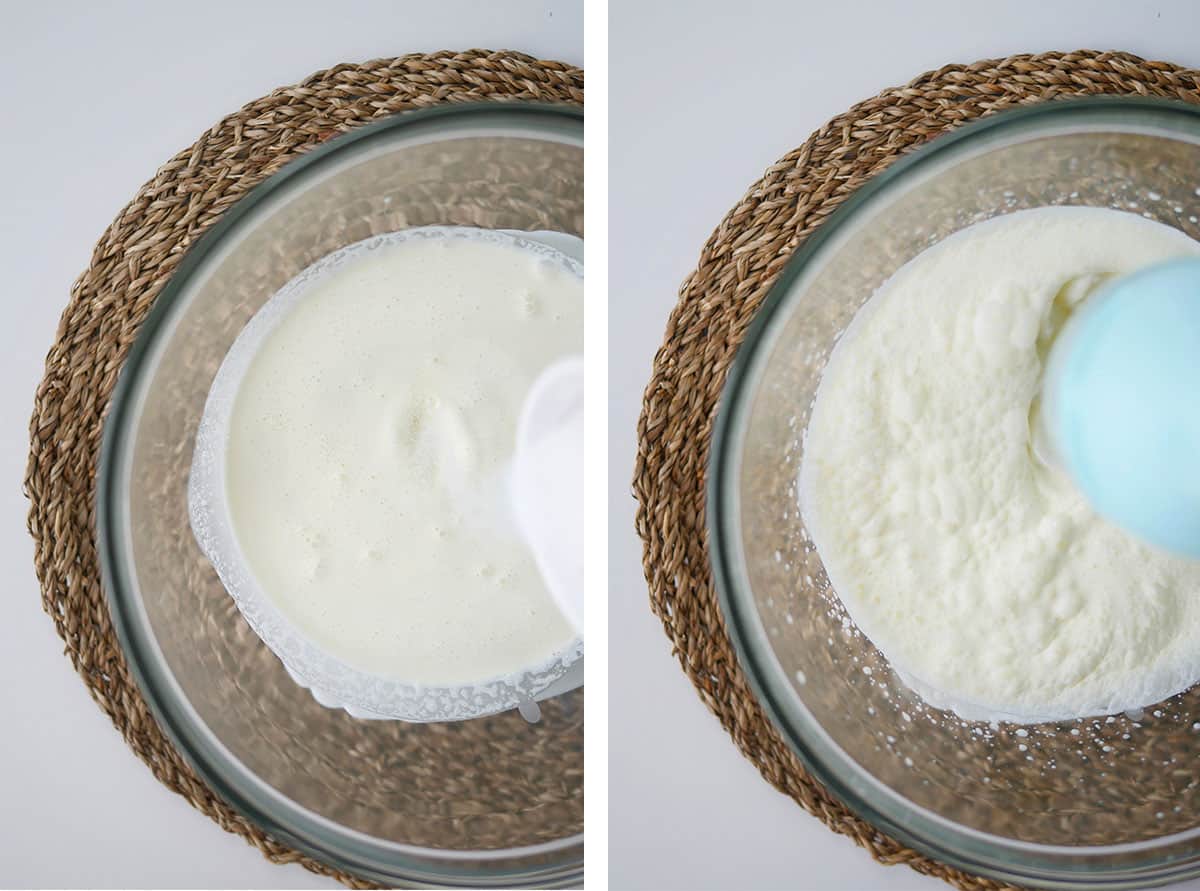
Whip until the beater starts leaving tracks inside the cream, pour the cooled gelatin into the bowl slowly and steadily. Aim for the area in between the whisk and the bowl while continuing to whip. Add extract.
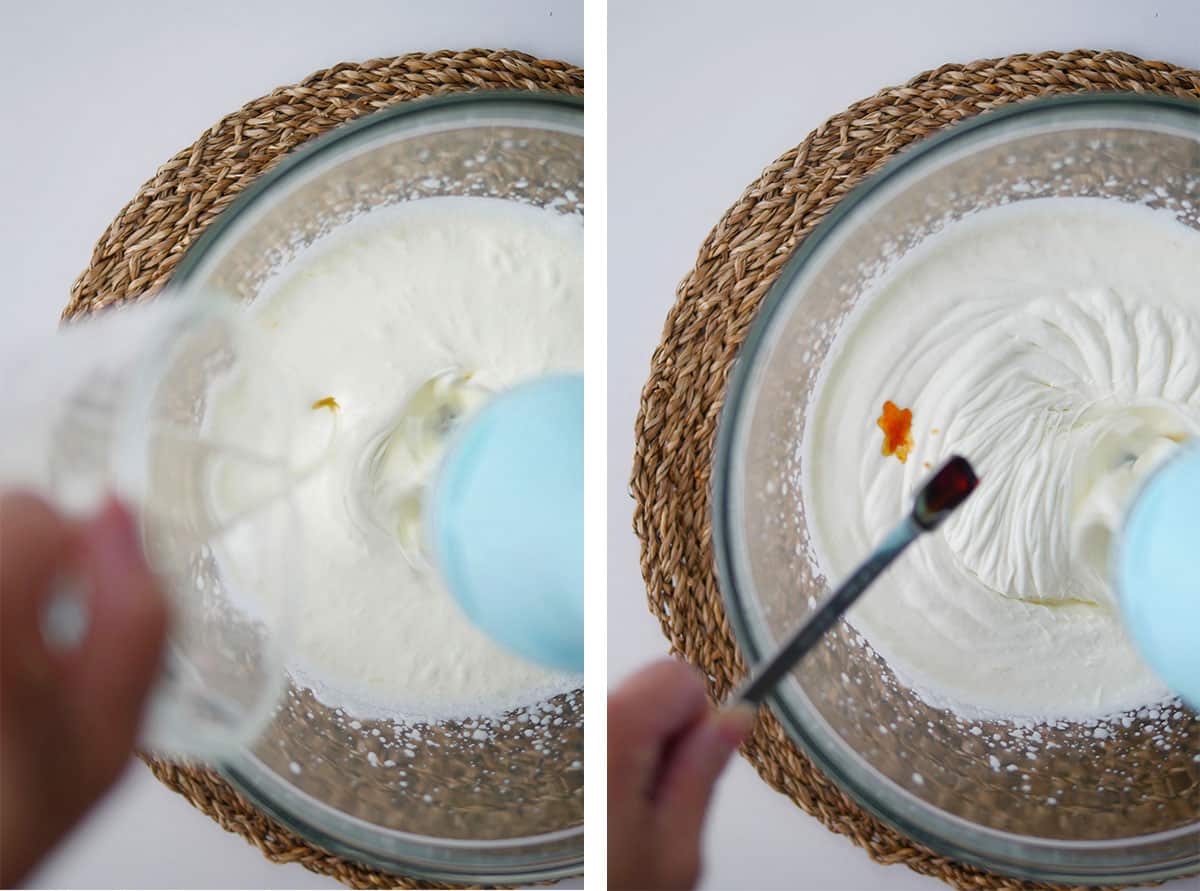
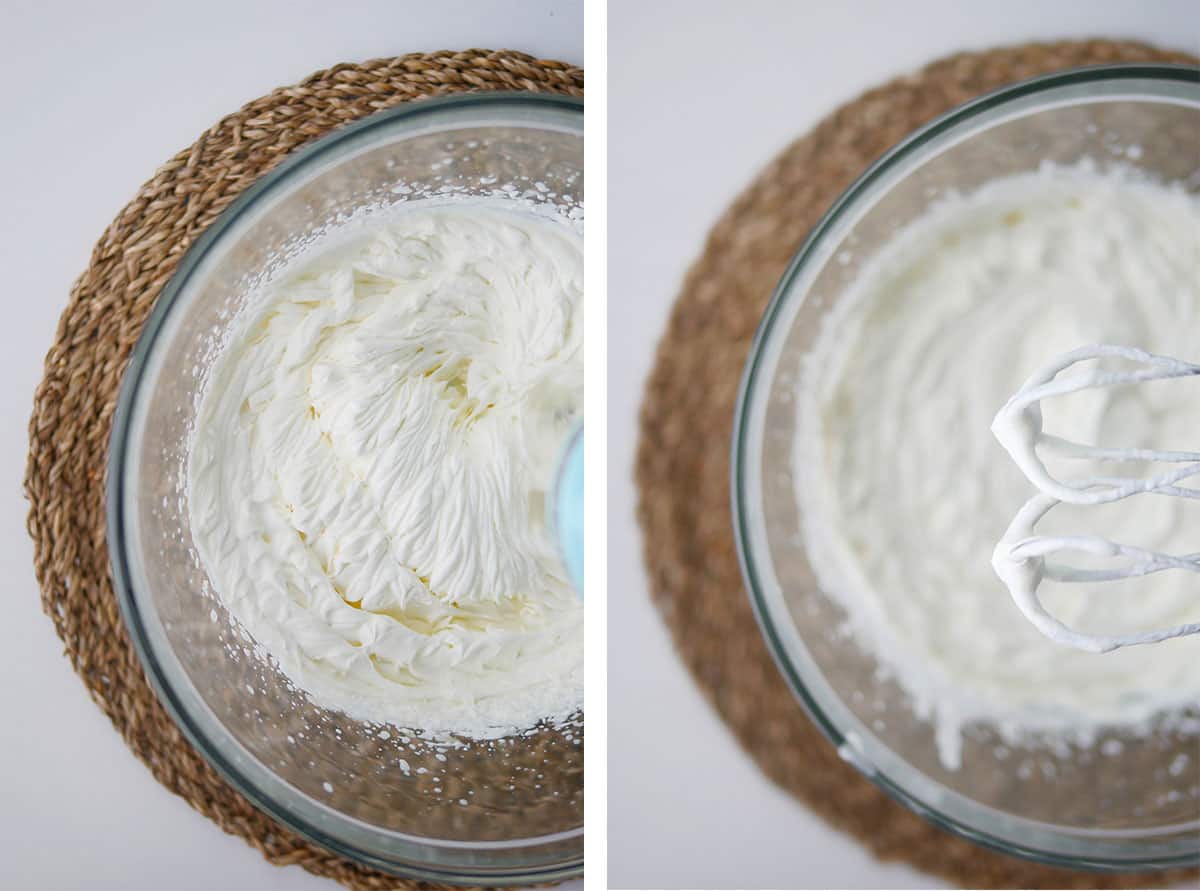
Increase speed to medium-high. Stop beating once the cream turns stiff (Note 6). Do not over whip. Use cream to assemble the cooled cake immediately.
Step By Step - Assembly
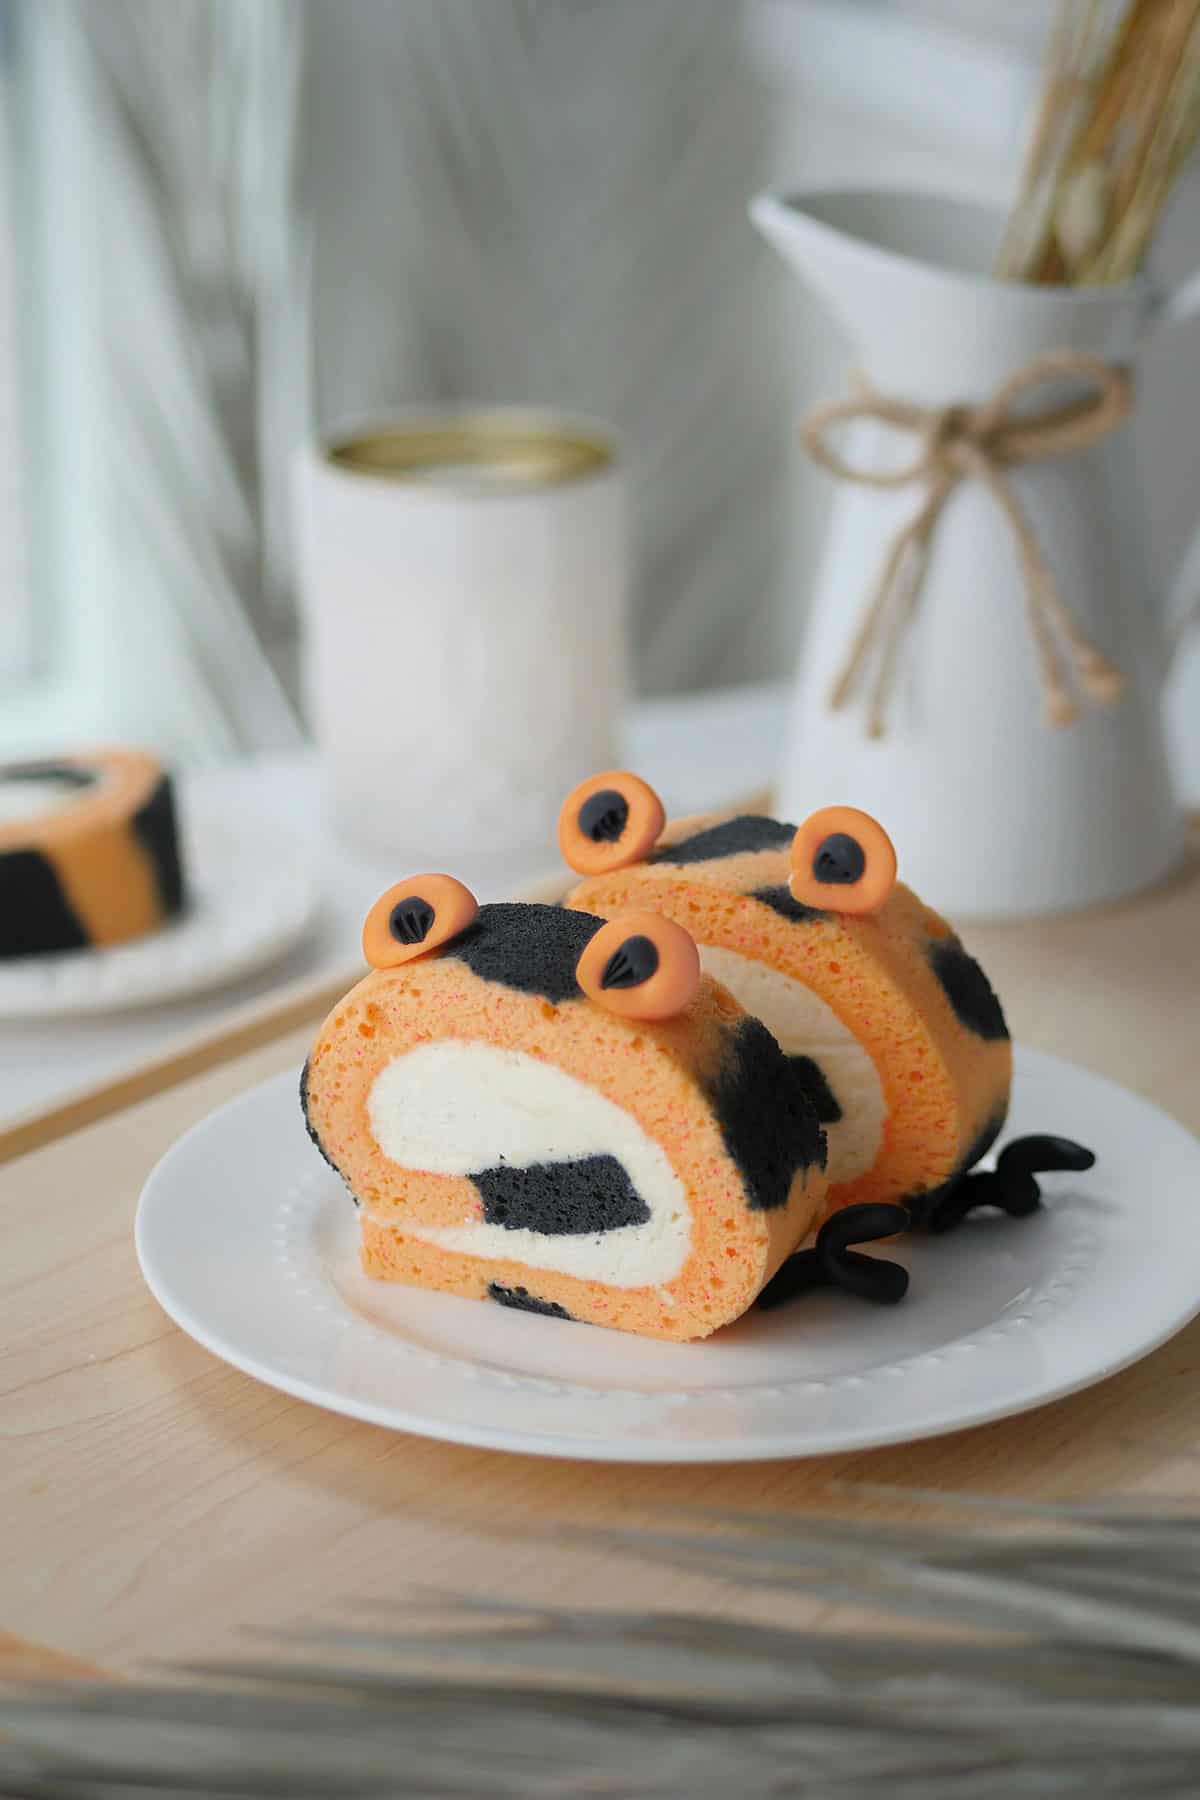
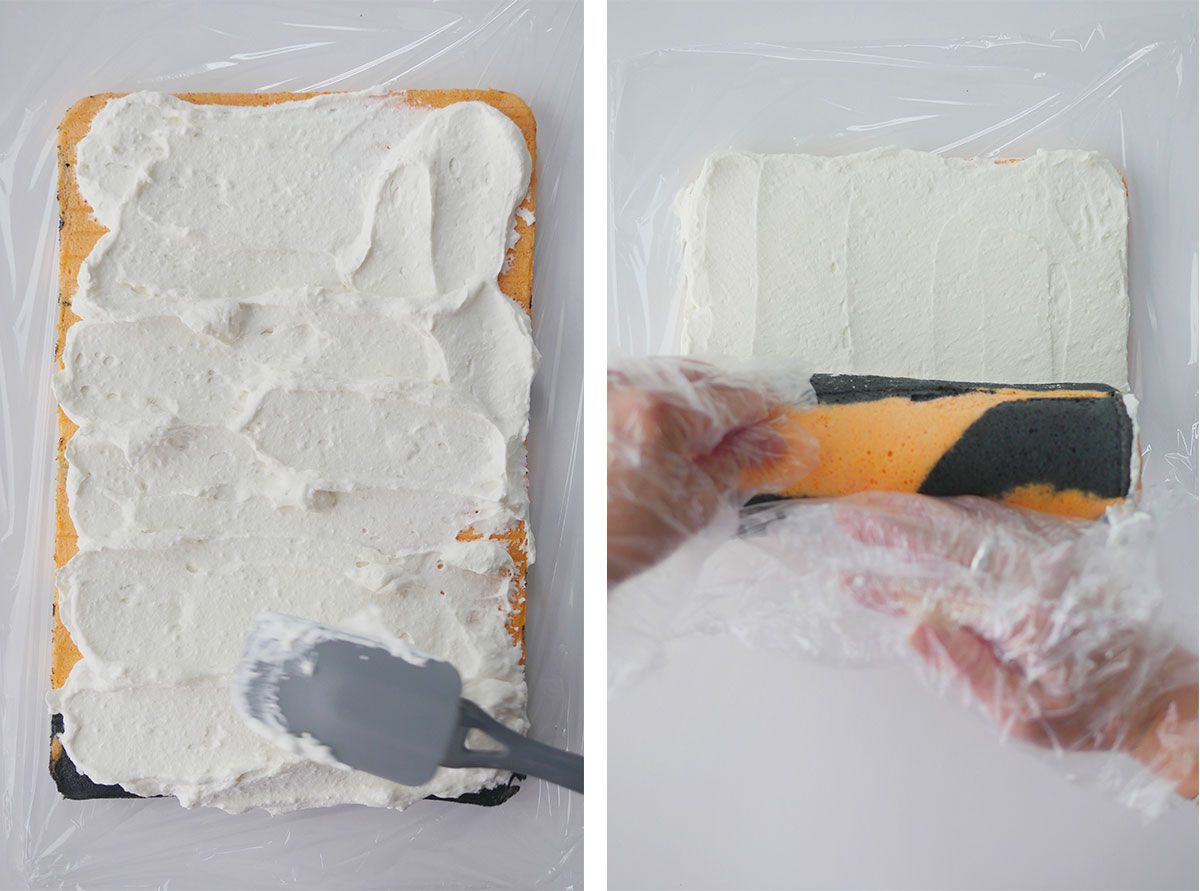
Spread the cream onto the tiger print cake with a bit of extra on the side that is to be rolled first (Note 7). Carefully roll up the cake from the short edge using the parchment paper to help push the cake onto itself. Wrap with plastic wrap and place in refrigerator to set before cutting.
Before serving, cut off sides for a cleaner presentation. If you want to decorate the cake, read body of post for different ways to do so. Tiger cake roll can be kept in the fridge in an air tight container for 2-3 days.
How to Make Swiss Cake Roll Look Neat and Round
To prevent the cake roll from sagging, stabilization of the cream filling is key. After that, employing an extra rolling technique with plastic wrap will further guide the cake towards a round shape. After assembling the cake with the cream, wrap the assembled cake in plastic wrap. Once it's secured inside the first piece of plastic, place it on a new piece of plastic and start wrapping it again while gently rolling it away from you, making sure you are creating a log shape at the same time. Just use gentle pressure, we don't want to squish the fluffy cake base! Allow the assembled cake to firm up in the fridge for several hours before serving. Doing the above steps will give you a beautiful round cake log at home.
How to Decorate the Tiger Cake
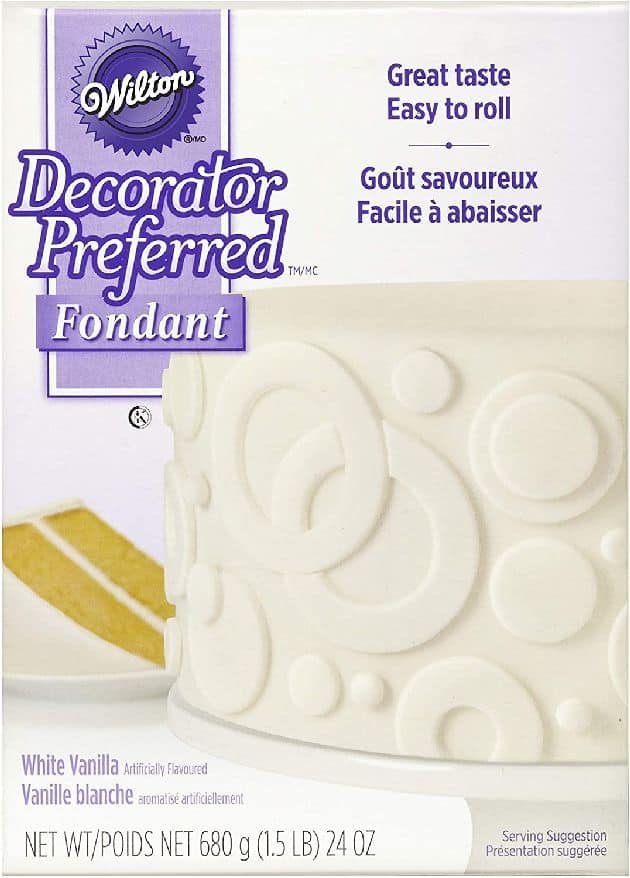
Now to the fun part - decorating! For this particular design, I made little tiger ears and facial elements out of ready-to-use fondant. You can also recreate this look with colored whipped cream instead. However, I found that the black color from the face tends to bleed into the white cream filling so I recommend applying these elements right before serving. Because I wanted to show off the inside of the cake roll for the purpose of this tutorial, I used separate facial elements but if I was serving this at a party, I would probably use an animal face made entirely of fondant to prevent the color bleed into the cream. Lastly, in another recipe, I used a cake painting to add finer details to the cake roll, take a look here, bear pattern cake roll & Silent Night Christmas Cake Roll.
Animal Cake Roll Templates
Here are some animal print cake roll templates I made for you.

Recipe
Tiger Pattern Cake Roll

A fun tiger animal cake roll made from a flexible cake base that is easy to roll without cracking. Tastes delicious and looks amazing!
Ingredients
Dry Mix
- 70 grams cake flour (Note 2)
- ¼ teaspoon sea salt
Wet Mix
- 90 ml whole fat milk
- 20 ml vegetable oil (Note 3)
- 30 grams granulated sugar
- ½ teaspoon vanilla extract
Meringue
- 6 egg whites, room temperature
- 55 grams granulated sugar
- ¼ teaspoon cream of tartar (Note 4)
- Gel color in desired colors
Stabilized Whipped Cream
- 1 cup heavy cream (36% M.F.) (Note 5), chilled
- 1 tablespoon + 2 teaspoon granulated sugar to taste
- 1 teaspoon vanilla extract
- 1 teaspoon unflavored gelatin powder
- 4 teaspoon water
Instructions
- Line a 8 X 12" rectangular cake pan with toaster-sized silicone baking mat, place animal print template below.
- Preheat oven to 325 F.
- In a small bowl, combine all the "wet" ingredients together with a whisk and set aside (this includes first portion of sugar).
- In a large mixing bowl, sift in dry mix. Stir to combine.
- Create a well in the center. Inside it, add all the "wet" ingredients.
- Combine until just incorporated, do not over mix as it will result in a tough cake. Set this flour mixture aside.
- In a clean and dry, non-plastic mixing bowl, whip egg whites on slow speed until frothy, add cream of tartar.
- Increase speed to medium, once the whites become opaque and bubble size have tightened up, add the second portion of sugar a little bit at a time.
- Increase speed to med-high, whip until stiff peaks (Note 6). You've now made a meringue.
- Weigh the meringue and portion out ⅙.
- Weigh the flour mixture and portion out ⅙.
- Add gel color into the flour mixture, black for the smaller portion and orange for the larger portion.
- Take the smaller portion of meringue and fold it into the smaller portion of wet flour mixture in three additions. Next, do the same with the bigger portion as well.
- Fill a pastry bag fitted with a #7 round tip with the black batter. Pipe the desired animal print on top of the silicone mat. Remove template. Use a skewer or toothpick to spread out the batter into the desired design.
- Fill another pastry bag fitted with a #10 round tip with some of the orange batter. Pipe the batter into all the areas without black batter. Tap the tray on the counter to help settle the batters.
- Optional: To further set small details, the design portion can be chilled before pouring the rest of the batter and baking. Take the silicone mat with the piped design and place it in the freezer for 10-15 minutes.
- Gently pour the rest of the orange batter into the cake pan over the design, spread out the batter evenly with an angled spatula.
- Tap the pan on the counter to release large air pockets.
- Bake for 10-12 min. at 325 F until a skewer pulls out clean and cake springs back in the center.
- Let cool in pan for 5 min.
- Place cooling rack over cake pan.
- Flip cake over onto the rack, gently remove paper or mat.
- The side facing up will eventually become the top of the cake roll. Let it sit on cooling rack while making the stabilized whipped cream.
- Place beaters, bowl and cream in fridge to chill. It's important for these tools and ingredients to be completely chilled before whipping.
- Place water in a heatproof cup and sprinkle gelatin on top to bloom. Wait 5 minutes.
- Place cup in a small sauce pan filled with simmering water. Once gelatin becomes liquid, take it out of the water. Let cool on the counter.
- Immediately start whipping the cream and sugar on medium speed.
- Whip until the beater starts leaving tracks inside the cream, pour the cooled gelatin into the bowl slowly and steadily. Aim for the area in between the whisk and the bowl while continuing to whip.
- Add extract.
- Increase speed to medium-high. Stop beating once the cream turns stiff (Note 6). Do not over whip.
- Use cream to assemble the cooled cake immediately.
- Spread the cream onto the tiger print cake with a bit of extra on the side that is to be rolled first (Note 7).
- Carefully roll up the cake from the short edge using the parchment paper to help push the cake onto itself.
- Wrap with plastic wrap and place in refrigerator to set before cutting.
- Before serving, cut off sides for a cleaner presentation. If you want to decorate the cake, read body of post for different ways to do so. Tiger cake roll can be kept in the fridge in an air tight container for 2-3 days.
Tiger Pattern Cake
Stabilized Whipped Cream
Assembly
Notes
1. Some ingredients are repeated, use them in the same order as outlined in instructions.
2. Cake flour is preferable for a soft fluffy texture. It can be substituted with All-Purpose Flour.
3. Neutral oil choices: canola, grapeseed, avocado
4. Cream of tartar is an acid that helps to stabilize the egg whites, it can be replaced with double the amount of lemon juice or vinegar.
5. Heavy cream is cream with milk fat content of 35%+ (also labelled as 35% M.F.) It can be substituted with whipping cream which has milk fat of 30%+. Heavy cream is preferred for it's stability.
6. Stiff peaks are characterized by egg whites that have a pointed peak when the whisk is pulled out. It points upwards and doesn't droop on itself.
7. Depending on the volume your cream attains once whipped, not all of the cream may be needed. A layer about ½" is recommended, with a bit more on the edge that will be rolled first.
Recommended Products
As an Amazon Associate and member of other affiliate programs, I earn from qualifying purchases.

Nutrition Information
Yield
8Serving Size
1Amount Per Serving Calories 213Total Fat 13gSaturated Fat 7gTrans Fat 0gUnsaturated Fat 5gCholesterol 35mgSodium 127mgCarbohydrates 18gFiber 0gSugar 13gProtein 5g
This information is provided as a courtesy and is an estimate only. This information comes from online calculators. Although indulgewithmimi.com attempts to provide accurate nutritional information, these figures are only estimates.

Leave a Reply