
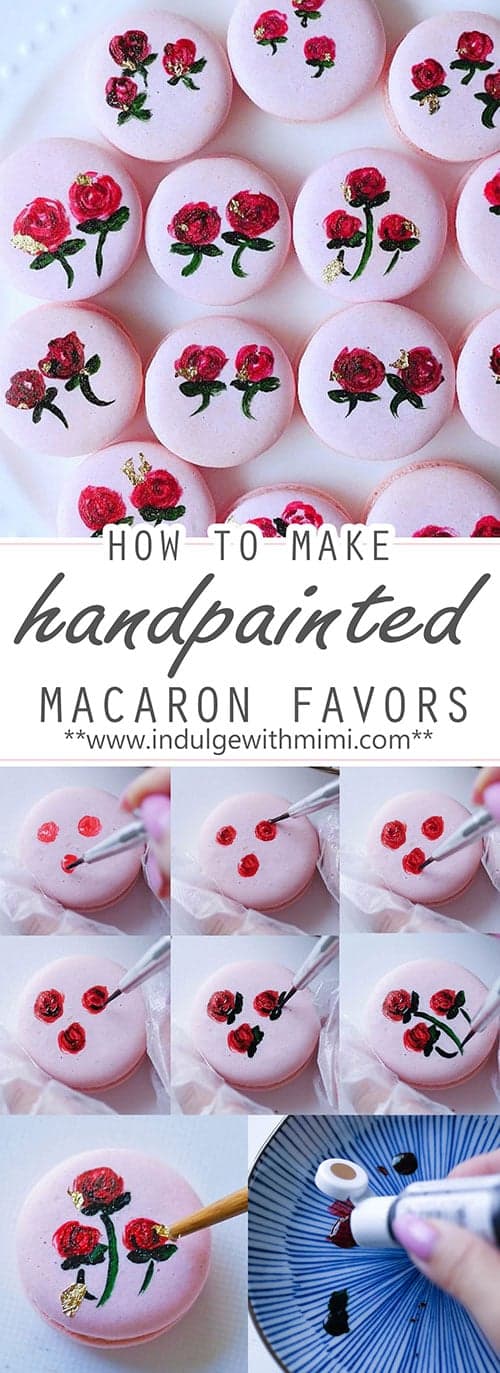
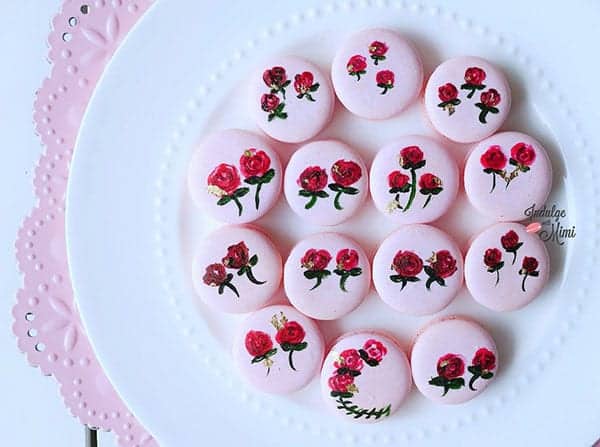
Last weekend my dear blogger pal, Samantha, hosted a Food Bloggers of Canada meetup potluck at her lovely home and these hand painted macarons were my little contribution. I didn't have a specific theme in mind when I started and everything just kind of came together after I picked up some delicious duck and apricot pâté from Oyama on Granville Island. The idea was to make a savoury macaron - something I don't often encounter. Inside each of these pink beauties is a dab of duck apricot pate with a ring of rose buttercream around it. Hence, the eventual application of a rose motif finished with a bit of gold foil for good measure. Because, you know, gold is best on ... everything. 🙂
I think these would be great for a spring or summer wedding theme. The hand painting is a little bit more work but does make a powerful impact. It definitely creates that "wow" factor moment for guests when they arrive at their table to find a piece of decadent edible art as part of the table setting. But you don't necessarily need to throw a wedding to enjoy these roses. An Instagram friend mentioned that these roses reminded her of Beauty and the Beast and I can see this as part of a pretty Belle themed tea party too.
I hope you enjoy the tutorial.
Xoxo,
Mimi

Tips for Hand Painted Macarons
- Use gel colouring for best results. You can mix it with a bit of clear alcohol to lighten or thin it out a bit but I didn't use it here. But be careful not to make it too runny. Macarons do not like moisture!
- I am using the finest paint brush in the Wilton Paint Brush Set. Link below.
- To preserve your beautiful work, let the paint dry up before packaging. 24 hours is best.
- I like to assemble that macarons with filling and refrigerate it before I start painting. This will prevent it from melting in your hands.
- Lastly, work quickly! Macarons start melting and the gel paint dries up as well.
Recipe
Soft Pink Hand Painted Rose Macarons
Elegant hand painted floral macarons for a wedding, shower, birthday party or Mother's Day.
Ingredients
Ingredients for Soft Pink Macaron Shells
- 65 grams almond flour
- 65 grams icing sugar
- 50 grams egg whites, (aged for min. of 24 hours)
- 45 grams castor (Note 1)
- ⅛ teaspoon cream of tartar
- 1 drop pink gel color, (I used Deep Pink by Americolor)
Supplies for Painting Roses
- Few drops of "Light" Pink Gel Colour, (I used Deep Pink by Americolor)
- Few drops of "Dark" Pink Gel Color, (I used Mauve by Americolor)
- Few drops of Red Gel Color, (I used Super Red by Americolor)
- Few drops of Green Gel Color, (I used Leaf Green by Americolor)
- Fine tip brush
Instructions
Basic Macaron Shells
- Set aged egg whites out at room temperature.
- Pulse almond flour and icing sugar together in a food processor to further break down any large pieces of almond flour.
- Sift dry ingredients: almond flour, icing sugar. Discard big pieces of almond that can't be sifted.
- If you are new to making macarons, please read the instructions to my BEST MACARON RECIPE before attempting to follow the rest of the instructions since it is condensed for the advanced macaron baker.
- With the balloon whisk attached, whip the room temperature egg whites on low-medium speed.
- Add cream of tartar when it becomes foamy.
- Turn up the speed to medium.
- Once the whisk starts to leave tracks in the egg whites, add sugar a little at a time.
- Turn the speed up to medium-high and whip until firm peaks, stop mixer and add gel food color if desired. Continue whipping on medium-high until stiff peaks.
- Fold the dry mix and meringue together until the batter becomes a "lava" or honey-like consistency.
- Transfer batter into a piping bag fitted with a round piping tip.
- On parchment paper or silicone mats, pipe out round shaped macarons.
- Rap the tray hard on the counter to remove any excess air bubbles. Use a toothpick to pop any remaining bubbles.
- Wait until the shells become completely dry before baking.
- Bake at 325F for 12-14 minutes. Every oven is different, you may need to adjust your own temperature settings. Please read How to Use Your Home Oven Properly for Baking Macarons if you are unsure.
- Macarons are done when the foot doesn't push back and the tops don't move when you wiggle it.
- Once baked, let cool completely before removing from the baking mat/parchment paper.
- Fill, assemble and chill the macarons before decorating.
Hand Painted Shells
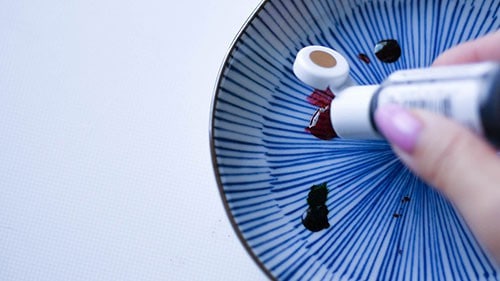
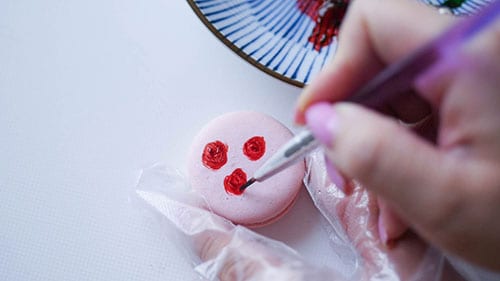
- Put a drop of each gel color on a clean plate. Use a little at a time since it will dry up.
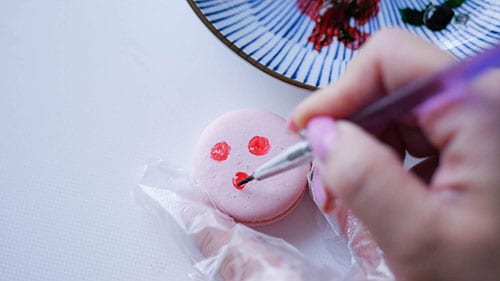
- Dip a fine paint brush into the light pink colour. Paint a few random strokes in a circular pattern leaving some white space in between strokes. This will form the rose "bud" foundation.
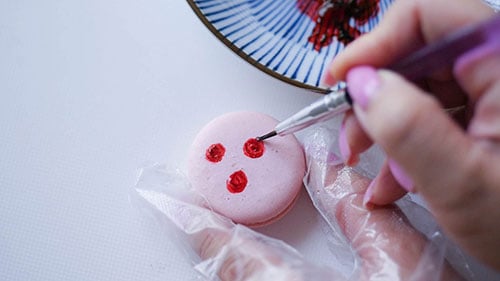
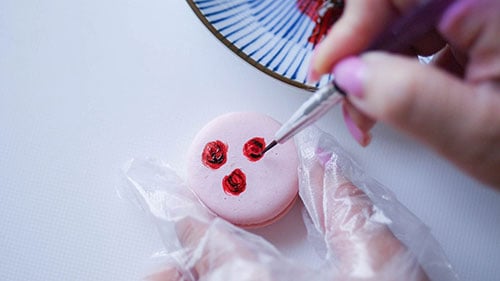
- Repeat previous step with the medium pink color while adding a few more strokes to the outer edge of the bud to create the "petals".
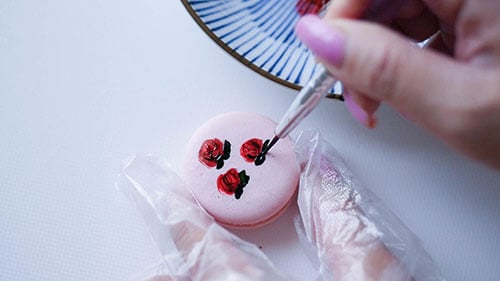
- Repeat previous step with the red color.
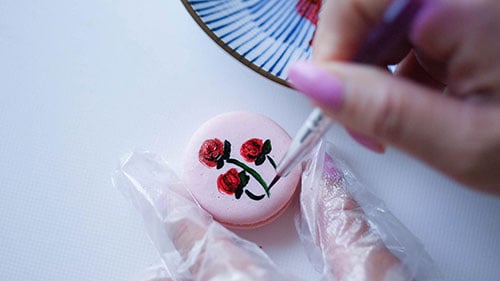
- Paint on the leaves and stem with the green gel colour.
- Place macarons back into the refrigerator and let dry for 24 hours before adding gold foil and packaging.
- Add gold foil. Tweezers or wooden chopsticks work really well for transferring gold fold.
- Don't forget to watch the video at the bottom of this post to see the video tutorial I made as well.
Notes
Nutrition Information
Yield
12Serving Size
1 gramsAmount Per Serving Unsaturated Fat 0g
Kelsey says
Love these! Once painted, can you freeze them? Worried that the colors may run when they thaw. Thanks!
Mimi says
Hi Kelsey,
Thank you! They will unfreeze with no problems. Just don't stack them while freezing.
xoxo,
Mimi
Mimi says
Reader's work using this tutorial. Thank yo so much for tagging me!