
Stabilized whipped cream with gelatin - a light and airy frosting, sturdy enough for piping designs and use as a deep filling for cakes without deflating.
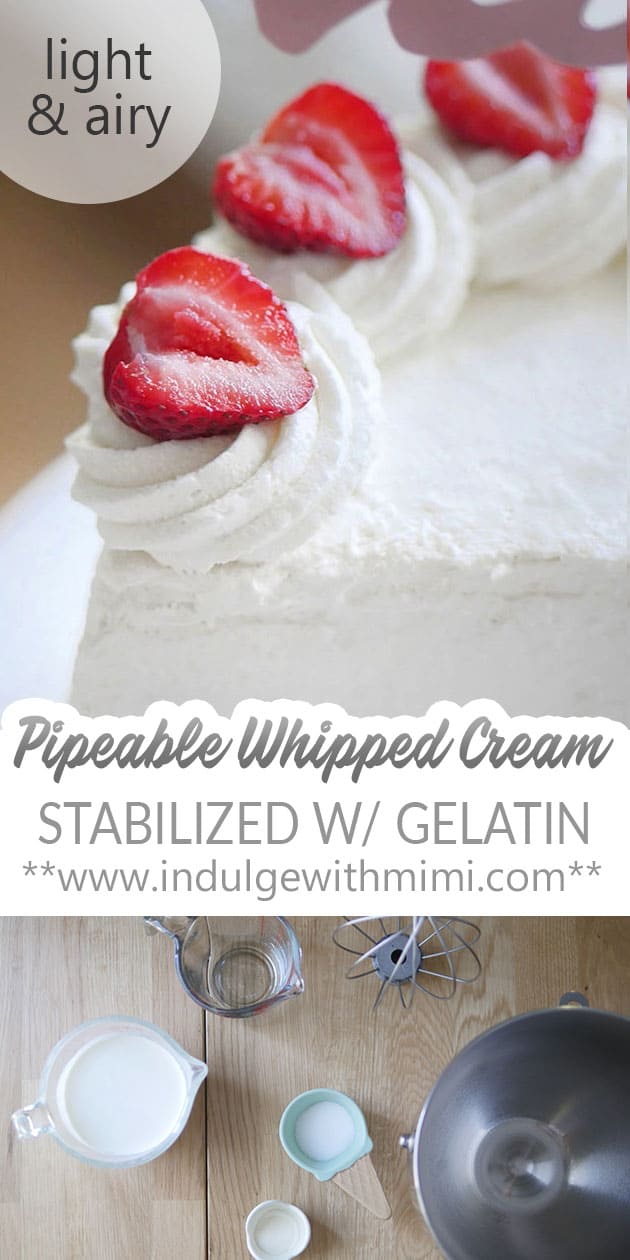
A Sturdy Whipped Cream for Piping or Deep Filling in Cakes
A stabilized whipped cream is perfect for those who prefer a frosting that is light, airy, less sweet and buttery but still sturdy enough for piping designs. Regularly, fresh whipped cream is not sturdy enough to be used for piping or as a deep filling without being stabilized with ingredients like gelatin, powdered sugar, cornstarch or pudding mix.
For use as a decorative cake topping, whipped cream can be conveniently stabilized with powdered sugar as shown in this recipe. However, to make it sturdy enough for piping and especially as a deep filling, it's preferable to make stabilized whipped cream with gelatin instead. The whipped cream will be much sturdier with a slightly spongy texture. It may sound intimidating to add gelatin to whipped cream but it's actually quite easy and the results are well worth the effort. Nobody likes a cake with droopy frosting.
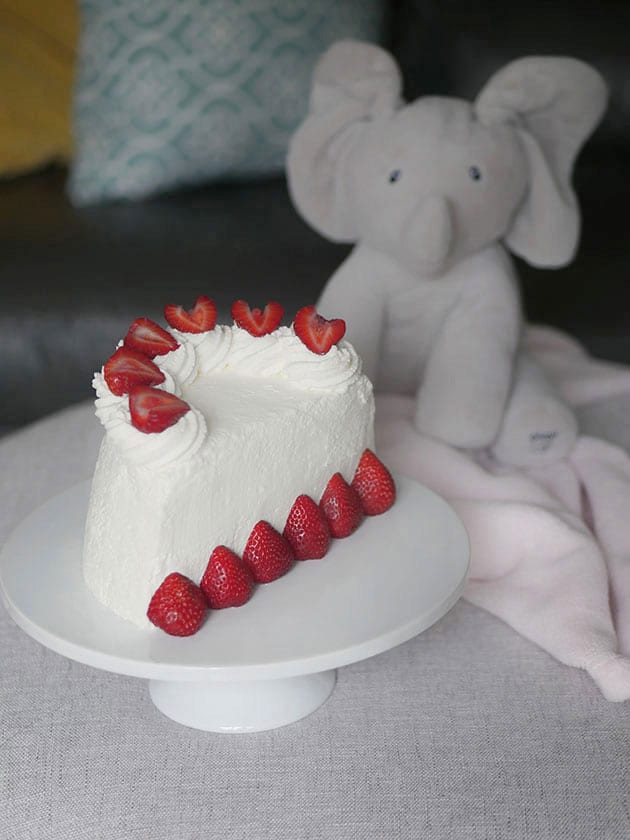
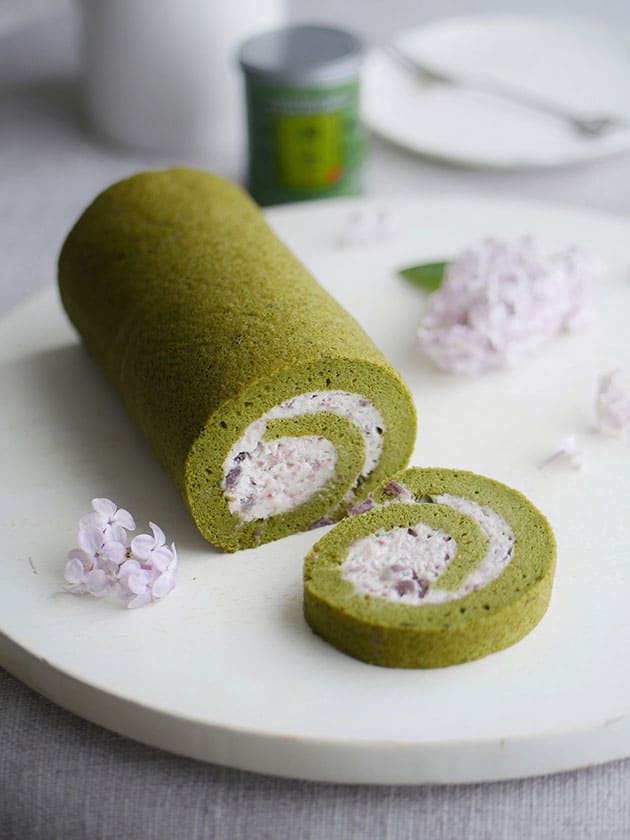
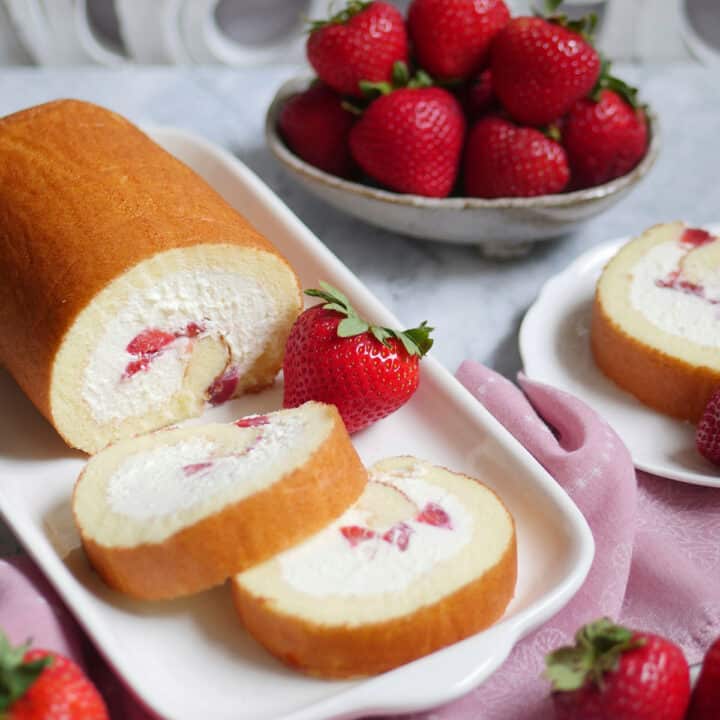
Adding gelatin to whipped cream makes it super sturdy and stabilized enough for piping medium to large designs, and for use as a filling for cakes like this Japanese strawberry cake roll I made below. To prevent it from deflating, it's also a good idea to stabilize whipped cream if mixing it with other elements like in this red bean whipped cream filling used to fill this Matcha Cake Roll. I also have a new version of this stabilized cream with mascarpone. Lastly, if you find pouring gelatin into whipped cream intimidating (it's really not!), you can try this easy stabilized 2-ingredient Real Chocolate Whipped Cream.

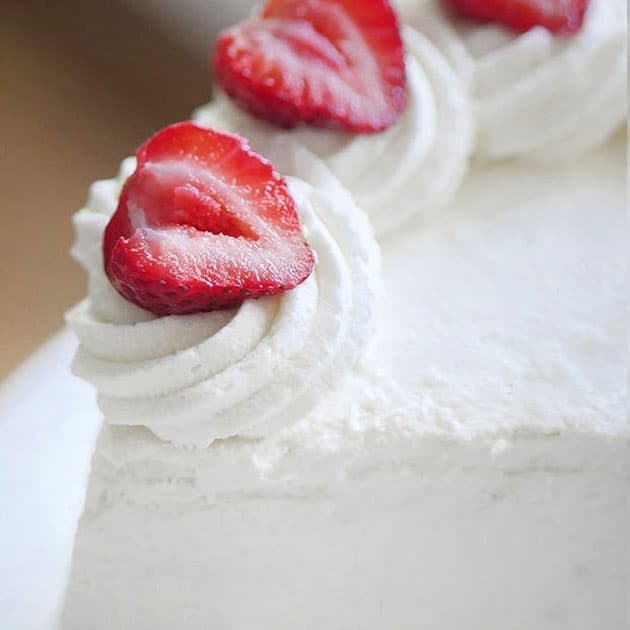
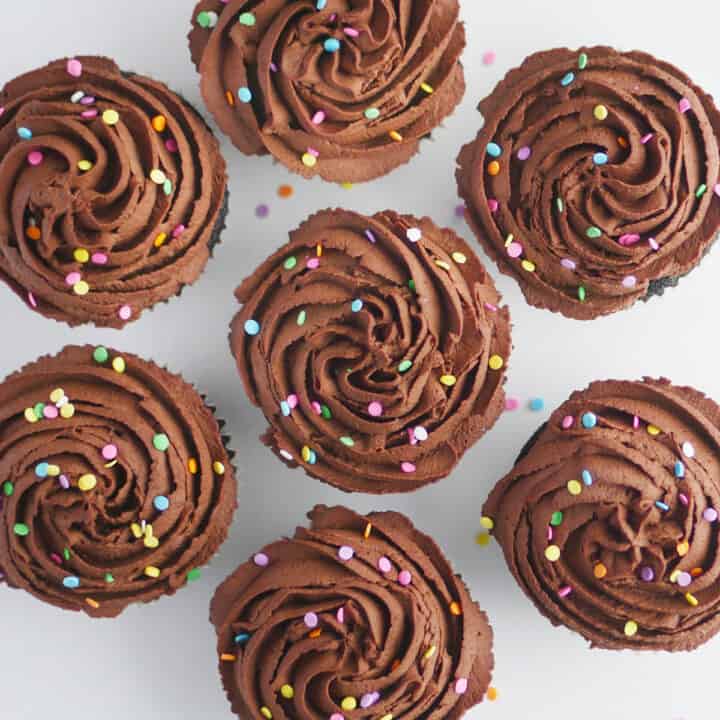
This stabilized whipped cream with gelatin can be piped into designs with a good amount of definition. Here, I piped the swirl design using a jumbo open star tip by Atecco (#828). (For piping finer details or if the cake needs to be left out at room temperature for long periods of time, I recommend a Swiss Meringue Buttercream frosting instead.)
Whipping Cream vs. Heavy Cream
Whipping cream has milk fat content of 30-35% and is usually found at 33% in most regular grocery stores. The heavy whipped cream designation is given to cream with a minimum milk fat content of 36% and above. Even with just a small percentage change, it's whipping ability changes dramatically.
Whipped cream and heavy cream are sometimes used interchangeably in some recipes and it can usually be swapped one for another in cooking without affecting the texture too much. For whipping, however, there is a marked difference with heavy cream being more stable after whipping.
Personally, I find the flavour of whipping cream at 33% to be a bit brighter and a bit sweeter than heavy cream so I prefer it in recipes like this Strawberry and Cream Cake Roll where it is stabilized with gelatin. I found that even regular whipping cream that is stabilized with gelatin to be firm enough for piping and filling. But if you're looking for a very stable whipped cream, consider using heavy cream instead. Heavy cream is usually found in gourmet food shops.
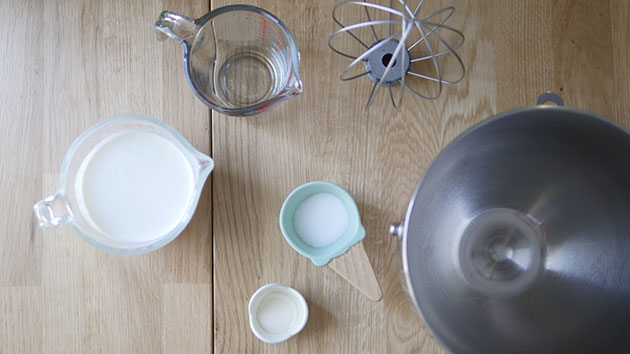
Ingredients & Substitutions
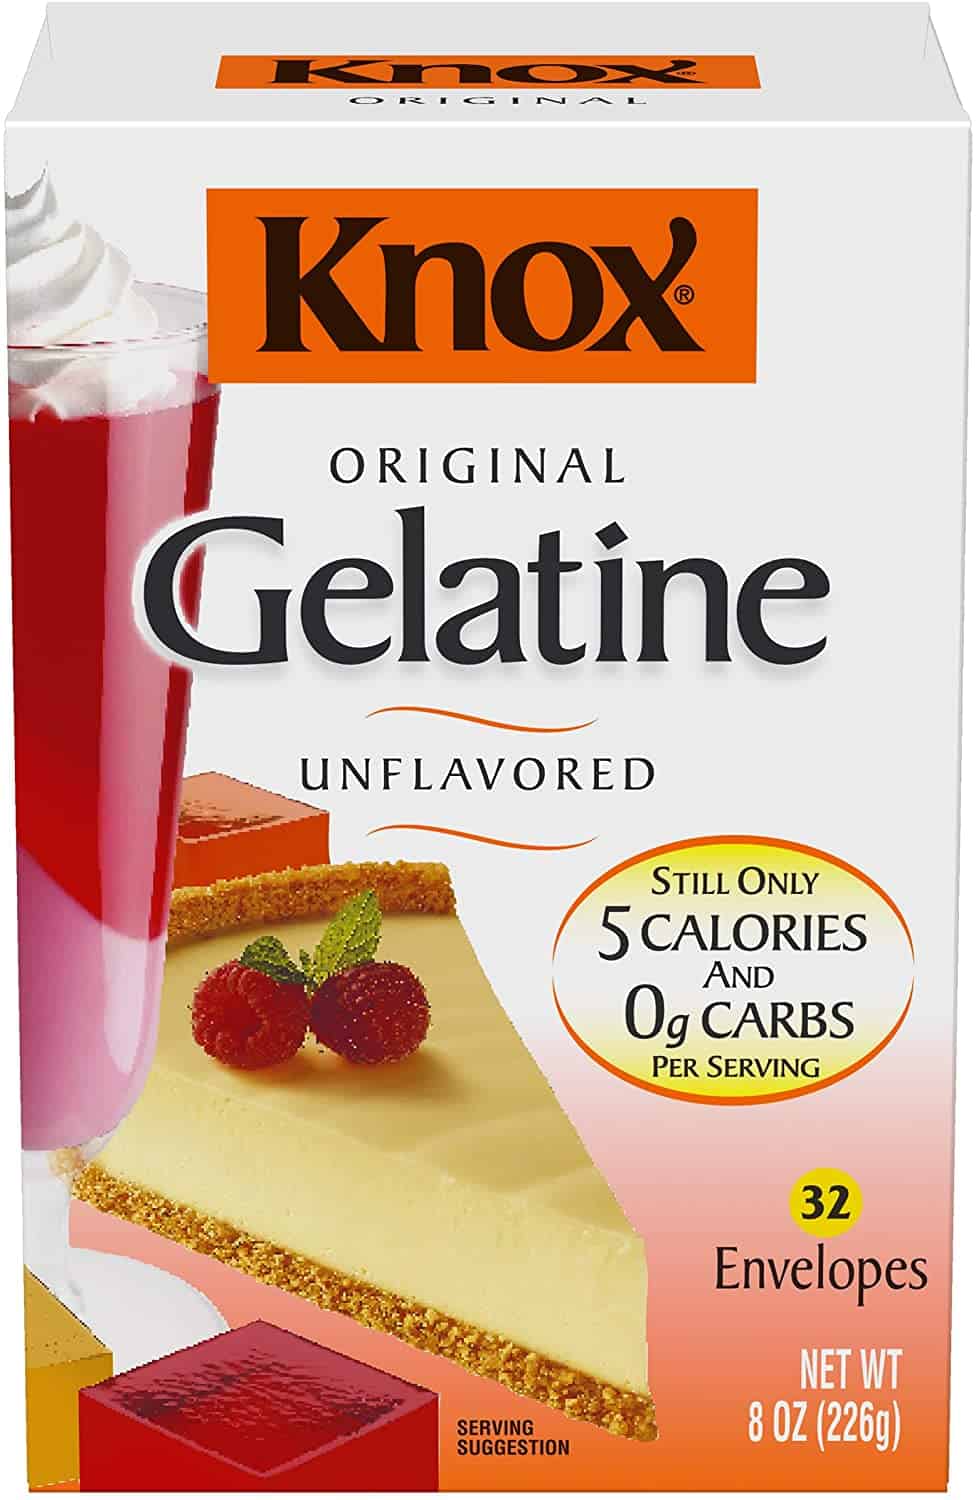
- Powdered Gelatin Unflavored:
The Knox brand is pretty standard and can be found in most grocery stores. It's usually found in the baking aisle or you can order it online. - Heat-proof Glass:
This is for blooming the gelatin and placing inside a pot of simmering water. A Pyrex measuring cup with handle is great for this. If you don't have a heat-proof bowl or glass and prefer to use the microwave method, microwave the bloomed gelatin on medium-high for 10 seconds at a time until it becomes liquid. - Granulated Sugar
- Whipping Cream (30%+ M.F.):
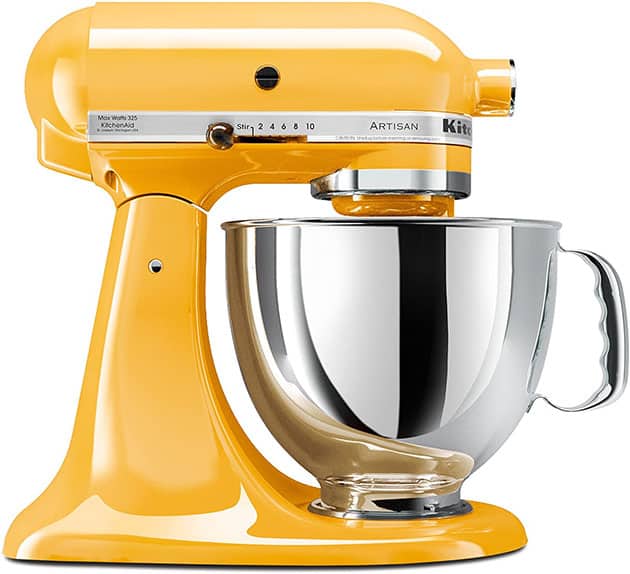
Read above on the difference between whipping cream and heavy cream. Either one can be used in this recipe with heavy cream producing an even more stable whipped cream. Make sure the cream is sufficiently chilled before whipping as it will not whip up otherwise. - Stand Mixer:
The melted gelatin needs to be poured into the whipped cream as it is whipping, this is much easier to do with a stand mixer if you're baking alone. If you don't have a stand mixer, try to enlist the help of someone else in the home to do the pouring or whipping.
How to Add Gelatin to Whipped Cream
To make a stablized whipped cream by adding gelatin isn't hard at all. First off, chill the cream, beaters and mixing bowl. This will help the cream whip up much easier without over beating which can cause it to curdle and break apart. Make sure the whipped cream itself is also very cold as it won't whip up at all if it's not cold enough.
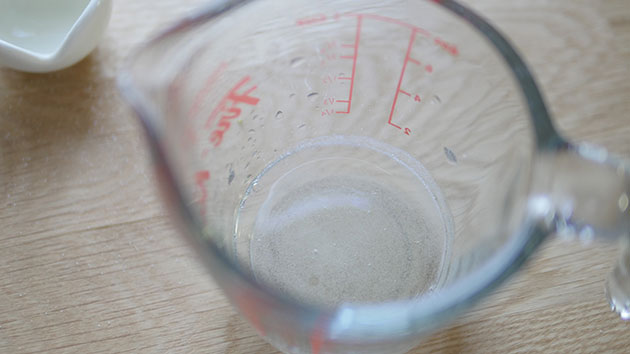
Next, bloom the gelatin by sprinkling it over water placed in a heat-proof measuring cup. After 5 minutes, the gelatin will swell and become solid.

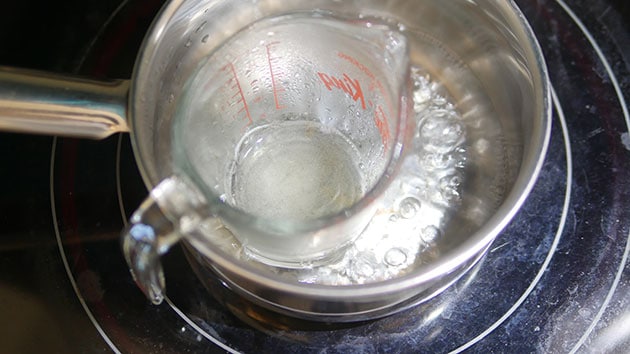
Place the measuring cup in a small pot of boiling water. Once it starts melting, stir it gently until it becomes liquid. Take off heat immediately and let it cool.

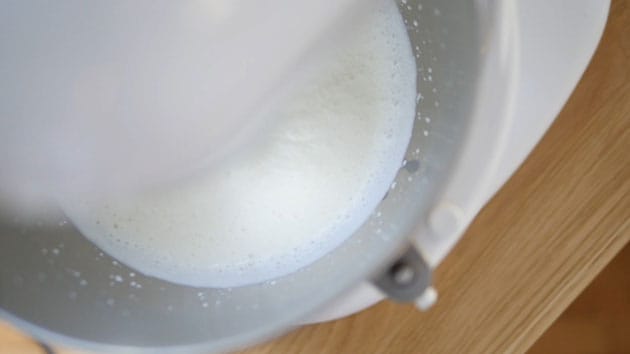
During this time, start whipping the cream and the sugar in a chilled bowl and beater in a stand mixer on medium, then increase speed to medium-high

Check on the gelatin. It should be liquid and runny, and no longer hot. If it has started to solidify again, place it in the warm water until liquid. Make sure it has cooled down again before using.
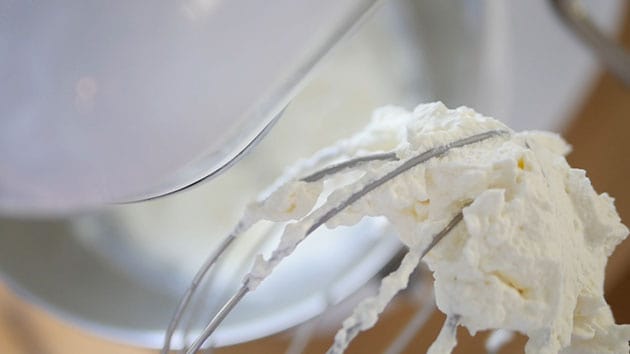
Once the beaters leave tracks inside the cream, pour the cooled gelatin into the mixing bowl aiming for the spot in between the beater and the side of the bowl, much like you would when adding the sugar syrup to an Italian meringue. Keep whipping and if desired, add extract and food coloring at this time.

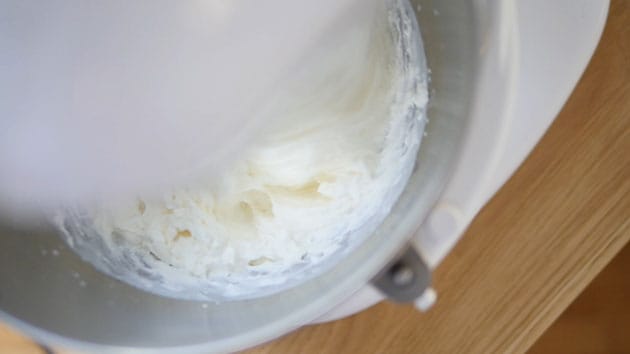
The whipped cream will start looking much fluffier and a bit matte. Stop whipping and check the stiffness. Once it reaches stiff peaks, stop whipping. Do not over beat. That's it, you have made stabilized whipped cream which can be used for piping designs or filling a cake. Use it immediately to fill or decorate your desserts.

How to Fix Over-whipped Whipped Cream
If the cream has just begun to separate, it is still possible to salvage the over whipped cream. Stop the mixer and add some more cold cream, just a little at a time, then gently fold it into the mixture until it all comes together again. If this doesn't work, it means the whipped cream has separated too much and you'll need to start over again unfortunately. Next time, watch the whipping process closely, especially at the end. Once the gelatin is added, make sure to look for signs that the cream has become matte and begins to clump up. This change happens very quickly. Be ready to stop the mixer when the entire mixture has reached this stage.
How to Store Stabilized Whipped Cream
While non-stabilized whipped cream should ideally be used and consumed immediately, the stabilized version can hold up for several days in the fridge once piped or used as filling. It's still better to use it immediately, however, unused portions should be placed on a cheesecloth elevated inside of a bowl to allow the water to drain out of the cream since it will start separating over time. Re-whip the cream before serving.
Whipped Cream as a Macaron Filling
Stabilized whipped cream with gelatin is great for cakes and many other desserts. It's naturally white, sturdy and pipeable. However, even though it has been stabilized, the mositure content is still too high to be used as a macaron filling. (Just think about the ingredients used, it's still mainly a liquid presented in a more solid form.) I would skip this one as a macaron filling, it tends to eat away at the macaron shells within the hour. READ: Yummy Macaron Filling Ideas.
Save this delicious stabilized whipped cream for use in desserts as toppings, deep fillings and frosting. It's so light and airy! Enjoy!
XOXO,
Mimi
Recipe
Stabilized Whipped Cream with Gelatin

Stabilized whipped cream frosting sturdy enough for piping designs and for use as a deep filling for cakes. Light, airy and delicious.
Ingredients
- 1 teaspoons powdered gelatin (unflavored)
- 4 teaspoons water
- 1 cup whipping cream (33%)
- 1 tablespoon granulated sugar
- Flavor extract (optional)
Instructions
- Refrigerate mixing bowl and beaters in the fridge for a minimum of 15 minutes. Ensure cream is very cold as well. This will all help cream whip better.

- Place water in heatproof cup and sprinkle gelatin on top to bloom. Wait 5 minutes.
- Place cup in a small sauce pan filled with simmering water. Once gelatin becomes liquid, take it out of the water. Let cool on the counter.
- Immediately start beating the cream and sugar in a stand mixer fitted with the chilled bowl. Whip on medium speed and then increase to medium-high.
- Check on the gelatin. It should no longer be hot but still runny.
- Once the beaters leave tracks in the cream, pour the gelatin into the bowl slowly and steadily. Aim for the area in between the whisk and the bowl. If desired, add extract and food color before the cream becomes stiff.
- Stop beating once the cream turns stiff. Do not over whip.
- Use cream to assemble cooled dessert immediately.


Notes
Read post on how to store whipped cream and how to fix over whipped cream.
For vanilla flavor, add ½ teaspoon of extract.
Recommended Products
As an Amazon Associate and member of other affiliate programs, I earn from qualifying purchases.

Nutrition Information
Yield
2Serving Size
1Amount Per Serving Calories 433Total Fat 43gSaturated Fat 27gTrans Fat 1gUnsaturated Fat 13gCholesterol 134mgSodium 35mgCarbohydrates 10gFiber 0gSugar 10gProtein 4g
This information is provided as a courtesy and is an estimate only. This information comes from online calculators. Although indulgewithmimi.com attempts to provide accurate nutritional information, these figures are only estimates.


Josh says
Hi Mimi! Will this whipped cream be strong enough to use as a dam for a curd filling for chiffon cake layers? I'm worried that the weight of the layers will be too much and cause the cream to bulge out the sides.. (VERY niche question I know.. sorry!)
Mimi says
Hi Josh,
Good question. I have a discussion of this in the post itself. You might want to go back to the post and read it. Long story short - no I wouldn't recommend it.
XOXO,
Mimi
Nila says
Hi. Urgent help please! Only have gelatin sheets- do I use same method? How many sheets will I need to use? TIA.
Mimi says
You'll need about 3 - 3.5 sheets soaked in water and then excess water rung out. Then melt it in a heatproof cup in the same way with a splash of cream to get it to a liquid state for pouring, then cool it like the recipe until it's time to pour.
XOXO,
Mimi
Peggy says
Hi there! So excited to be trying this after failure with my runny frosting. But I want to make an ombre smash cake. In the video, you said to add color before the frosting stiffs. Can I split the frosting into 3 batch and fold in coloring to 2 of the batches?
Mimi says
Hi Peggy,
I'm excited for you. It sounds like it will be a great smash cake! Yes you can split the frosting into 3 batches and then whisk in the color in each separate bowl. Make sure to split it after the gelatin is added but before the frosting stiffens, when whipped cream gets overwhipped, it breaks apart and its very difficult to bring it all back together again.
XOXO,
Mimi
Mir says
My cream didn’t whip. I followed your instructions to add sugar to the cream at the start, but after 10 min nothing happened, still runny. I read elsewhere that sugar should be added later after you have soft peaks. Did u add your sugar at the beginning too and it whipped?
Mimi says
Hi Mir,
There is a video I posted showing the exact process, you can take a look to help guide you. Yes, I added the sugar in the beginning. In this recipe, we're adding gelatin after soft peaks to help with the stabilization which makes it extra sturdy than if using sugar alone. Make sure you eventually move up the speed to medium-high or even high depending on what kind of unit you're using. Fast speeds along with COLD bowl and ingredients is crucial to making cream whip up to volume 🙂
XOXO,
Mimi
Connie M Faison says
Looking for a stabilized whipped cream for cheesecake piping. Will this recipe be stay stable on a cheesecake x 3-4 days in the fridge?
Mimi says
Hi Connie,
I think it's best to make it closer to the day of serving. It will be stable but I think 3-4 days will be near the tail end for it to look and taste the freshest. It just looks a whole lot fluffier on the first 2 days. When serving for the first time, it will help for it to look its best, afterwards, everybody understands that leftover cake will not look exactly the same as when it was first served.
XOXO, Mimi
JJ says
How can I make the texture smooth? Although it's stabilized, it seems like it's clumpy.
Mimi says
Hi JJ,
There might be a problem at the pouring stage. The gelatin should be runny but not hot. If it's getting a little more viscous and it's poured slowly into the whipped cream, it will not incorporate well and become clumpy. Hope that explanation helps.
XOXO,
Mimi
Jason says
I made many kinds of cake such as muffins, cupcakes, cookies even biscuits. But I have stopped a birthday cake because I don't know how to make the cream. So this sturdy whipped cream frosting recipe is very useful for me. I can apply to cook many cakes or combine them with fresh fruits.
Mimi says
Yes, this cream is perfect with fresh fruits. I actually made it yesterday for a simple vanilla cake and everyone loved it! It was so easy to put together, I made the cake and cream in under an hour and a half. I hope you'll find many uses for it too.
XOXO,
mimi