
To be good mille crepe cakes need to be made with crepes that are ultra-thin. Here are some tips on how to make a great crepe cake.
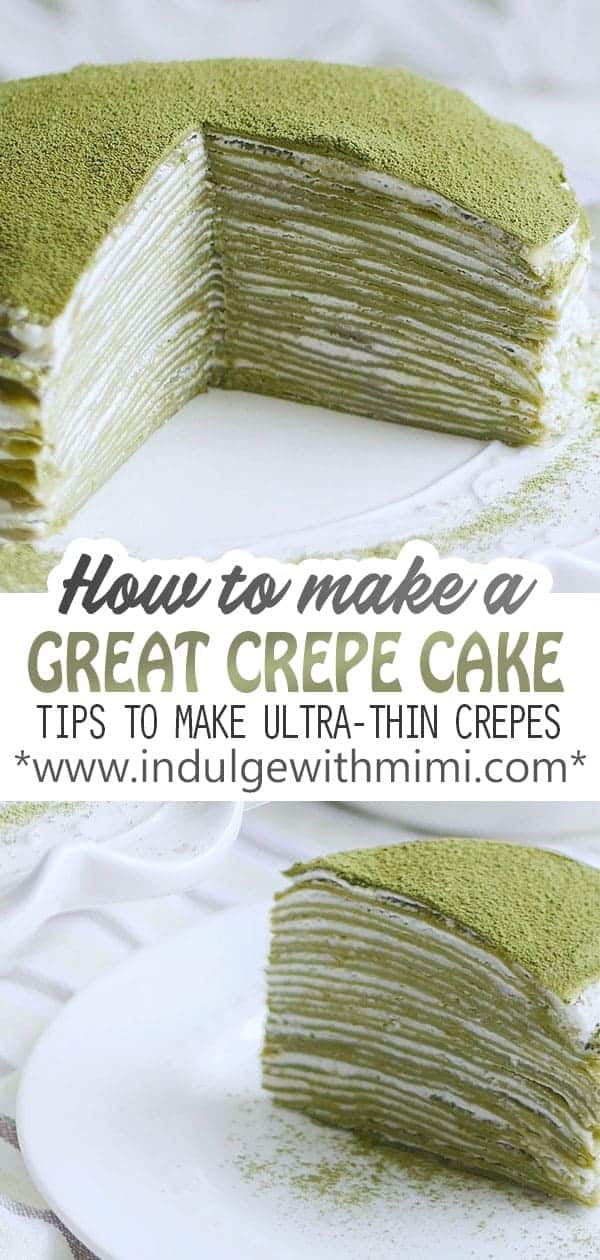
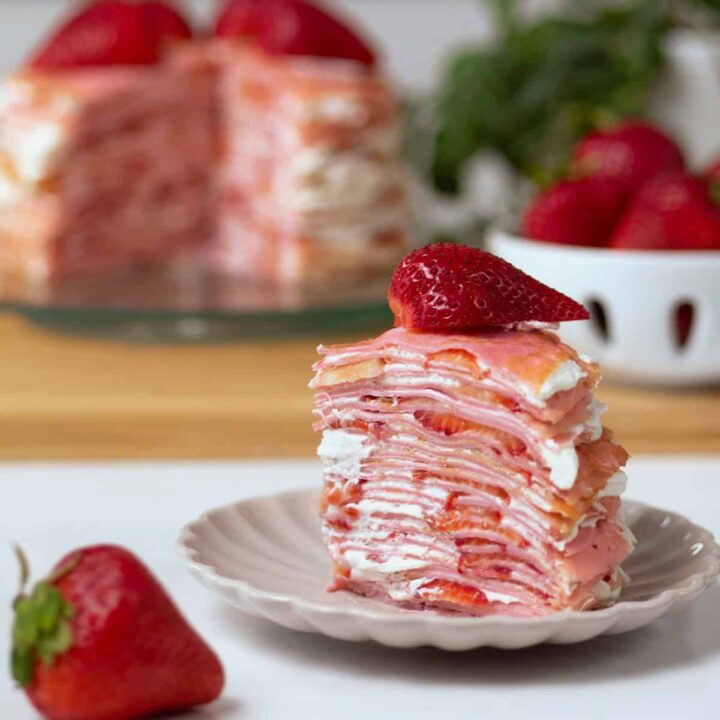
This post on how to make a great cake provides supplementary information to users making my recipes in my Japanese crepe cake series: Strawberry Mille Crepe Cake, Rainbow Crepe Cake and Matcha Crepe Cake. It will help you make a crepe cake with a wonderful soft texture and flavor. Please leave any questions you have for me in the comments.
XOXO,
Mimi
History of the Crepe Cake
The history of the thin pancake otherwise known as a crepes began in France's north Westernmost region, Brittany. Unlike regular pancakes, it's made without a raising agent so it remains flat. Made with just flour, sugar, salt, milk, eggs, and butter, its simplicity is transcended by its versatility. It can be used as a wrap for both savoury or sweet fillings and even stacked 20-30 at a time to create an elevated dessert called a mille crepe cake - an invention by Japanese cake artist, Emma Wada who founded the popular dessert chain, Lady M*.
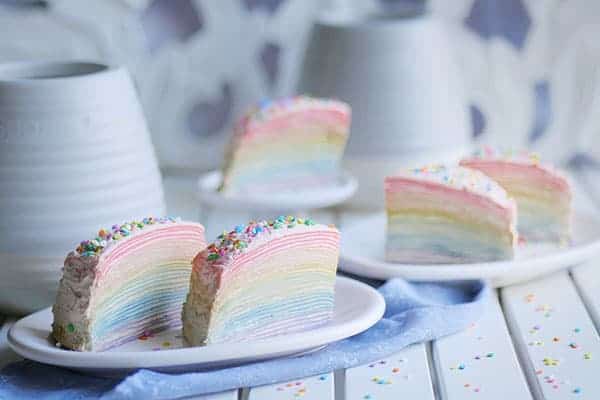
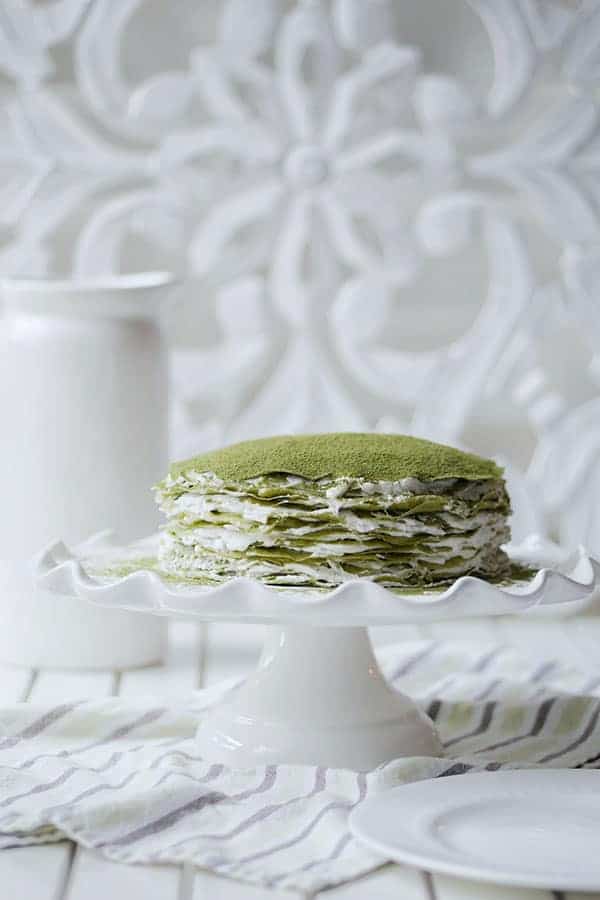
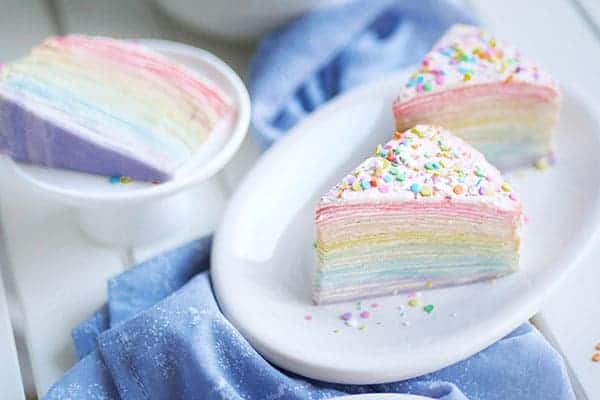
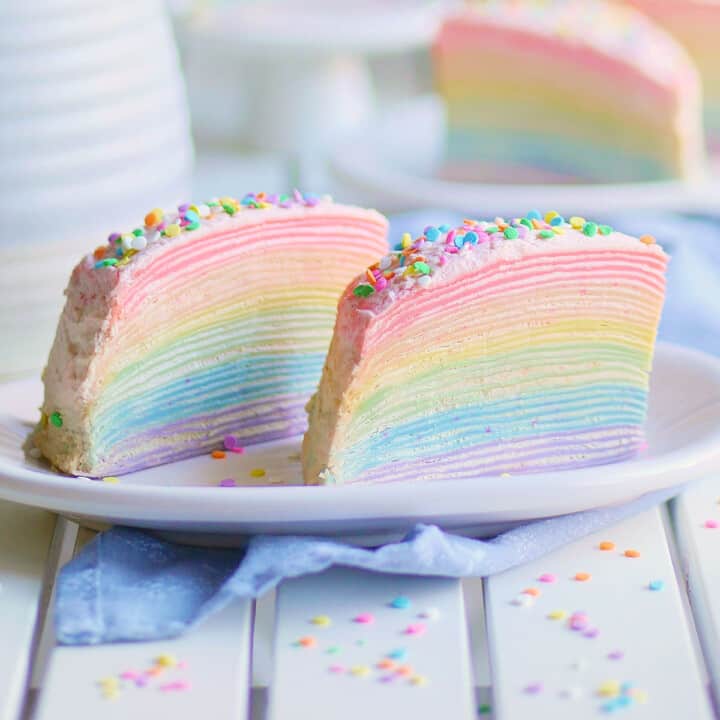
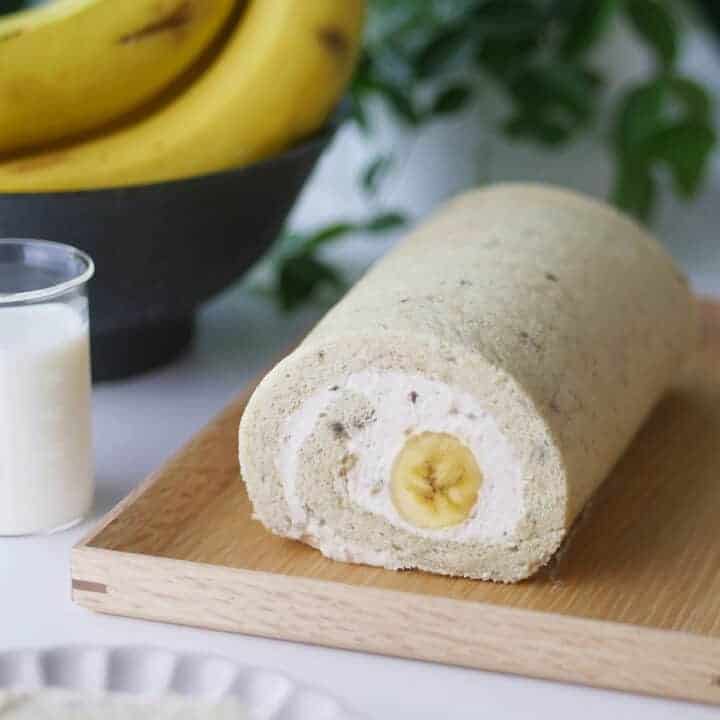
A mille crepe as the name suggests, is a cake made up of a "thousand" layers of paper-thin crepes stacked one on top of one another and then filled with cream in between each crepe. When cut open, the many layers that make up the cake is revealed. This is especially captivating when the crepes are colored with food coloring and stacked into a rainbow pattern.
What Makes a Good Crepe Cake?
Crepe cakes are especially good when it is flavourful, tender and easy to cut through with just a dessert fork without falling apart. This is achieved by making the crepes ultra-thin. Although you might not notice it when eating the cake as a whole, each crepe by itself is paper-thin and almost too fragile to handle. Stacked one on top of another with cream filled in between each layer, it becomes a complete crepe cake that almost melts in the mouth.
The thinness of the crepe should allow the cake slice to be easily cut down with a fork while eating. Making crepes so thin takes some time and skill to perfect. Although it might sound like a lot of work to make ultra-thin crepes in order to make a good crepe cake, this effort is mitigated by the fact that there is absolutely no baking involved and all the ingredients are readily available in most kitchen pantries.
To make a great crepe cake, all you need are some simple ingredients, a good non-stick pan and a willingness to practice cooking the crepes with some sacrificial batter. Below are some tips to help you make the perfect crepe cake.

Tools for Ultra-thin Crepes
- 8” Round non-stick pan - a good non-stick pan is required for making the crepes ultra-thin. It will prevent the crepes from tearing.
- Silicone tongs - silicone tongs helps pick up the edge of the crepe gently without tearing it.
- Pastry brush - a pastry brush will disperse the butter evenly on the pan creating a non-stick barrier for making thin crepes.
- Blender/Food Processor - a blender helps in incorporating all the ingredients together into one even and uniformed crepe batter. This is the food processor I use in my kitchen. It's very versatile, I use it for chopping up baby food or grinding my own almond flour.
- Mixing Bowls
- Medium-sized pot
- Hand held mixer
- Sifter
- Spatula - a good flat spatula will be needed to lift the crepe off the pan
Tips of Making a Great Crepe Cake
- Clear up space in your kitchen to make the crepes in an assembly line fashion. Ample space is needed at the stove top for cooking the crepes and pouring the batter. Counter space will be needed for cooling the crepes, stacking them and then assembling the cake with filling.
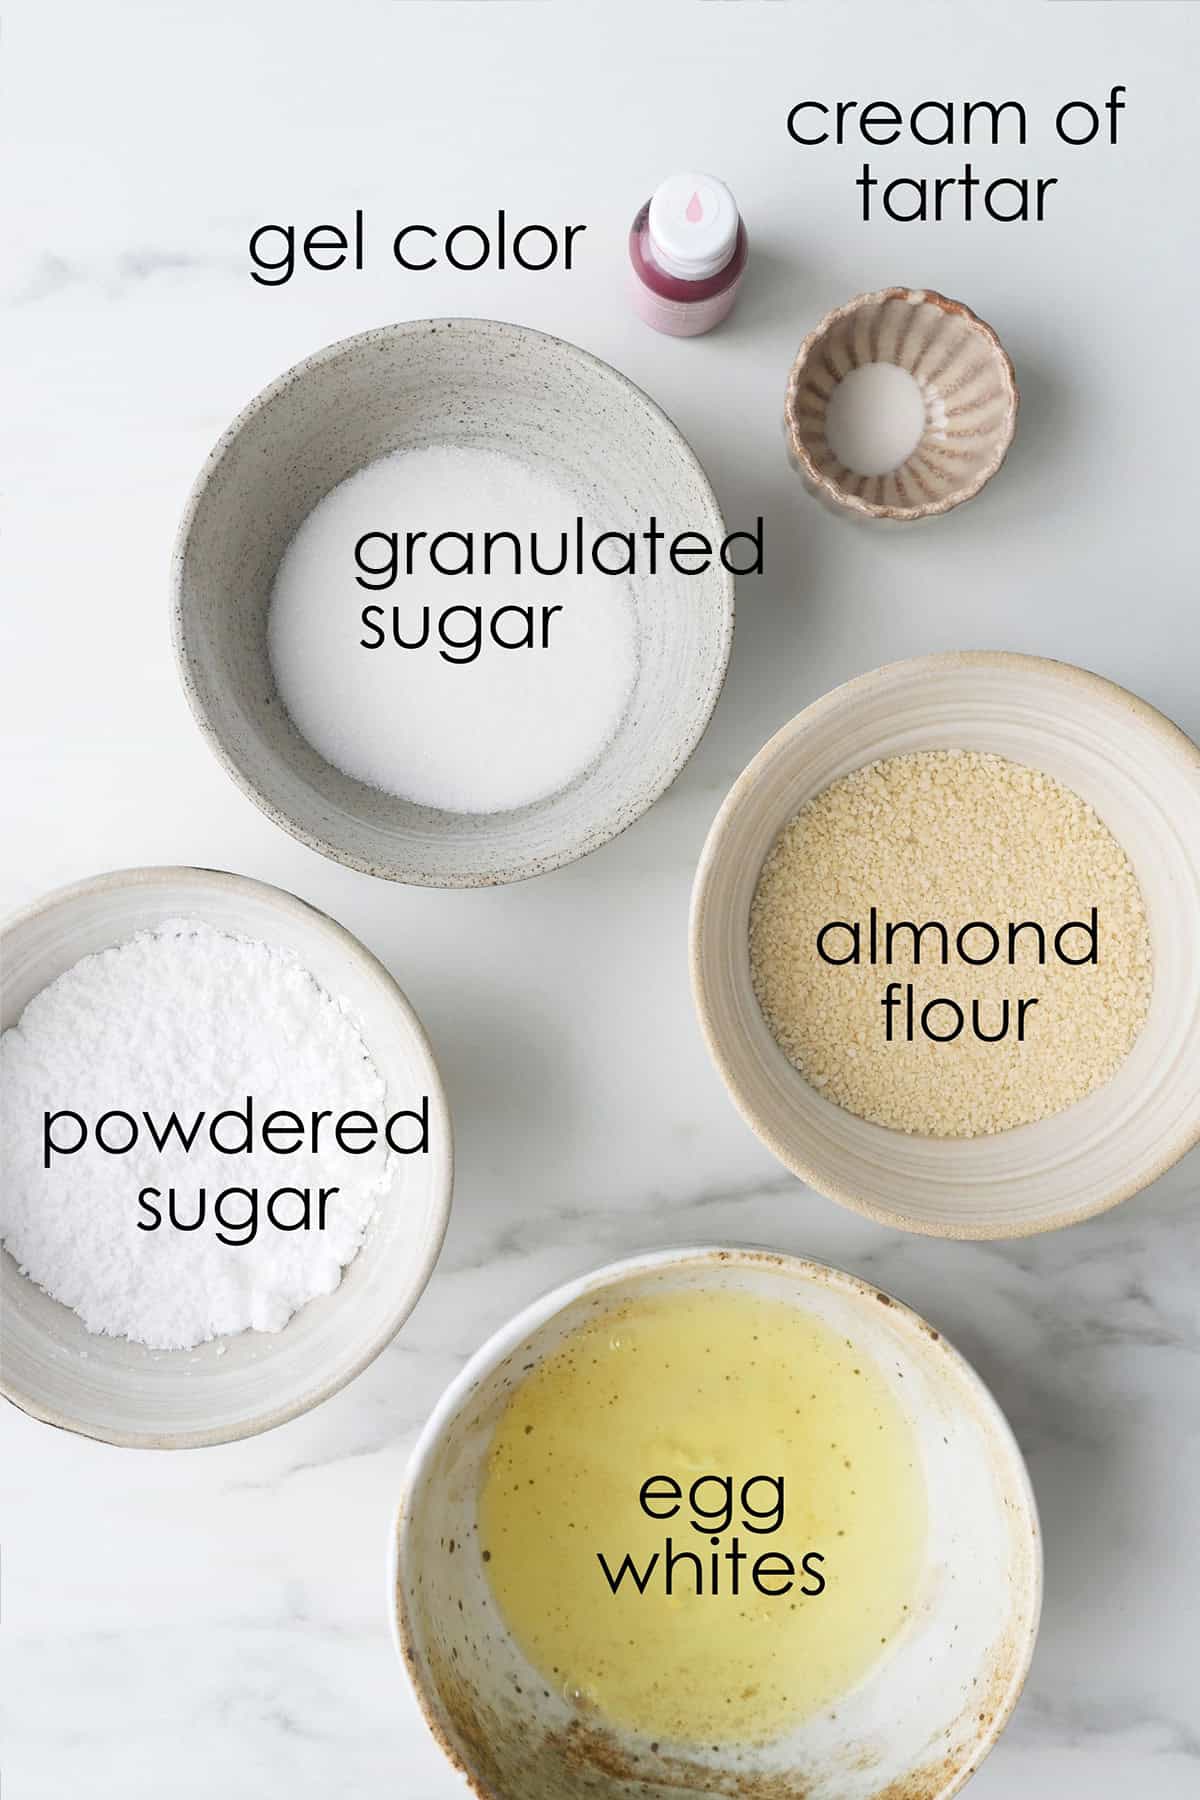
- Use cake flour instead of all purpose for a more tender crepe.
- Place all the ingredients in the blender and blend until homogeneous.
- Use a sieve to catch any lumps in the batter for a smooth crepe.
- Before using the crepe batter, allow it to rest at least one hour in order for the dry ingredients to become hydrated and for the extra air to escape from the batter which can cause the crepe to tear.
- For the first crepe, butter the pan generously with a pastry brush or paper towel. For subsequent crepes, add a very small dab onto the pan to prevent sticking. Don't overdo it as it will cause the crepes to brown easily.
- Make a few sacrificial crepes first in order to find the optimal temperature, time and amount of batter needed. To keep the size of the crepes uniformed, use a timer to keep track of time and a small ladle to measure the same amount of batter each time.
- Cook the crepes on low heat with a non-stick pan. I used number 4 heat (out of 10) on my stove top. The batter should sizzle as it hits the pan but not set completely. Consider using a lower cooking temperature if the crepes sets or browns too soon.
- As you cook, the pan may get hotter, you might need to shorten the cooking time moving forward. It may take up to 3 minutes to cook the first few and 1.5 minute for the last ones. The second side usually takes half of the time as the first.
- As soon as the batter hits the pan, tilt the pan to start swirling the batter around to the edge in a circular motion before the batter starts to set. If it sets too soon, either lower the heat or add a bit more water.
- The second side browns a little faster, watch it closely after flipping.
- Making the crepes extra thin will produce a softer and more tender mille crepe. The crepe should almost be too thin to handle and translucent like a stretched out balloon. It may take some skill and practice to flip such a thin crepe. When cooking the first side, pick up the edge with a pair of silicone tongs, if it doesn't tear, it is ready to be flipped with a flat spatula.
- Use silicone tongs instead of metal to prevent crepes from tearing.
- To make the crepes extra thin, add some of the water to the batter to thin it out immediately before cooking. My recipes (see links below) will list how much water to add. After adding the water, the batter should look runny and not gooey. As soon as it hits the pan, it should sizzle.
- Once the crepes are cooked, place them on a cooling rack before stacking together on a plate so the steam can evaporate and prevent them from getting soggy.
- If not assembling the crepes immediately, lay a piece of parchment paper in between each layer and store it in an airtight box for up to 2 days.
- When assembling, spread an appropriate amount of filling on each layer. Soft fillings like cream should be spread sparingly as the cake disassembles easily without support.
- When using whipped cream as filling, stabilize it by adding powdered sugar or gelatin. A firmer filling prevents the crepes from sliding around.
- It's easier to slice the cake after it has time to set in the fridge. Allow it to set fully by refrigerating it overnight.
- Slice the cake with a very sharp knife for a defined edge.
Crepe Cake Recipes To Try
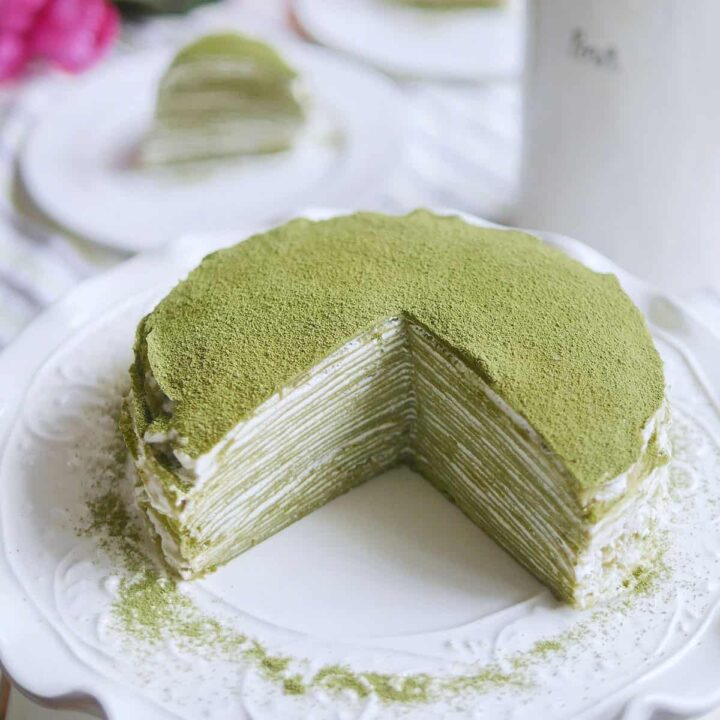
Here are a few crepe cakes you can try making. One is the ever popular matcha crepe cake made with Japanese green tea and the other is the insta-famous rainbow crepe cake that has the whole internet buzzing.
*Source: https://www.manilatimes.net/meet-the-inventor-of-the-mille-crepe/405618/
Susan says
making a tiered crepe cake - Hey Mimi! Do you have any tips on the best nutella filling to make it stable? I'm making a 3 tier crepe cake for a wedding and am worried it might run away off the table.... thanks!
Mimi says
I would stabilize the whipped cream and then fold the Nutella in. Here is my stabilized whipped cream with gelatin recipe.
XOXO,
Mimi
Lili says
Hi Mimi,
May I ask how much gelatin should we use for every 100ml of both dairy and non dairy whipping cream?
Thank you very much
Mimi says
To stabilize cream for the crepe cake, I recommend using this recipe here: stabilized whipped cream with gelatin.
XOXO,
Mimi
Saba says
Hey mimi,
How much gelatin should we use if we are using the heavy cream as the filling.
I made a nutella crepe cake but the cake kept falling apart .
Thanks
Mimi says
Hi Saba,
It depends on the recipe you are using. I'm not quite sure if your nutella filling already has whipped cream in it or if you are applying nutella only onto the crepe... perhaps you can ask the writer of your particular nutella filling recipe how to adjust the cream better for more stability.
If it were me, I would try making a stabilized whipped cream with this recipe and then folding nuttella inside. XOXO, Mimi
Javeria says
hello Mimi ❤️
I had a question regarding the setting of the crepe cake after assembling it..... is it safe to refrigerate my tiramisu crepe cake overnight for it to set completely before eating it?? I also used heavy cream in it which becomes whipped with other ingredients added to it.....also if not can u suggest a time for long I should let it set?!
Thank u :))))
Mimi says
Hi Javeria,
Since I am not sure about the ingredients you used in your tiramisu filling, I cannot be certain. It's best to check with the recipe writer. My only concern would be if the filling contained a lot of moisture and is meant to be consumed within a shorter period of time to prevent the cake from getting soggy. In most cases, crepe cakes do need to chill to set in the fridge so that it can be cut without falling apart. I usually let me Matcha and VAnilla crepe cakes set overnight for the best results. Additional time would not be needed after that point.
XOXO,
Mimi
Pearly says
Hi, Mimi!
Thanks for the useful tips in making the mille crepe cake. I'd like to know how to prevent the cake from doming during assembly, meaning how to spread the cream evenly so that the end result is a thoroughly flat-topped cake.
Mimi says
Hi Pearly,
Do you have a scraper tool? It will help to flatten the cream out with it.
XOXO,
Mimi
Bibiana says
Hi, could you freeze a crepe cake? If you can, how long?
Mimi says
Hi Bibiana,
The crepes can be frozen with parchment paper in between each, I would not freeze it with the filling, especially if it's whipped cream based. The crepes can last a month in the freezer, just take it out to thaw in the fridge and then assemble with filling when you're ready.
XOXO,
Mimi