
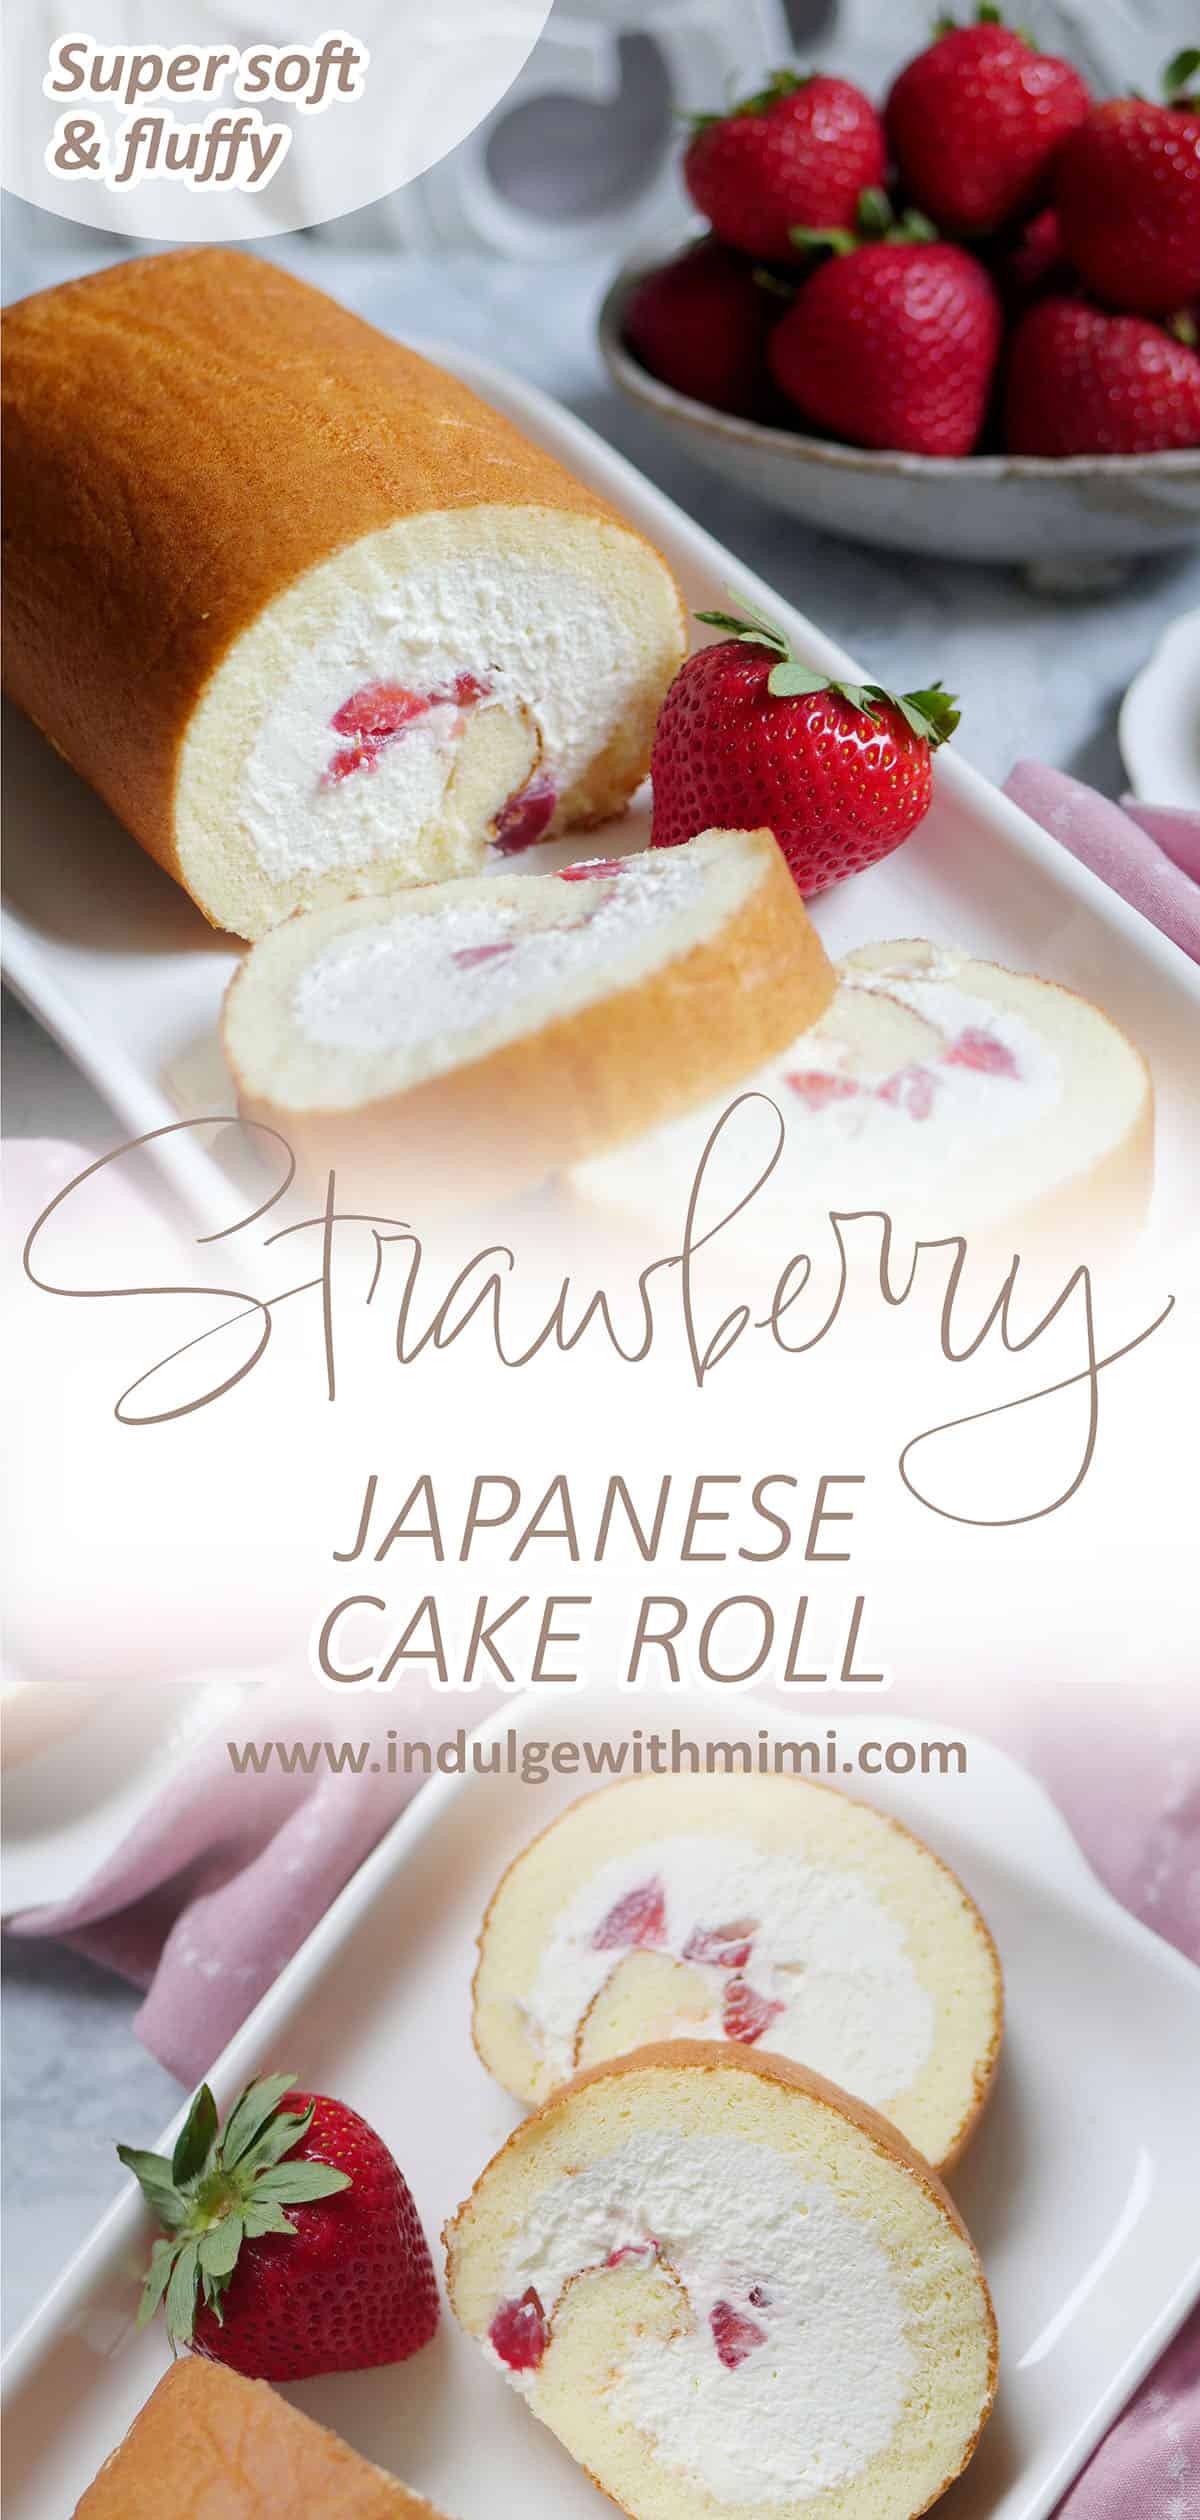
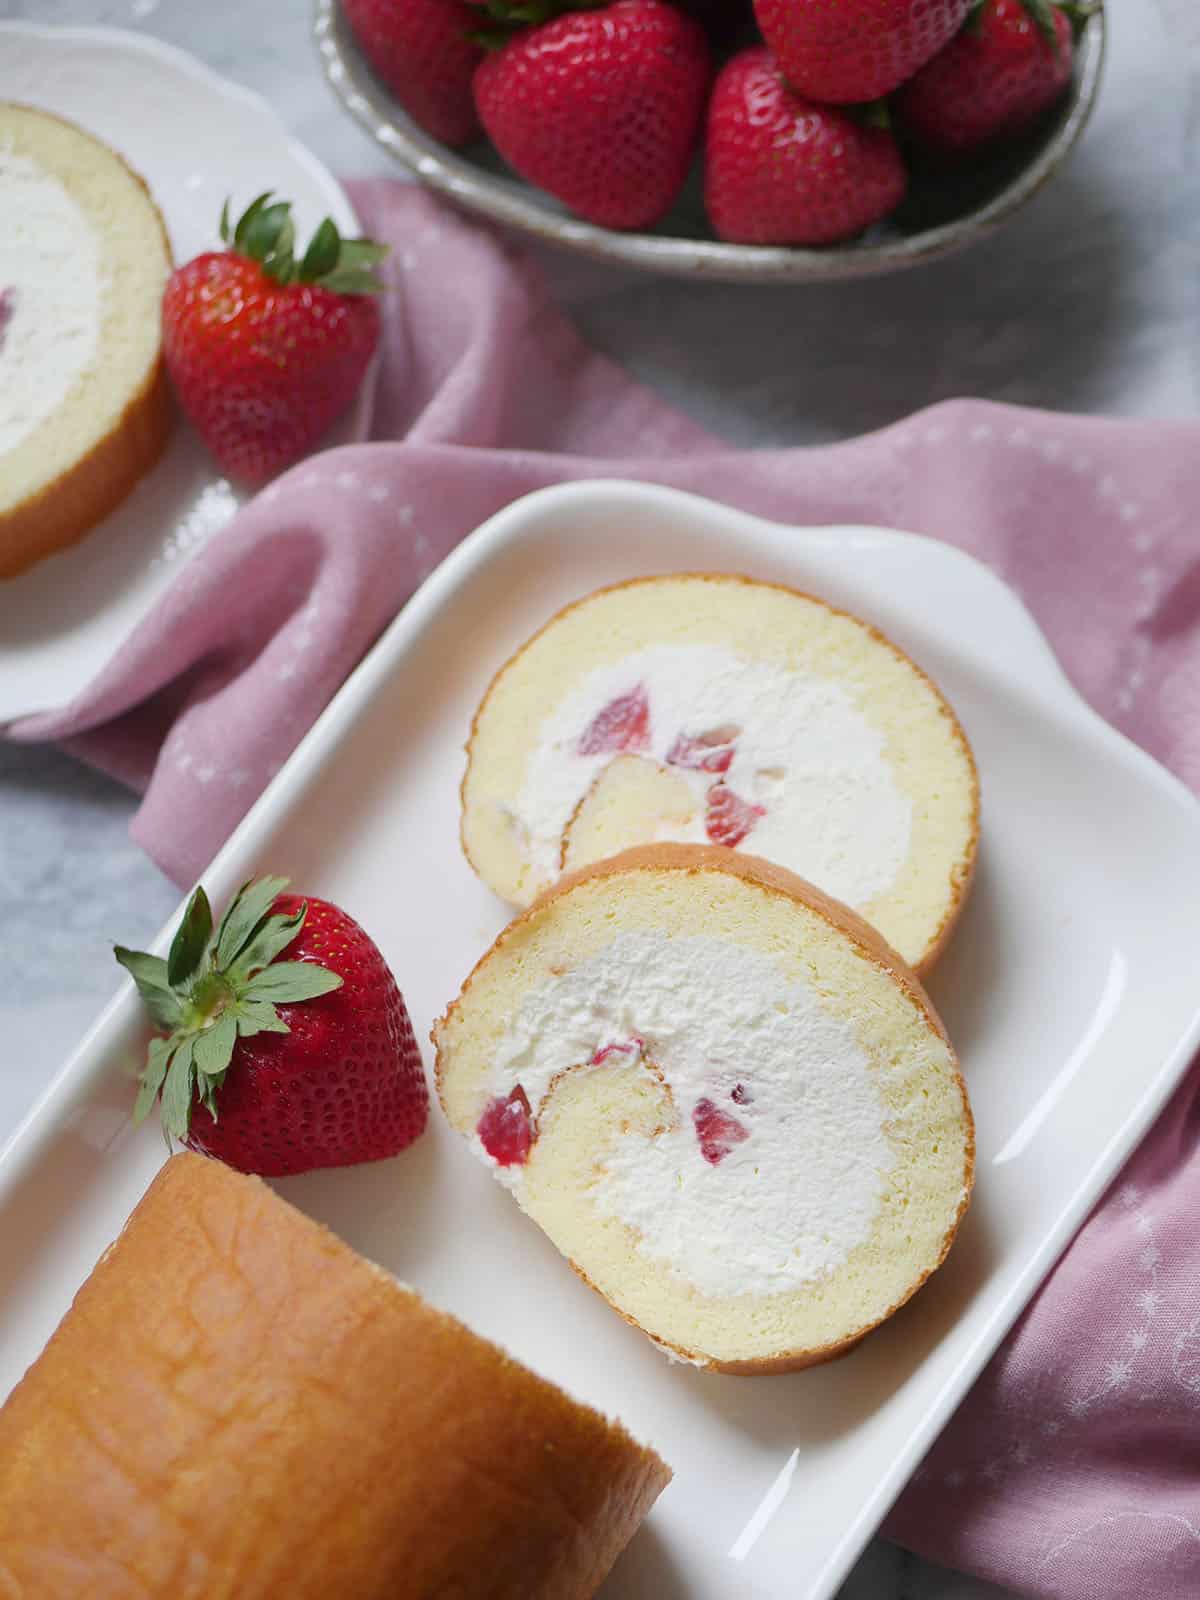
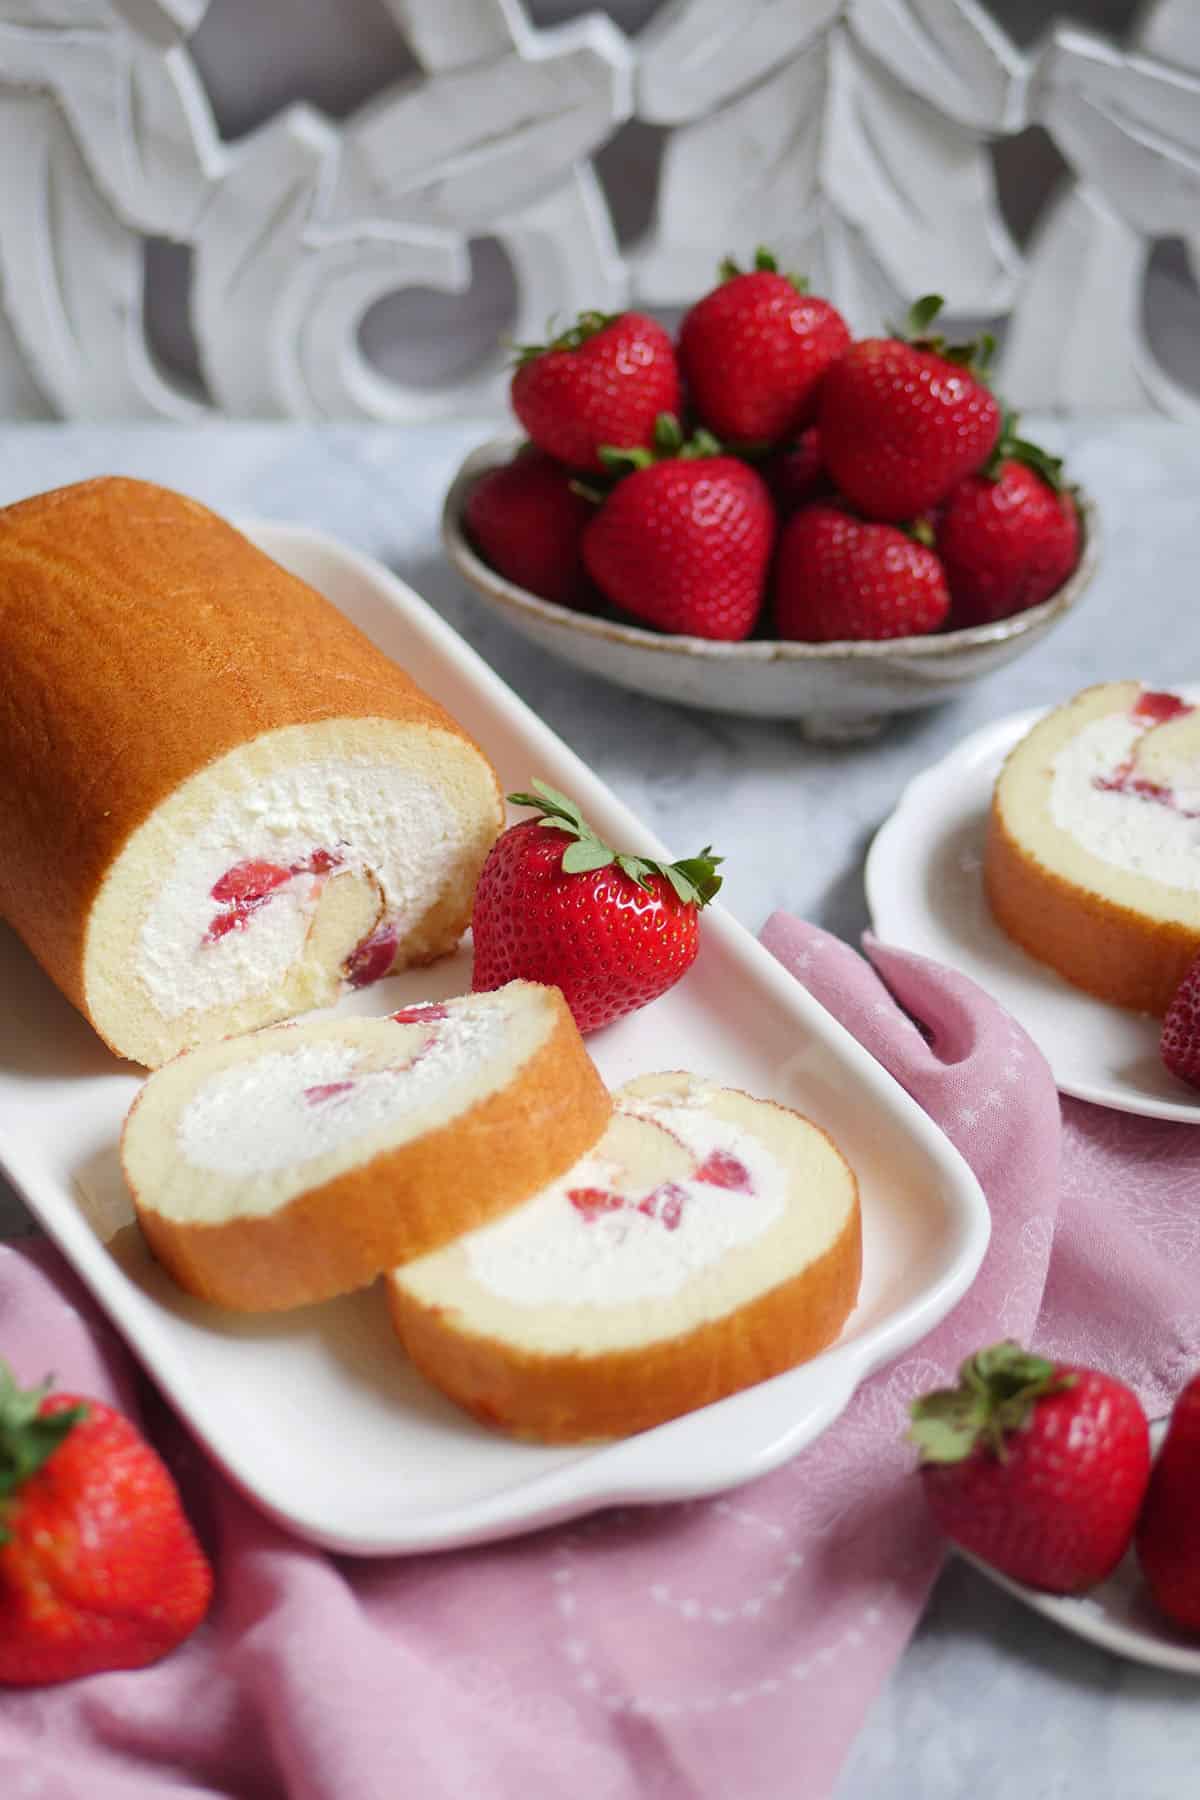
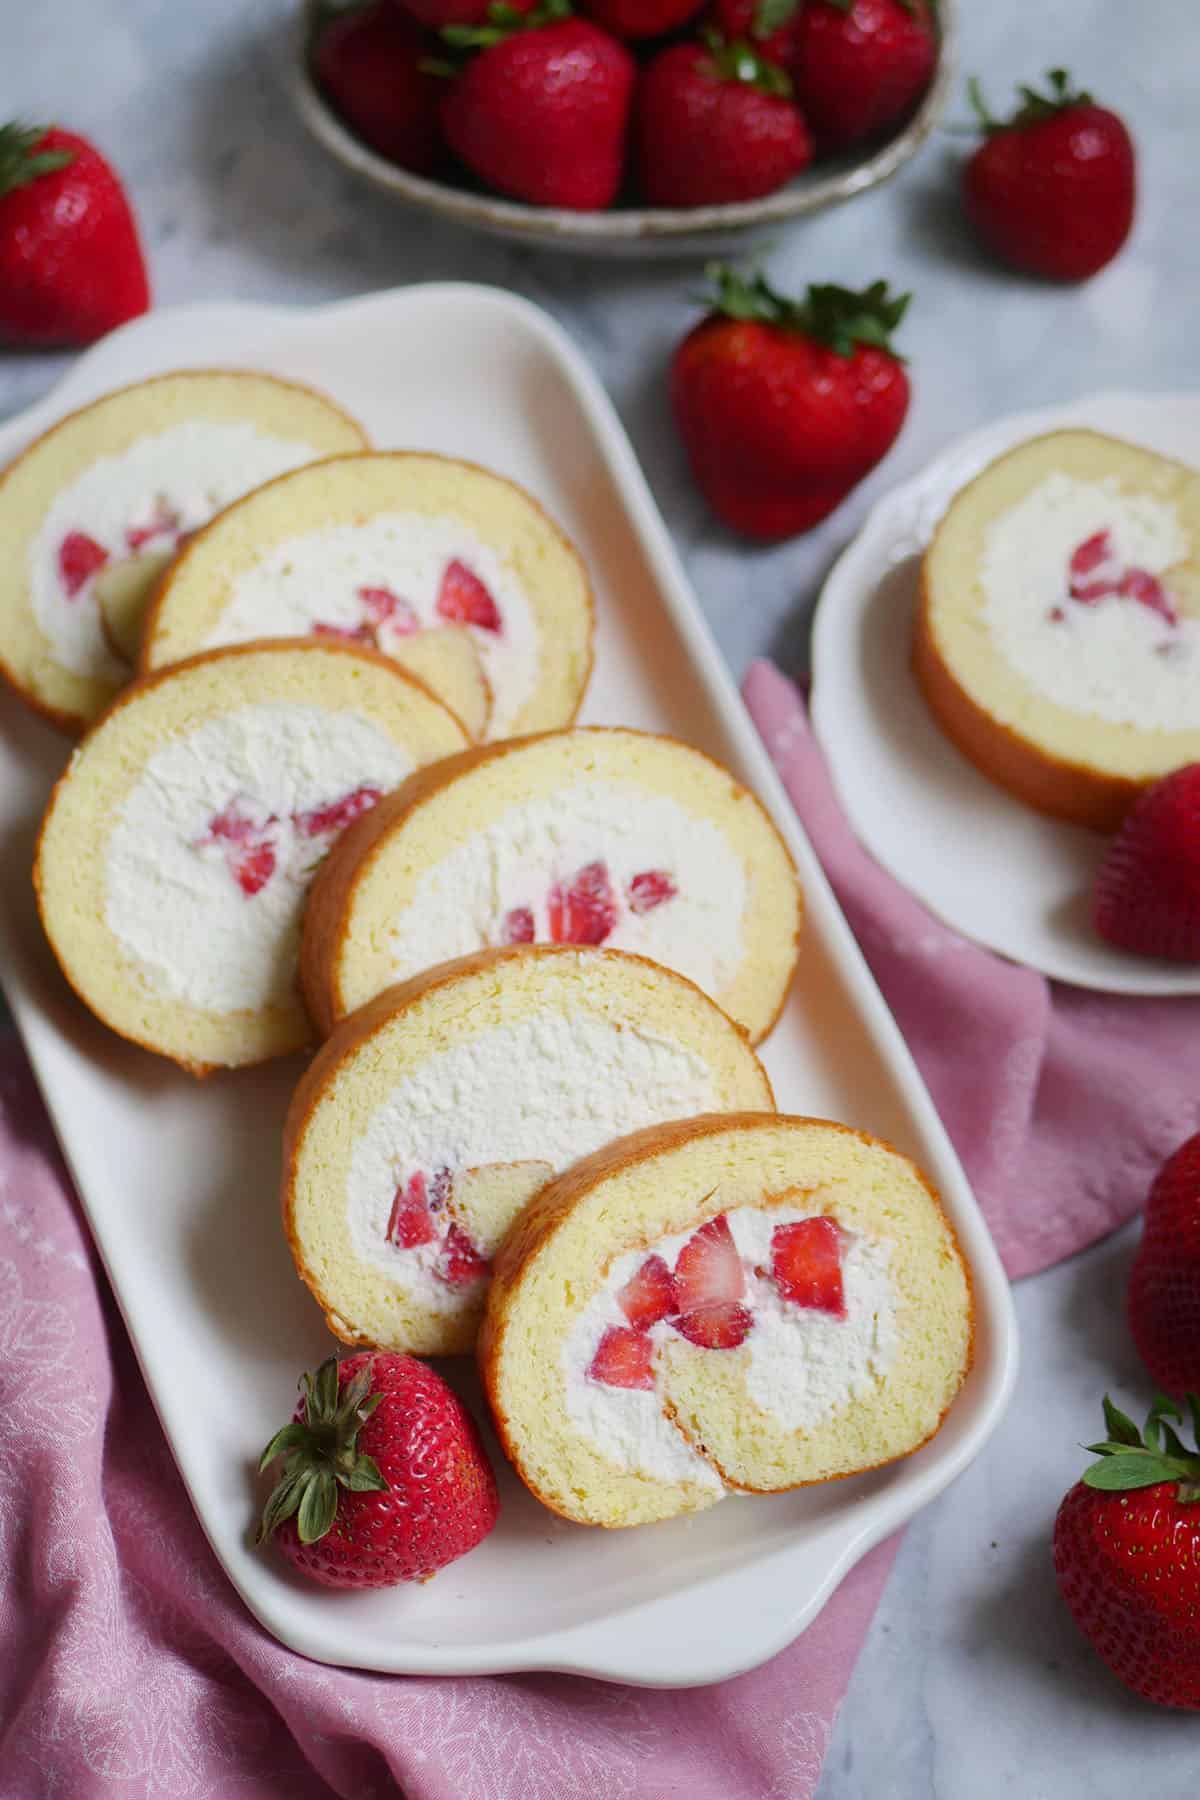
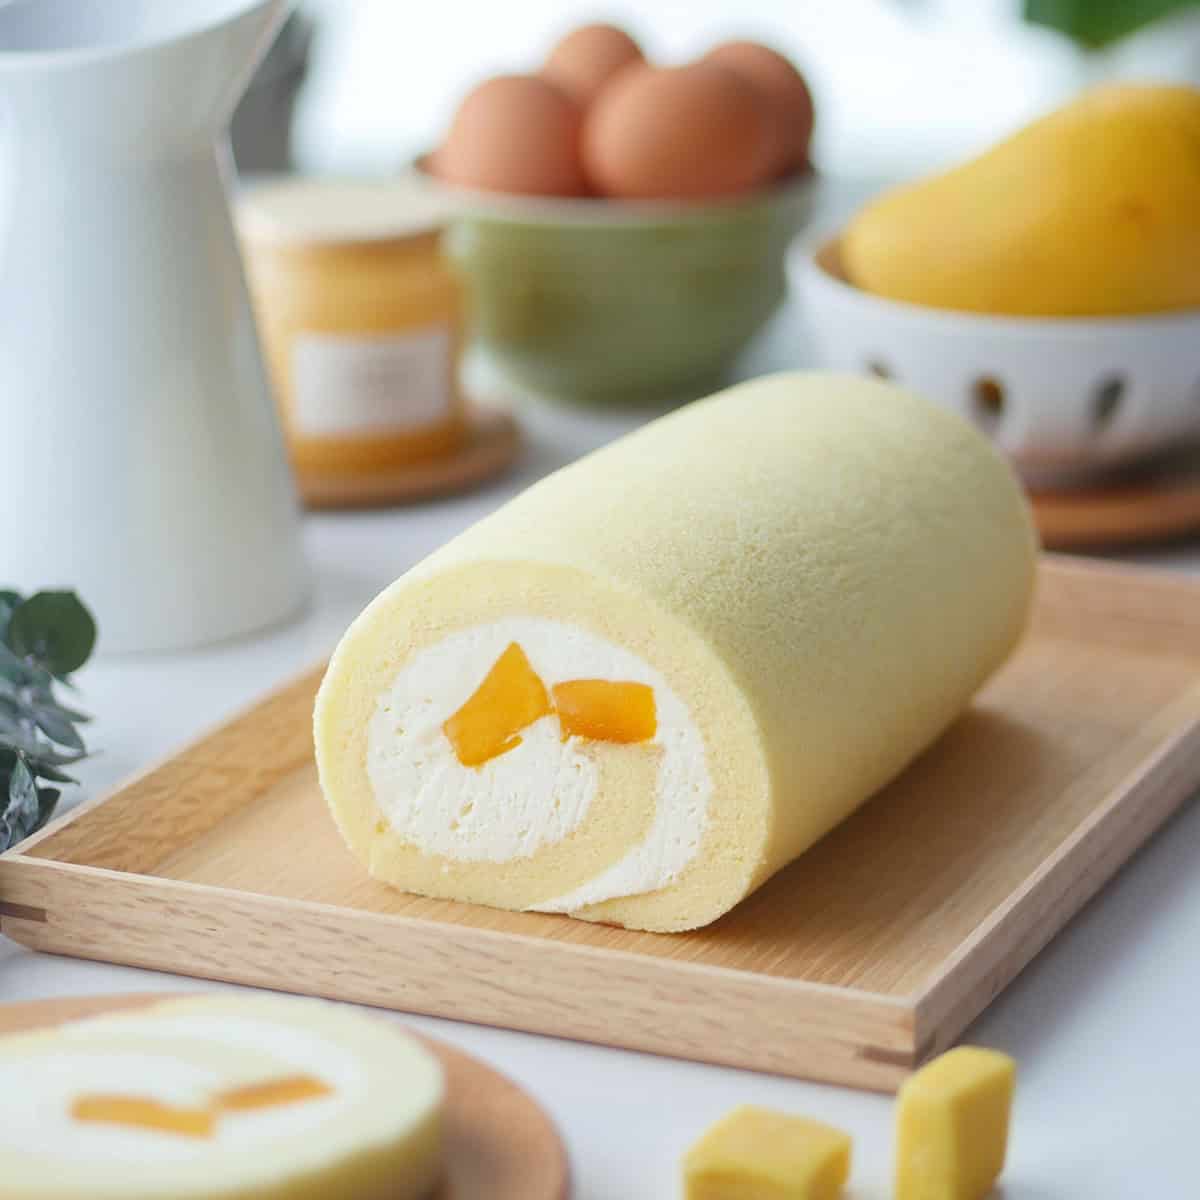
A fluffy and moist Japanese cake roll filled with fresh strawberries and a not-too-sweet whipped cream that is stabilized with gelatin. The most heavenly dessert.
Jump to:
- Perfect Not-Too-Sweet Japanese Dessert
- Why You'll Love This Recipe
- Ingredients & Substitutions
- How to Prevent a Cake Roll From Sagging?
- Tips For the Fluffiest Chiffon Cake Roll
- Step-By-Step Strawberry Swiss Roll
- Step By Step - Stabilized Whipped Cream
- How To Make Different Flavored Rolls
- How to Use a Different Sized Pan
- How to Make This Cake a Birthday Cake
- Recipe
Perfect Not-Too-Sweet Japanese Dessert
A light and airy Japanese cake roll filled with strawberries is one of the most requested recipes I had in the last few months. After the success many of you had with my Japanese Chocolate Cake Roll recipe, many expressed the desire to bake a similarly soft and fluffy chiffon cake but in a vanilla flavor so it can be filled with whichever fruit your heart desired. It took a little while because I've been happily writing away over at indulgewithbibi (this month's topic: baby sleep training) but I'm happy to finally share this recipe for a delicious strawberry swiss roll that is made in the not-too-sweet Japanese style.
This strawberry cake roll is by far one of the easiest and most delicious desserts you can make in under an hour and a half from start to finish. I highly recommend you give it a try. And if you've made it and enjoyed it, I challenge you to bring the look of your cake roll up a notch by making fancy patterns on the cake roll with this Fancy Pattern Cake Roll recipe.
XOXO,
Mimi
Why You'll Love This Recipe
- Light & Fluffy - this strawberry cake roll uses a chiffon cake as the base so it's super light and airy.
- Flexible Cake Base - doesn't crack easily when rolled.
- Semi-sweet - made in the Asian dessert style, both the fresh cream filling and the cake base are mildly sweet.
- Pipeable Whipped Cream - unlike regular un-stabilized whipped cream, the stabilized whipped cream in this recipe is sturdy enough for use in cake rolls without drooping and for piping designs.
Ingredients & Substitutions
Japanese Chiffon Cake Base
- Cake Flour - cake flour is a low protein flour which will help make this cake lighter and softer than if using all purpose flour. You can also use "cake & pastry flour" which many stores sell, This is a blend of both flours with a lower protein than AP. It's ok to use AP flour if that is all you have.
- Baking soda + cream of tartar - it acts as a leavening agent in case there is any weaknesses in the meringue. It can be substituted as a group with 1 tsp. baking powder.
- Sea salt - use half the amount if using table salt.
- Granulated sugar - this first set of sugar is added into the wet ingredients to help add moisture and separate the grains.
- Neutral oil - canola, grapeseed, avocado are all good choices.
- Vanilla extract - rounds out all the flavors in the cake.
- Egg whites - fresh egg whites, large size. Preferably at room temperature.
- Granulated sugar - use only granulated sugar, powdered sugar does not work for whipping meringue.
- Cream of tartar - is an acid that helps to stabilize the meringue. It can be substituted with double the amount of lemon juice or vinegar.
Stabilized Whipped Cream
- Granulated sugar - the sweetness level is moderate in this recipe, add an extra 1 teaspoon if you prefer a sweeter taste.
- Heavy cream 36% M.F. - has a milk fat content of at least 36%. It can be substituted with whipping cream (with minimum 30% milk fat) but heavy cream will produce an even more sturdy frosting. It needs to be completely chilled before whipping or else it won't whip up.
- Vanilla extract
- Gelatin powder, unflavored - the Knox brand was used in this recipe. It can usually be found in the baking aisle by the yeast.
- Fresh organic strawberries - this can be substituted with other fruits like mangoes or canned peaches.
How to Prevent a Cake Roll From Sagging?
This fresh strawberry cream cake roll is filled with a fresh whipped cream that is stabilized with gelatin. For cake rolls, I prefer taking some extra steps to stabilize the cream filling because whipped cream has a tendency to deflate after a while. It's completely possible to skip the stabilization part by whipping the cream with sugar and omitting the gelatin - which a lot of recipes do - but you might find that the cream gets a bit sloppy and the shape of the cake roll doesn't hold up as well, especially after a few hours.
For use as a cake topping, whipped cream can be conveniently stabilized with powdered sugar as seen in this recipe. However, for use as a filling, it's preferable to stabilize it with gelatin instead. It may sound intimidating but it's actually quite easy and the results are well worth the effort. If you need extra guidance and tips, here is a complete tutorial on How to Stabilize Whipped Cream with Gelatin.
Tips For the Fluffiest Chiffon Cake Roll
Unlike a sponge cake which uses no or little butter, the pillow-y soft chiffon cake base in this roll uses oil instead. The secret to this Asian bakery-style roll cake is its super fluffy cake base. Here are some tips:
- Use cake flour instead of AP flour.
- Always sift cake flour to prevent clumps.
- Gently incorporate the dry-mix and wet ingredients together until no lumps of flour can be seen. Do not over mix as it will result in a tough cake.
- For the meringue, use room temperature egg whites for better volume.
- Whip the egg whites in a clean non-plastic bowl free of oil and water.
- Gently fold the meringue into the cake batter, retaining the air that you've built into the meringue. Do not stir.
- Use parchment paper to line the cake pan and for rolling. It prevents sticking and tearing of the cake.
Step-By-Step Strawberry Swiss Roll
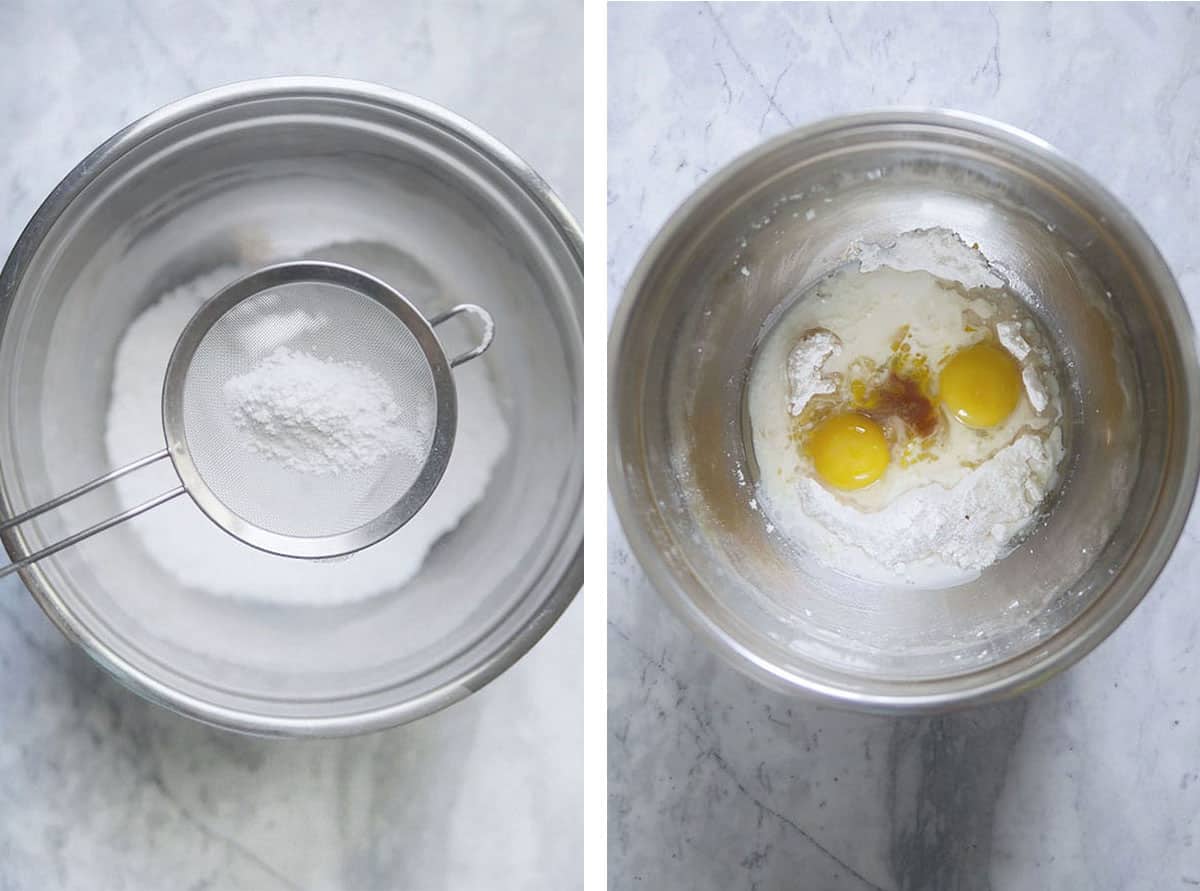
In a large mixing bowl, sift in cake flour, sugar, baking soda, cream of tartar and salt. Stir to combine. I like this type of strainer for sifting dry ingredients because it's quicker and provides better control. Create a well in the center. Inside it, add yolks, oil, vanilla extract and milk.
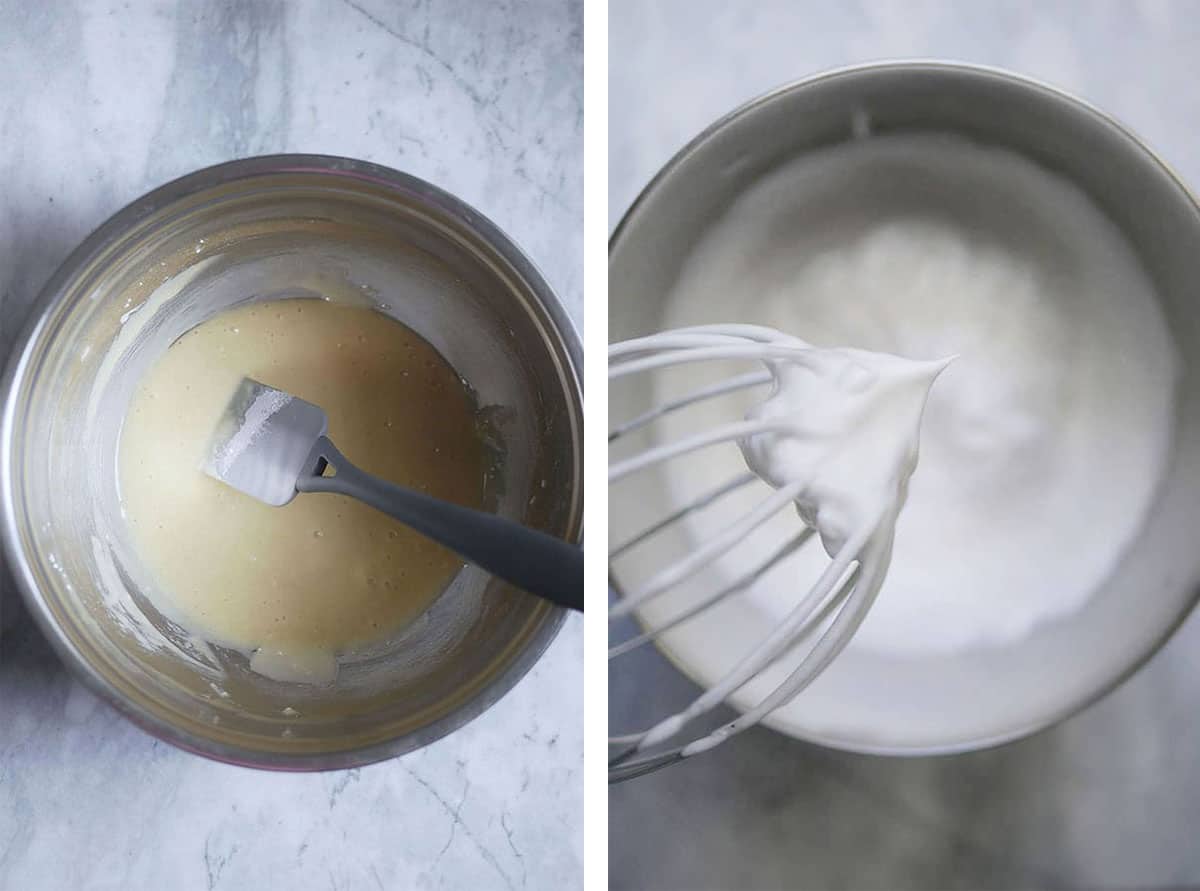
With a spatula, stir to combine until fully incorporated, do not over mix. Set this milk-flour mixture aside.
Next, Make the meringue in a clean and dry, non-plastic mixing bowl (ex. stainless steel mixing bowl or glass mixing bowl). This is crucial as meringues do not whip well in the presence of oil and water. Whip egg whites on slow speed until frothy, add cream of tartar. Whip until stiff peaks as shown in the photo above on the right. When the whisk is pulled out, the meringue does not droop on itself.
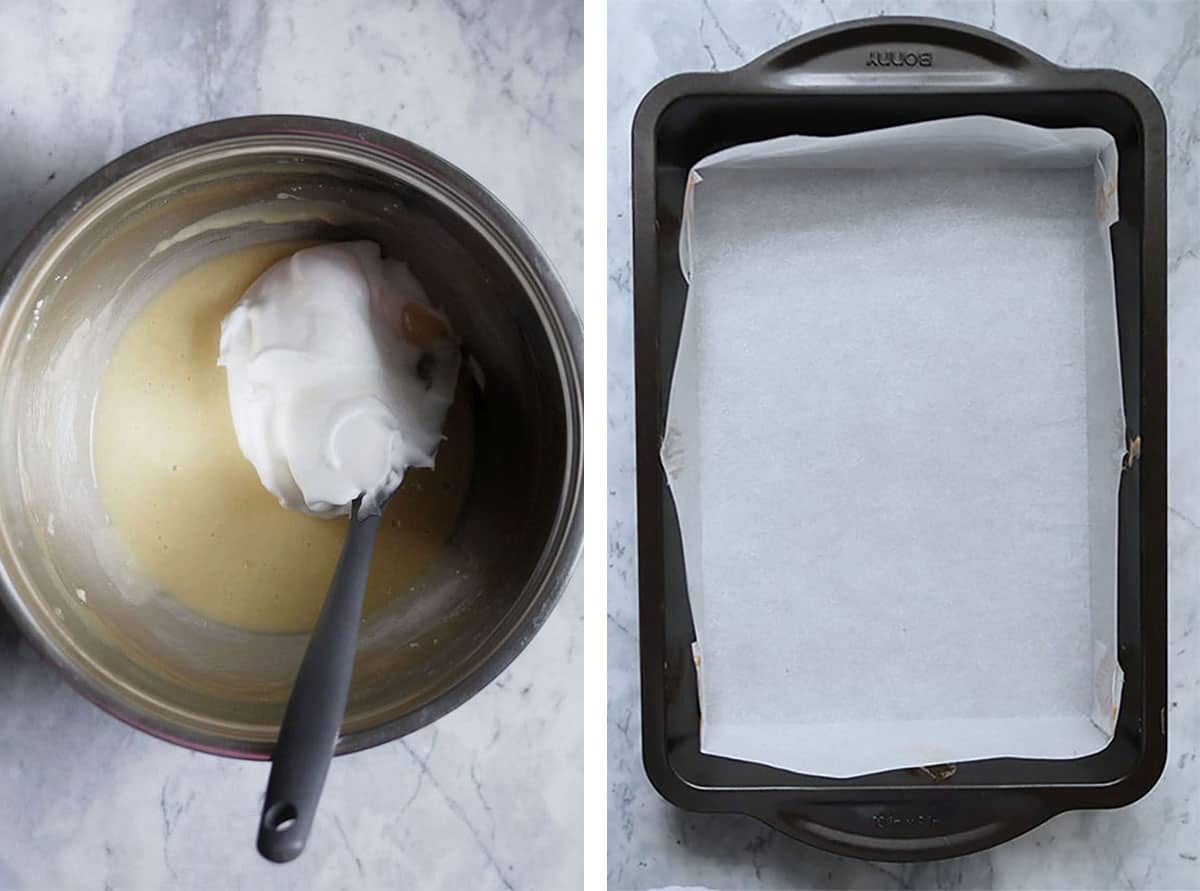
Gently fold the meringue into the cake flour batter until fully incorporated.
Dab a little bit of the batter onto the parchment paper and stick it to the pan to prevent the paper from tipping over into the cake batter. I used a darker colored pan here giving my cake a more golden finish. It turns out this 8 x 12 pan size in this color is a little hard to find, my pan was inherited but I was able to find this one on Amazon for you.
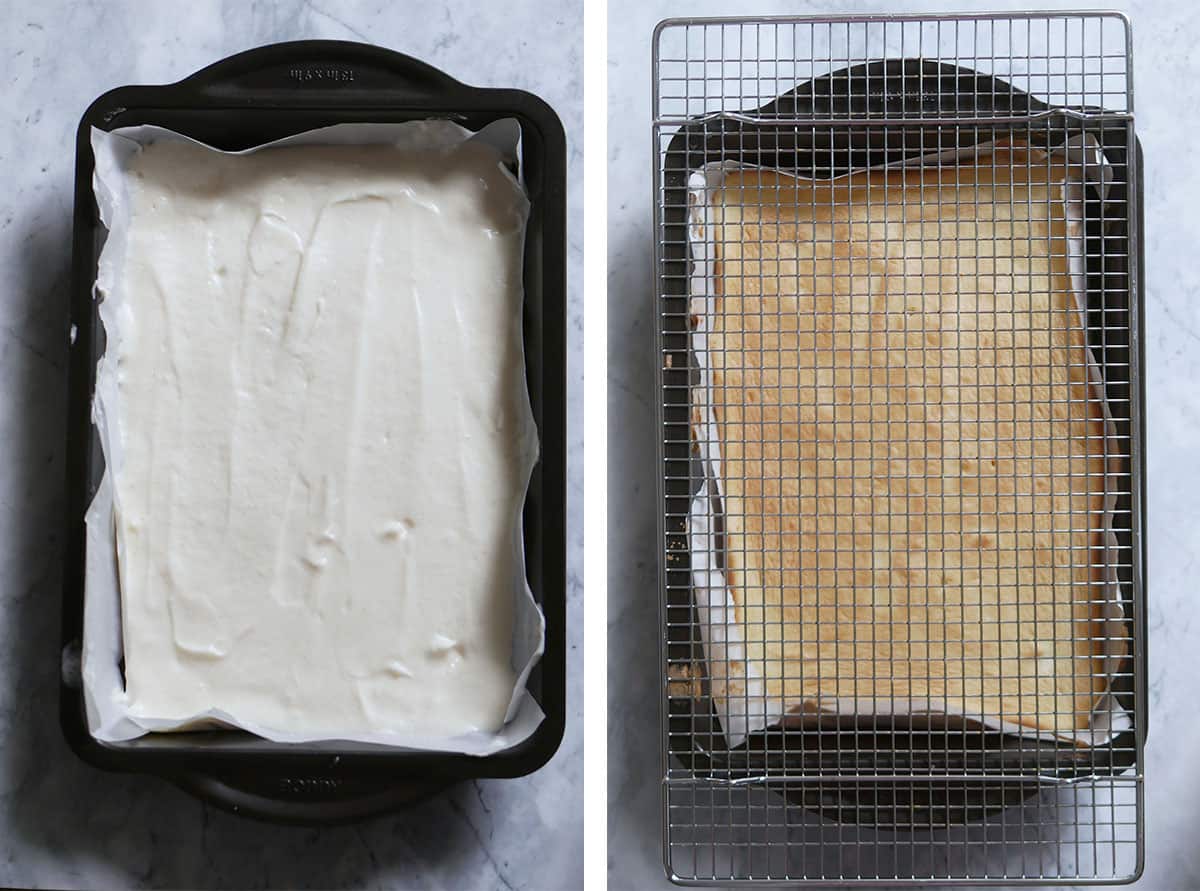
Pour batter into lined cake pan from one spot, spread out the batter evenly with an angled spatula. Rap the cake pan on the counter a few times to rid excess bubbles. Bake for 14-16 min. at 325 F. Let cool 5 min. in the pan before removing. Place cooling rack over cake pan.
Flip cake over onto the rack, remove pan. Gently remove paper. The side facing up will eventually become the top of the cake roll. Let it sit on cooling rack for 5 min.
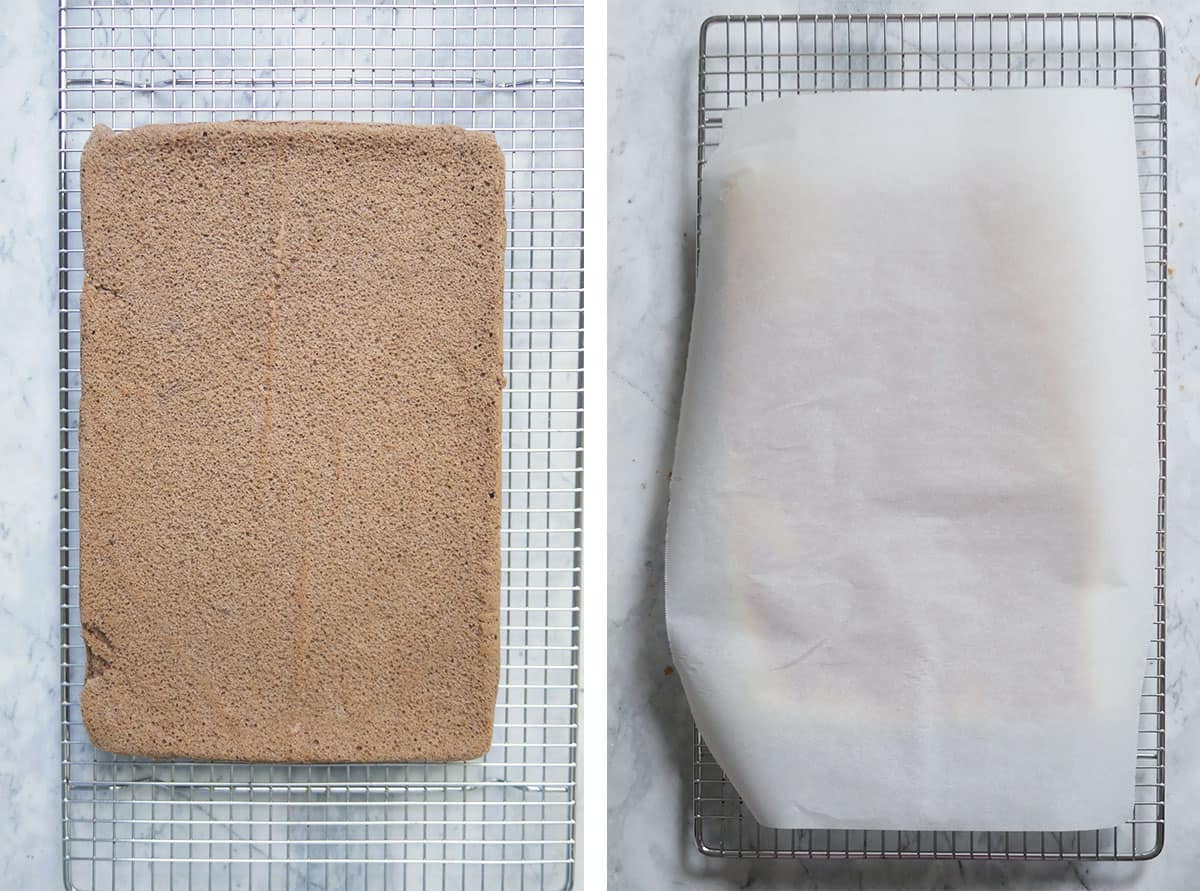
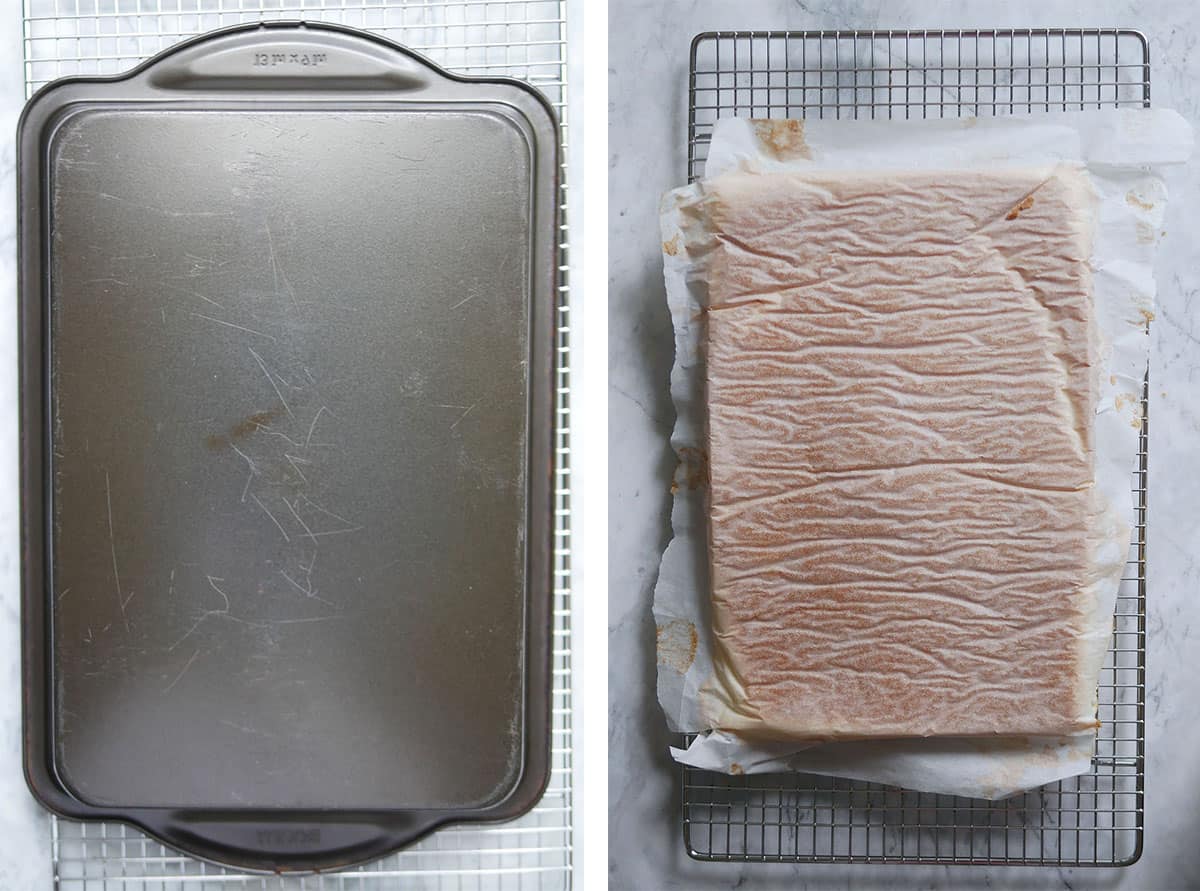
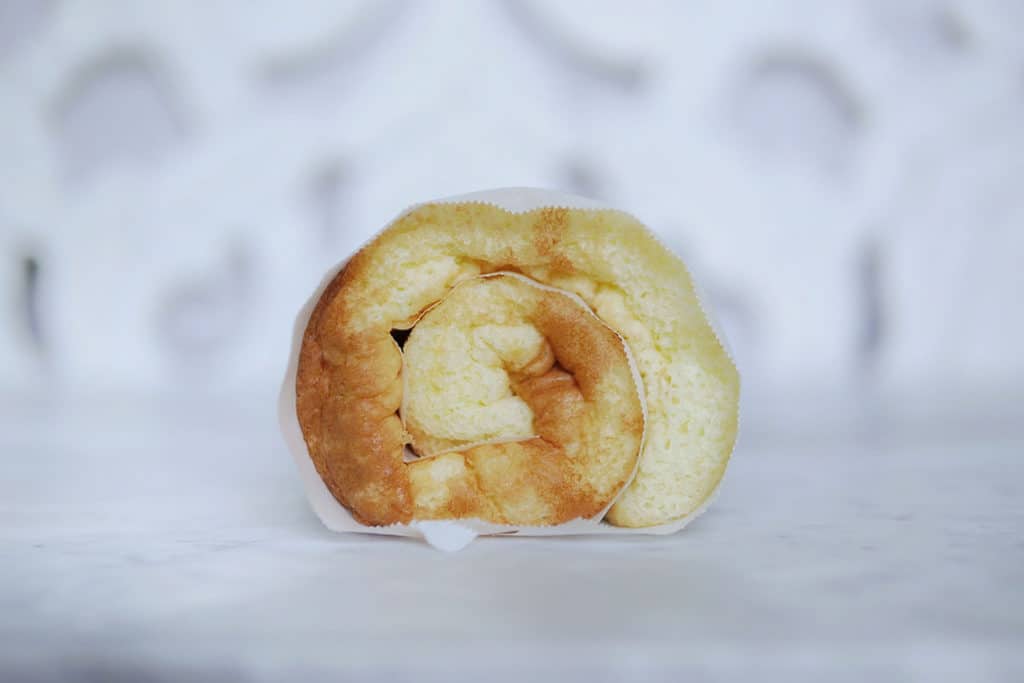
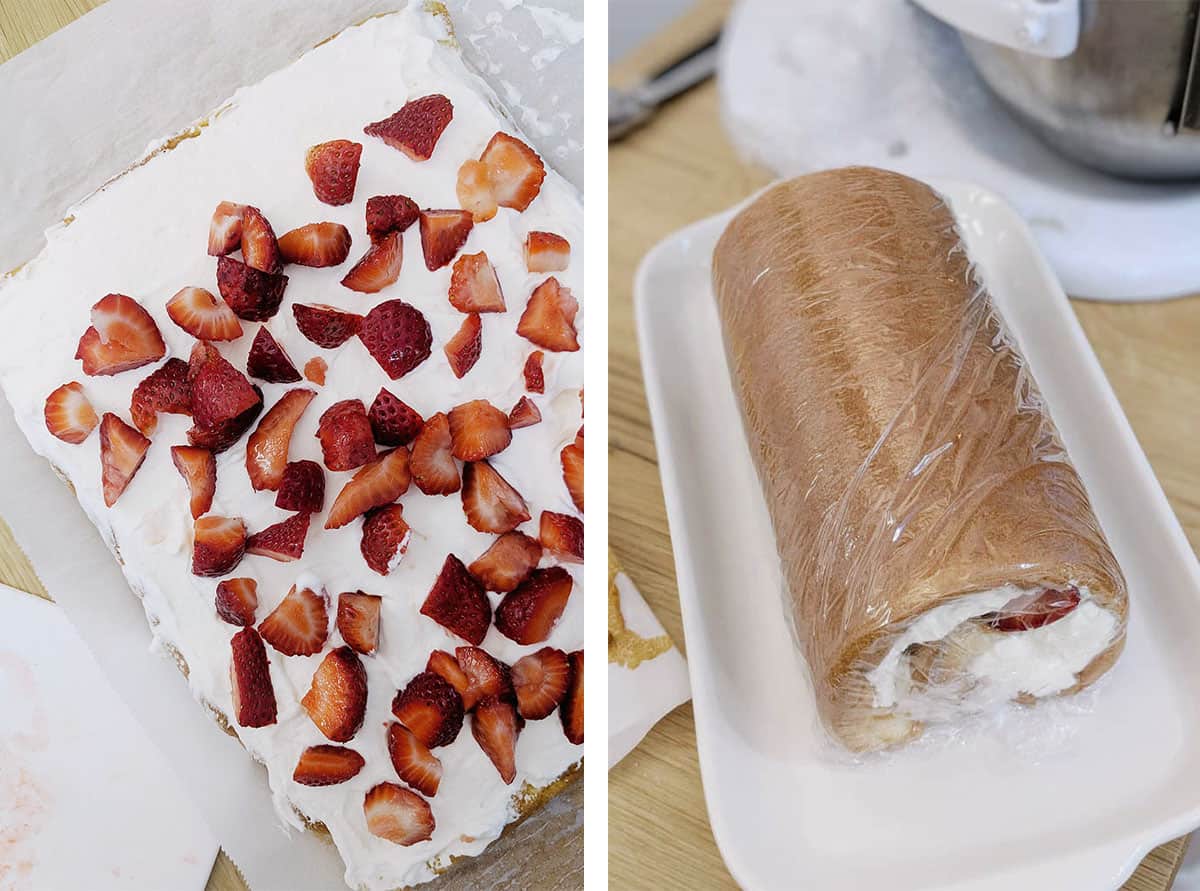
Place a piece of new parchment paper on top of the cake. Flip the cake over and start rolling. Let it cool in this wrapped condition while making the fresh cream.
Step By Step - Stabilized Whipped Cream
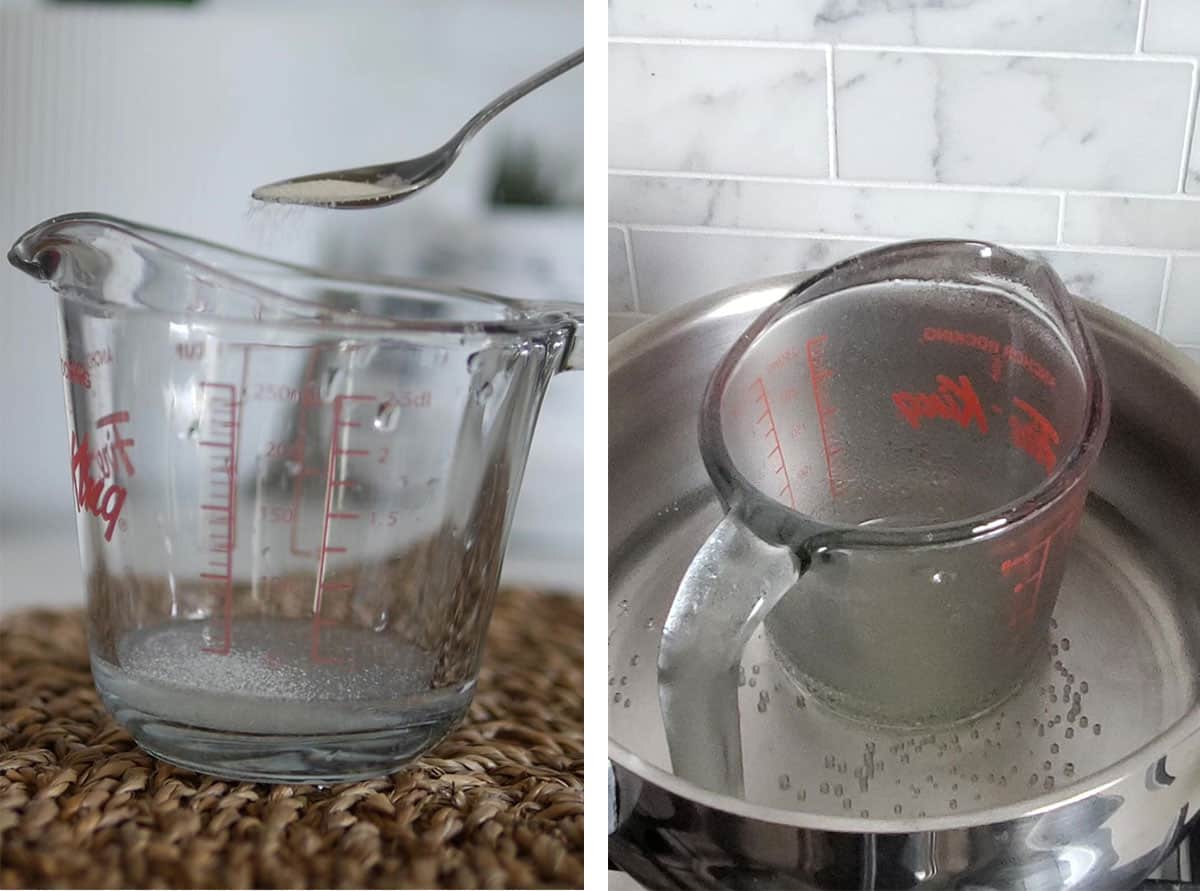
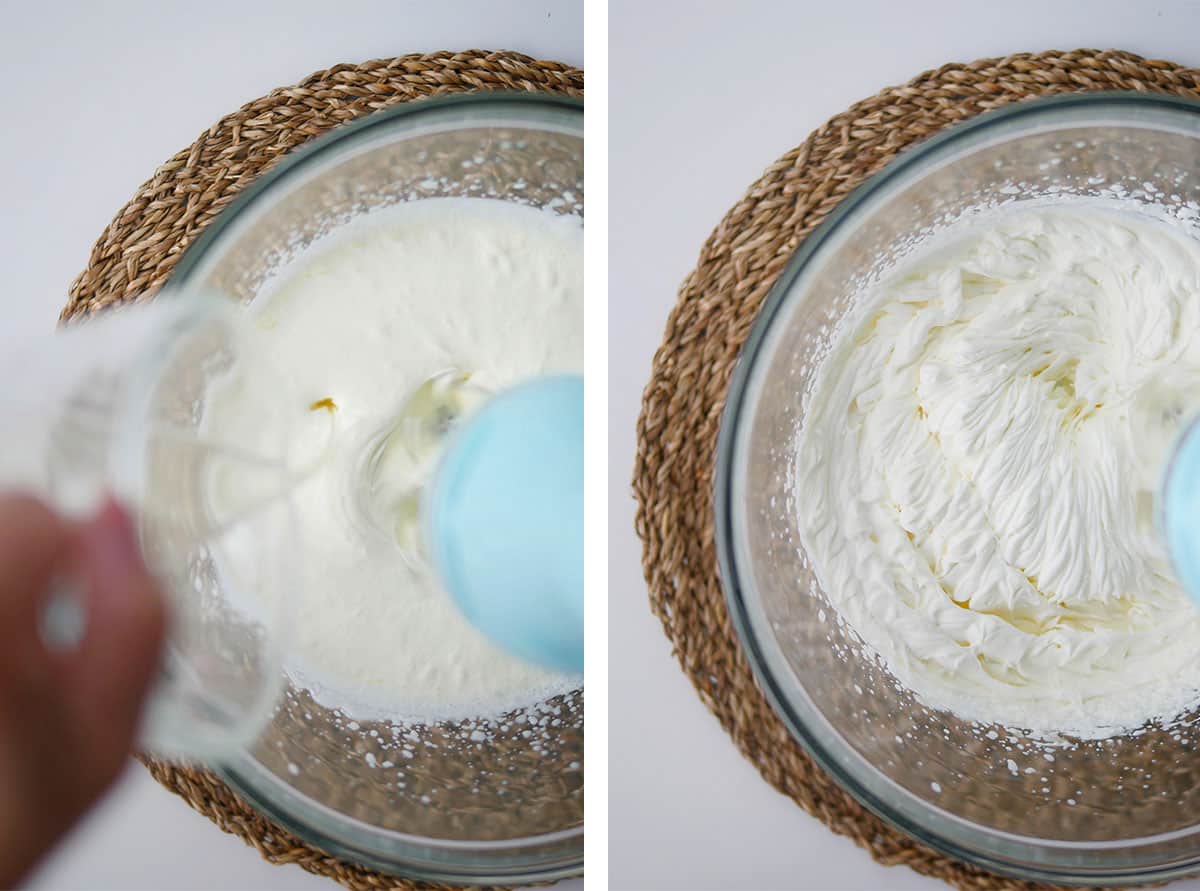
Refrigerate mixing bowl and beaters in the fridge for a minimum of 15 minutes. This will help cream whip better. Clean and pat dry strawberries. Remove the husk and cut into 1 cm sized pieces. Place water in heatproof cup and sprinkle gelatin on top to bloom. Wait 5 minutes. Place cup in a small sauce pan filled with simmering water. Once gelatin becomes liquid, take it out of the water. Let cool on the counter.
Immediately start beating the cream and sugar in a stand mixer fitted with the chilled bowl. Whip on low speed and then increase to medium. Check on the gelatin. It should no longer be warm but still runny.
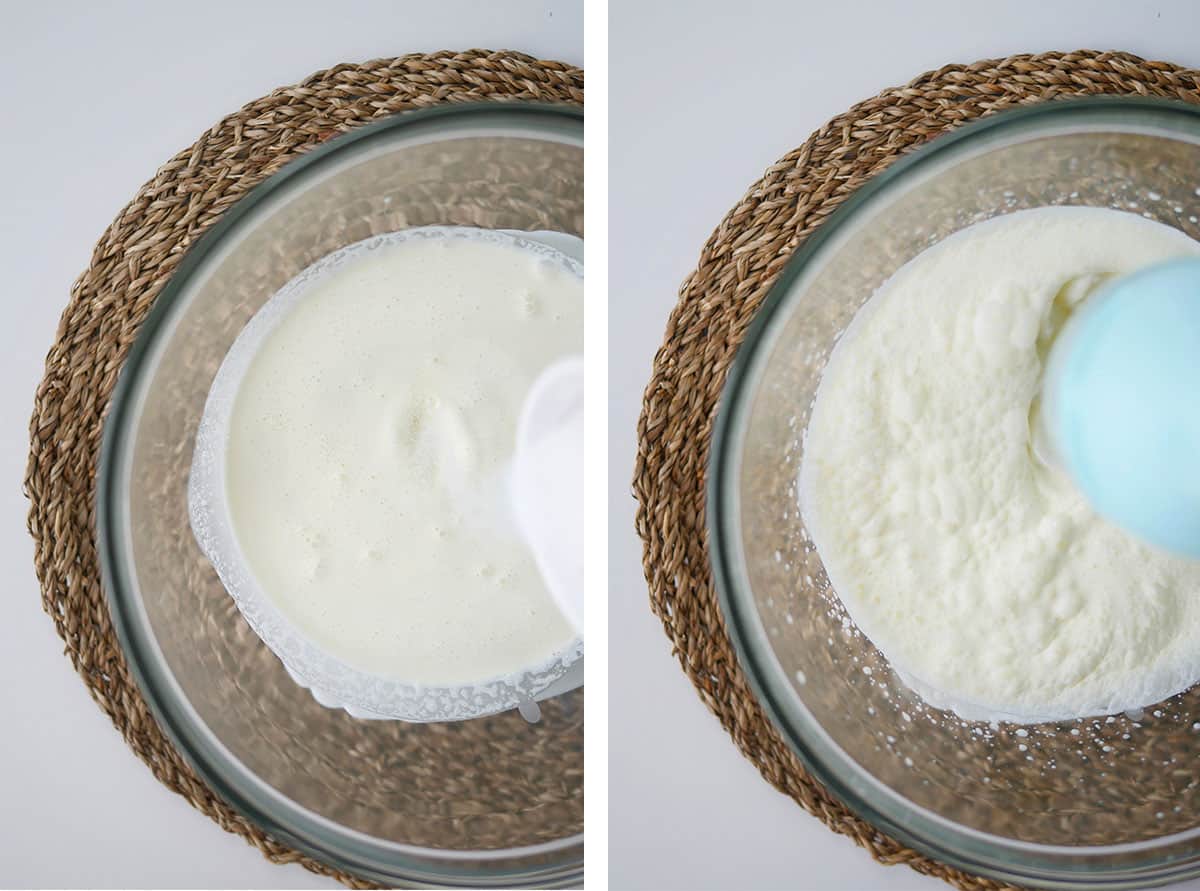
Once the beaters leave tracks in the cream, pour the gelatin into the bowl slowly and steadily. Aim for the area in between the whisk and the bowl. Stop beating once the cream turns stiff. Do not over whip. Use cream to assemble the cooled cake immediately.
Clean and pat dry strawberries, then cut into 1 cm sized pieces. Apply an even layer of cream to unrolled cake roll, spread strawberries evenly apart, then roll up. Wrap cake roll in plastic wrap and place in fridge to set before cutting. Cut off the sides before serving for a cleaner finish.
How To Make Different Flavored Rolls
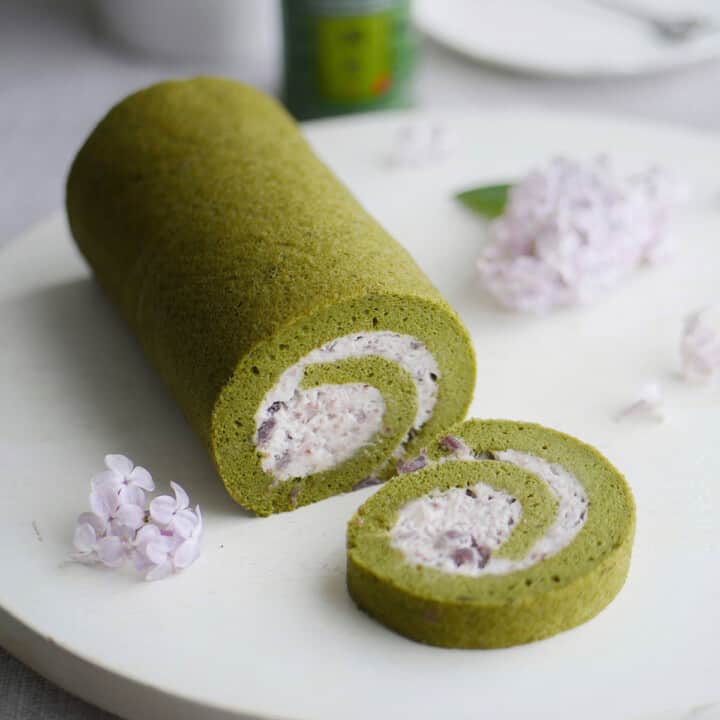
To make the cake roll in different flavors, powders, extracts and infusion-method can be utilized in either the cake base or the filling. Dry powders (like cocoa, matcha etc.) can be added into the cake base with the dry mix like in these recipes: matcha cake roll and gingerbread cake roll.
On the other hand, liquid extracts can be added into the wet mix like in this cotton candy cake roll or vanilla flavored strawberry cake roll). For added flavor and natural coloring, fruit/vegetable purees can be added like in this pumpkin spice cake roll or carrot spice cake roll. Adding ingredients with more liquid composition will take more experimentation. If you want an easier method try the next method below.
Another way to add flavor is to simply add extracts into the cream filling during the whipping process. The flavors can also be infused into the cream by letting the flavored ingredients (like leave leaves) soak/steep inside the cream before using it for whipping (see Earl Grey Tea cake roll, instead of steeping the whipping cream, the leaves are steeped in the milk for the cake batter). Just make sure not to use ingredients with high acidity as it will cause the cream to curdle.
You can even try mixing and matching different flavored cake bases with different cream fillings using these recipes to guide you: chocolate cake roll, matcha cake roll, coffee cake roll, mango cake roll and carrot cake roll.
Lastly, you can make beautiful pattern cake rolls using these recipes: fancy pattern cake roll, bear pattern cake roll, Christmas silent night cake roll and gingerbread man pattern cake roll.
How to Use a Different Sized Pan
You can bake this cake in a different sized pan but note that the quantity of ingredients are at an optimal amount for use with the current pan size resulting in a perfect thickness for rolling without cracking. This Sloppy Peach Cake in a cup recipe will teach you how to bake this cake in different sized pans. It has the same great taste but allows more room for error if you're not confident about rolling the cake base.
How to Make This Cake a Birthday Cake
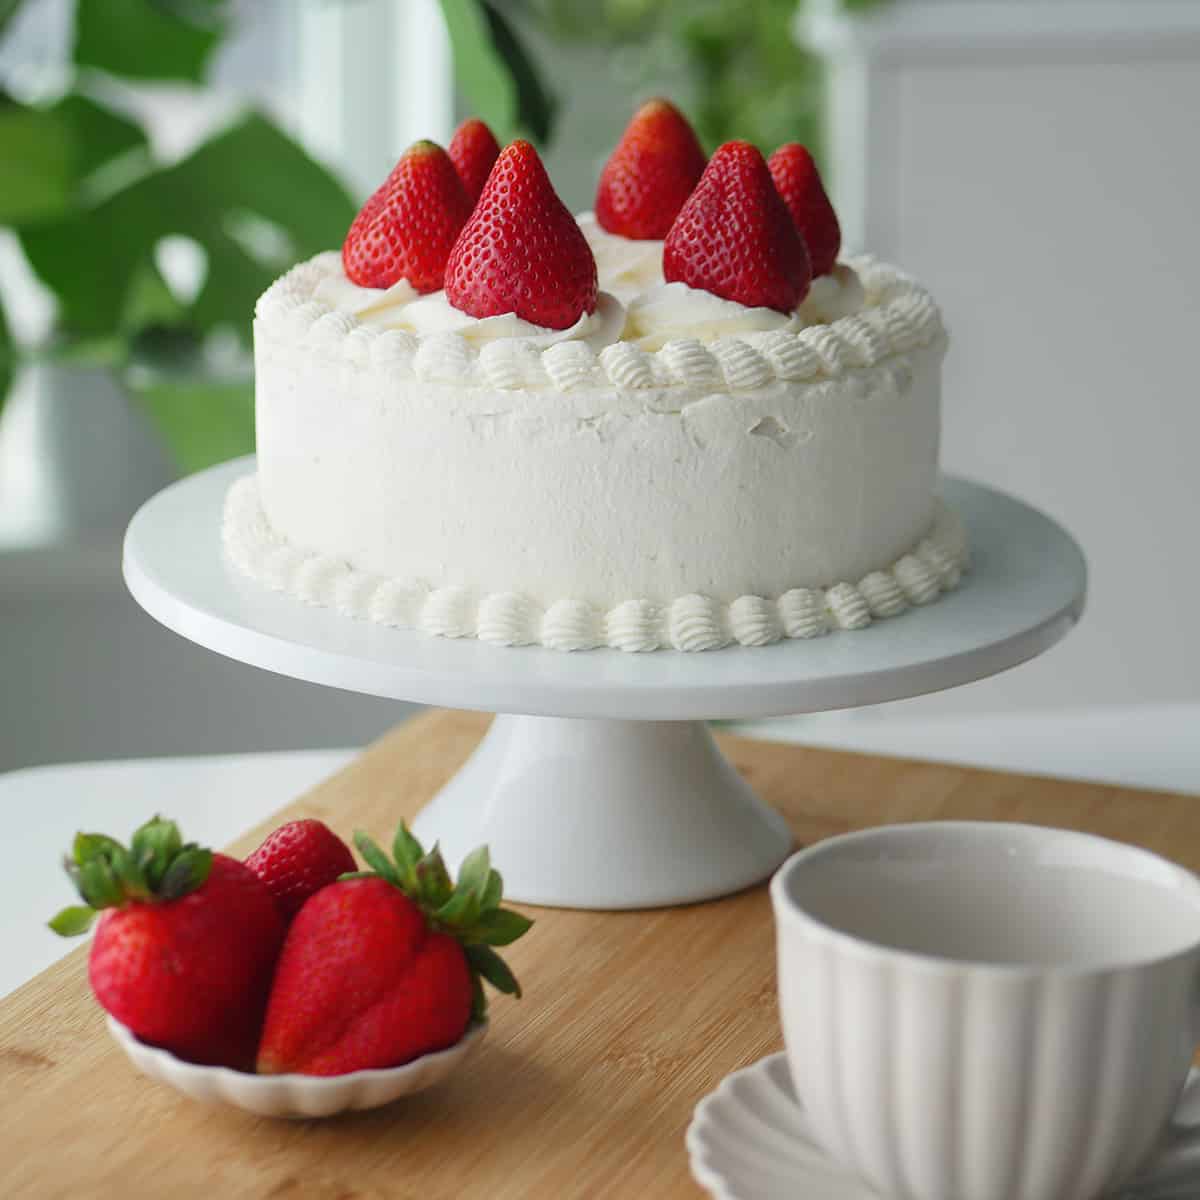
I'm often asked if this cake can be made into a "birthday cake". I completely understand what this question means but a part of me also wants to say, "cake rolls can be birthday cakes too!" Kidding aside, this cake base is super soft and fluffy which makes it perfect for cake rolls but not as sturdy for a round birthday cake that requires stacking and extra cream. I've since worked on adapting this recipe for use as a "birthday cake". The adapted recipe is called: Asian Bakery Strawberry Chiffon Cake.
Recipe
Fresh Strawberry Cream Japanese Cake Roll
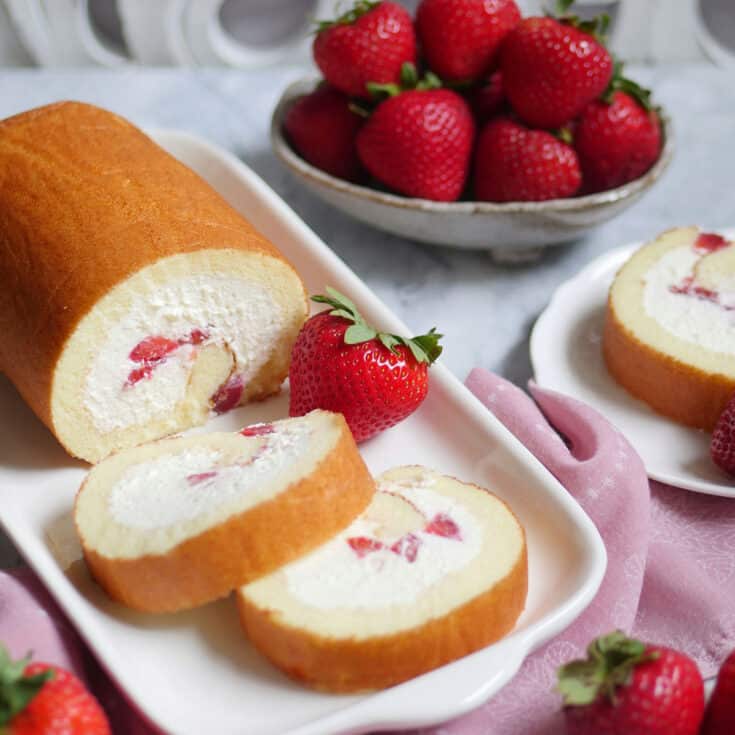
A fluffy and moist Japanese cake roll filled with fresh strawberries and a not-too-sweet whipped cream that is stabilized with gelatin. The most heavenly dessert.
Ingredients
Dry Mix for Japanese Style Chiffon Cake
- 45 grams cake flour*
- ¼ teaspoon baking soda*
- ½ teaspoon cream of tartar*
- ¼ teaspoon sea salt
Wet Mix for Japanese Style Chiffon Cake
- 25 grams granulated sugar
- 50 ml whole fat milk
- 3 egg yolks
- 40 ml neutral oil (e.g. canola, grapeseed, avocado)
- ¼ teaspoon vanilla extract
Meringue for Japanese Style Chiffon Cake
- 4 egg whites
- 50 grams granulated sugar
- ¼ teaspoon cream of tartar*
Stabilized Fresh Cream
- 1 + ¼ teaspoons powdered gelatin
- 5 teaspoons water
- 1 ¼ cup whipping cream (33%)
- 1 tablespoon +¼ teaspoon granulated sugar
- 10 small fresh organic strawberries
Instructions
Japanese Style Chiffon Cake
- Line a 8 X 12" rectangular cake pan with parchment paper.
- Preheat oven to 325 F.
- In a large mixing bowl, sift in dry mix. Stir to combine.
- Create a well in the center. Inside it, add the wet mix.
- Stir to combine until fully incorporated, do not over mix. Set this milk-flour mixture aside.
- Now make the meringue. In a clean and dry, non-plastic mixing bowl, whip egg whites on slow speed until frothy, add cream of tartar.
- Increase speed to medium, once the whites become opaque and bubble size have decreased, add sugar a little bit at a time.
- Increase speed to med-high, whip until stiff peaks.* This is the meringue.
- Gently fold ⅓ of the meringue into the milk-flour mixture to get it moving. Once incorporated, fold in the rest of the meringue. Do not stir. Use batter immediately.
- Dab a bit of the batter onto the sides of the parchment paper to keep corners together. Dab a little more onto the paper and stick it to the pan to prevent the parchment paper from tipping over into the cake batter.
- Pour batter into lined cake pan from one spot, spread out the batter evenly with an angled spatula.
- Tap the pan on the counter to release large air pockets.
- Bake for 14-16 min. at 325 F until a skewer pulls out clean and cake springs back in the center.
- Let cool 5 min. in the pan before removing.
- Place cooling rack over cake pan.
- Flip cake over onto the rack, gently remove paper.
- The side facing up will eventually become the top of the cake roll. Let it sit on cooling rack for 5 min.
- Place a new of parchment paper on top of the cake.
- Flip the cake over and start rolling, allowing the parchment paper to be in between the folds. This will prevent the cake from sticking to itself. It's important to roll the cake before it cools completely, otherwise, it will crack while rolling. Refer to video in post on how to roll.
- Let it cool in this wrapped condition while making the fresh cream.
Stabilized Fresh Cream Instructions
- Refrigerate mixing bowl and beaters in the fridge for a minimum of 15 minutes. This will help cream whip better.
- Clean and pat dry strawberries. Remove the husk and cut into 1 cm sized pieces.
- Place water in heatproof cup and sprinkle gelatin on top to bloom. Wait 5 minutes.
- Place cup in a small sauce pan filled with simmering water. Once gelatin becomes liquid, take it out of the water. Let cool on the counter.
- Immediately start beating the cream and sugar in a stand mixer fitted with the chilled bowl. Whip on low speed and then increase to medium.
- Check on the gelatin. It should no longer be warm but still runny.
- Once the beaters leave tracks in the cream, pour the gelatin into the bowl slowly and steadily. Aim for the area in between the whisk and the bowl.
- Stop beating once the cream turns stiff. Do not over whip.
- Use cream to assemble the cooled cake immediately.
Assembly
- Gently unwrap rolled cake and spread an even layer of cream on it.
- Lay strawberries evenly apart on cream.
- Carefully roll up the cake from the short edge using the parchment paper to help push the cake onto itself.
- Wrap with plastic wrap and place in refrigerator to set before cutting.
- Before serving, cut off sides for a cleaner presentation.
Notes
- Some ingredients are repeated, use them in the same order as outlined in instructions.
- Cake flour is a low protein flour which yields soft fluffy cakes. It is preferred but can be substituted with AP Flour.
- Baking soda and cream of tartar in the dry mix can be substituted as a group with 1 tsp. baking powder.
- Cream of tartar in the meringue helps stabilize it. It can be substituted with double the amount in lemon juice or vinegar.
- Stiff peaks in characterized by the egg whites having pointed peaks that point upwards without drooping when the whisk is pulled out.
Recommended Products
As an Amazon Associate and member of other affiliate programs, I earn from qualifying purchases.
-
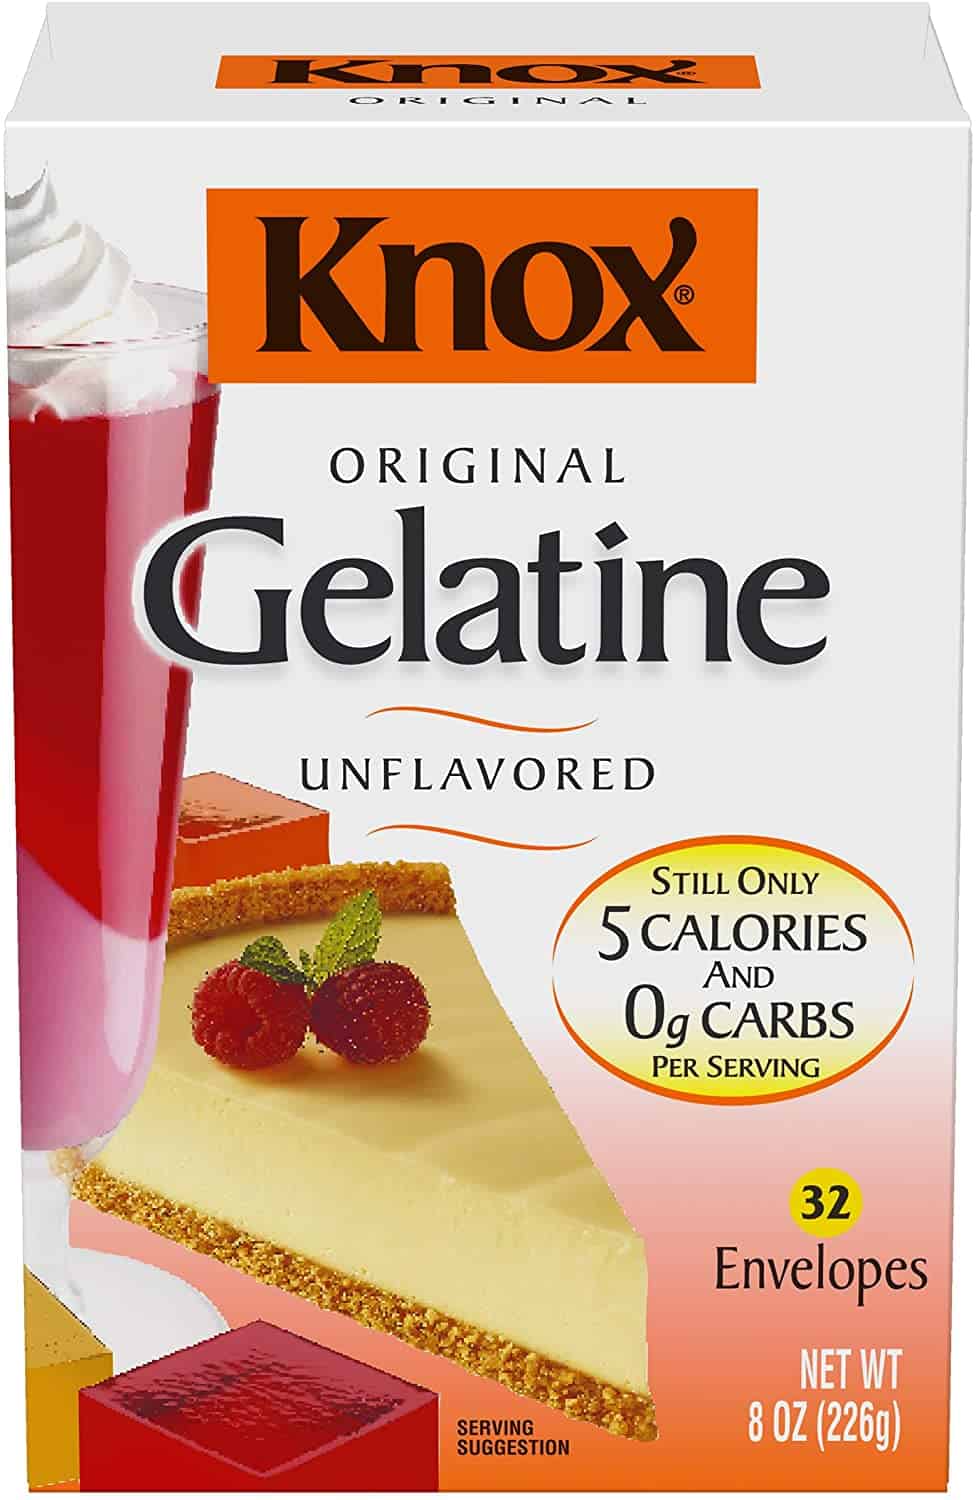 Knox Original Unflavored Gelatine Dessert Mix (32 Packets)
 -
 Wilton Industries Perfect Results Mega Cooling Rack, Black
 -
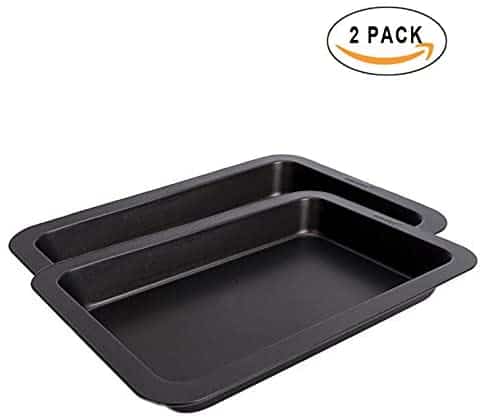 Rectangle Baking Pan
 -
 Vollrath 47934 4-Quart Economy Mixing Bowl, Stainless Steel
 -
 McCormick Gourmet All Natural Cream Of Tartar, 2.62 oz
 -
 PaperChef Culinary Parchment Multipurpose Non-Stick Paper, 205 sq ft
 -
 RYBACK Stainless Steel Egg White Yolk Filter Separator Cooking Tool Dishwasher Safe Chef Kitchen Gadget
 -
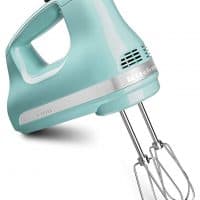 Kitchenaid Handheld Mixer
Nutrition Information
Yield
8Serving Size
1Amount Per Serving Calories 269Total Fat 20gSaturated Fat 10gTrans Fat 1gUnsaturated Fat 9gCholesterol 112mgSodium 151mgCarbohydrates 18gFiber 0gSugar 13gProtein 5g
This information is provided as a courtesy and is an estimate only. This information comes from online calculators. Although indulgewithmimi.com attempts to provide accurate nutritional information, these figures are only estimates.
Note to reader: The format of this recipe was updated on May 17, 2023 to make it more concise. The method, and all ingredients and its quantities, remain the same as before.

Coco says
Hi Mimi, is it alright if I used all 4 egg yolks?
Mimi says
It's ok but it's preferable to follow the recipe for a lighter fluffier cake.
XOXO,
Mimi
Kayla says
Hey, Mimi!,
I'm a big fan of this recipe since it's so similar to a recipe from my family's home country, so I've used it many times.
However, recently, I've been thinking about making this roll cake into a normal cake. Would that be possible for would I need to change the baking style?
Hope to hear from you soon!,
Mimi says
Hi Kayla,
I'm so glad to hear that! It's more suited for a cake roll but can be made into a round cake as well like in this recipe for a half birthday cake. It won't be very firm for supporting heavy frostings or decorations.
XOXO,
Mimi
sue says
I finally got around to trying out this recipe! The chocolate version was delicious and this vanilla version is just as delicious and works too! Although my cake got stuck to the parchment paper and I had to very carefully use a scraper to peel it off - will bake just a tad longer next time. Anyway it doesn’t really matter cos it’s the surface layer that needs to stay pretty 🤩. Also adjusted the amount of egg used as the eggs I have are extra large. Thank you for sharing the recipe! I can finally make a proper vanilla roll cake without breaking the cake and cheating with cream cover-ups! 😂
Mimi says
Hi Sue,
Thanks so much for coming back and letting me know. I'm so happy to hear your results with the extra large egg. It's so nice to hear everyone enjoying this cake!
XOXO,
Mimi
Michelle says
Hi! I’m Having trouble finding an 8x12 cake pan locally. Would any other size be ok to use. Would really love to try your recipe!!!!!
Mimi says
If your pan is bigger, you can use aluminum foil to create a dam and make a "smaller" pan size. You can also bake this cake in a smaller pan. This tutorial will show you how to bake this cake in different sized pans: Peach Cake in a Cup.
XOXO,
Mimi
Echoe von Otto says
Amazing. I'm surprised it turned out so well, especially since it's my first time making a Swiss Roll, but it came out perfect. I want to try making all the different flavors now 🤤
The only change I made was to use 1/2 tsp of pectin instead of the gelatin and water. My cream filling turned out about the consistency of Cool Whip and held up well enough.
Mimi says
I'm so happy you had excellent results with this one. It is definitely one of my favorites as well! Thanks for sharing your experience with using pectin, I'm sure other readers will find this info useful. Happy baking! XOXO, Mimi
Nanxi says
Hi mimi! Is it ok to make the cake portion, roll and refrigerate overnight, and then assemble the cream and strawberries the next day? Or better to just assemble everything the same day and just refrigerate?
Mimi says
Yes, you can do this at different times. I often bake multiple cakes and fill it the next day because I don't have the time to finish working on it all on one day.
XOXO,
Mimi
Apinon says
Can you make the measurements in like cups instead of grams? I searched online and for 25 grams it told me 1/3 cup but when I searched for 50 grams, it told me 1/4. I’m confused 🙁
Mimi says
Hi Apinon,
I hear you. Sometimes it's easier to use cups to weigh out ingredients but we're only using a small amount of some of these ingredients, a scale will be needed to get accurate measurements for more consistent results. The results you're yielding in cups is just a rounded number, so not very accurate.
XOXO, Mimi
Alecia says
Hello
Do you know how to make this with coffee and coffee whip cream. I remember purchasing a coffee Swiss roll from a Japanese bakery and it was so amazing. I moved away and don’t live near any of them anymore.
Mimi says
Hi Alecia,
I wrote a coffee swiss cake roll recipe here. Let me know how you like it:)
XOXO,
Mimi
Kristyn Marujo says
Hi, Mimi,
This cake tastes sooo delicious! Thank you for sharing.
I have a question about the parchment paper. So the first time I tried it - whoops! I used wax paper and ripped the cake apart.
Second time, I used proper parchment paper and waited for the cake to cool, but it still seemed to rip some of the cake off when I peeled it away. I thought maybe it was still too warm, but it seems to be happening consistently. Any ideas? I don't want to coat the parchment paper with any butter/oil and potentially ruin the cake.
Mimi says
I'm so happy to hear the cake worked out well for you. There is no need to coat the parchment paper since that is the parchment paper's job. It's to be non-stick. Try baking the cake until golden, underbaked cakes tend to stick to the paper. It might also be the brand of parchment you're using. If you're not too picky about the looks, then you don't have to invest in getting another brand of paper.
XOXO,
Mimi
Beth says
I absolutely love this recipe. I was wondering if they can be frozen?
Thank you!
Mimi says
I'm so happy to hear your feedback on this recipe. I would not freeze this cake as it contains whipped cream and it doesn't usually defrost very well. The cake might tear very easily if you try to freeze just the cake portion and fill it later. However, if you fill the cake with a buttercream instead, the assembled cake roll can be frozen and defrosted for later consumption. I remember another commenting that he made the chocolate version of this cake and this is what worked for him 🙂
XOXO, Mimi
Ema Mori says
Hi Mimi,
Thank you so much for this amazing recipe! I can’t remember how but I came across this last year and I’ve made it approximately 4 times so far - every time it is absolutely perfect and reminds me of the cakes my grandma used to give me in Japan ❤️
Mimi says
Hi Ema,
I'm so happy to hear that! Especially the part about how it reminded you of your grandma. She sounds like a great baker! I was so inspired by Japanese desserts after living there for a year. It brings back great memories. I hope you'll continue to make many more cake rolls in the different flavors I've posted.
XOXO,
Mimi
Loella Dela cruz says
Hello! 🥰
I made this a lot of times and it is the best!so fluffy and yummyyyy.
I just made 4 batches for Christmas Eve tomorrow 🎄
I’m just wondering if I’m not putting the whipped cream yet can I leave it in room temperature or keep the cake in the fridge? Thank you!!!🥰
Mimi says
Hi Loella,
Sorry for the delay. I took some time off. I'm happy you had such good results with it. Generally, for food safety, the cake should only be kept out at room temperature for no longer than 2 hours. If your kitchen is not too hot, it can be kept out for longer without the whipped cream. After that, just keep it rolled up in the fridge until you're ready to fill it.
XOXO,
Mimi
CeeJay says
Thank you so much Mimi for this awesome recipe. I have made this for my dad who doesn’t like any cakes other than costco tiramisu and he approved. He was also impressed as i am not an experienced baker which shows that anyone can make this!! Looking forward to more easy recipes that you can share. Thank you 🙏
Mimi says
I'm so happy to hear you made this for your dad. He's one lucky guy! There's a new carrot cake roll I just wrote or try some of the other flavors in this cake roll series. Looking forward to hear more of your baking adventures!
XOXO,
Mimi
Donna says
This recipe is so easy! Turns out everytime I make it. I have made this and have replaced the whipped cream filling with a cream cheese frosting and strawberries. Very yummy!!
Mimi says
Hi Donna,
Thanks for the feedback. I'm so glad you love it. I made it twice this week too. I hope you'll try some of the other flavors too! There's a new carrot cake one which is pretty interesting.
XOXO,
Mimi
ffr says
this recipe seems to be the best one out there but i do not have cream of tartar, would it be ok to substitute it for lemon juice instead?
Mimi says
For the dry mix, you can omit the tartar and soda and use 1 tsp baking powder. For the meringue (egg white part), use lemon juice in double the amount.
XOXO, Mimi
Noreen says
Hi Mimi,
I am planning on swapping matzah cake flour and making for Passover tomorrow. I think/hope it will work?Also, If I make today and serve tomorrow night will it stay fresh?
Thanks!
Noreen
Mimi says
Hi Noreen,
Yes you can definitely make this a day ahead 🙂
XOXO,
Mimi