
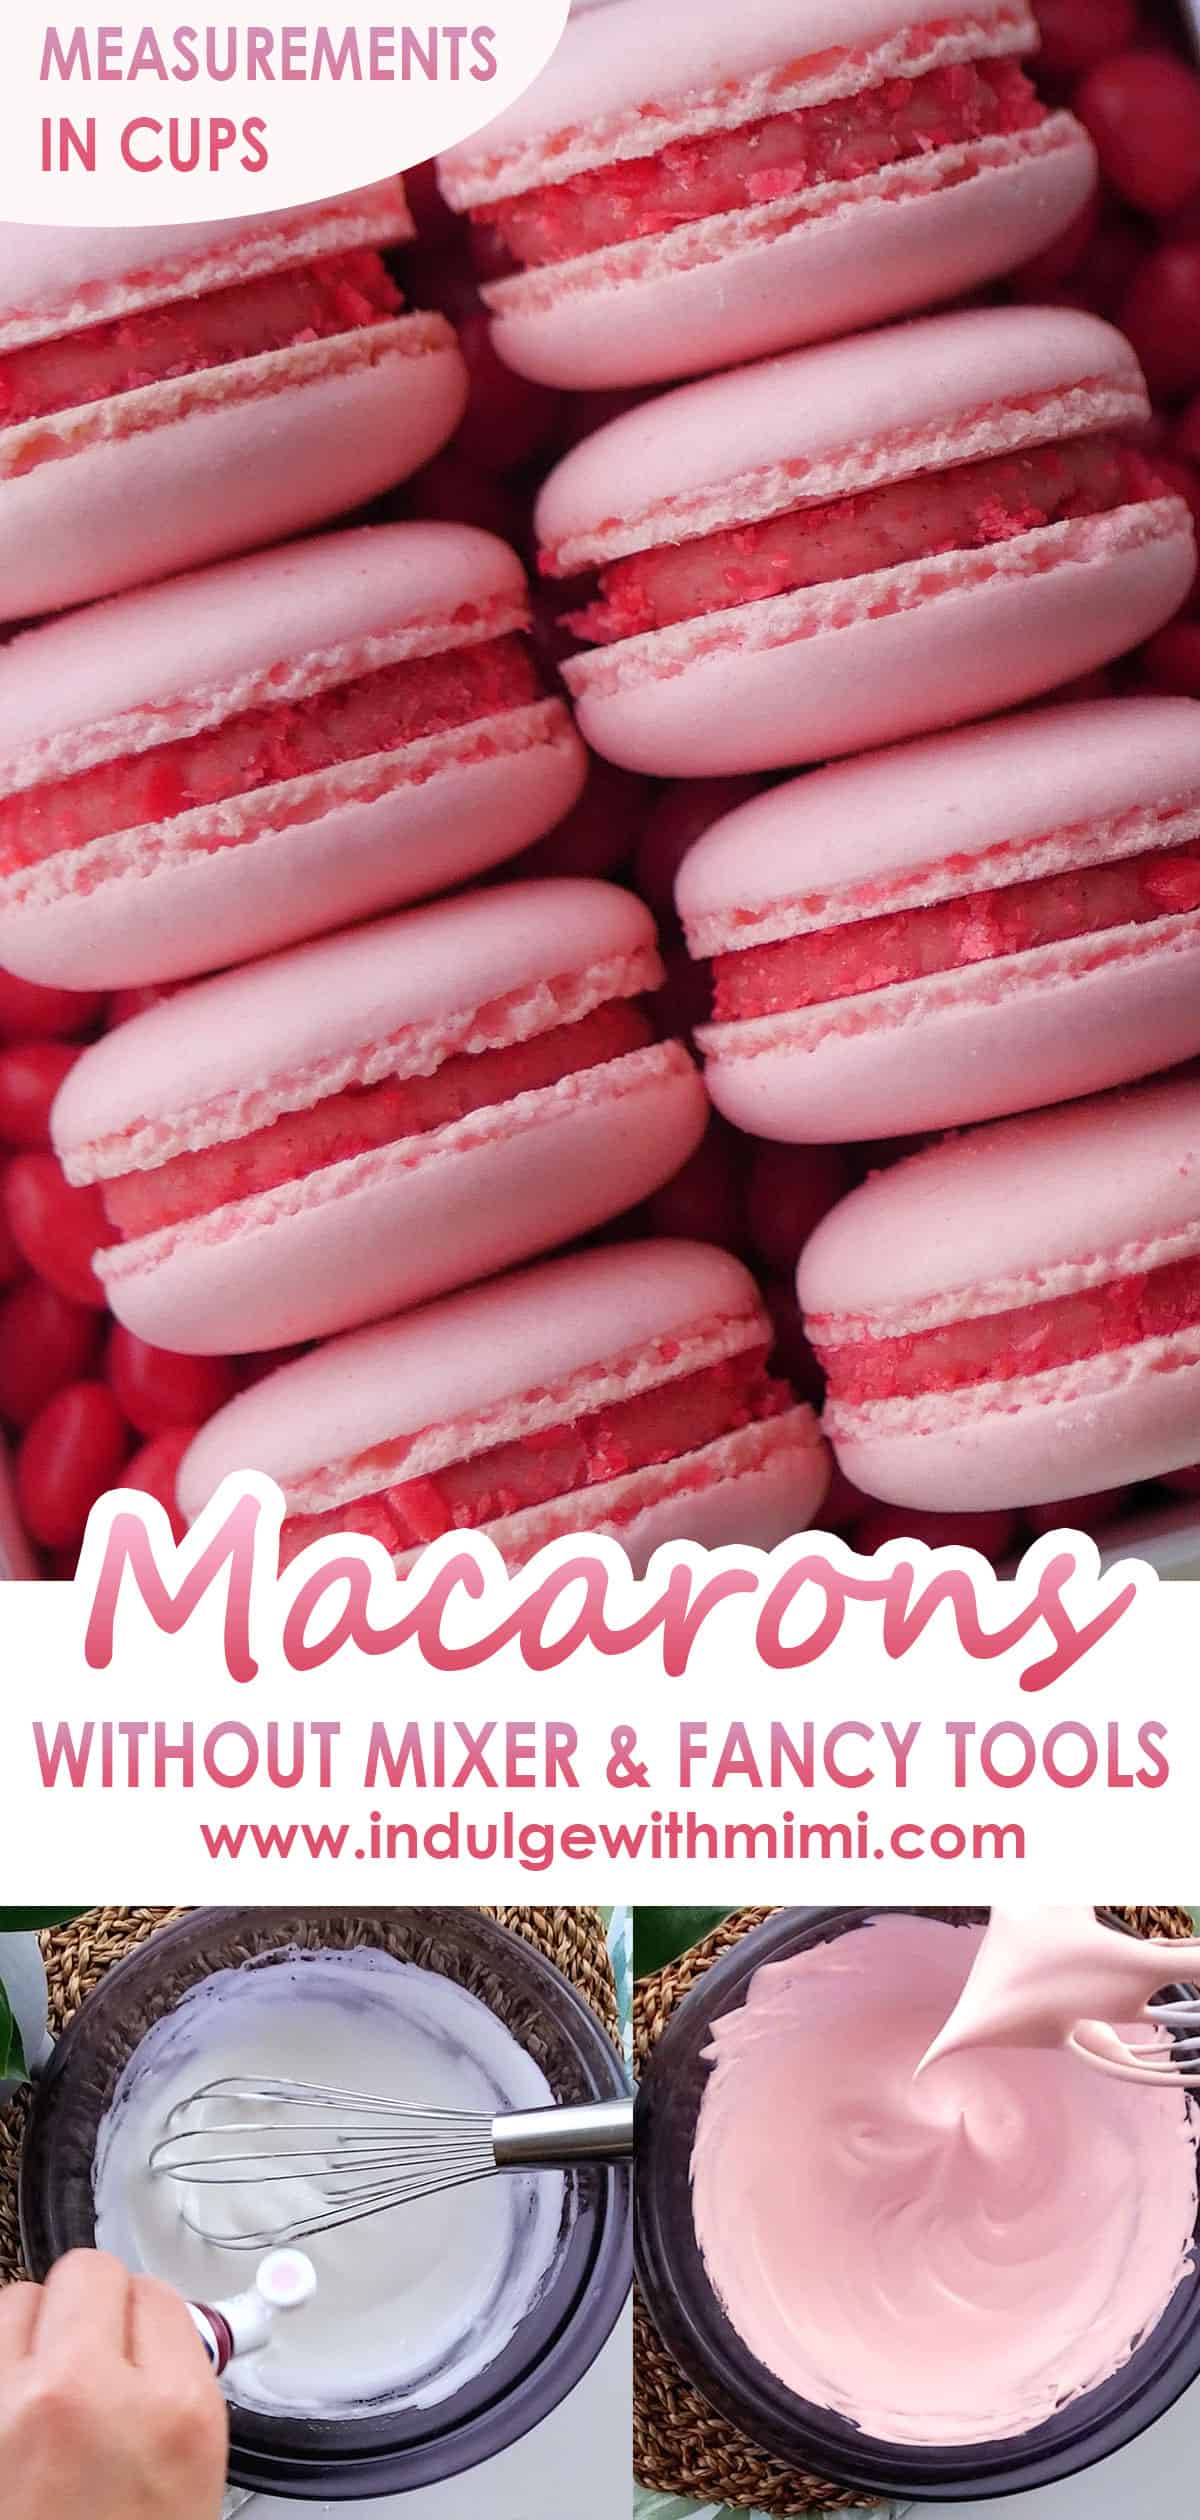
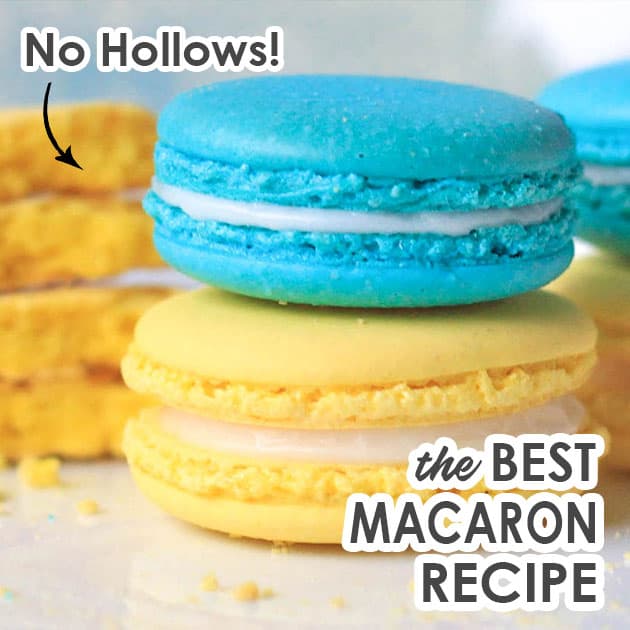
It's easy to make perfect macarons without a mixer (hand whipped meringue), scale (measurements in cups), cream of tartar & other fancy tools or ingredients. Learn how to whip a perfect meringue for macarons entirely by hand to prevent hollow macarons.
Jump to:
- Can I Make Macarons without a Mixer?
- Step 1: Carefully Measure Ingredients Without a Scale
- Step 2: Grind Almonds Into Flour
- Step 3: Whip Meringue By Hand with a Spatula
- Step 4: Macaronage and Figure 8 Test
- Step 5: Piping Batter Without a Piping Bag
- Step 6: Rap Tray & No-Resting
- Step 6: Bake Without a Convection Oven
- Step 7: Fill & Assemble
- Conclusions
- Recipe
Can I Make Macarons without a Mixer?
Yes! You can definitely make macarons without an electric or stand mixer, fancy tools and ingredients. The meringue for macarons can actually be whipped entirely by hand! I know there seems to be a lot of barriers to entry for making perfect macarons so I wanted to simplify things today and show you how you can make macarons using:
- No scale
- No electric mixer
- No cream of tartar
- No pre-ground almond flour
- No piping bags
- No resting
- No convection setting in the oven
The main point of this tutorial is to show that with the right techniques, macarons can be easily made without spending a lot of money on tools and ingredients. I still prefer my original Best Macaron Recipe for its efficiency and consistent results using the proper tools like a kitchen scale. However, I hope this new method will give advanced macaron bakers insight into how you can get better results without having to spend more money on new tools or a new oven. And for those new to macaron baking, I hope it will help you decide what type of tools you should start investing in. Good luck and leave all your questions below in the comments 🙂
XOXO,
Mimi
Step 1: Carefully Measure Ingredients Without a Scale
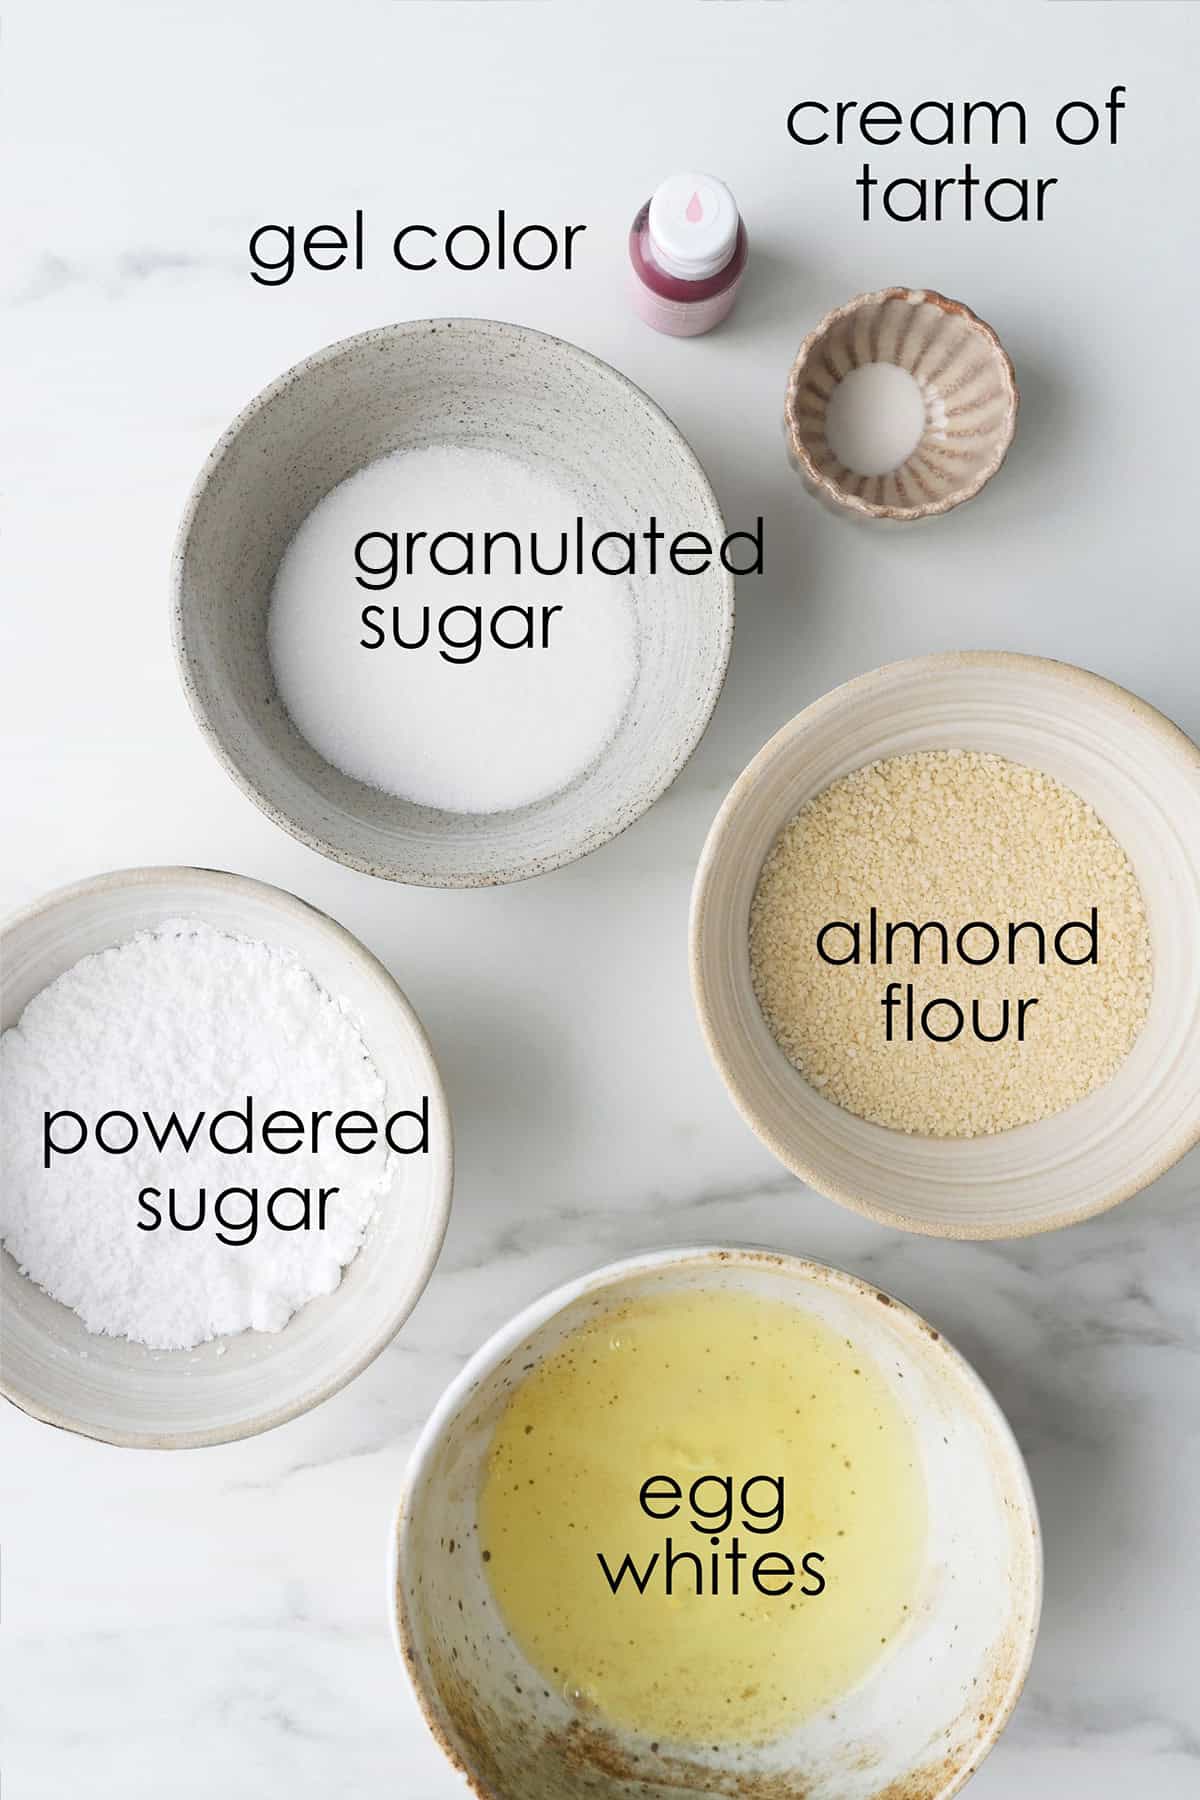
Normally, a scale is the best way to measure ingredients for baking. Precise measurement is key to many recipes so a digital kitchen scale will help provide consistent results. Definitely try to invest in a scale. It's not too expensive and you can use it again for other recipes or for shipping. Having said that, I know many of you have continually asked for a macaron recipe that is measured in cups so here it is. Please carefully measure these ingredients according to the methods below to get as accurate measurement as possible without using a scale.
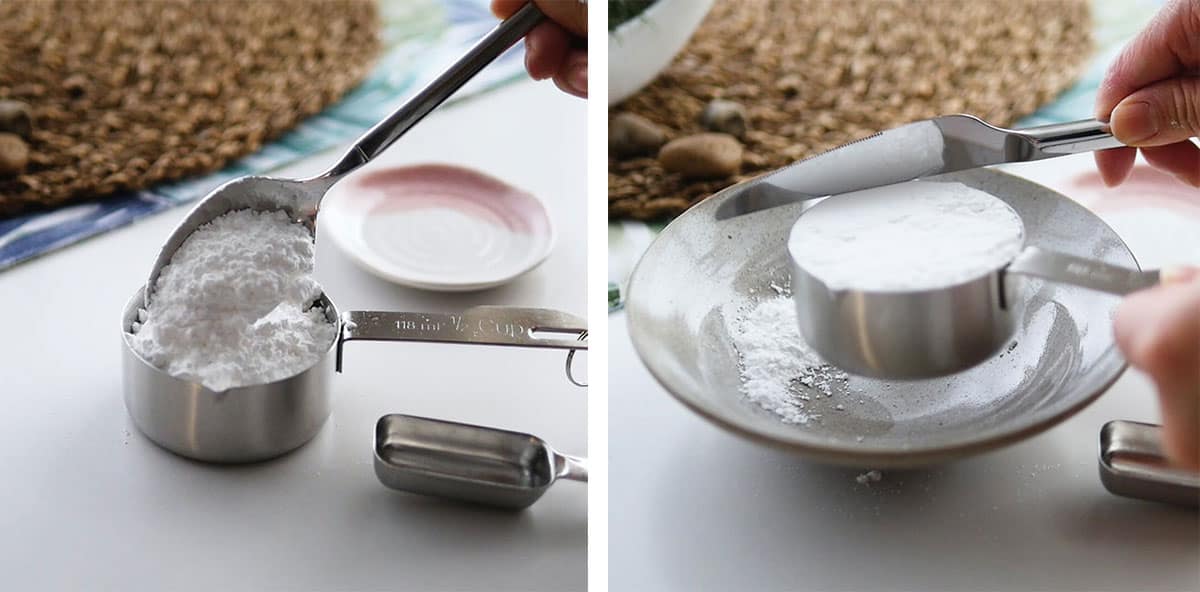
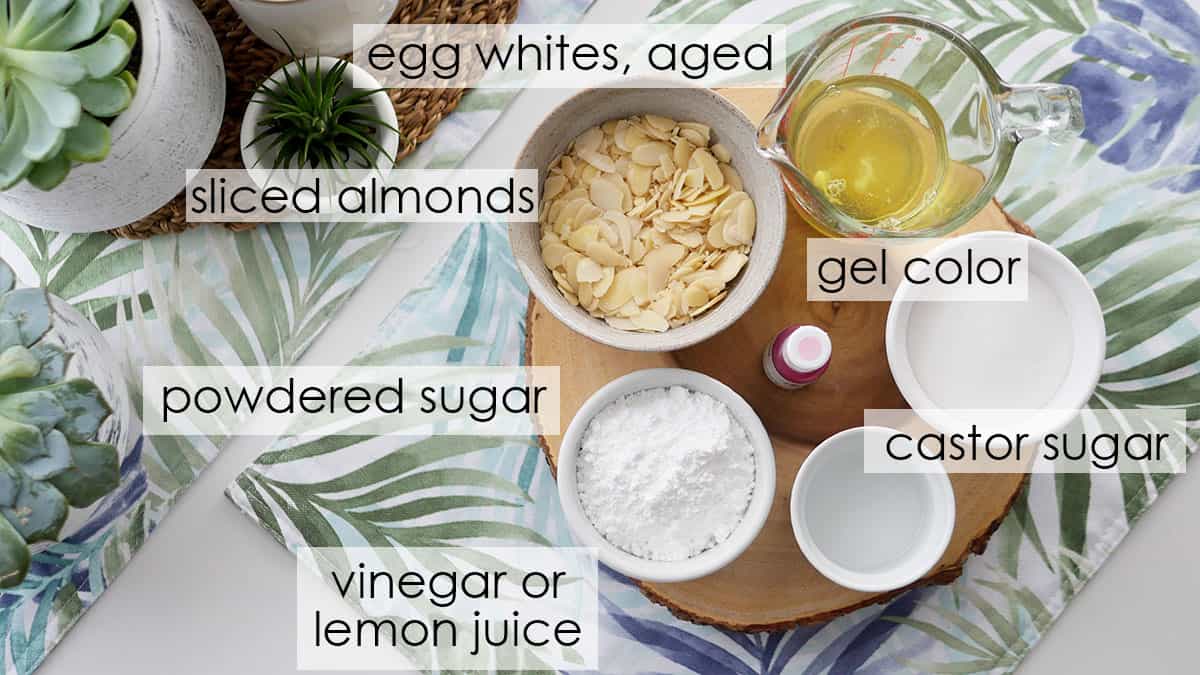
- Powdered sugar/ icing sugar - fluff it up before you start scooping. Use a spoon to scoop it into a measuring cup until its full, do not pack it in. Gently level it off with the back of a knife. Note: The type of powdered sugar sold in N. America usually contains a little bit of corn starch as an anti-caking agent.
- Almond slices - use the same scooping method above. Note: choose almond slices or slivers that are blanched (without the skin).
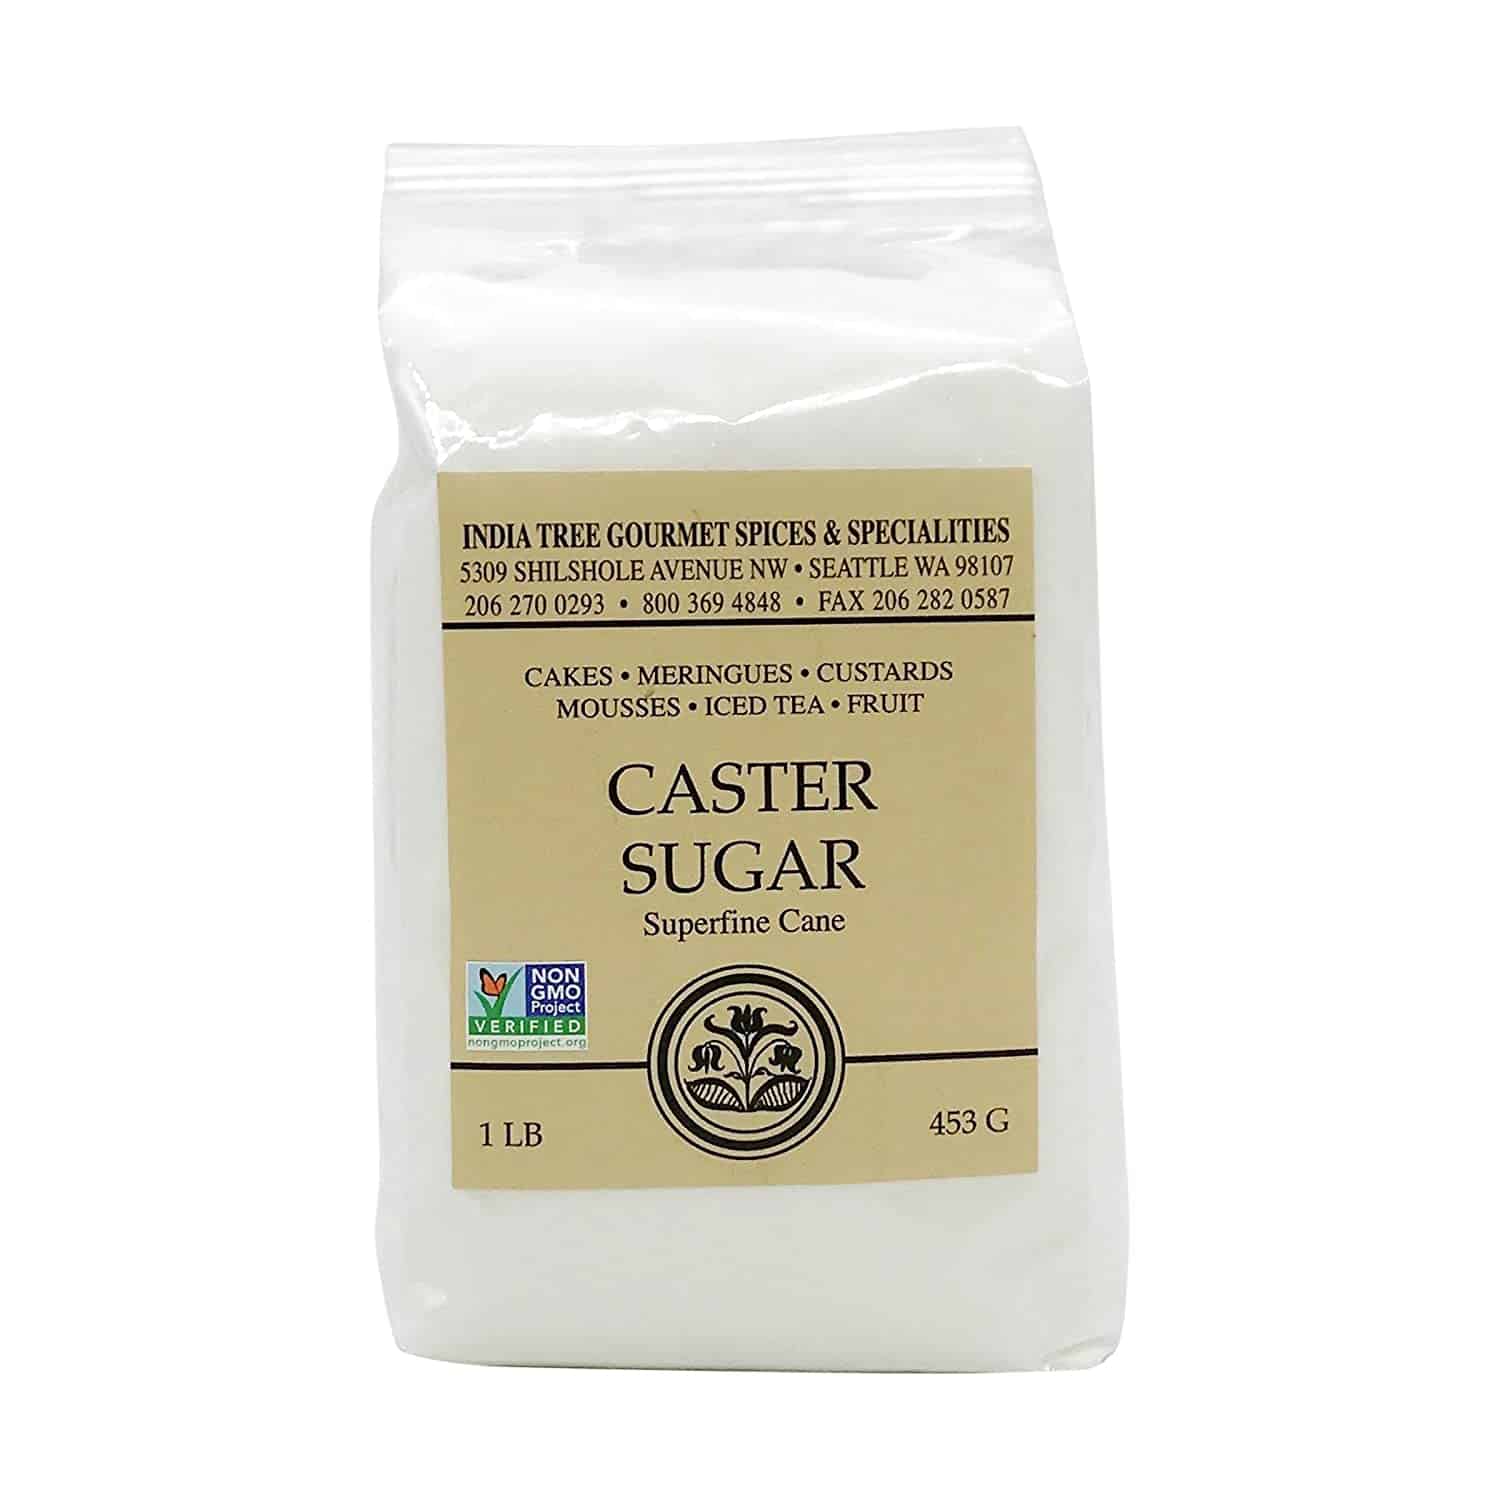
- Castor sugar - you can reach directly into the container to scoop the sugar out. Note: castor sugar is also known as fine granulated sugar or berry sugar. It’s a finer granulated sugar that dissolves readily into the meringue making it ideal for macarons, which is heavily dependent on a strong and healthy meringue. If you can’t find castor sugar, you can use regular granulated sugar but if whipping the egg whites completely by hand, it's better to use castor sugar since you won't be able to whip it as easily as an electric mixer. Do not try to pulverize regular granulated sugar in the food processor to make castor sugar, it results in “chopped-up sugar crystals that will not perform well.” (Source: chsugar.com)
- Egg whites, aged - Separate egg whites while cold and place it in a clean cup. Cover with plastic wrap and poke a few holes on top and place it in the fridge, use at room temperature after 24 hours of aging. Note: egg whites that have been separated and let to “age” in the fridge have more relaxed proteins which makes it easier to whip to volume without overwhipping. It’s recommended for the beginner macaron baker but is not absolutely necessary. Most carton egg whites are not intended for whipping into a meringue, check the back of the carton. A few (but not many) readers have reported success with carton egg whites.
- Vinegar or fresh lemon juice - Note: this acid is added to the meringue to make it more stable. Normally, cream of tartar is called for in half the amount, it can be found in the baking aisle next to the spices.
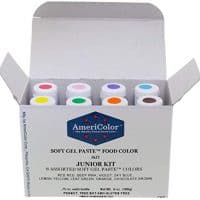
- Gel food color – this is a more potent form of food color that doesn’t add unwanted moisture into the macaron batter. Some brands perform better than others while baking. I prefer this brand for its color stability during baking.
Step 2: Grind Almonds Into Flour
Transfer the almond slices and powdered sugar into a food processor and pulse until it becomes fine. Make sure to pulse the two ingredients together to prevent the almonds from becoming butter. Sift the mixture and discard any large pieces that cannot be sifted. If you have a large amount leftover (more than 2 tsp), weigh it and grind more almonds with the already sifted almond/sugar mixture to compensate for that amount.
Step 3: Whip Meringue By Hand with a Spatula
Whipping the meringue by hand might seem tiresome but it actually doesn't take much longer than an electric mixer, this was actually the way we made meringue when I was taking pastry classes. Whipping meringue by hand for macarons also has a few benefits too:
- Lessens the chance of overwhipping resulting in hollow macarons.
- Keeps it quiet if you're baking at night.
- Can be done anywhere ex. if you're in a vacation home situation etc.
- Doesn't require pulling out extra equipment.
First, make sure the egg whites are at room temperature. Next, wipe down a medium mixing bowl with some vinegar or lemon juice. Place the room temperature aged egg whites inside and start whipping it by hand with a spatula. Watch the accompanying video to see how I whip it. It helps to hold the bowl close to your body with one hand while whipping with the other.
It takes about 3 minutes to whip it up to a foamy consistency but remember how long it takes you will depend on your own whipping speed, your tools, ingredients etc. Use the appearance to judge whether it's time to move to the next step rather than the duration itself.
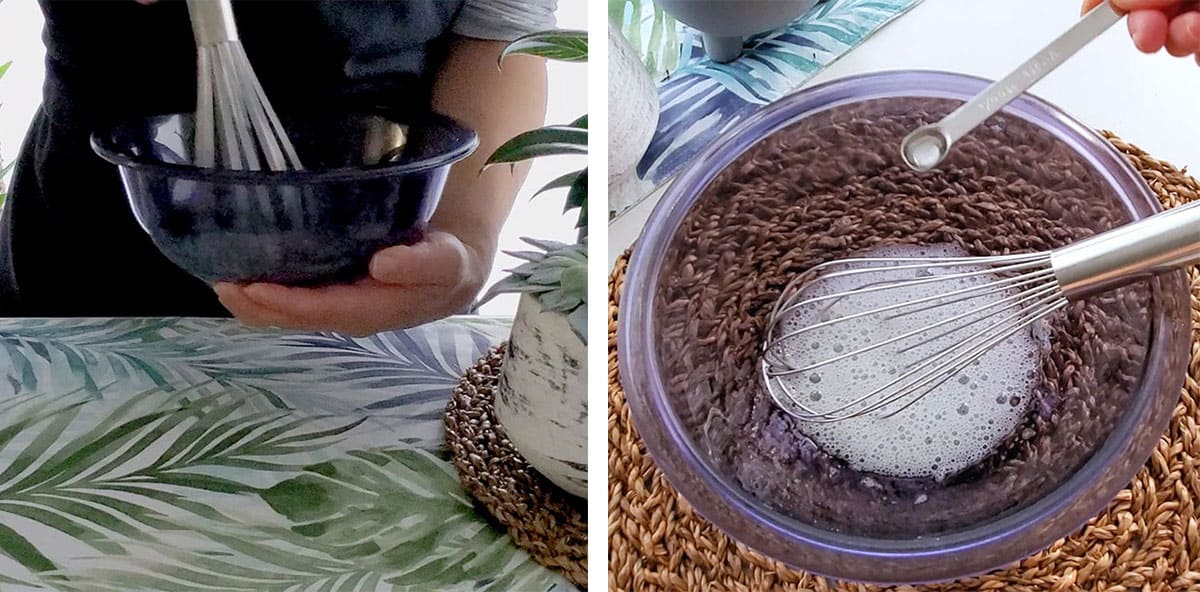
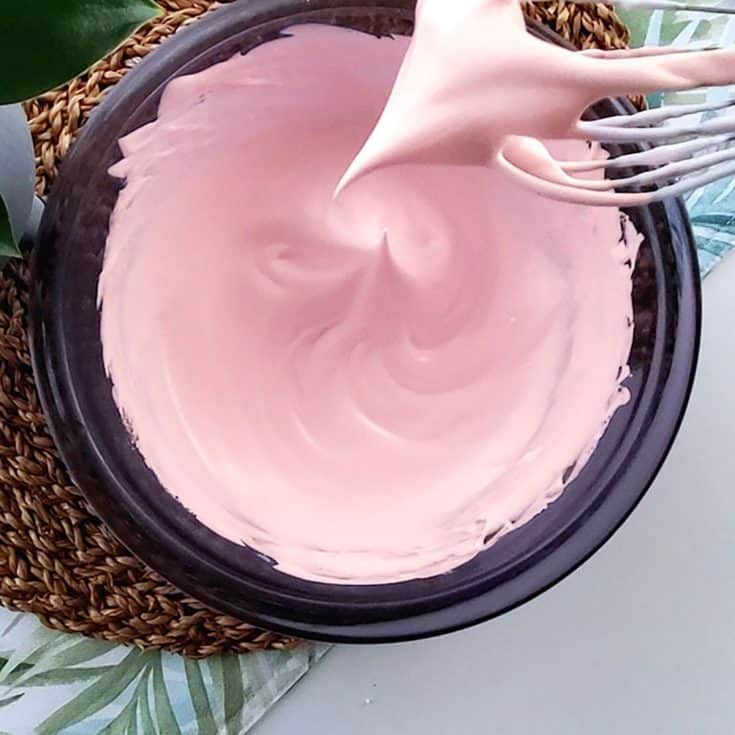
Once the whites become foamy with large bubbles present, add the acid (lemon, vinegar or cream of tartar) and keep whipping until the whites become opaque, the bubbles have decreased in size and the whisk start leaving tracks.
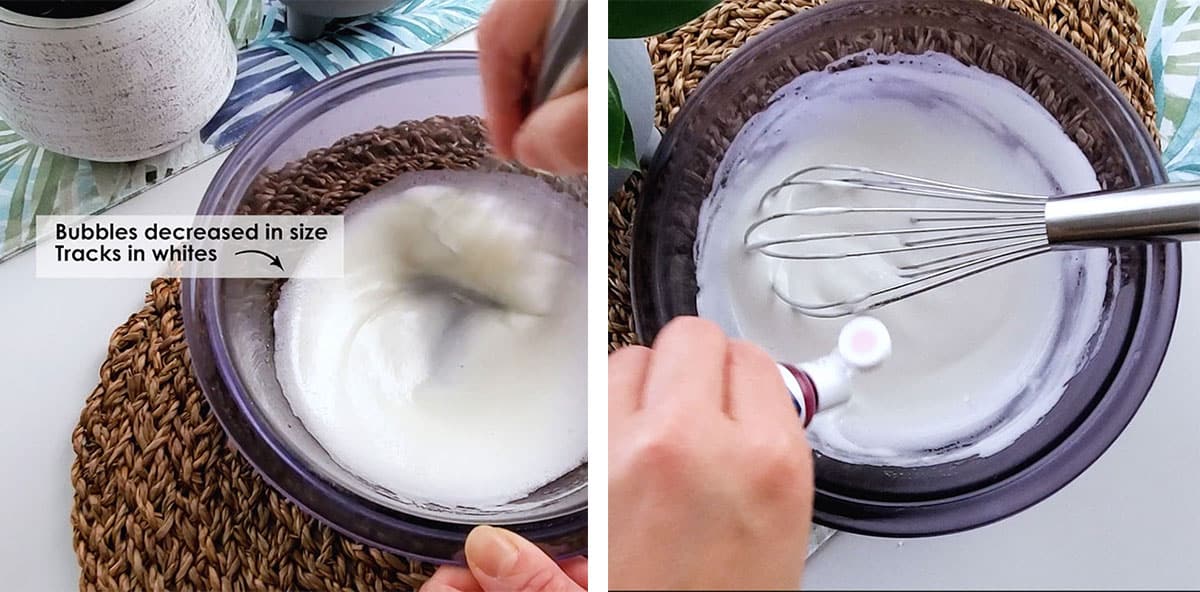
Add the sugar a little at a time. It's important to do this slowly so the sugar can be fully absorbed. Keep whipping. It takes about 6 minutes for the whites to get from foamy to a soft peaks stage. At this time, you can add a few drops of your favorite gel color and keep whipping.
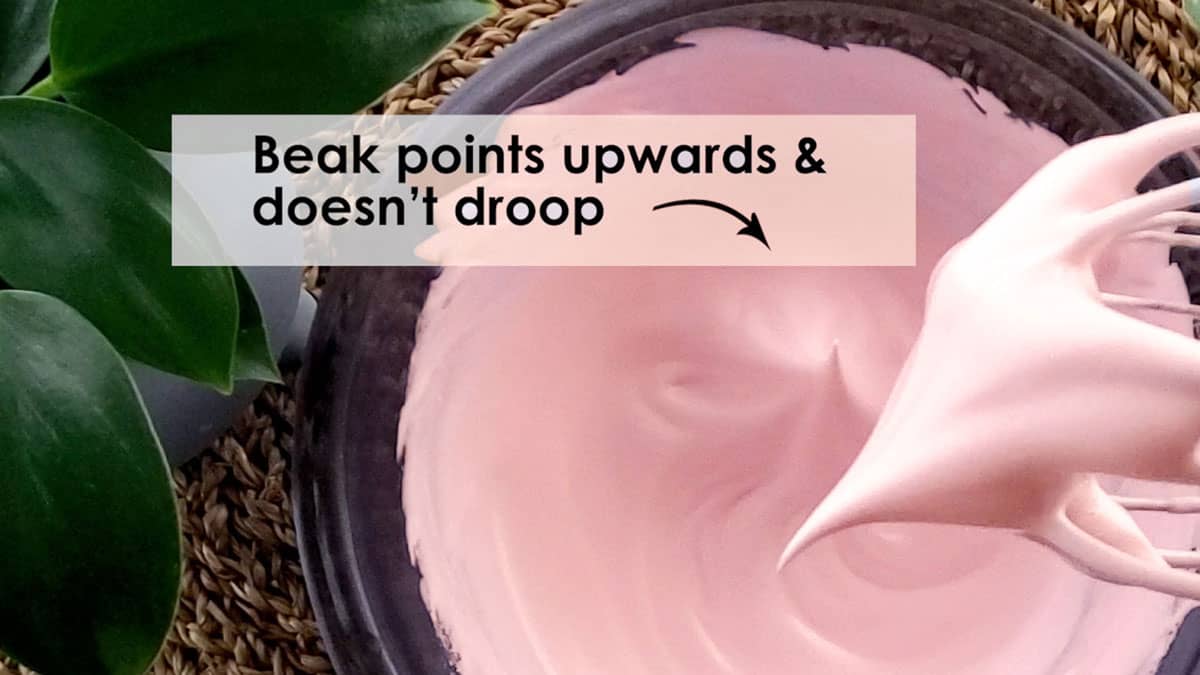
It takes about another 6 minutes for it to go from soft to stiff peaks. You'll see that once you pull the whisk out, the points in the meringue doesn't droop. You can also test it by turning the bowl upside down, the whites don't slide around in the bowl. In total, it took me 15 minutes to whip it from start to finish. Further reading: How to Whip Perfect Meringue for Macarons
Step 4: Macaronage and Figure 8 Test
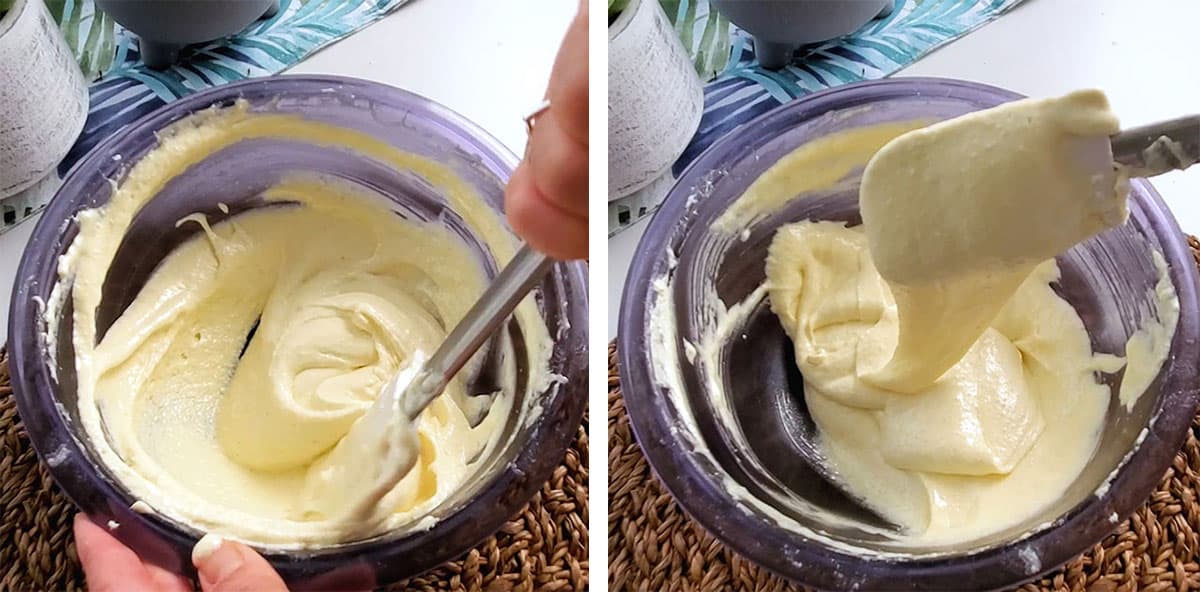
Next, add the dry ingredients in 3 separate additions, gently fold it into the meringue. Take the spatula and gently go under the mixture, use a sweep down-across-up-and-over motion (like you’re scraping around the bowl towards the middle) while turning the bowl at the same time. Occasionally, cut down through the center of the mixture to incorporate the ingredients in the center. Once its most incorporated, press out some more of the air by pressing the batter against the bowl.
Test the batter consistency. It should flow like honey, slowly, not too runny and without breaking apart. Here's an in-depth post on How to Macaronage
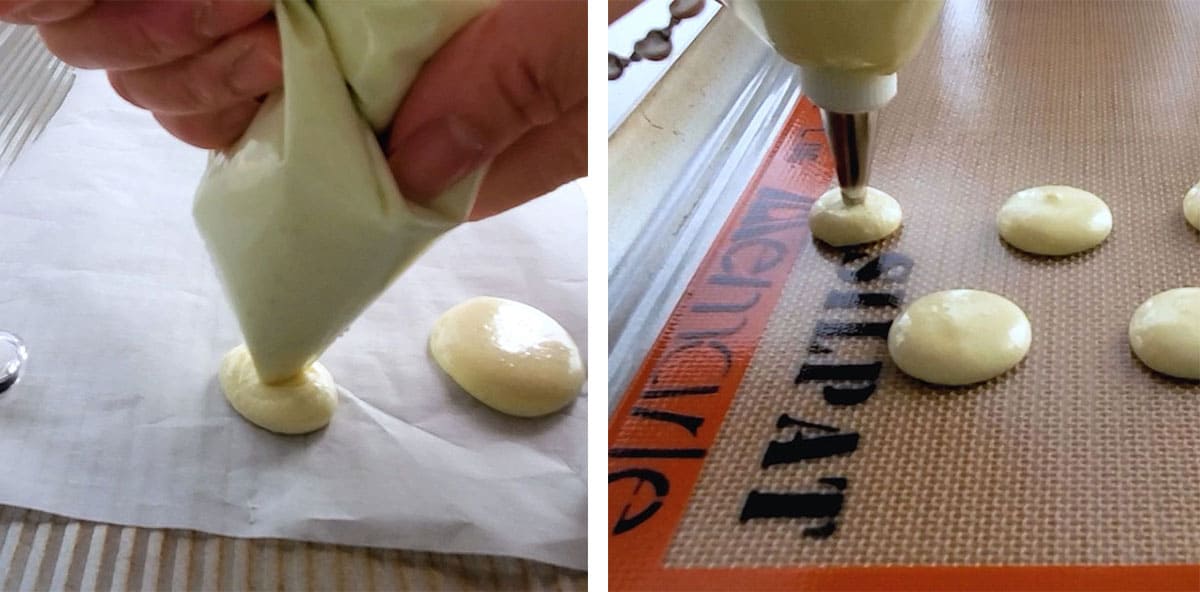
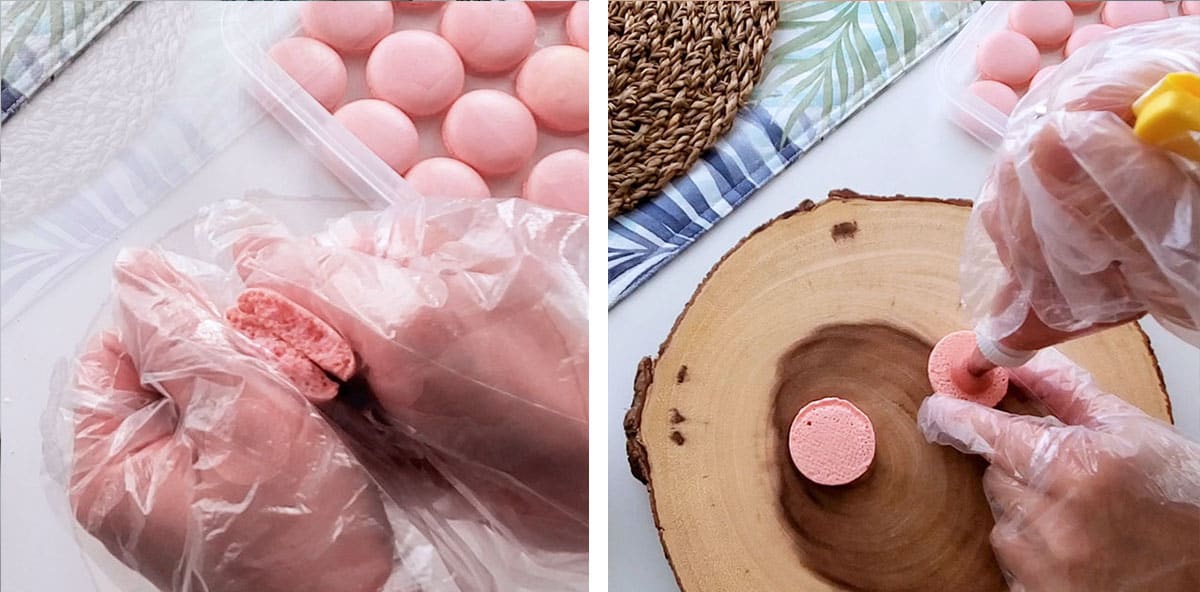
Step 5: Piping Batter Without a Piping Bag
Now transfer the batter into a freezer Ziploc bag. I recommend the freezer kind since it is thicker, providing more control while piping. If you're finding it hard to pipe beautiful round shells, consider using a combination of heavy weight piping bags and a round piping tip. Out of all the macaron making tools you can skip, I would recommend not skipping this one. It is so inexpensive and will really help elevate the appearance of your macarons. I like using the round #10 size because it provides a bit more control than the larger nozzles.
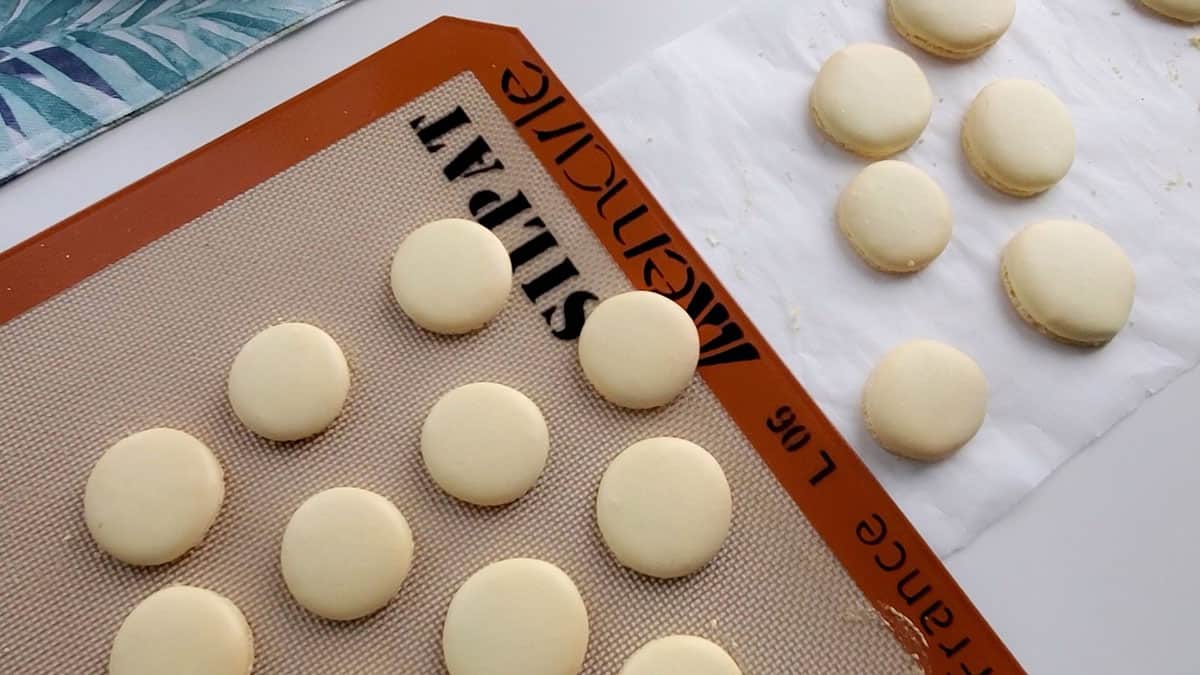
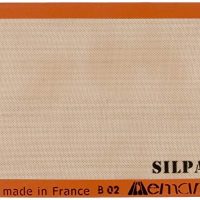
Holding the bag perfectly straight, pipe the batter onto the parchment paper. If your budget allows, buy a silicone mat, it will make the piped batter look perfectly round. Scroll to step 6 to take a look at the difference between macaron batter I piped using parchment paper and silicone mats.

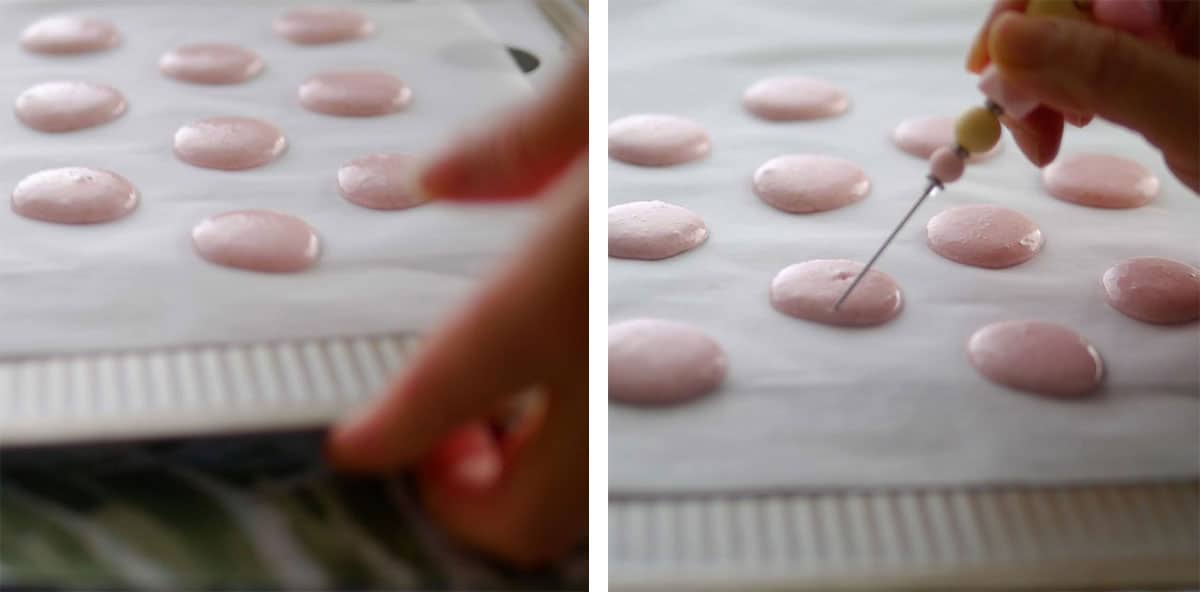
Step 6: Rap Tray & No-Resting
Bang the tray on the counter several times to get rid of the excess bubbles. For the really stubborn ones, just use a toothpick or scribe tool to pop them.
Next, I'm going to just pop these macarons in the oven right away without resting. The resting period allows for the macarons to develop a thin skin before baking which helps to prevent cracks during baking. I wanted to show you that it's possible to bake macarons directly piping without resting. I should note that this is not due to anything special about my recipe or any recipe that claims to be a no-rest recipe. It really depends on you and your technique.
If your meringue is strong, you haven't over folded the batter, and you don't live in a humid environment, it's perfectly okay to just pipe regular rounds straight into the oven right after baking. Here's a detailed post on Resting the Macaron Shells. If you're new to macaron baking, it's worth it to rest the macaron shells until a light skin forms so when you touch it, the batter doesn't stick to your fingers. It will act as extra insurance for your macarons.
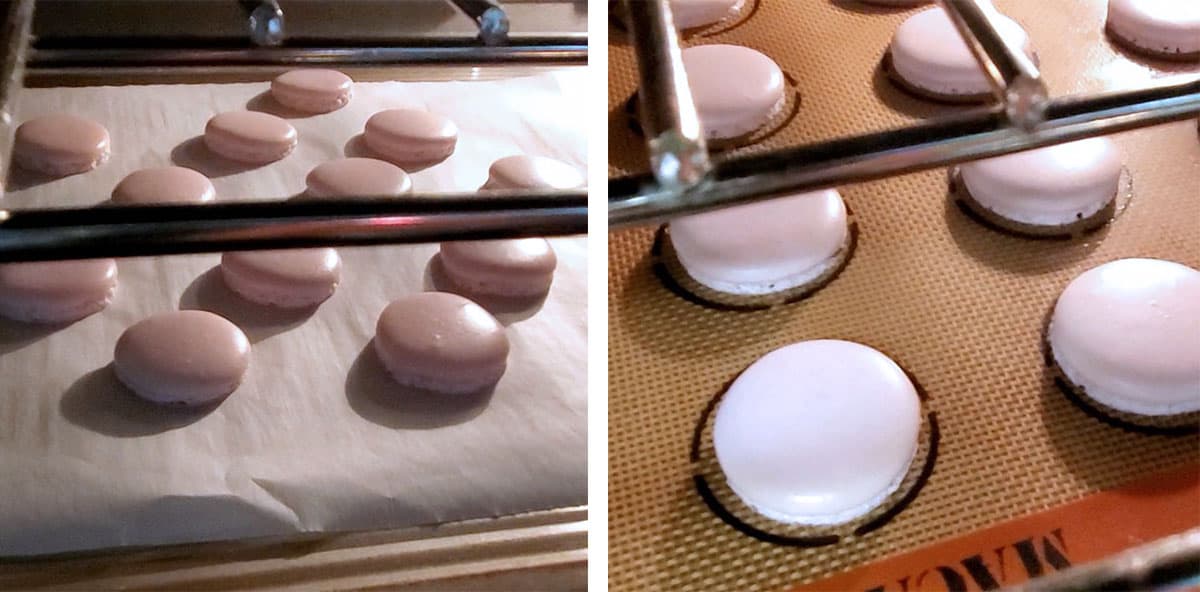
Step 6: Bake Without a Convection Oven
Bake the macaron shells for 12-14 minutes at 325F on the middle rack, one tray at a time. Remember every oven is different so take a look at this guide for properly using your home oven for baking macarons to help you find optimal setting for baking macarons in your own oven.
I'm using the regular bake setting without the convection fan for this batch just to show you that it can be baked in a regular oven. (Usually, it's recommended to use turn down the temperature by 25F when using the convection setting since it can get a little hotter.)
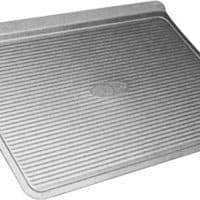
I also like to use rimless pans to allow even air flow to the macaron shells, this one by USA pan conducts heat very well for macarons. Test the doneness by nudging the shell. If it doesn't wiggle, it's done. The pictures below shows the difference between macarons baked on parchment paper and silicone mat.
Step 7: Fill & Assemble
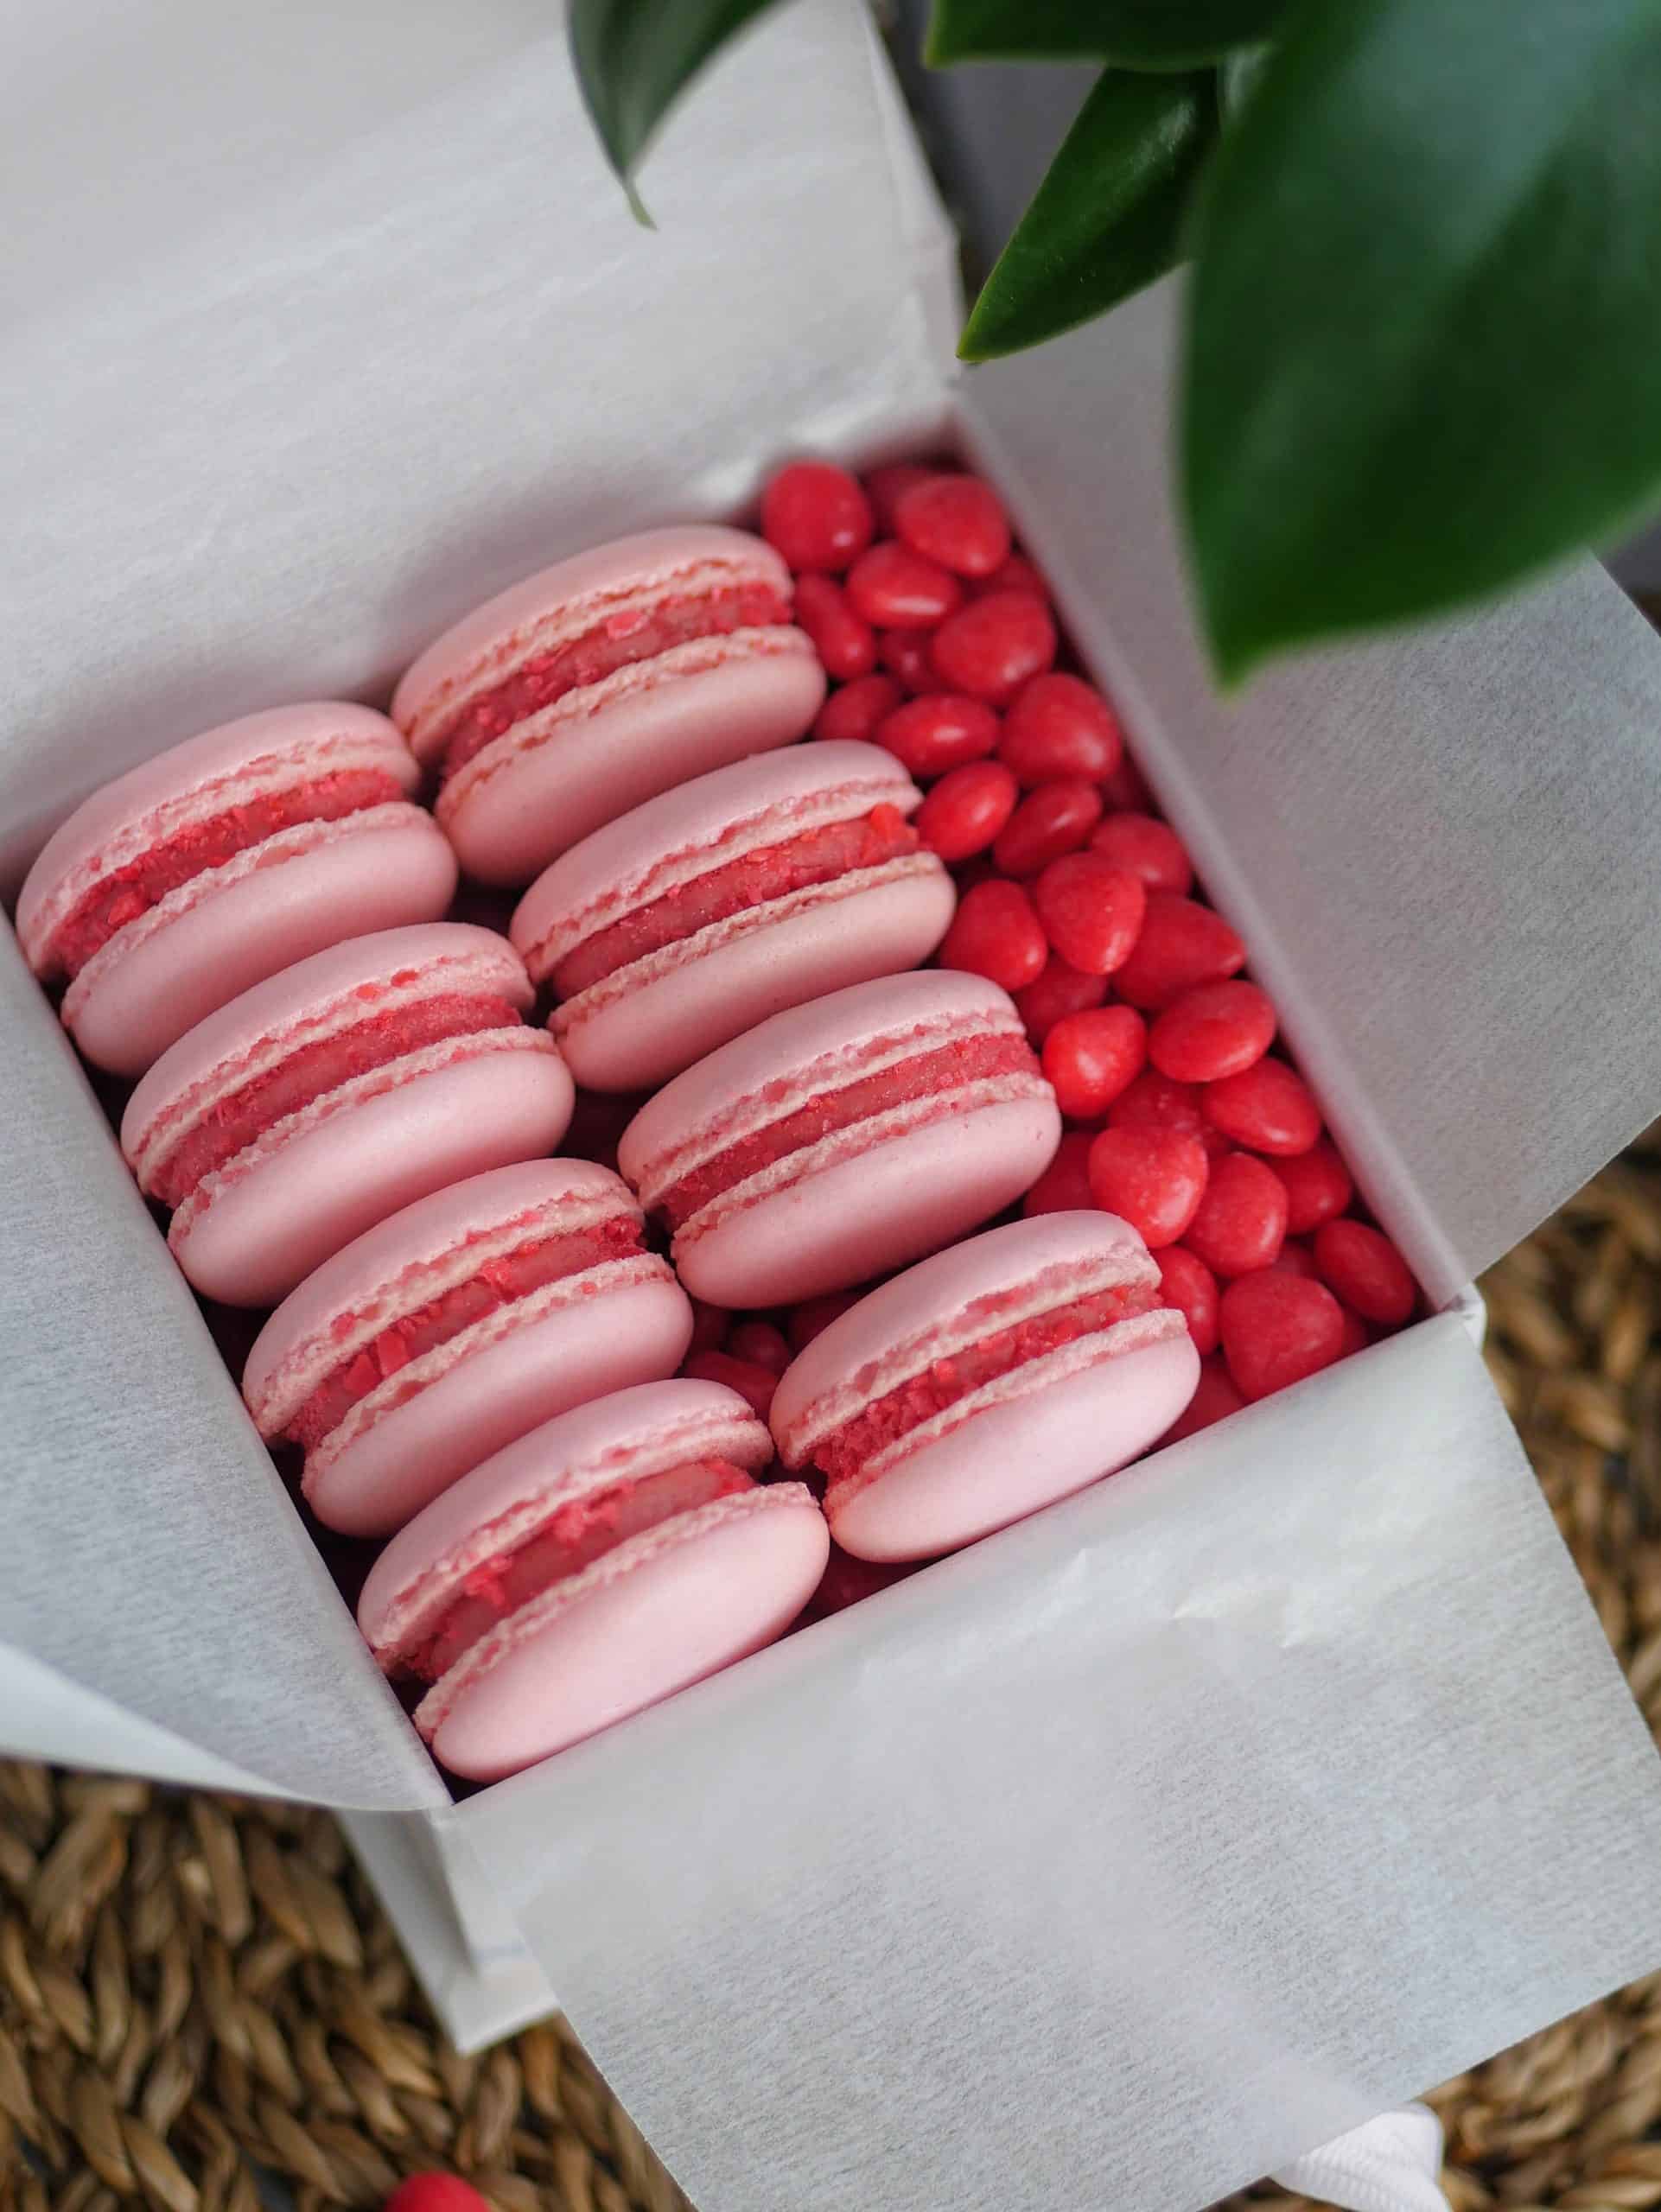
Once cooled, fill it with your favorite filling and let it mature in the fridge in an air-tight container for 24 hours before eating. Here is a basic 3-ingredient chocolate macaron filling or you can look for yummy macaron filling ideas here. If you need to make macarons in advance, refer to this post on How to Freeze Macarons and Make in Advance. Enjoy!
Conclusions
Whipping up a meringue by hand is a great way for any baker to learn more about the stages of meringue formation and prevent overwhipping of the meringue which can lead to hollow macarons. If you haven't tried making a meringue completely by hand for macarons before, give it a try just once. In the future, you can consider doing a hybrid of the two, let the machine do most of the mixing and then whip the rest by hand. (But remember to start off on a slow whipping speed first to help with building stability. Here's more on How to Prevent Hollow Macarons)
The supplies I would highly recommend investing in first would be the scale and round piping tip. Later on you can consider investing in a silicone mat and a rimless baking sheet.
Recipe
Making macarons without a scale, mixer, resting & fancy tools.
Macaron recipe measured in cups and made without a mixer, scale, cream of tartar and other fancy tools or ingredients.
Ingredients
Macaron Ingredients
- ½ + ¼ cup almond slices (78 grams)
- ½ cup + 2 tablespoon powdered sugar (78 grams)
- 3 tablespoon + 1 teaspoon + ½ teaspoon castor sugar* (55 grams)
- 2 egg whites, aged, room temperature*
- ¼ teaspoon vinegar or lemon juice*
- GEL color of your choice*
Supplies
- Measuring cups and spoons
- 2 very clean and dry mixing bowls
- Sifter
- Flexible spatula
- Piping bag or freezer Ziploc bags
- Round piping tip*
- Good quality baking pan
- Template with macaron outline
- Oven thermometer
- Parchment paper or silicone mat
Instructions
- 24 hours in advance, separate egg whites while cold and place it in a clean cup. Cover with plastic wrap and poke a few holes on top and place it in the fridge, use at room temperature after 24 hours of aging.
- Carefully measure all the ingredients according to the instructions in Step 1 in post.
- Pre-heat oven to 325F.
- Transfer the almond slices and powdered sugar into a food processor and pulse until it becomes fine. Make sure to pulse the two ingredients together to prevent the almonds from becoming butter. Sift the mixture and discard any large pieces that cannot be sifted.
- In a separate bowl, whip room temperature egg whites with a spatula until foamy (about 3 min.) Add vinegar or lemon juice and keep whipping.
- Once the beater starts leaving tracks in the egg whites and the bubbles have tightened up in size, add castor sugar ⅓ at a time. It’s important to do this slowly so the sugar can be fully absorbed. Keep whipping.
- Once all the sugar has been fully incorporated and before reaching stiff peaks (about 6 min), add 1-3 drops of gel color to your liking. Keep whipping until stiff peaks (another 6 minutes).
- Test meringue stiffness. It should have pointed peaks when the whisk is pulled out.
- Pour a third of the almond/powdered sugar mixture into the egg whites. Gently fold it into the egg whites. Then add the rest of the mixture and fold.
- Stop folding once the dry ingredients have been fully incorporated and the batter has reached a “lava” like or honey consistency. The batter should pass the figure-8 test. Watch video in post.
- On parchment paper or silicone mats, pipe the batter to the size of the circle on the template. Sign up to my newsletter to get free templates of various sizes.
- Remove the paper template from underneath the parchment paper or mat.
- Rap the tray several times on the counter to rid of excess bubbles.
- Before the batter dries, pop any remaining bubbles with a toothpick.
- Bake them right away or if you're new to macaron baking, let it rest on the counter for 30 min. AND until a “skin” has developed. This will help prevent the shells from cracking during baking.
- Bake at 325F for 12-14 minutes on the middle rack.
- Take them out and test doneness. The feet should not push back and the shell should not be wobbly.
- Let them cool off on the pan (or off if they are overdone).
- Fill macarons with your own favorite filling. (Further reading: Yummy Macaron Filling Ideas)
- Leave them in the fridge in an airtight container and let them mature for 24 hours.
- After 24 hours of maturation in the fridge, bring them back to room temperature 30 min. before serving. They will remain fresh stored in an airtight container in the fridge for up to 4 days, depending on filling used. ENJOY!
Notes
- This recipe yields 18 assembled macarons. This recipe can be doubled, tripled, and so forth.
- If using almond flour, measurements in cup is ⅓ cup + 1 tbsp.
- Castor sugar, a.k.a “berry” sugar or extra fine granulated sugar. Regular granulated sugar can be used but castor sugar is preferable, especially if whipping by hand.
- Egg whites from 2 large sized eggs. Do NOT use meringue powder or egg white powder.
- Vinegar or lemon juice can be substituted with half the amount of cream of tartar.
- Use GEL food color, do not use liquid color.
- Recommended round piping tips: Wilton #12 or Wilton #1A. I prefer Wilton #1A or Ateco #805 Plain Seamless Tip for regular round macarons or Wilton #12 for more control with character macarons.
- To further shelf life, unfilled macaron shells and assembled macarons can be frozen for up to one month.
Recommended Products
As an Amazon Associate and member of other affiliate programs, I earn from qualifying purchases.
-
 Round Piping Tip #10
 -
Digital Scale
-
USA Pan Rimless Baking Sheet for Better Airflow to Macaron Shells
-
McCormick Gourmet All Natural Cream Of Tartar, 2.62 oz
-
C&h Powdered Sugar 4 Lbs (1)
-
India Tree Superfine Caster Baking Sugar, 1 lb. bag
-
Wilton Coupler Standard
-
Gel Food Coloring AmeriColor Junior Kit, 8 Colors.75 Ounce Bottles
-
Braun 4-in-1 Immersion Hand Blender, Powerful 350W Stainless Steel Stick Blender, Multi-Speed + 2-Cup Food Processor, Whisk, Beaker, Masher, Easy to Clean, Black, MultiQuick MQ537BK
-
Regular Sized Silpat Non-Stick Silicone Baking Mat
-
Round Piping Tip #10
-
Ateco Disposable Piping Bags, 12-Inch, Pack of 100
-
PaperChef Culinary Parchment Multipurpose Non-Stick Paper, 205 sq ft


Nutrition Information
Yield
18Serving Size
1Amount Per Serving Calories 14Total Fat 1gSaturated Fat 0gTrans Fat 0gUnsaturated Fat 1gCholesterol 0mgSodium 12mgCarbohydrates 2gFiber 0gSugar 1gProtein 1g
This information is provided as a courtesy and is an estimate only. This information comes from online calculators. Although indulgewithmimi.com attempts to provide accurate nutritional information, these figures are only estimates.


Lyneé Blair says
What do you flavor them with?
Mimi says
Hi Lynee,
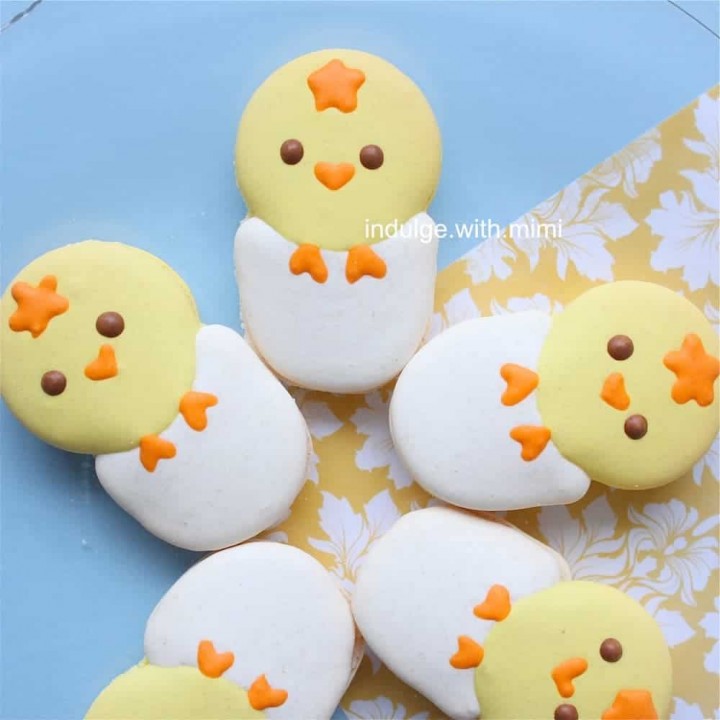
Usually macarons are flavoured with the filling through maturation. For the advance baker, Extracts (added in the meringue) and flavoured dry powders can be added into the dry mix. For this particular batch I filled it with cinnamon candy filling.
Xoxo, Mimi
Elaine Lerman says
I love your recipe for macs. It works so well.
Mimi says
So happy to have your feedback on this! Thank you for coming back to tell me.
XOXO,
Mimi
Alejandra says
You should probably know that they are NOT CALLED "Mac-Rons", but ARE INSTEAD CALLED "Mac-A-Roons"..... Just saying, it kind of gives one pause to take you seriously when you have an entire site dedicated to macarons, whilst calling them "Mac-Rons" instead.
Mimi says
Hi,
MacarOOns are a confection made from shredded coconut, sugar and egg whites. They are distinctly different in texture, Appearance and taste than the macarons I have dedicated this blog to. I hope this will clarify it for anyone else who may be confused about the differences between the two. Happy baking.
Xoxo, Mimi
Mary Leung says
Thank-you!! This is the first time my macarons worked out. I was surprised to find out my oven was 10 degrees hotter than it reads. No wonder my previous macarons looked like puddles. Your mixing techniques to take out some air bubbles fixed my other problem of hollow cracked shells. I was ecstatic to see beautifully shaped shells when I first opened the oven door. For the first time I was excited to share my macarons with my friends. Thanks again !!!
Mimi says
Hi Mary,
That is just wonderful news! I can feel your excitement. It's such a great feeling to make these for myself and others whenever I want. I hope you'll continue to make many different shapes and flavors in the months to come.
XOXO,
Mimi
Faith says
Silly question, but does 78 grams of almond flour weigh the same as 78 grams of almond slices that you would put in the food processor? Does it change in weight at all? I want to try this recipe but I already have almond flour so i won't need to put almond slices in the food processor. thanks!
Mimi says
Hi Faith,
If you're using a scale, 78 grams of almonds will be the amount needed no matter if the are sliced or not. Hope that helps.
XOXO,
Mimi
Alejandra says
any chance any of you know whether or not you truly need to let the egg whites to age for 24 hours or not? I feel like so long as the eggs are room temp. that step may, at least for the most part, be optional. Either way, we shall see, I have to make something now for tomorrow and figured I'd make 1/2 not and the other 1/2 later; will report the results.
Sherry says
Very informative. Thank you so much for this post.
Mimi says
I'm happy you enjoyed it! Thanks for the feedback!
XOXO,
Mimi