
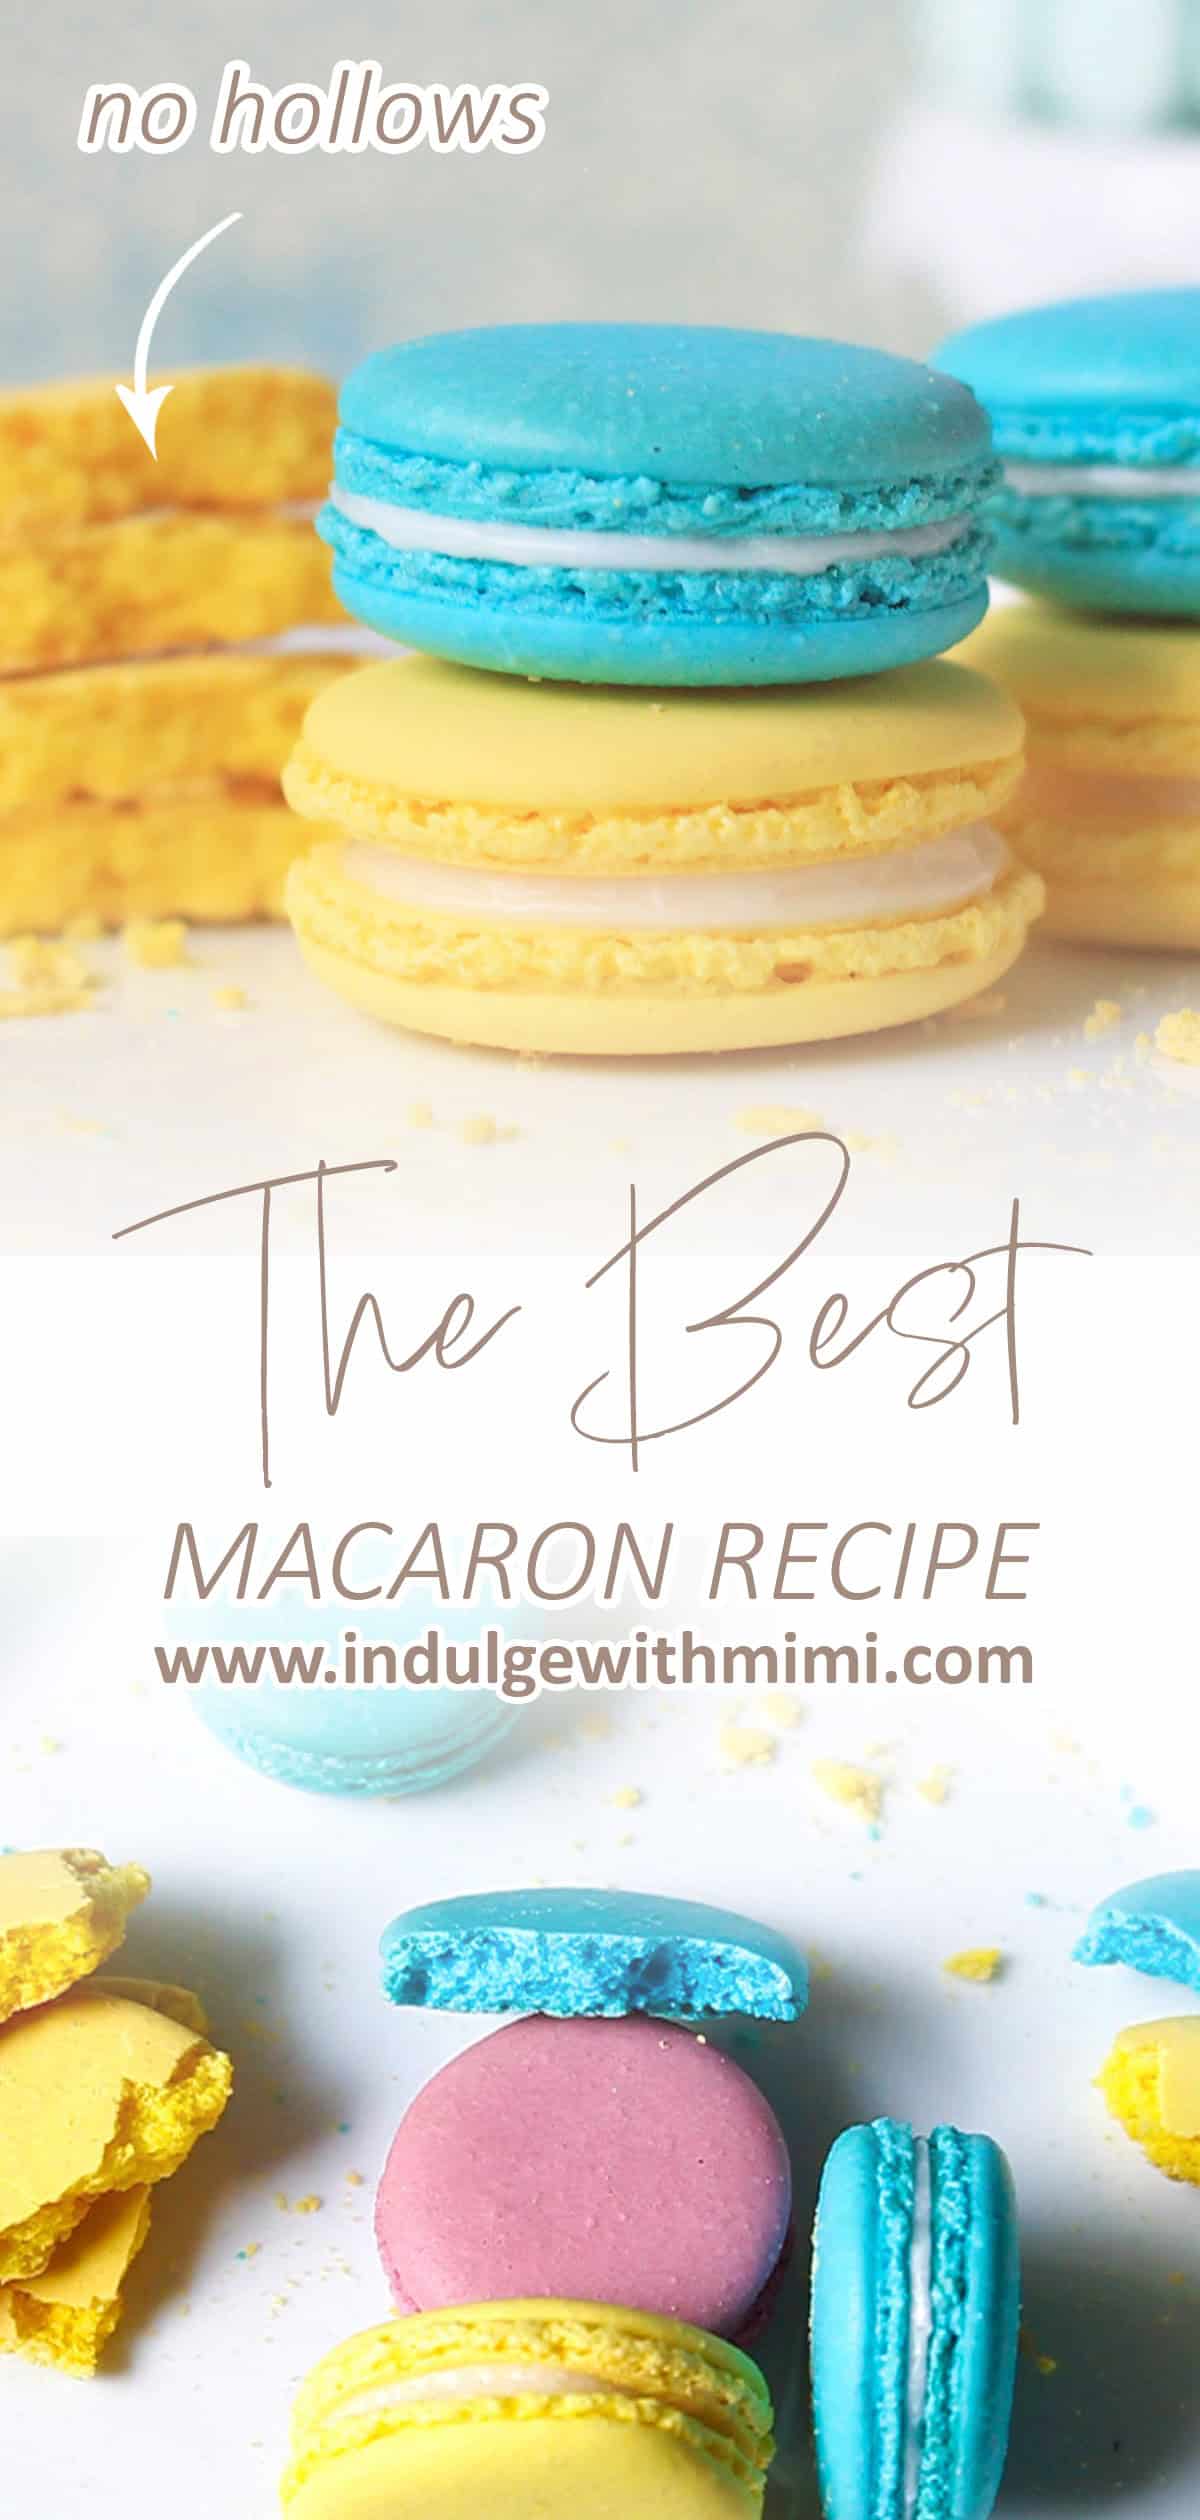
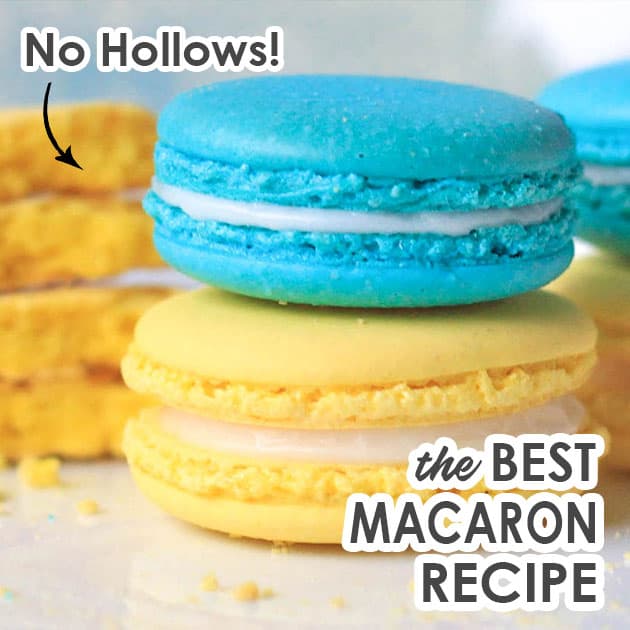
Mimi's best macaron recipe for making non-hollow macarons successfully. Perfect for beginner or professional use. Covering proper techniques: macaronage, aging the egg whites, making the meringue, figure-8 test, resting the shells and more.
Jump to:
Why This Recipe Works
I'm happy to share this updated version of my best macaron recipe with you all. I first learned to make macarons from a French pastry chef and after a lot of trial and error and a lengthy recipe development process in my home kitchen, I created this user-friendly macaron recipe. It was originally published in 2014, since then countless home bakers have used it to successfully make macarons at home and professionally. Why it works:
- Ingredient ratios yield more consistent results, suited for bakers at every experience level.
- It covers all the foundation techniques you need.
- Tons of tips and video to help you nail down each step. Includes links to further in-depth articles.
- Free macaron template to help you pipe perfectly round macarons.
Remember, there isn't one magical recipe out there - including mine! What's important is that you learn the proper techniques and then tweak them with what works best in your kitchen and in your oven. Below I've included all the foundation techniques you will need. Start by following each step carefully and practice, practice, practice! Good luck my dears!
XOXO,
Mimi
Ingredients & Substitutions
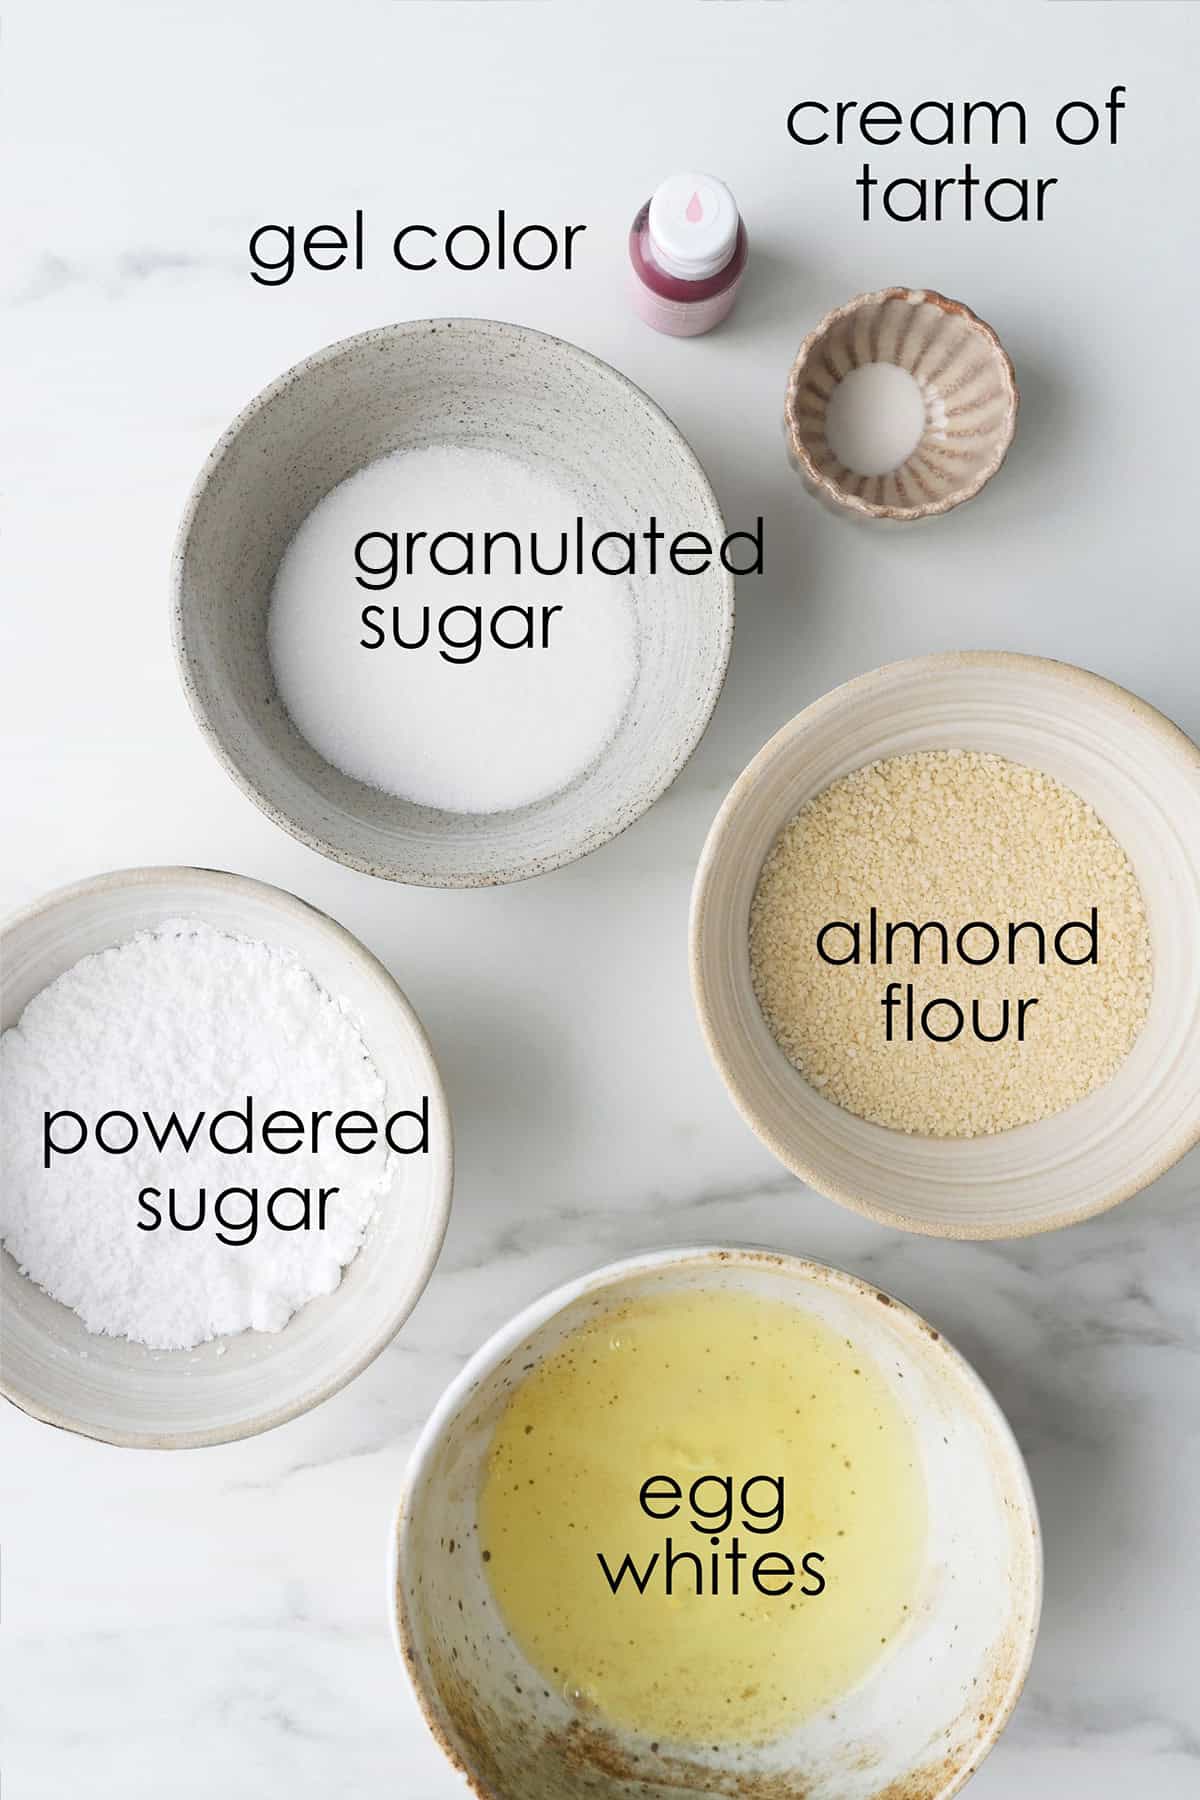
- Almond flour - it should be ground from blanched almonds. Some brands are more "oilier" than others so for the most consistent results, I like to make my own homemade almond flour. Alternatively, many readers have had good results with this brand.
- Powdered sugar - also known as icing sugar or confectioner's sugar. The type sold in North America usually contains a bit of corn starch as an anti-coagulant. It's important to always sift it for use in baking.
- Castor sugar - this is also known as extra fine granulated sugar or berry sugar. It's a finer granulated sugar that dissolves readily into the meringue making it ideal for macarons, which is heavily dependent on a strong and healthy meringue. If you can't find castor sugar, just use regular granulated sugar. Do not try to pulverize regular granulated sugar in the food processor to make castor sugar, it results in "chopped-up sugar crystals that will not perform well." (Source: chsugar.com)
- Egg whites, aged - egg whites that have been separated and let to "age" in the fridge have more relaxed proteins which makes it easier to whip to volume without overwhipping. It's recommended for the beginner macaron baker but is not absolutely necessary. Most carton egg whites are not intended for whipping into a meringue, check the back of the carton. A few (but not many) readers have reported success with carton egg whites.
- Cream of tartar - is an acid that is added to the meringue to make it more stable. It is usually found in the baking aisle next to the spices. If you do not have cream of tartar, you can substitute it with another acid like lemon juice or vinegar in double the amount. You can skip this ingredient if you can't find it. Make sure your bowls are clean and dry and whip carefully with room temperature aged egg whites until it reaches still peaks. If your egg whites take too long to whip or breaks apart, reconsider using cream of tartar.
- Gel food color - this is a more potent form of food color that doesn't add unwanted moisture into the macaron batter. Some brands perform better than others, I prefer this brand for its color stability, it doesn't fade after baking.
Best Macaron Baking Supplies
- If you don't have these tools yet, this post will show you how to make macarons without a mixer and fancy tools.
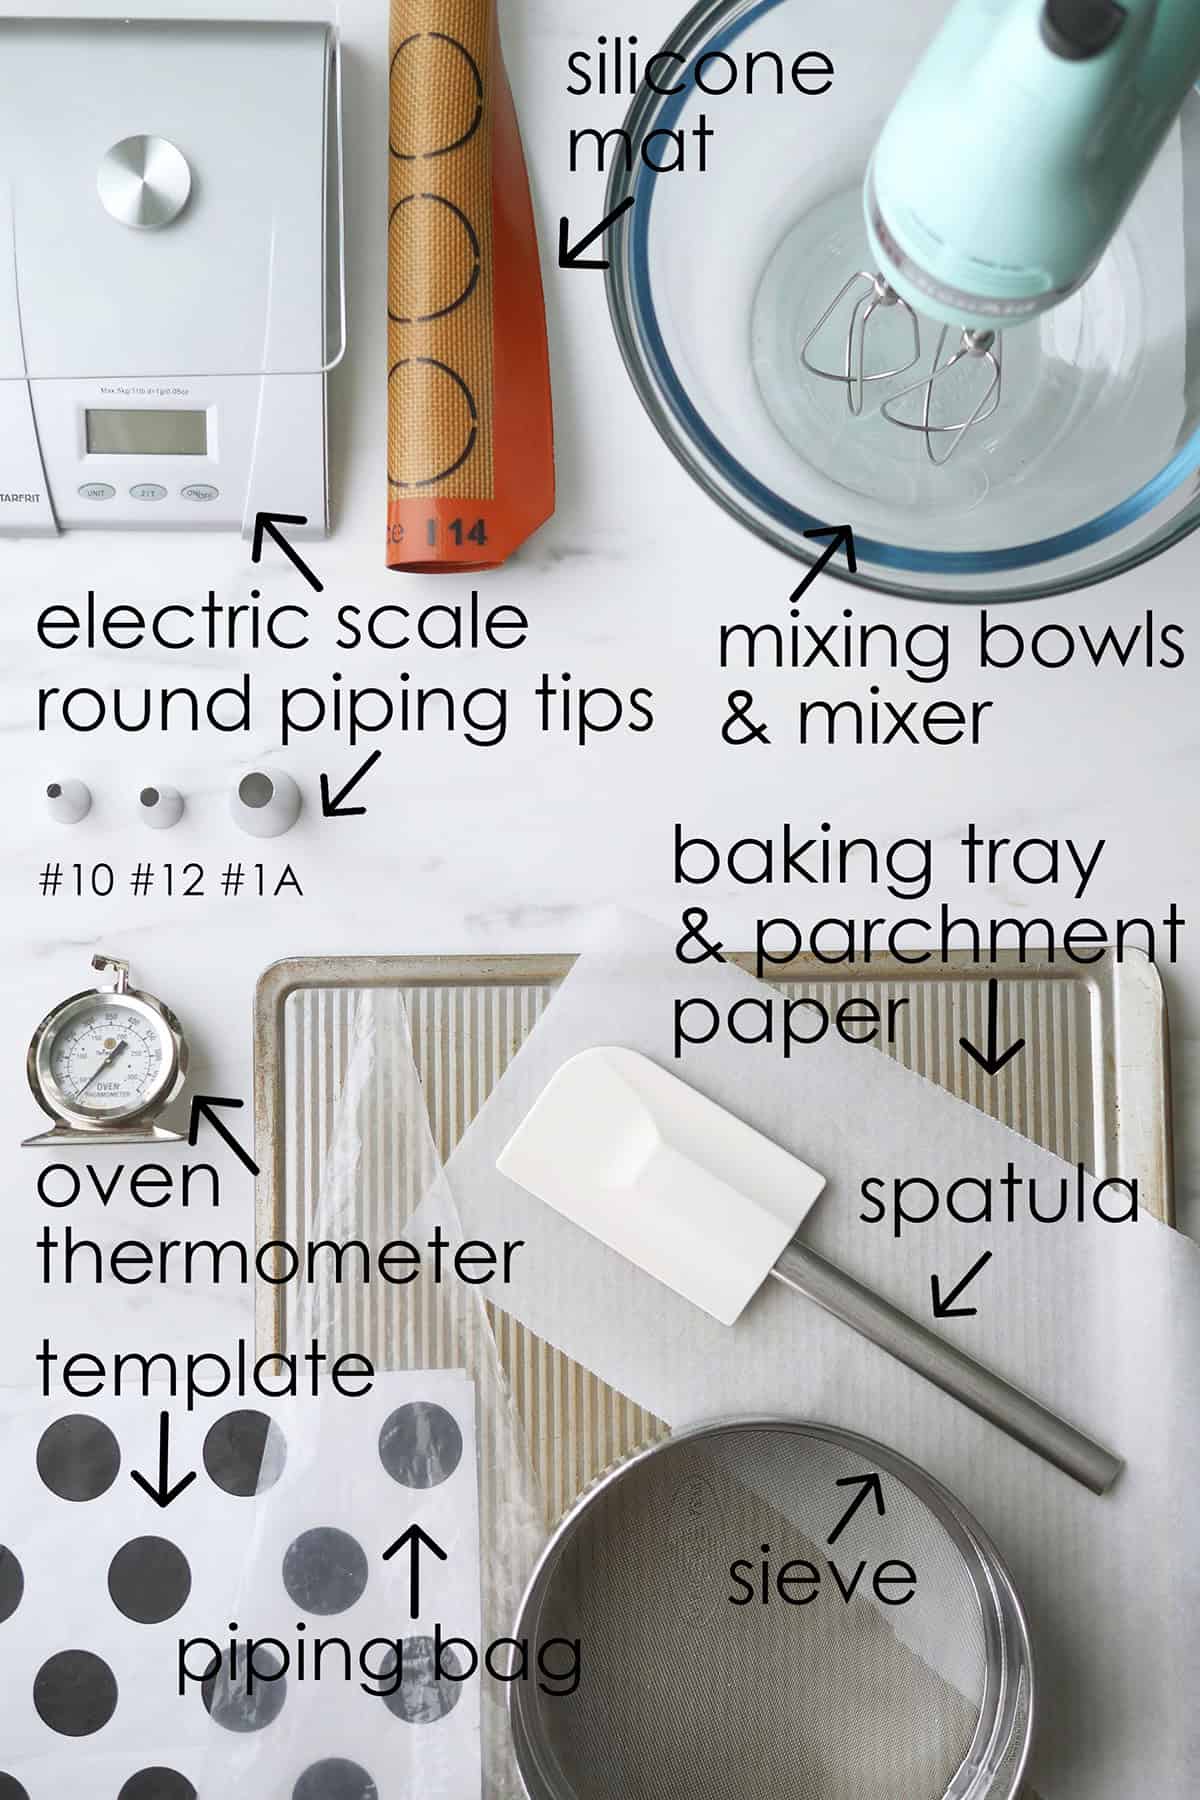
- Electric scale - Using a scale is a best way to measure ingredients accurately for baking as they can weigh differently depending on the way it is packed into a cup.
- Silicone mats - are excellent for keeping the piped batter in place for nice and round shells. They don't conduct heat as readily as parchment paper though and may require practice for the beginner.
- Parchment paper - is a good choice for beginners and can be repurposed for lining cake pans etc. Choose between using silicone mat or paper.
- Mixing bowls - should be non-porous ones in stainless steel or glass as plastic ones can trap oil which can prevent the proper formation of the meringue.
- Mixer - can be handheld or stand. At minimum, it should have slow and medium speeds. The egg whites in this recipe are in a small quantity but I have successfully made macarons using the Kitchenaid Pro stand mixer with the 5 QT bowl.
- Baking tray - preferably a rimless one to allow for even air flow. I prefer the one I linked here because it conducts and maintains heat without warping.
- Spatula - use a flexible one, the bigger the better when folding meringue. It will prevent excessive folding causing lost of air in the batter. I use the L size in the set.
- Sieve or strainer - used to aerate the dry mixture and isolate large almond bits for the smoothest macaron shells.
- Piping bag - use them instead of Ziplock bags. The linked piping bags are thick and sturdy. They won't bend and shuffle around as you hold it, helps in piping rounder shells.
- Oven thermometer - consistent temperature and sufficient heat is essential for baking full macaron shells without hollows. A thermometer will help you assess when the oven is fully pre-heated and ready for baking.
- Round piping tips - help pipe nice and round macaron shells. I prefer using the smaller tips for fuller shells without hollows e.g. Wilton round #10 or round #12.
- Macaron template - is helpful for piping even sized shells that are evenly spaced for baking. You can get access to all my free macaron templates after you sign up for my newsletter.

Prep Work & Tips for Success
- Wipe down mixing bowls with some vinegar to remove leftover oils. Then use bowls to store egg white for "aging". The meringue does not whip well in the presence of oil.
- Age the egg whites 24 hours in advance. Separate the egg whites with an egg separator while the egg is still cold, making sure that no traces of egg yolks remain. Wrap with plastic wrap and poke a few holes into it. Place it in the fridge to rest until ready to use READ: Detailed instructions on how to age egg whites.
- About 30 minutes before baking, bring the egg whites back to room temperature. To speed up the process, soak the vessel holding the egg whites in warm water. Be very careful not to let any water get into the bowl.
- If your parchment paper comes on a roll, flatten it out by laying heaving objects on top. Piping the batter on a smooth flat surface will prevent it from spreading into odd shapes.
- For the most accurate measurement, measure all the ingredients with a kitchen scale.
- Set up piping bag by pushing the piping tip firmly into the opening. This ensures that it doesn't move around when you start piping. Twist the bag and push it into the piping tip to stop any macaron batter from leaking out when you begin to fill it. Set this bag inside a tall glass. Open up the top so that you can have both hands free to fill up the bag later. WATCH VIDEO: How to Set up Piping Bag for Macaron Batter
- If you live in a moist humid environment and have a dehumidifier, set it to bring the humidity level in the room below 50. This is the dehumidifier I have. I turn it on in the kitchen after washing dishes or cooking a dish that releases steam into the kitchen. Alternatively, if the kitchen is humid after water use, open the windows and turn on the range hood fan. A dryer environment will help the macaron shells to "rest" and develop a skin after piping.

Macaron Templates
Generally, the most popular size for round macarons is 1.5". However, you can definitely pipe the shells larger or smaller. Pipe the batter using a template as your guide so you can have similarly sized shells for matching during assembly. You can download free macaron templates in other sizes like 1.25", 1.5", 1.75" by subscribing to my newsletter.
Step By Step
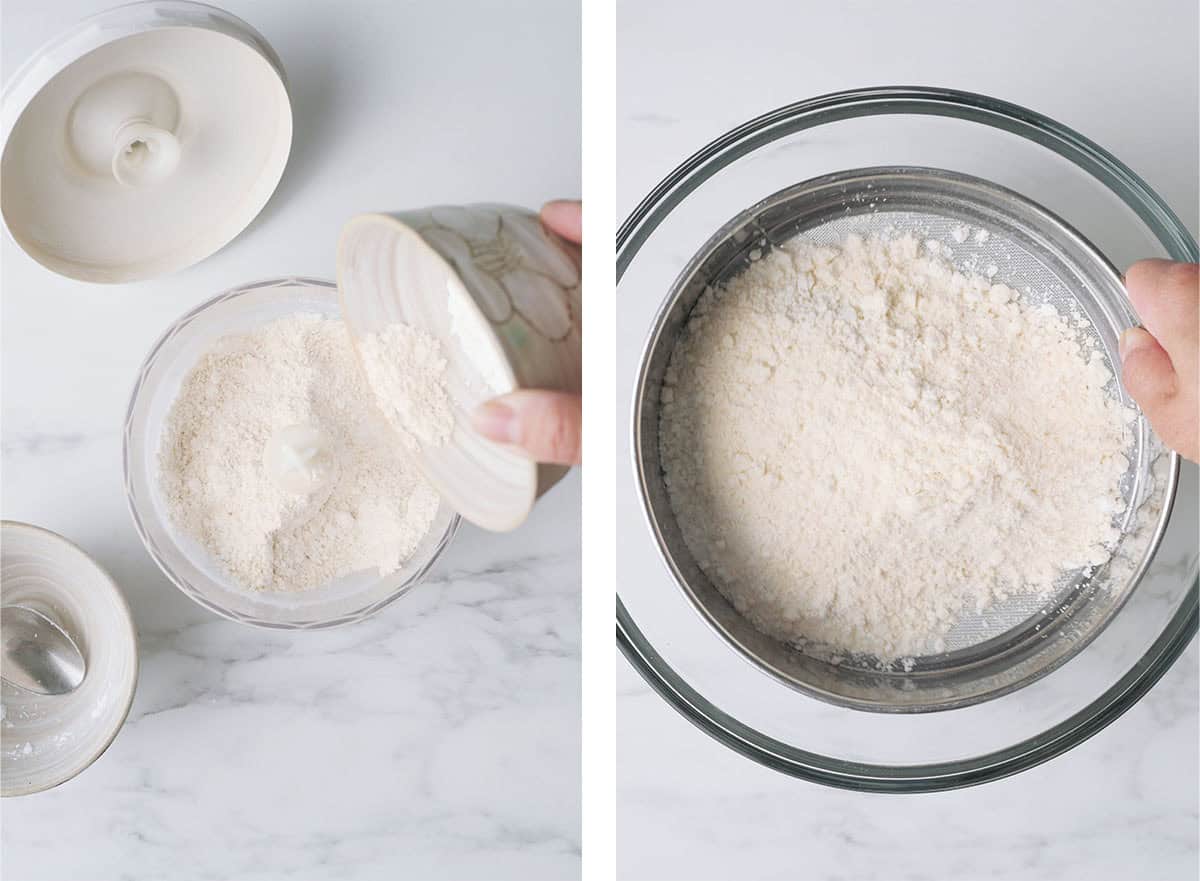
Step 1: Prep Almond Flour and Powder Sugar
Sift together the almond flour and powdered sugar to eliminate big pieces and aerate the mixture. Optional: run the combined mixture through a food processor to further break down the bigger pieces first.
Step 2: Whip Egg Whites & Add Acid
In a separate bowl with a handheld or counter top mixer, whip egg whites on slow-speed until foamy, then add cream of tartar. The cream of tartar is an acid that aids in stabilizing the meringue, it can be replaced with another acid (e.g. lemon juice or vinegar) in double the amount.

Step 3: Add Sugar to Egg Whites
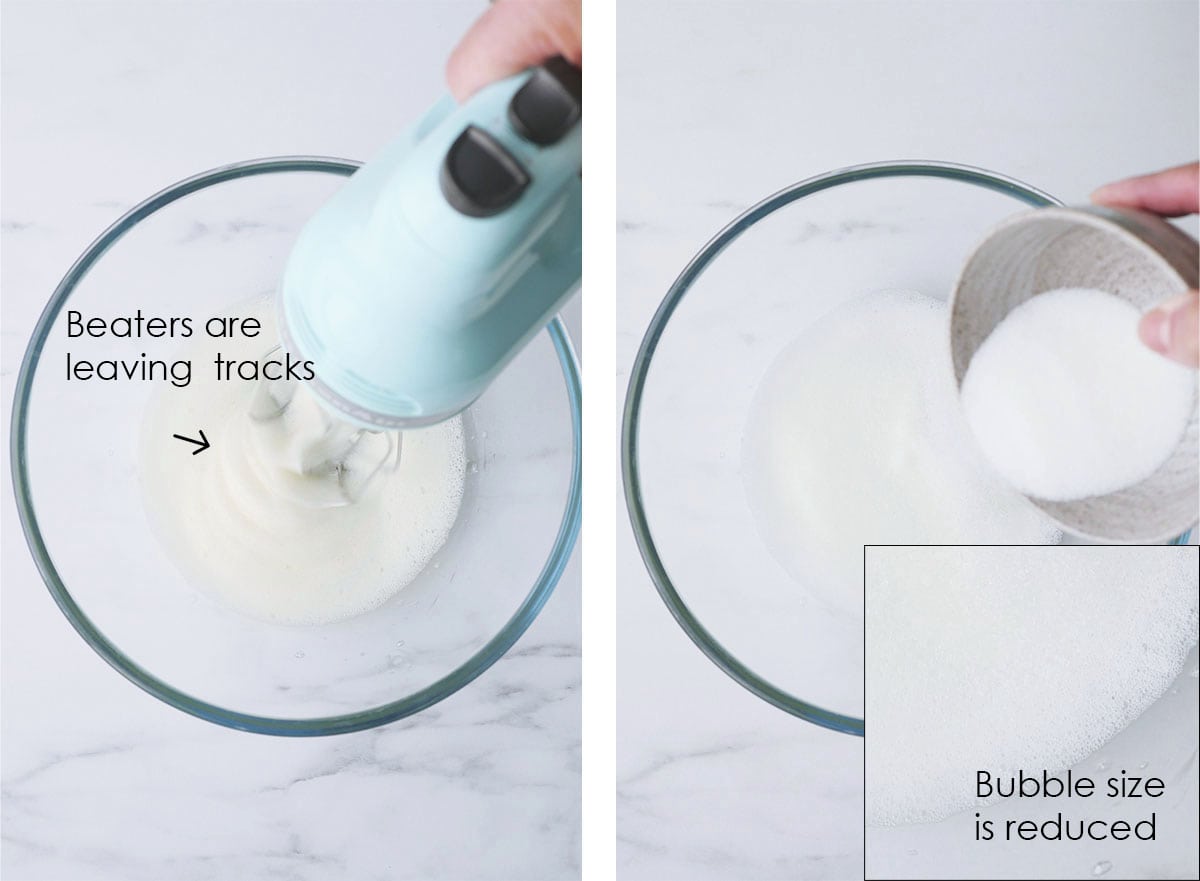
Once the beaters start leaving tracks inside the egg whites and the foam bubbles have reduced in size, add granulated sugar ⅓ at a time while continuing to whip. Increase speed to medium.
Step 4: Add Gel Color at Soft Peaks
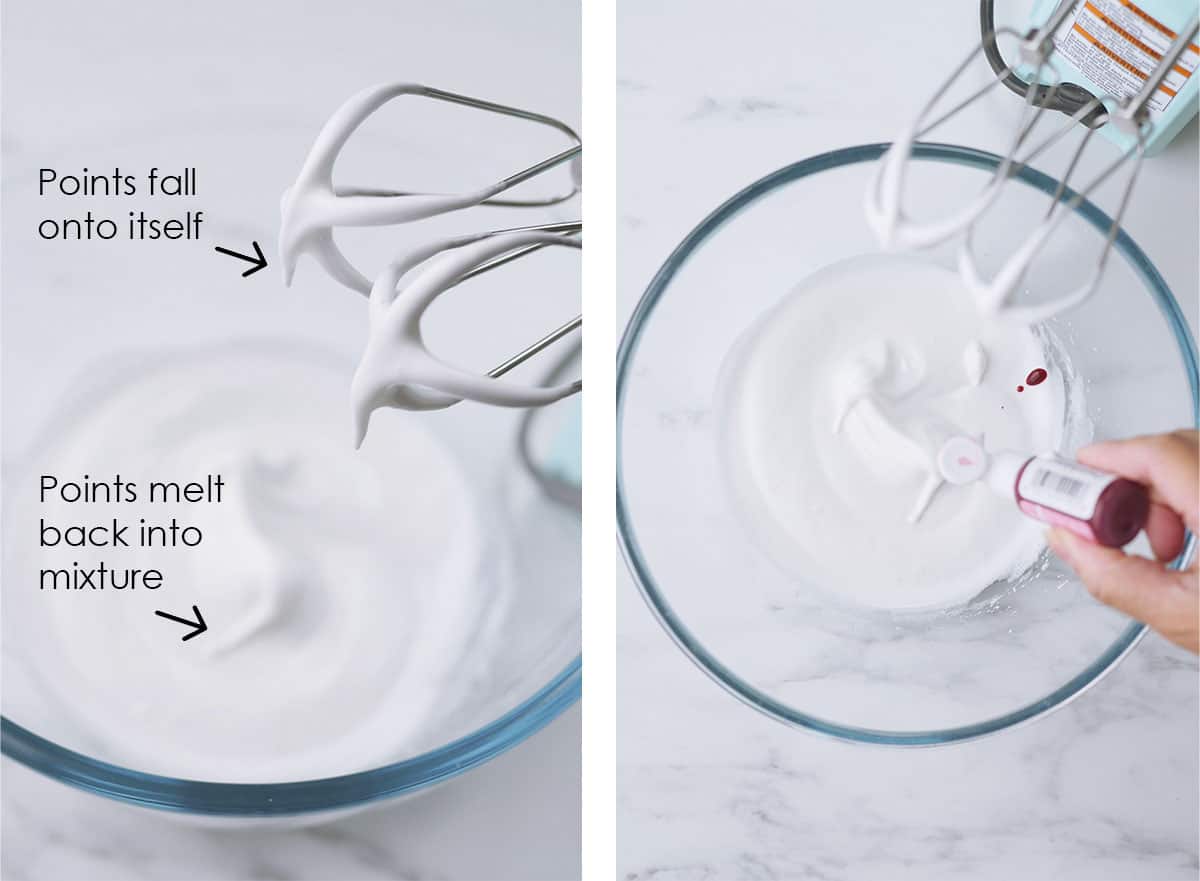
Once all the sugar has been fully incorporated and the meringue is at soft peaks stage add 1-3 drops of gel color to your liking. This stage is characterized by soft points that fall back onto itself when the beaters are pulled out.
Step 5: Whip Until Stiff Peaks
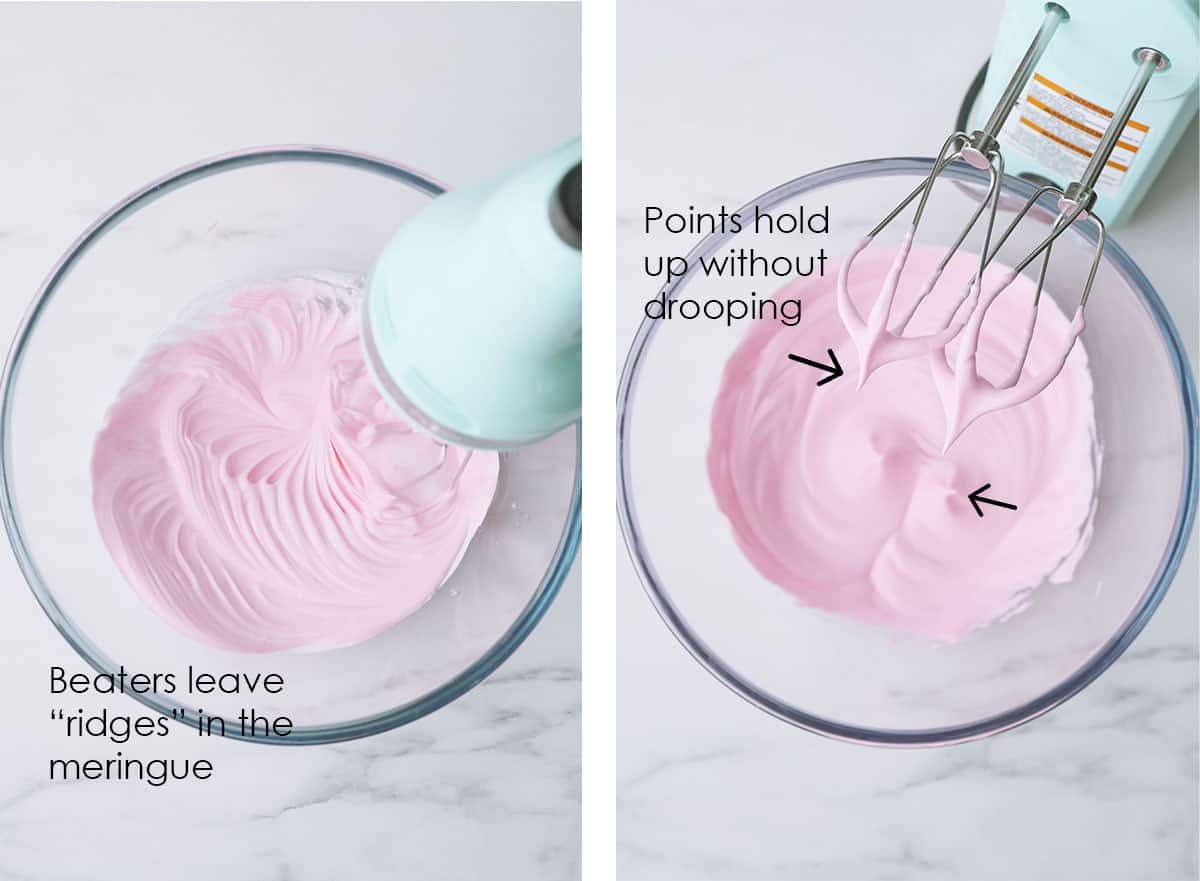
Whip until stiff peaks. This stage is characterized by points in the meringue that point upwards when the beaters are pulled out. Test the meringue by flipping your bowl COMPLETELY upside down. The whites should not slip or fall, instead it stays firm inside the bowl. WATCH VIDEO: How to Make Perfect Meringue for Macarons
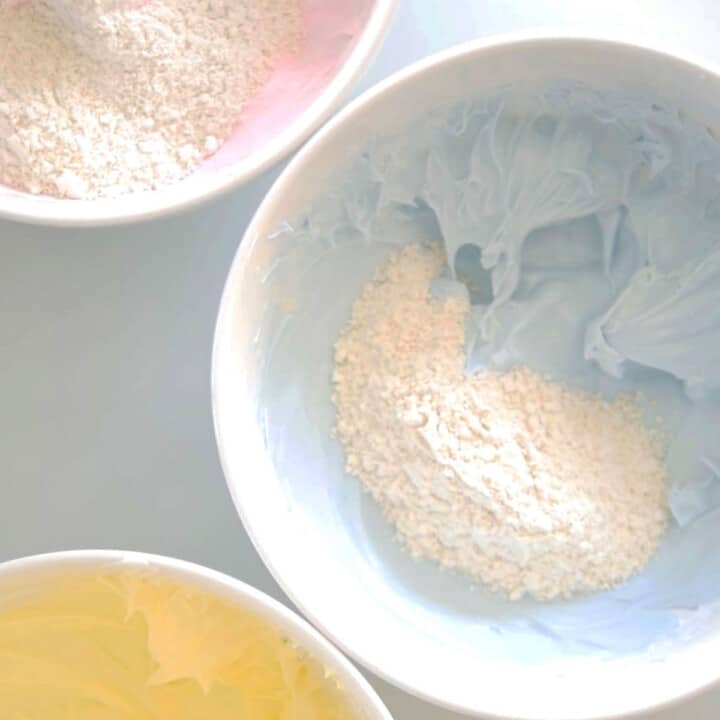
Step 6: Macaronage or Folding
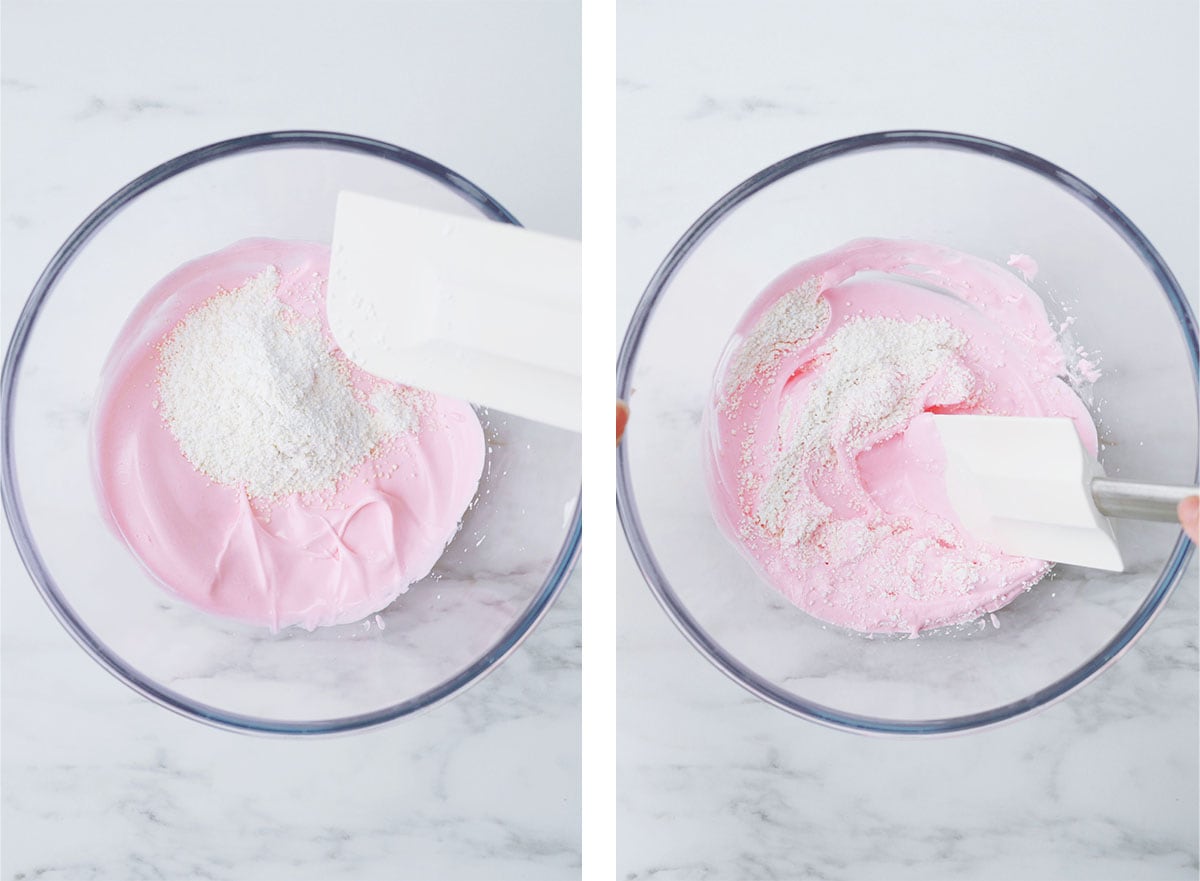
Pour ⅓ of the almond mixture into the egg whites. Gently fold this dry ingredient into the egg whites, then add the rest of the dry ingredients ⅓ at a time. Do not mix or stir. Folding properly will ensure that the air bubbles that you beat into your egg whites do not all deflate when incorporated with the heavier dry ingredients.
How to Fold Macaron Batter
This is a very critical step in the macaron making process called "macaronage". Take the spatula and gently go under the mixture, use a sweep down-across-up-and-over motion (like you're scraping around the bowl towards the middle) while turning the bowl at the same time. Occasionally, cut down through the center of the mixture to incorporate the ingredients in the center. Do not "dump" the mixture back into itself. If you fold gently, it will eventually incorporate into one mixture even though it may not look like it will at first.
Step 7: Stop Folding & Check Batter Consistency
Stop folding once the batter has reached a honey-like consistency. To check the consistency, occasionally, pick up the batter and see how it runs. You should be able to write a "figure-8" pattern with it, stop folding immediately once it reaches this point. The success of your macarons will depend largely on your ability to gauge when to stop folding your batter. WATCH VIDEO: How to Fold Macaron Batter Shown in Real Time
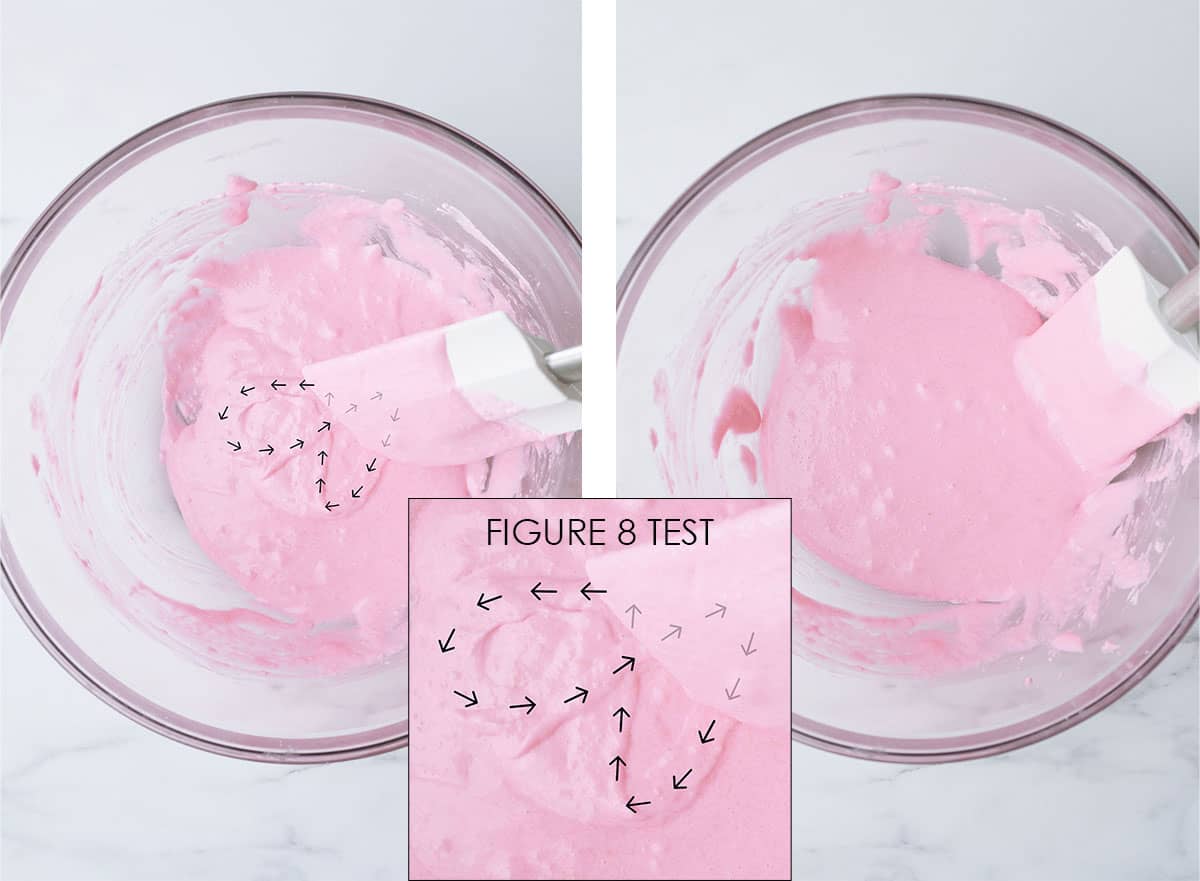
How Long Should I Fold the Macaron Batter?
As soon as the batter begins to look homogenous, start testing the consistency. With your spatula, pick up the batter and drop it back into the bowl. It should not "plop" down into the bowl but flow very slowly like honey. It should fold into itself just a few times like a ribbon but no more than that. Pick up the batter and let it flow down while drawing the figure "8". If it can do that, immediately stop folding. If it looks like a runny pancake batter, then you've gone too far! Watch my YouTube video as a visual guide.
It's always better to under mix than to over mix. When you under mix, your macaron shells will still form albeit, they'll be bumpy. But if you over mix, you will deflate the air in your egg whites and your macaron shells will spread like crazy when you try to pipe it.
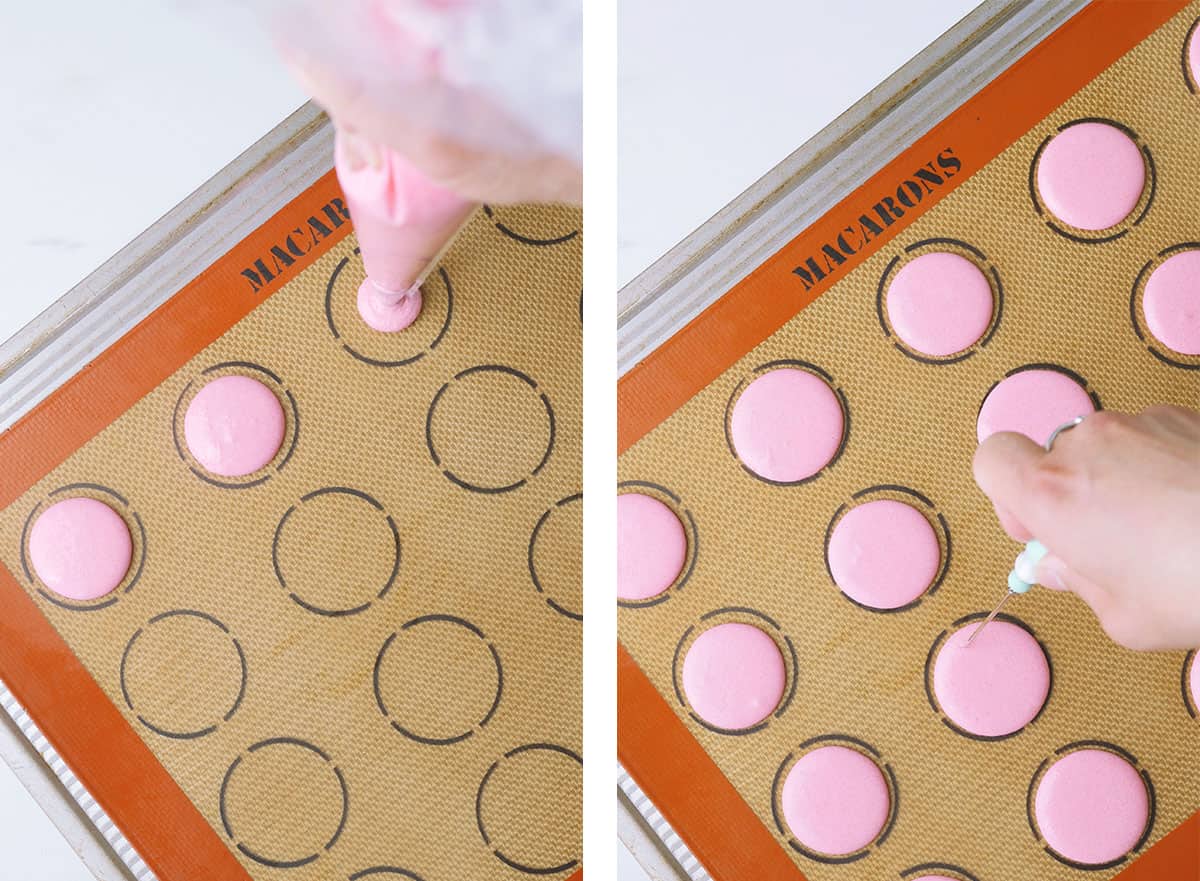
Step 8: Piping
If using parchment paper, dab a little bit of batter on the bottom of all four corners of the parchment paper. Use it as a "glue" to keep the paper attached to the tray while piping. Gently transfer the batter into the piping bag with a spatula.
To pipe, start from the center while holding the piping bag vertically and squeeze while applying even pressure to all sides until the batter has nearly reached the size of the template, swing the tip around back towards the center and pull away, that's where you want your batter to end. Ideally, if your batter has been prepared properly and is at the correct consistency, the "points" should sink back into itself.
Tip: remember to squeeze out the batter from the top of the bag without handling it excessively since you don't want the structure of the batter near the end to be compromised. Here's a post showing you the proper consistency of a macaron batter after piping.
Step 9: Rap & Remove Bubbles
Remove the paper template from underneath the parchment paper. Rap the tray several times on the counter to allow any air bubbles to escape and prevents your macarons from cracking during the baking process. If the points do not smooth out after rapping, then the batter is too thick. Next time, try to fold the batter just a bit more before piping. Before the batter dries, pop any remaining bubbles with a toothpick.
Step 10: Resting
Let it rest on the counter for 30 min. AND until a "skin" has developed. Once the shell looks dull and matte as opposed to glossy like when it was first piped, test on a sacrificial shell. Lightly touch the surface of the shell and if no batter sticks to your fingers, it's ready.
Do I Need to Rest the Macaron Shells?
Resting the shells can help aid in developing a firm skin that prevents it from cracking in the oven during baking. Sometimes the shells can be rested for 30 minutes or more and a skin may still not develop due to a humid environment OR if the batter is weak. The timing is not as important as the presence of a skin and a matte dull finish. You DON'T have to rest the shells but it is extra insurance for those who are new to macaron baking. Click here for a full post on this topic.
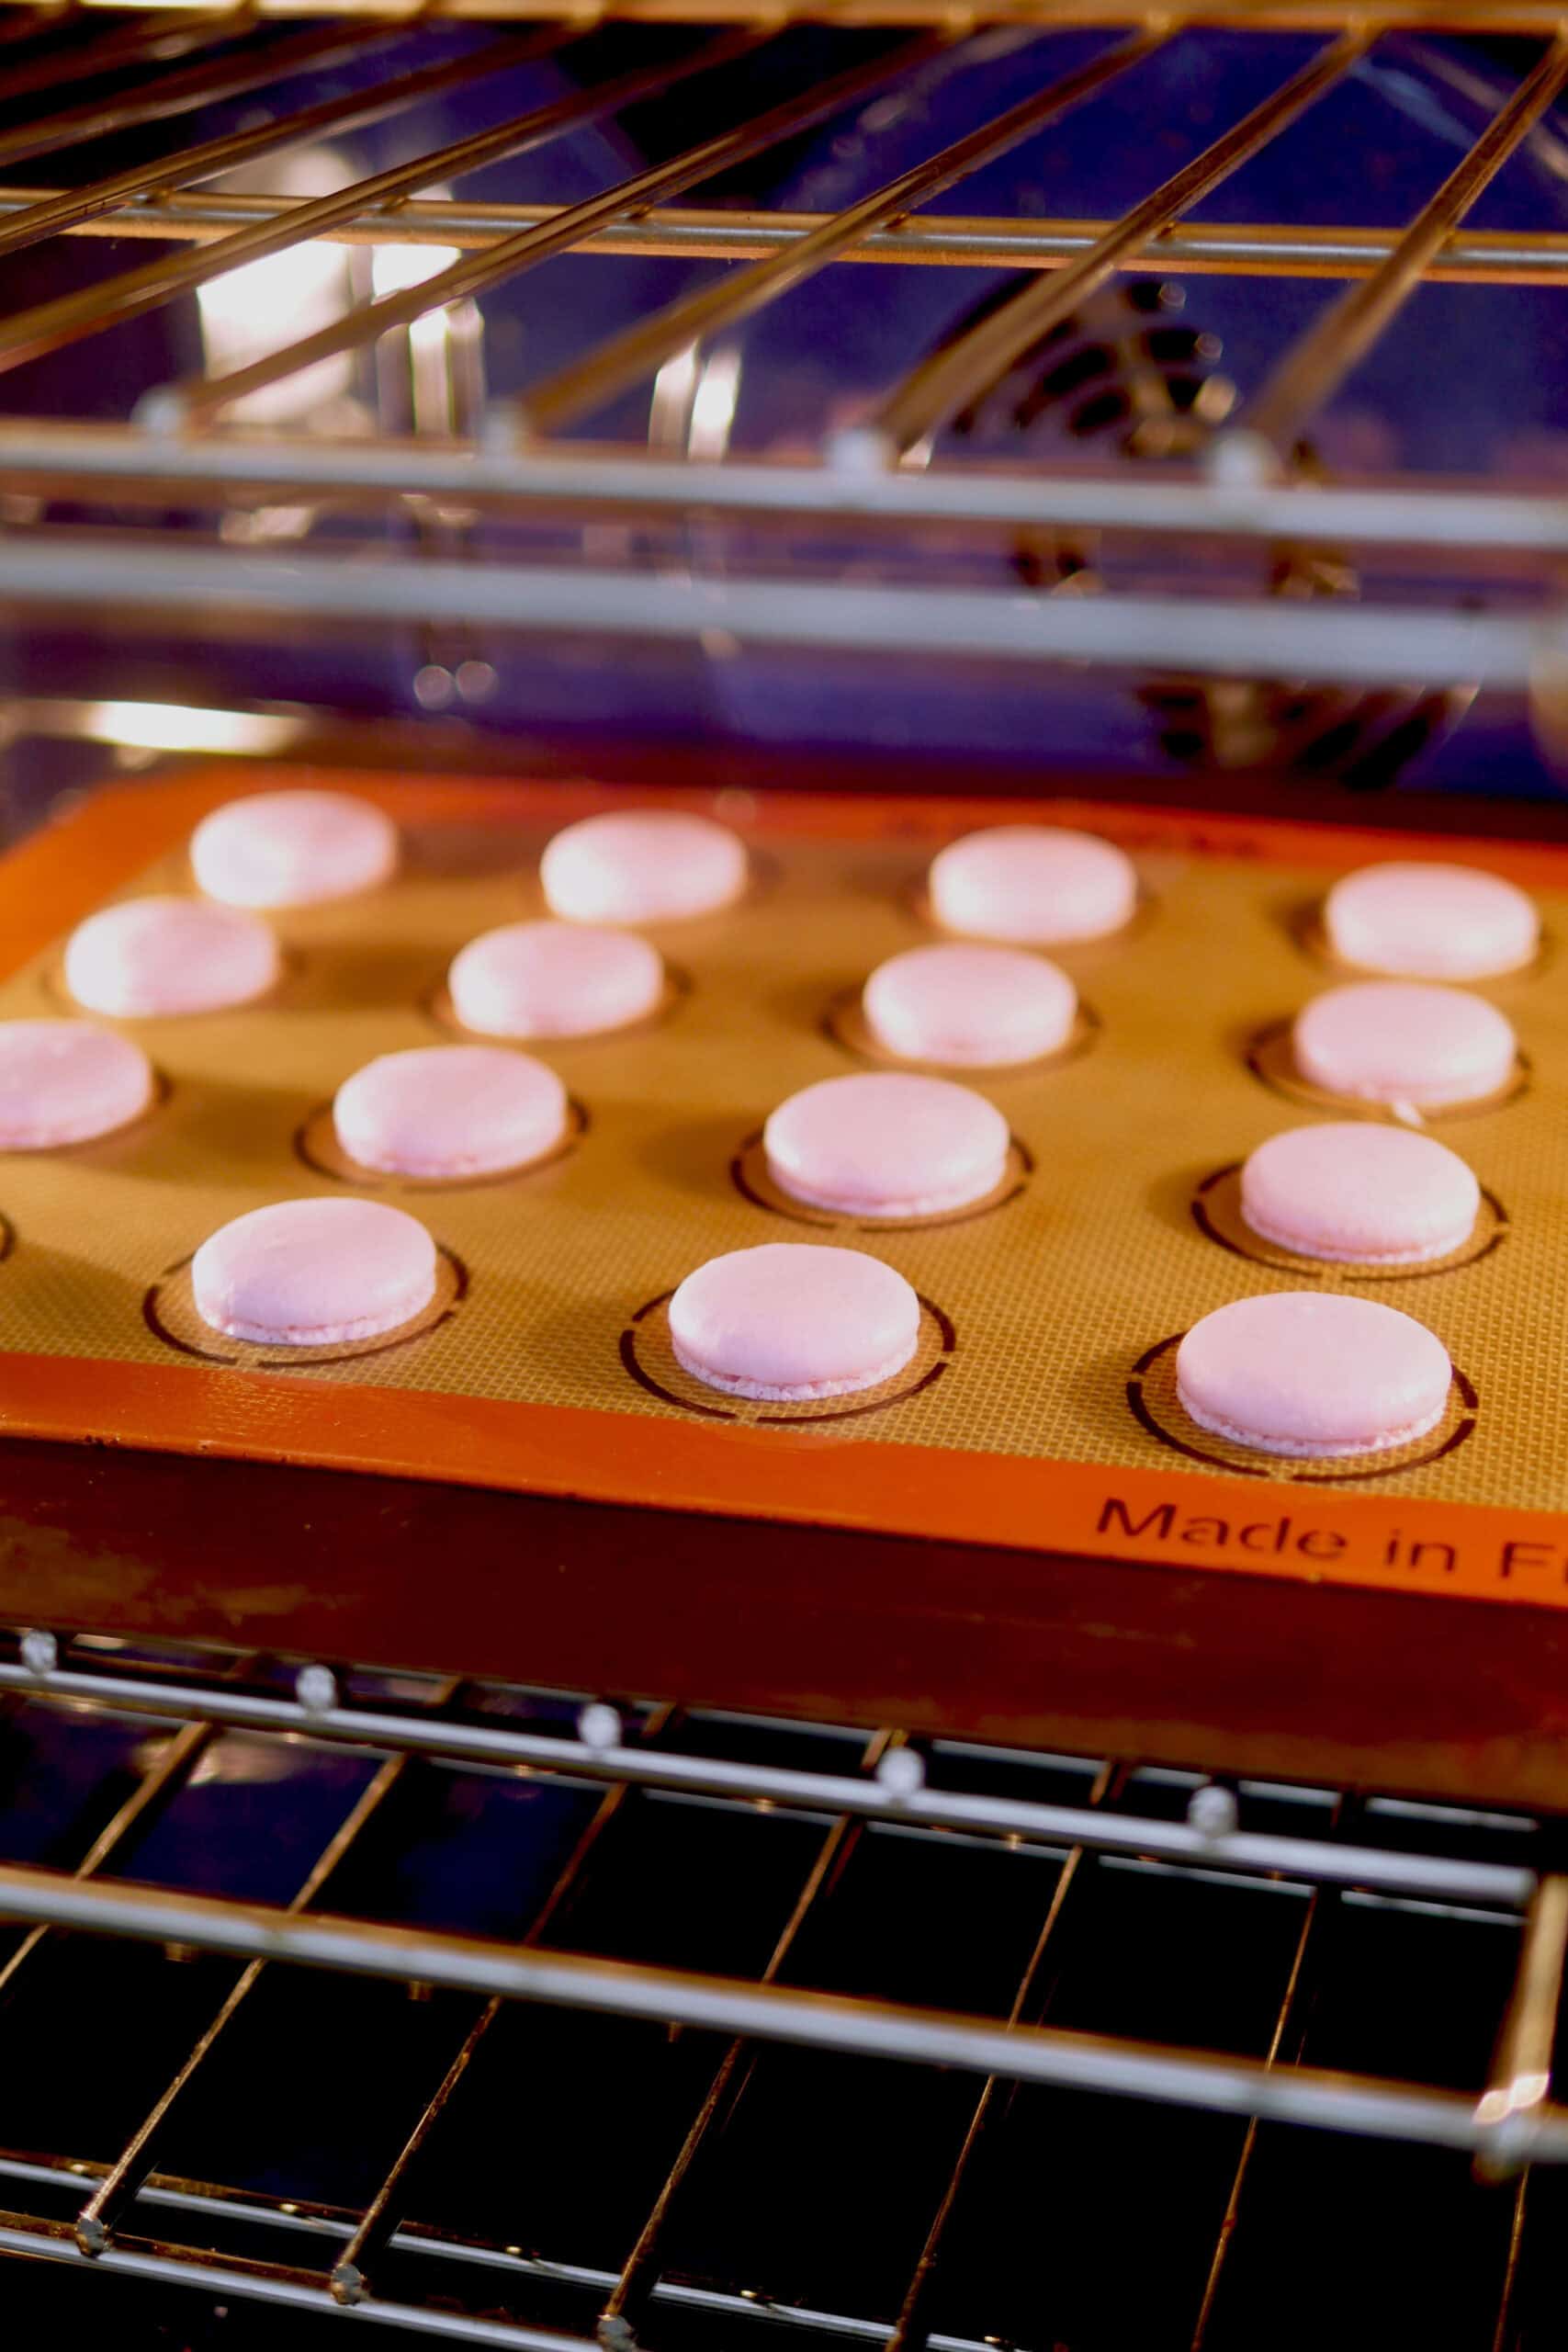
Step 11: Baking
Preheat your oven to 320 F. Place an external oven thermometer inside the oven to ensure that the temperature is correct. Many bakers assume that their ovens are at the correct temperature when in fact the temperature has increased or decreased during the baking process without their knowledge. A steady and consistent temperature is needed for macarons to bake without deflating, resulting in hollow macarons. READ: how to prevent hollow macarons.
Place the tray on the middle shelf and bake for 12-14 minutes. Bake only one tray at a time. Every oven is different so I suggest using this temperature and rack position as a baseline if it's your first time making macarons, then make any adjustments you need to perfect them.
Click here to read about the different ways to set your oven for baking perfect macarons.
Click here to read about how to control the oven temperature for baking macarons.
Step 12: Check Doneness
Take the shells out to test doneness. Use a spatula to lightly tap the feet, it should be firm and not push back. Wiggle the top of the shell from left to right, it should not be wobbly. Lightly peel back the parchment paper and the macaron should peel off easily without sticking (This does not work well on silicone mats though.) If it doesn't pass the tests above, put them back in the oven and bake an extra 1 minute at a time.
Keep on pan to cool off or take them off. If the bottoms are just a tiny bit sticky (just a little bit though), keep them on the tray to cool off for about 15 min. If however, the bottoms are already brown, they peel off cleanly or appear over-baked, take them off the hot tray to cool down. Break one open and check the inside, it should be fully set and not overly moist. If it is too moist the cookies will collapse when they cool. Err on the side of over baking rather than under baking as the maturation process will be able to salvage over baked macarons.
Step 13: Fill and Assemble
Fill with your favorite filling. Place the filling in a pastry bag and squeeze a dollop of it in the center. Stop a few millimeters before reaching the edge so it won't overflow once it's assembled with the other shell. Click here to get some yummy filling ideas.
Step 14: Maturation
Leave them in the fridge in an airtight container and let them mature for 24 hours. Once matured, the flavors will be absorbed into the shell. If your shell is hard/crunchy/over baked, the maturation process allows the shells to absorb the moisture from the filling resulting in that distinctive soft and chewy texture. The maturation process can also be sped up by lightly brushing the bottom of the shells with milk or a syrup that is the same flavor as the filling. 30 minutes before serving, bring them back to room temperature. ENJOY!
How to Store and Freeze Macarons
Macarons should be stored in the fridge in an air-tight container. The shells by itself will stay fresh for 4-6 days while assembled macarons will stay fresh for 2-4 days, depending on the type of filling used. If you're making them in advance and want to extend the shelf life, you can either assemble them closer to the serving date or freeze them. The shells alone or fully assembled can stay frozen for up to one month without affecting the freshness or quality. Take a look at this dedicated post on How to Store and Freeze Macarons for ideas on what types of fillings freeze well and further details on this topic.
FAQ
It all comes down the the preparation of the meringue. In the French method, the meringue is made by pouring sugar into egg whites that are being whipped, creating a French meringue. In the Italian method, sugar is heated with water to create a hot syrup first and then simultaneously poured into egg whites that are being beaten. If you have no previous experience making an Italian meringue for other pastries, this French macaron method is the easier one to start with. However, both would yield the same type of magical chewy and flavorful cookies that most people would know to be a macaron. (Click here to read more about the textural differences between a French and Italian macaron).
The pronunciation between macaron and macaroon is quite different as well. The 'on' in macaron is pronounced more like 'aw' as in lawn. Whereas, macaroon is pronounced exactly as it's written, the 'oon' is pronounced the same as in the word moon.
A macaron and macaroon are two totally different pastries. Because of the similar spelling, the two have been mistakenly used interchangeably in the last few years. A macaron is a French pastry that is composed of 2 airy meringue cookies containing egg whites and almonds, and then sandwiched with a softer flavored filling in between. Macaron cookies come in a variety of colors and shapes. A macaroon, on the other hand, is usually made with shredded coconut, sugar, flour and egg whites. It's simply mixed together and formed into a ball for baking. It looks more like a melted snowball.
Yes and no. First of all, I should make clear that there is absolutely nothing special about a recipe that says no resting is required. It is simply the author telling you not to do so. They are not guaranteeing that your macarons will not crack in the oven. This part is all up to you. I have a whole post on whether resting the macaron shell is necessary. If your batter is prepared correctly, it can go right into the oven without resting. Resting the macaron shell is great for those times when the batter is a bit thin and needs some time to develop a skin so it doesn't crack in the oven.
No, you can bake them just as easily on parchment paper. Silicone mats are better for keeping the shapes perfectly round, however, they are a bit trickier to use because they don't conduct heat as well. I prefer using the official Silpat brand silicone mat because it is made with food grade silicone and conducts heat well.
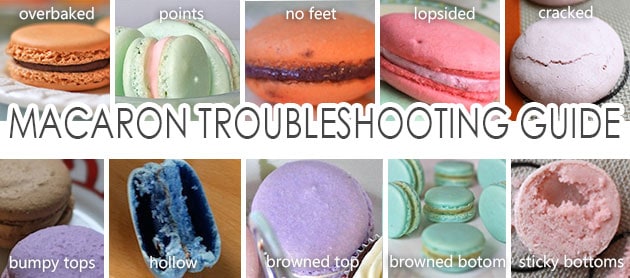
Common Problems and Troubleshooting
Cracked Macarons
Cracked macarons are caused by trapped excess air in the batter, using too high heat or a weak meringue. Tips: Rap the tray after piping to release all the excess air out of the batter, find an optimal oven temperature that is not too hot but still allows the macarons to develop. Make sure meringue has reached stiff peaks.
Macarons With No Feet
Macarons without feet are caused by a weak meringue and low baking temperature. Tips: Whip the meringue to stiff peaks and make sure to rest the macaron batter after piping. After that, use a higher temperature to assist the rise in the oven during baking. Increase the temperature by 25 degree intervals.
Lopsided Shells
Lopsided macaron shells can be caused by problems in the batter, oven conditions, baking tools, resting time or piping techniques. Tips: Deflate a sufficient amount of air from the batter by using proper folding techniques until the batter reaches the figure-8 stage; turn off convection fans inside the oven if it's too strong; use sturdy flat baking trays that don't buckle; watch out that the shells are not overly dry after resting; and pipe the batter while holding the bag completely vertically. More problems and troubleshooting in this dedicated post below:
Readers Share Their Success Stories
So how did yours turn out? I hope you enjoyed the process and the recipe worked out well for you. If you didn't quite achieve the results you're looking for this time, try using some of the tips I've provided in my macaron troubleshooting guide and other macaron technique posts I've written below.
And don't forget to share all your beautiful babies with me on Instagram and Facebook. I love sharing everyone's results here. Let's talk baking! Until next time.
XOXO, Mimi
Note: This post was originally published on September 27th, 2014.
Recipe
Best Macaron Recipe by Mimi
Mimi's best macaron recipe for making non-hollow macarons successfully. Perfect for beginner or professional use.
Ingredients
Macaron Ingredients
- 65 grams almond flour*
- 65 grams powdered sugar
- 45 grams castor sugar (a.k.a “berry” sugar or extra fine granulated sugar)*
- 50 grams egg whites, aged, room temperature*
- ⅛ teaspoon cream of tartar
- GEL color of your choice*
Supplies
- Electronic scale
- 2 very clean and dry mixing bowls
- Hand mixer
- Sifter
- Flexible spatula
- Piping bag
- Round piping tip*
- Good quality baking pan
- Template with macaron outline
- Oven thermometer
- Parchment paper or silicone mat
Instructions
- Complete all the PREP WORK as listed in post. In a big bowl, Sift together the almond flour and powdered sugar to eliminate big pieces and aerate the mixture.
- In a separate bowl with a handheld or counter top mixer, whip egg whites on slow-speed until foamy (see photo in Step By Step #2), then add cream of tartar. (Further reading: How to make perfect meringue for macarons.)
- Once the beaters start leaving tracks inside the egg whites and the foam bubbles have reduced in size (see photo #3), add granulated sugar ⅓ at a time while continuing to whip. Increase speed to medium.
- Once all the sugar has been fully incorporated and the meringue is at soft peaks stage add 1-3 drops of gel color to your liking. This stage is characterized by soft points that fall back onto itself when the beaters are pulled out (see photo #4).
- Whip until stiff peaks. This stage is characterized by points in the meringue that point upwards when the beaters are pulled out. Test the meringue by flipping the bowl COMPLETELY upside down. The whites should not slip or fall.
- Pour ⅓ of the almond mixture into the egg whites. Gently fold this dry ingredients into the egg whites, then add the rest of the dry ingredients ⅓ at a time. Do not mix or stir.
- Stop folding once the batter has reached a honey-like consistency. To check the consistency, occasionally, pick up the batter and see how it runs. You should be able to write a "figure-8" pattern with it (see photo #7), stop folding immediately once it reaches this point. (Watch video: How to Macaronage for No Hollows)
- On parchment paper or silicone mats, pipe the batter to the size of the circle on the template.* (Further reading: Proper macaron batter consistency while piping.) Remove the paper template from underneath the parchment paper or mat.
- Rap the tray several times on the counter to rid of excess bubbles. Before the batter dries, pop any remaining bubbles with a toothpick.
- Let it rest on the counter for 30 min. AND until a “skin” has developed. This will prevent the shells from cracking during baking. (Further reading: Do I need to rest the macaron shell?)
- Preheat oven to 320 F. (Further reading: How to use your home oven for baking macarons.) Place the tray on the middle shelf and bake for 12-14 minutes. Bake only one tray at a time.
- Take them out and test doneness. The feet should not push back and the shell should not be wobbly. Let them cool off on the pan (or off if they are over baked).
- Fill macarons with an easy 3 ingredient chocolate filling or your own favorite filling. (Further reading: Yummy Macaron Filling Ideas)
- Leave them in the fridge in an airtight container and let them mature for 24 hours. (Further reading: Can macaron shells be frozen?)
- After 24 hours of maturation in the fridge, bring them back to room temperature 30 min. before serving. They will remain fresh stored in an airtight container in the fridge for up to 4 days, depending on filling used. ENJOY!
Notes
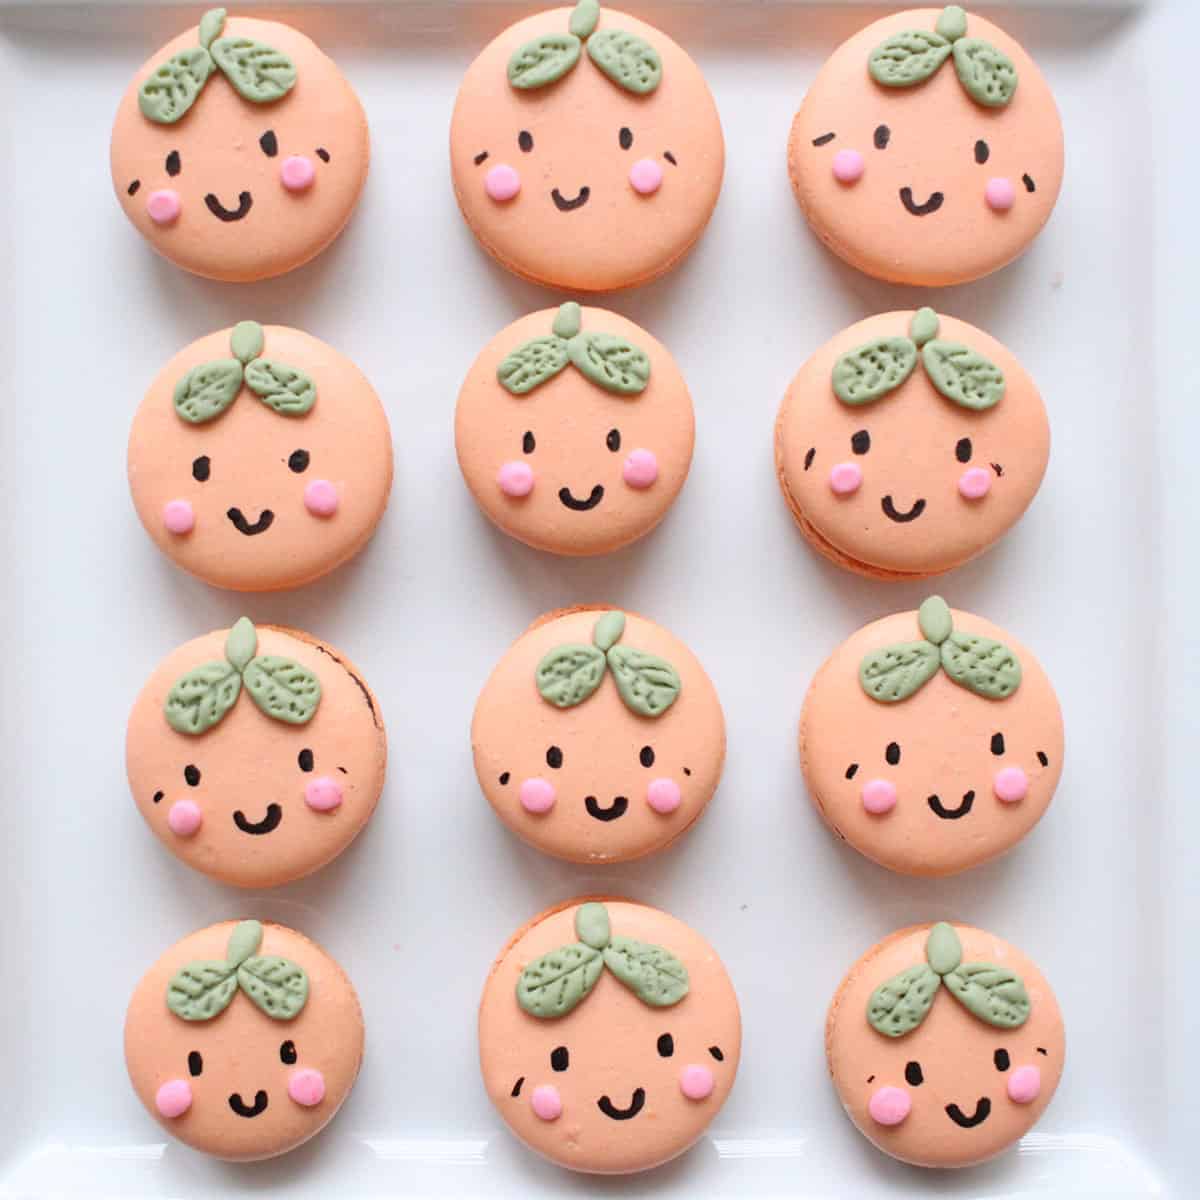
- This recipe yields 12 assembled macarons. This recipe can be doubled, tripled, and so forth.
- Read this post on How to Make Your Own Almond Flour
- Regular granulated sugar can be used but castor sugar is preferable.
- Measure out 50 grams of fresh egg whites and then age it before using. Do NOT use meringue powder
- Use GEL food color, do not use liquid color.
- Recommended round piping tips: Wilton #12 or Wilton #1A. I prefer Wilton #1A or Ateco #805 Plain Seamless Tip for regular round macarons or Wilton #12 for more control with character macarons.
- To further shelf life, unfilled macaron shells and assembled macarons can be frozen for up to one month.
- Free macaron templates can be downloaded from my Member's Only Area. Sign up for the newsletter to receive the password to enter.
Recommended Products
As an Amazon Associate and member of other affiliate programs, I earn from qualifying purchases.
-
 Bob's Red Mill Super-Fine Gluten Free Almond Flour, 3 Pound
 -
 India Tree Superfine Caster Baking Sugar, 1 lb. bag
 -
 McCormick Gourmet All Natural Cream Of Tartar, 2.62 oz
 -
 Cuisinart CTG-00-3MS Set of 3 Fine Mesh Stainless Steel Strainers
 -
 Round Piping Tip #10
 -
 Regular Sized Silpat Non-Stick Silicone Baking Mat
 -
 Cuisinart CTG-00-SMB Stainless Steel Mixing Bowls with Lids, Set of 3
 -
 Toaster Oven Size Silpat Non-stick Silicone Baking Mat
 -
 PaperChef Culinary Parchment Multipurpose Non-Stick Paper, 205 sq ft
 -
 USA Pan Rimless Baking Sheet for Better Airflow to Macaron Shells
 -
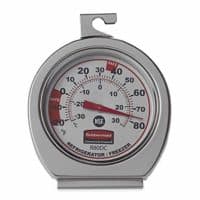 Oven Thermometer
 -
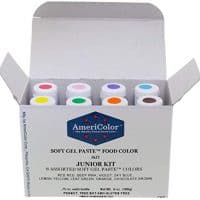 Gel Food Coloring AmeriColor Junior Kit, 8 Colors.75 Ounce Bottles
 -
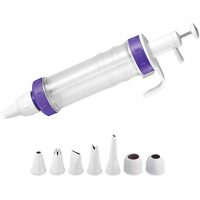 Batter Piping Tool
 -
 Ateco Disposable Piping Bags, 12-Inch, Pack of 100
 -
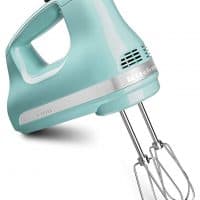 Kitchenaid Handheld Mixer
 -
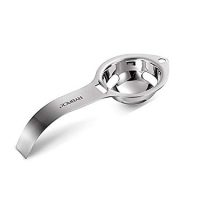 RYBACK Stainless Steel Egg White Yolk Filter Separator Cooking Tool Dishwasher Safe Chef Kitchen Gadget
 -
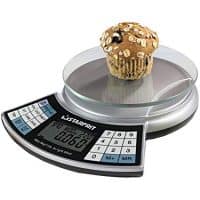 Digital Scale
Nutrition Information
Yield
12Serving Size
1Amount Per Serving Calories 73Total Fat 3gSaturated Fat 0gTrans Fat 0gUnsaturated Fat 2gCholesterol 0mgSodium 9mgCarbohydrates 11gFiber 1gSugar 10gProtein 2g
This information is provided as a courtesy and is an estimate only. This information comes from online calculators. Although indulgewithmimi.com attempts to provide accurate nutritional information, these figures are only estimates.

Diya says
How can I vary this recipe to make it a coffee macaroon with a chocolate filling?
Mimi says
Hi Diya,
Here is a recipe for coffee macarons 🙂
XOXO,
mimi
Mylien says
Hi Mimi. I've found that buttercream filings are not as study as I would like it to be especially in the heat. I want to try making genaches, do you think it can be done with any flavors? Do you have a basic genache recipe? Thank you!
Mimi says
Yes, definitely, different flavors can be added. You can either make ganache with juices, add extracts into the ganache or steep the cream with flavoring. There's a lot of different ways to do it. Start with a small portion first though as the chocolate can separate due to introduction of different ingredients. Here are a few flavoured ganache recipes: Baileys Chocolate Ganache Filled Gingerbread Dachshund Puppy Dog Macarons (Template) Christmas Macaron Bear Tutorial with TemplateEasy Gingerbread Macarons with Chocolate Spice Filling
XOXO, Mimi
nidhi kalra says
I was very apprehensive about macarons, having read about many first time disasters. But your recipe was very detailed and the outcome was quite decent. Some of them were sticky cracked and hollow though. But more than half the batch turned out good. My piping needs more practice. Thanks a lot
Mimi says
Good to hear you gave it a try! With a bit of practice, those little macarons will become better and better!
XOXO,
Mimi
Jena says
I'm a little confused on the measurements of the almond flour and powdwred sugar. I measured 65 grams of each and then grinded them in the food processor. I then weighed the amount to discard which was 21 g. I replaced that 21 grams with more almonds and re grinded the entire mix. Again there was 17 g that needed discarded. Am I supposed to keep adding more almonds or is one time of added almonds enough? The ending weight of my sifted mixture was 85 g total. Is that a sufficient amount?
Mimi says
Hi Jena,
You will need to replace the discarded almonds with exactly the same weight of ground almonds. There will always be some that can't be ground up so if it were me, I would grind up much more than 21 gram and then sift it... then just take that sifted amount (21 grams) and put it back into the entire mixture.
XOXO,
Mimi
ROBYN says
This is the first recipe of yours that I saw and it was the first time I managed to make perfect macarons! The buttercream was a bit eggy for me but piped some with chocolate ganache and they were amazing! Showing exactly when to stop mixing the batter really helped!
Mimi says
Hi Robyn,
Thank you so much for the feedback. I'm so happy it worked so well for you. I totally understand, not everyone likes meringue based buttercreams because of the eggs and large amount of butter. I'm glad you found the chocolate one tasty 🙂 White chocolate also works well as a base for many flavours too. You can see one such recipe here: White chocolate gingerbread macaron.
Xoxo,
Mimi
Mary says
Hi,
I am wondering if the cream of tartar can be replaced with dried egg white powder, if so would it be the same amount as the cream of tartar in your recipe? Thanks for your help and amazing videos!
Mimi says
Hi Mary,
You don't need cream of tartar but it does help to stabilize the egg whites, as any acid would. You can use lemon juice or vinegar in double the quantities. Egg white powder isn't an acid but can help to increase the protein bonds, you can add 1/2 tsp into the meringue and go from there.
XOXO,
Mimi
Brenda says
Does your powdered sugar have any cornflour in it?
Mimi says
I live in Canada and most of the powdered sugar sold is the same as the ones in the USA, it contains a little bit of cornstarch in it as an anti-coagulating agent.
XOXO, Mimi
Ximena says
Question about the Yielding of this recipe: Are those 12 shells or 12 assembled macarons (24 shells)?
Mimi says
12 assembled macarons 🙂
XOXO,
Mimi
CARIN NEWHAUSER says
How would you add a flavoring? and what would you use? example: lemon, raspberry, chocolate etc..
Mimi says
I prefer to add it in the filling instead of adding it to the shells, especially if it is a liquid flavouring. Liquids can compromise the integrity of the meringue if using too much or added at the incorrect time. You can get good flavour, by osmosis during maturation. If adding dry flavours, add it into the dry mix 🙂
Xoxo, Mimi
Melody says
Hey I have a question about Silpat mats!
In your experience, how often do you need to replace your macaron mats? I’m wondering if when they get older (I’ve been using mine for just over a year) they could cause macarons to get lopsided or something.
Mimi says
I have had mine for over 5 years and bake a whole ton with them.. I haven't needed to replace them yet. Perhaps you can check with Silpat to see when a mat requires replacement.
XOXO,
Mimi
Paola says
This recipe is great! My only issue is that the macarons stick to the slipmat no matter where in the oven i place them. And if i use parchment paper, the shape doesn't hold. Do you grease your slipmat?
Thank you!
Mimi says
Hi Paola,
No, I don't grease the mat. There is no need to as it is made to be non-stick. I recommend that you let more heat conduct to the mat from the bottom. Either use a better heat conducting pan or lower the position of where you are placing the tray in the oven. These two posts will help you. How to use home oven to bake macarons. How to preven Hollow macarons. xoxo, mimi
dmr88 says
I tried it yesterday. I really love it!. To be honest, i will use this recipe till i die. Good job. Thanks a lot!!!
Mimi says
So great to hear! I love that very much. It makes me smile 🙂 Happy Baking XOXO, Mimi
Jessica Benavides Lake says
I was curious if you have every tried this recipe with carton egg whites that have already been separated rather than fresh eggs that you have to separate? This will be my first time trying to make macarons so i am looking for all the help:-) Thanks!!
Mimi says
Hi Jessica,
I recently had a reader who told me they tried with carton egg whites and it worked great for her. Her comment was on the post on how to age egg whites. If you need more info, perhaps you can make a reply to her comment. XOXO, Mimi
Riddhi says
Hi Mimi,
I want to reduce the sweetness of the macarons since that fits better into my taste. Do you recommend reducing the quantity of the powdered sugar or of the fine sugar in the meringue? Does reducing that sugar affect the structure of the macaron?
Mimi says
Yes, sugar is an integral part to the macaron. You will find that the change in sweetness is pretty minimal. You can adjust the filling to compensate for this, add some salt to balance out the sweet filling or use a tangy/fruit filling. XOXO, Mimi
Gary Boatman says
most silpat Mac templates hold 30 shells. Why don't u tailor your recipe to this quantity of shells? Another site let's u put in the desired # of Macs and the ingredient quantities for both the shells and filling automagiCally change to suit...Nice option!
Is it your opinion and experience that you can just multiply a given recipe's ingredients by some factor (say..by 1.5 or 2) and still have them turn out perfectly? Some recipes don't take well to being changed... Lastly, am pretty good at this now but I am always underwhelmed by my smallish feet....Any hints??? Maybe I'm just a size queen?
Oh...One last thing...Am always triying to recreate the vibrant colors that I see in these recipes..why do my colors nvr seem as vibrant or as electric\stunning? What am I doing wrong? Am using reputable gel colorings.
I think Mac recipes are best compared aganst one another by ratio of ingredients. I usAlly use 1:1.25:1.5:0.8...any thots on this ? Allows me to reduce or expand my production easily...
Mimi says
Hi Gary,
Thanks for your feedback, as per my post, I made the recipe in the smallest quantity possible so readers can try to make it at home without wasting their precious ingredients if you're not skilled at macaron making yet. This recipe is definitely able to be doubled, tripled and so forth. I know of bakeries who use my recipe too 🙂 Yes, something like a cake, it won't be possible to just increase the quantity without changing the integrity of the recipe but macarons are pretty safe as they have a small surface area. Small feet are great in my opinion. Big tall feet usually indicate a hollow macaron. As for the coloring... I have the best success with Americolor gel colors. I would recommend it. There are certain brands that are not heat stable once baked 🙂 I hope that helps. XOXO, Mimi
Debbie Taylor says
Mimi,
Thanks so much for this recipe. I was so nervous, volunteered to make these cookies for a wedding shower and they were PERFECT! I made 3 batches and loved the small size of each batch and still ended up with about 50! I made mine w lemon buttercream and they were the hit of show!
Thank you so much! You are my heroine!
Debbie Taylor
Mimi says
Hi Debbie,
Thank you so much for coming back to tell me about your results! That is so perfect to hear. It must have been amazing to share those wonderful creations with everyone. It's the best feeling to share these little macaron babies with everyone and see how much they all love and adore homemade macarons. Your guests must have been spoiled! Happy Baking!
XOXO,
Mimi