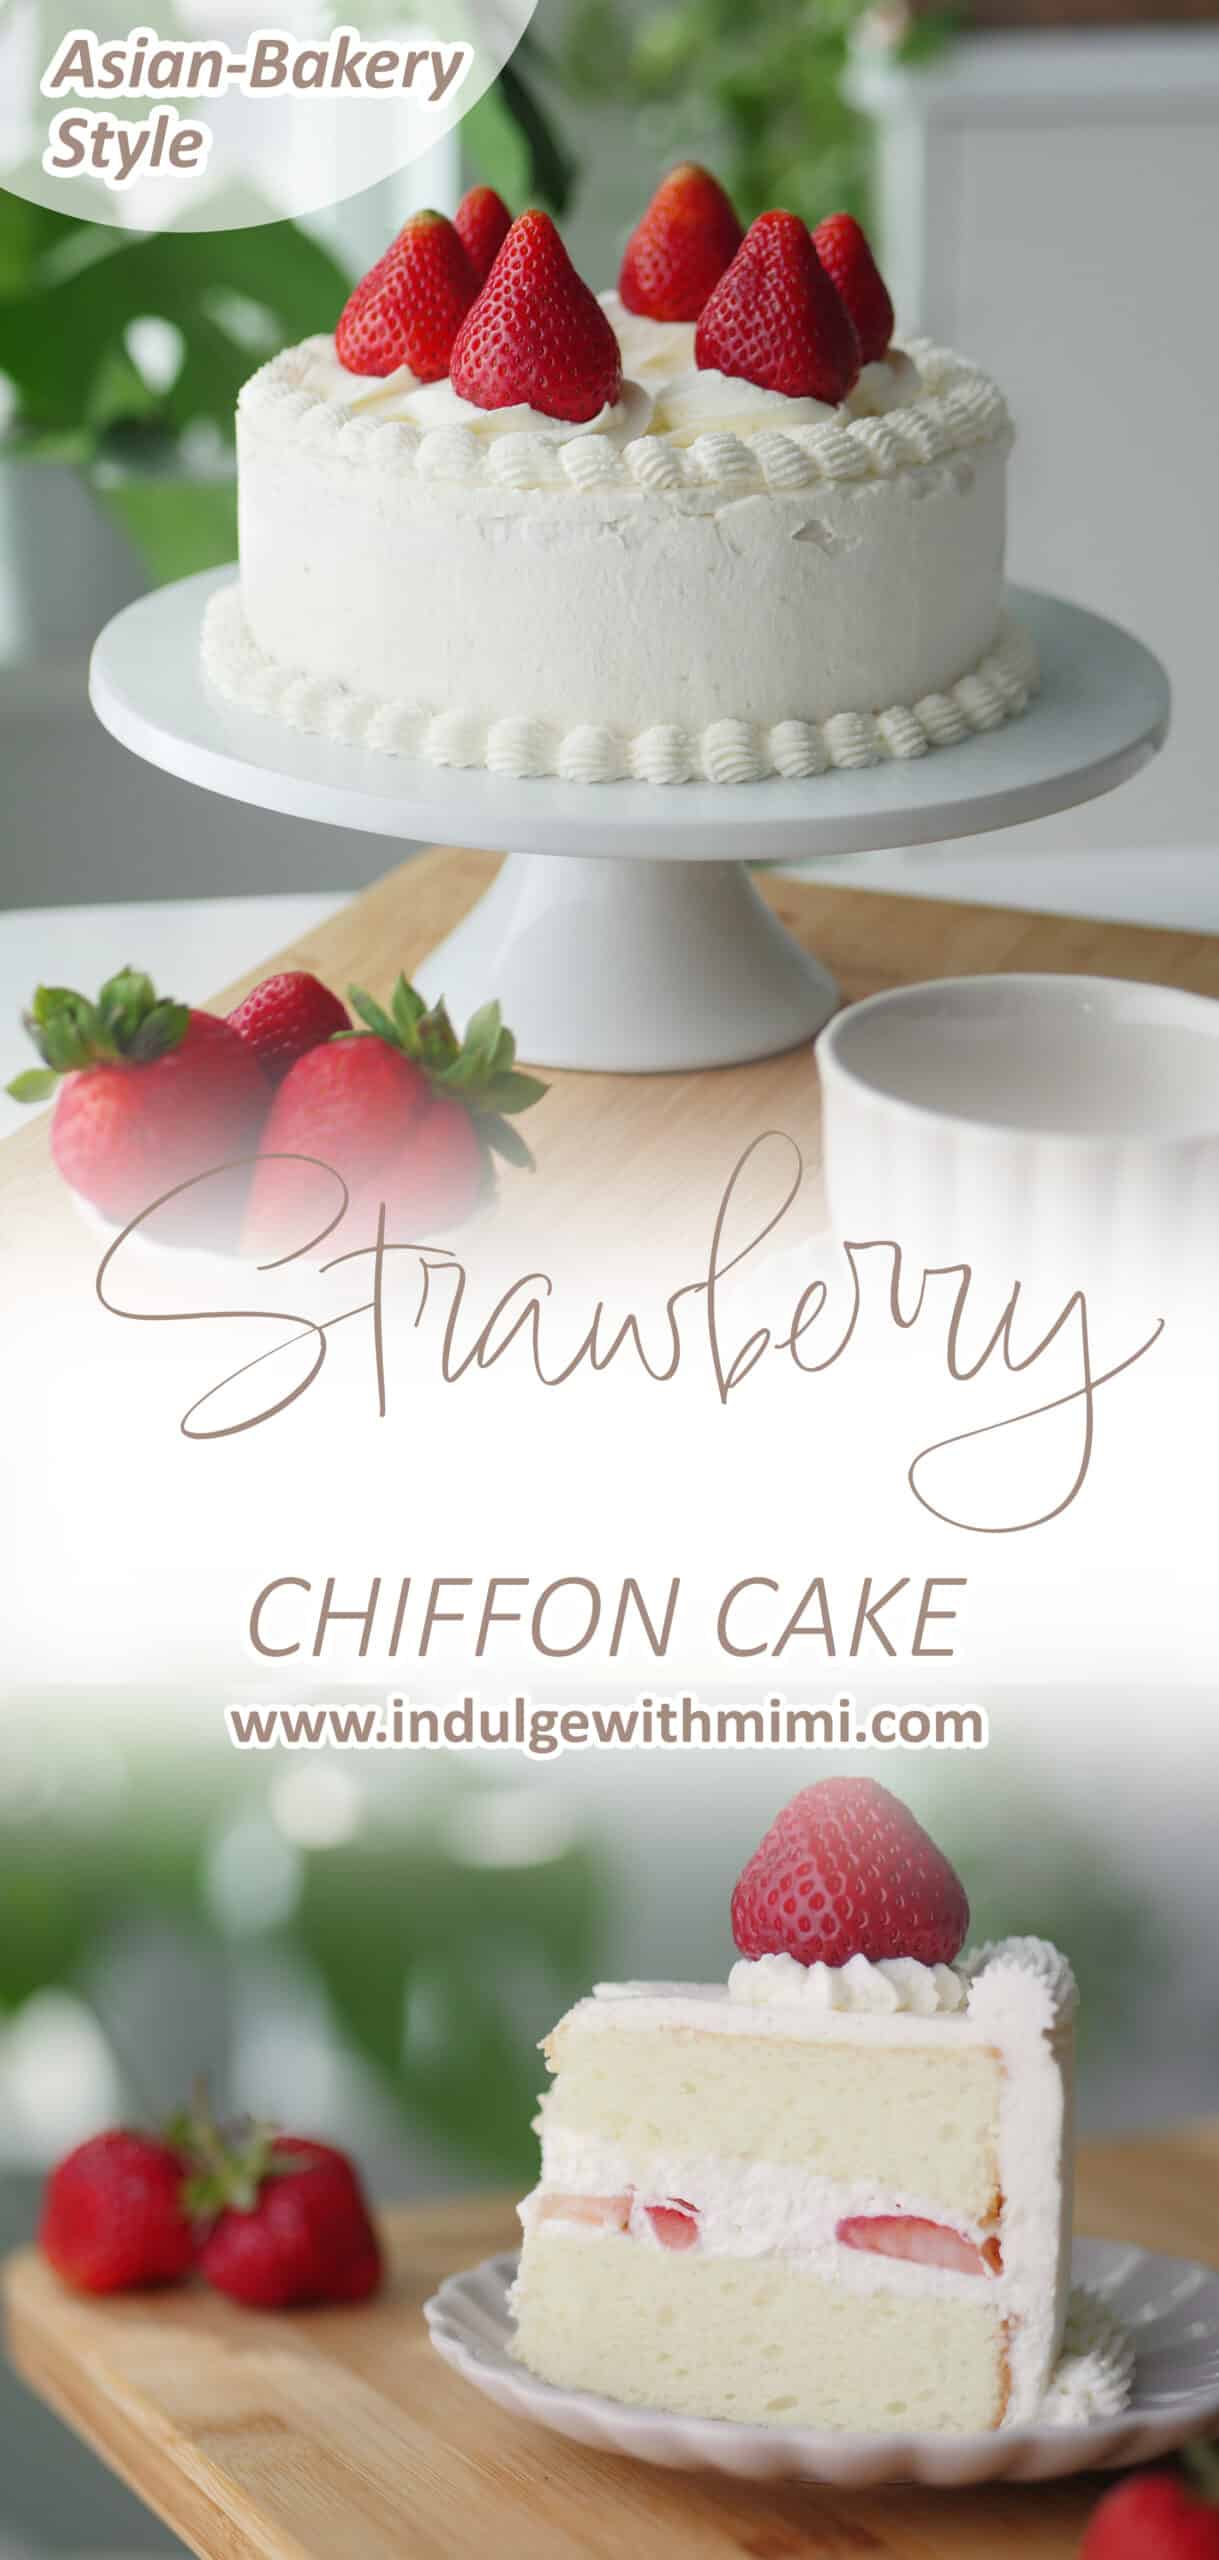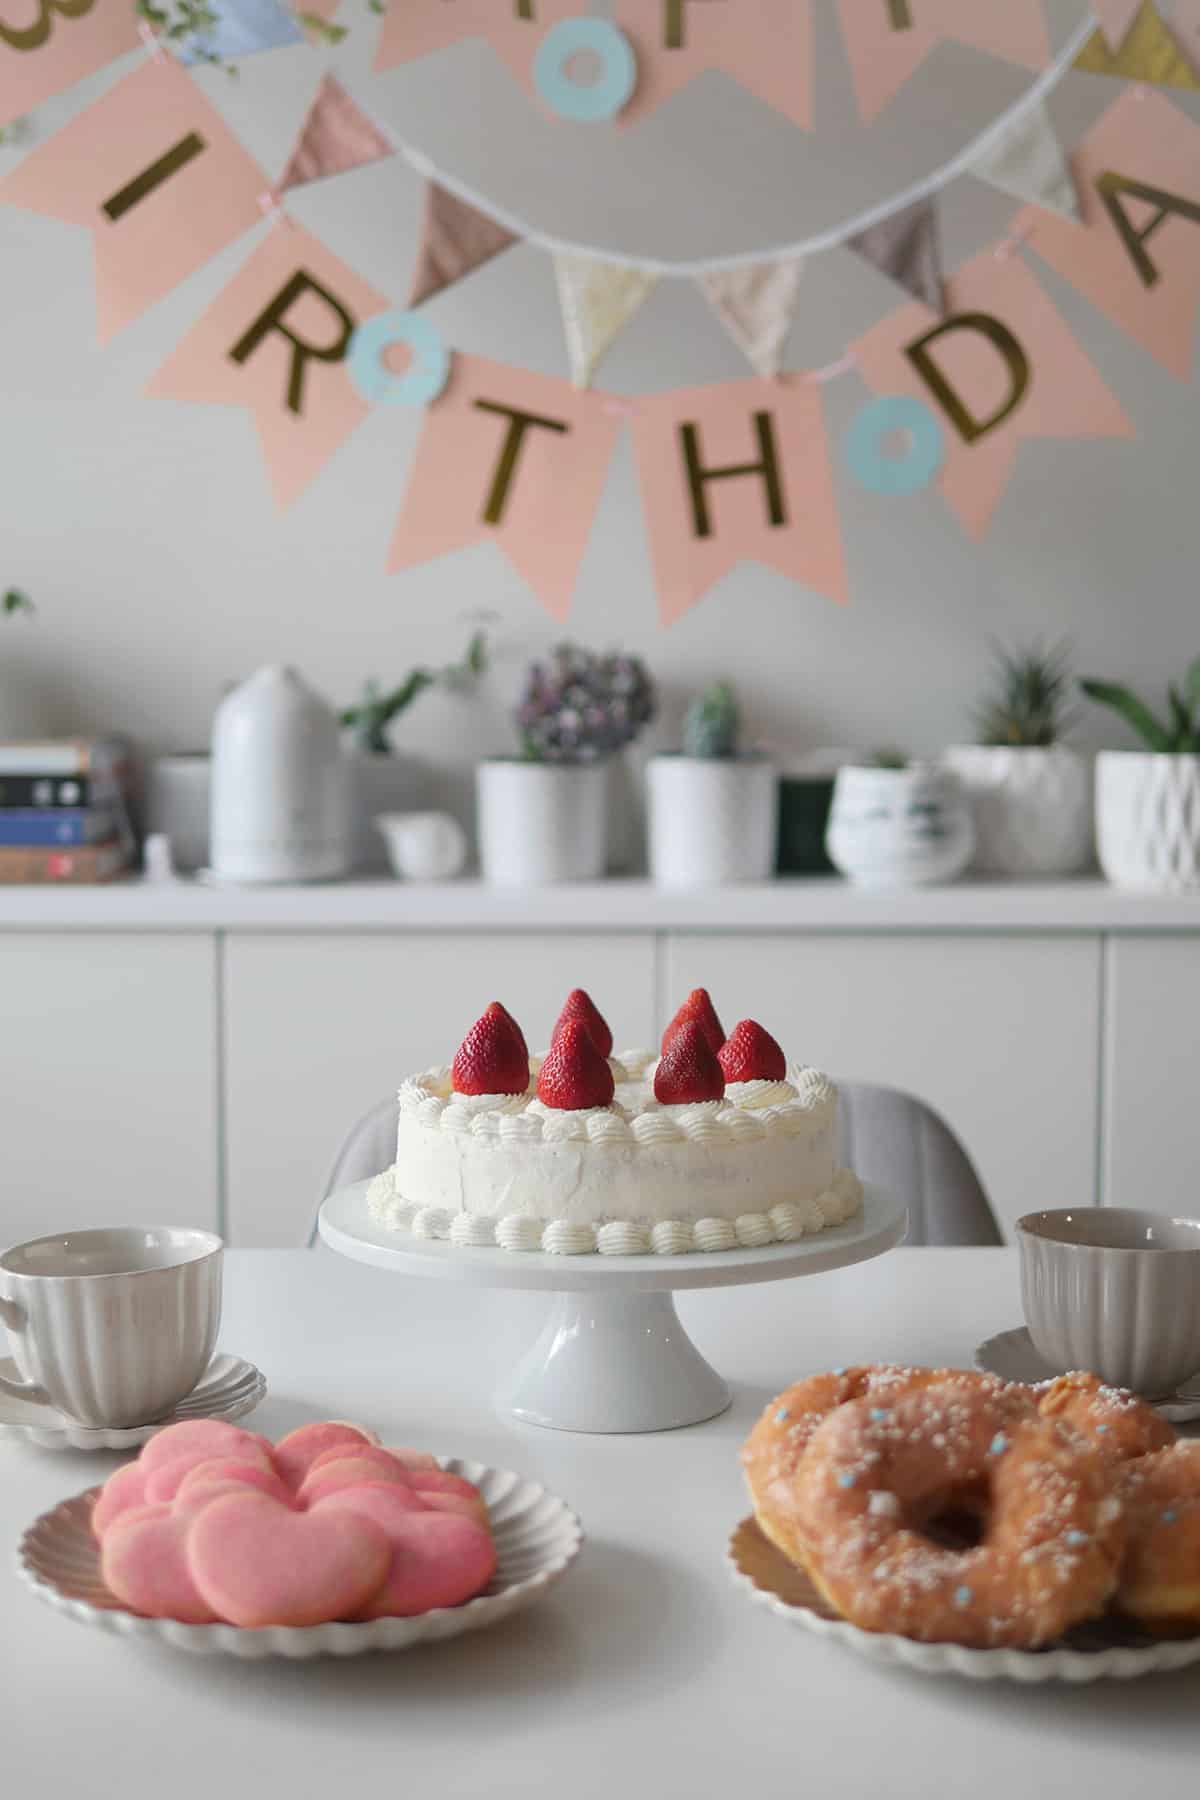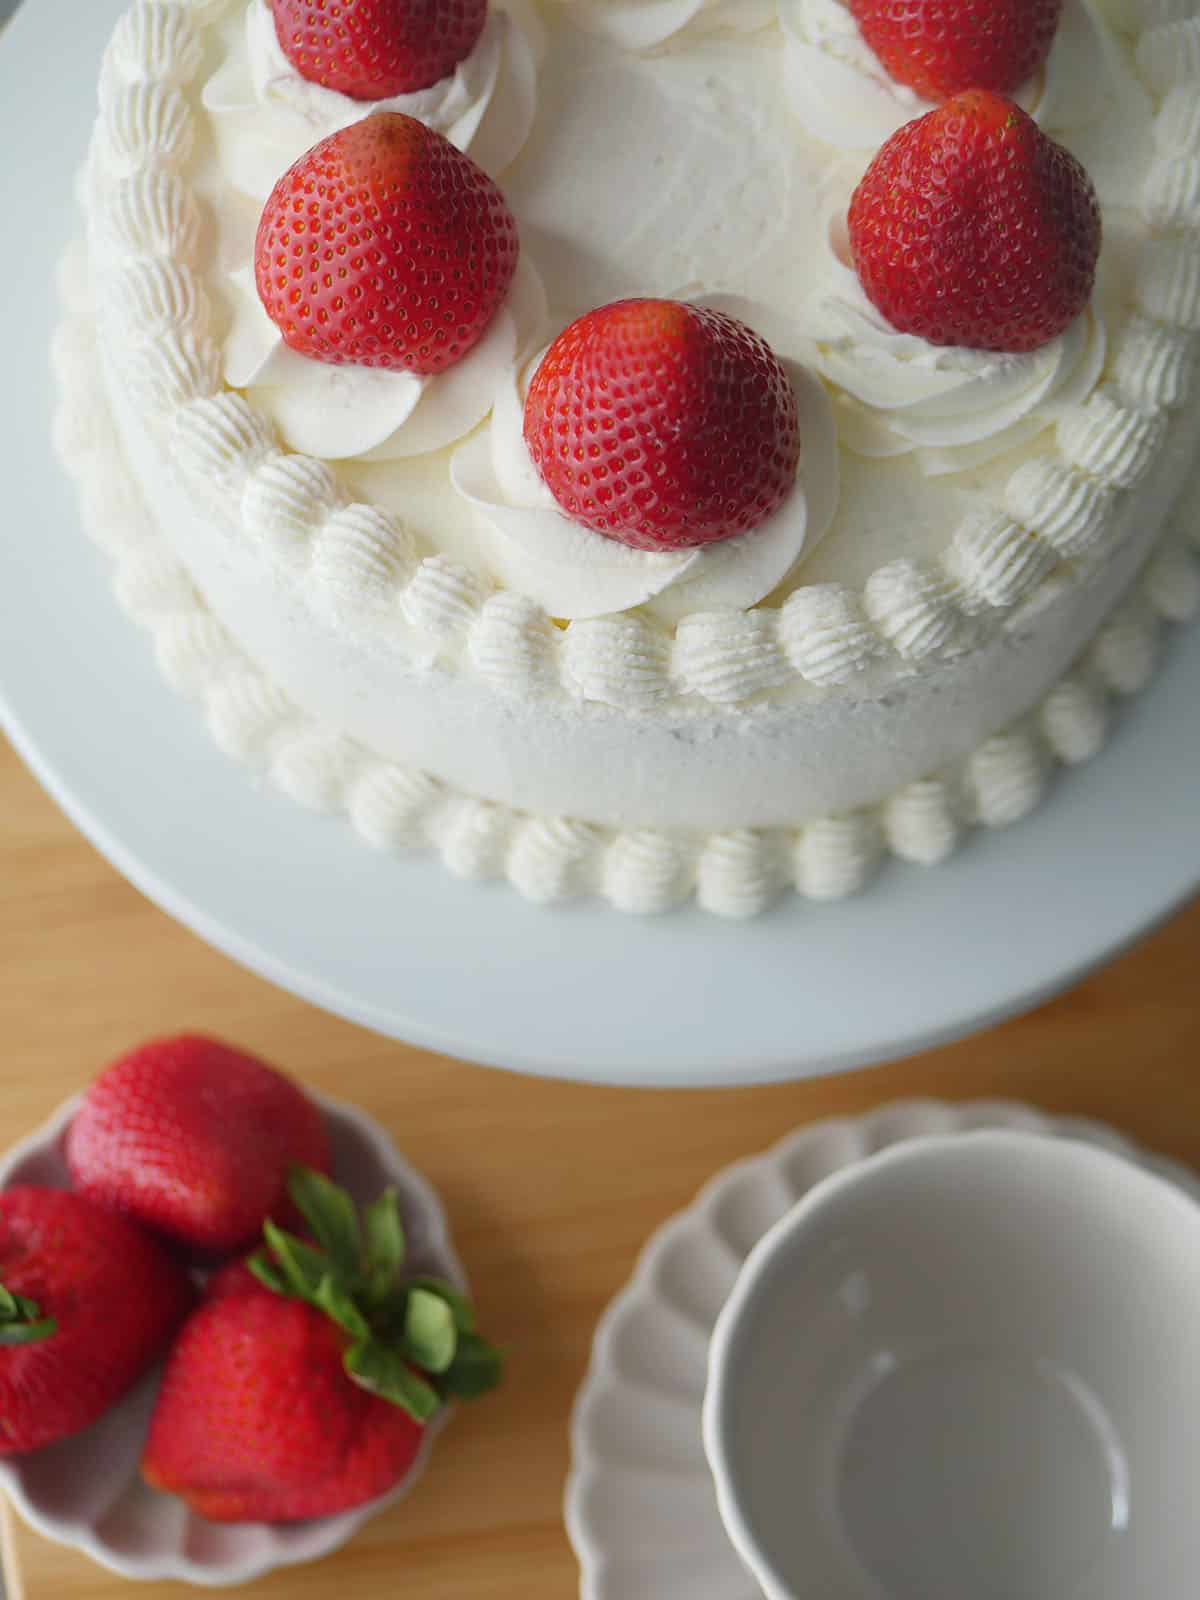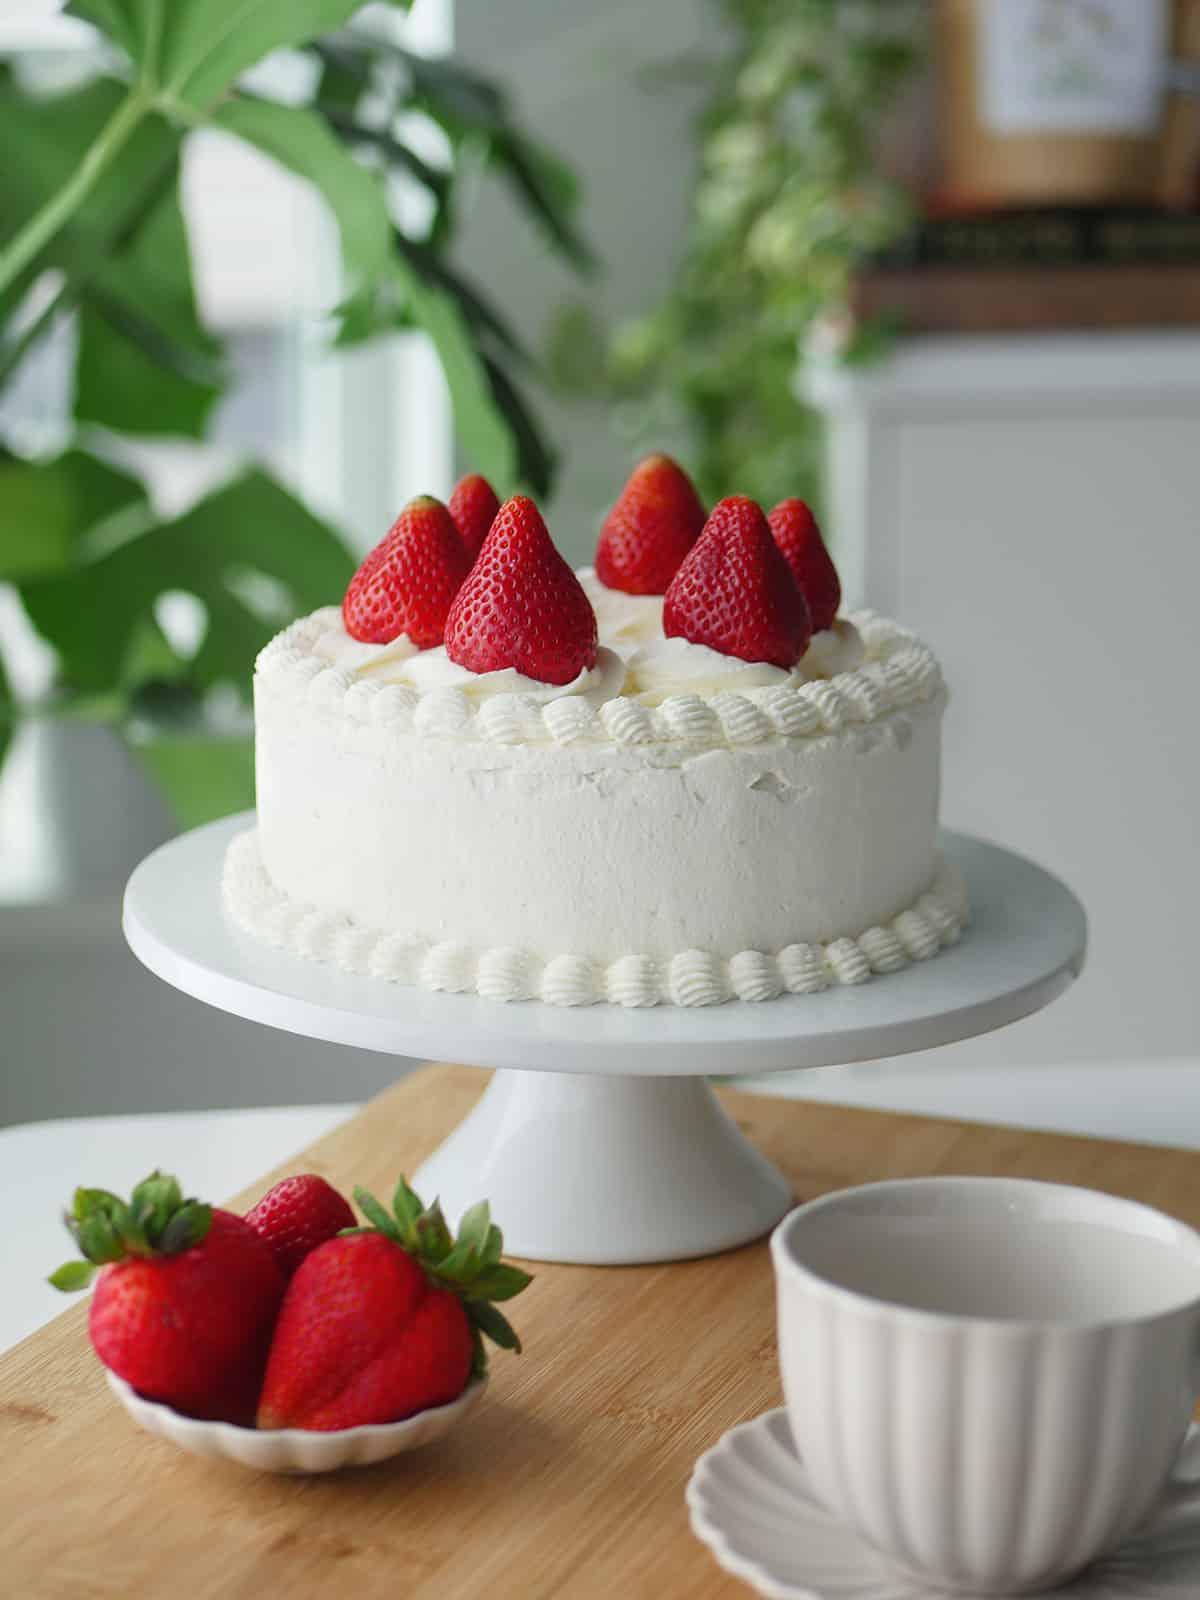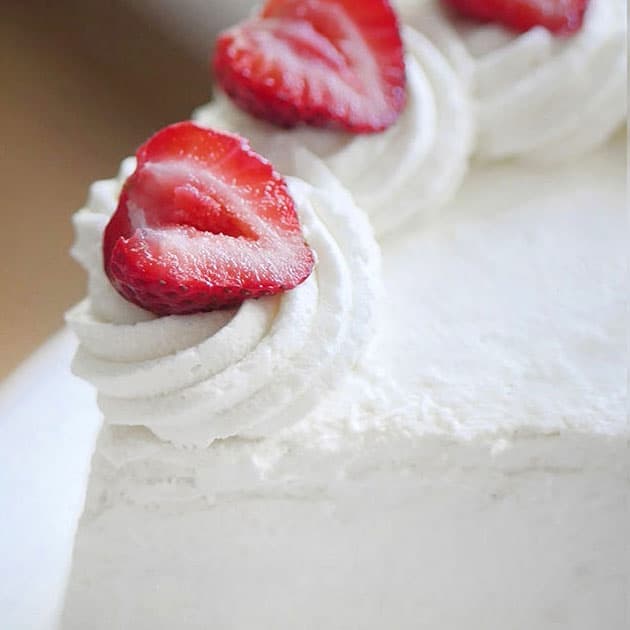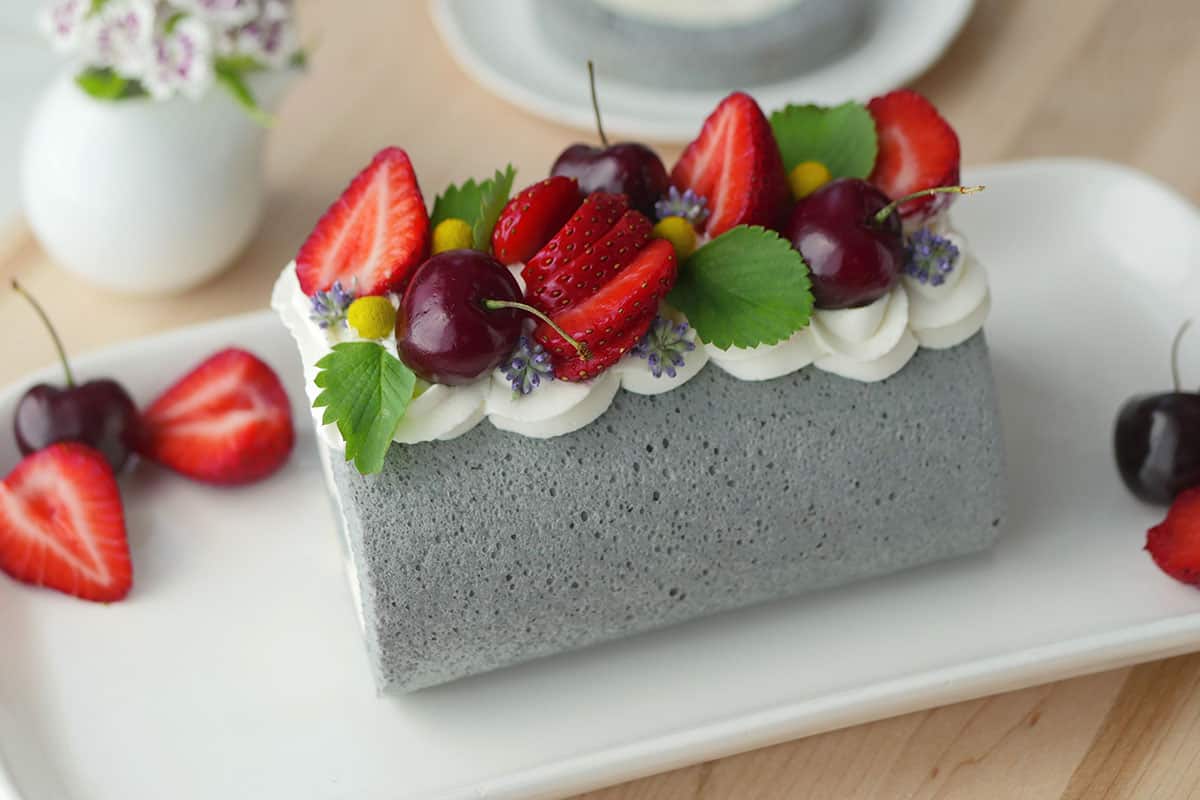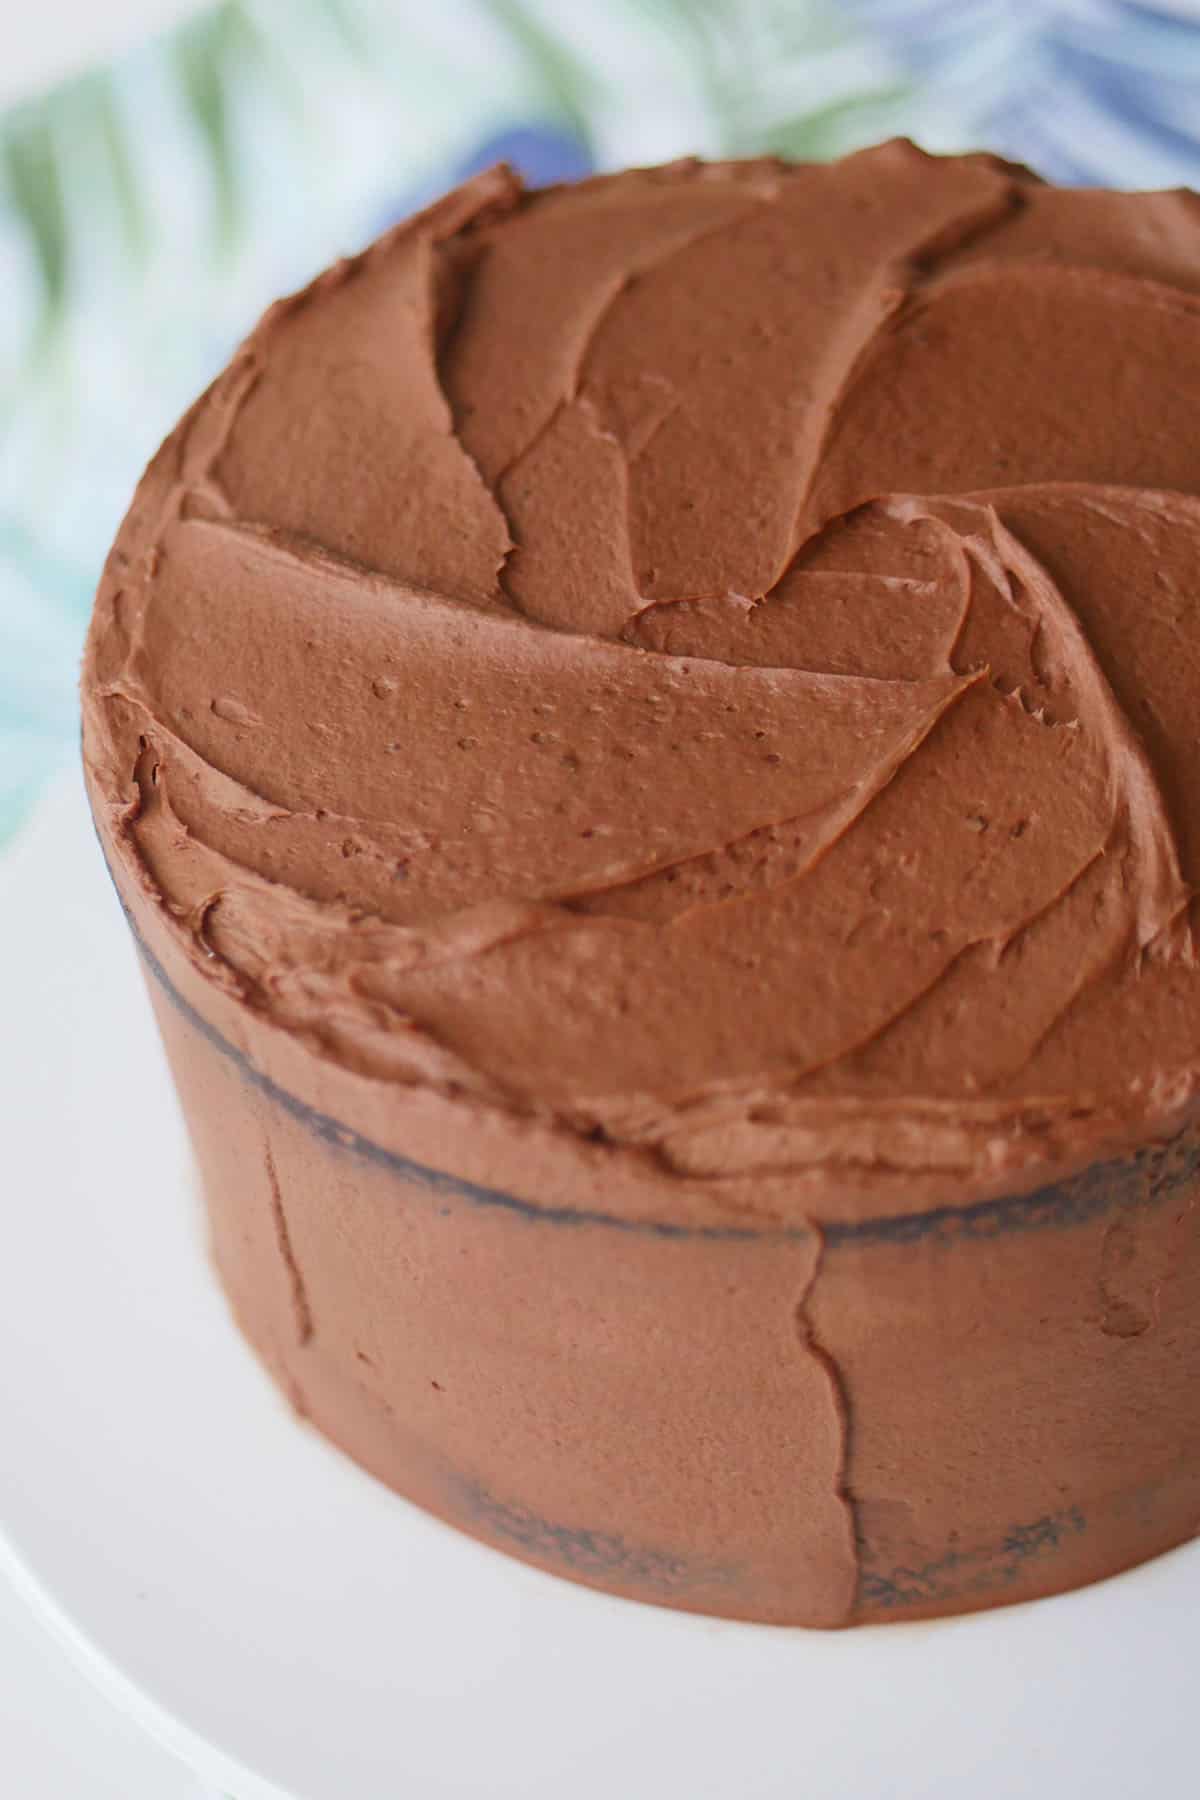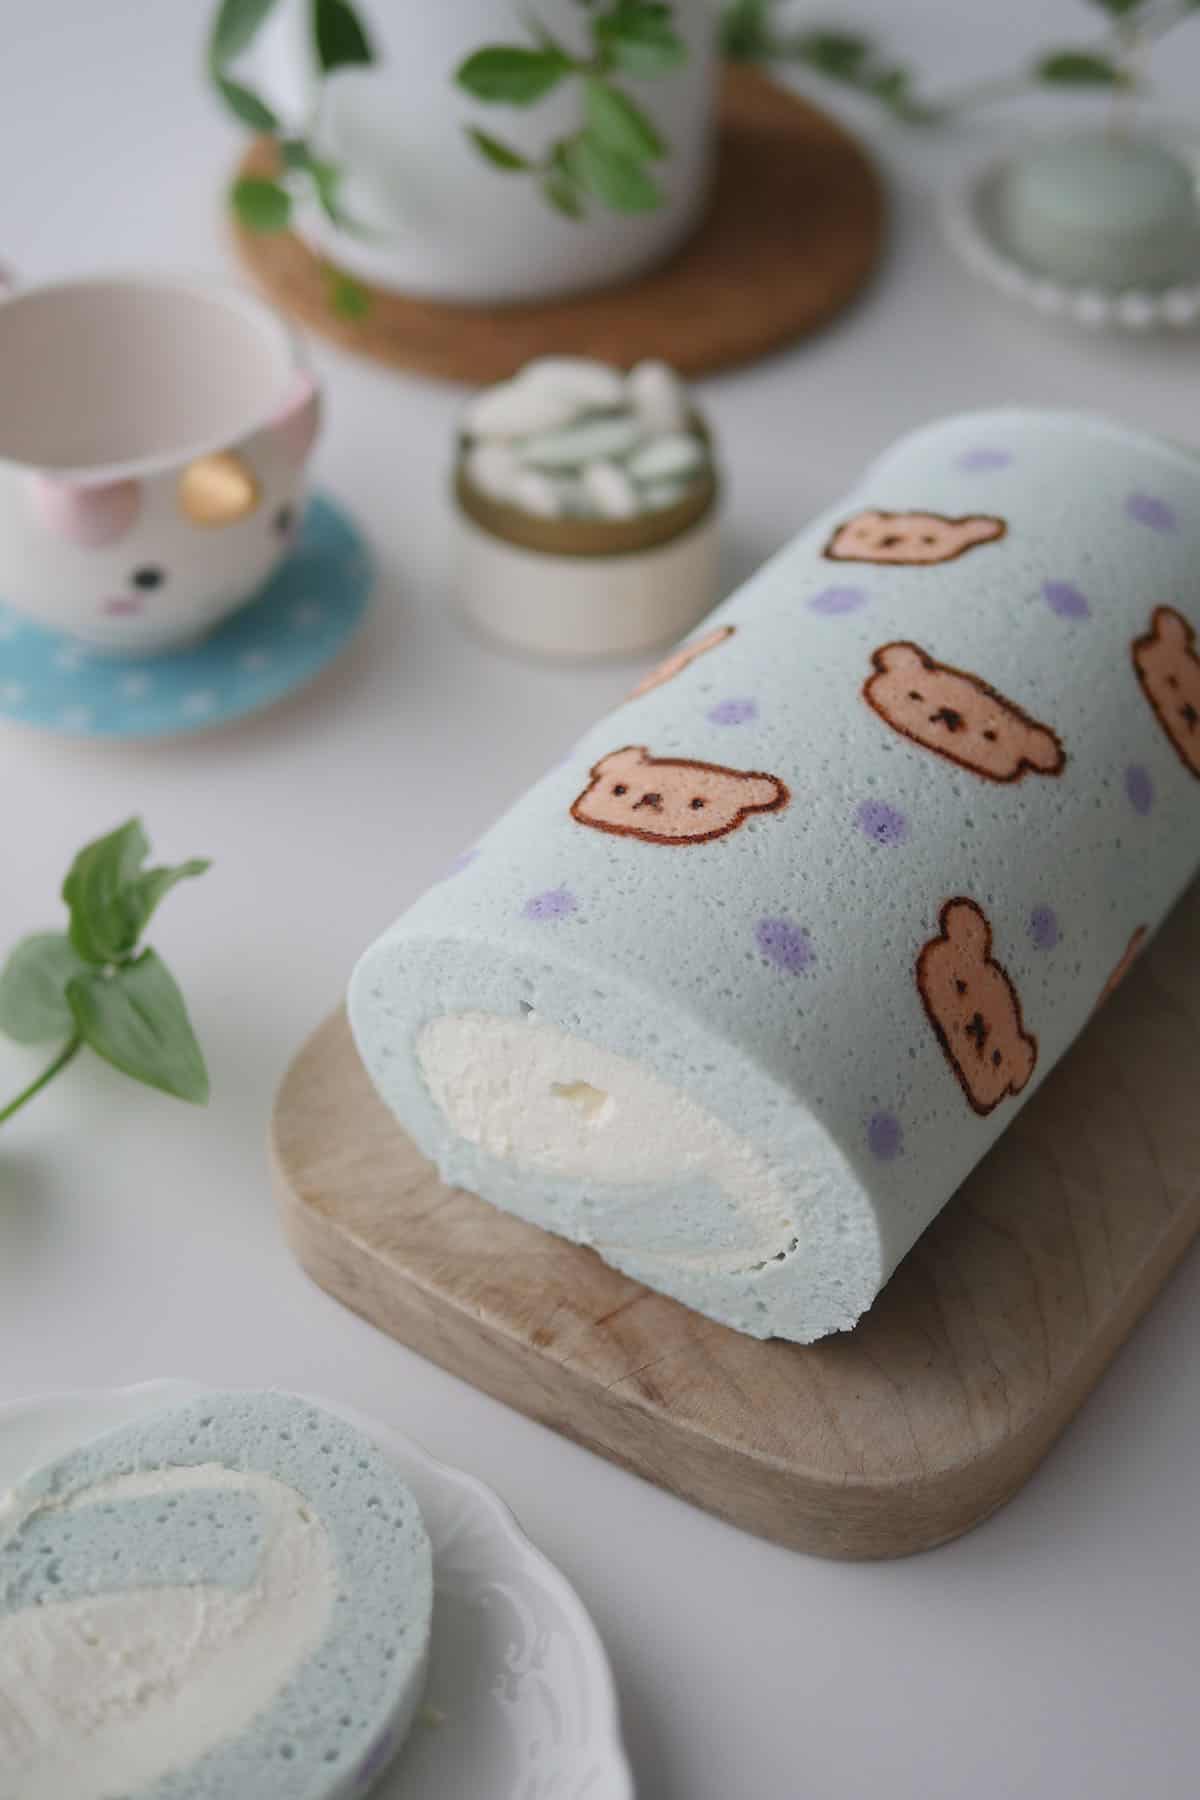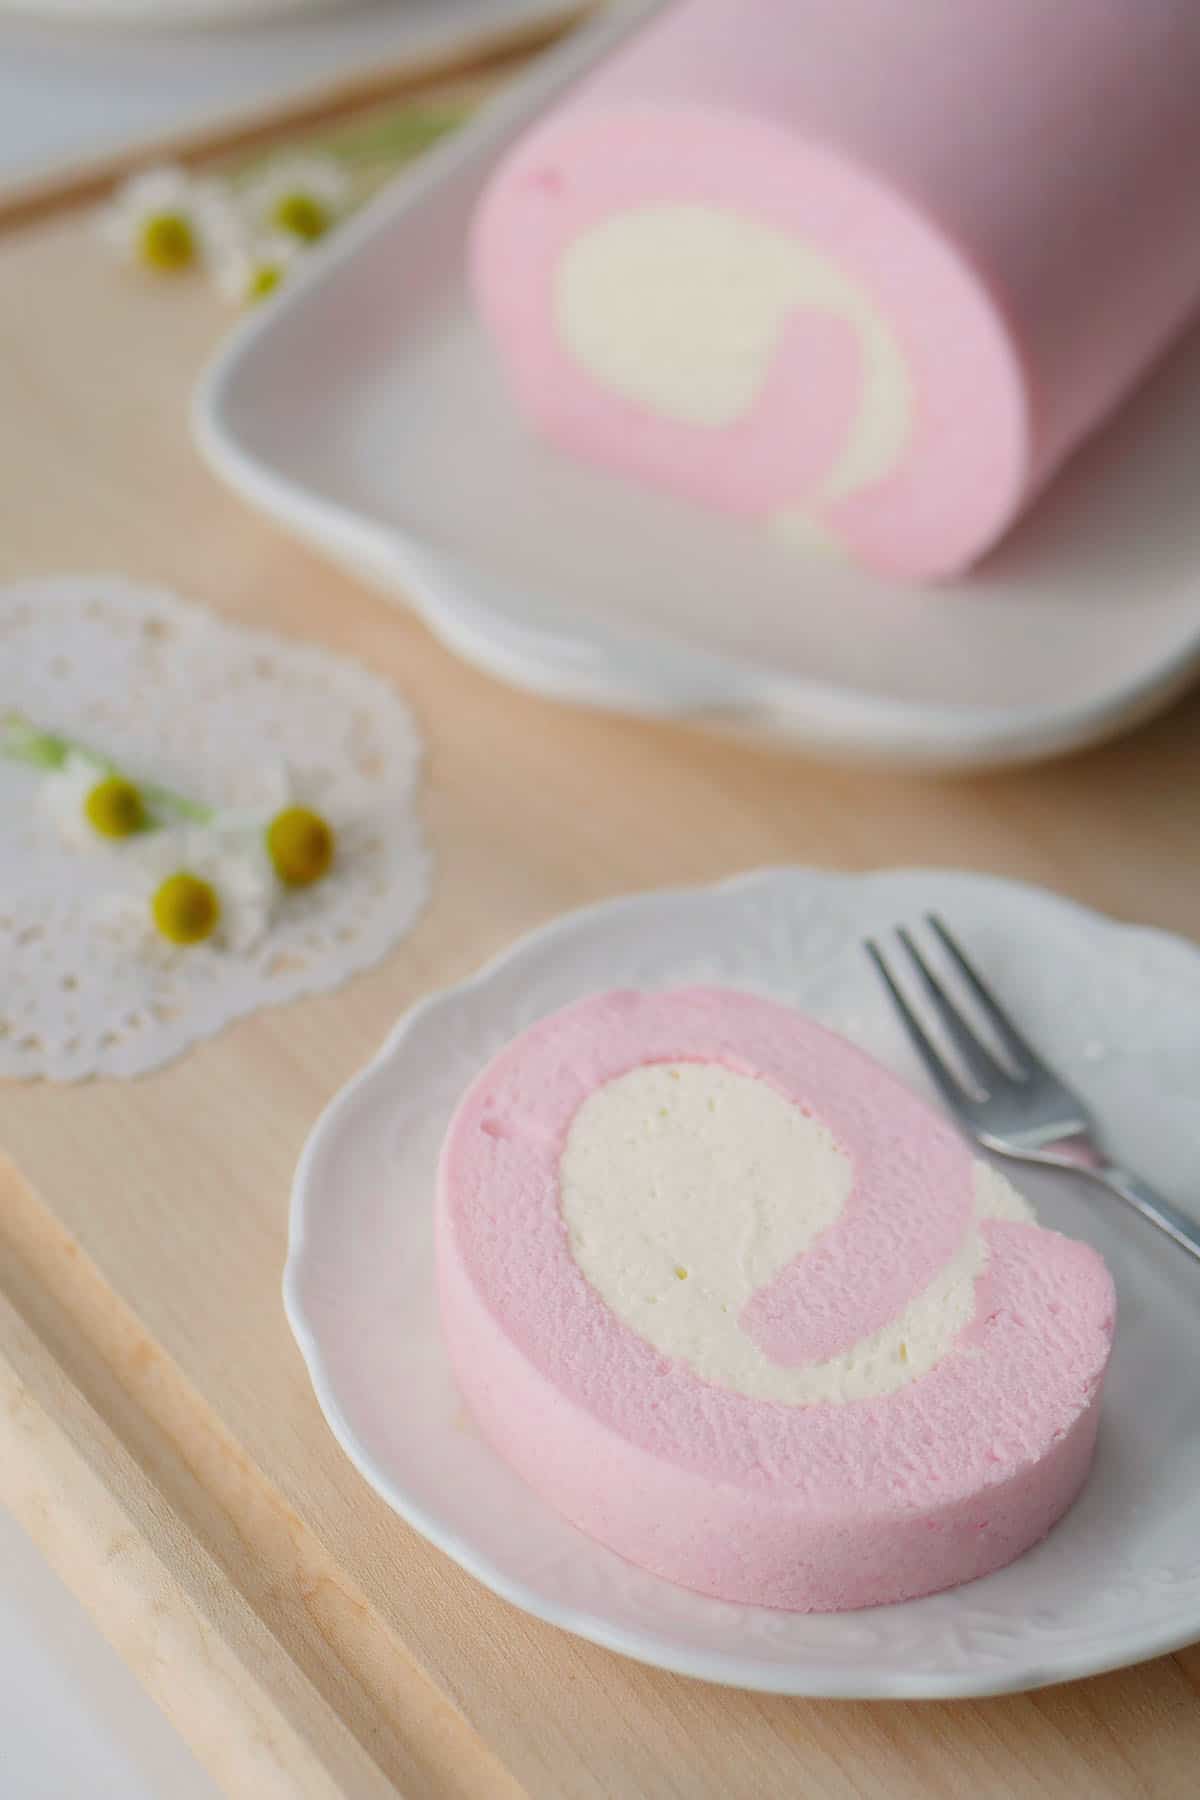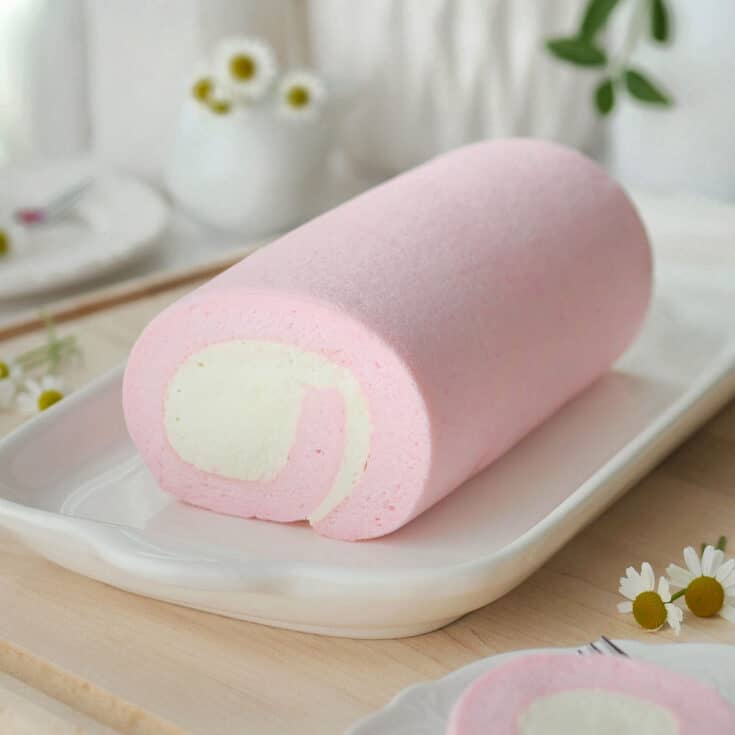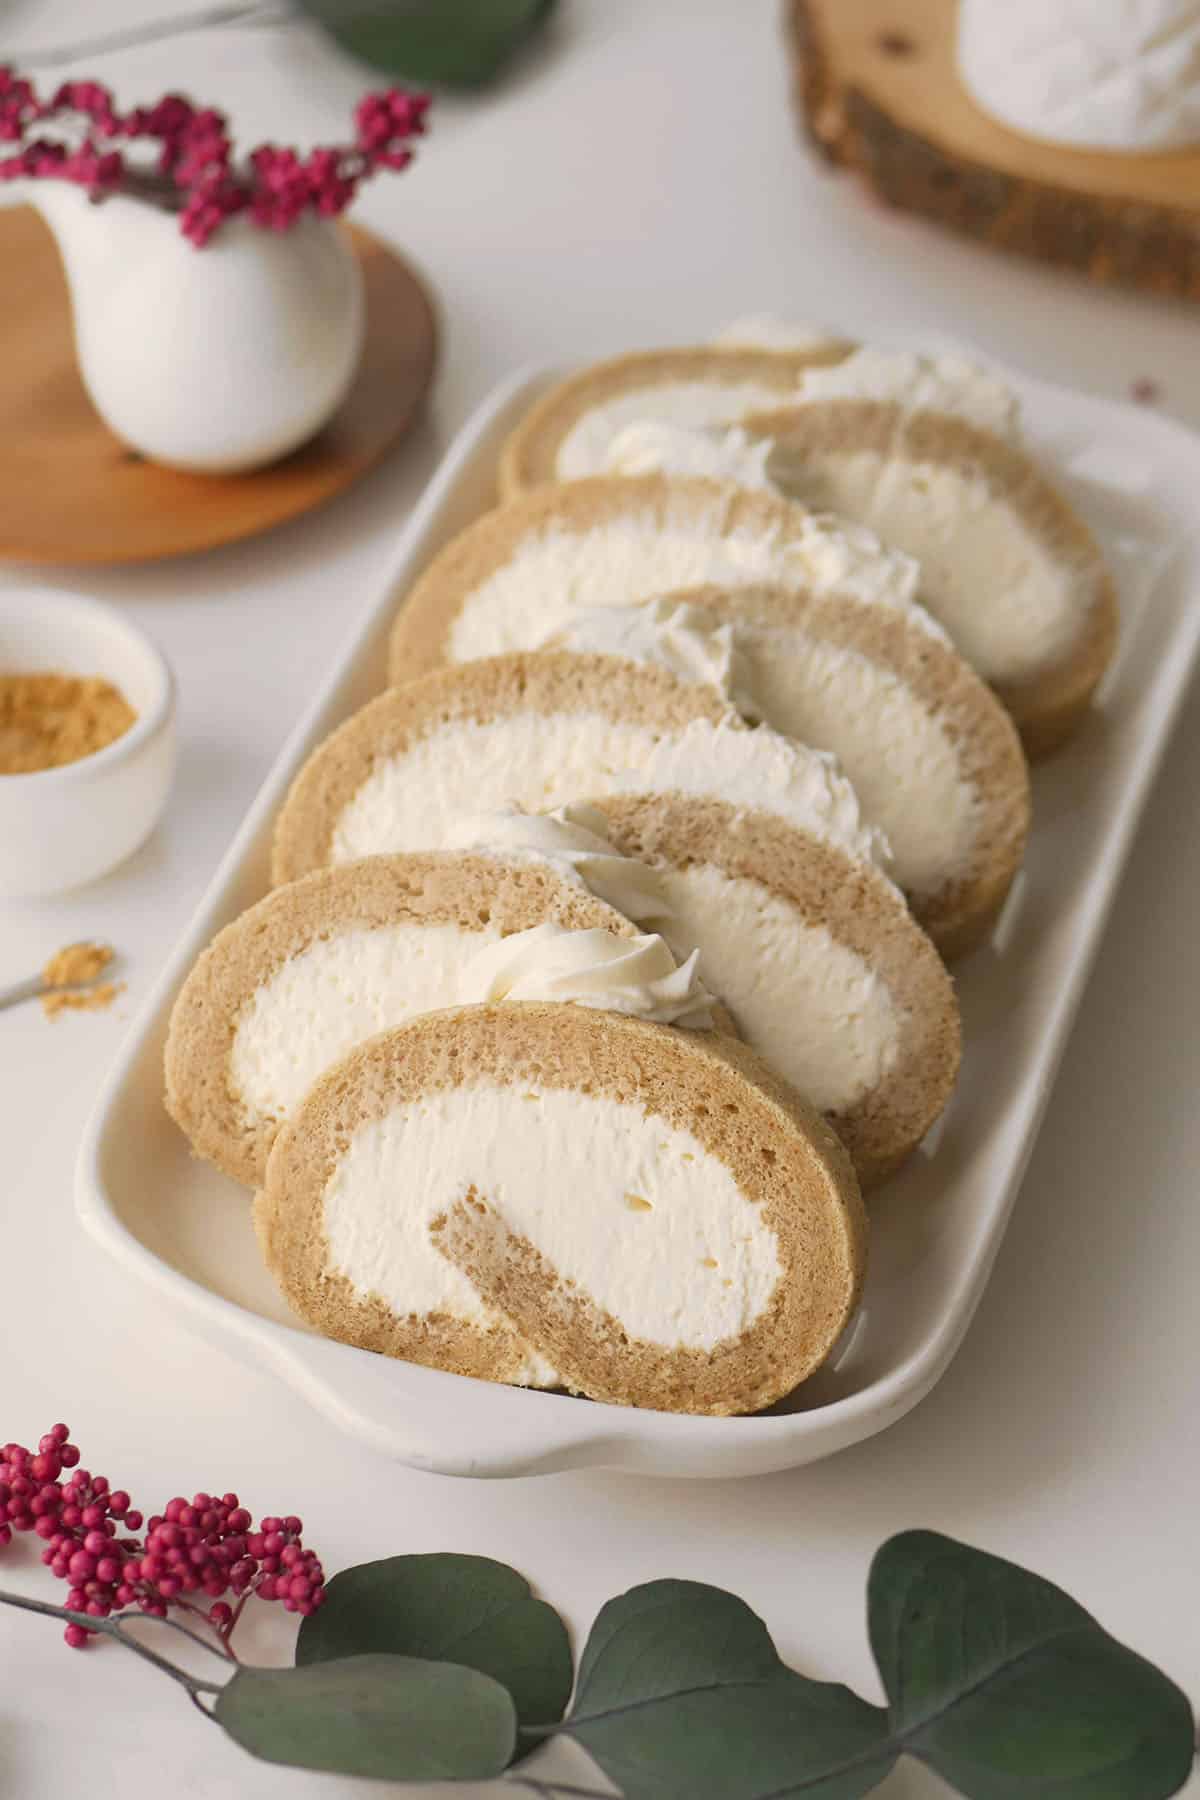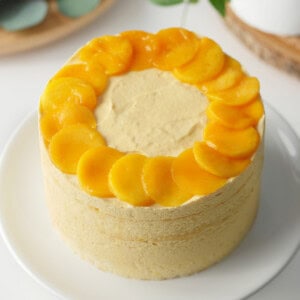
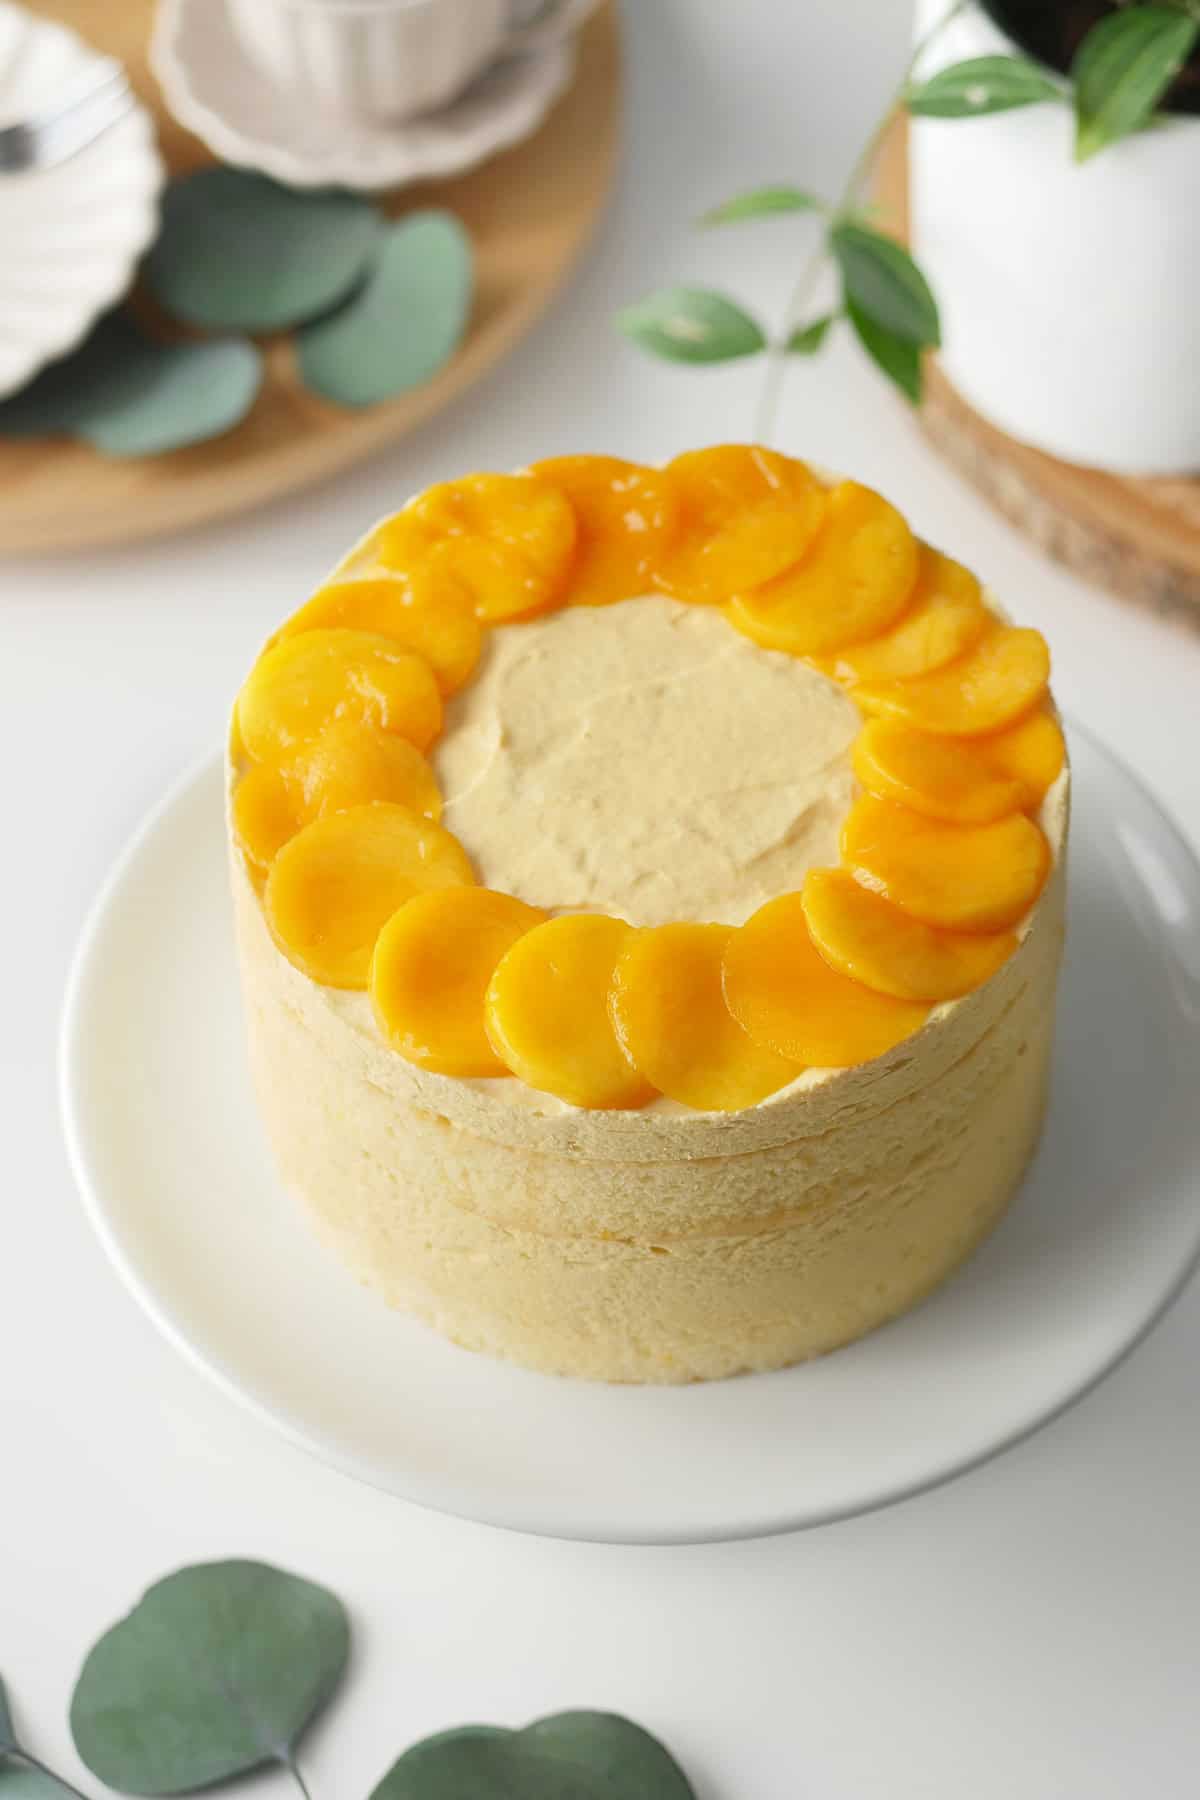
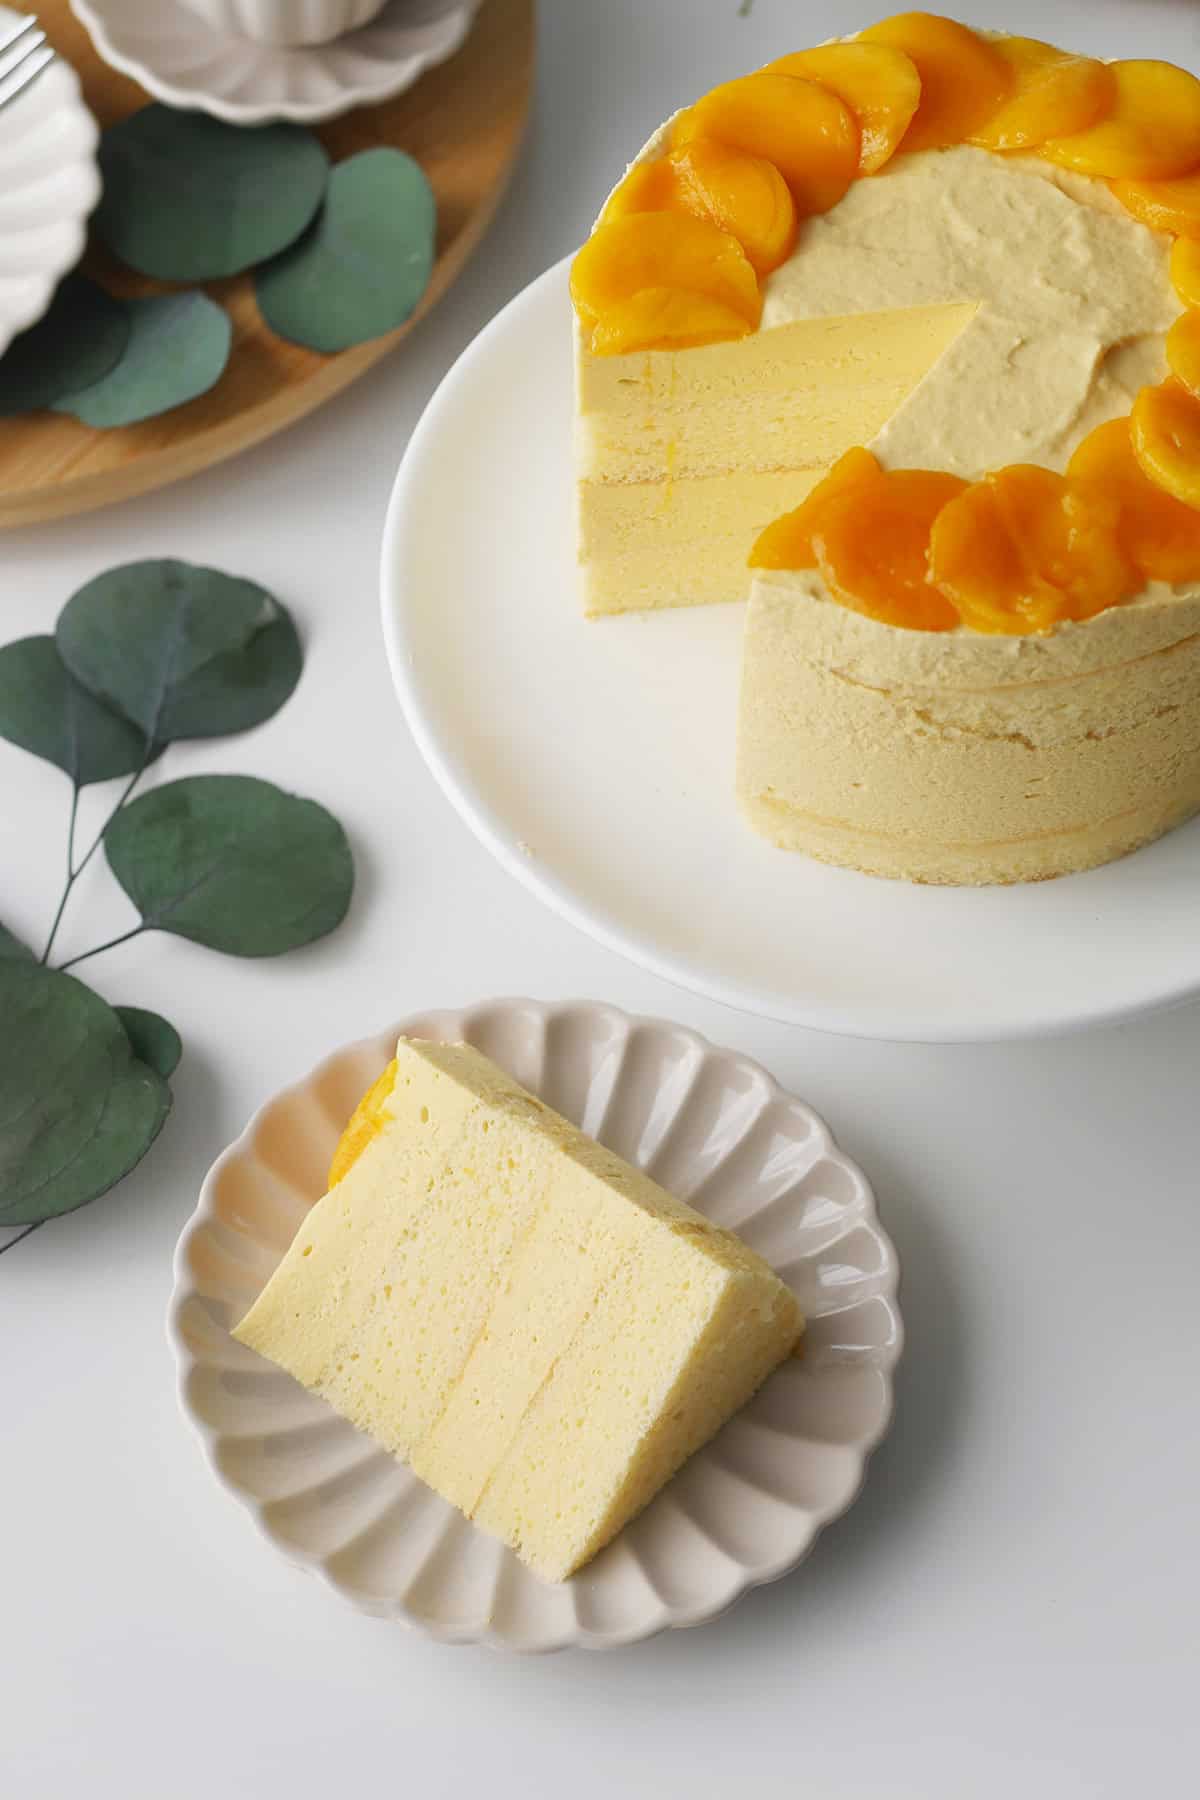
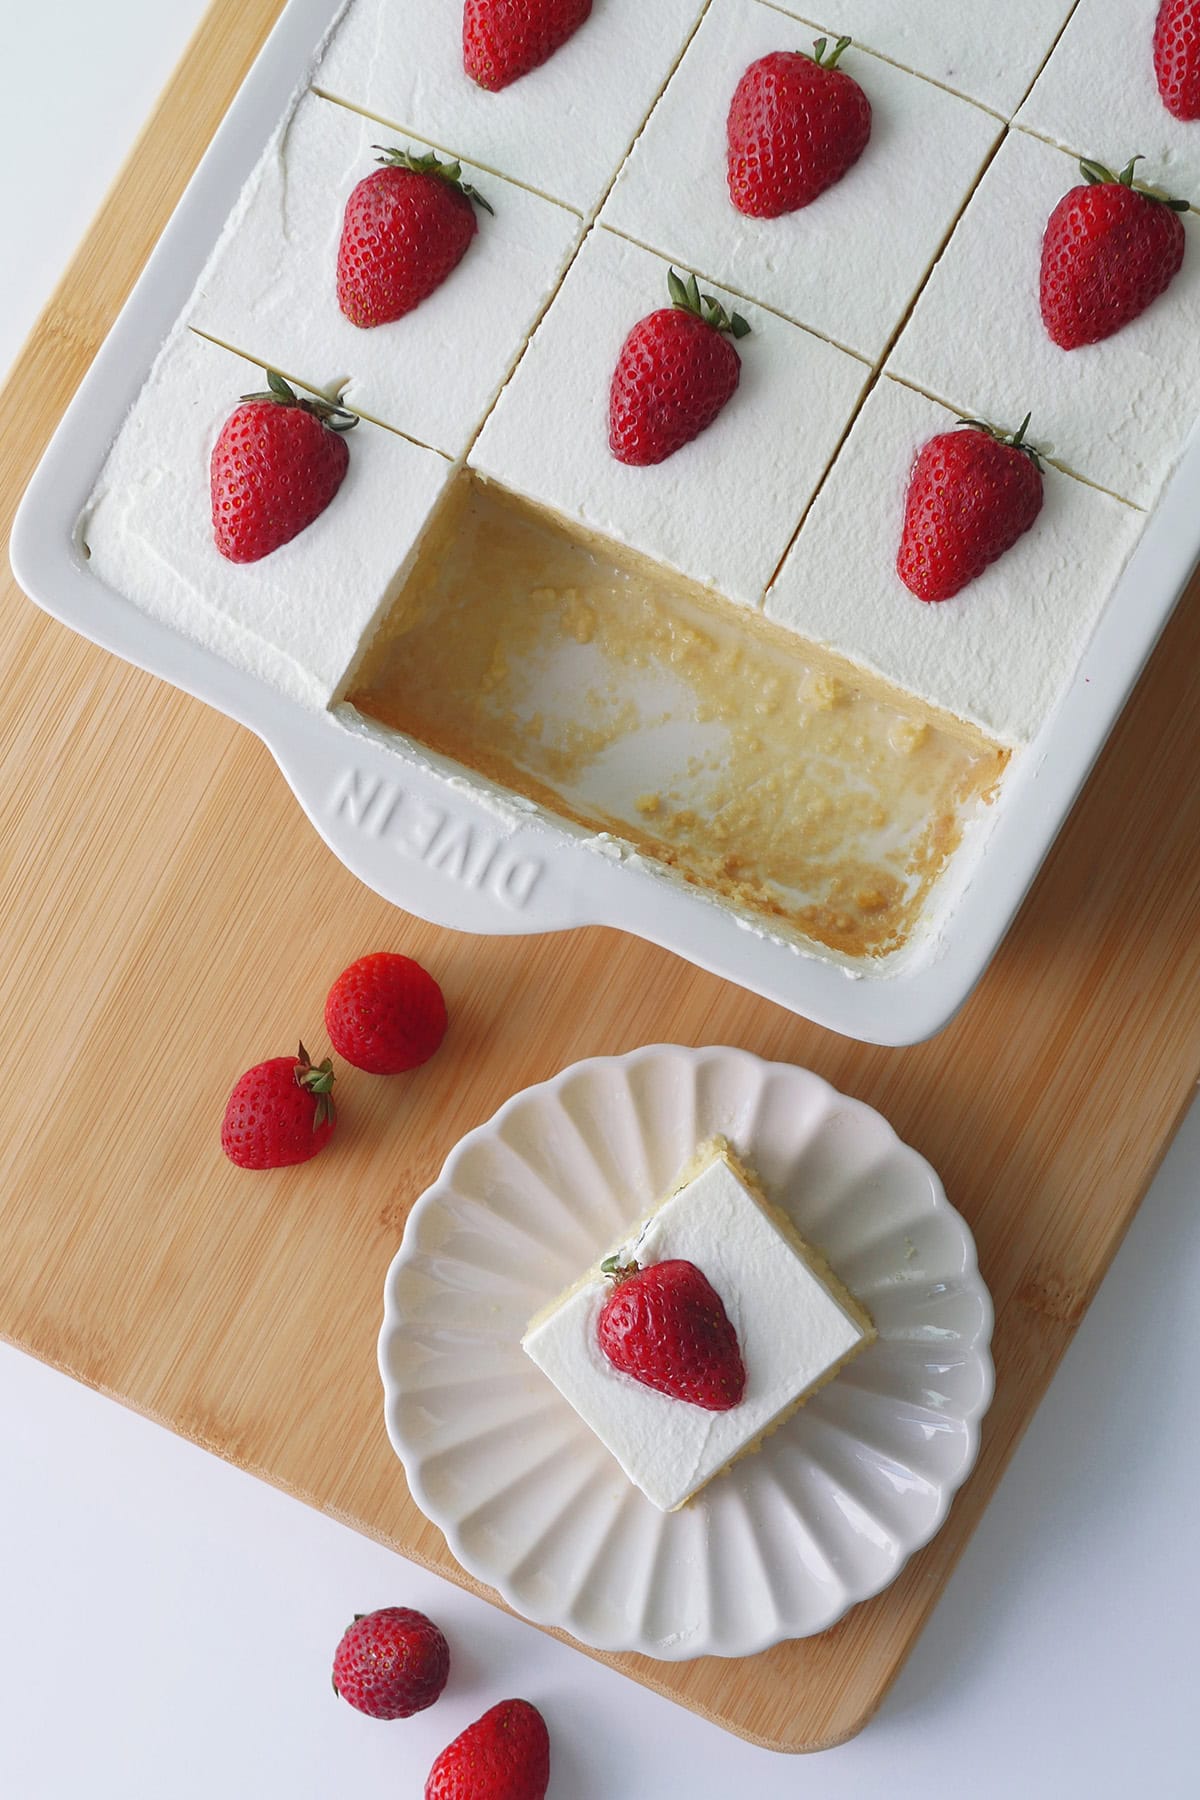
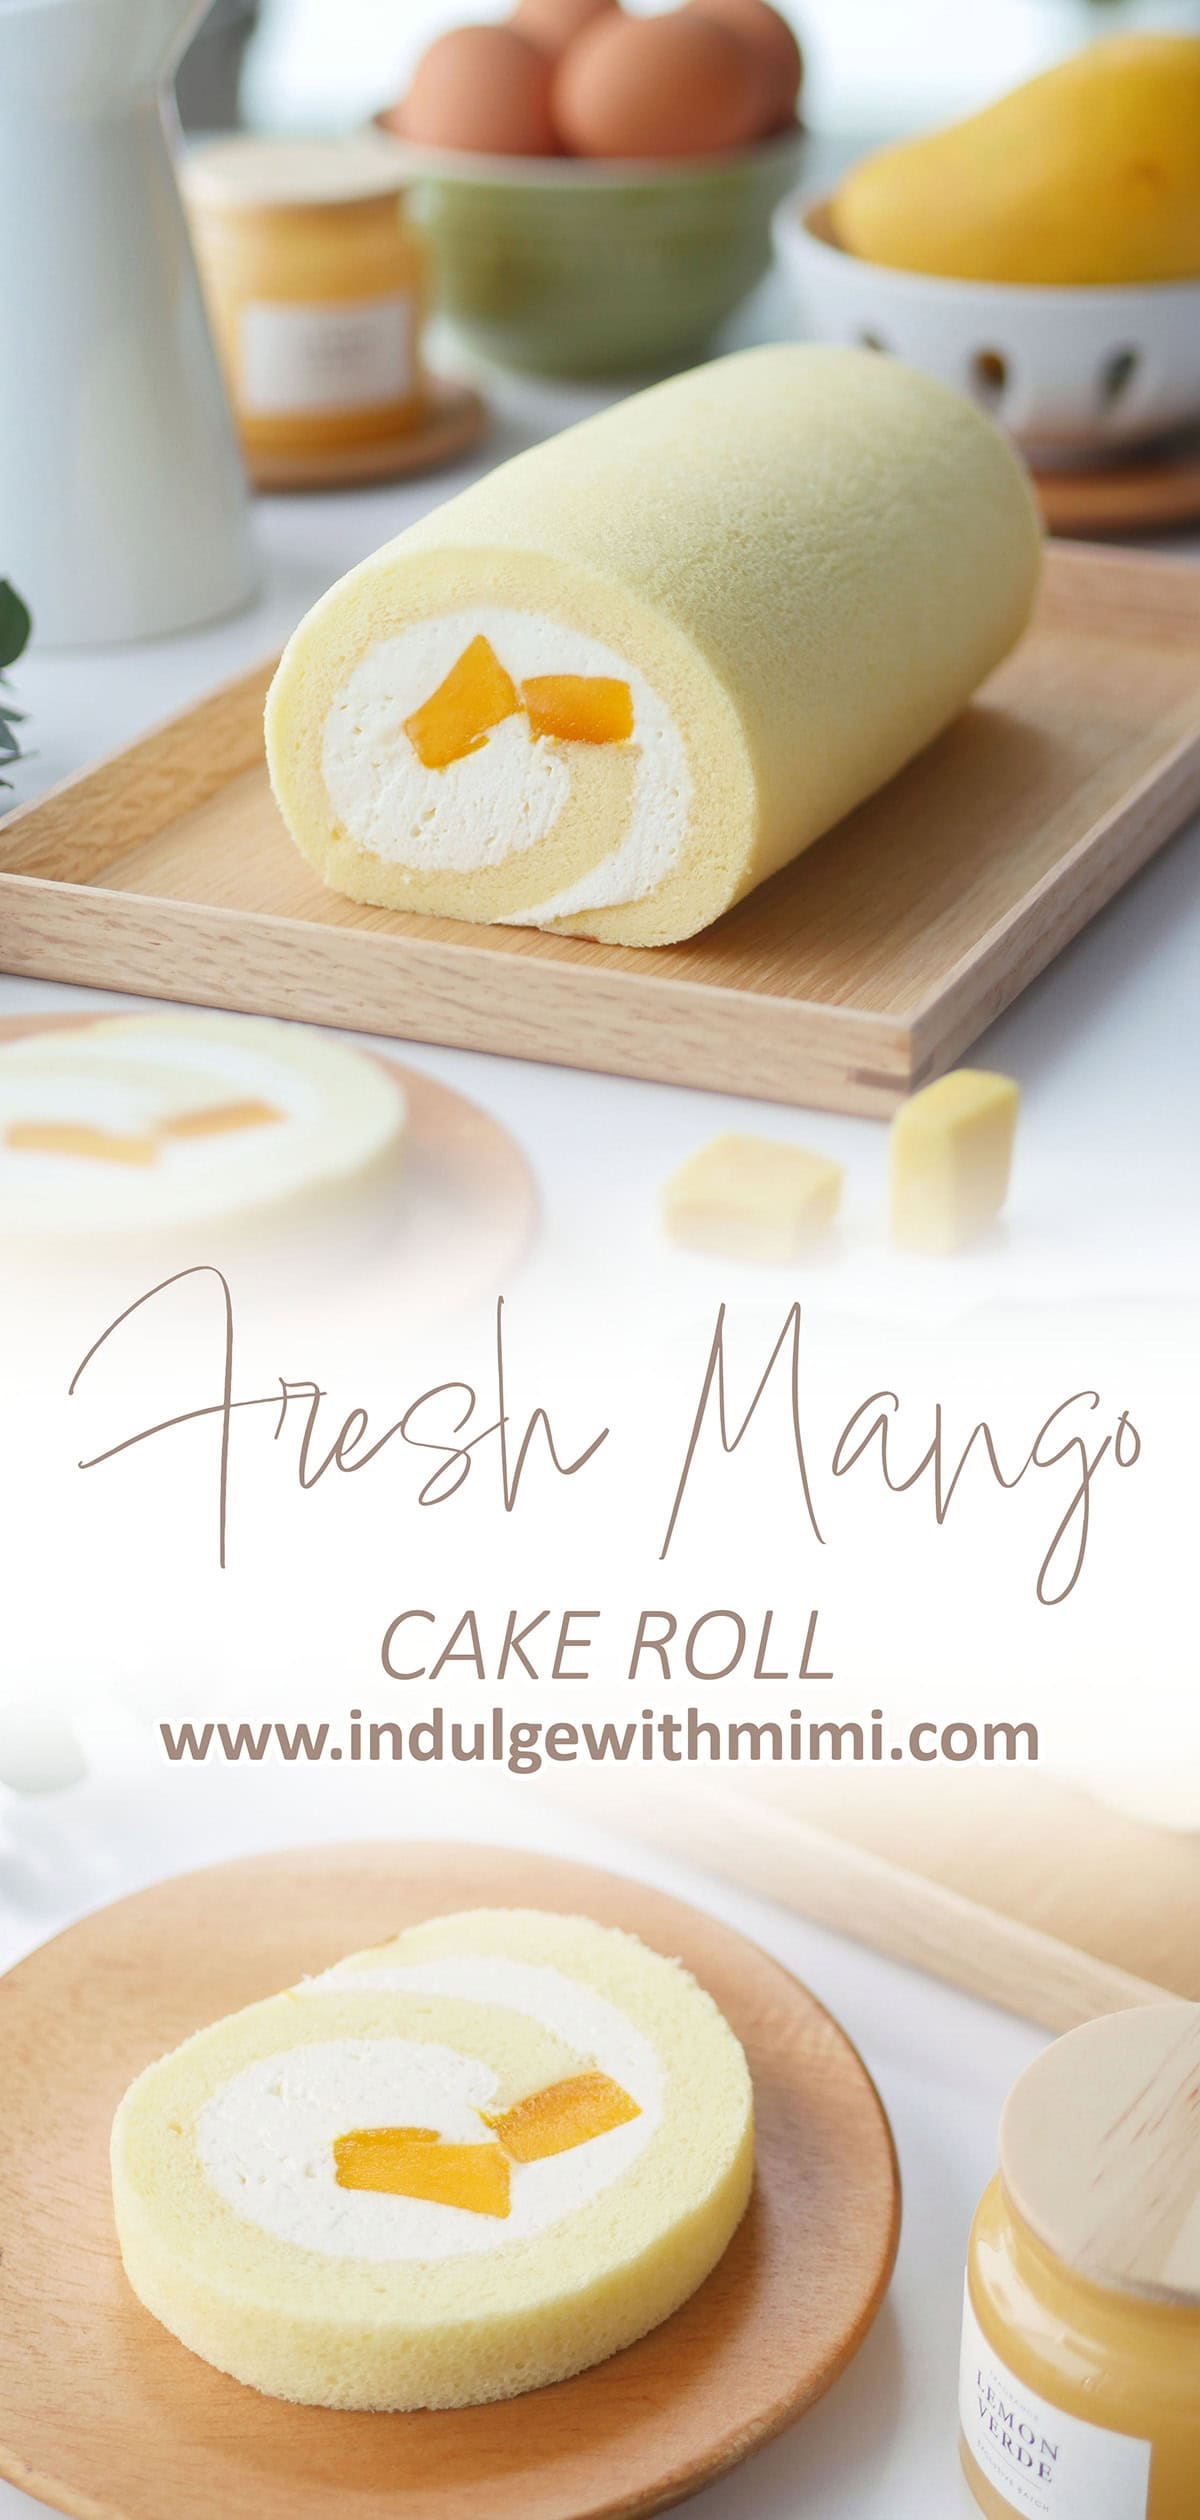
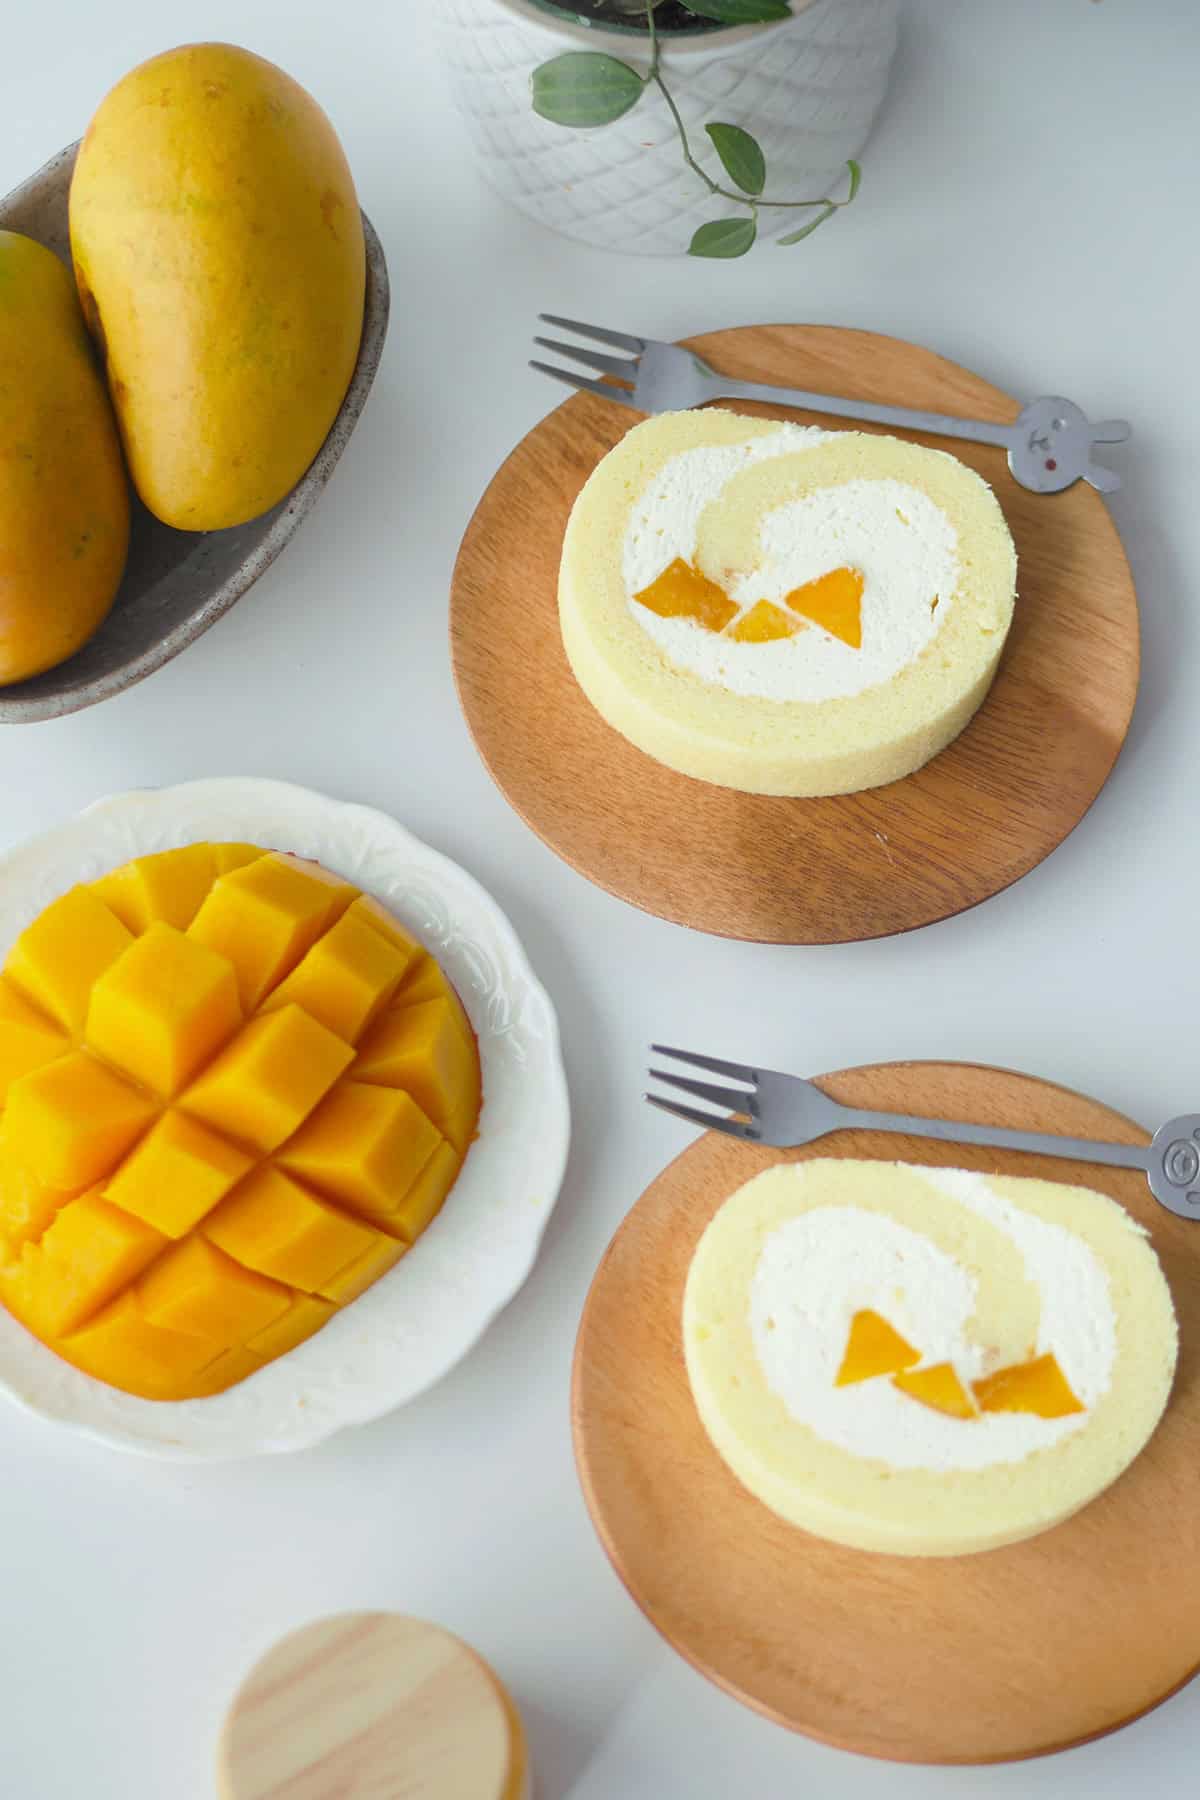
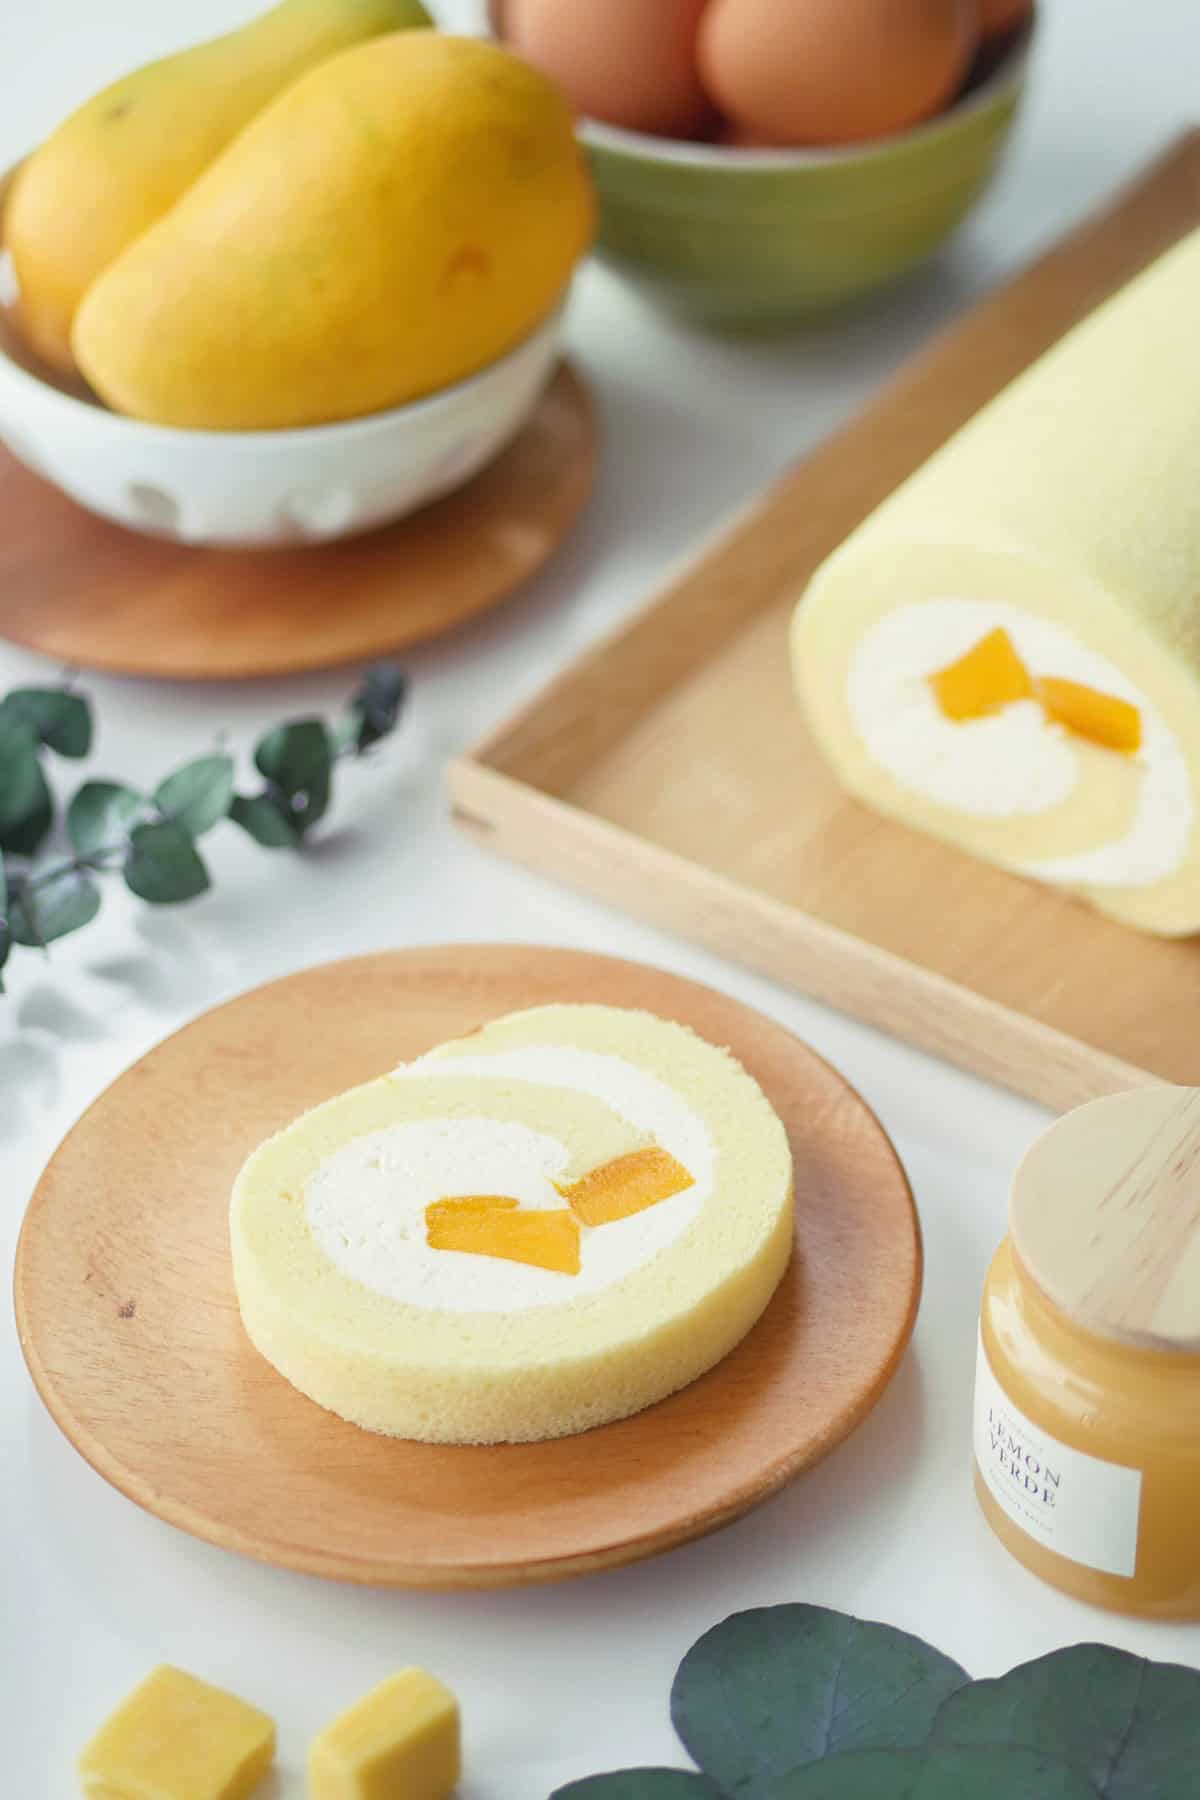
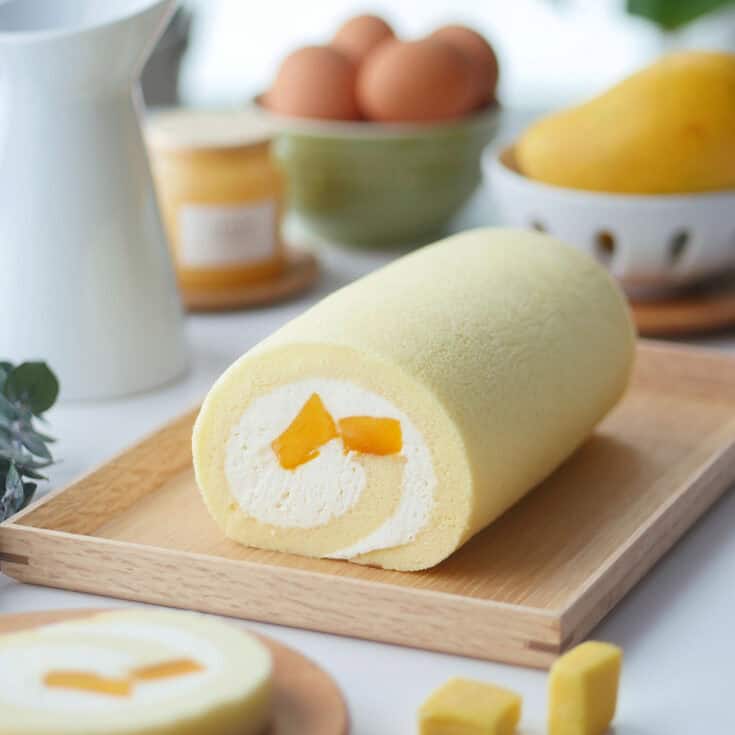
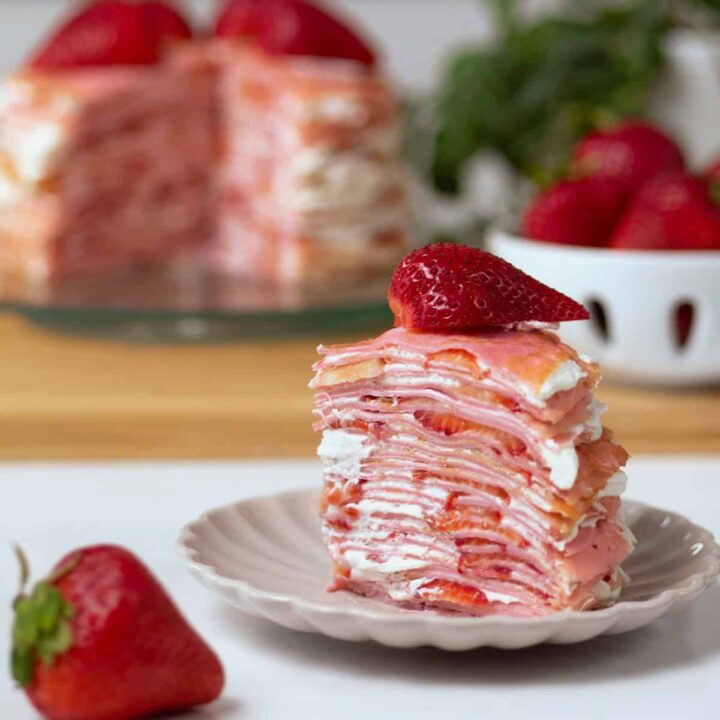
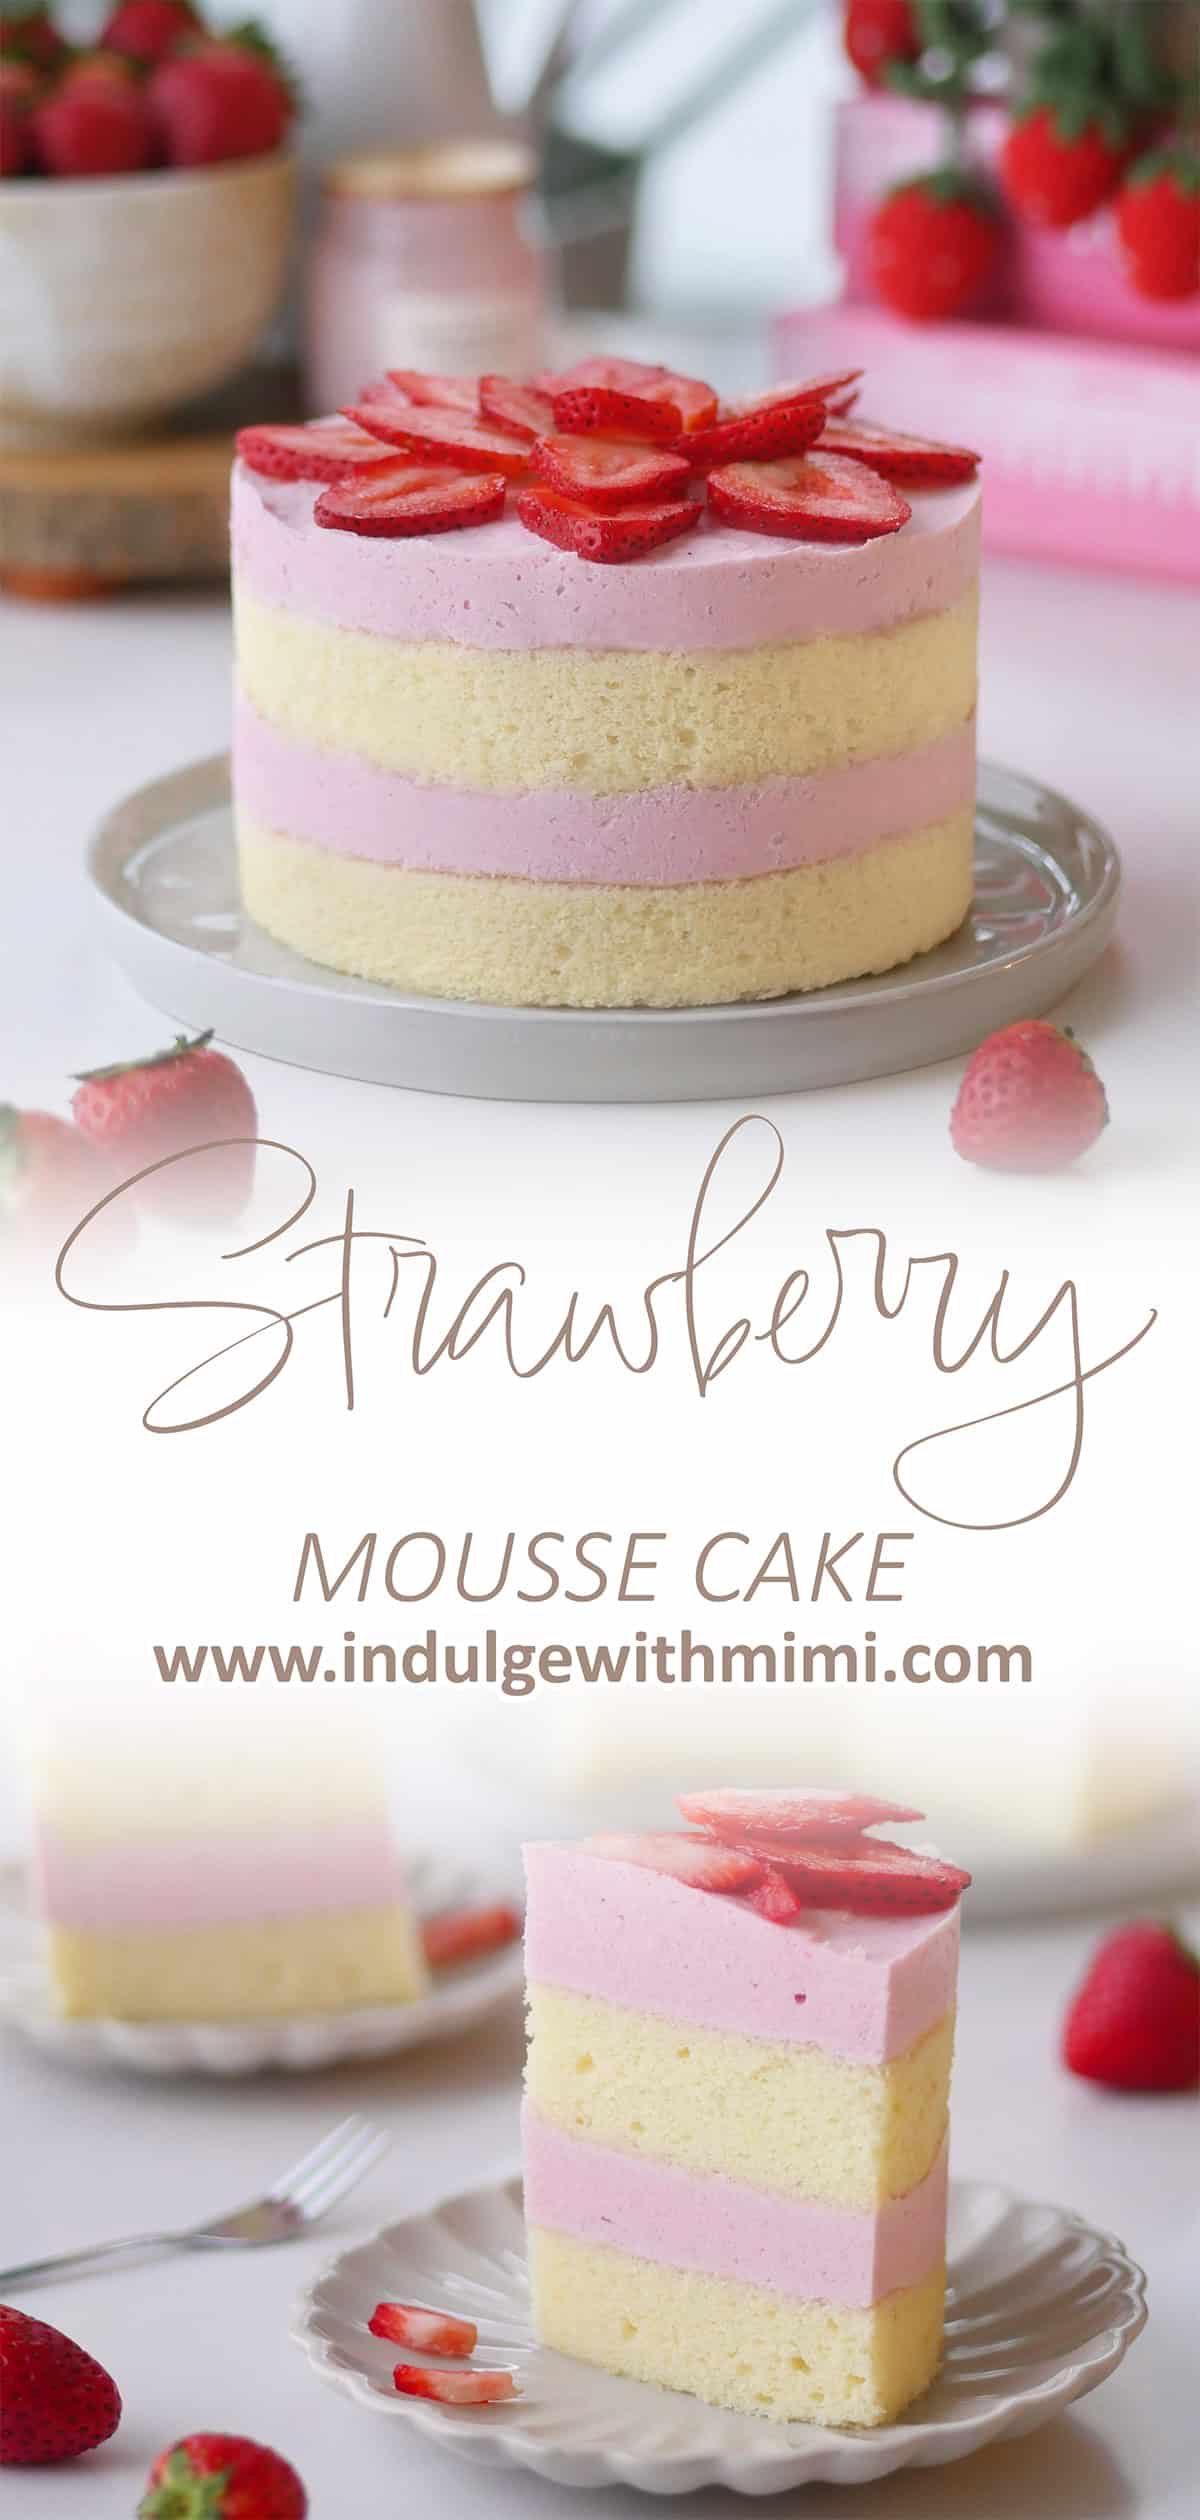
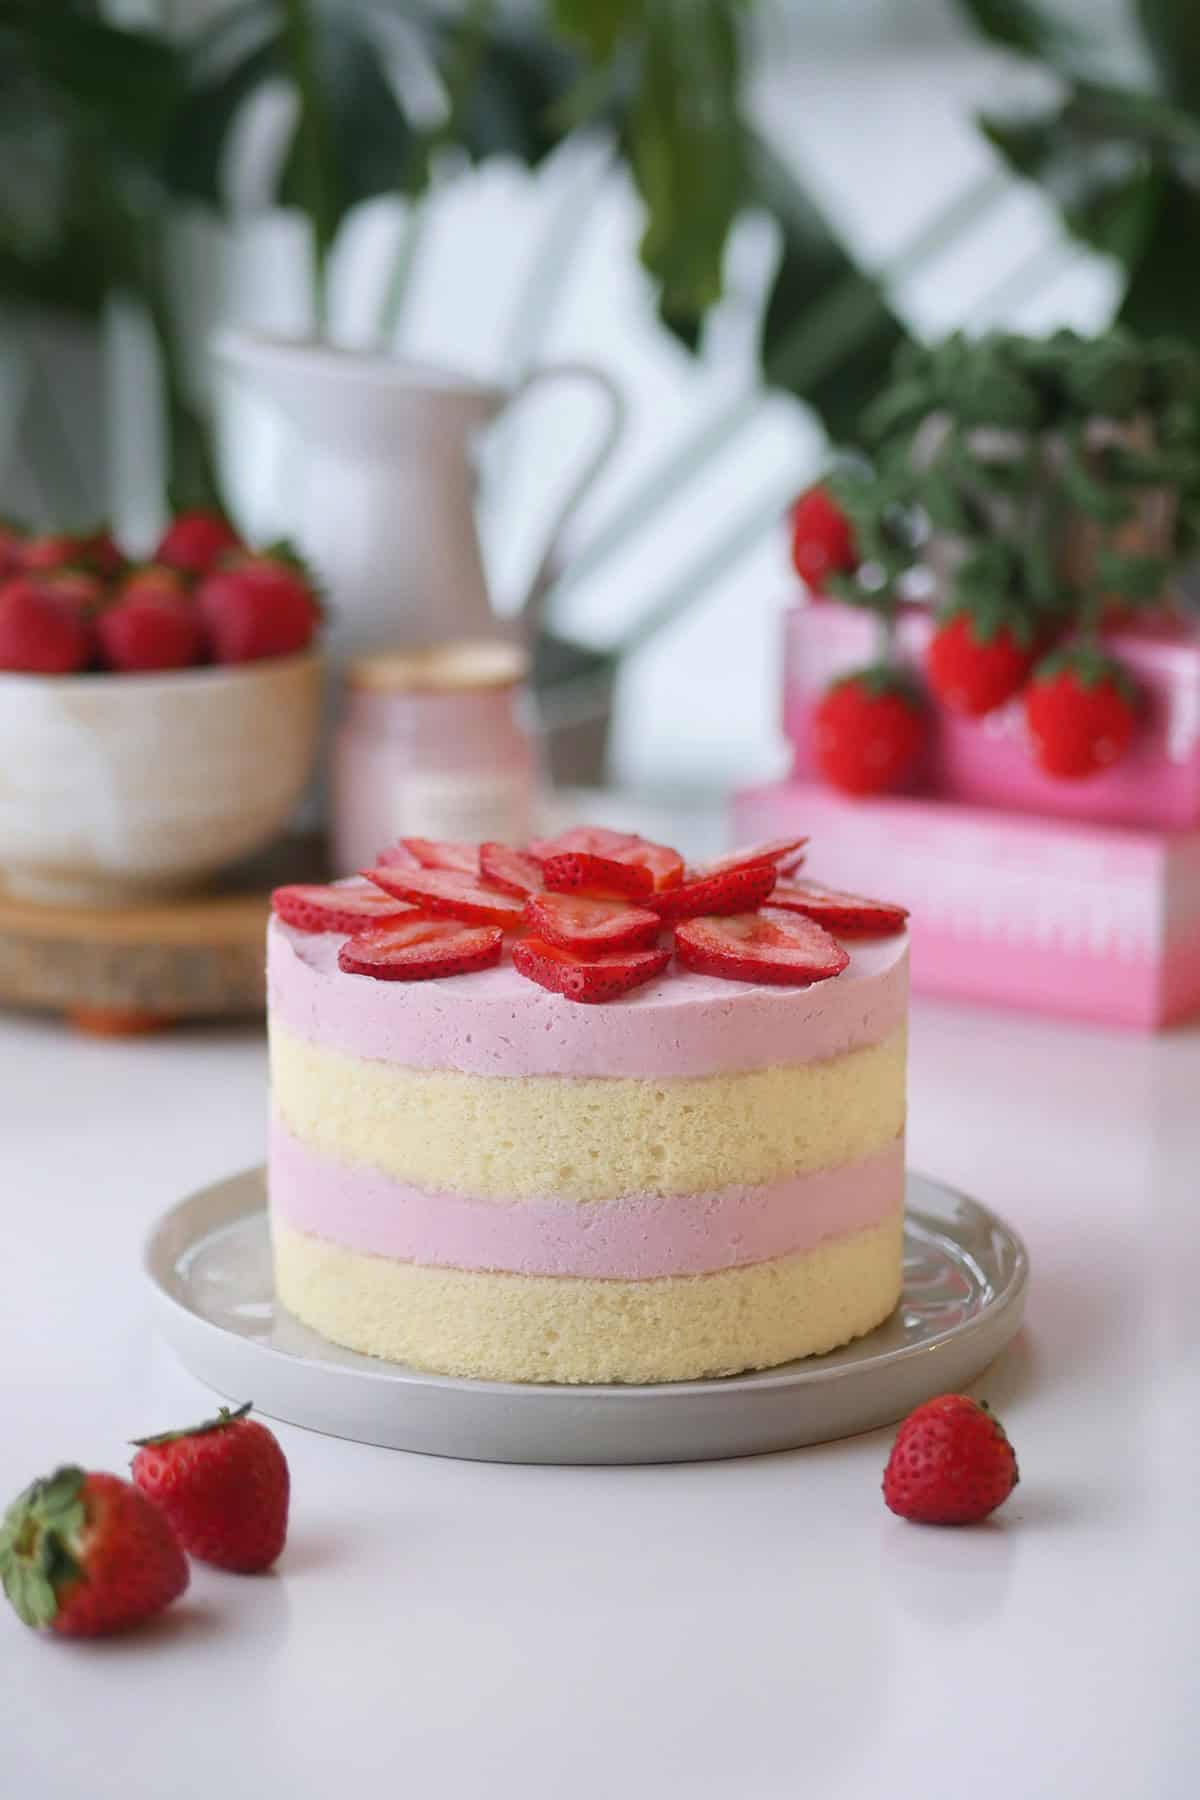
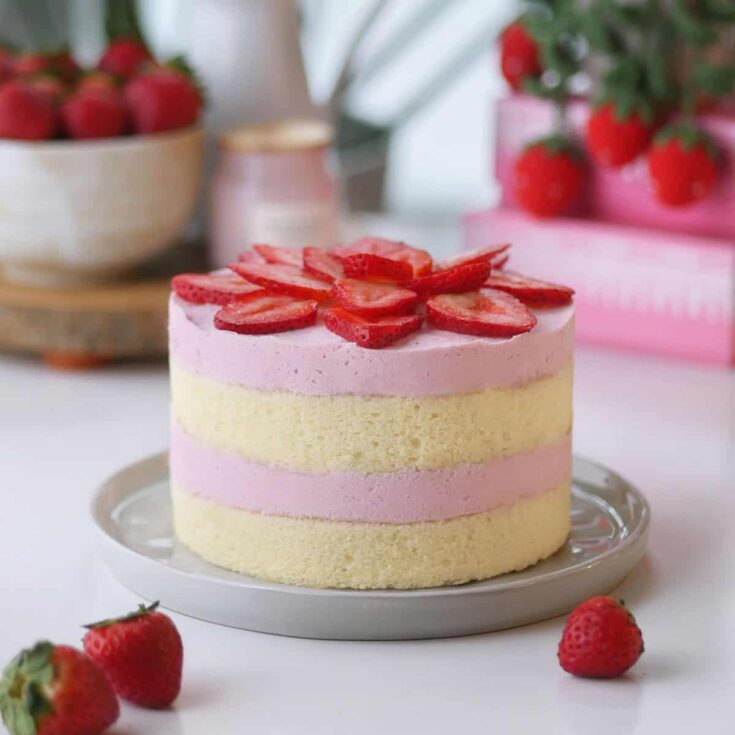
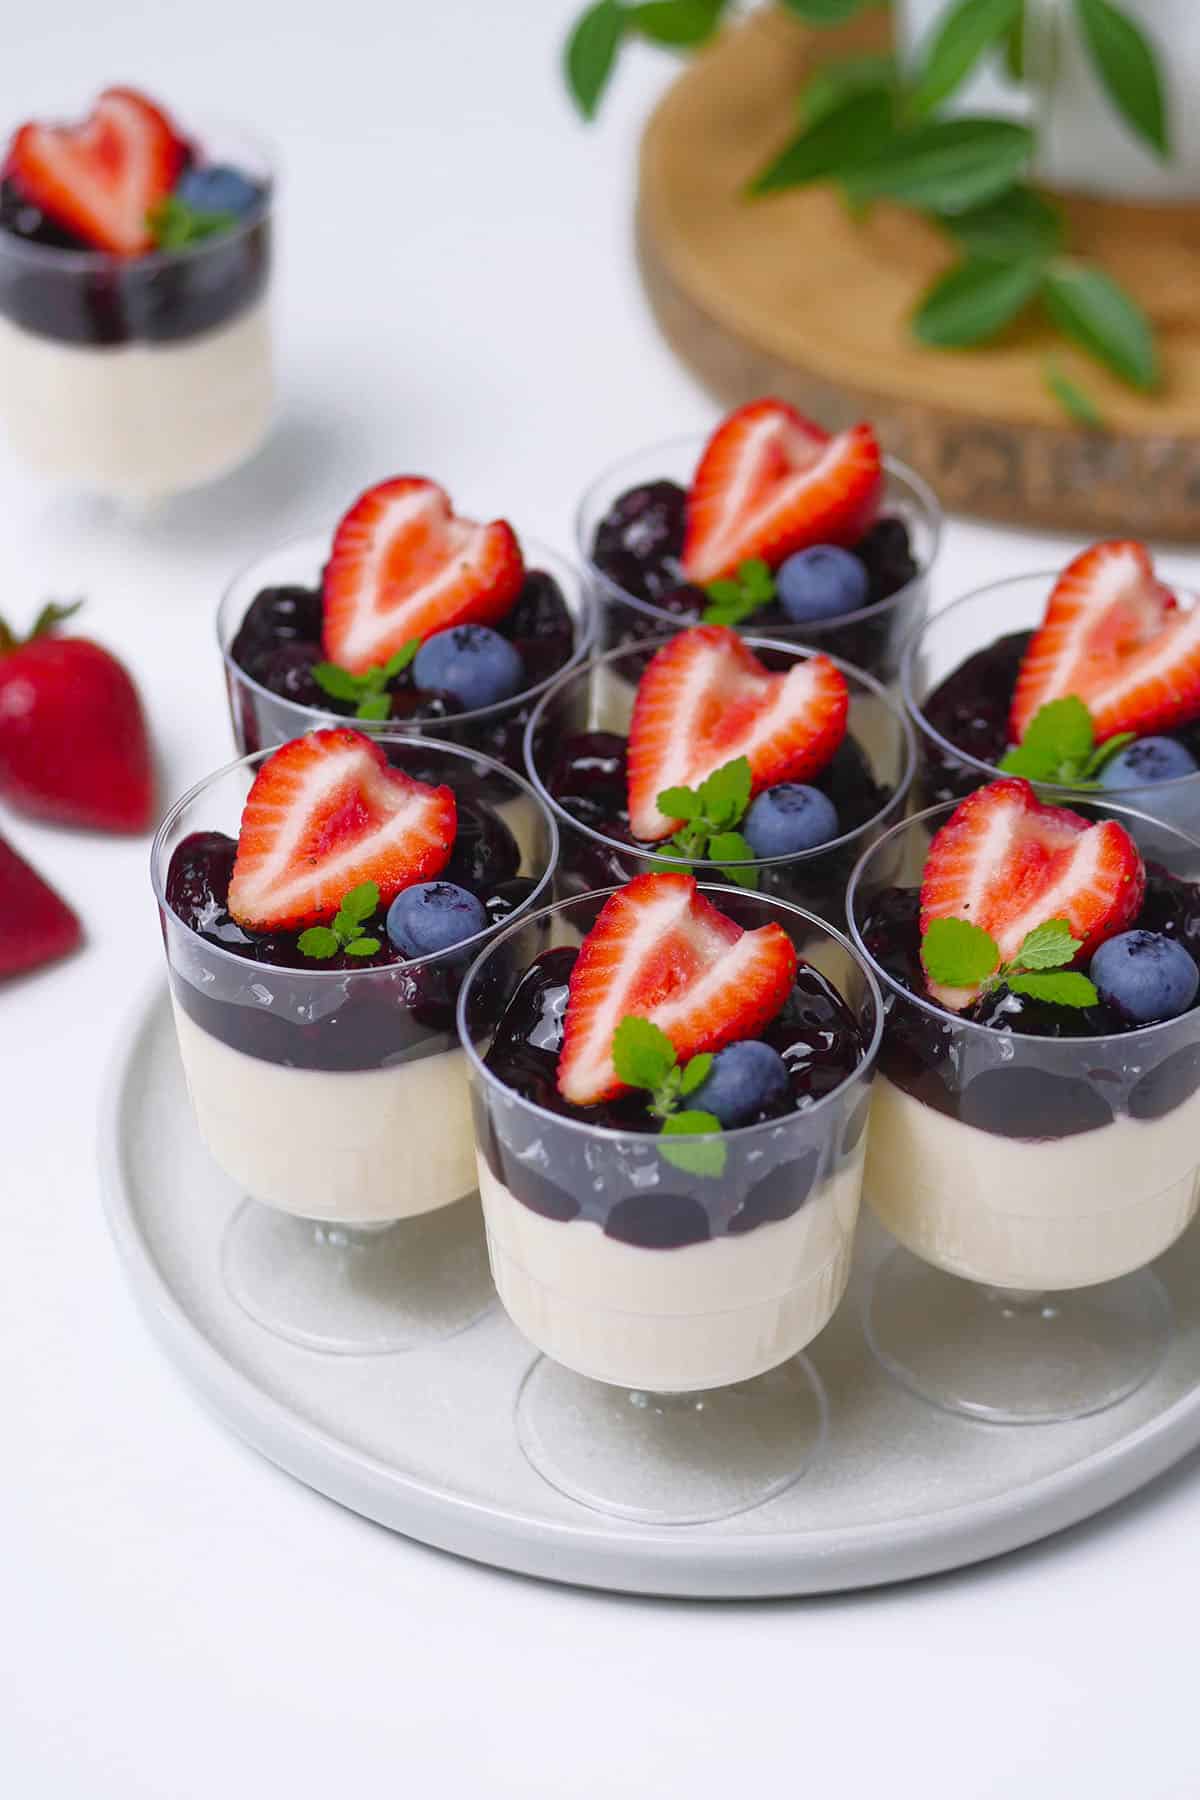
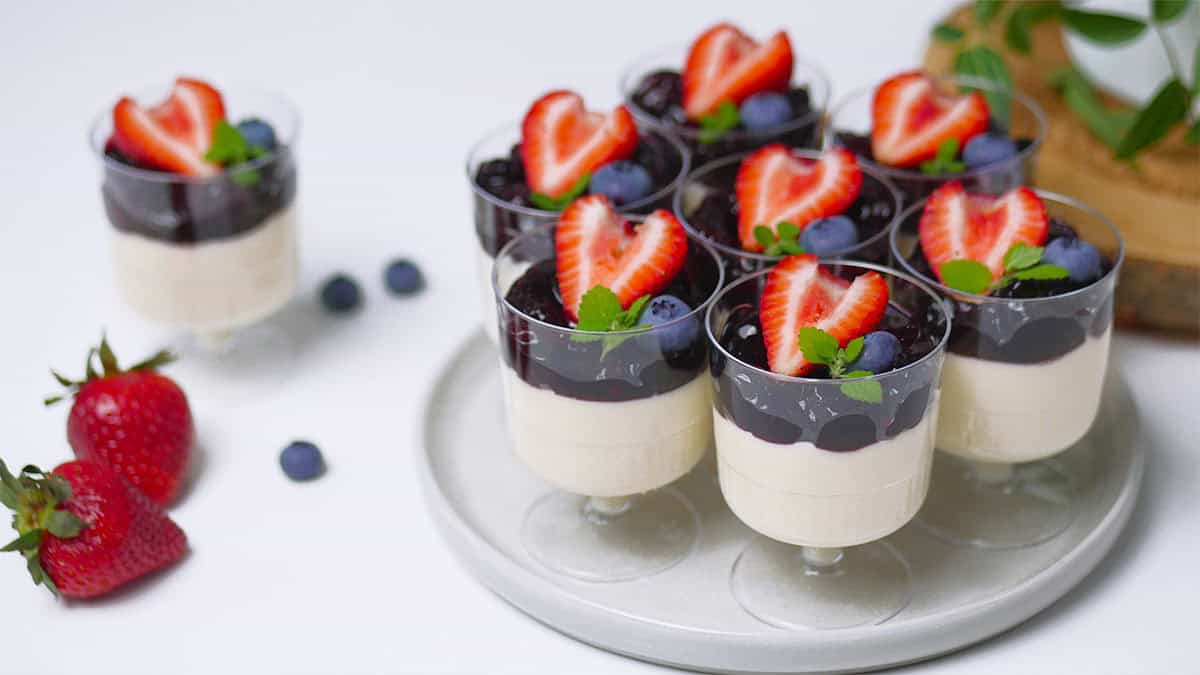
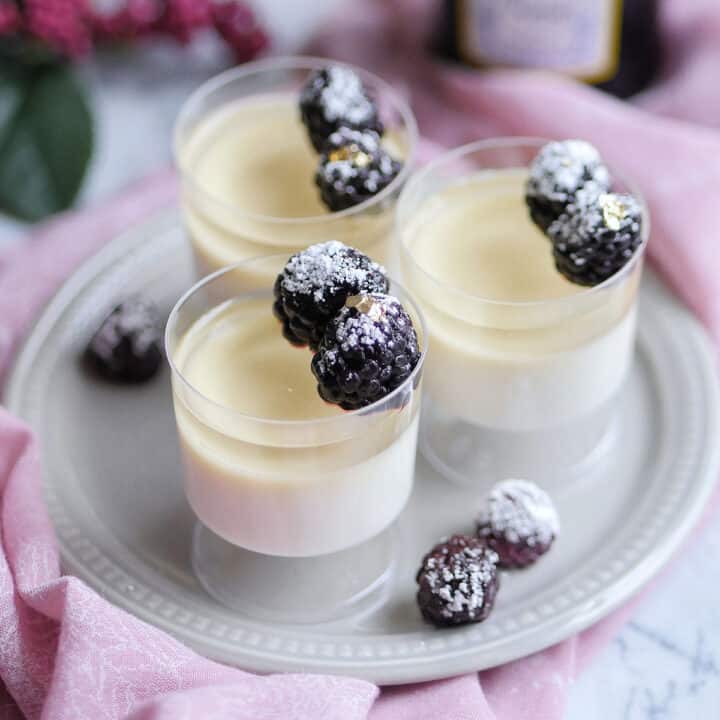
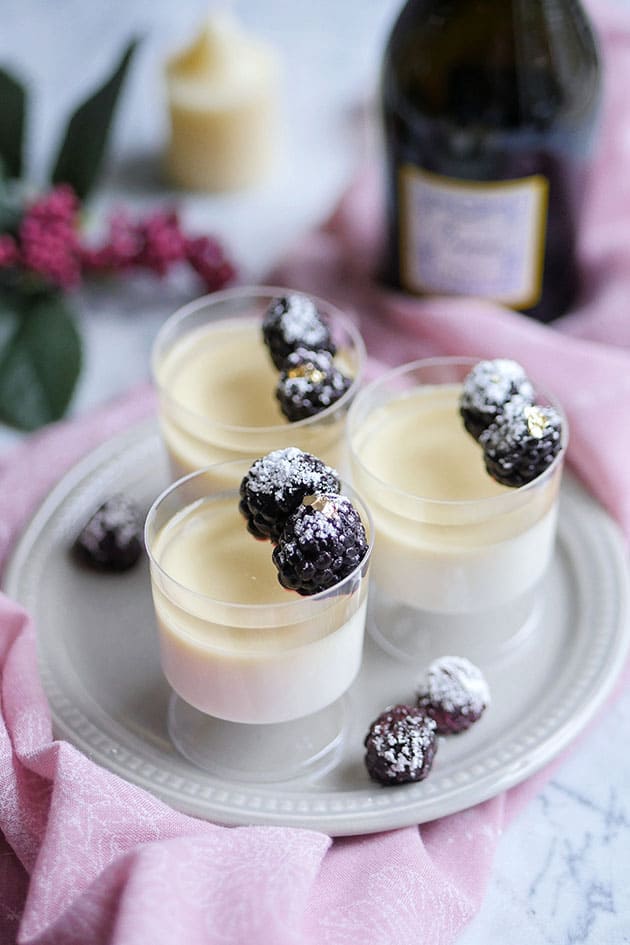
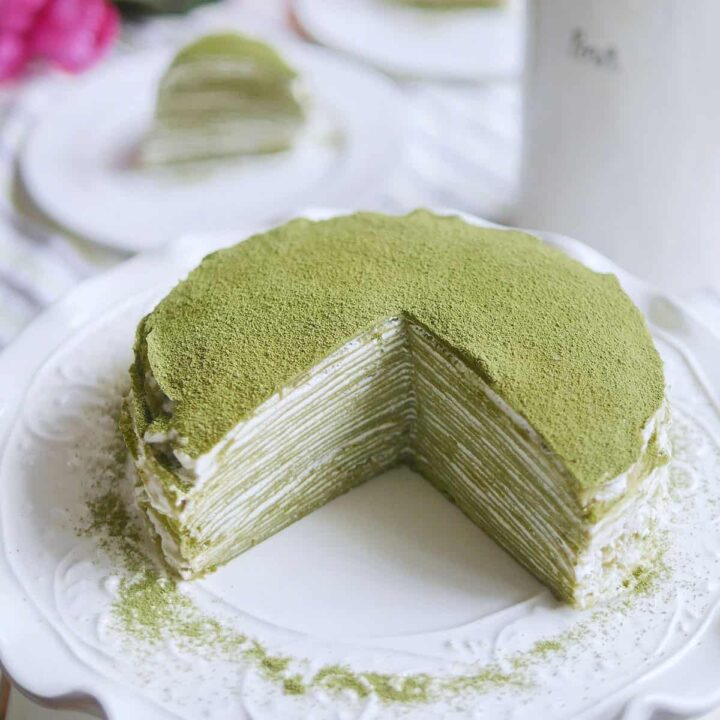
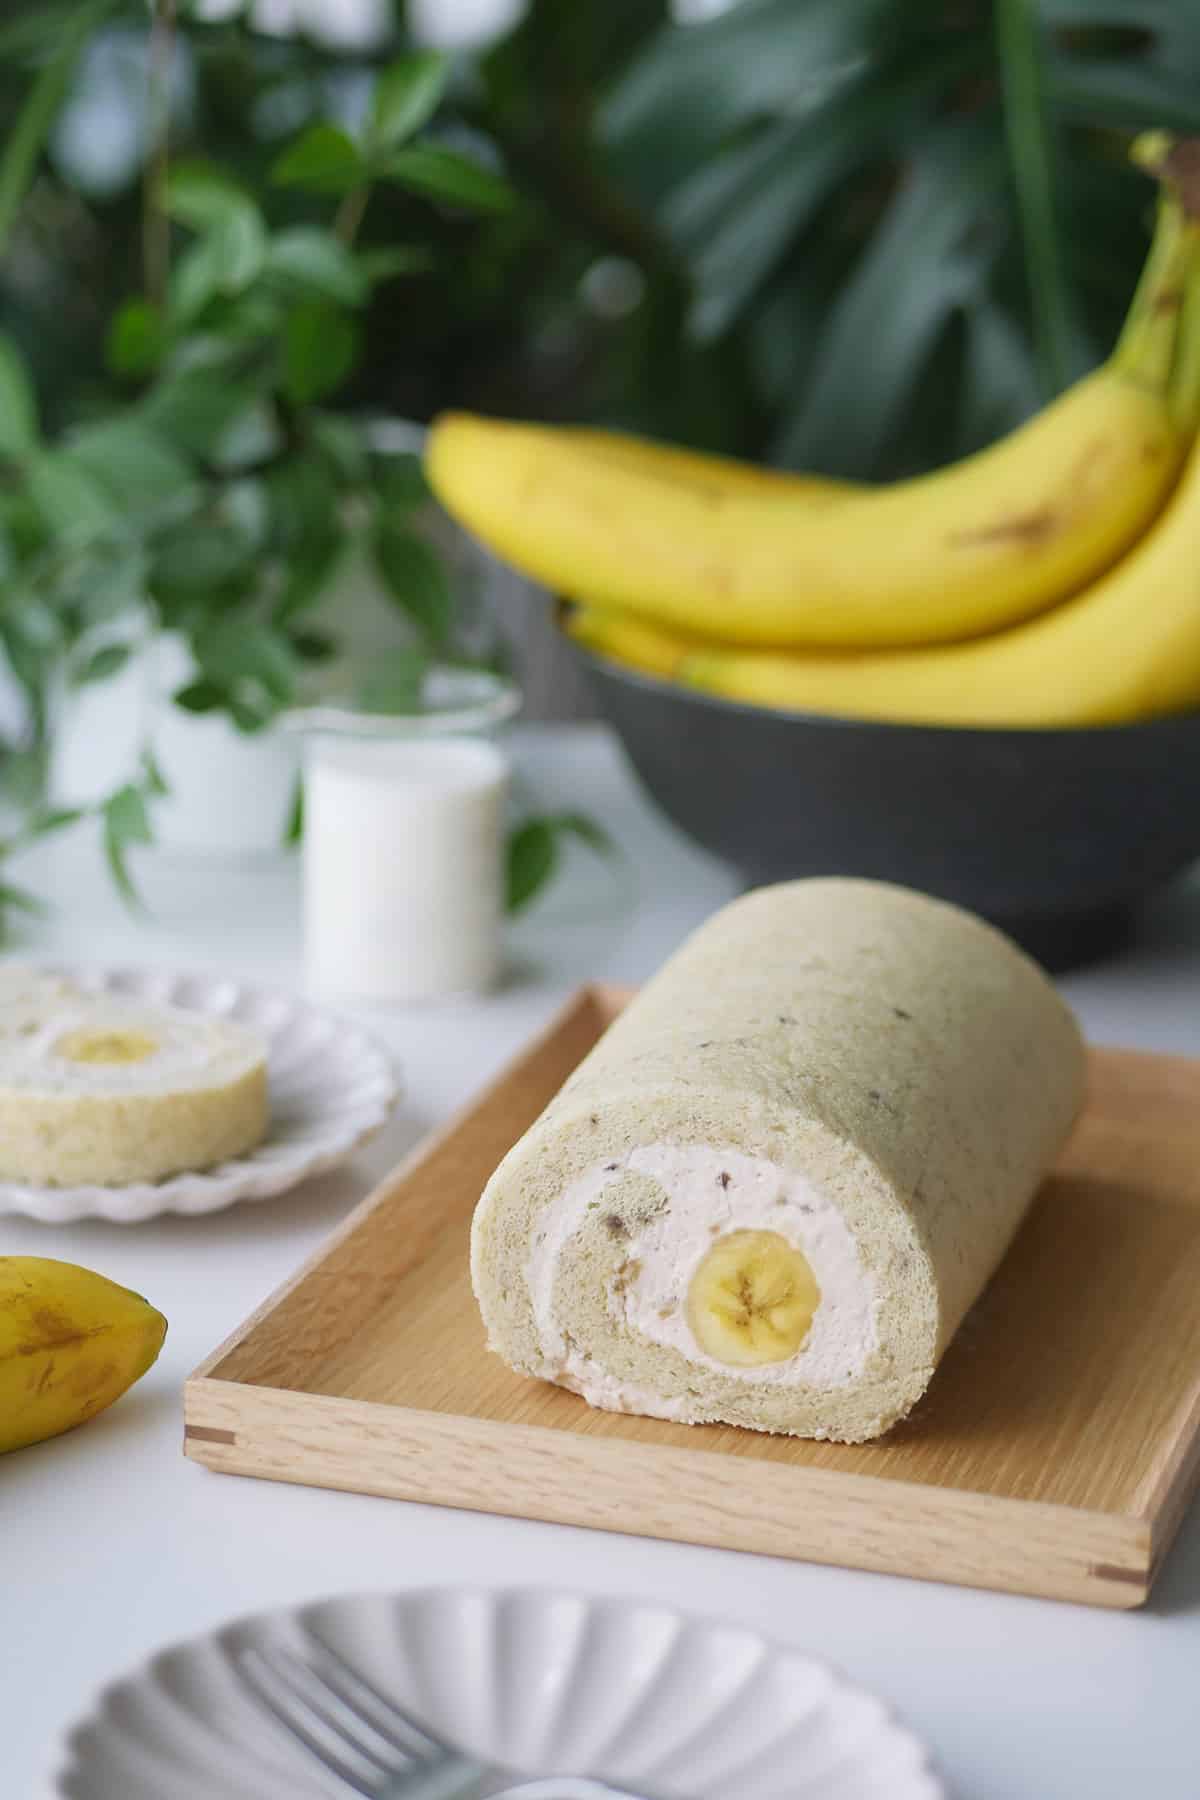
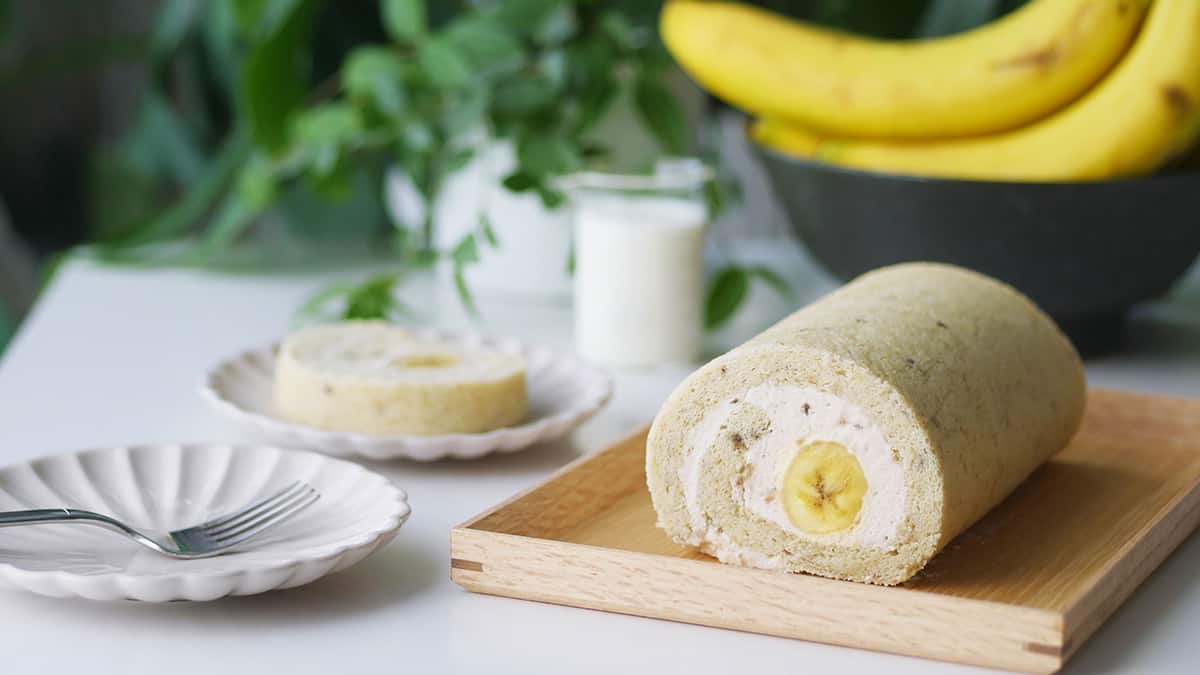
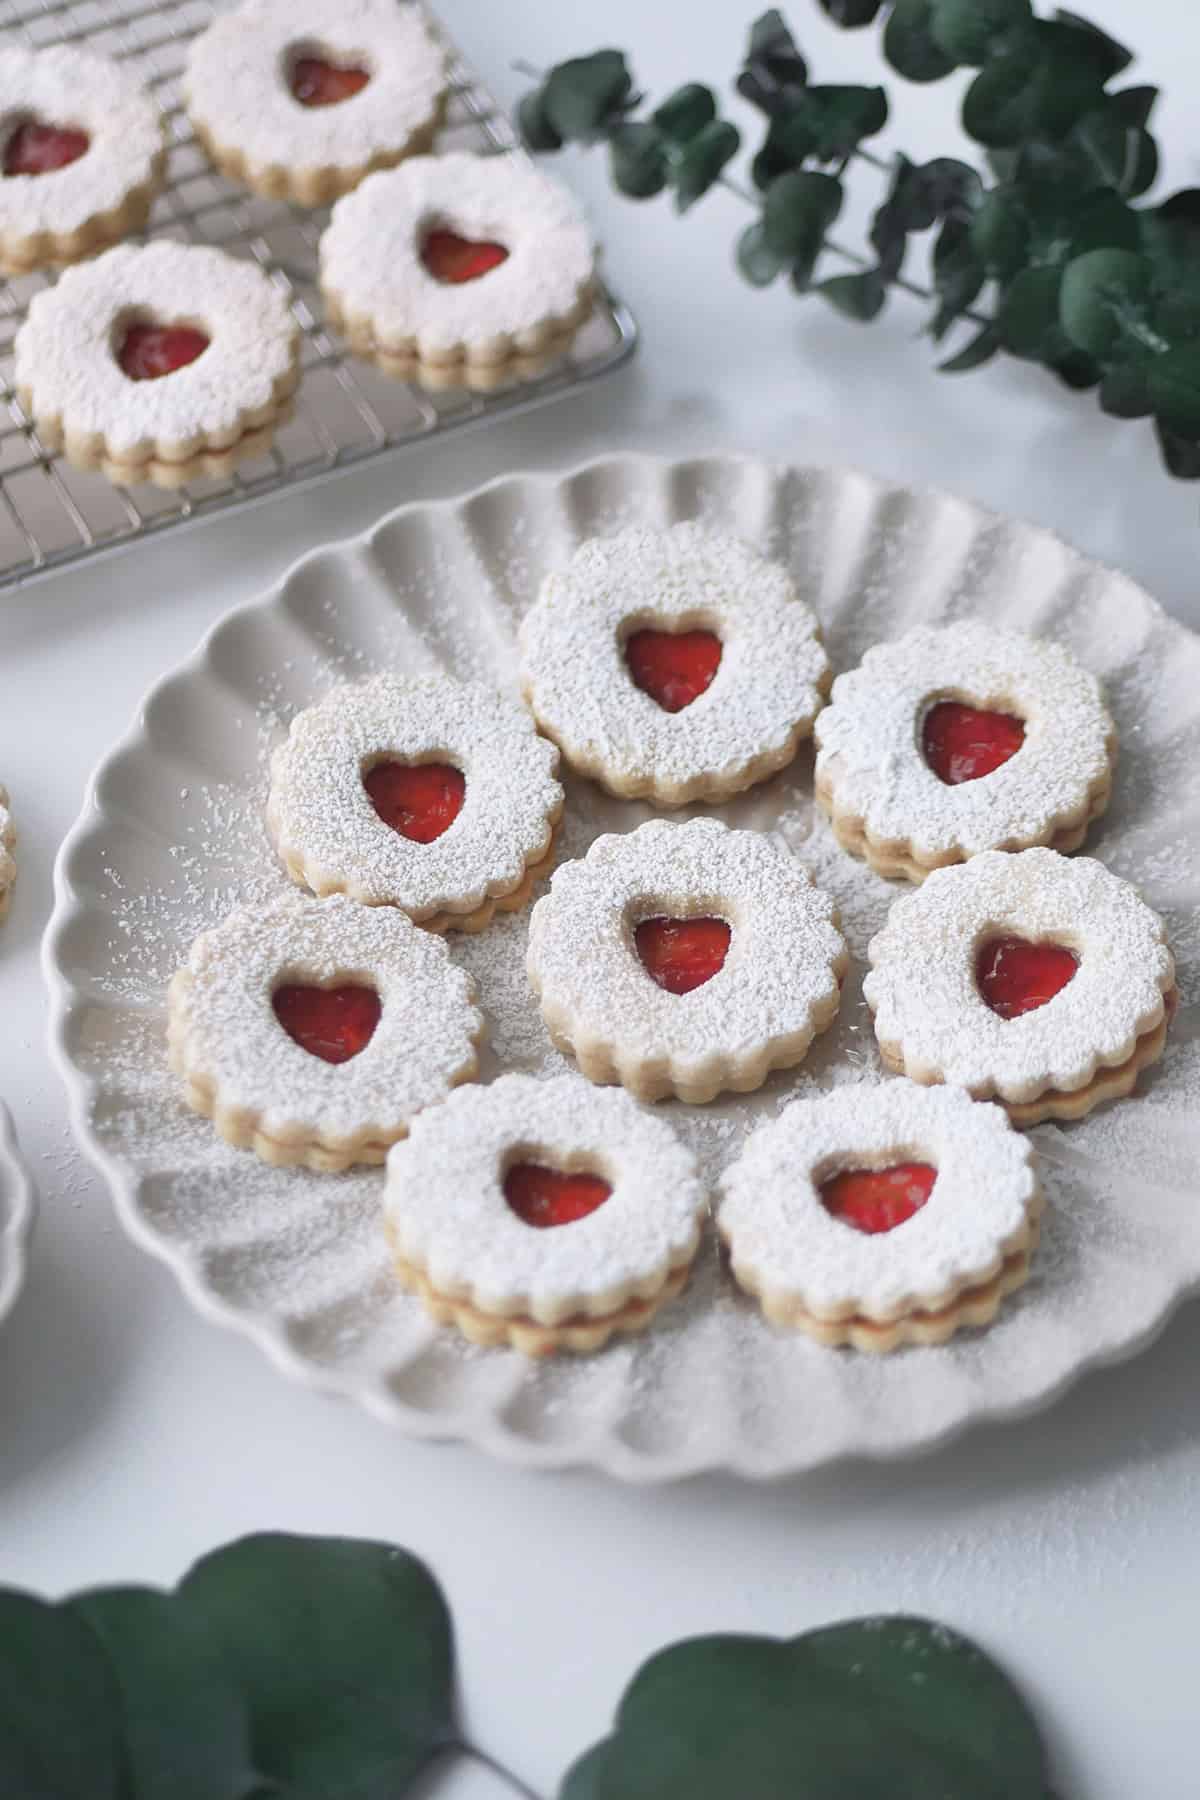
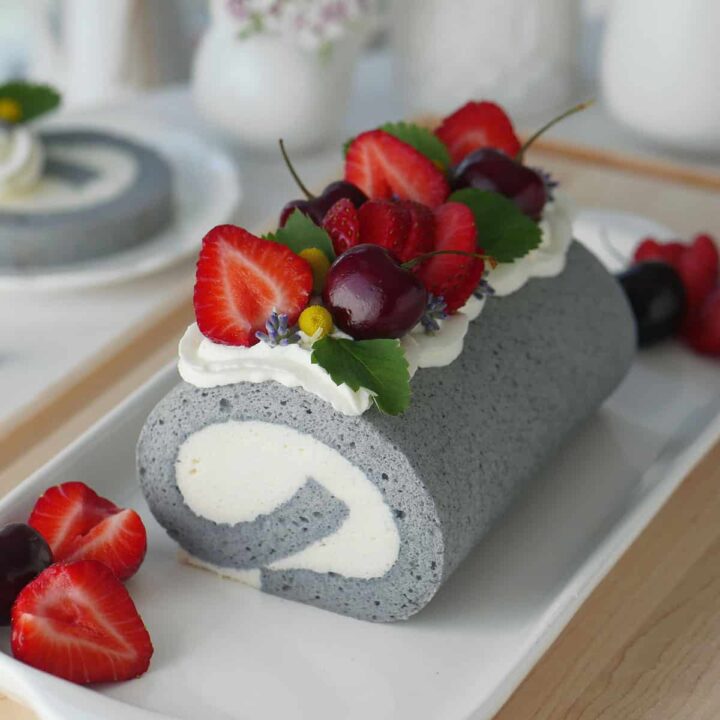
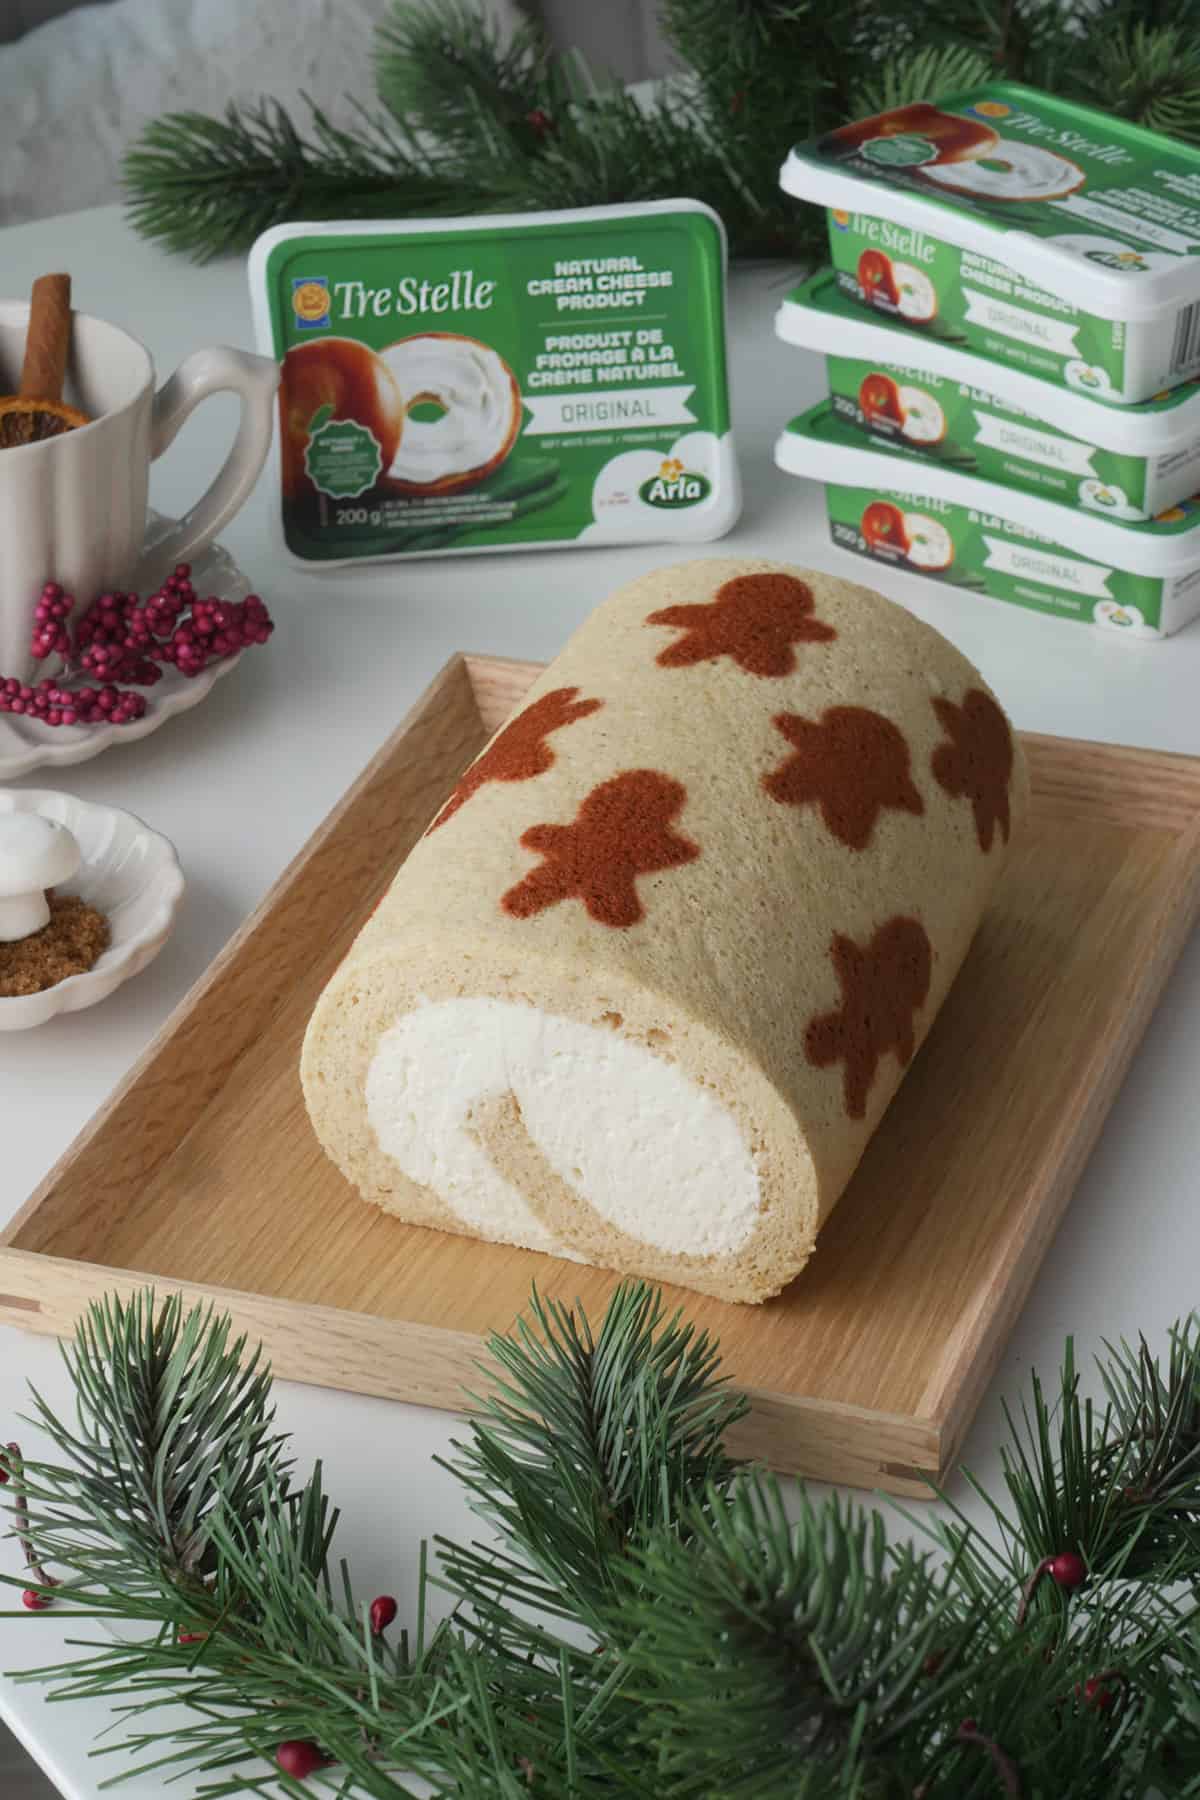
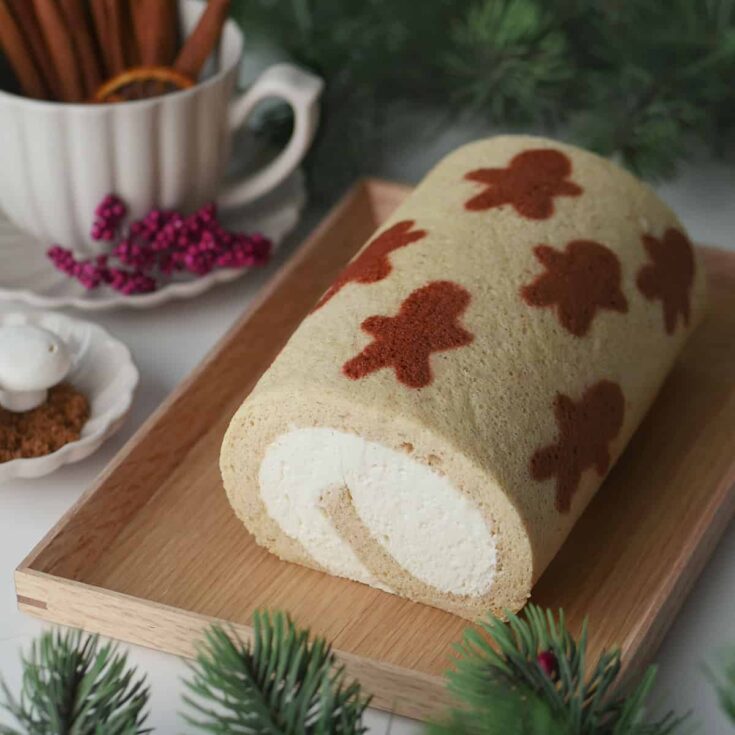
A light Chinese bakery-style mango mousse cake with fresh whipped cream, perfect for birthdays and celebrations.
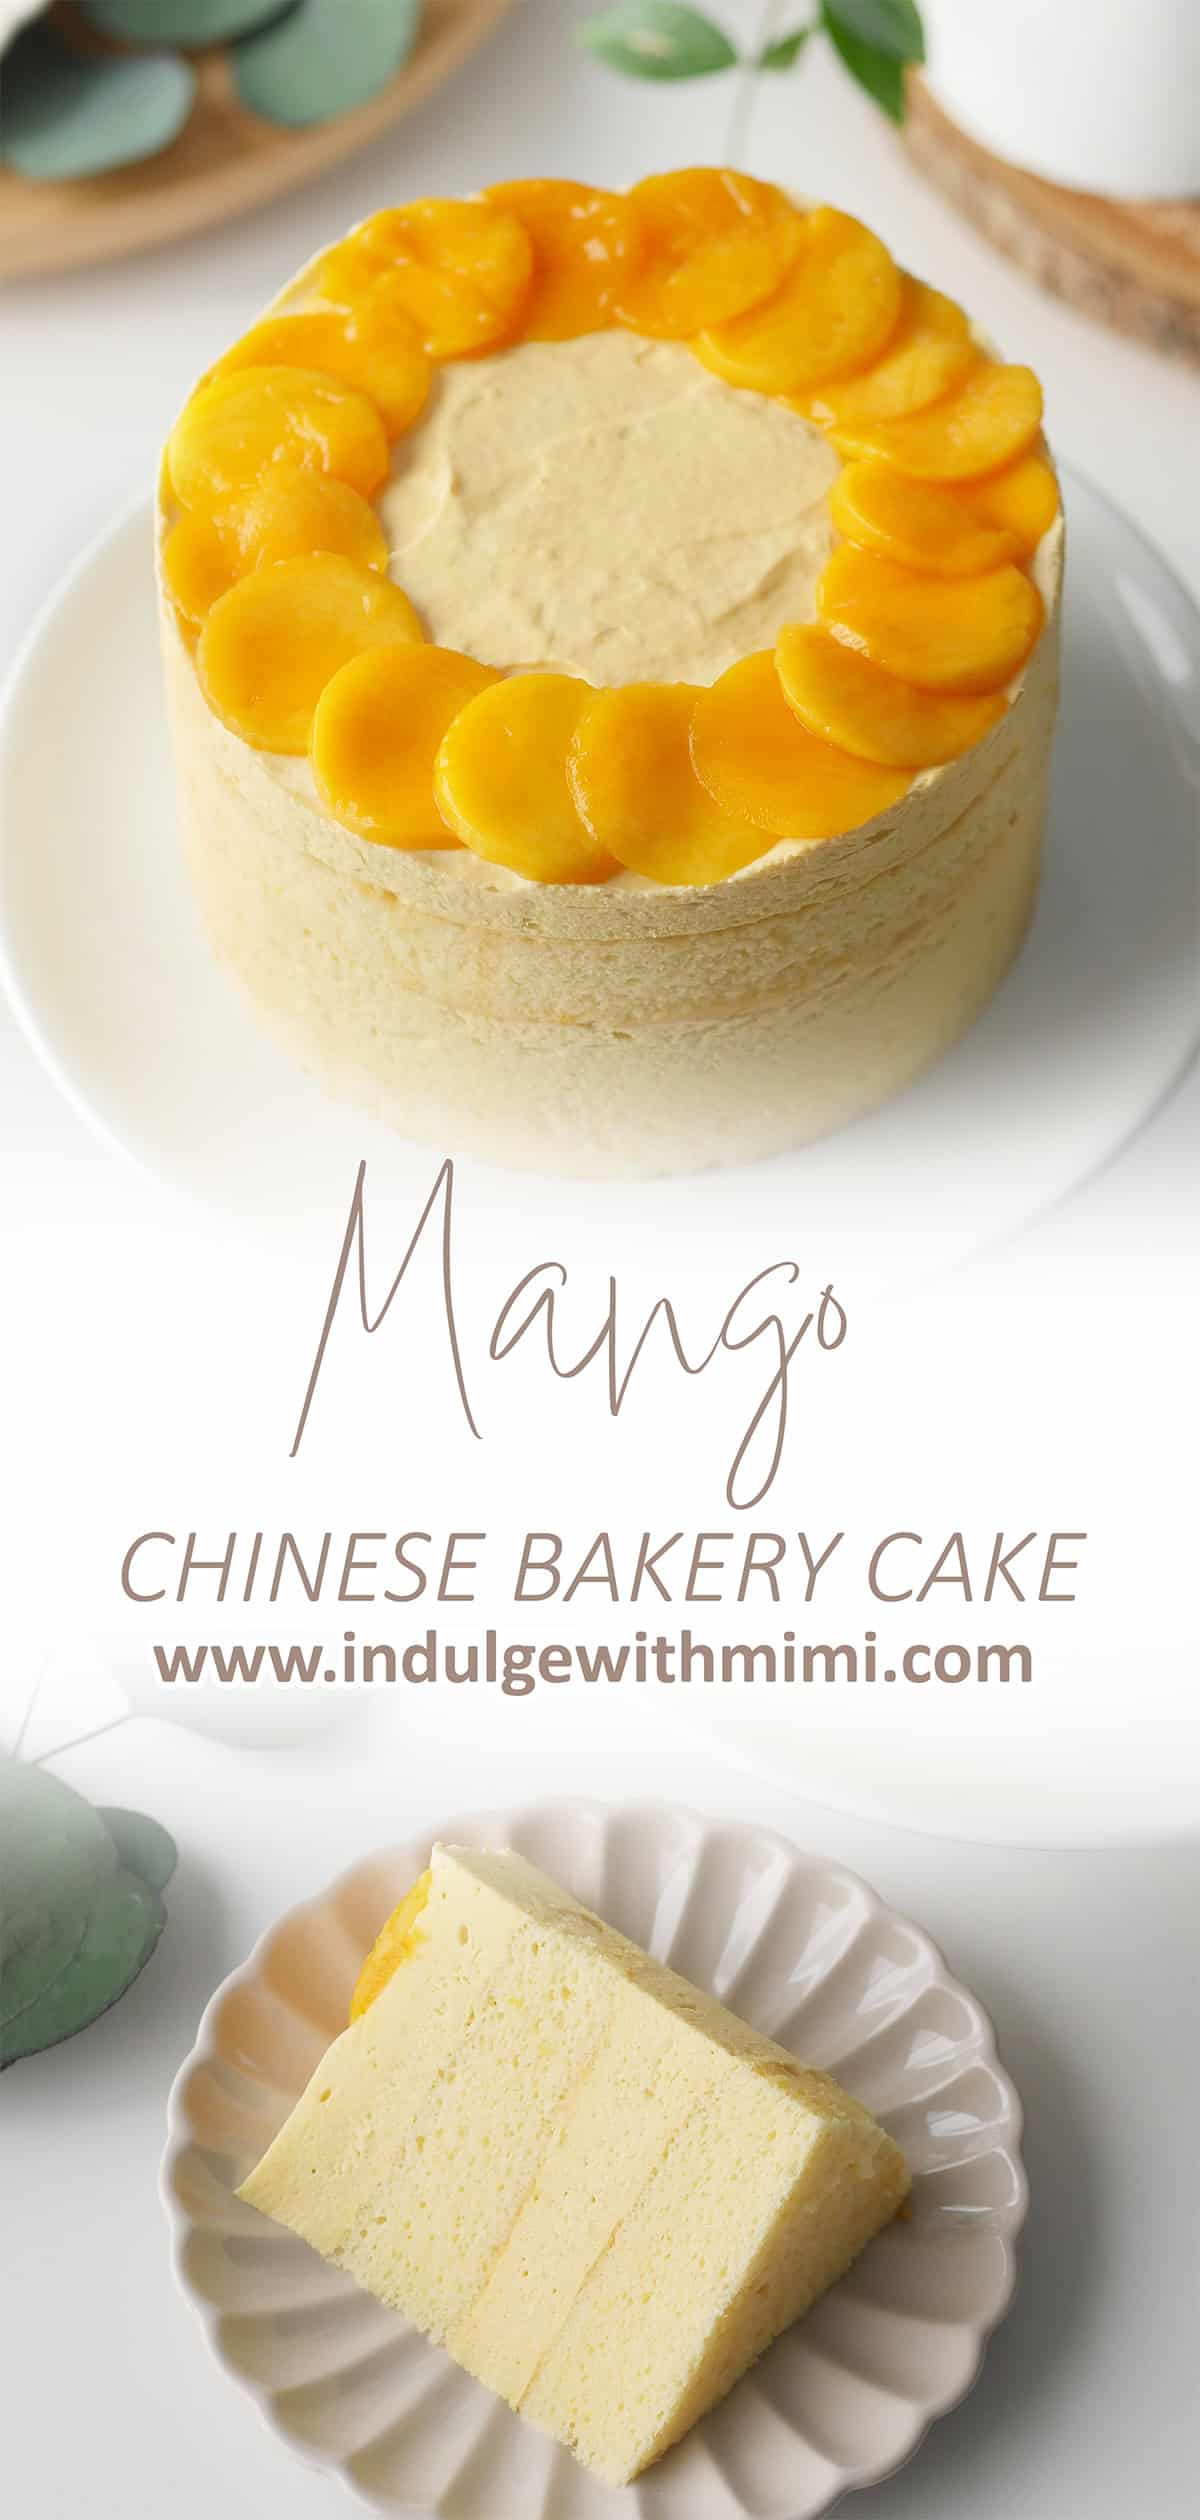
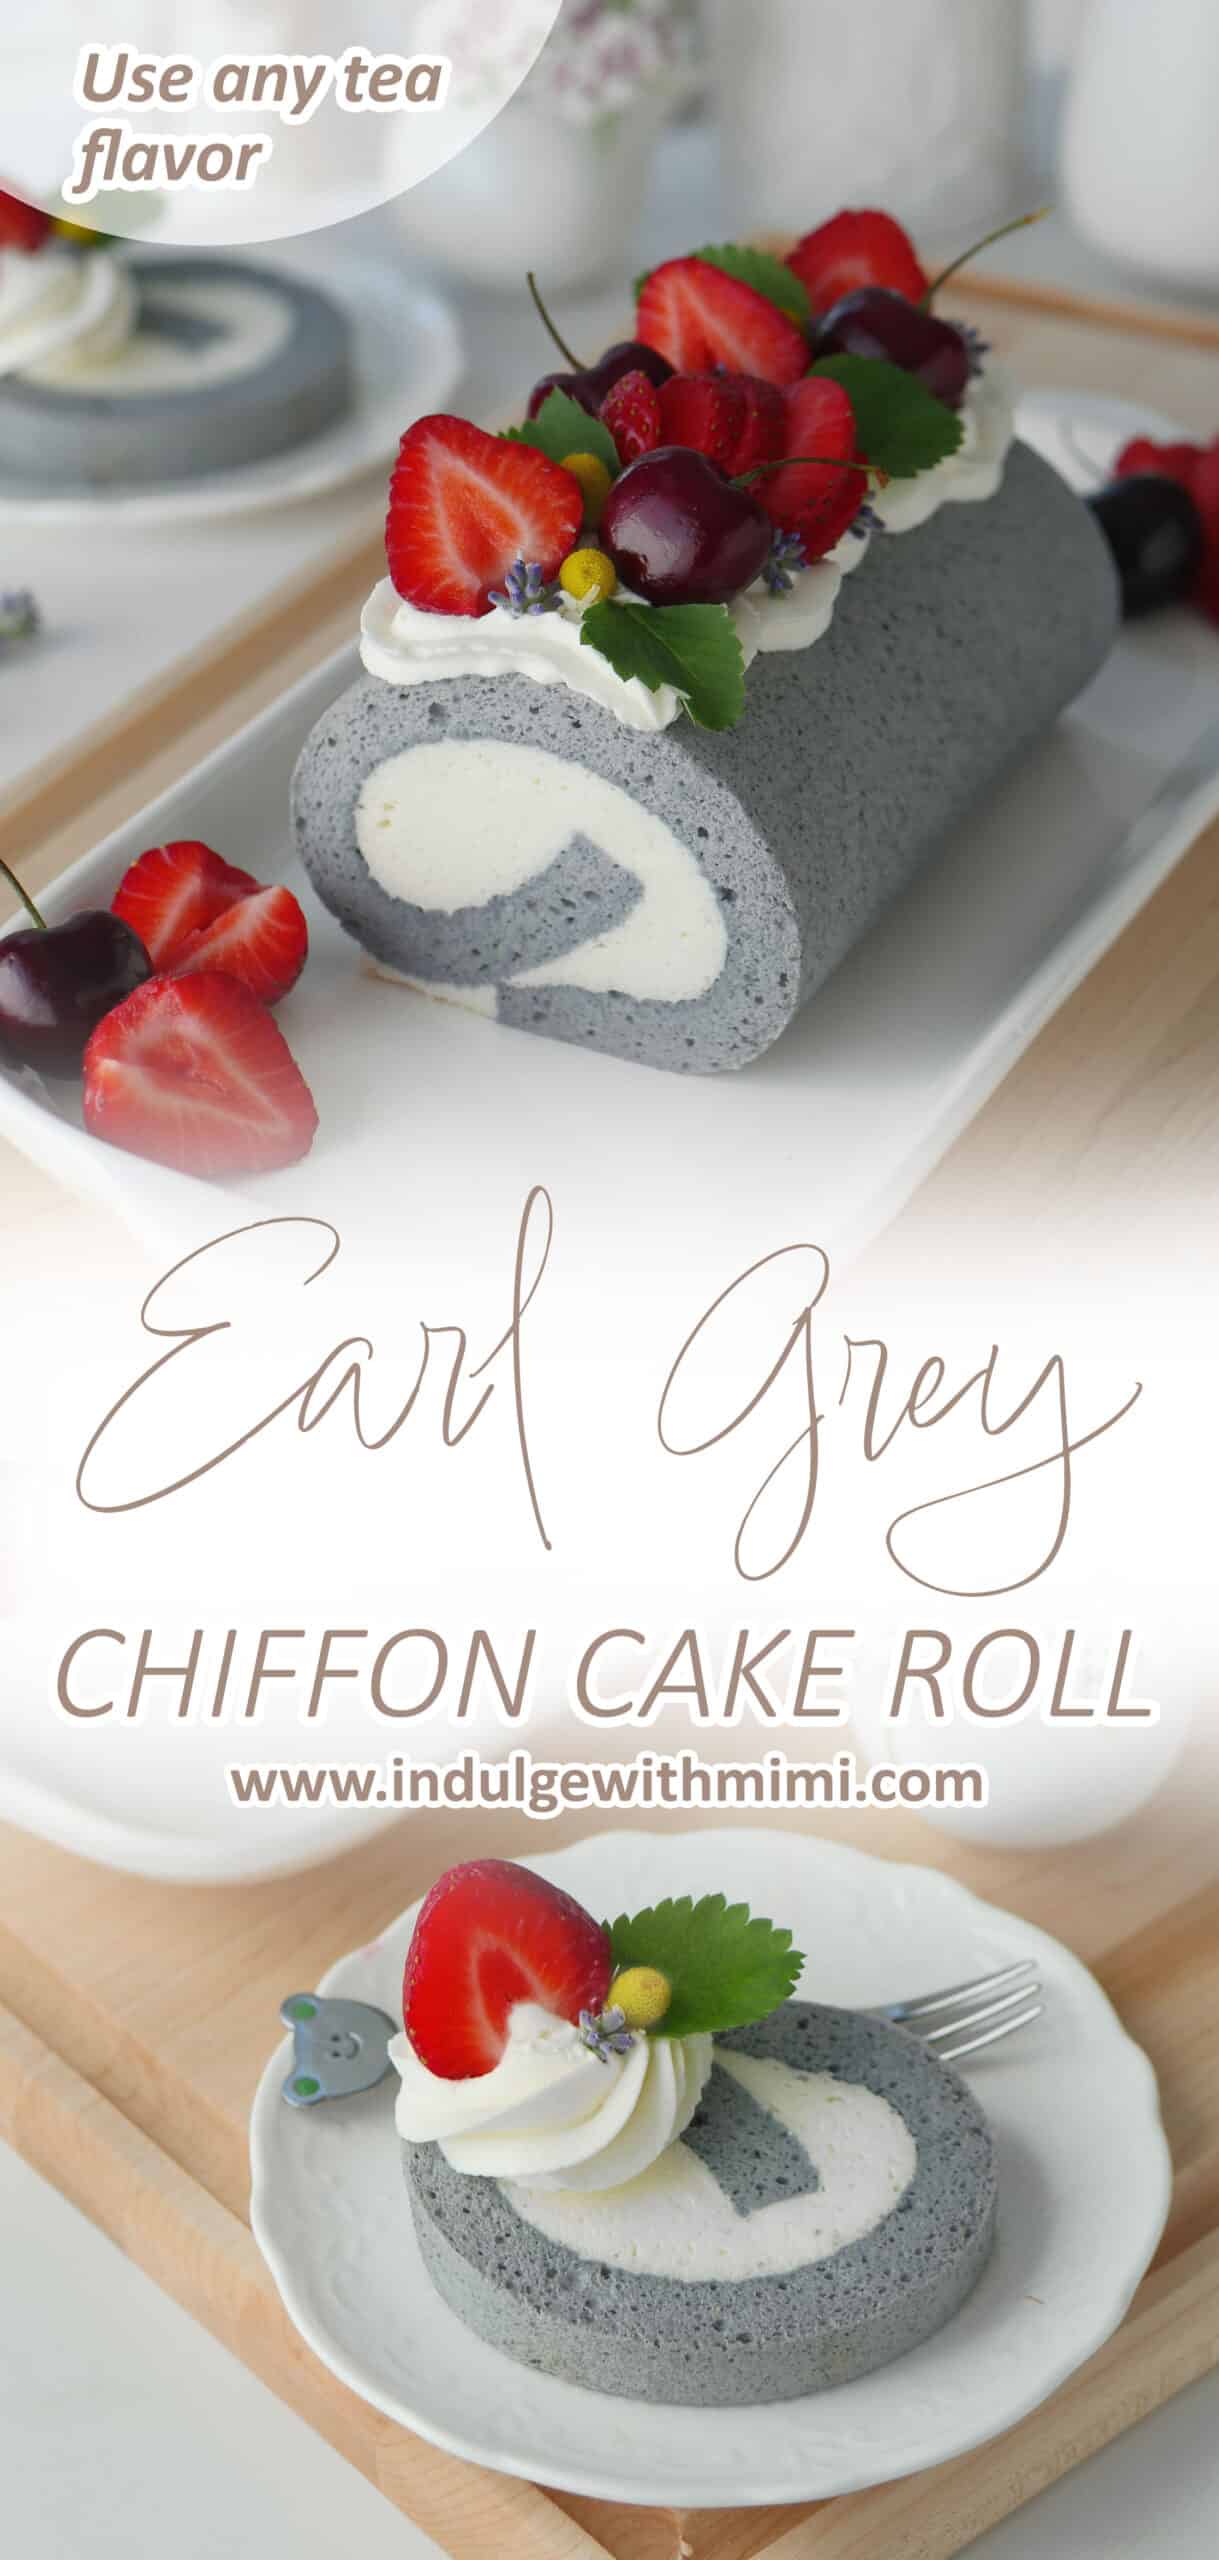
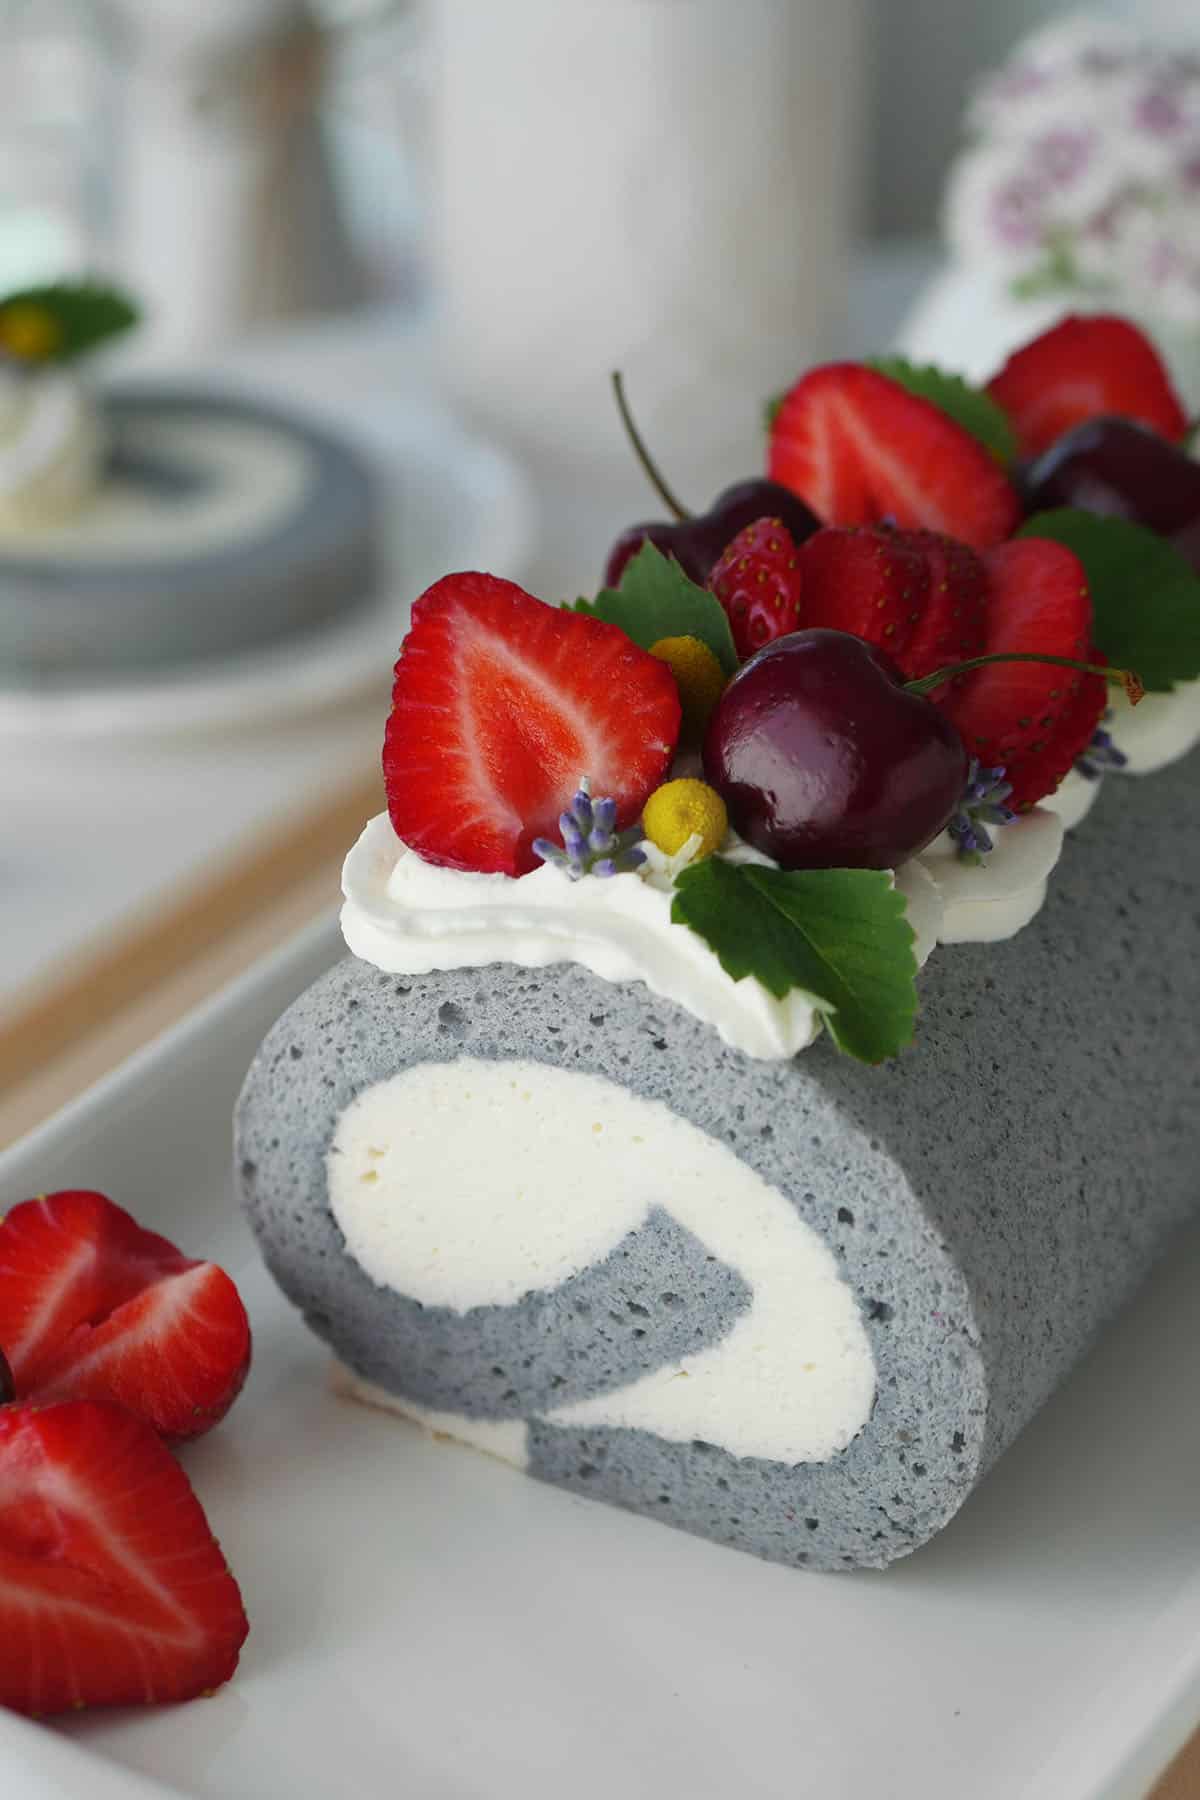
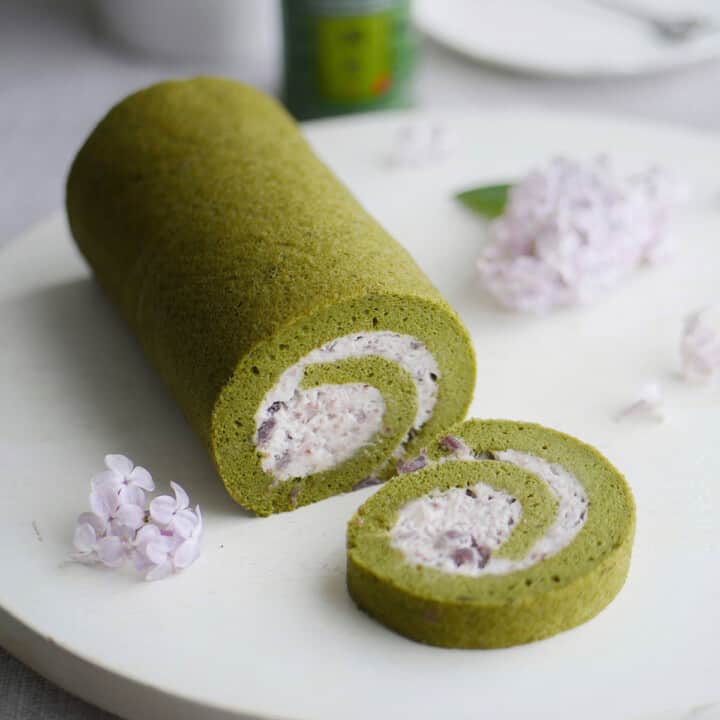
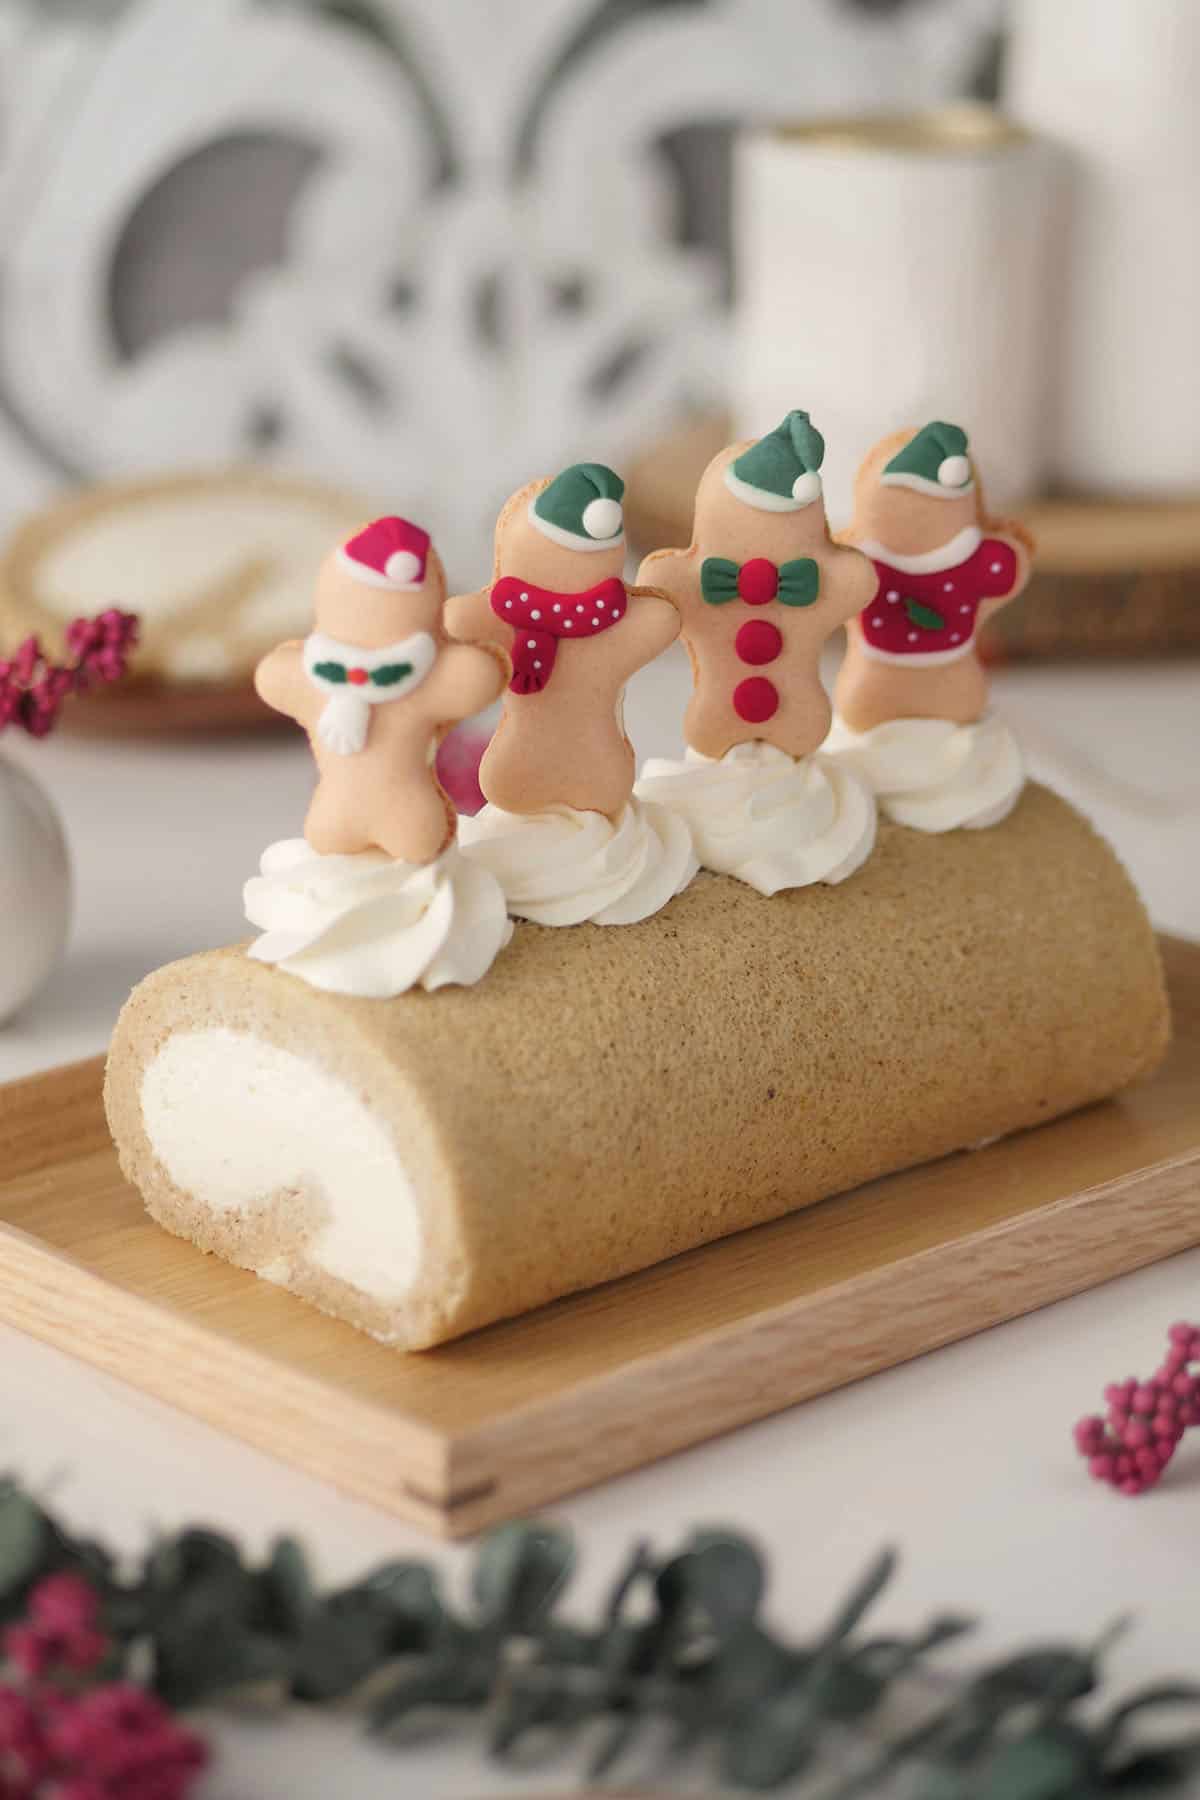
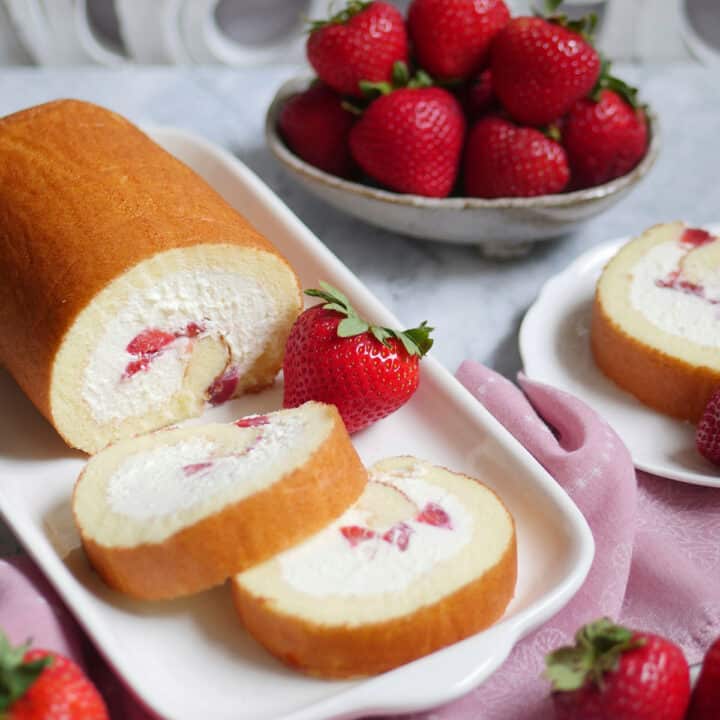
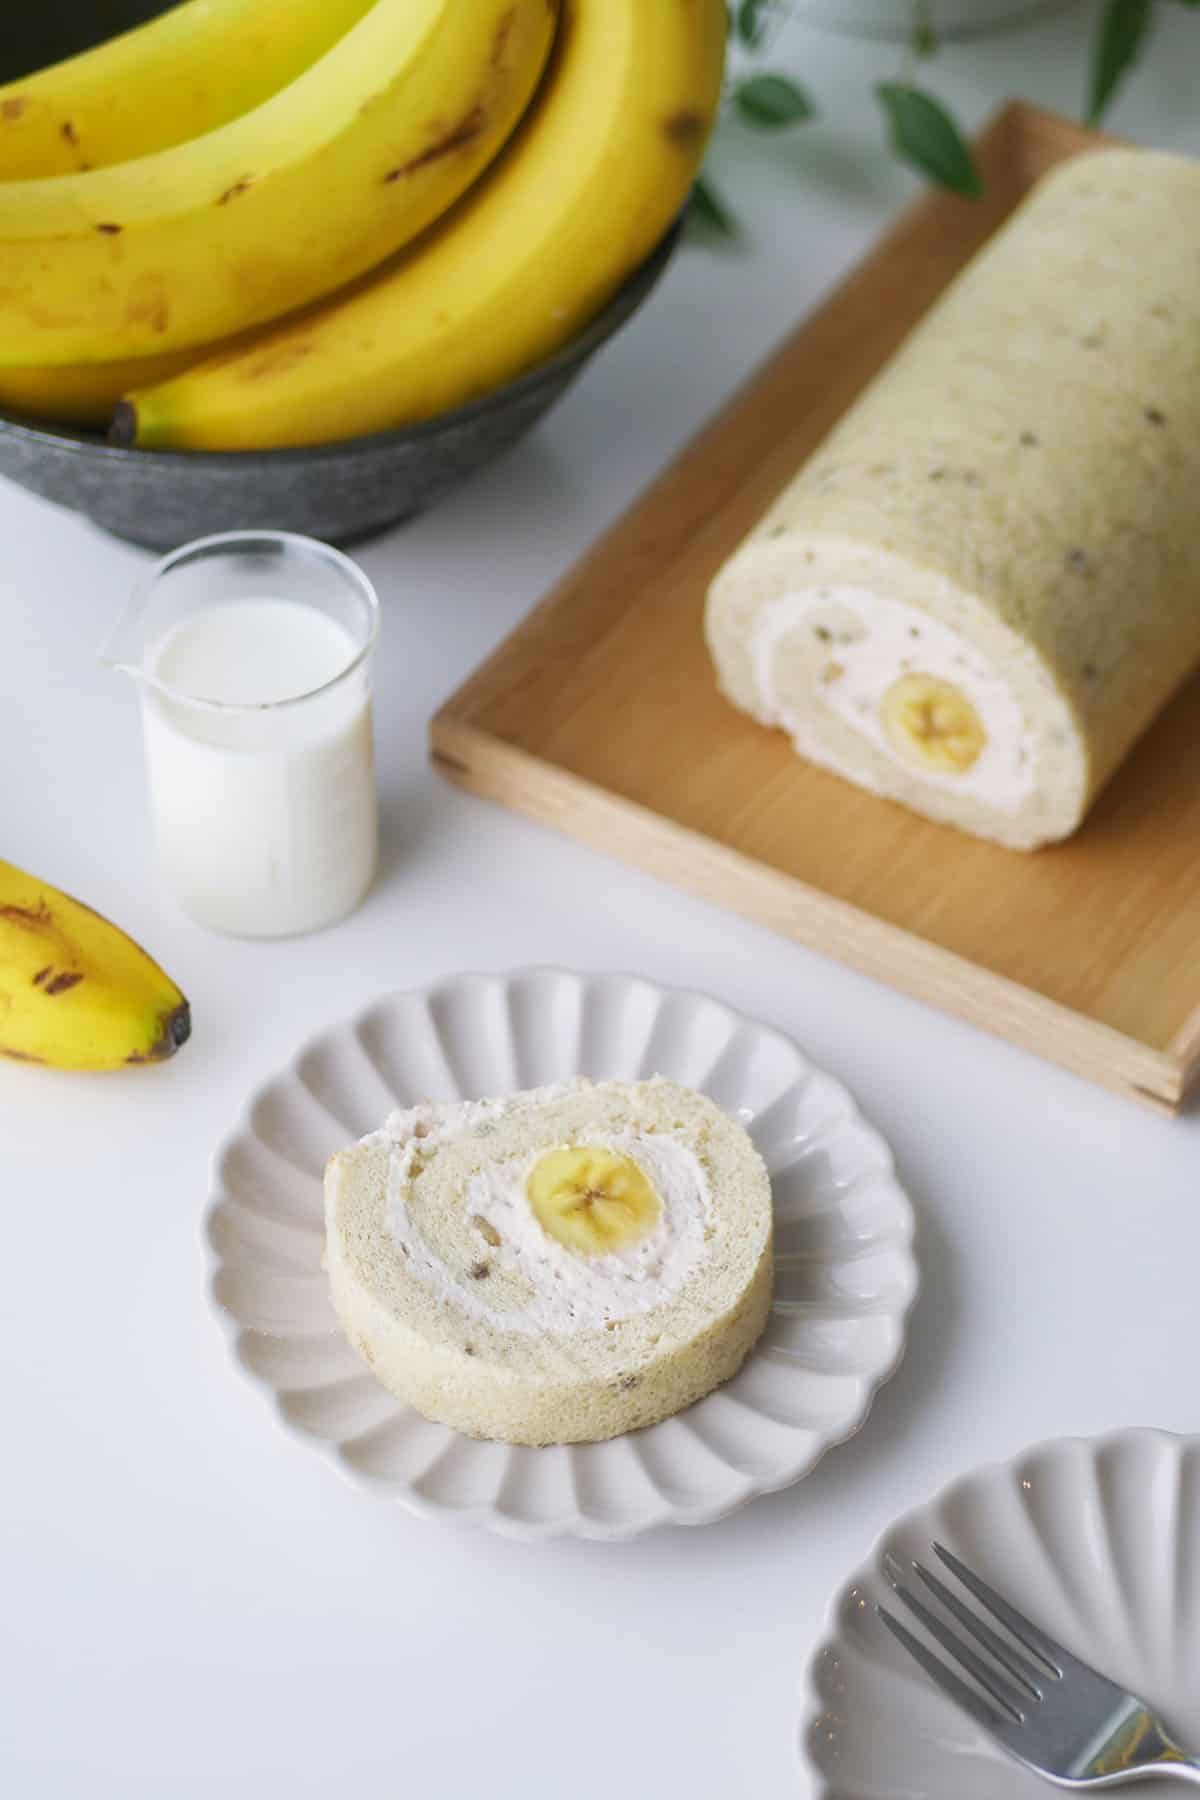
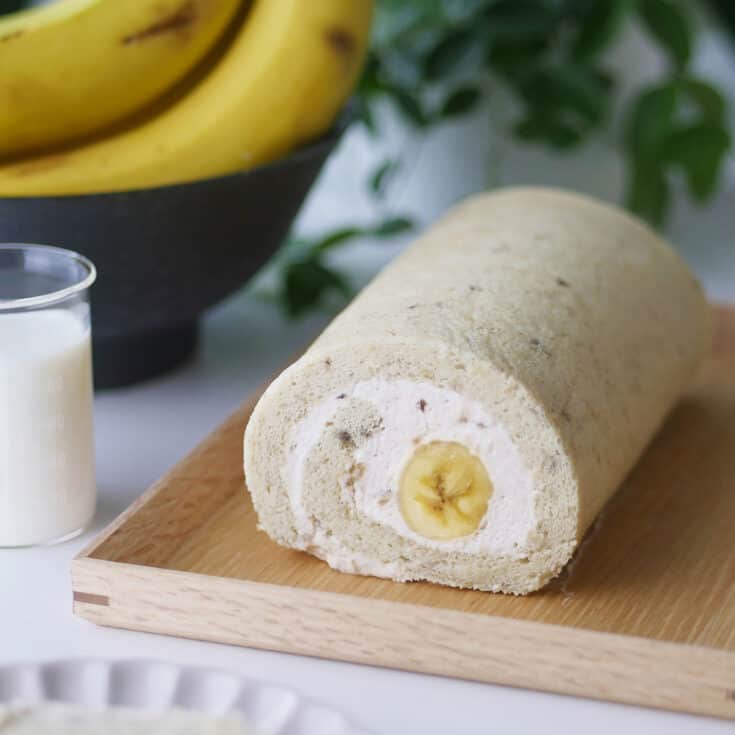
This mango mousse cake is adapted from my latest recipe, Easy Strawberry Mousse Cake. I decided to use mangos this time because my family loves the fresh mango cakes at the Chinese bakeries like fresh mango cake roll. This cake will have a similar taste profile, sweetness level and texture of the desserts available there. Working with fresh mangos can seem intimidating but it's made easier by putting them in a mousse form and cutting the fresh mangos out with a circular cutter for the decorations like in this recipe. Besides being surprisingly approachable, this mango mousse cake also freezes really well for future events. I highly recommend it for your next celebration!
XOXO,
Mimi
Why You'll Love This Cake
- Easy to prepare - no frosting and decorating needed
- Beautiful - naked layered cakes look elegant all on its own
- Tastes great - balanced sweetness with real fruit flavors
- Unique - mangoes are exotic but widely accepted by different palettes
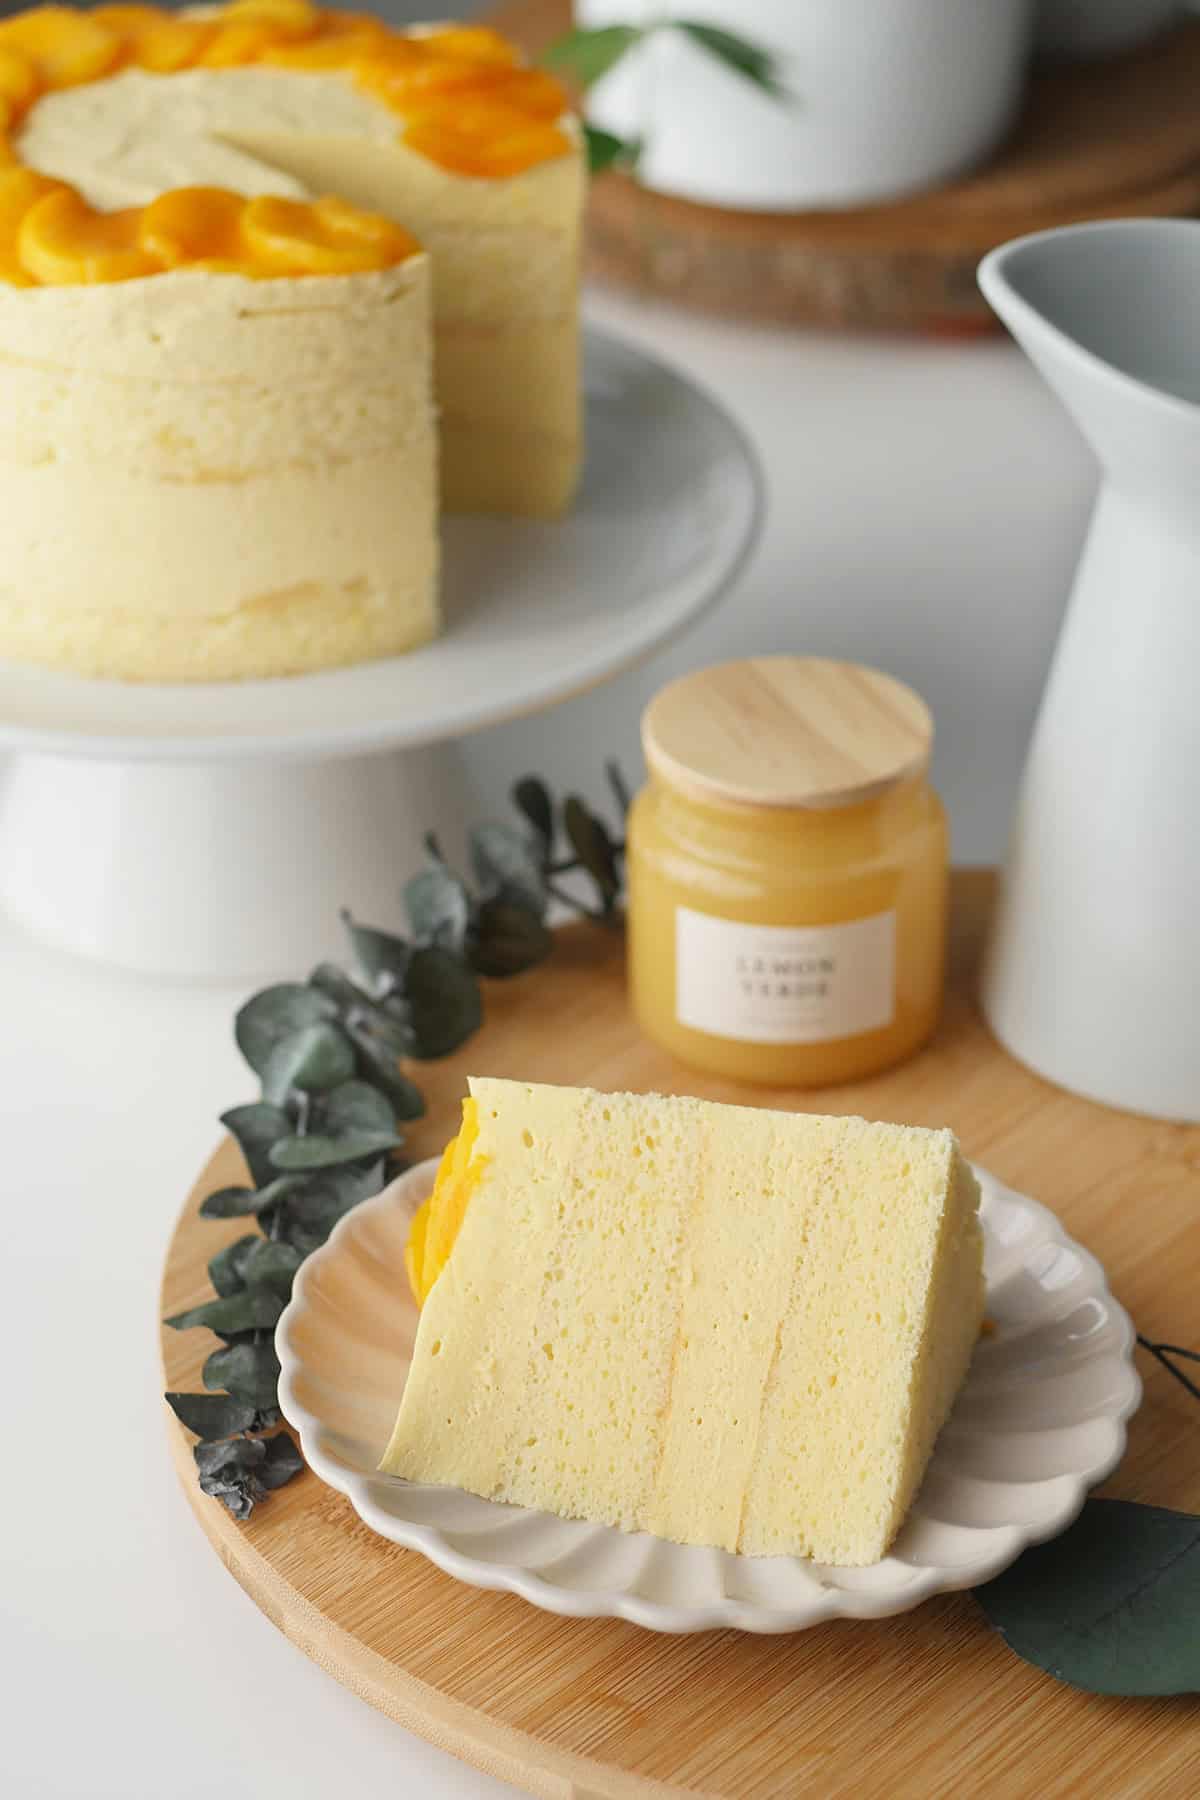
What Does This Cake Taste Like?
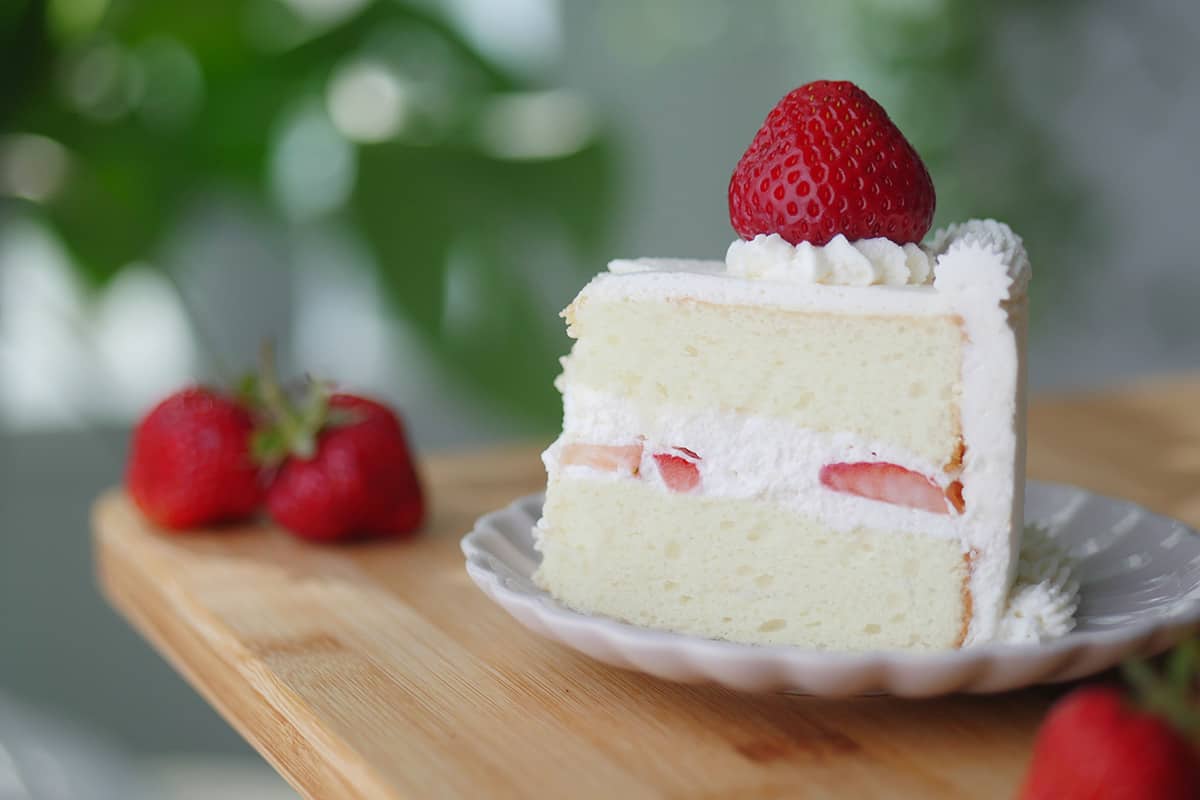
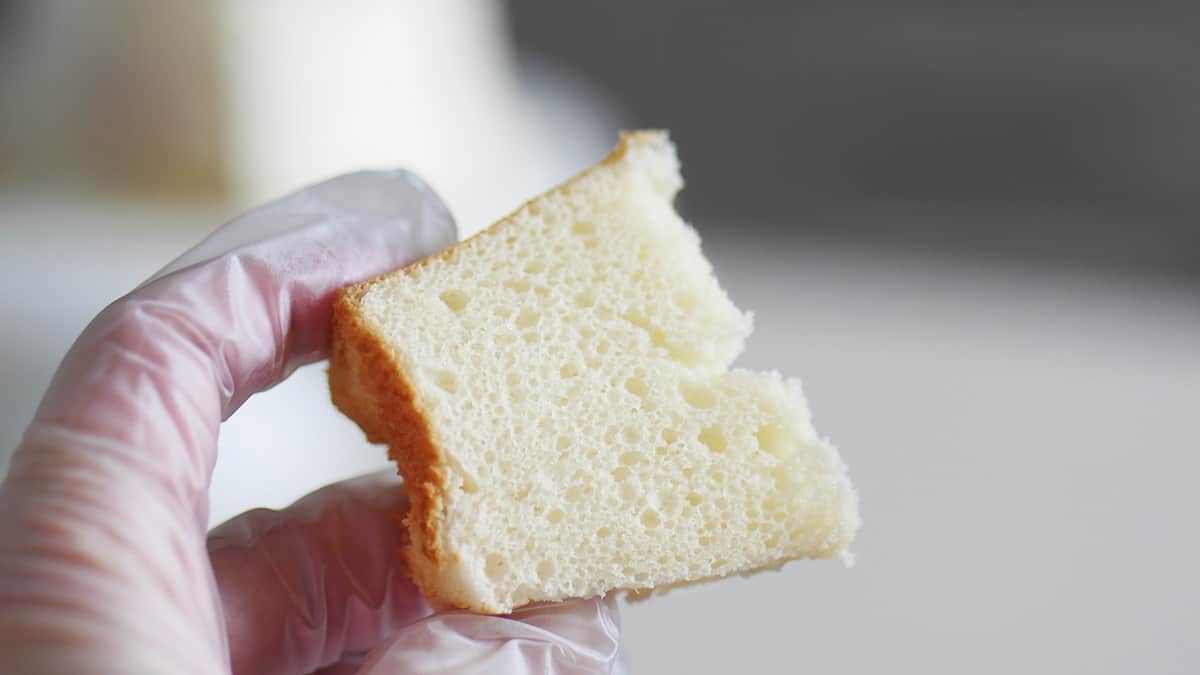
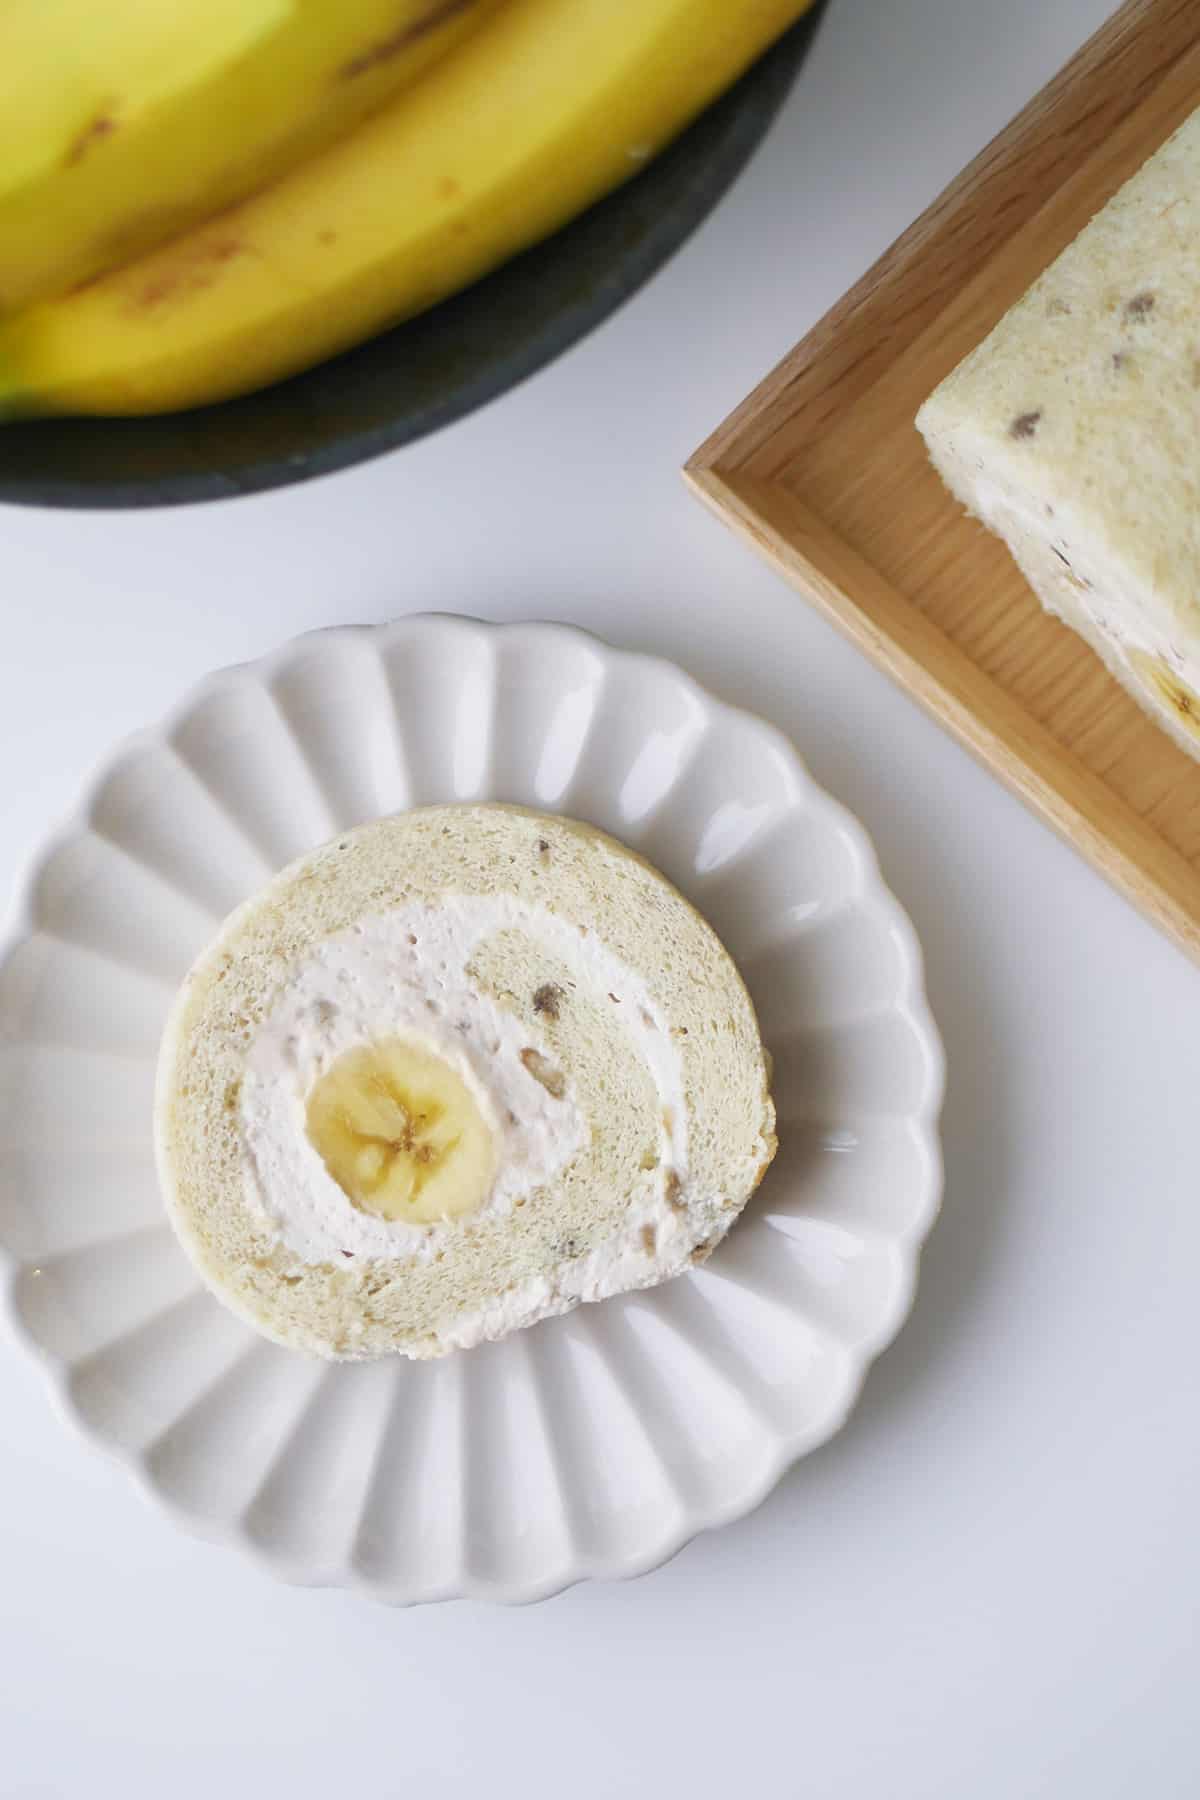
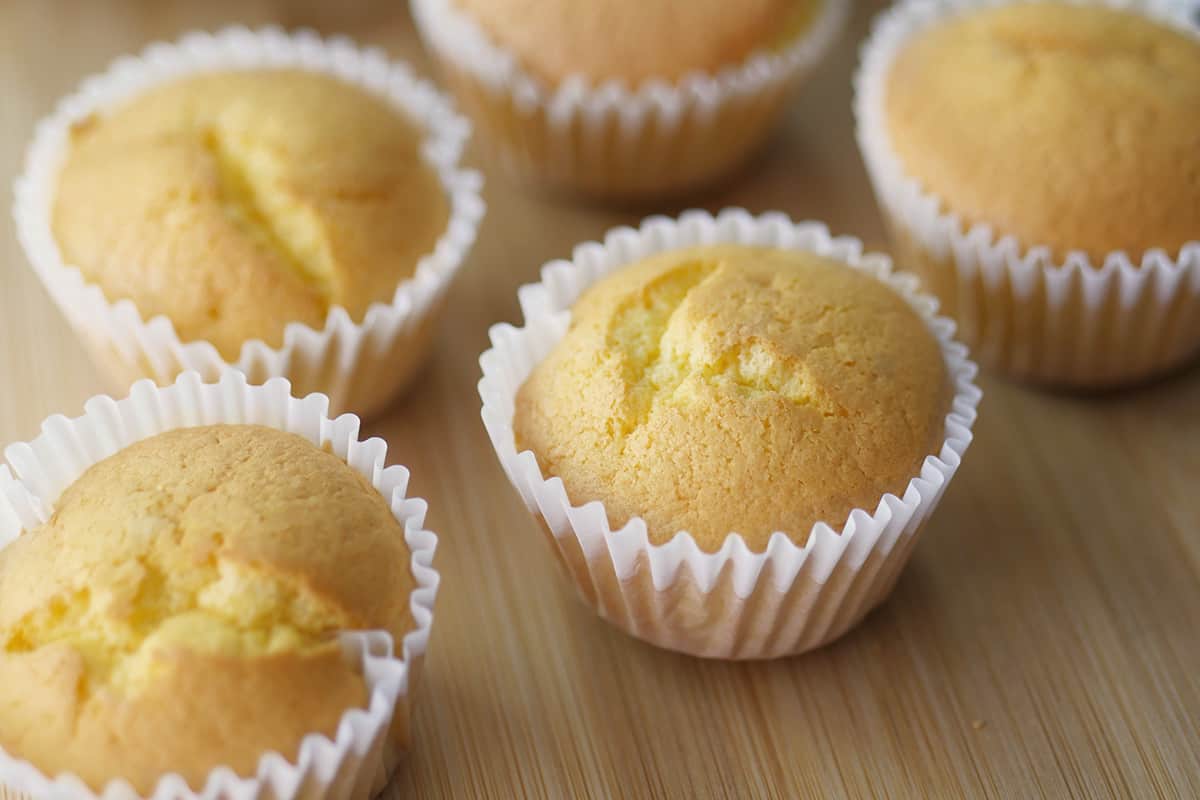
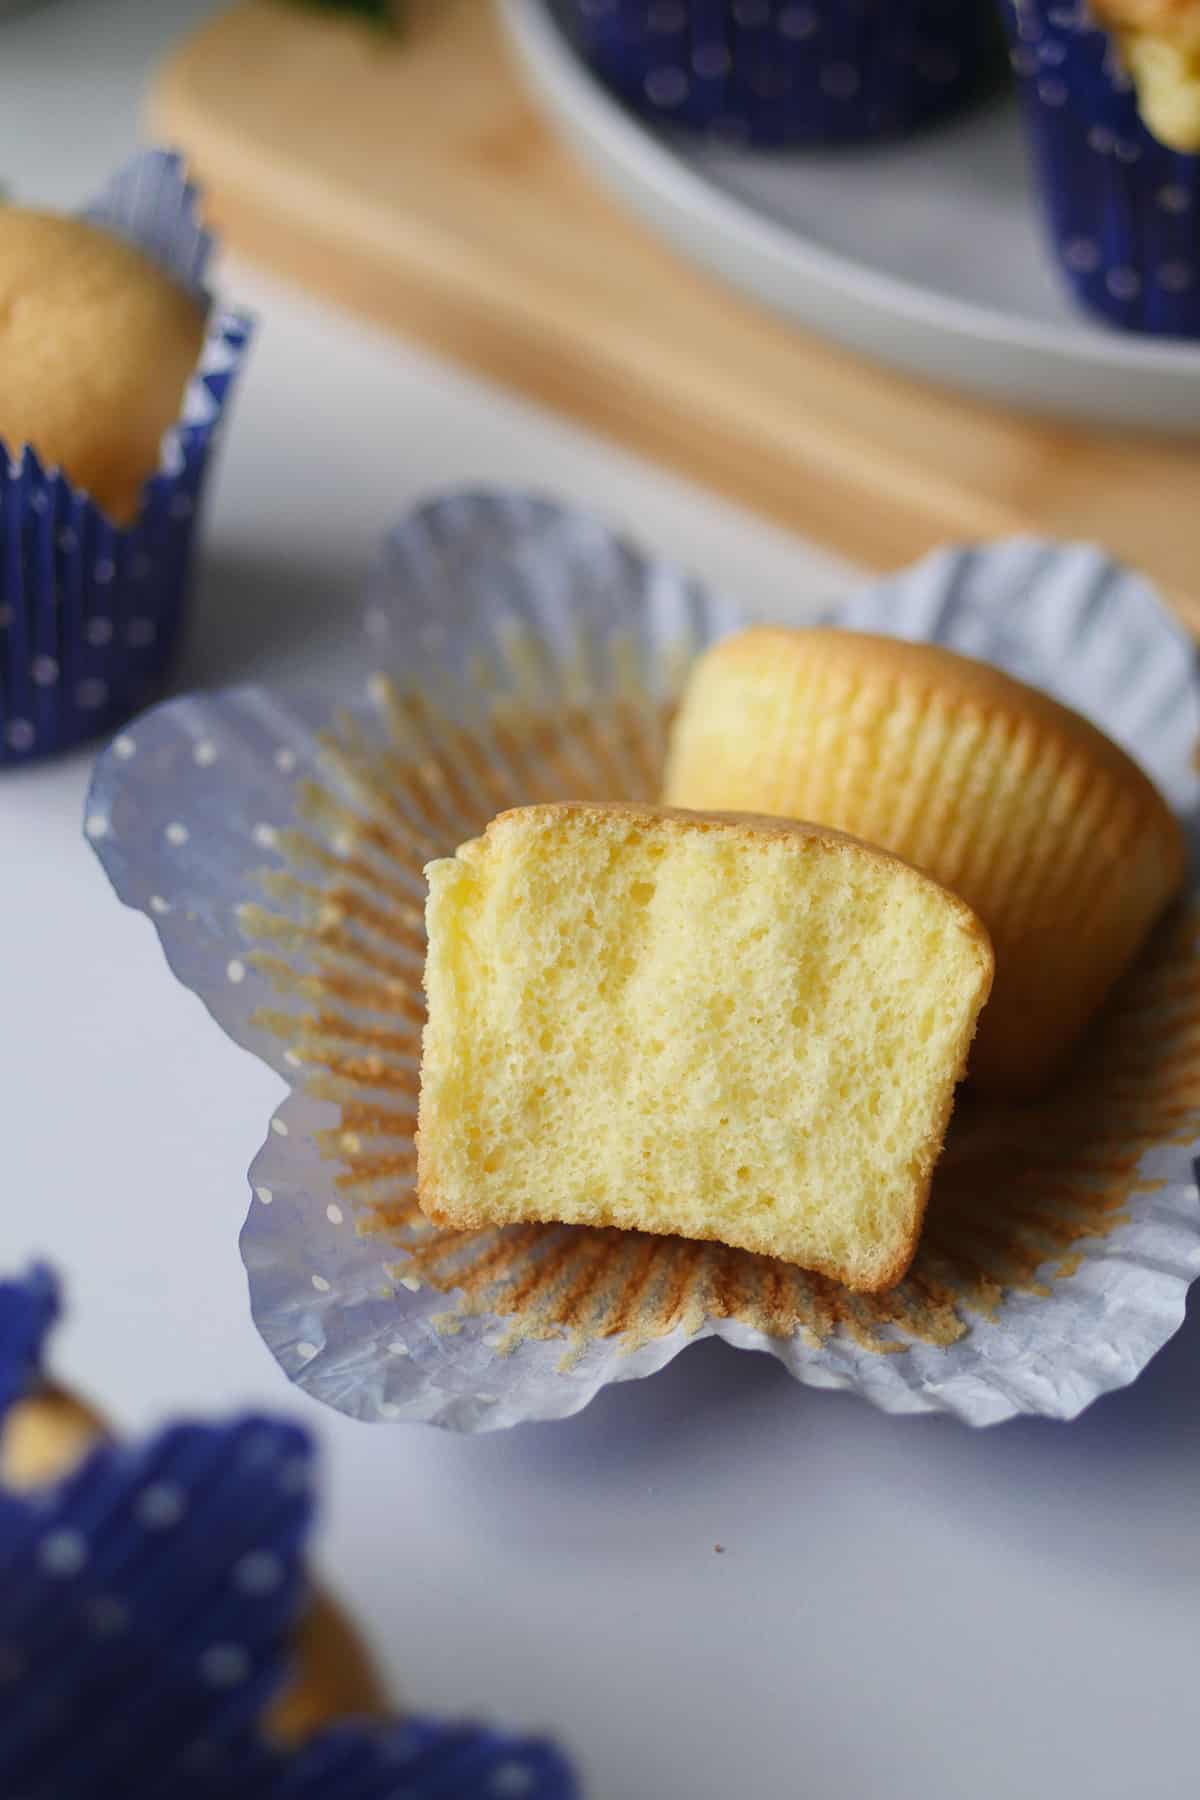
This mango mousse cake is composed with layers of tender chiffon cake and real mango mousse. A chiffon cake is a type of foam cake that uses oil instead of butter as the fat. This makes the cake extra tender and soft. The mousse layer is predominantly flavored with real mangos and fresh cream - the flavors of the mangos really come through! I would have to say that this cake is similar to most desserts you'll find at the Asian bakeries - soft, moderately sweetened, and not too rich.
What kind of Mangos Can I Use?
You can use different varies of mangos as long as they are ripened. Ripe mangos yields slightly from pressure and gives off a sweet, fruity aroma near the stem. Their color will have likely changed from green to yellow, orange or red, depending on their variety. Some varieties remain green so it's best to do the feel and smell test.
Can I Use Different Fruits for this Cake?
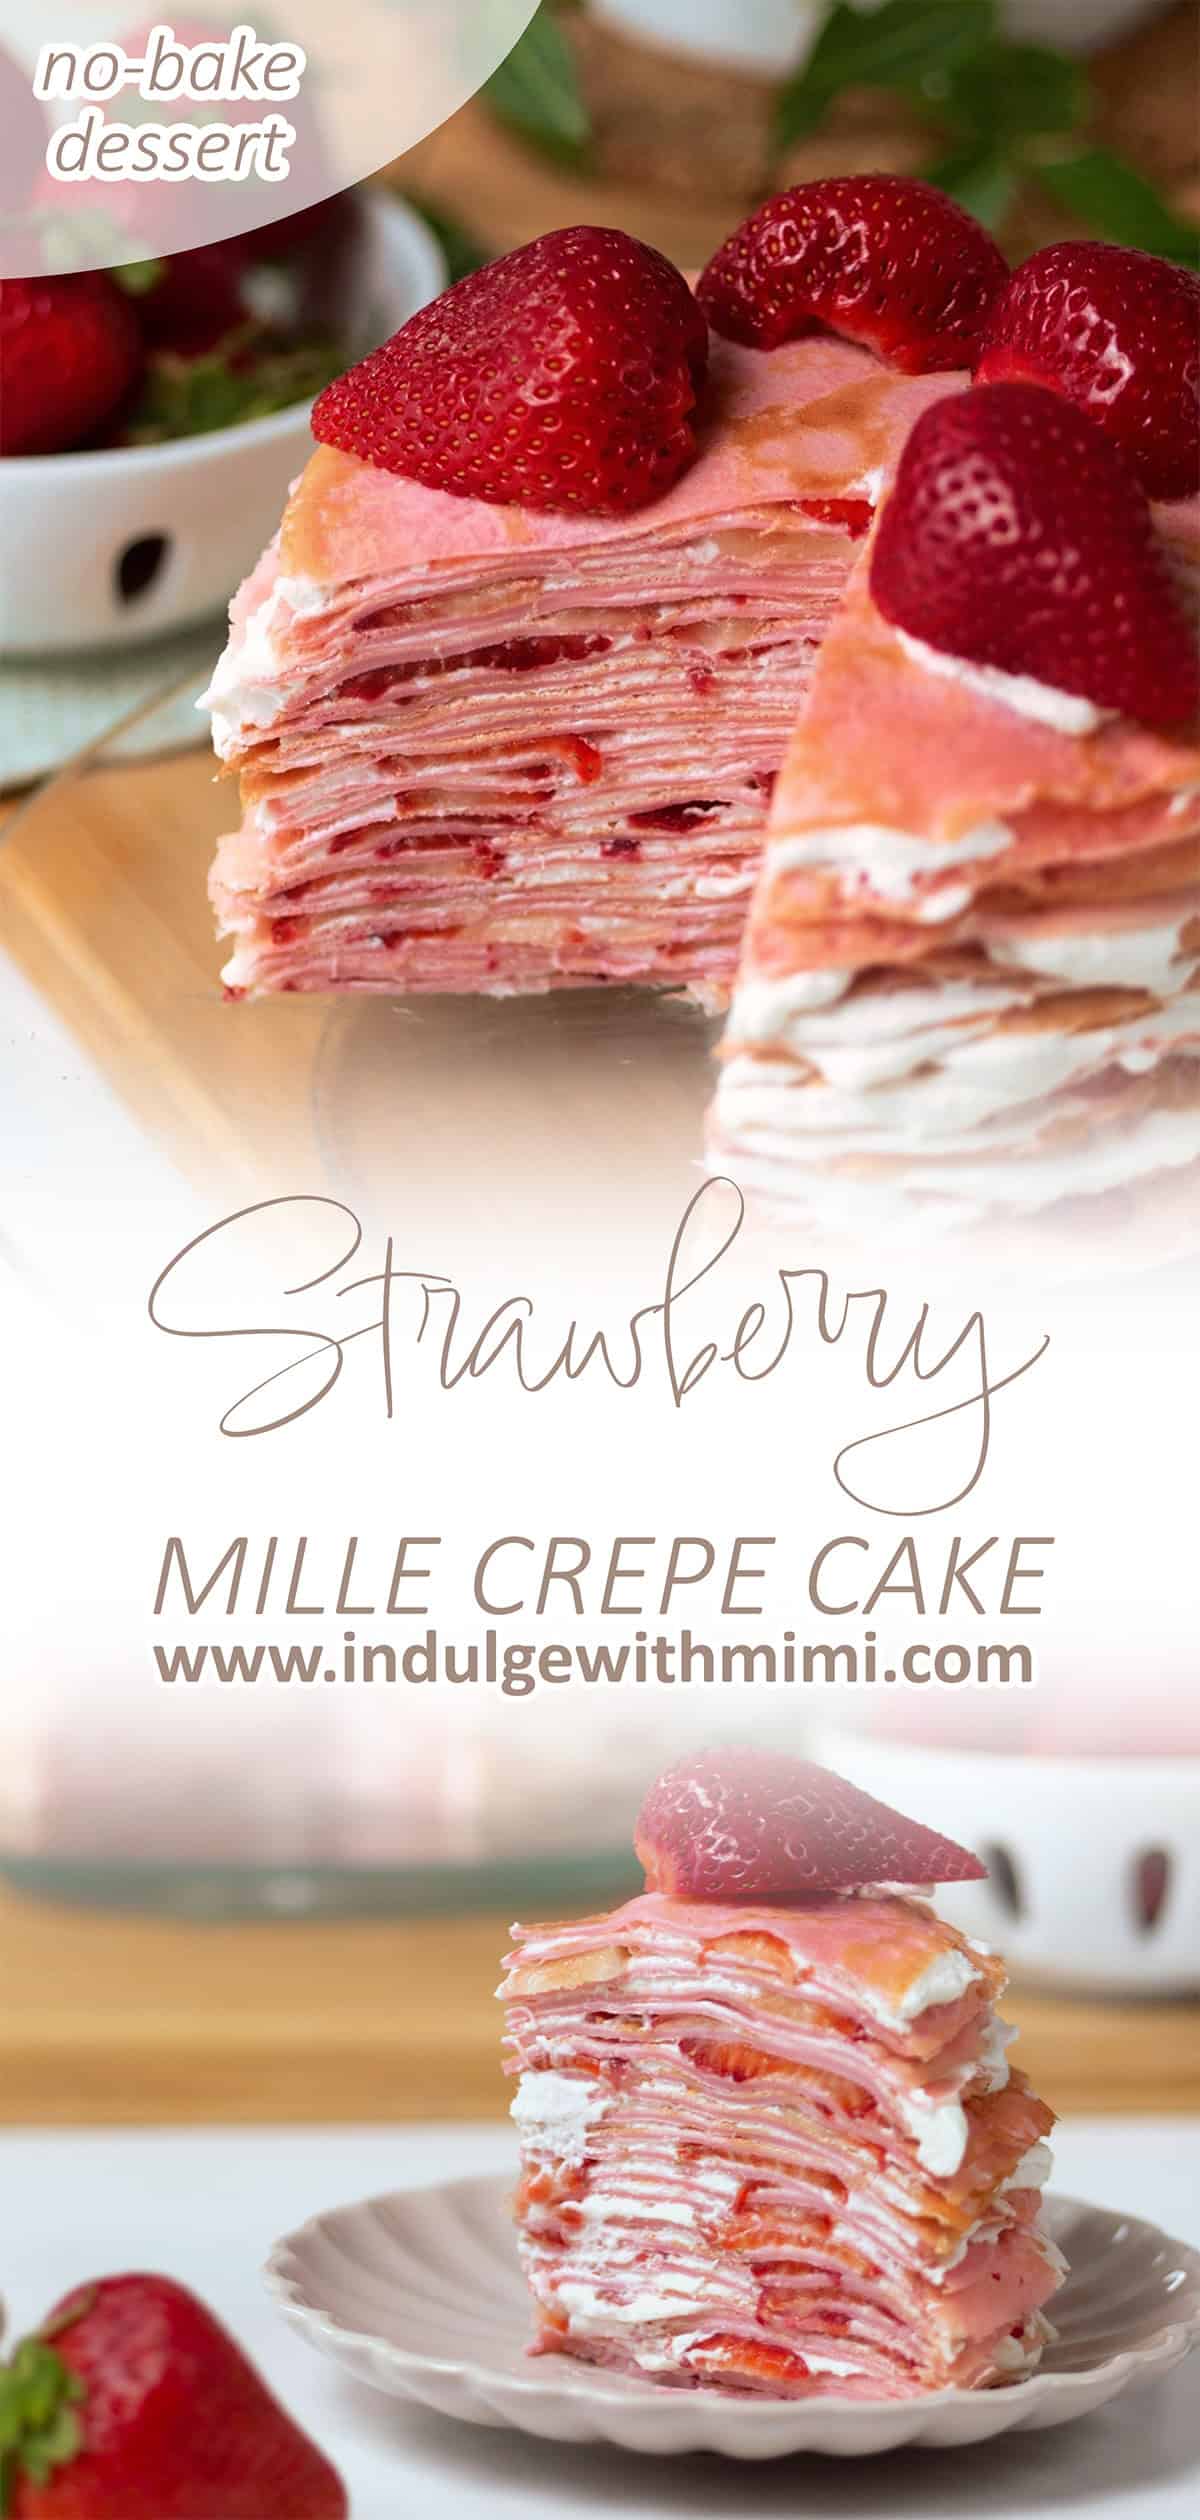
Yes, you can but it will take some experimentation to get different fruits to set to a preferable consistency for mousse. Different fruits have different pH levels and different amounts of pulp which can affect how it sets. For example, fresh figs, kiwi fruit, papaya and pineapple contain protease enzymes that destroy proteins which in turn, prevents the gelatin from gelling properly. Here a mousse cake recipe using strawberries: 2 Hour Strawberry Mousse Cake.
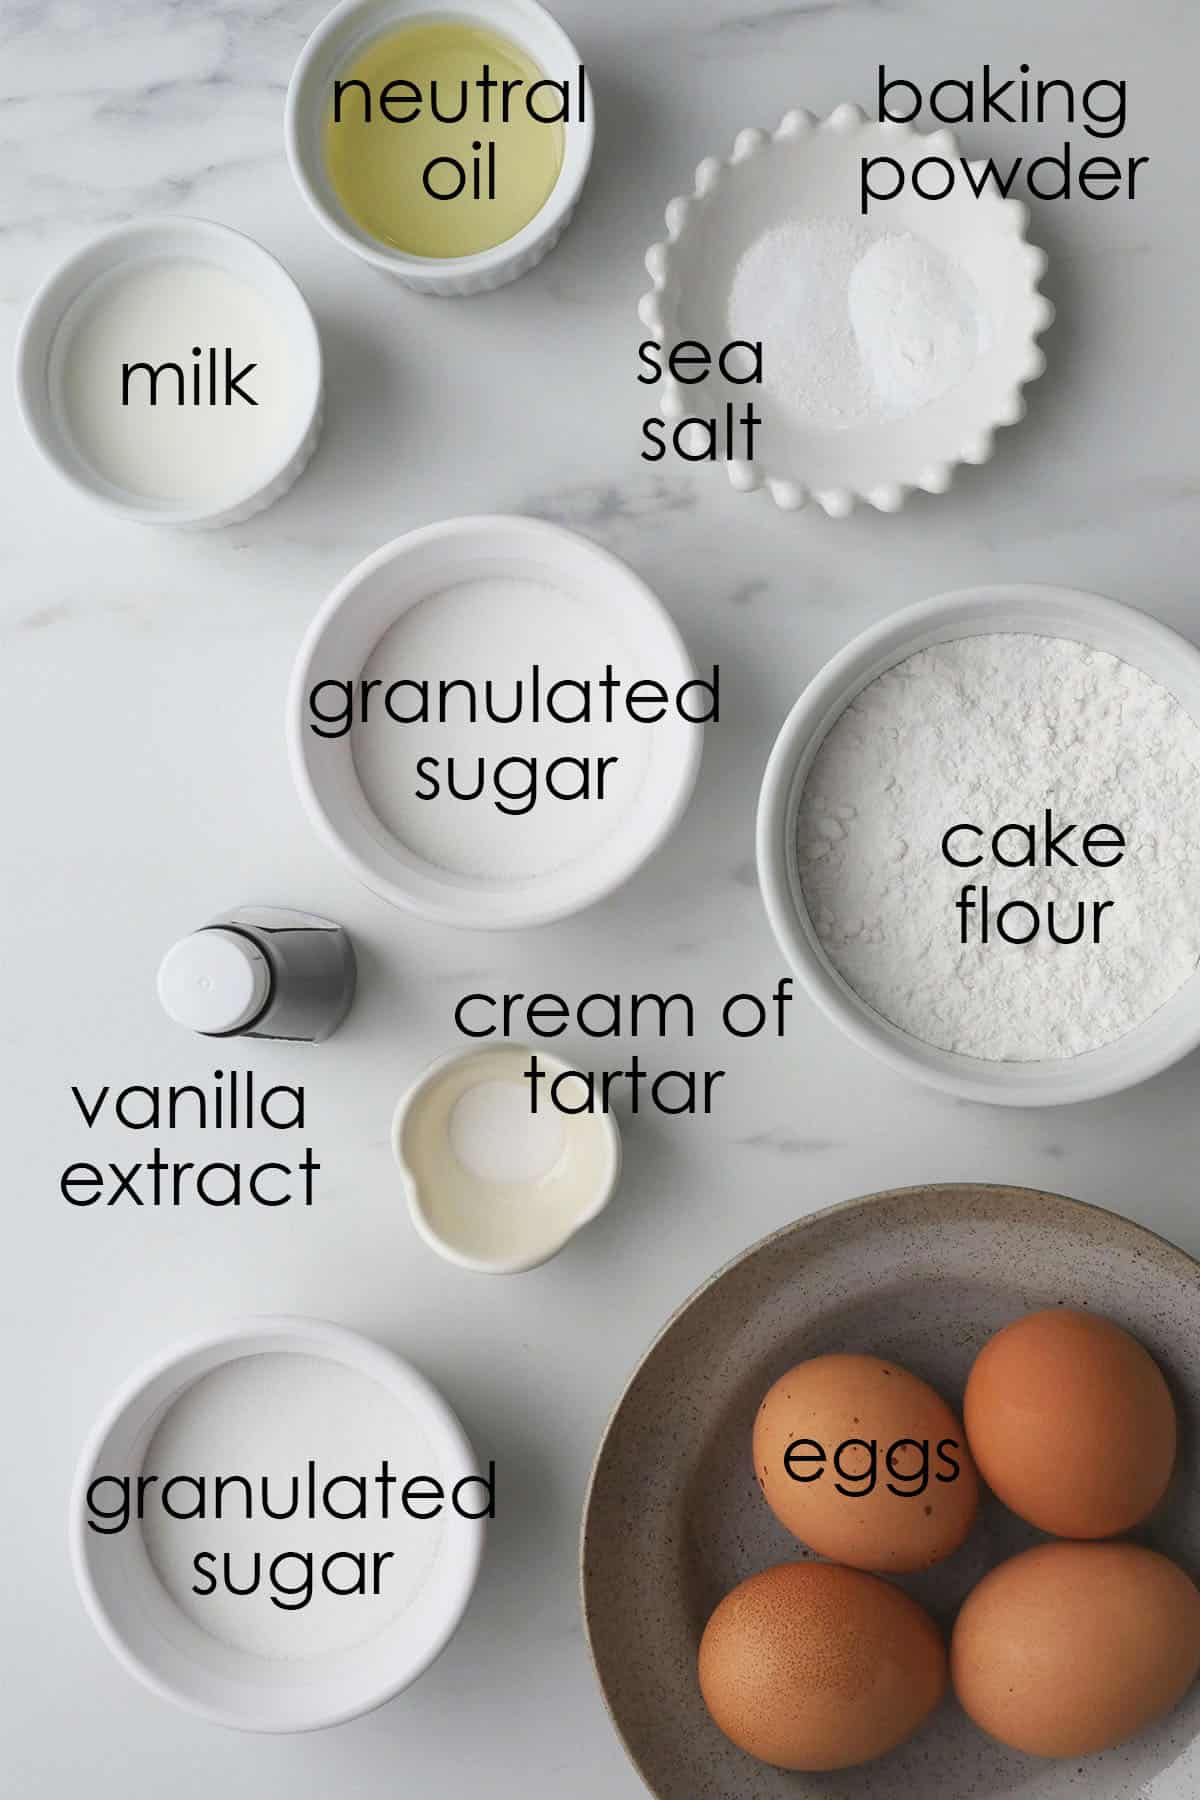
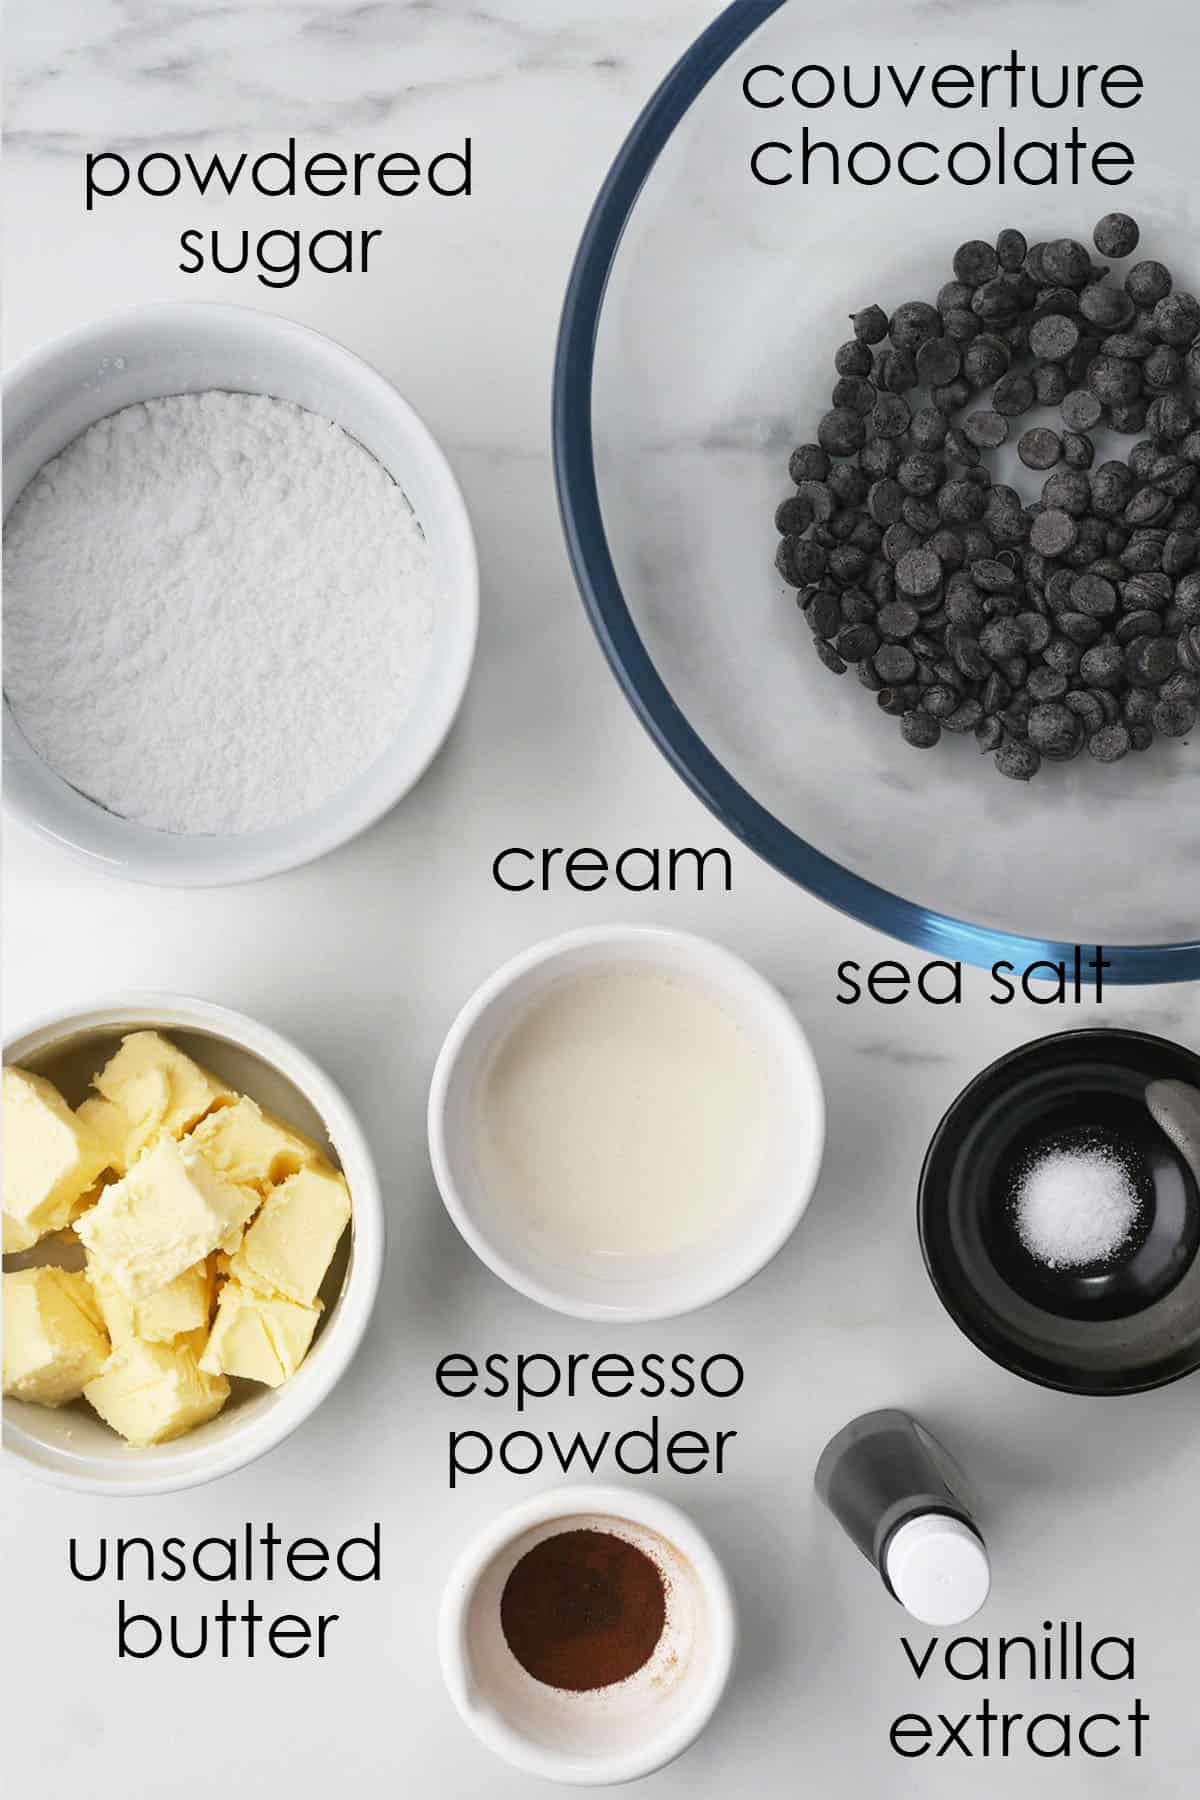
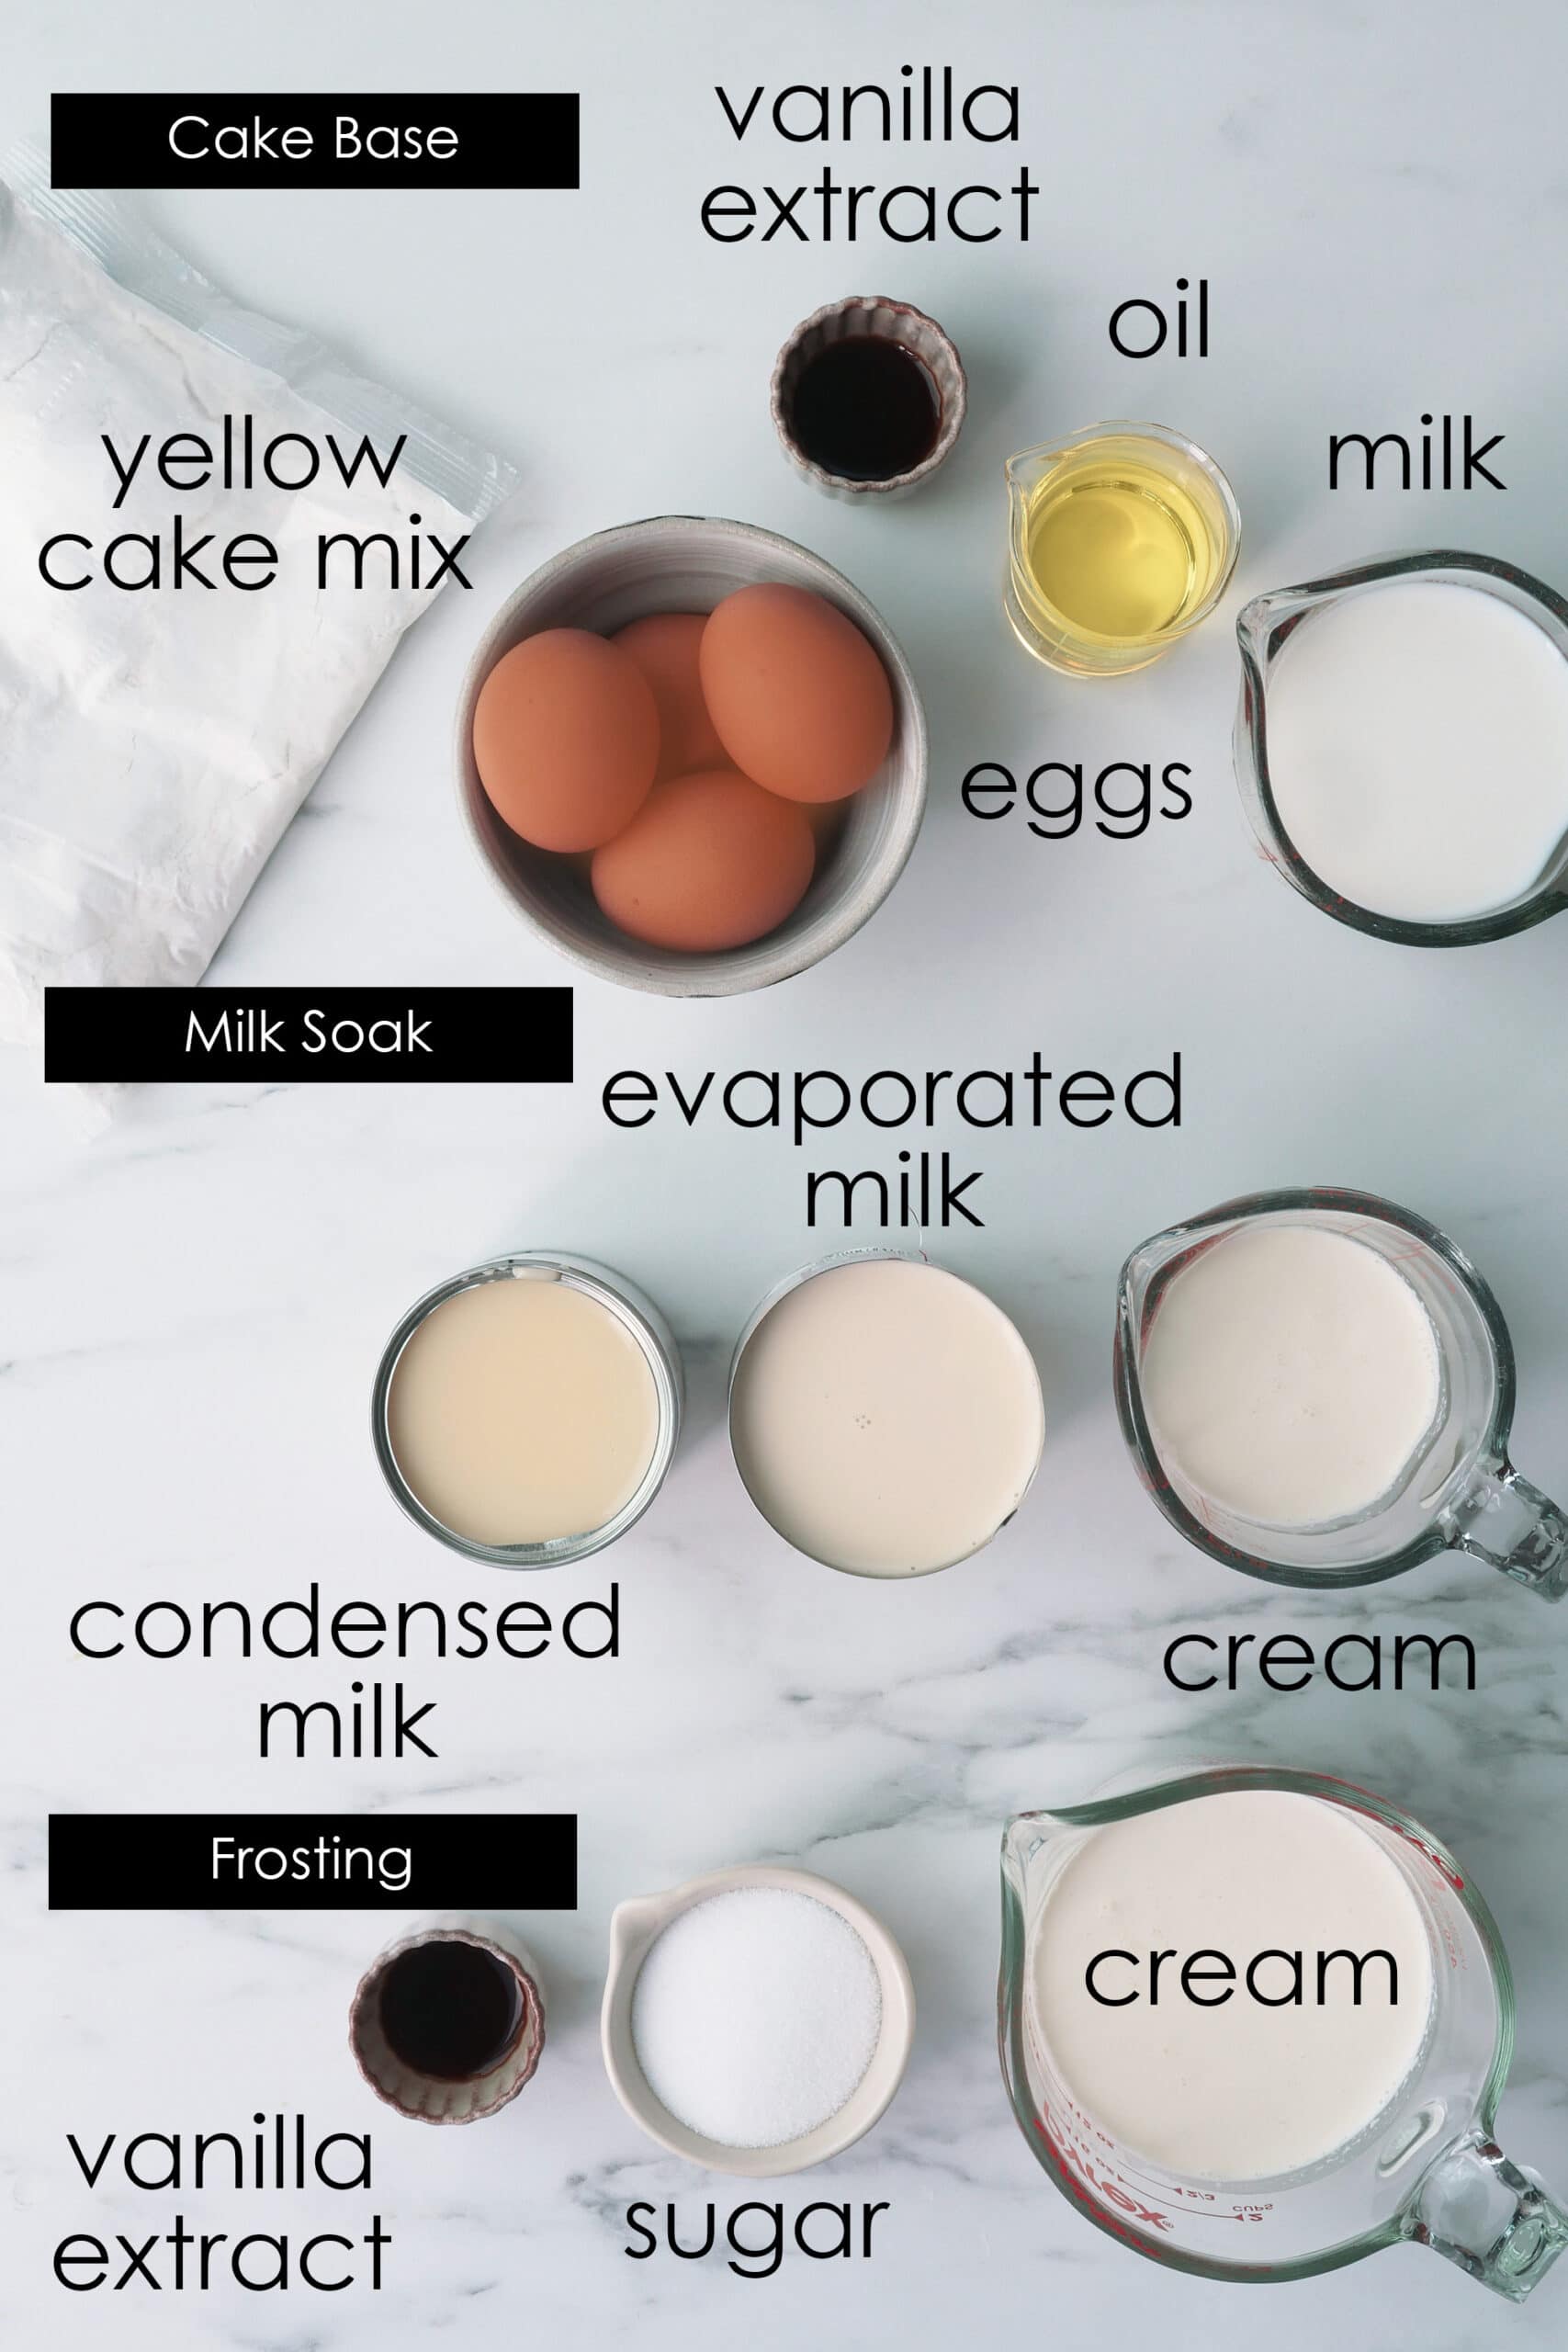
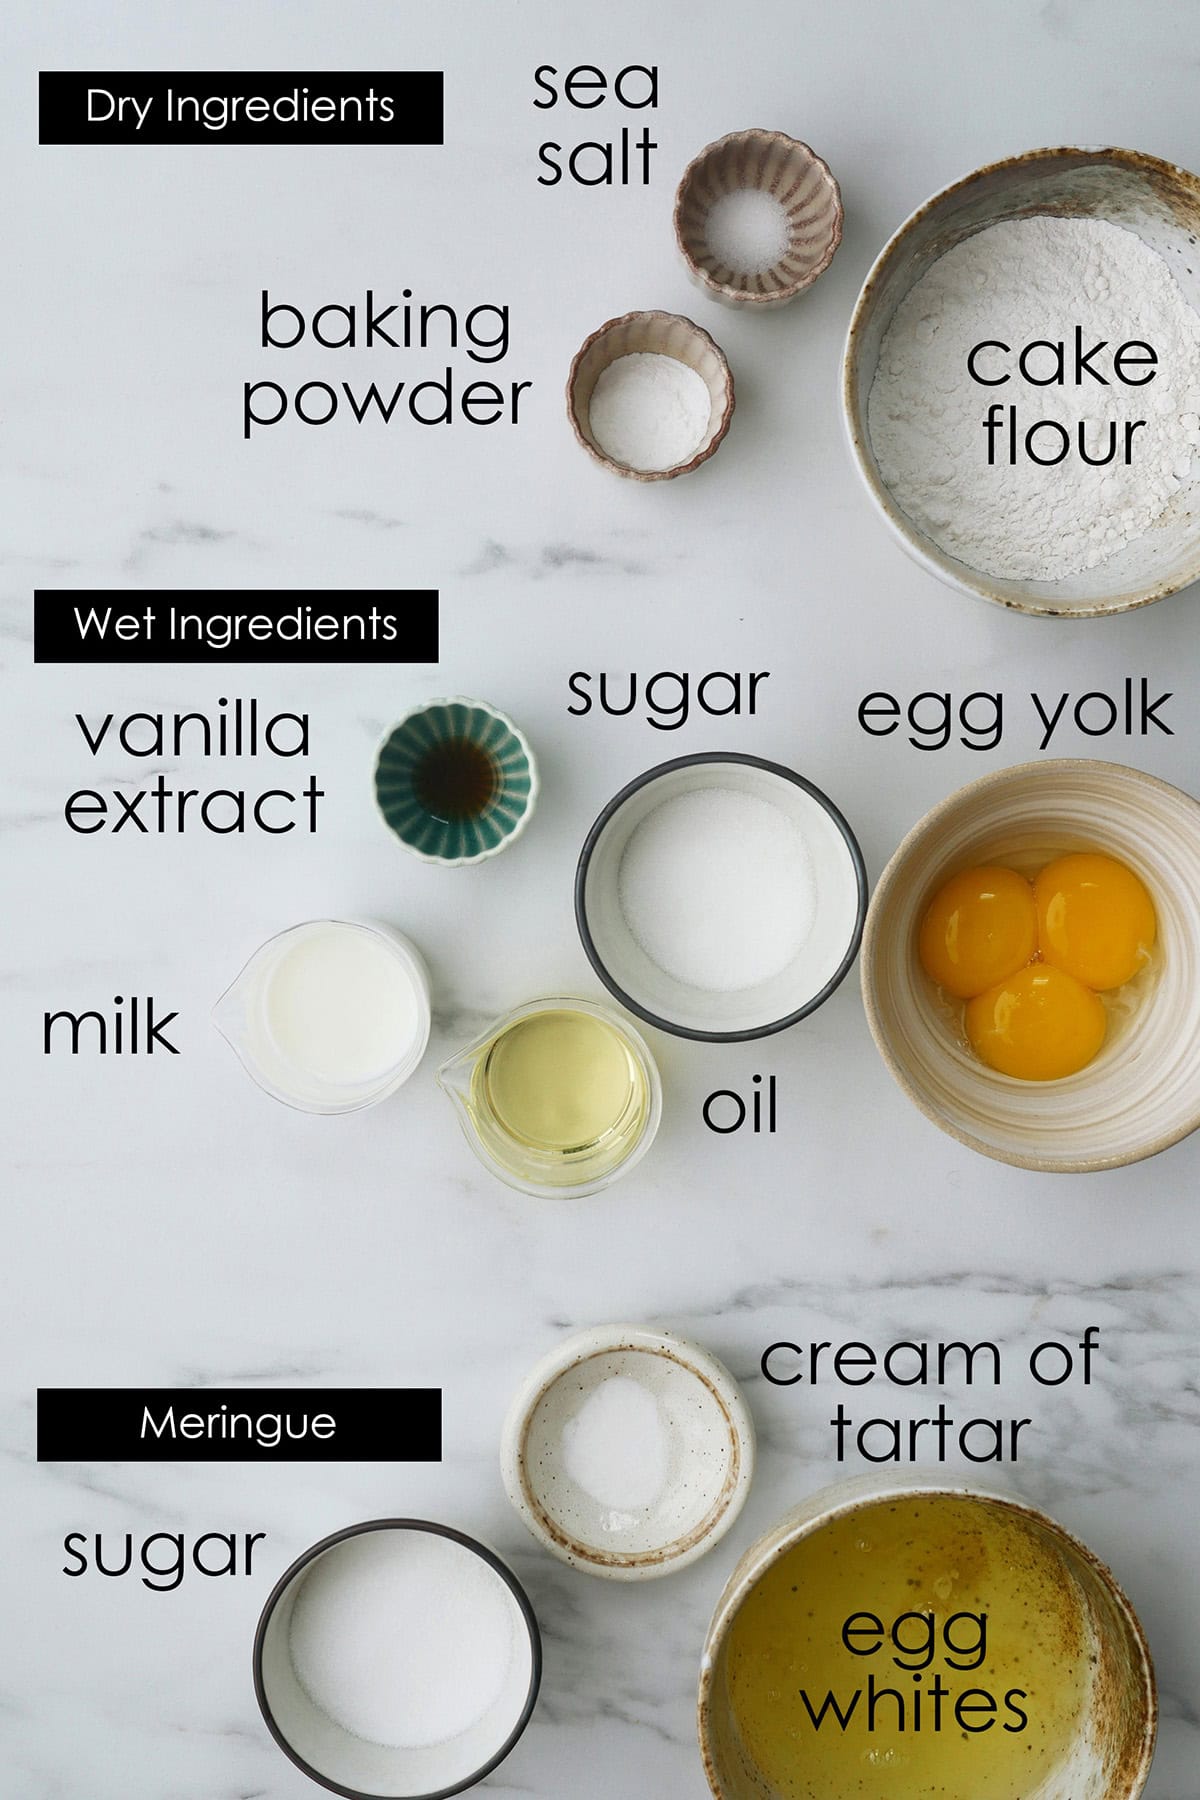
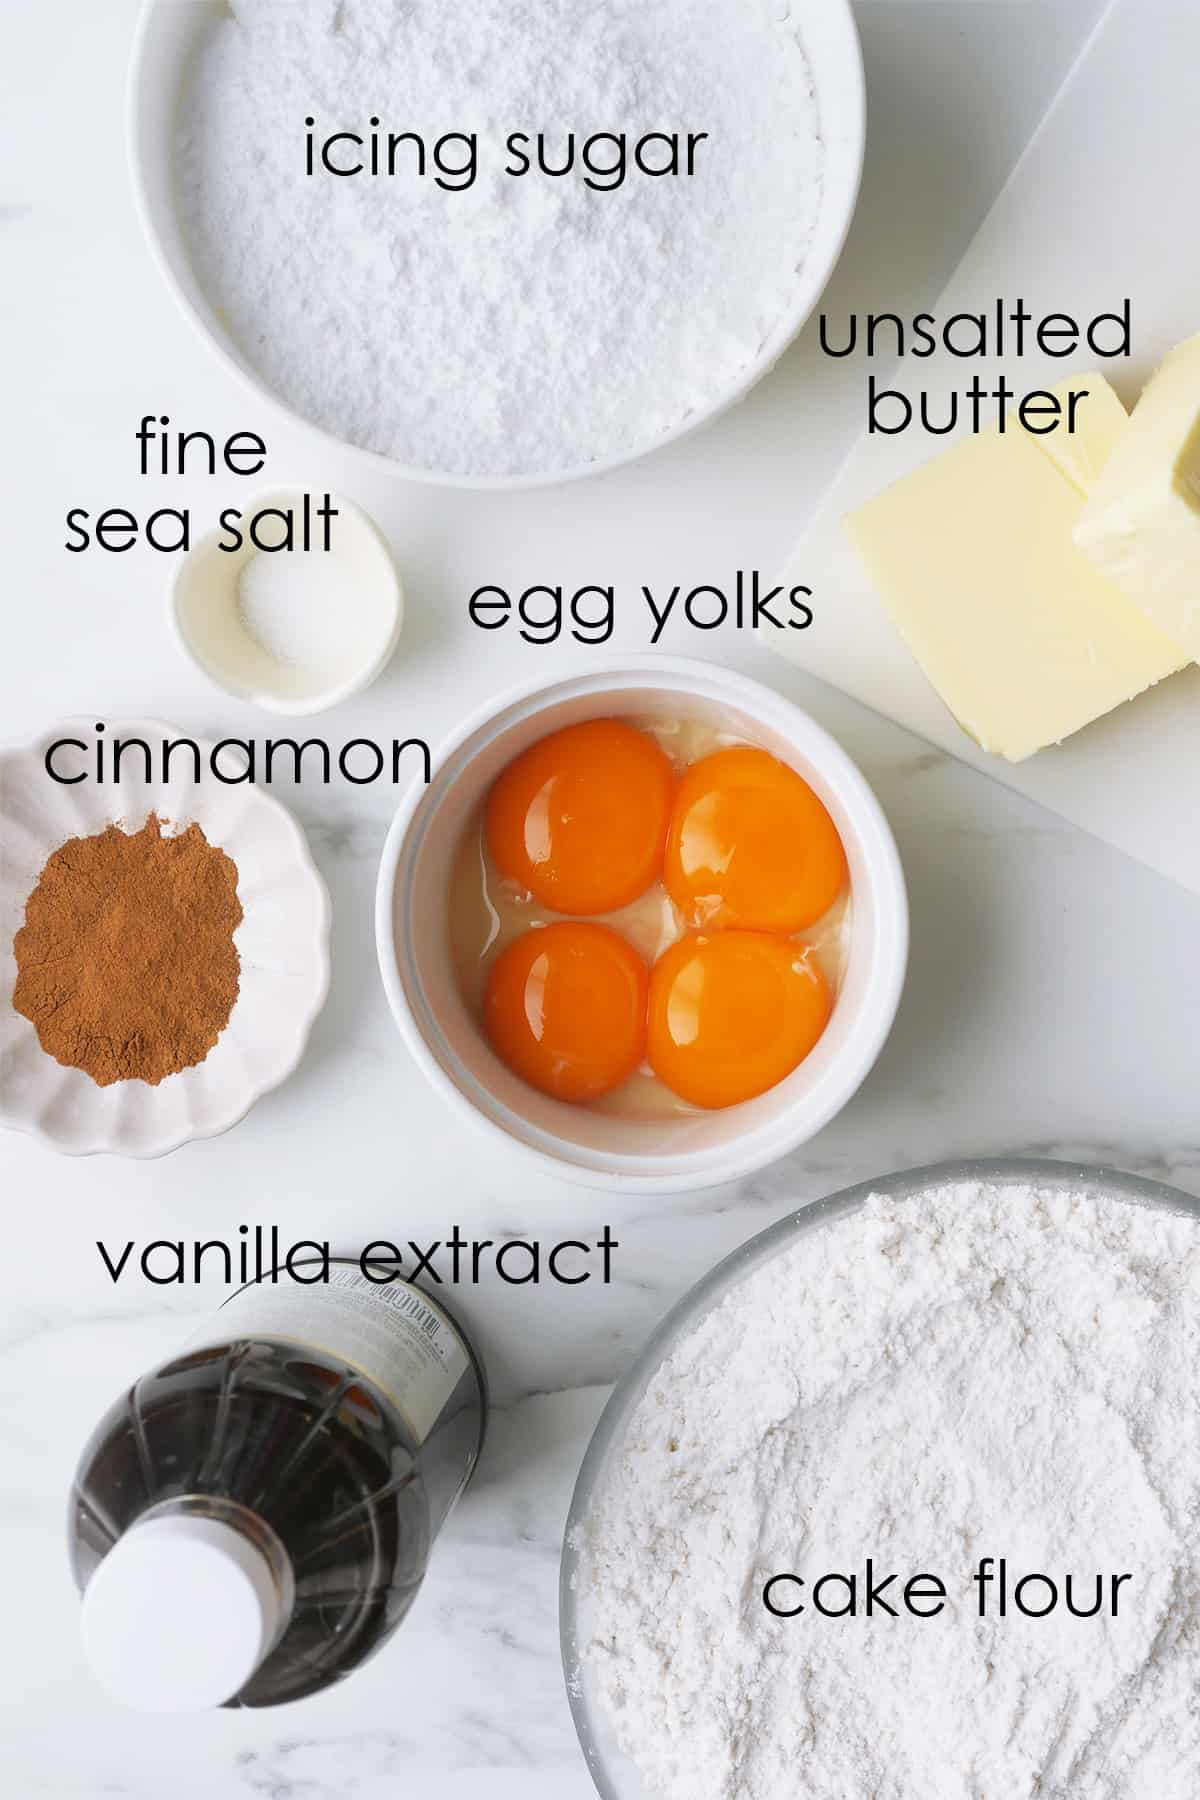
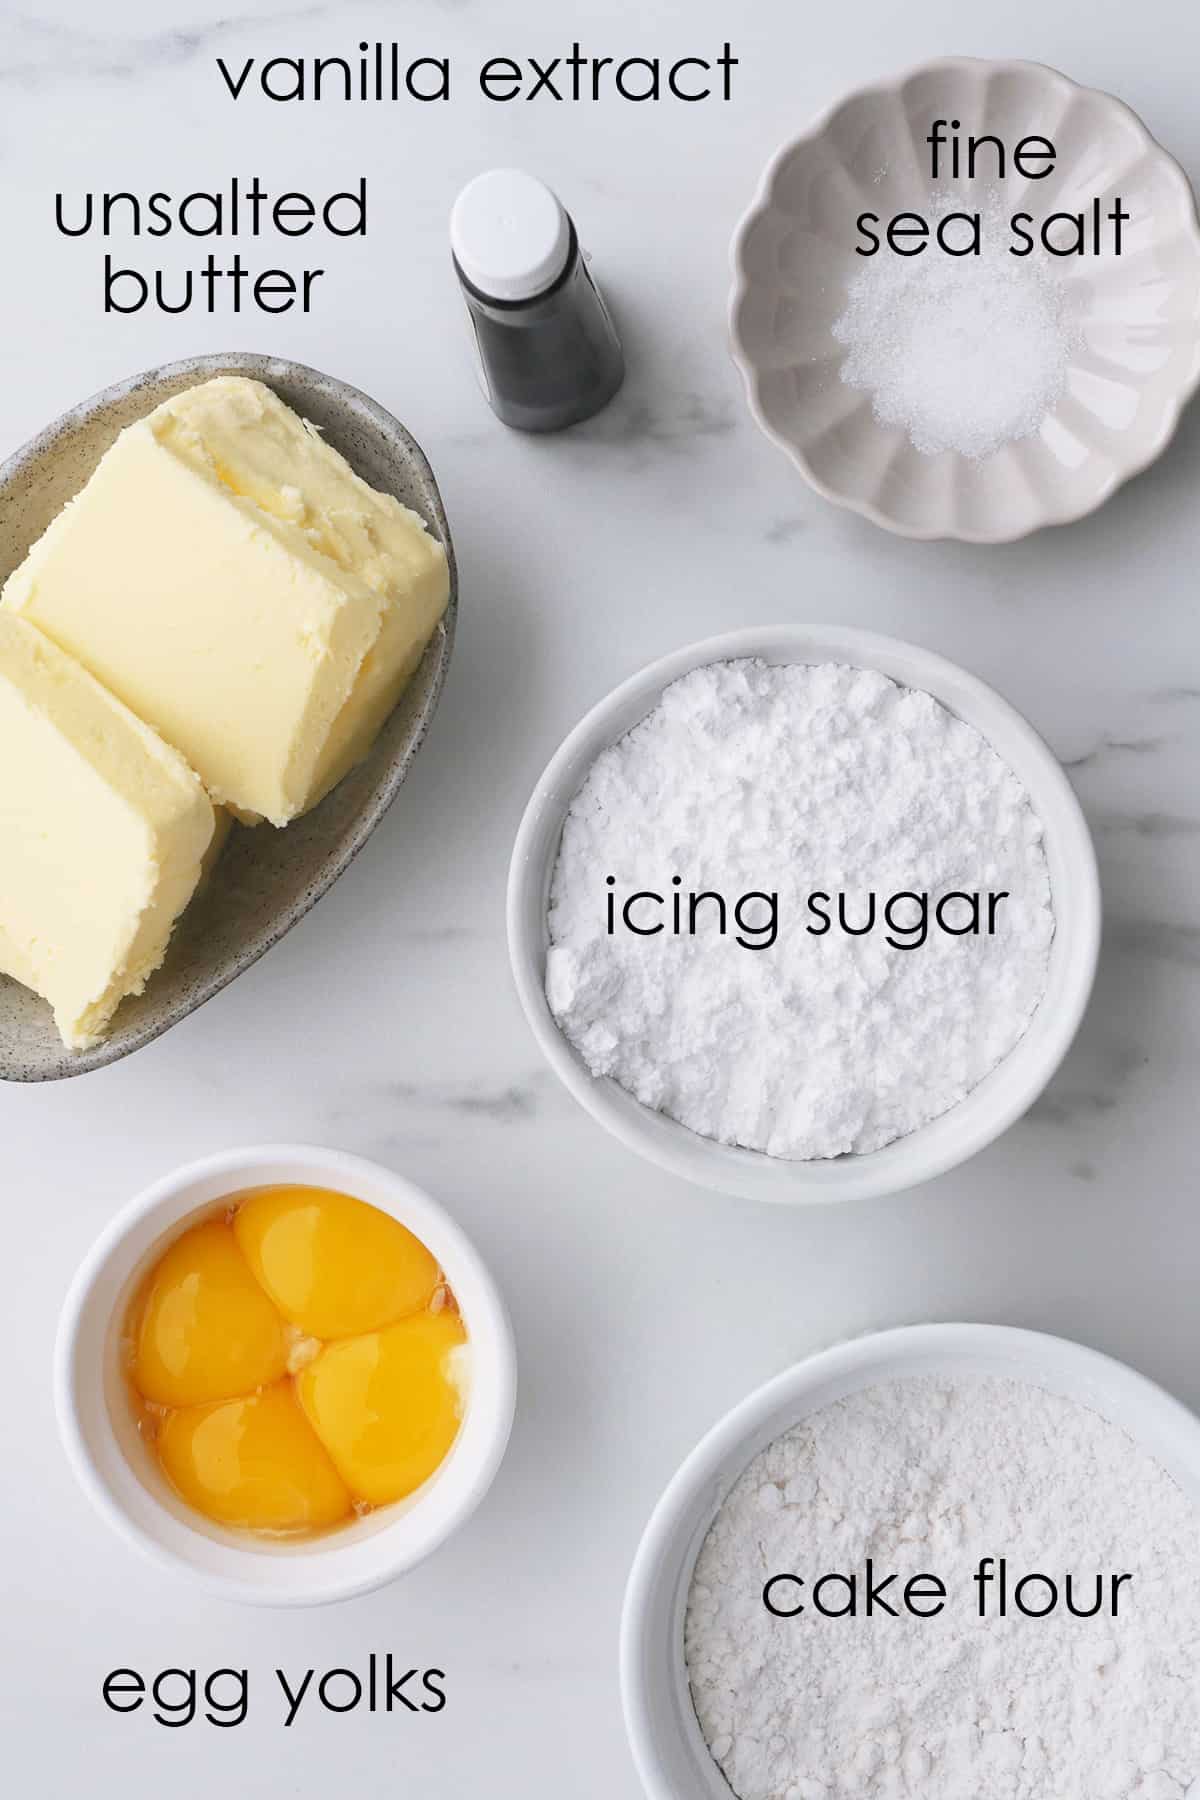
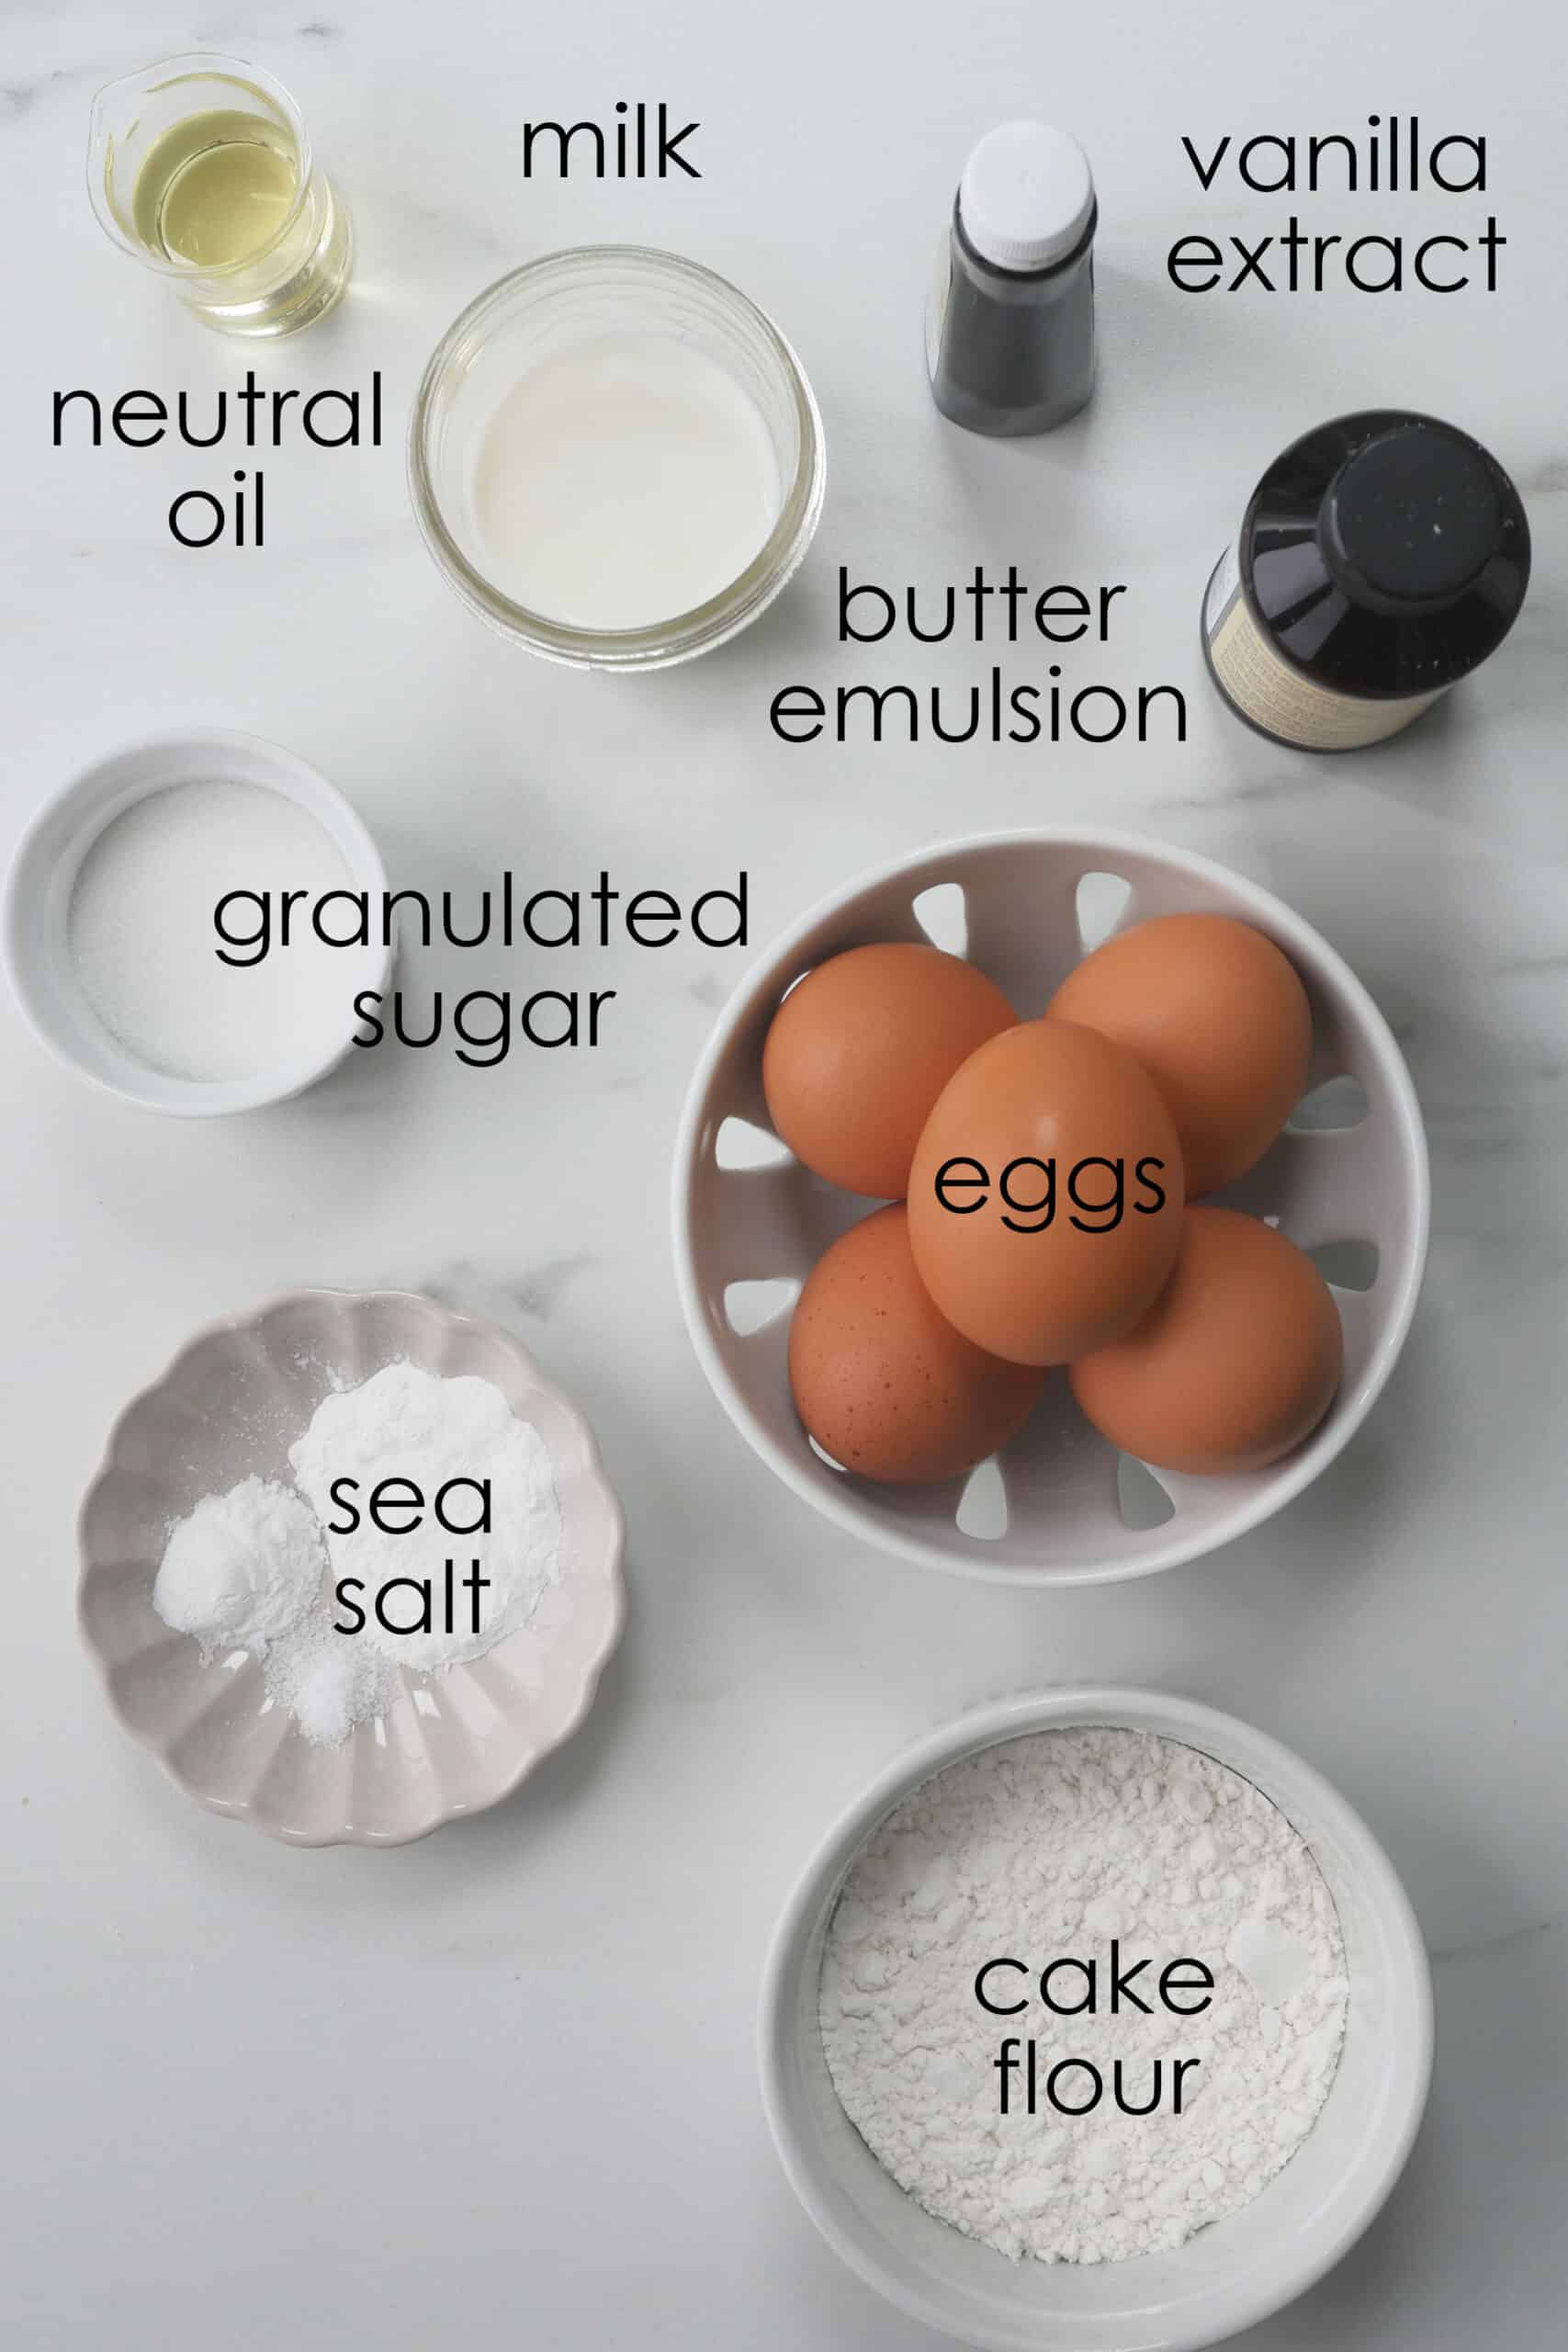
Ingredients & Substitutions
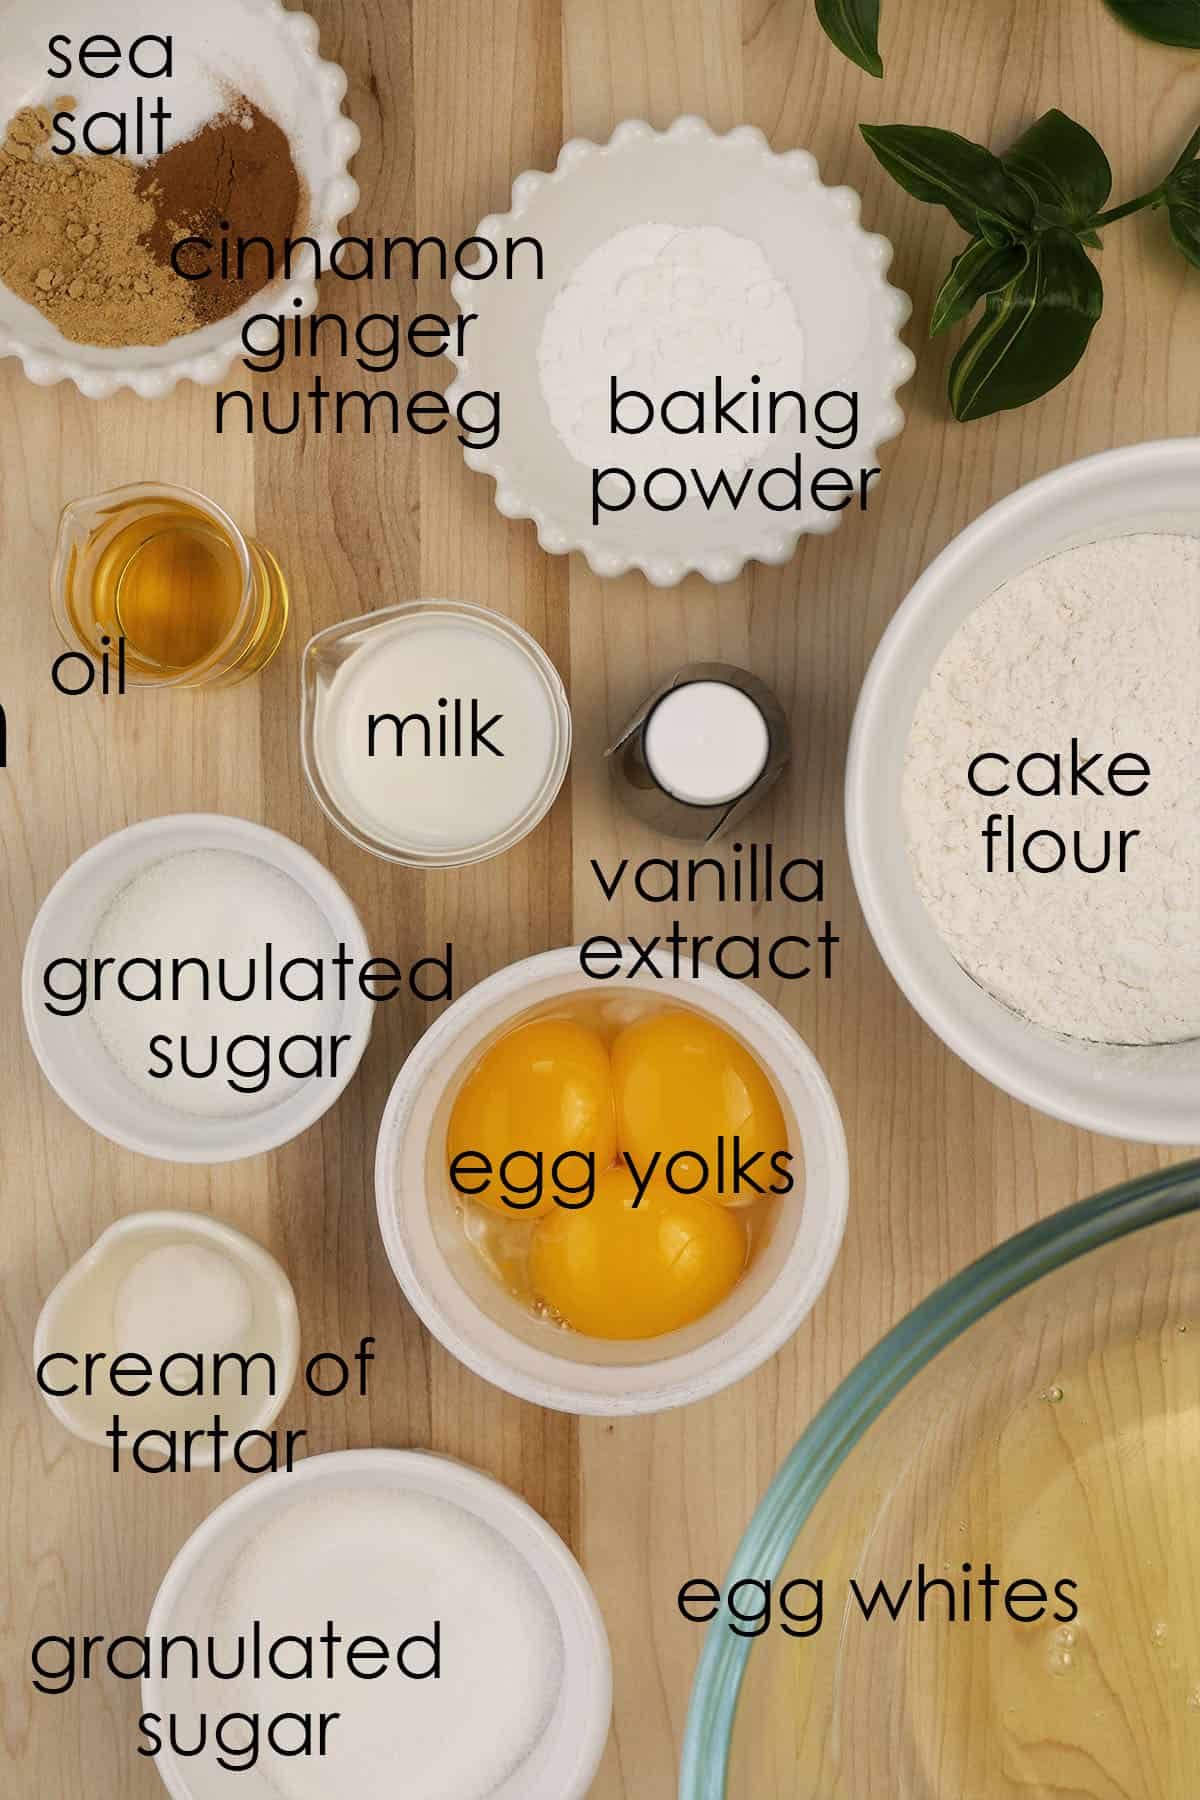
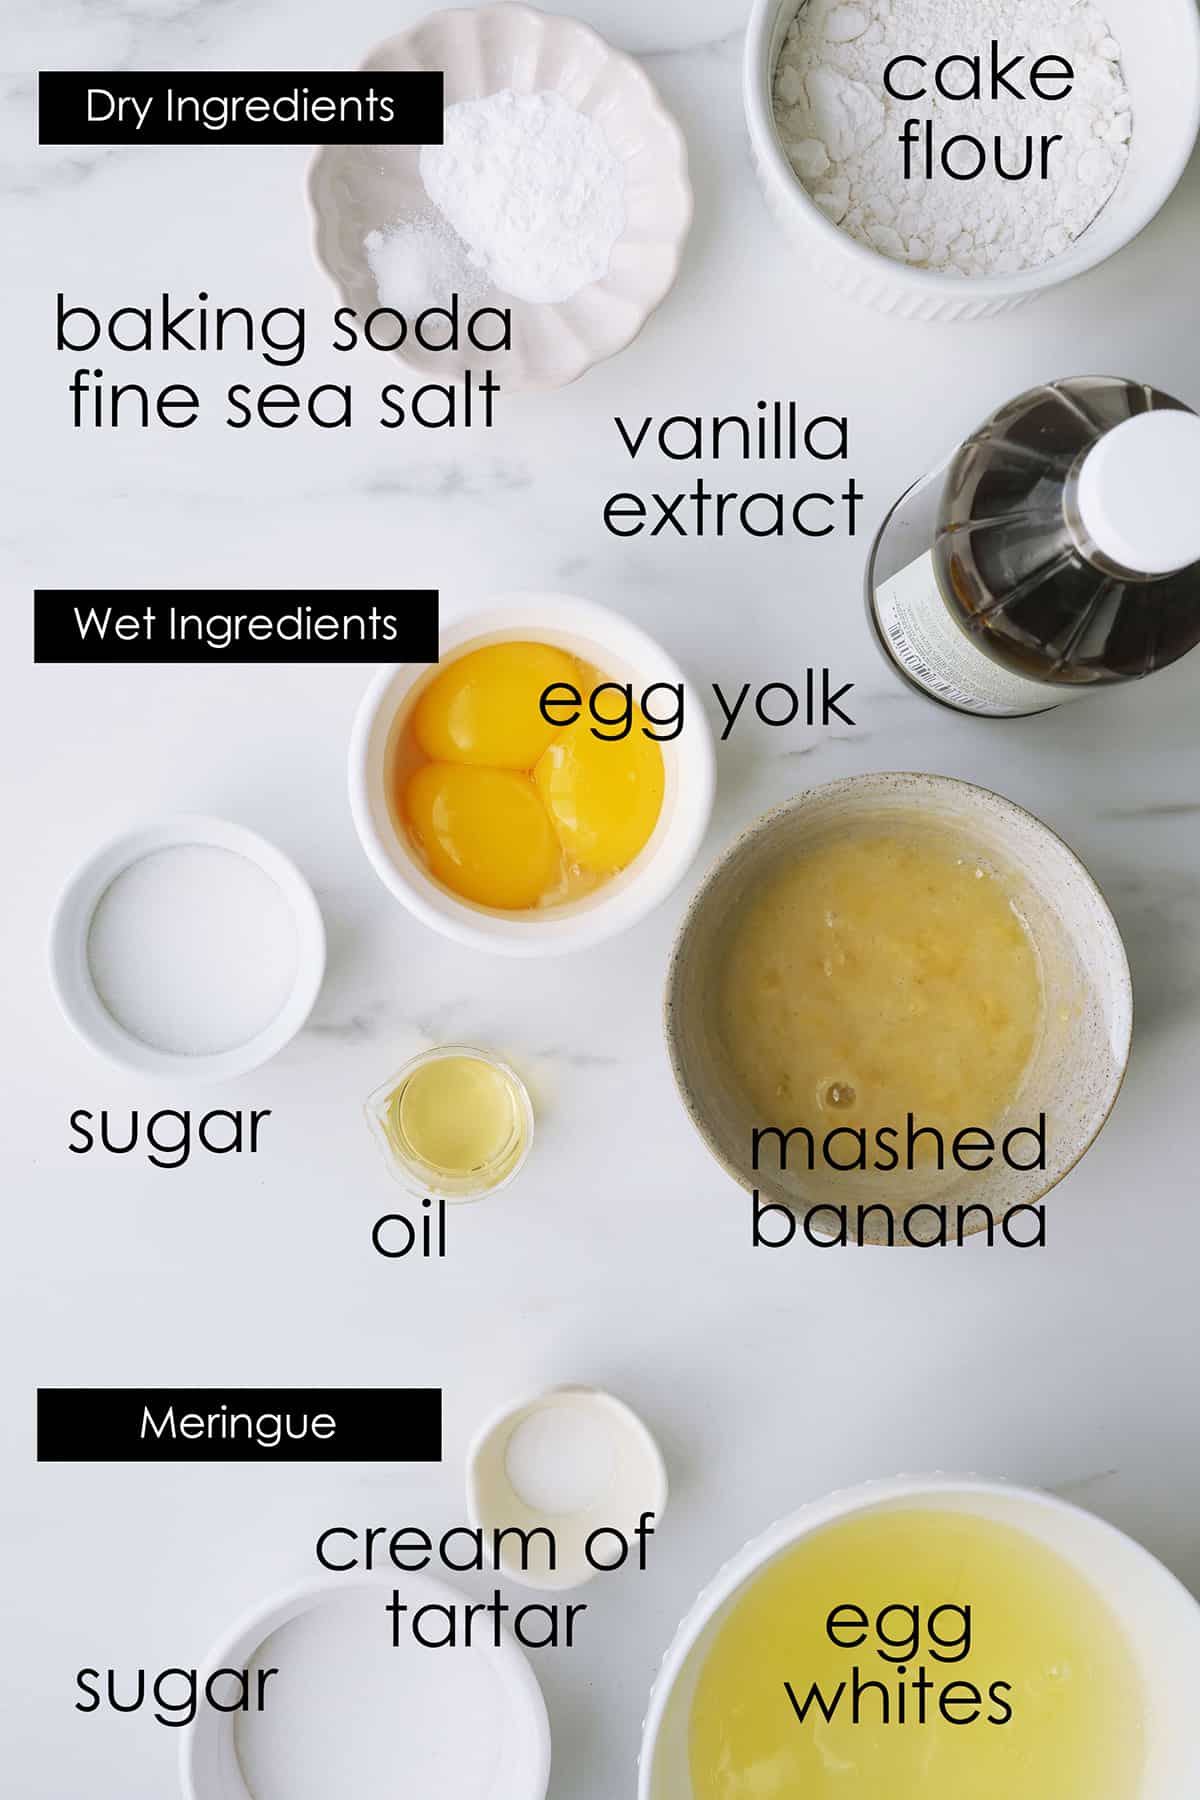
Dry Mix for Chiffon Cake Base
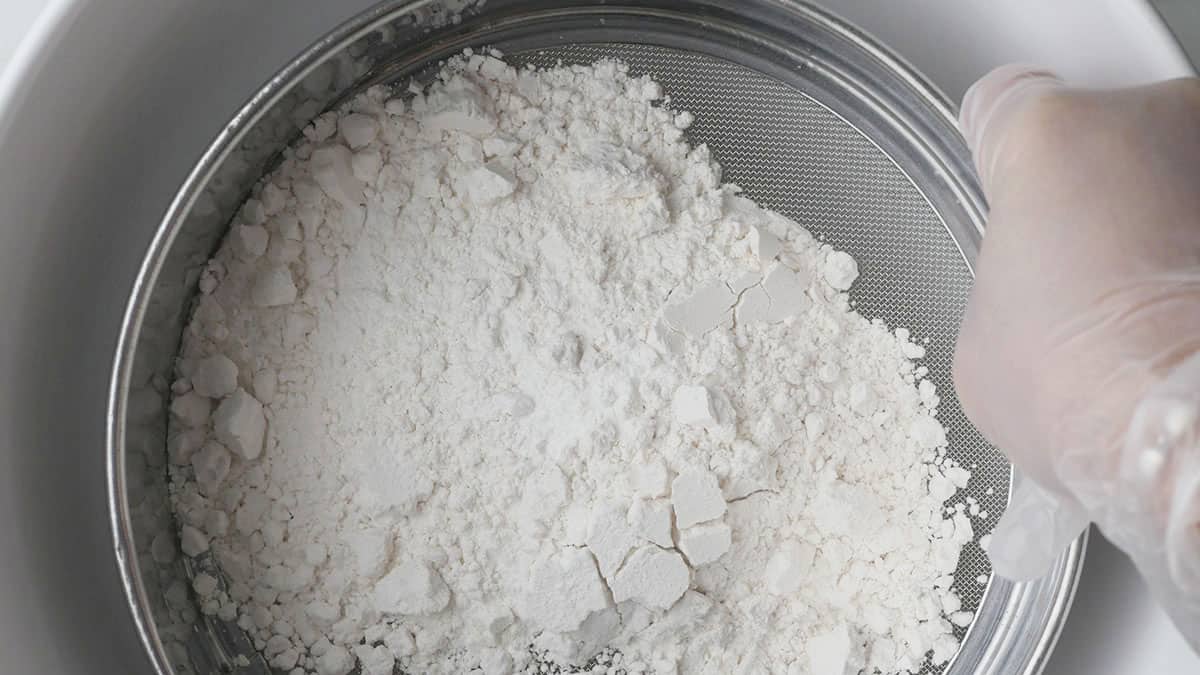
- Cake Flour - cake flour is a low protein flour which will help make this cake lighter and softer than if using all purpose flour. Cake flour needs to be sifted before use to prevent clumps. You can also use "cake & pastry flour" which many stores sell, This is a blend of both flours with a lower protein than AP. It's ok to use AP flour if that is all you have.
- Baking Powder - it acts as a leavening agent in case there are any weaknesses in the meringue.
- Salt - brings out the flavors in the cake and acts as a contrast to the sweetness.
Wet Mix for Chiffon Cake Base
- Granulated sugar - this first set of sugar is added into the wet ingredients to help add moisture and separate the grains. If you have it on hand, berry sugar or extra fine granulated sugar is a better substitute. It dissolves and mixes more easily for a finer textured cake.
- Neutral oil - adds moisture to the cake base. Canola, grapeseed, avocado are all good choices.
- Milk - adds extra flavor.
- Vanilla extract - rounds out all the flavors in the cake.
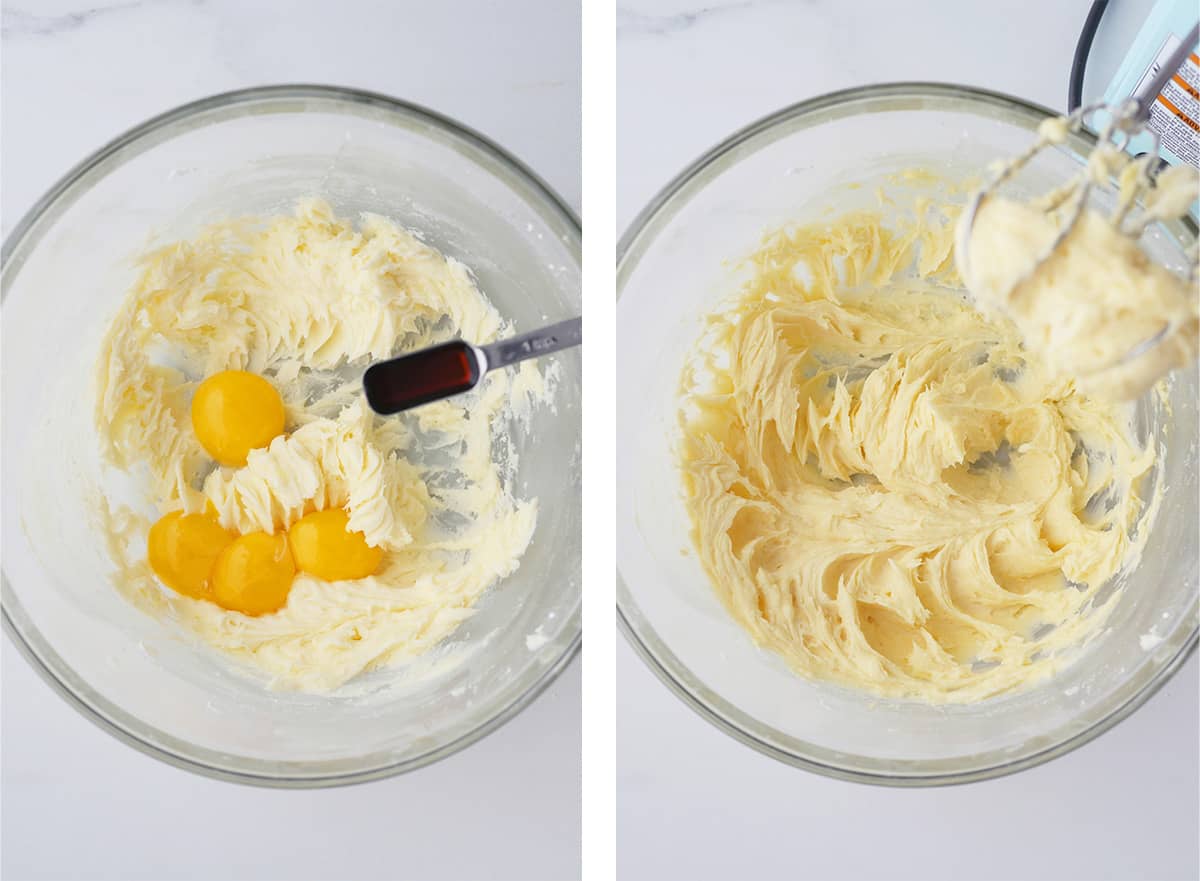
- Egg Yolks - tenderizes the cake, adds structure and emulsification of the cake batter.
Meringue for Chiffon Cake Base
- Egg whites - use fresh egg whites from large size eggs. Eggs separate more readily when it's cold and whip better when it has come to room temperature.
- Granulated sugar - use only granulated sugar, powdered sugar does not work for whipping meringue.
- Cream of tartar - is an acid that helps to stabilize the meringue. It can be substituted with double the amount of lemon juice or vinegar.
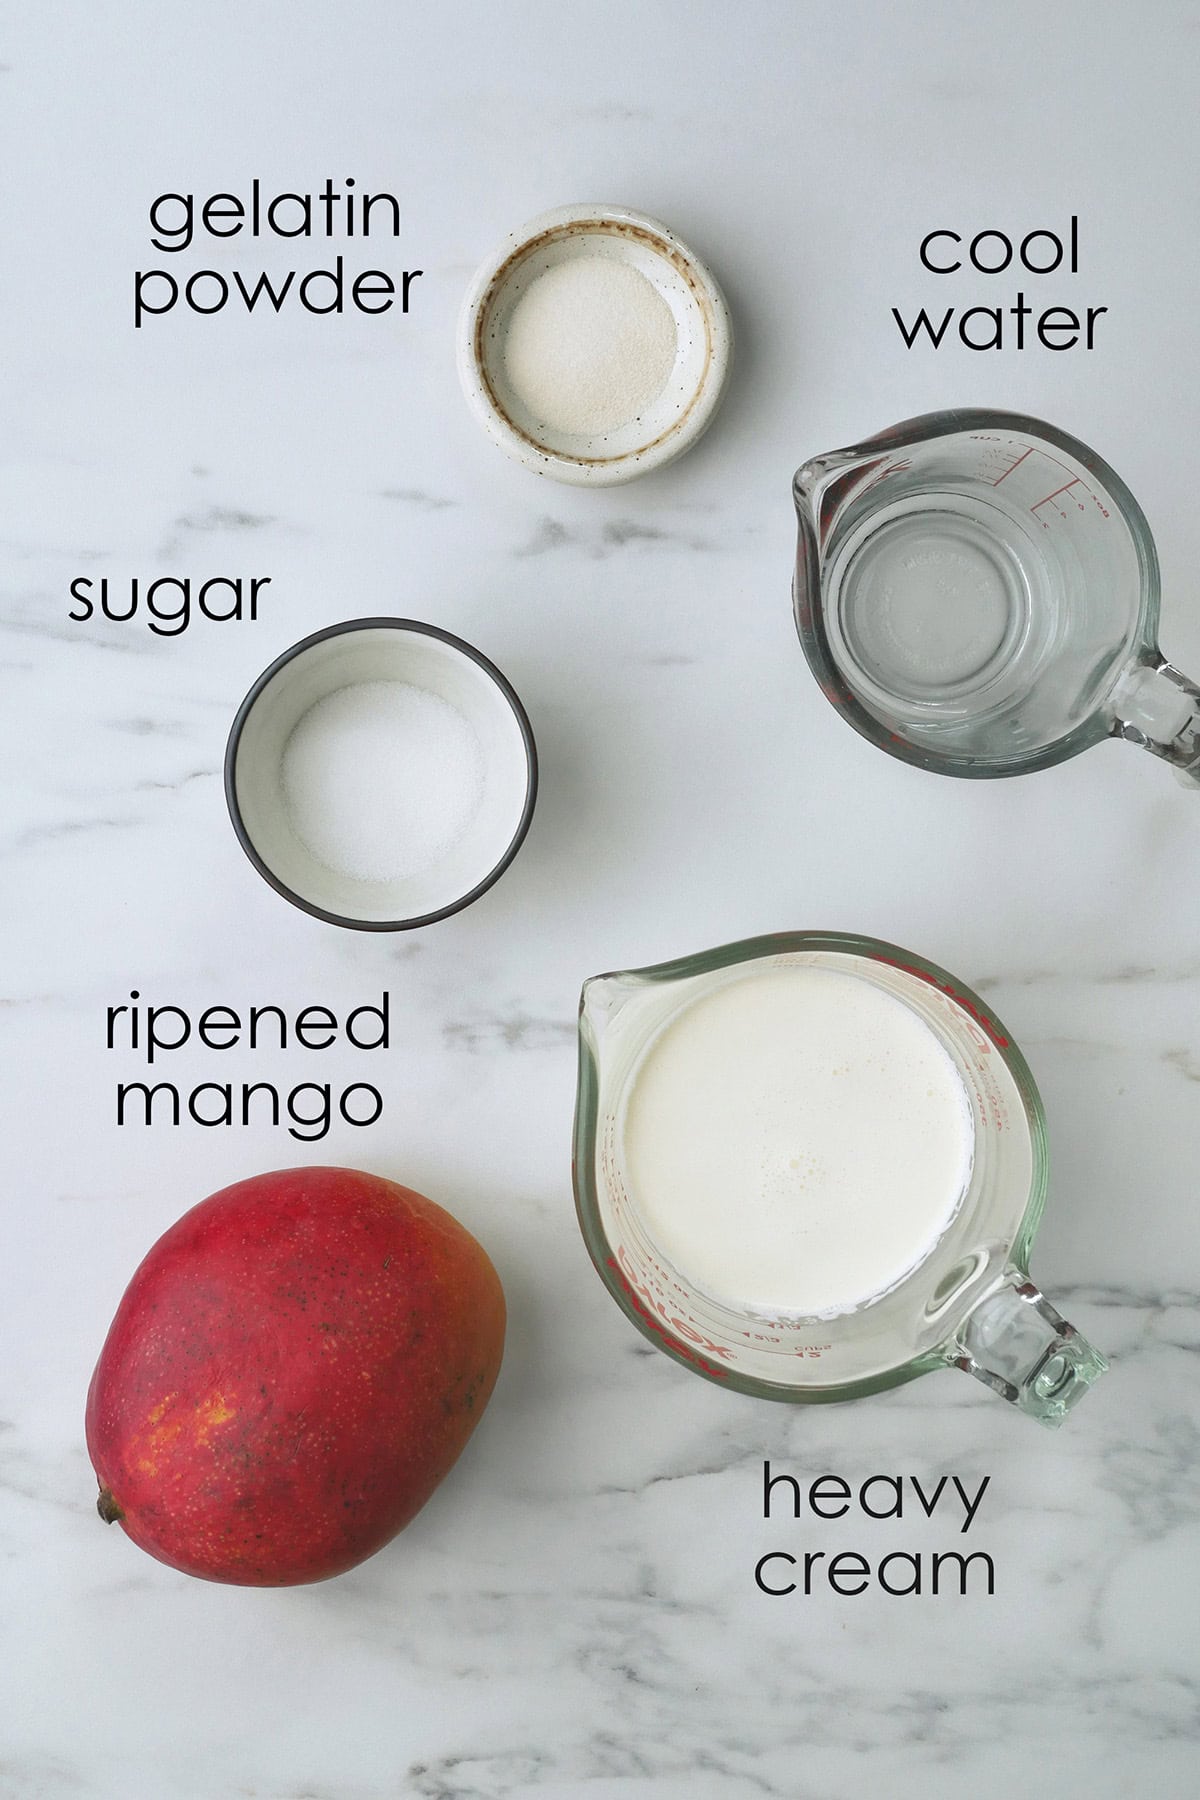
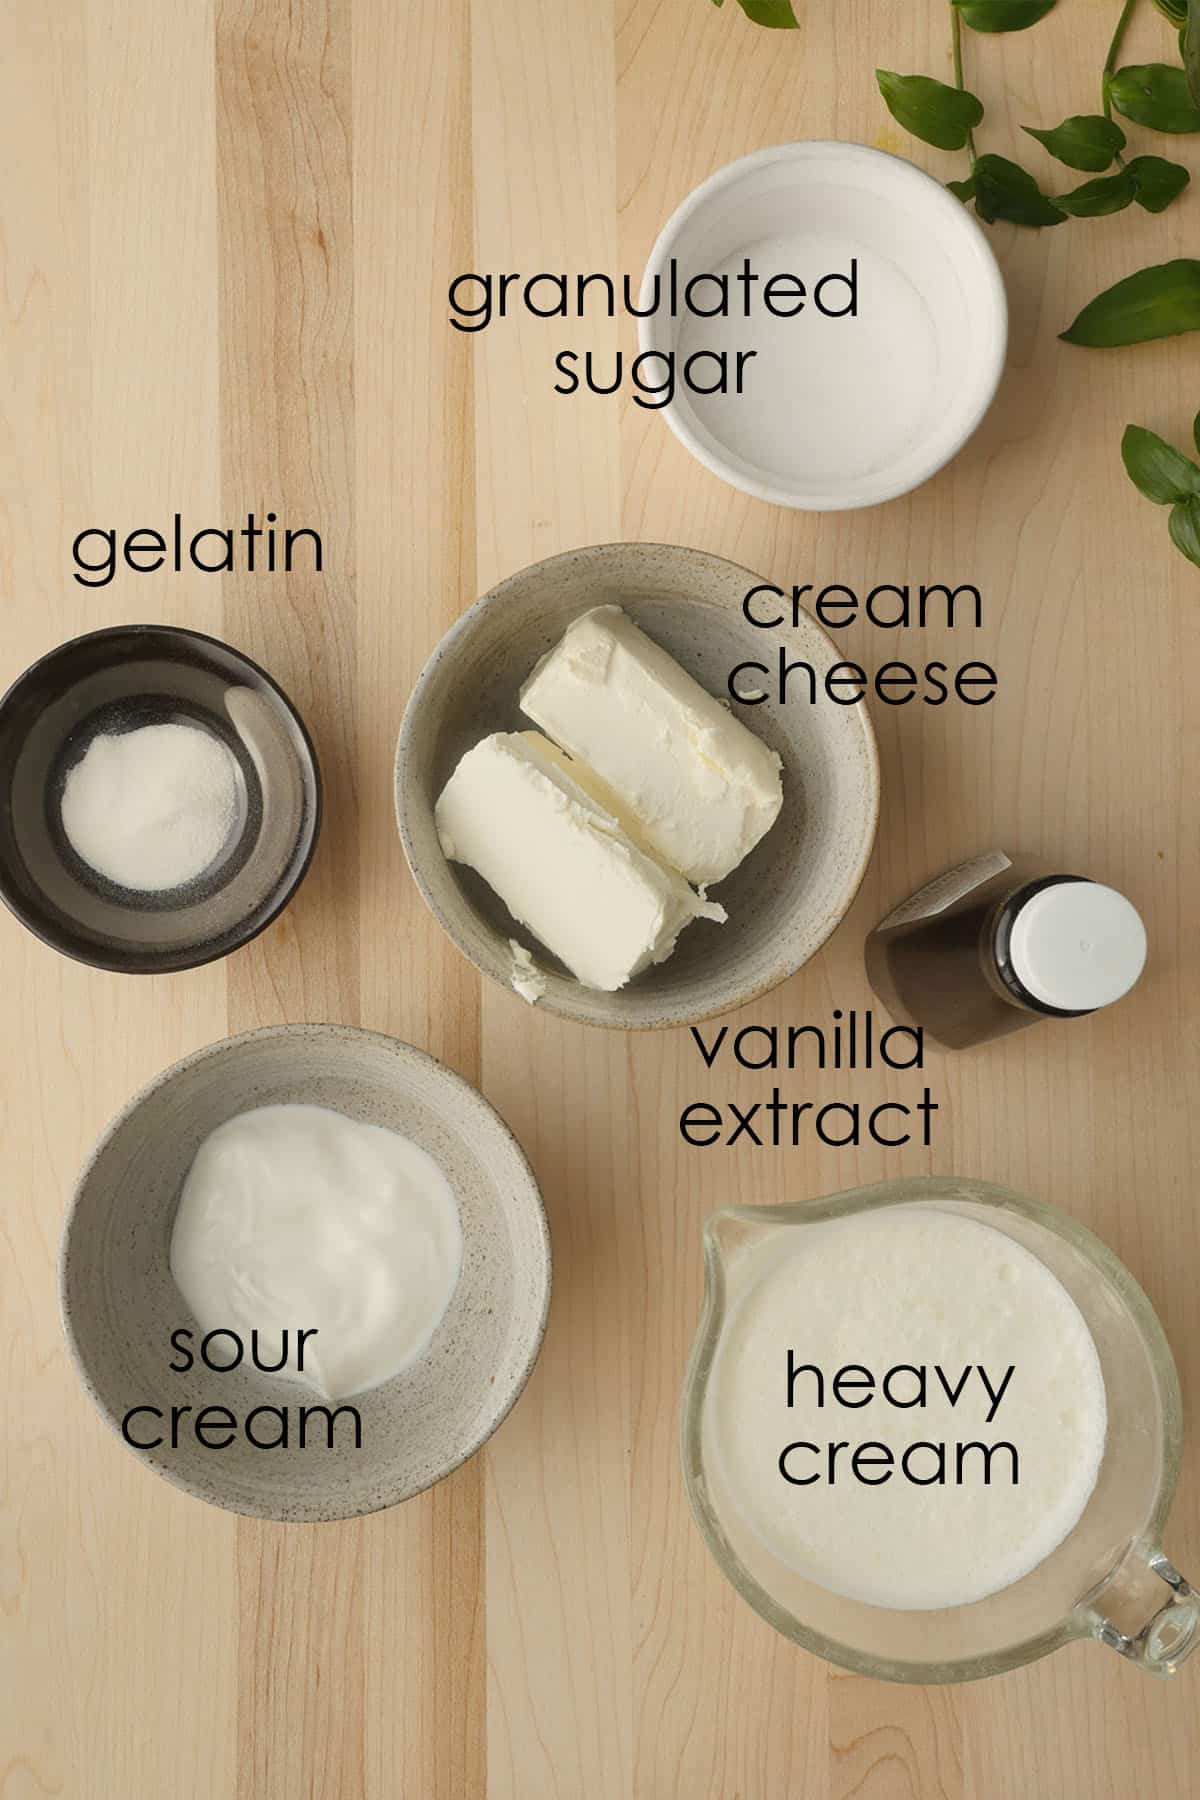
Mango Mousse
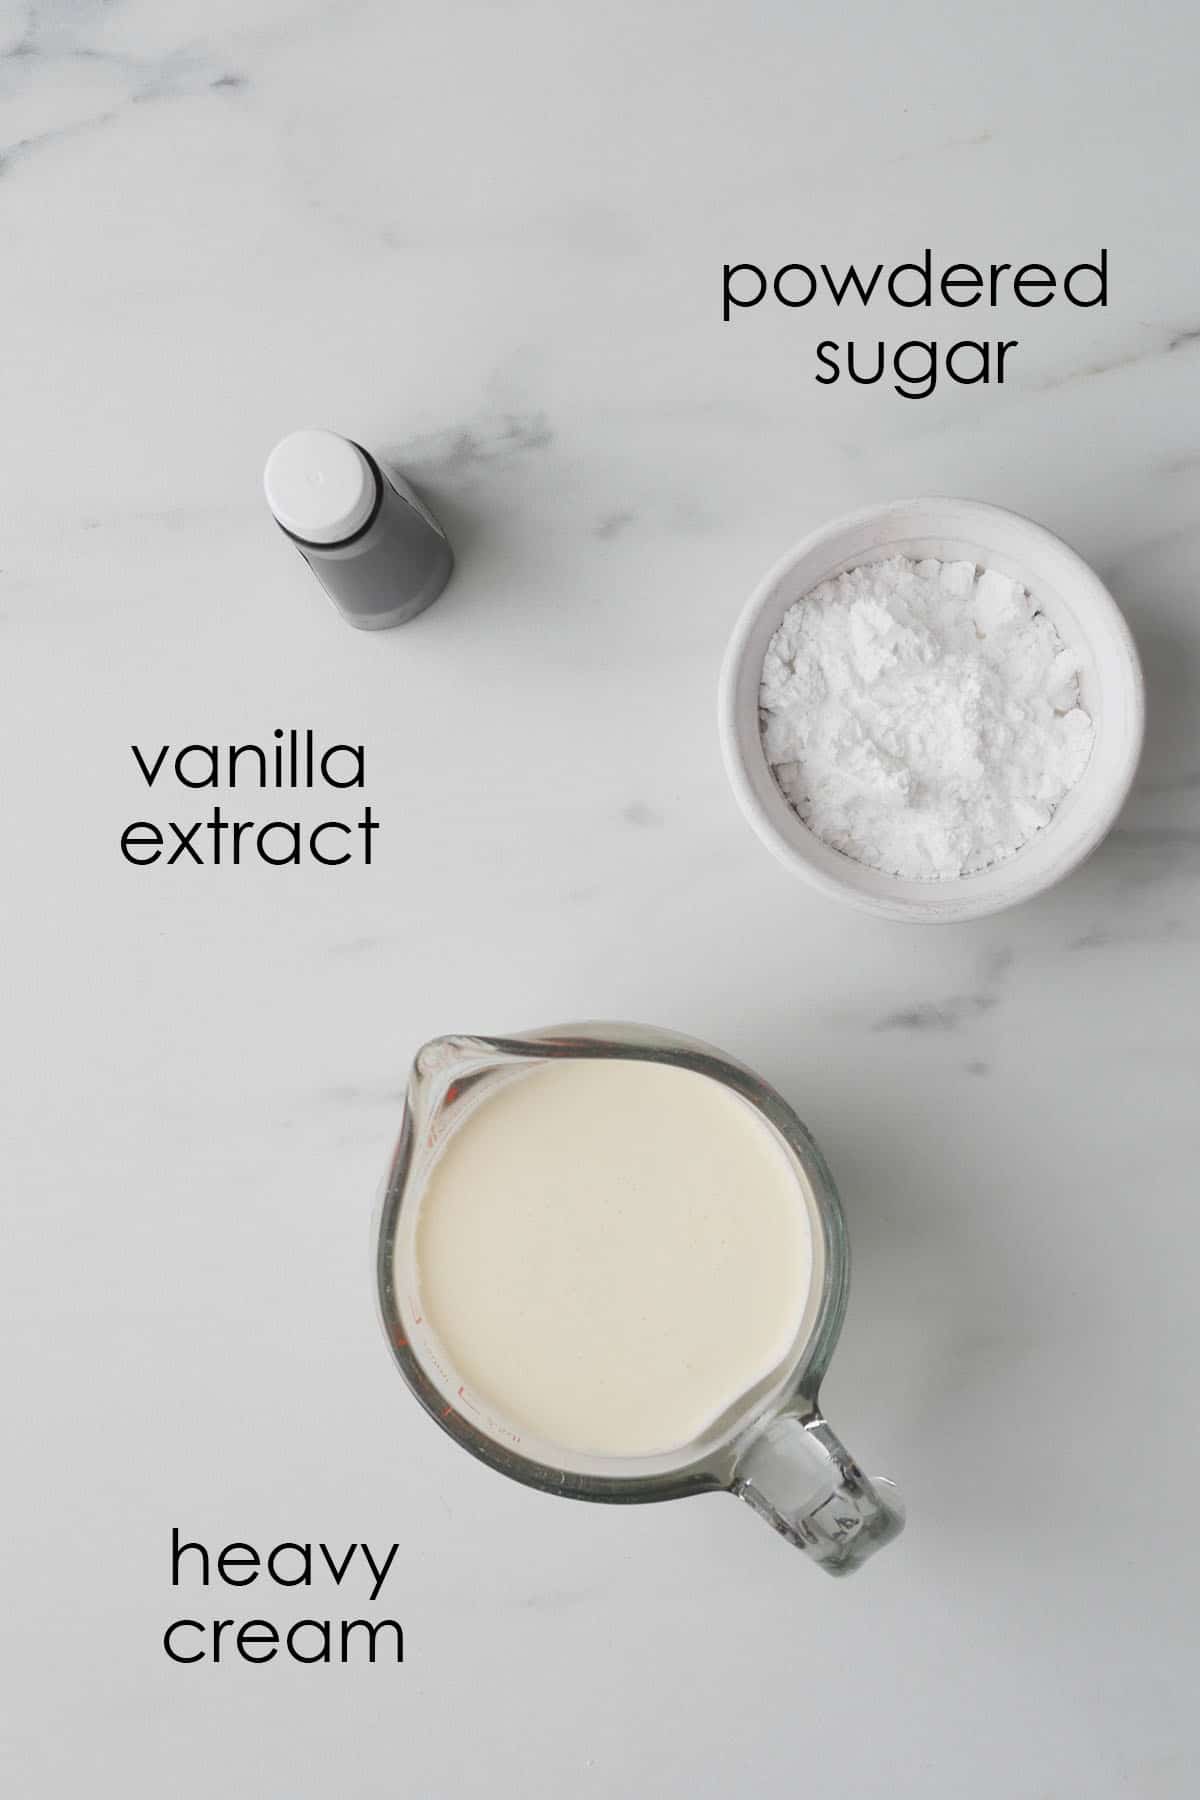
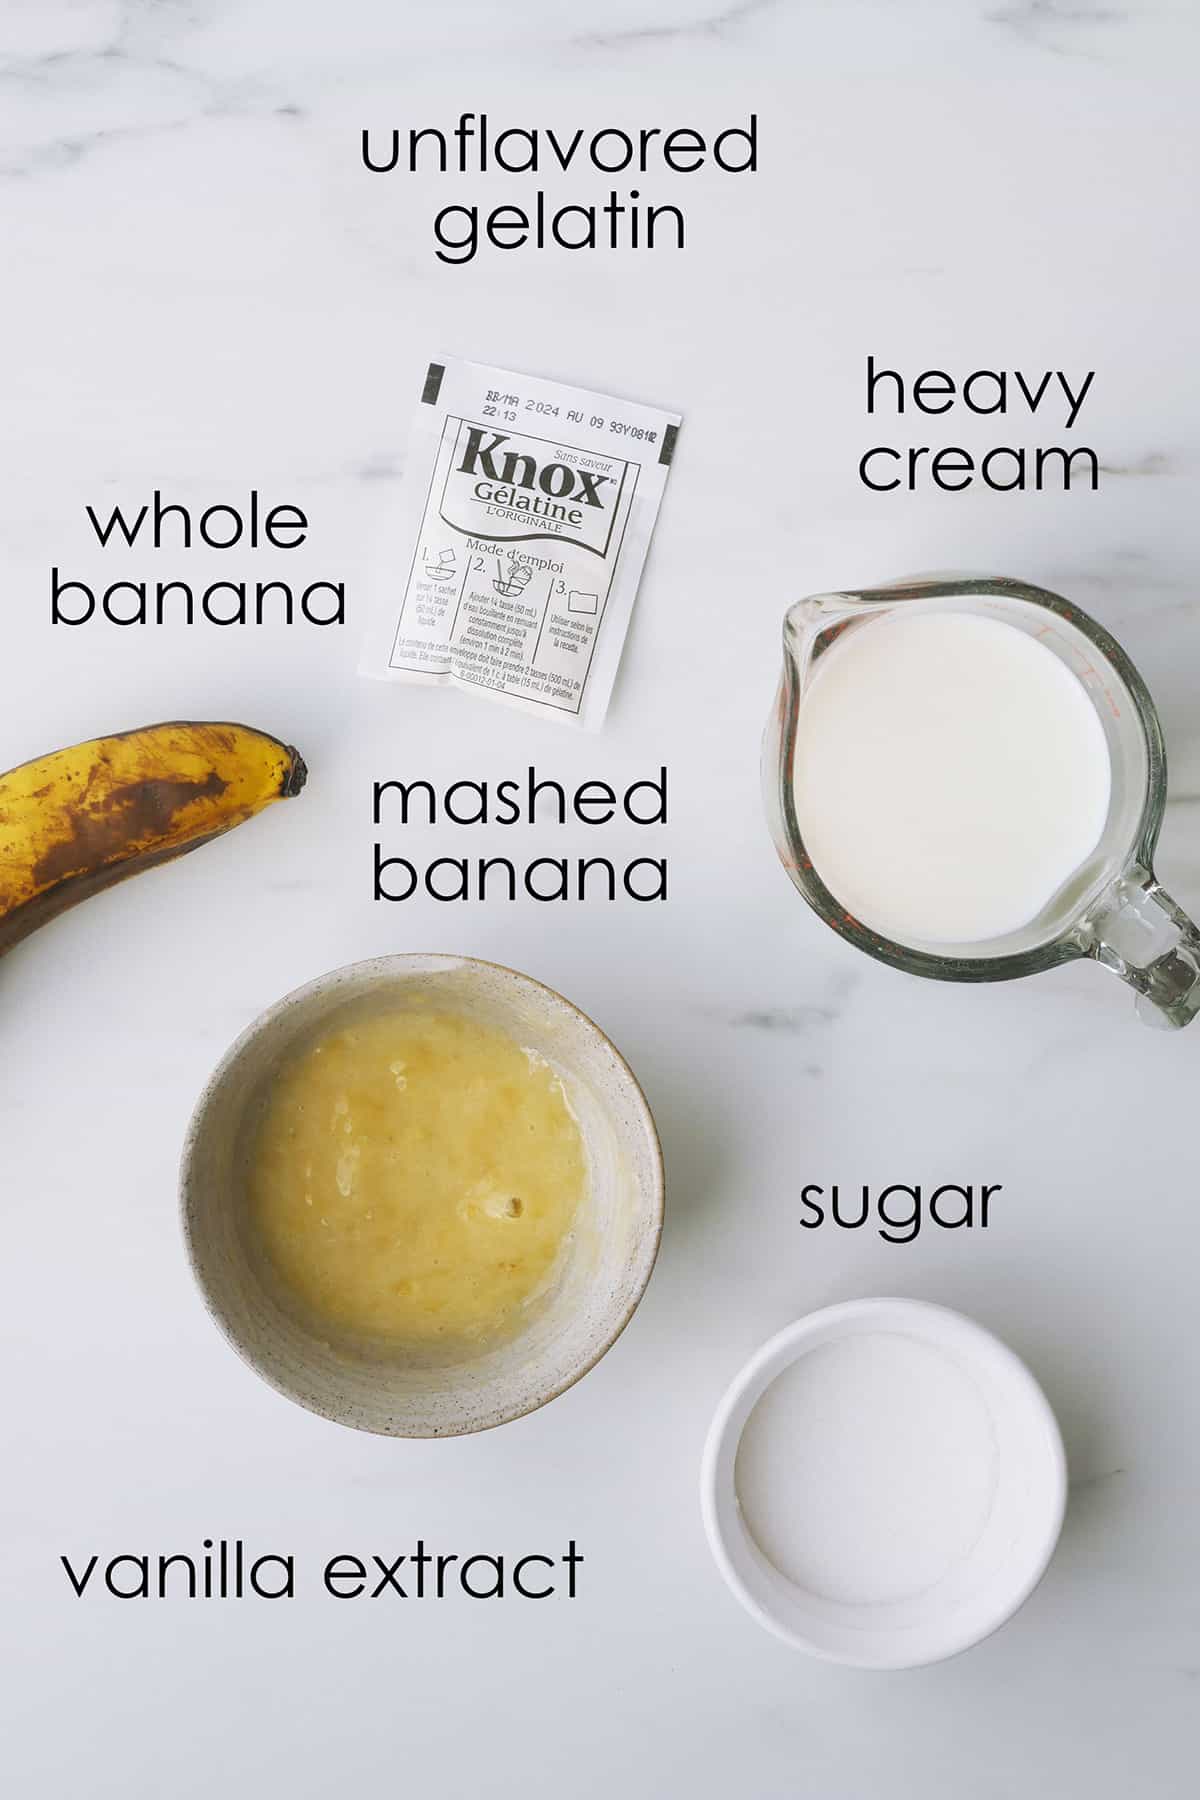
- Whipping cream - has a milkfat content of 33% (labelled as M.F. 33). Heavy cream (labelled as M.F. 36+) can be used to substitute, it will make the mousse firmer and richer. Do not use half and half or milk.
- Fresh Mangos - make sure they are ripened. Ripe mangos yields slightly from pressure and gives off a sweet, fruity aroma near the stem. Their color will have changed from green to yellow, orange or red, depending on their variety.
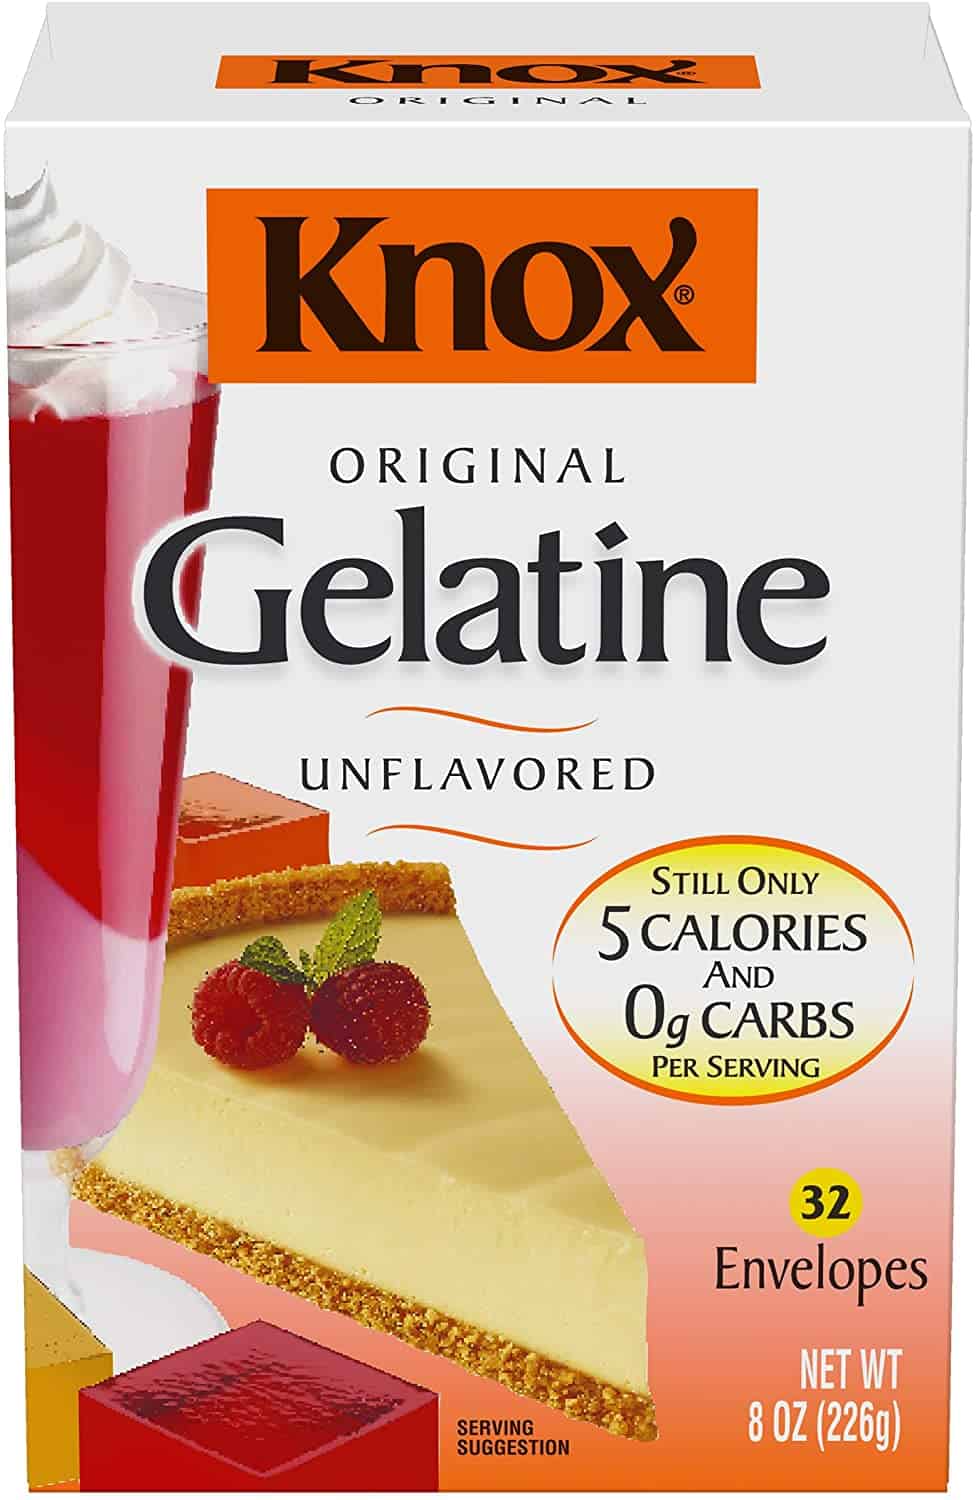
- Powdered gelatin, unflavored - I prefer Knox gelatin because it's easily accessible. If using sheet gelatin, per the company, "one pouch of gelatin (2 ½ tsp) has the same gelling strength as 5 sheets (2-⅞" x 8-½") leaf gelatine.
- Water - ensure the water is cool. Do not use hot water to bloom gelatin.
- Granulated sugar - adds sweetness, add more or less to taste while cooking.
Supplies
- Regular kitchen tools PLUS:
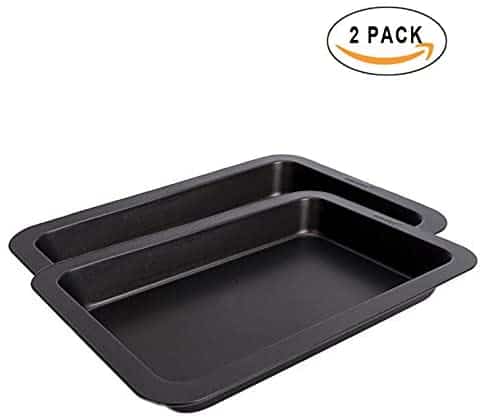
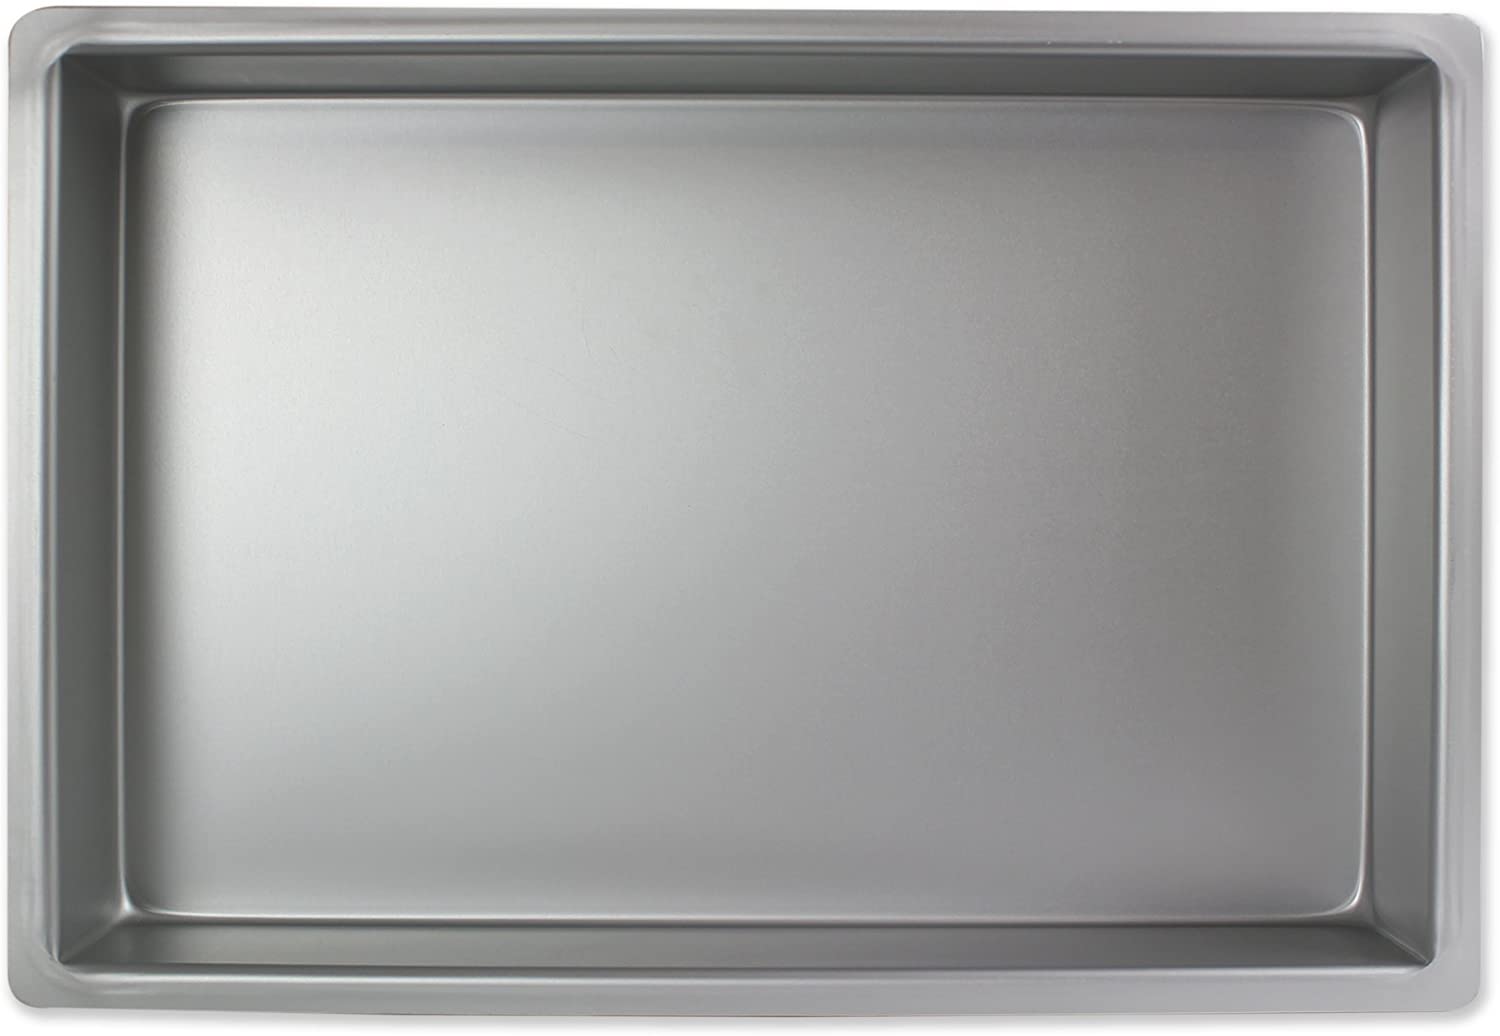
- 8" round cake pans X 2
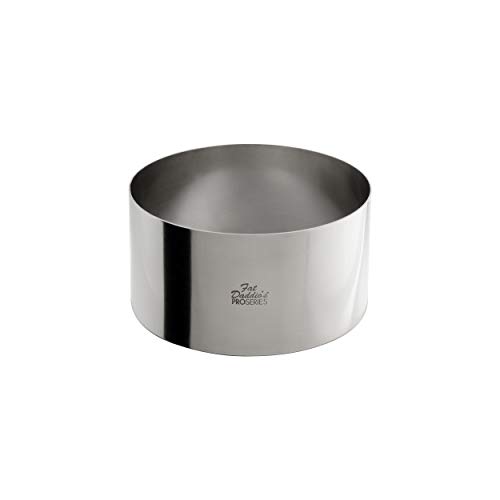
- 6" cake ring - was chosen for this recipe as it's one of the most popular size. You can use a 7" one as well which will result in less wasted cake after cutting. If you don't want to buy a cake ring for this project, you can secure the acetate strips into a tube shape with tape instead, then carefully cut out the cake with a knife and place the cake inside like you would have with the lined cake ring.
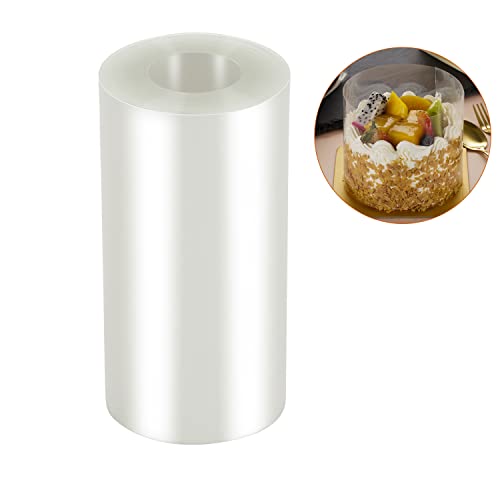
- Acetate strips (4" tall) - is required to retain the shape of the cake when the cake ring is removed. Parchment paper can be used instead but it's flimsy so the edges won't be as neat, especially if there is any wrinkling in the paper.
- Food processor or blender - breaks up the pulp in the mango.
- Angled spatula - is ideal for levelling the mousse evenly. A regular spatula works too.
- Parchment paper - prevents the cake from sticking. Buttering the pan instead works too.
- Sieve
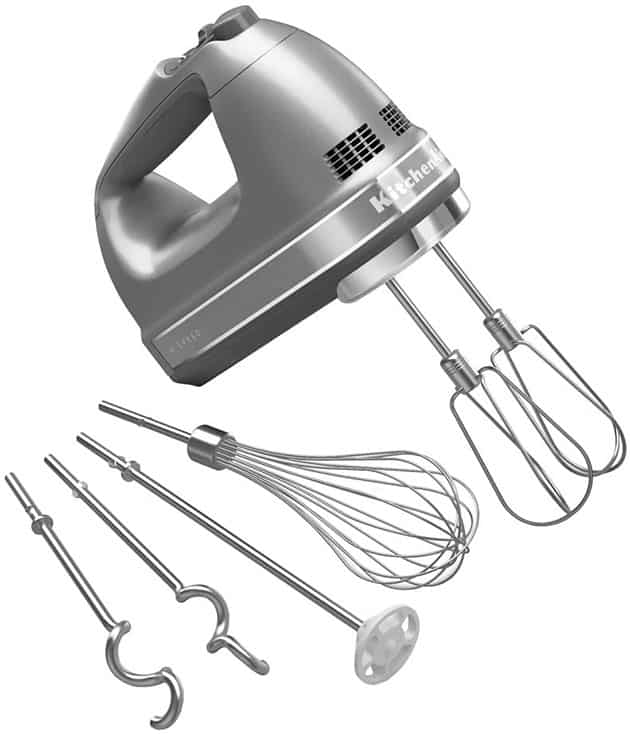
- Mixer - either a handheld or stand mixer to whip the whipped cream and meringue. You can definitely do this by hand but be prepared for vigorous whipping that will tire you hand.

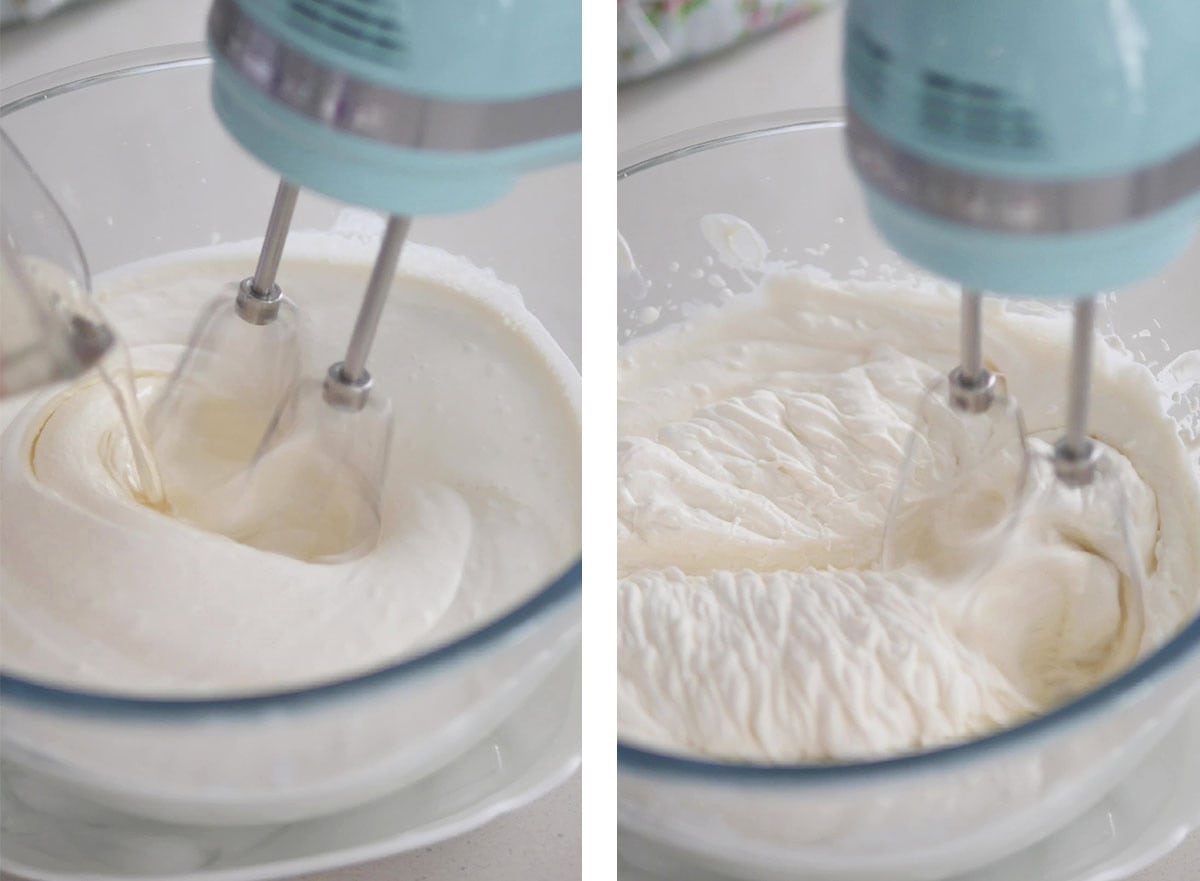
What Consistency Should The Mousse Have?
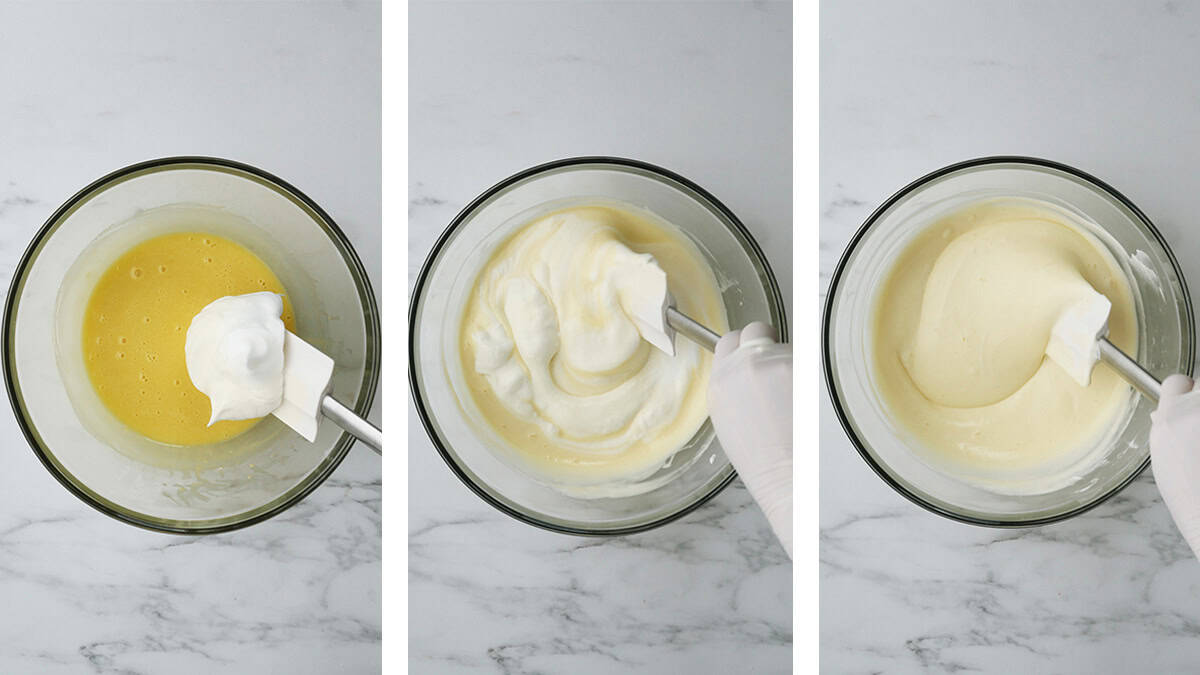
During the assembly, the consistency of the mousse should be thick and voluminous (see process photos in post body). It doesn't "pour" like pancake batter. It's more like a thick pudding. You'll need to use a spatula to spread the mousse to the edges to achieve neat edges when the acetate strip is removed. After it has been chilled and fully set in the fridge, the mousse should be firm and have clean lines when cut with a sharp knife.
Why is My Mousse So Runny?
First of all, make sure the mousse has a thick voluminous consistency at assembly time. If it doesn't, there's already something wrong with it. Some tips on achieving the proper mousse consistency:
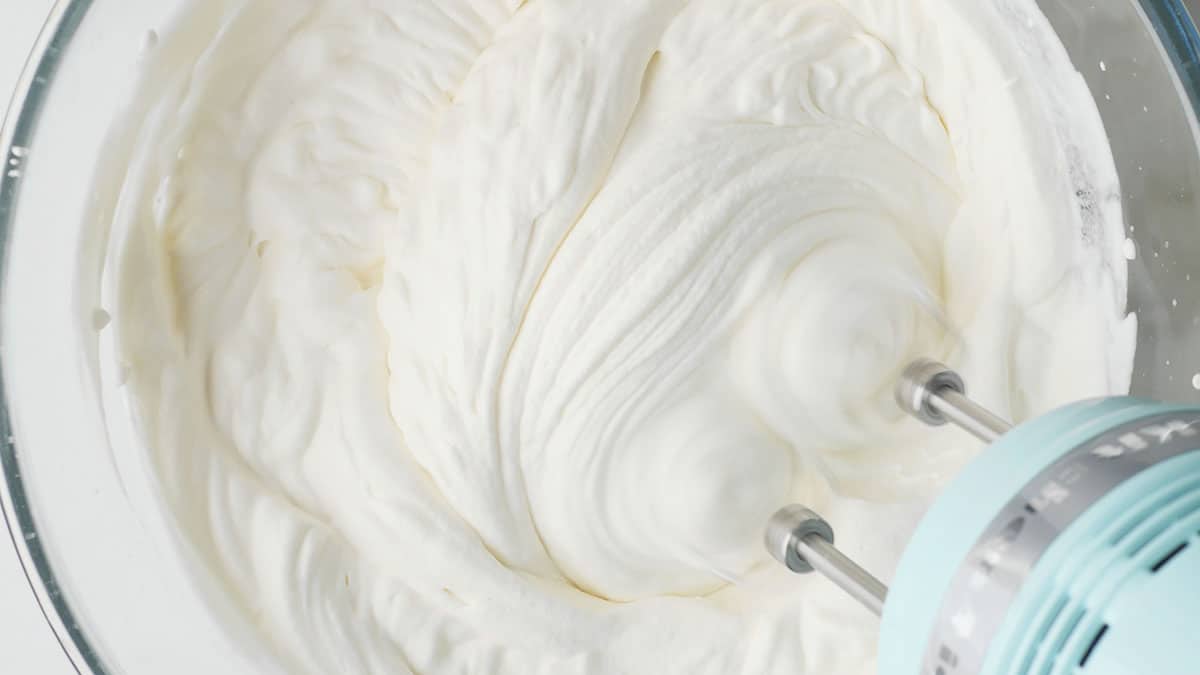
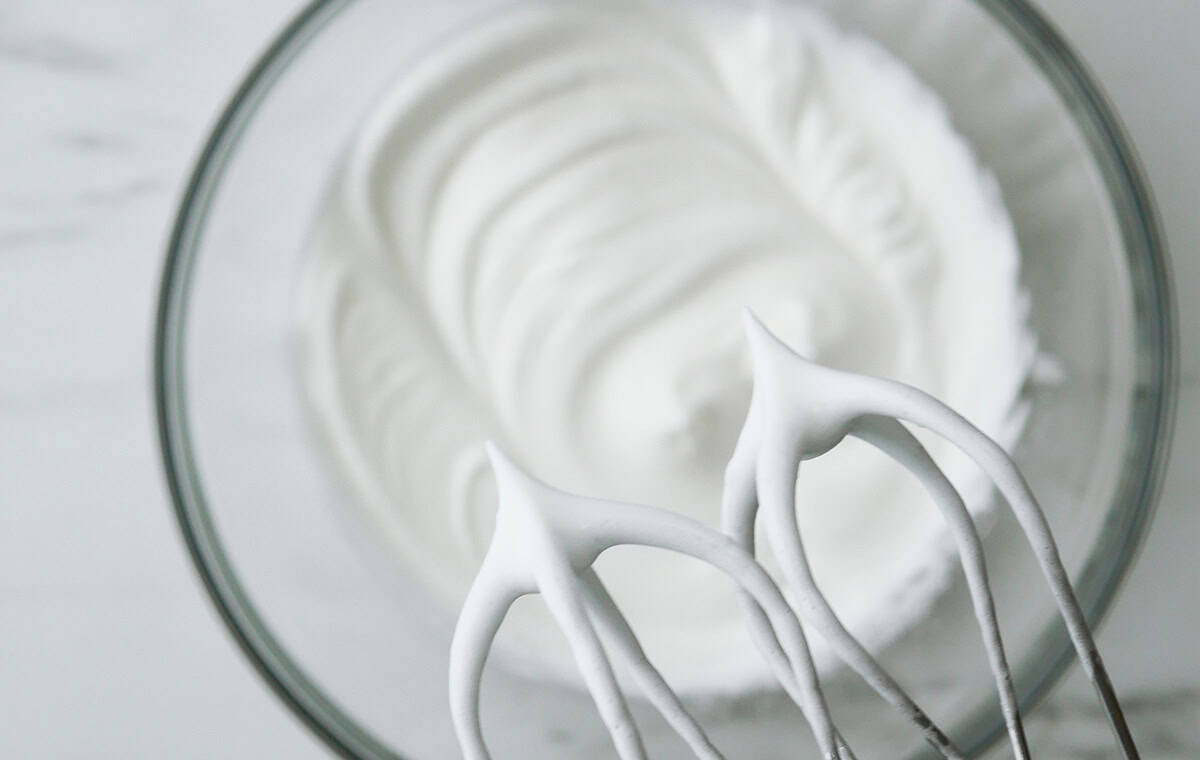
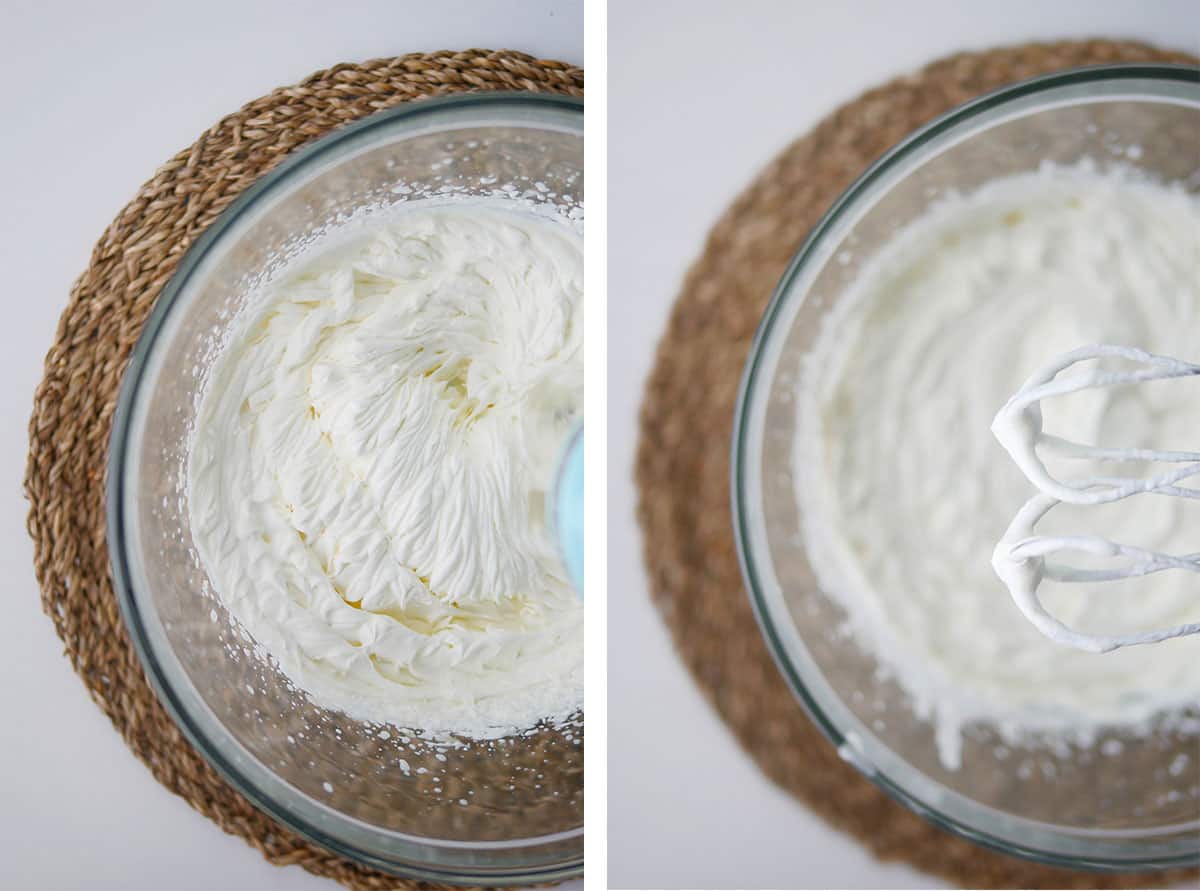
- Whipped cream needs to be whipped to stiff peaks. This gives the mixture volume. Stiff peaks is achieved when the points in the cream stands vertically and do not fall over on itself.
- The puree needs to be cooled to room temperature for incorporation into the whipped cream.
- When incorporating the two ingredients (whipped cream and puree) temper it by slowly folding in a small amount of cream each time.
- Properly use gelatin by blooming it in cold water and not overheating it. Only add the bloomed gelatin to the puree when the heat has been turned off.
- The mousse needs at least 3 hours to set in the fridge before serving.
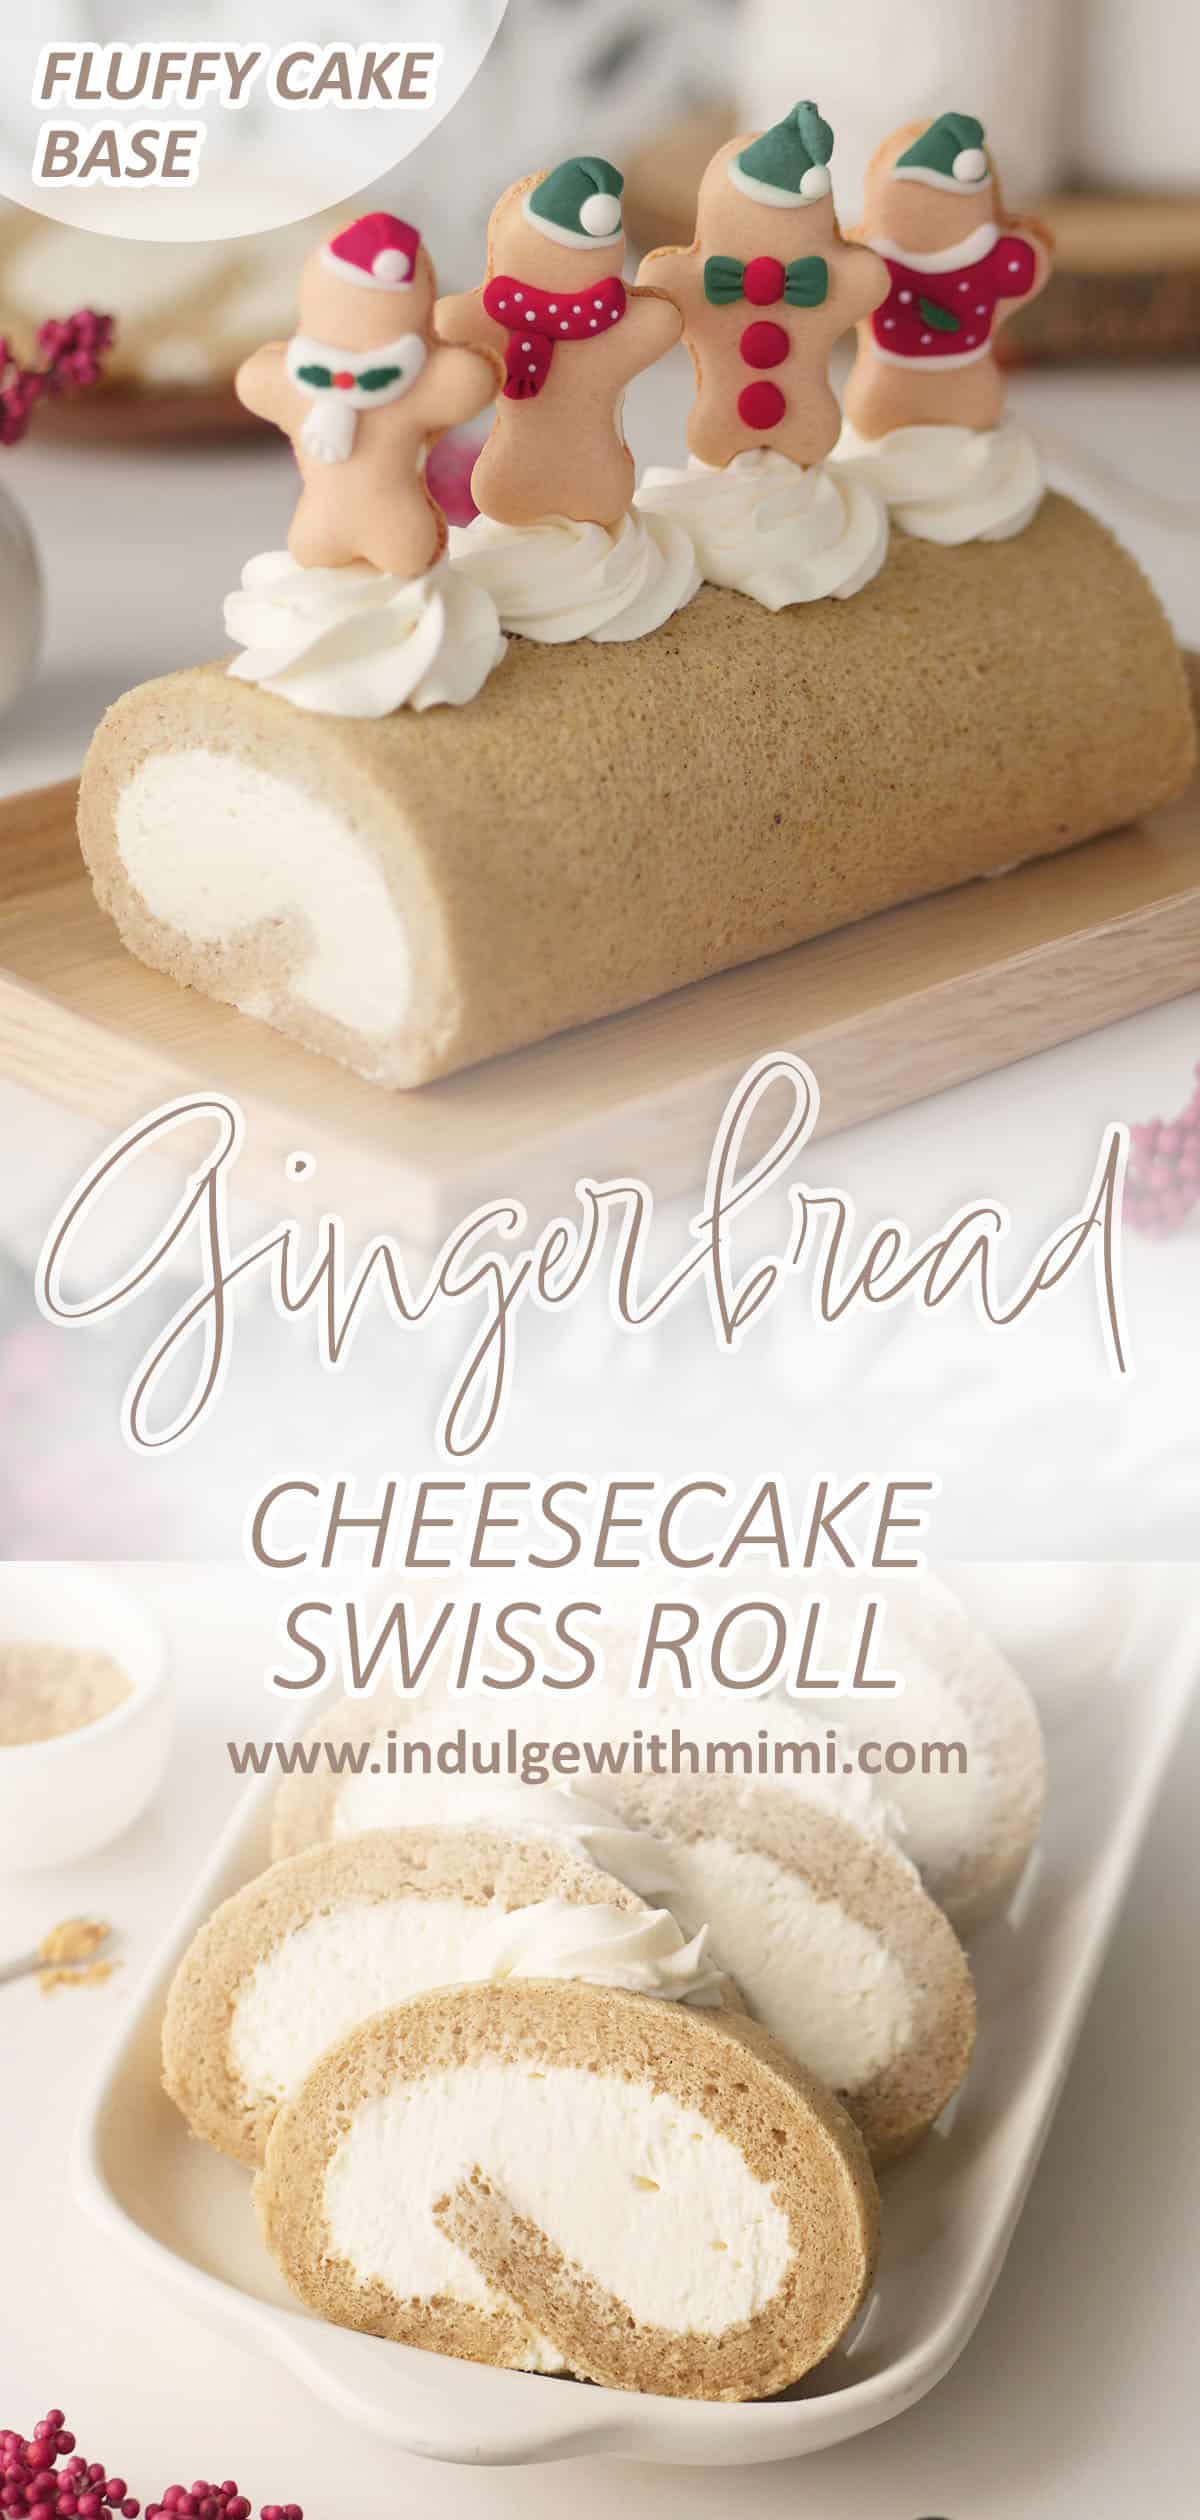
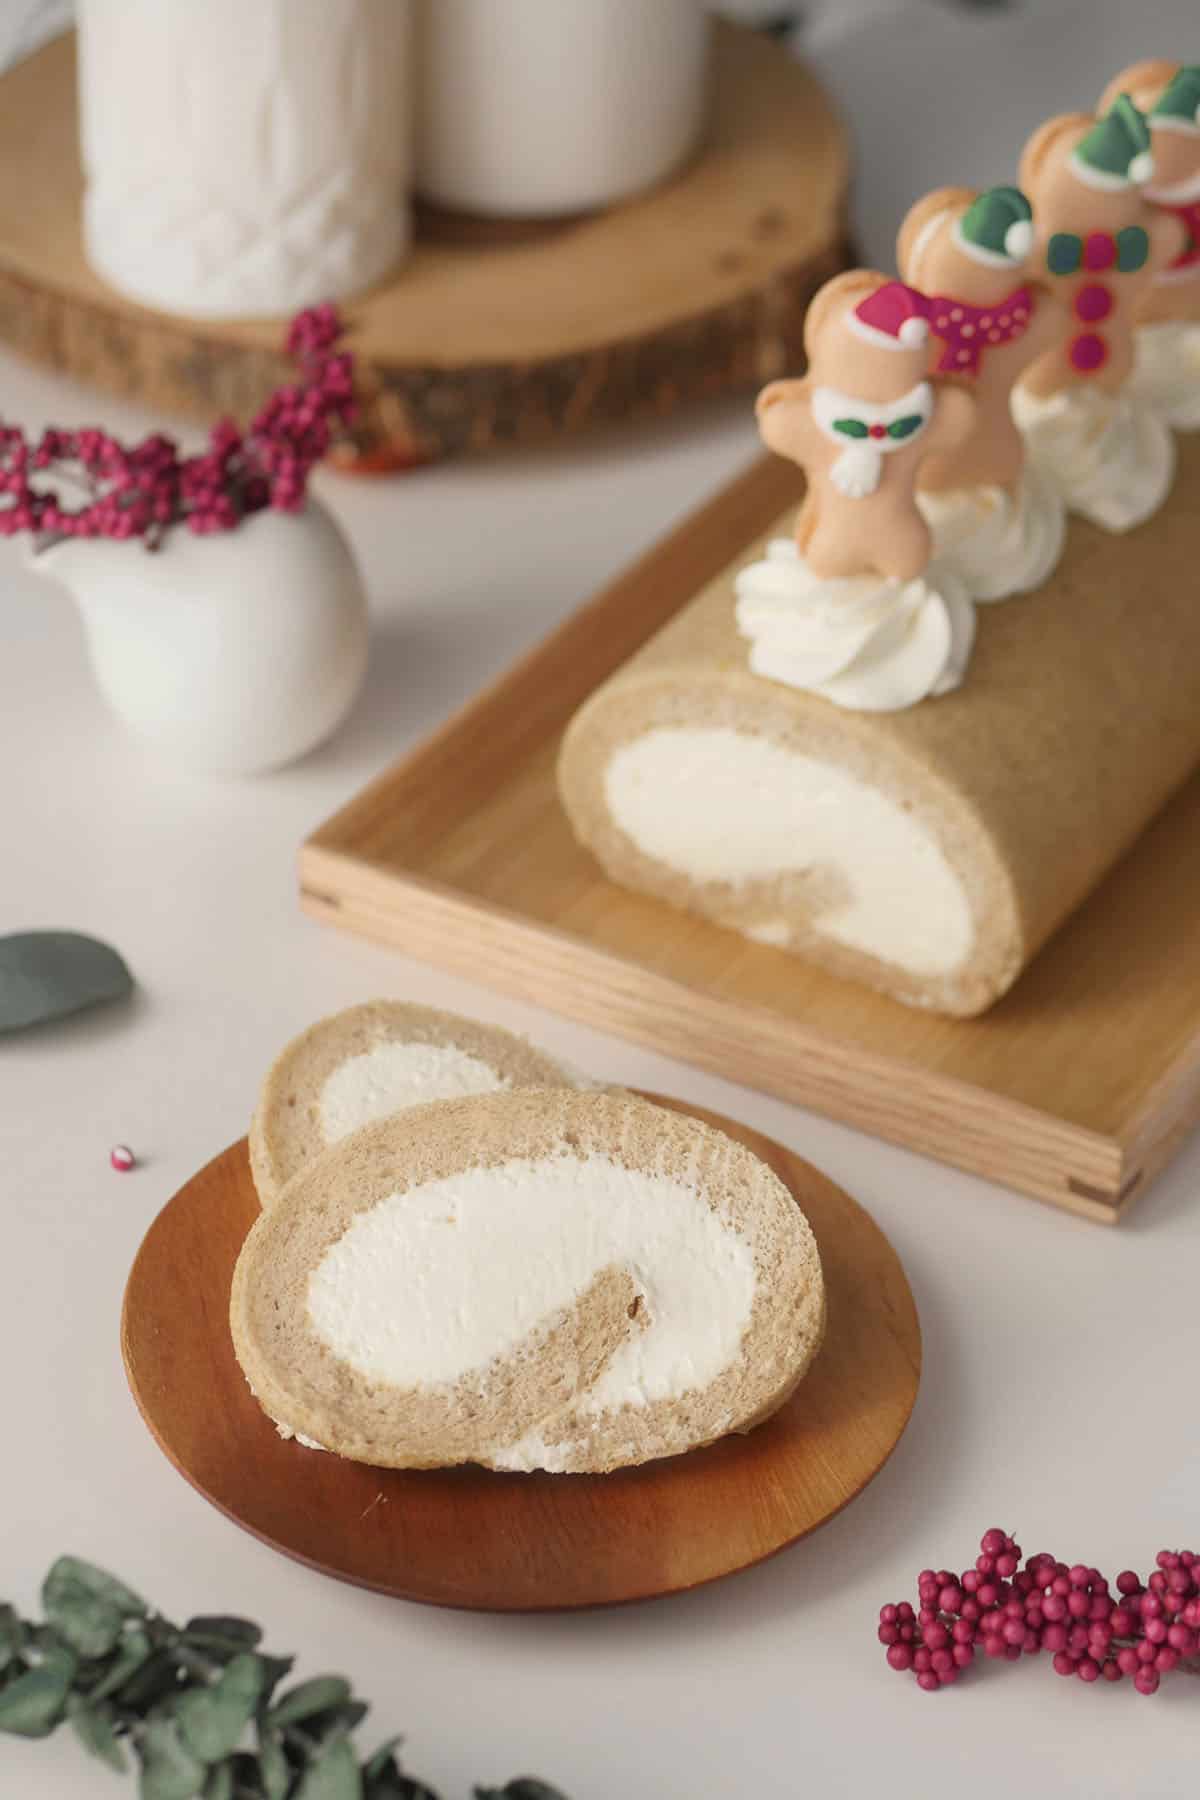
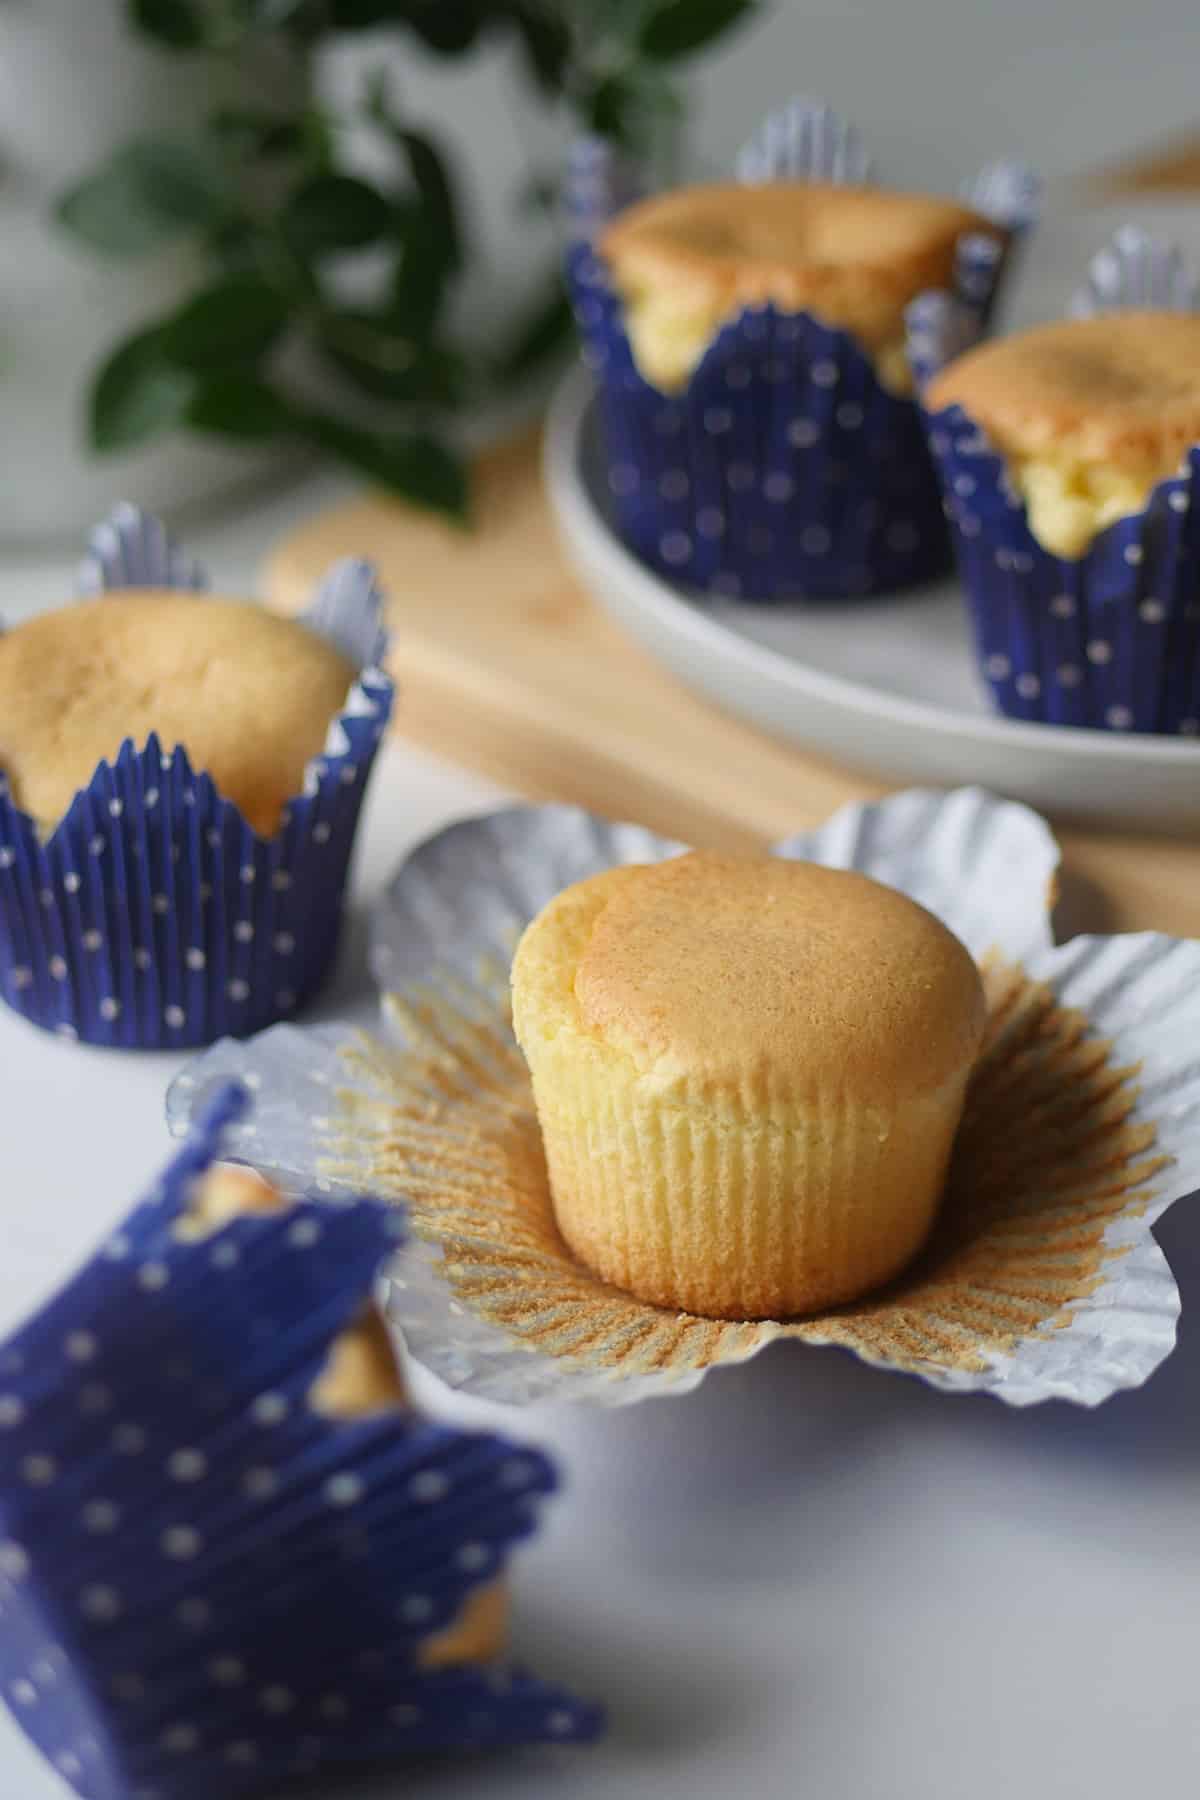
Tips For the Fluffiest Chiffon Cake
Unlike a sponge cake which uses no or little butter, the pillowy soft chiffon cake base in this roll uses oil instead. The secret to this Asian bakery-style roll cake is its super fluffy cake base. Here are some tips:
- Use cake flour instead of AP flour.
- Always sift cake flour to prevent clumps.
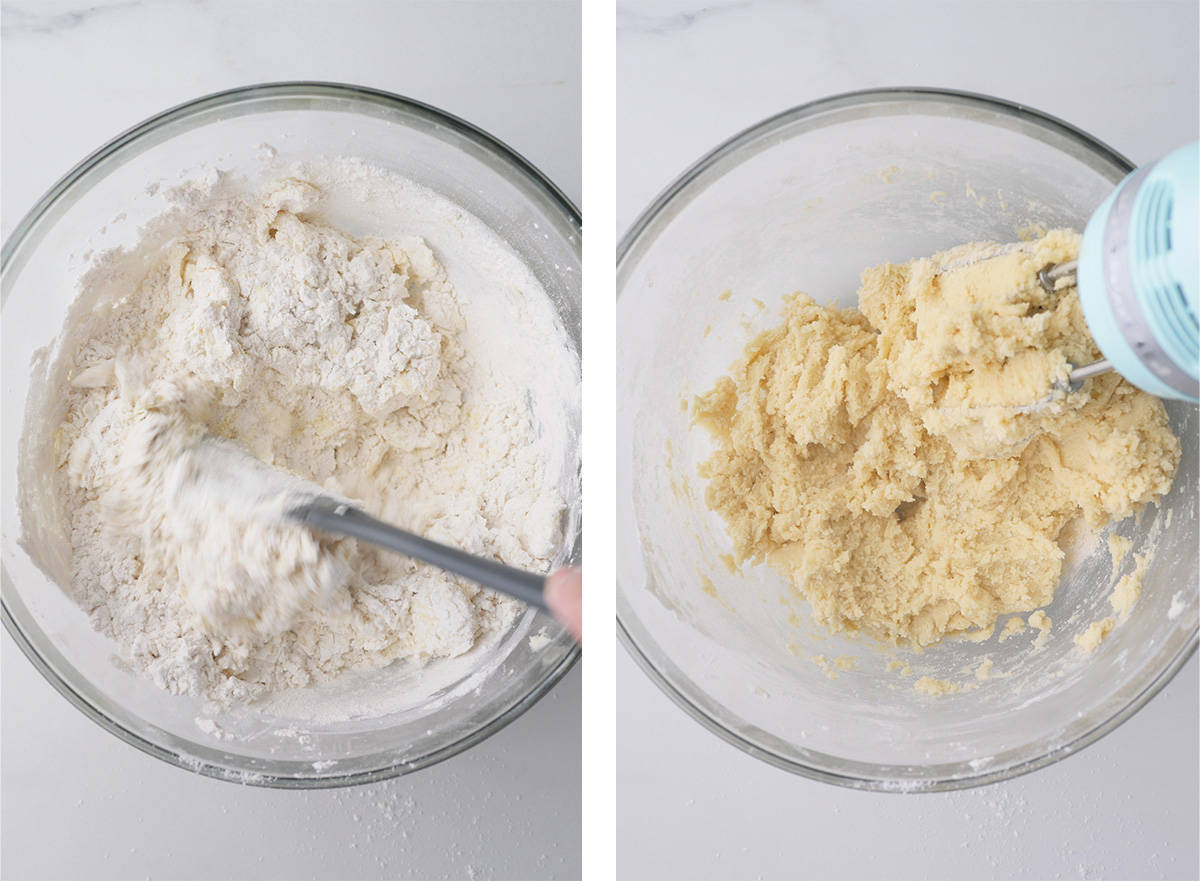
- Gently incorporate the dry-mix and wet-mix together until no lumps of flour can be seen. Do not over mix as it will result in a tough cake.
- For the meringue, use room temperature egg whites for better volume.
- Whip the egg whites in a clean non-plastic bowl free of oil and water.
- Whip the egg whites until stiff peaks stage.
- Gently fold the meringue into the cake batter, retaining the air that you've built into the meringue. Do not stir.
- Use parchment paper to line the bottom of the cake pan for a clean release.
Can I Make This Cake in Advance?
Yes! The assembled cake is an excellent choice for making in advance. It can be frozen for up to one month. It will be completely ready for serving once defrosted. There will be very minimal changes in texture and no changes in flavor. Our pastry class instructors assured us that this is how mousse cakes are prepared and stored for future use in bakeries and hotels. This way, they always had certain baked goods on hand. Once the cake has set in the fridge, leave it in the cake ring, wrap up the top with some aluminum foil and freeze it for up to one month.
How to Store Mango Mousse Cake?
The assembled cake can stay fresh inside the fridge for up to 4-5 days. Always store this cake in the fridge and leave it out at room temperature for no more than 2 hours. To freeze, read above paragraph.
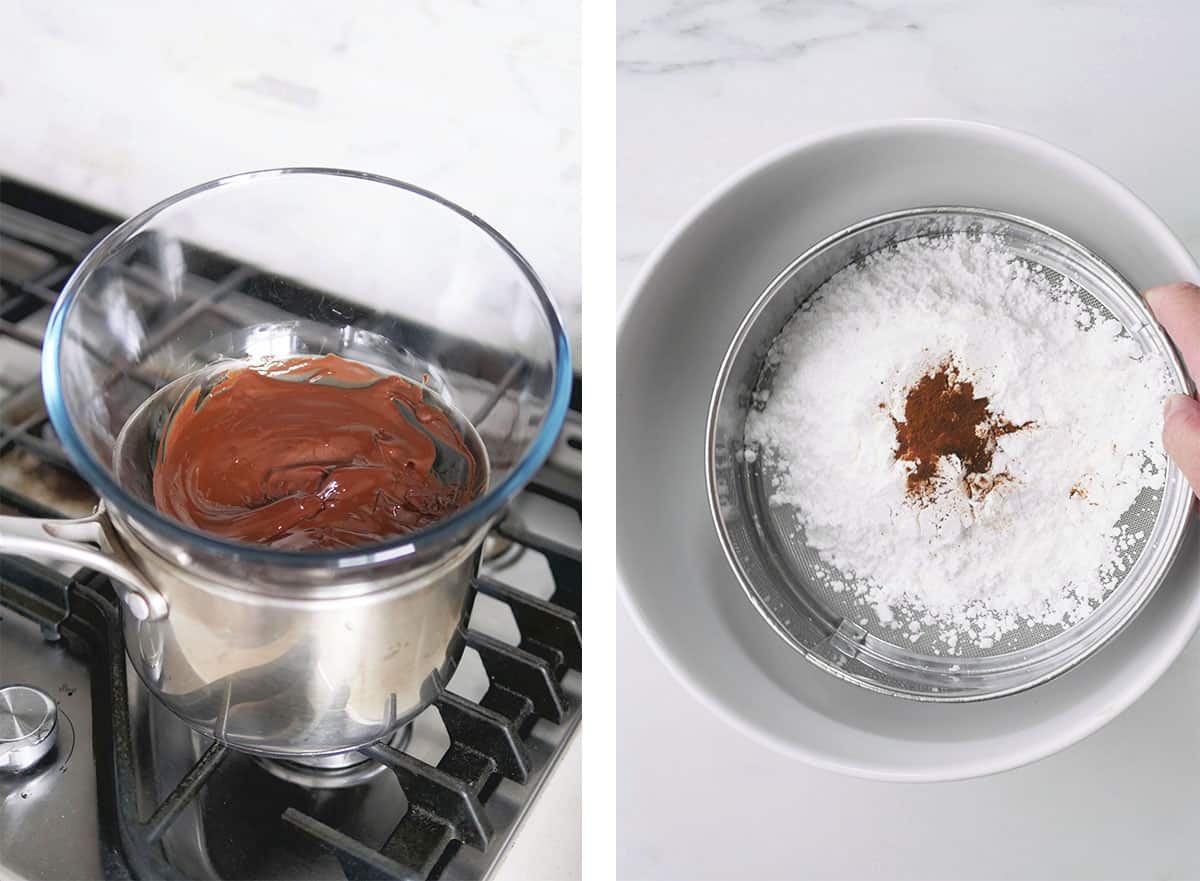
Step By Step Photos
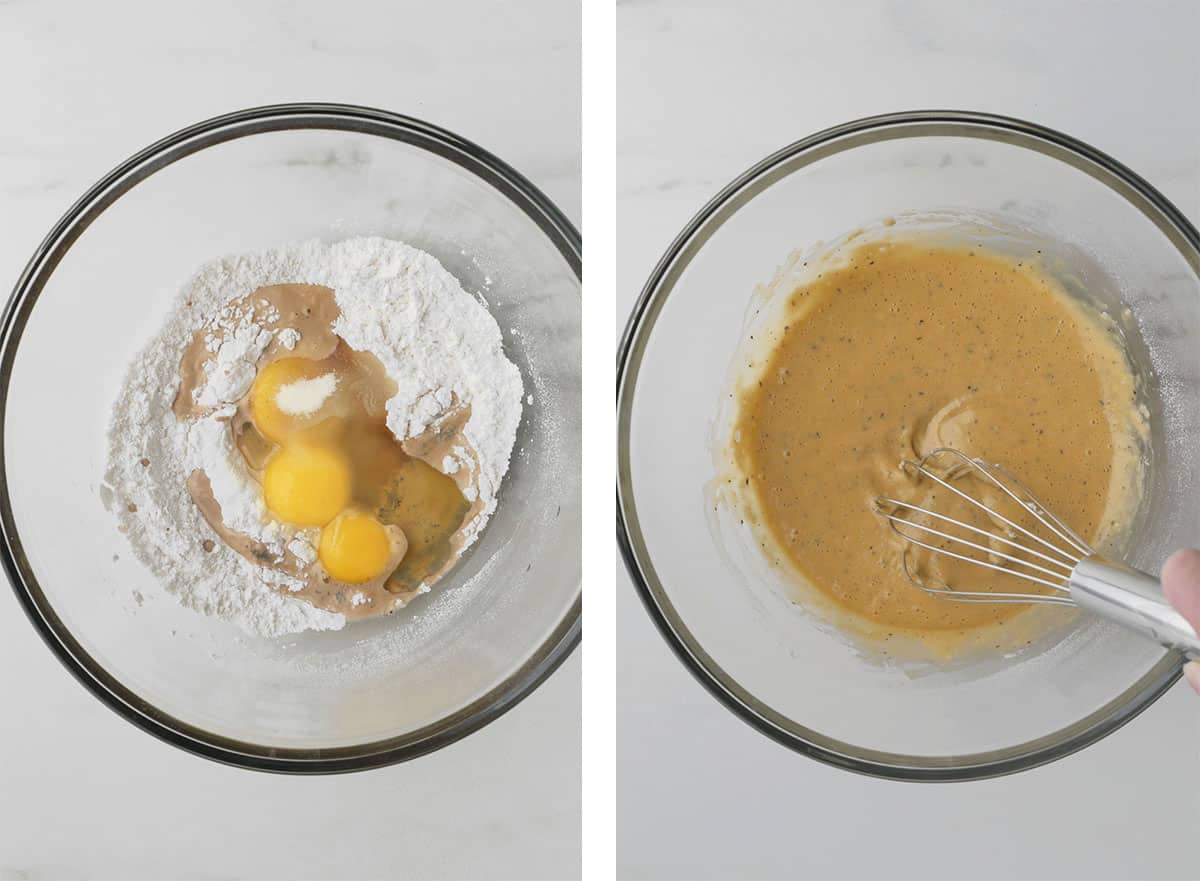
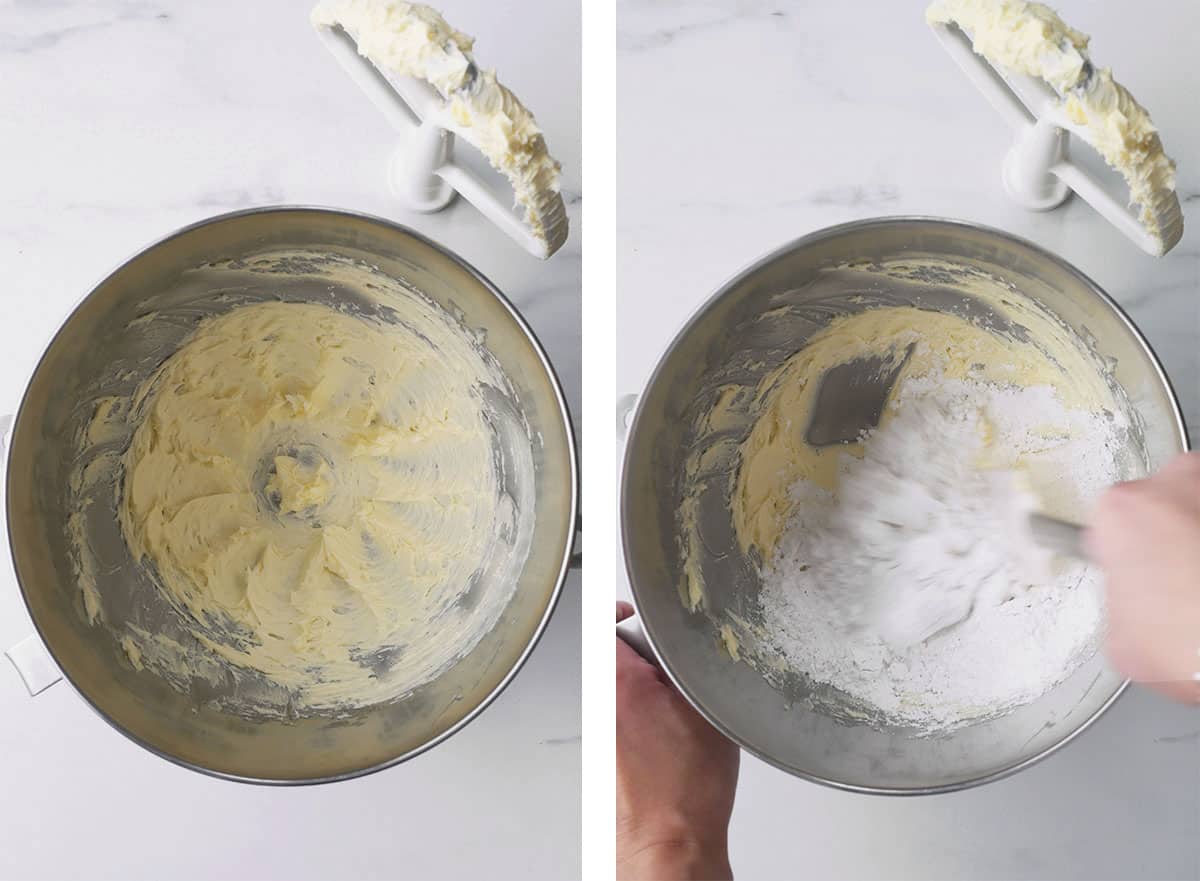
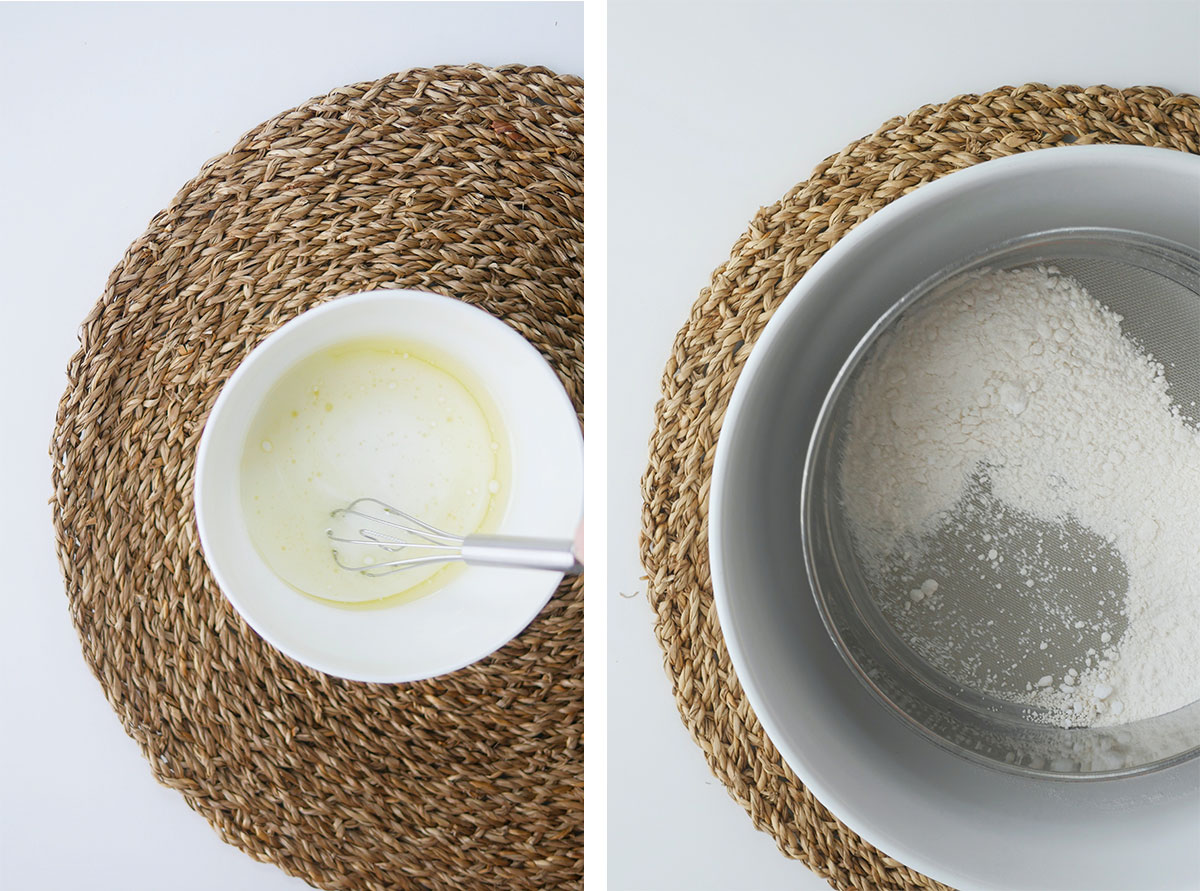
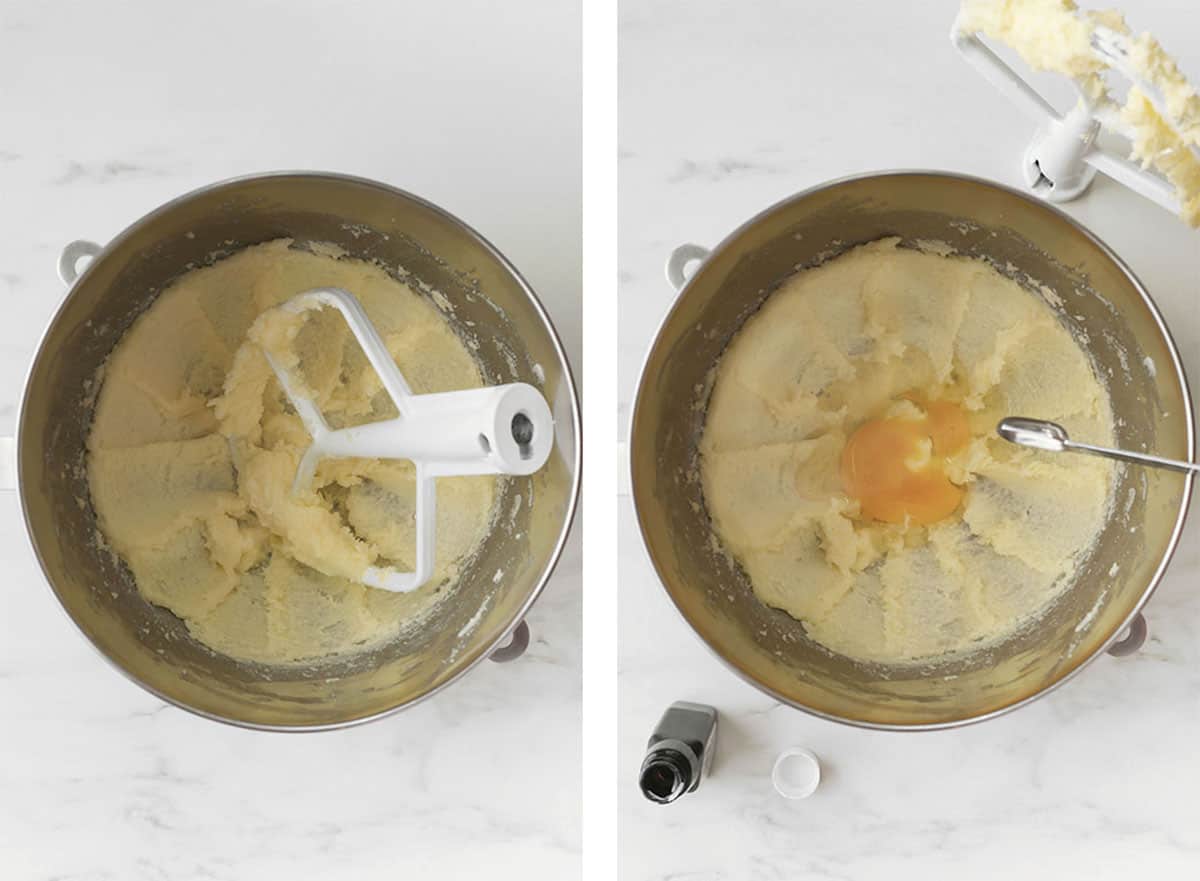
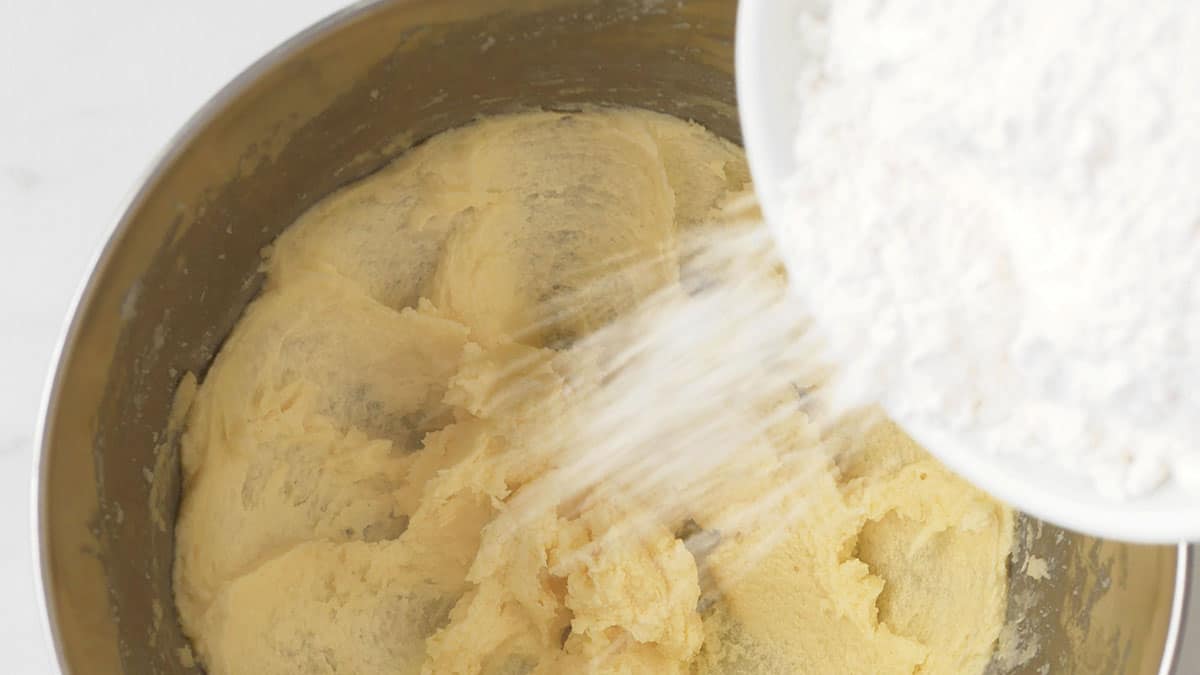
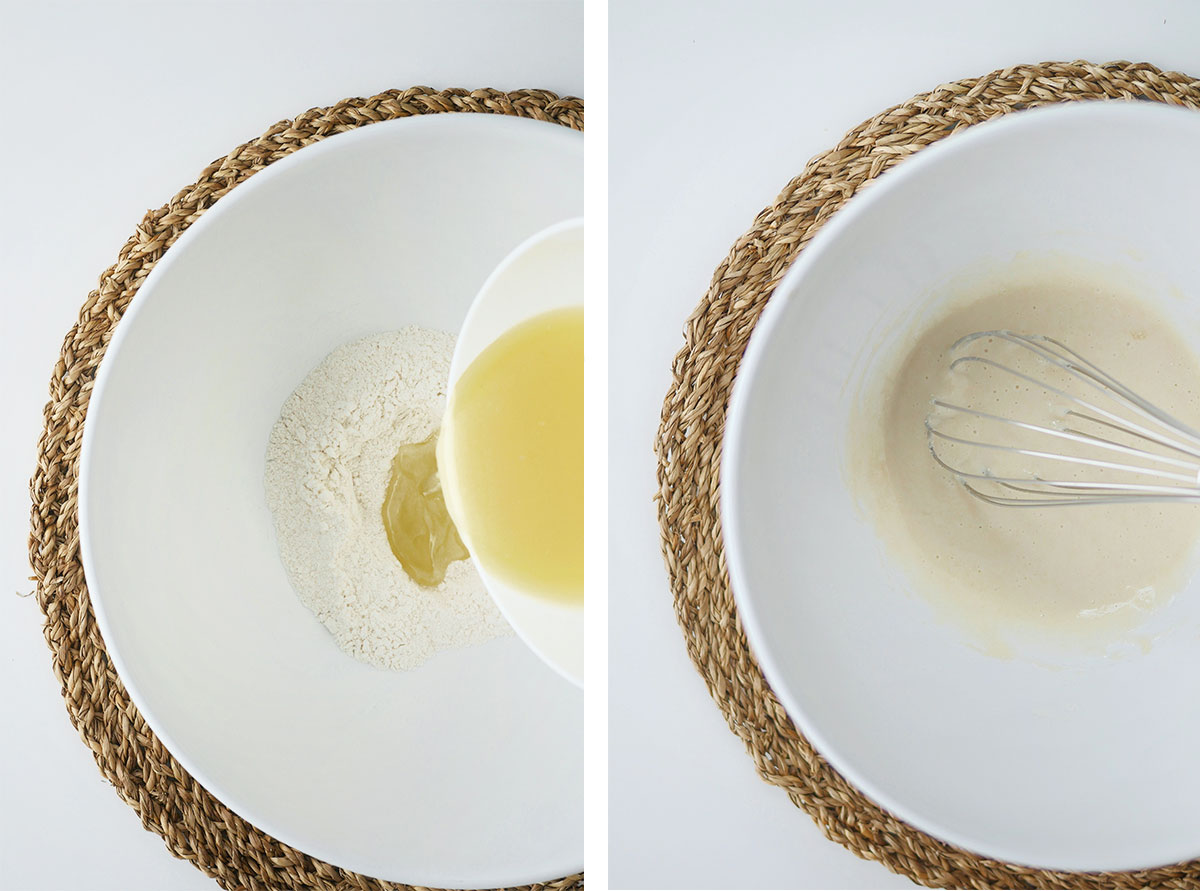
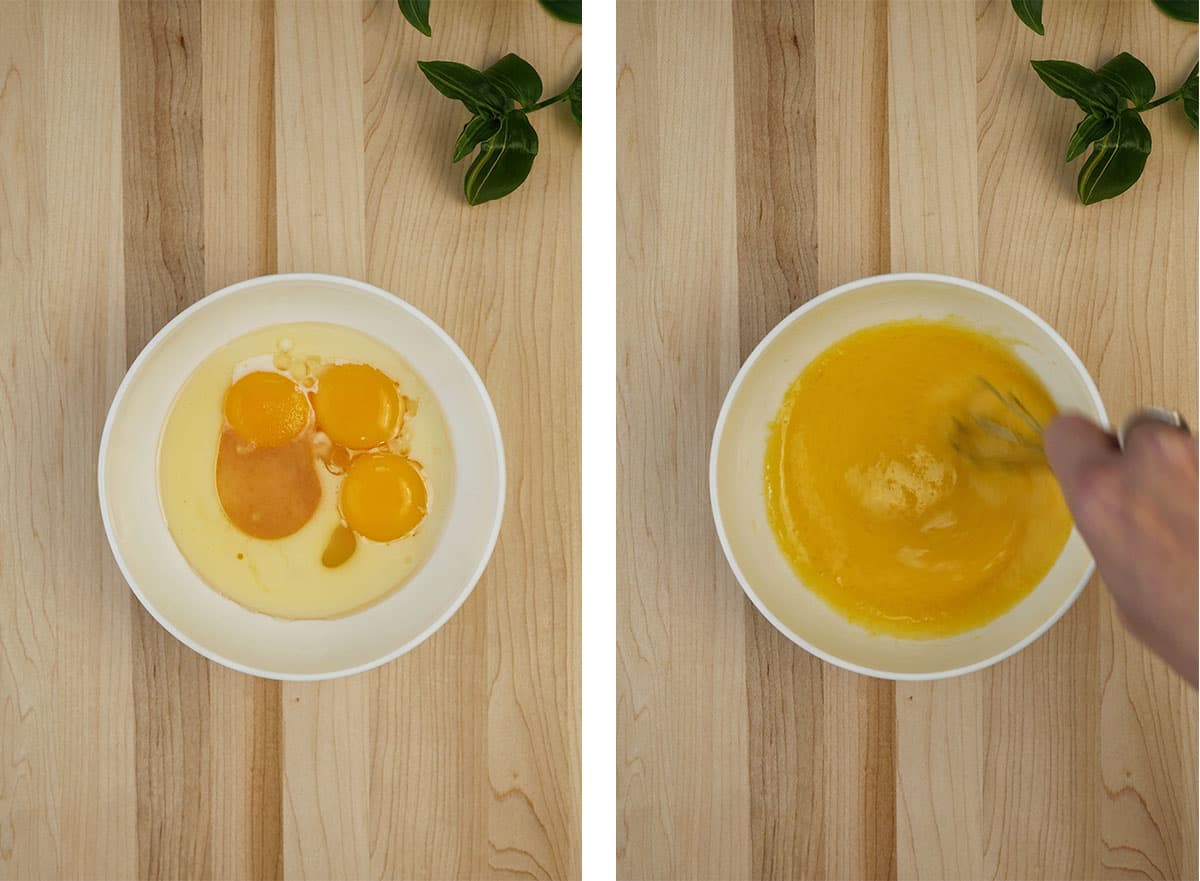
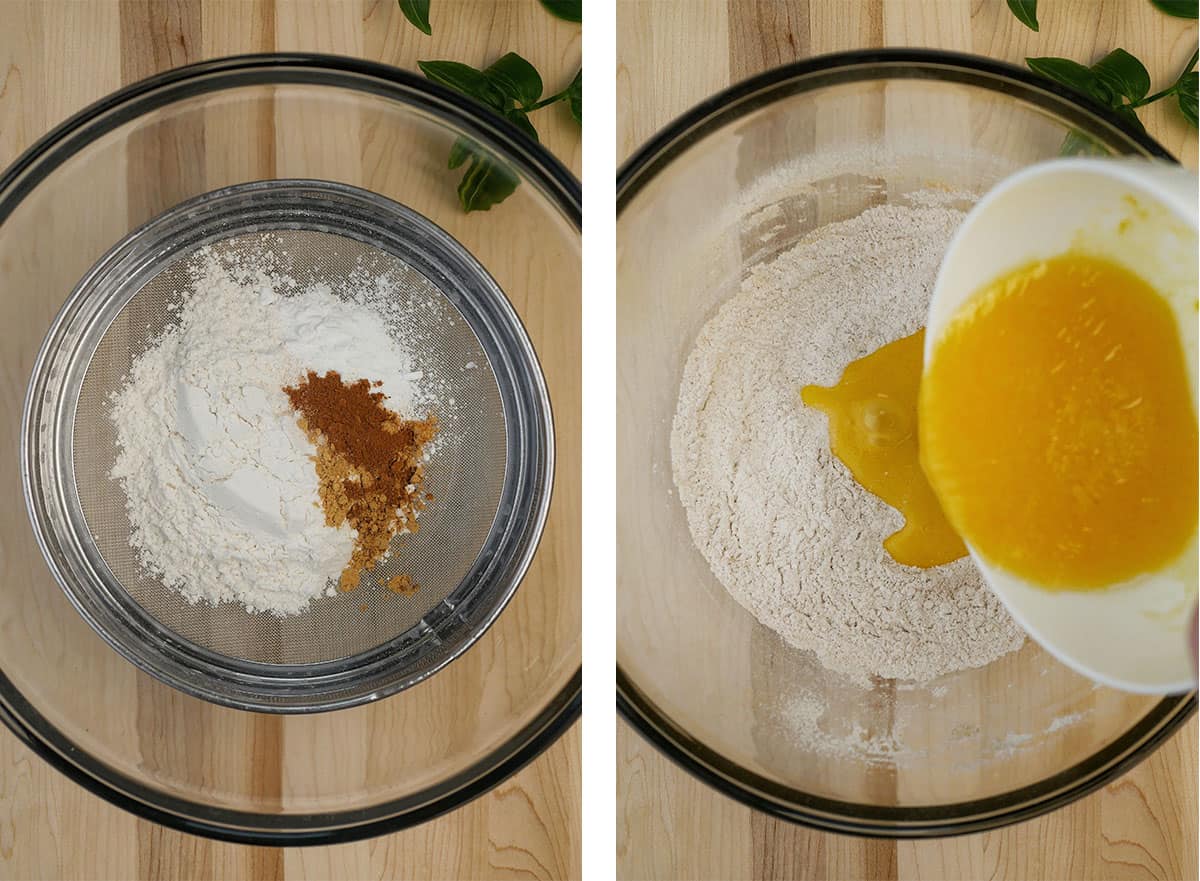
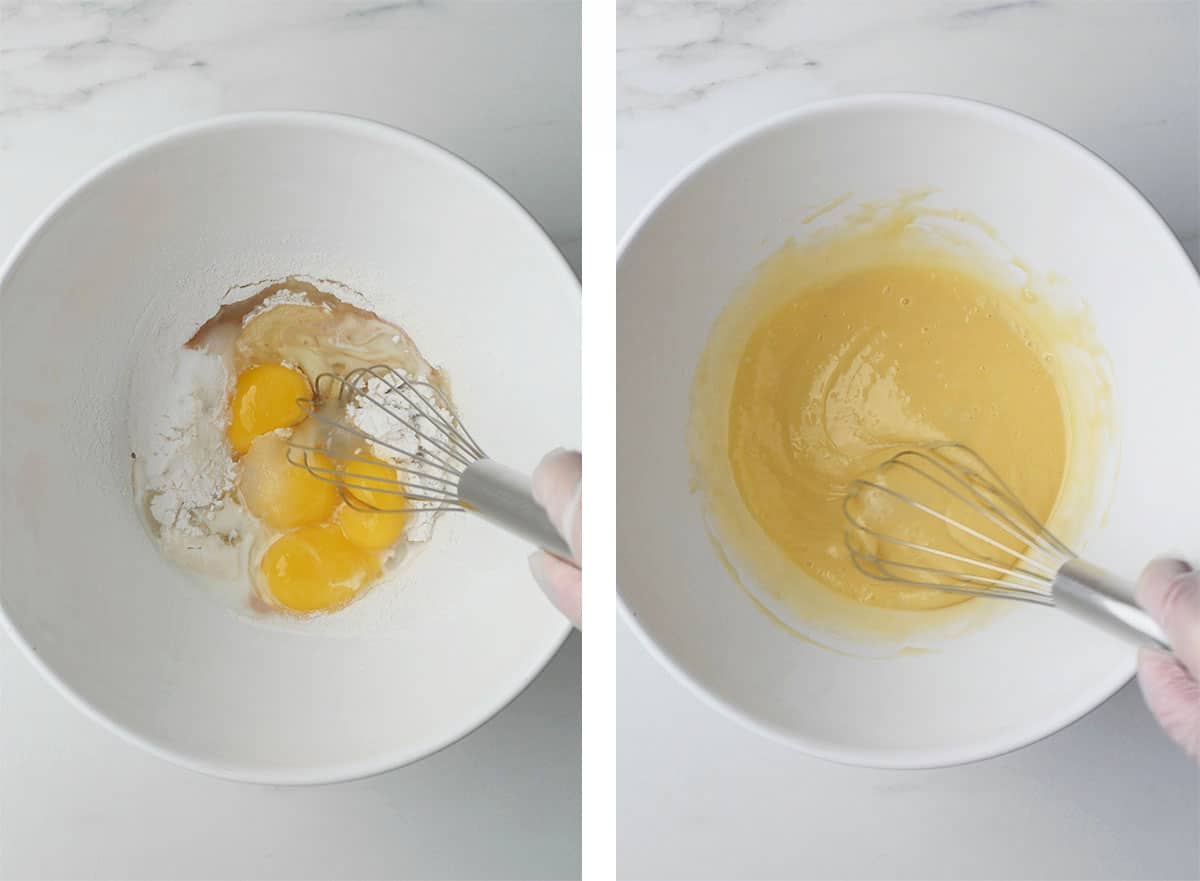
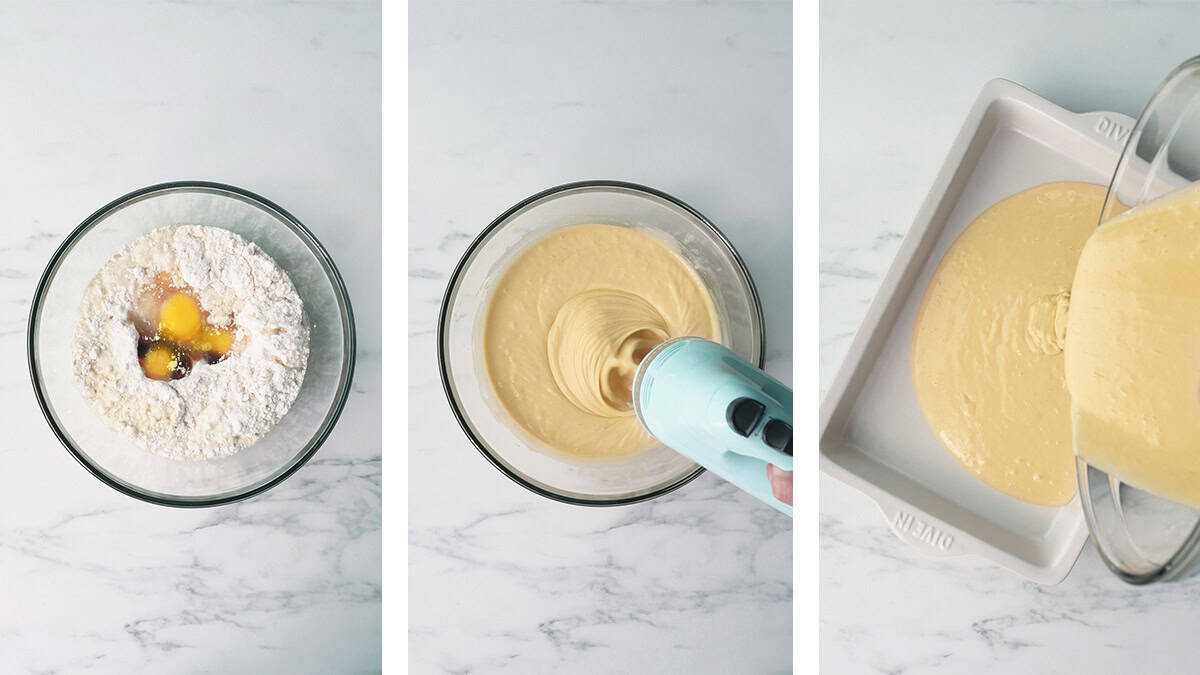
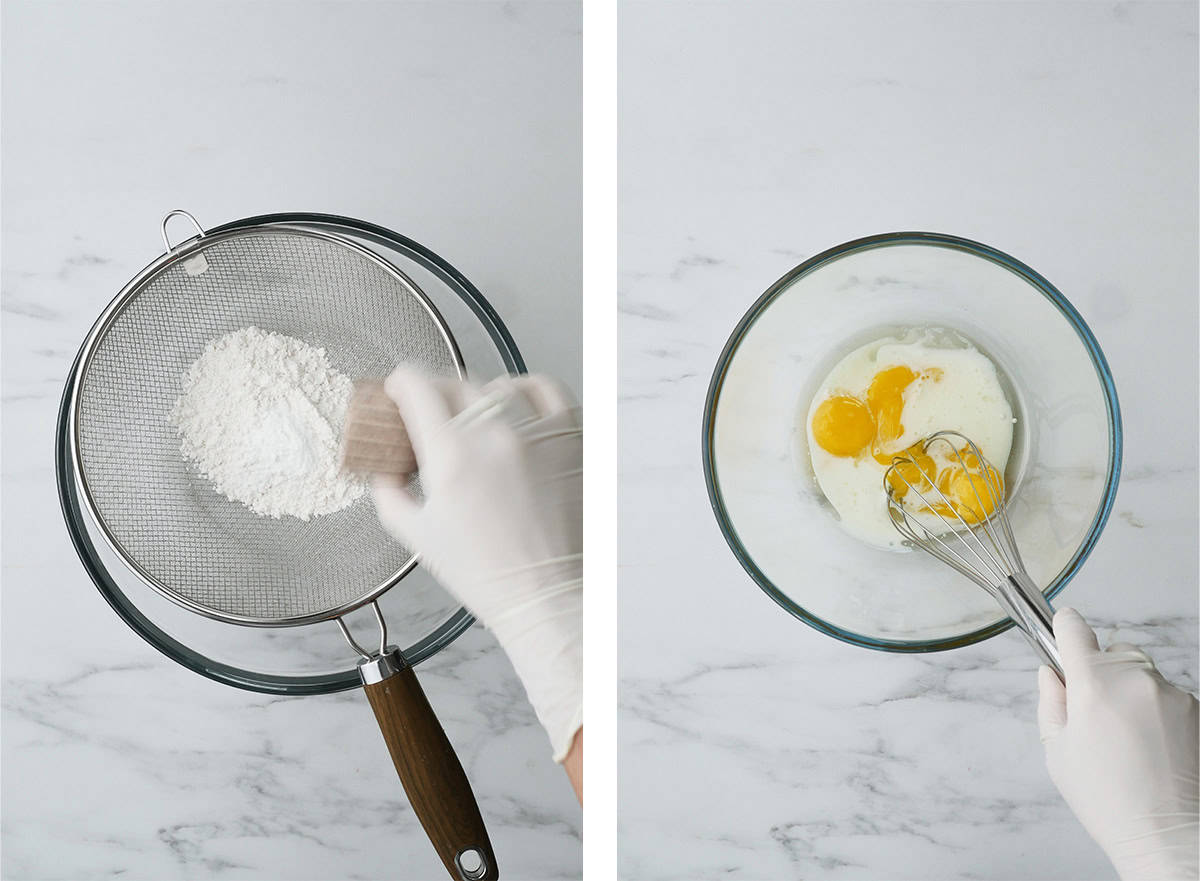
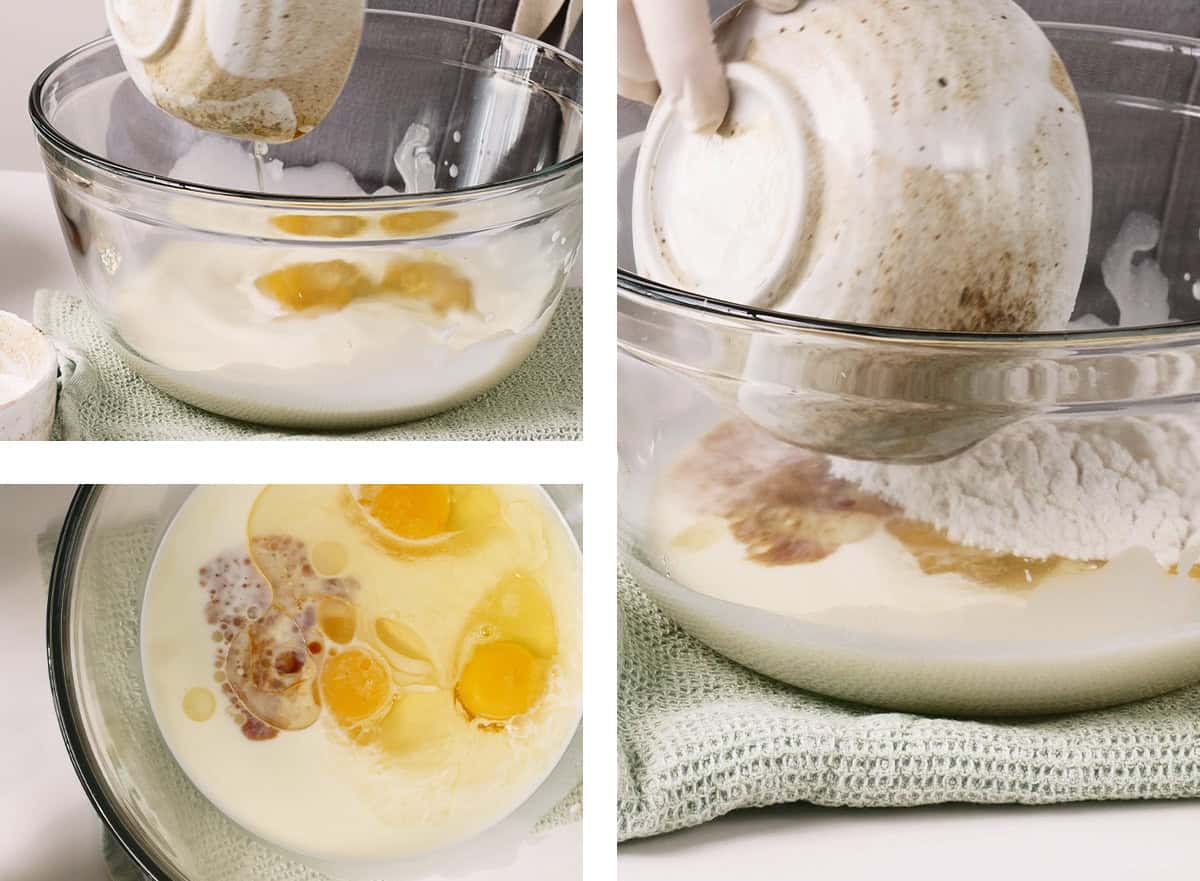
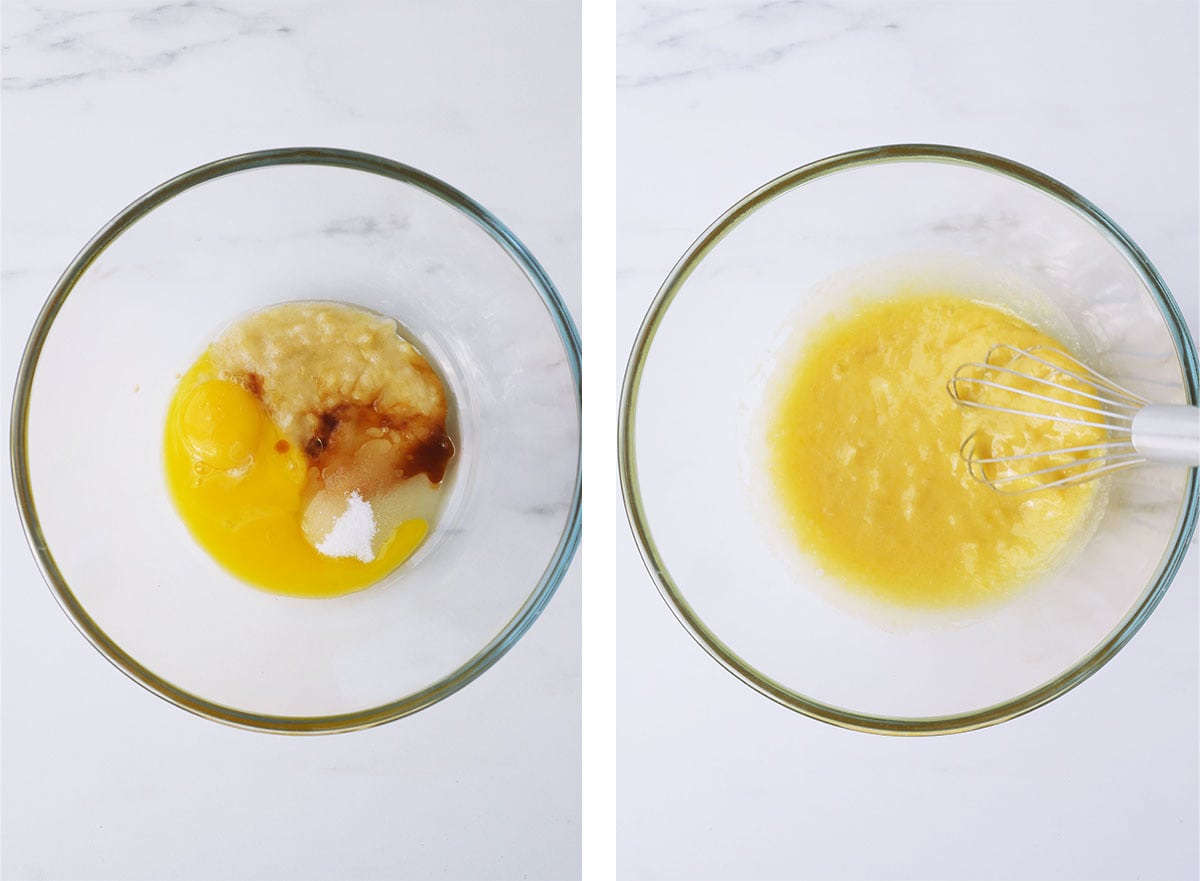
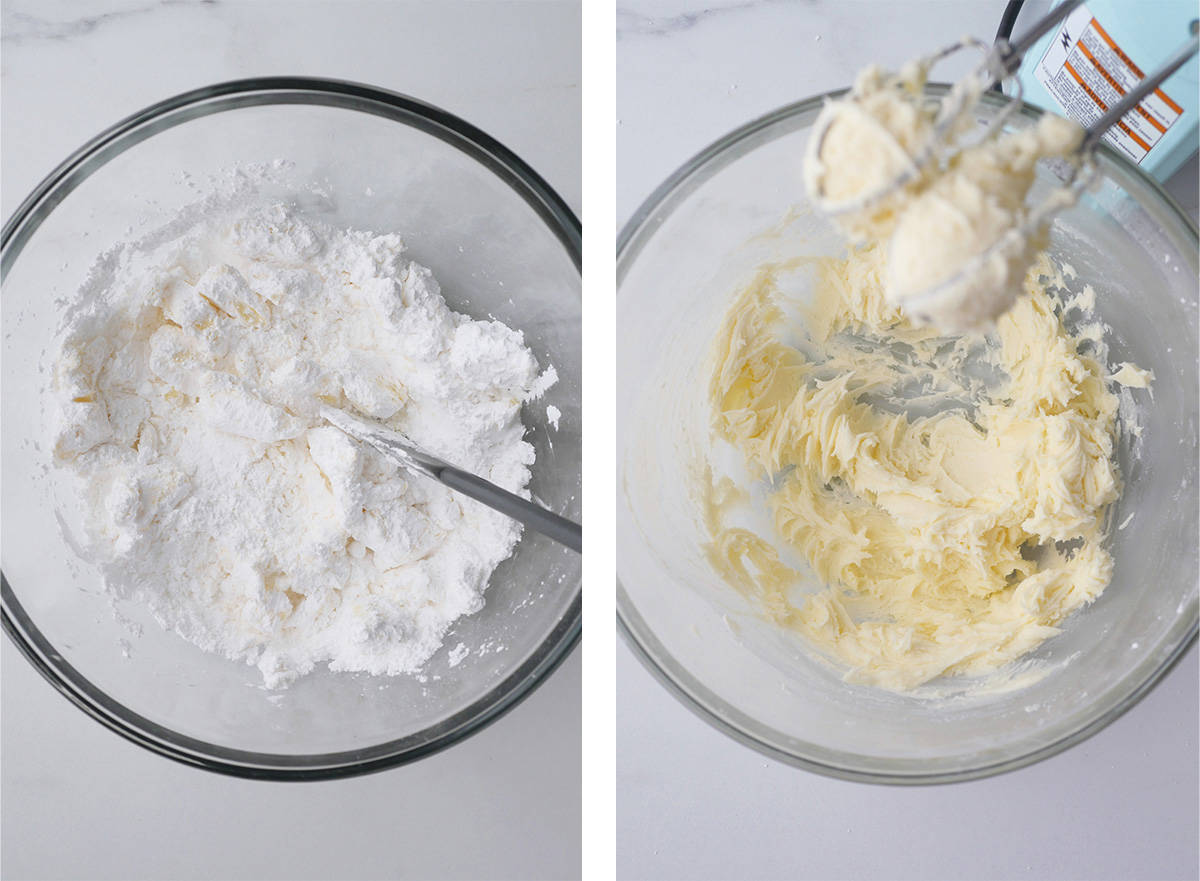
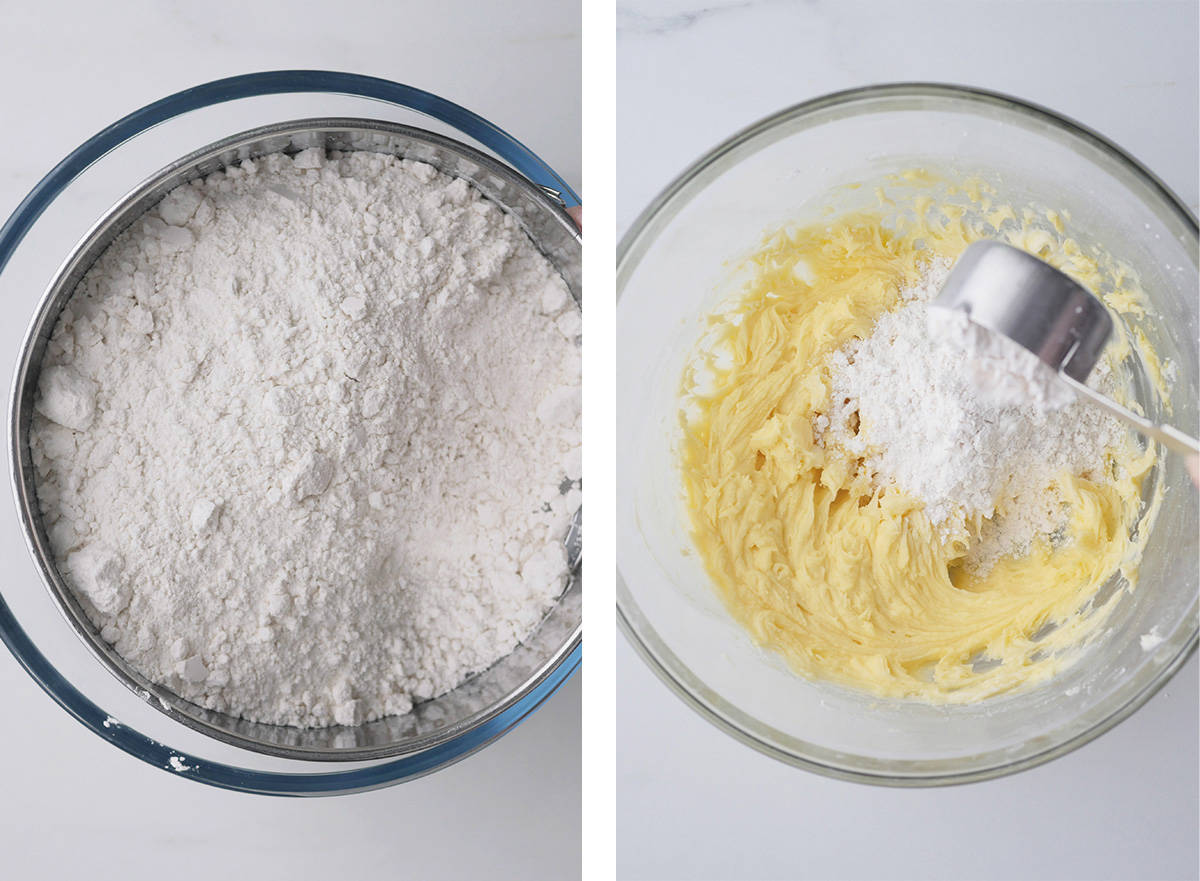
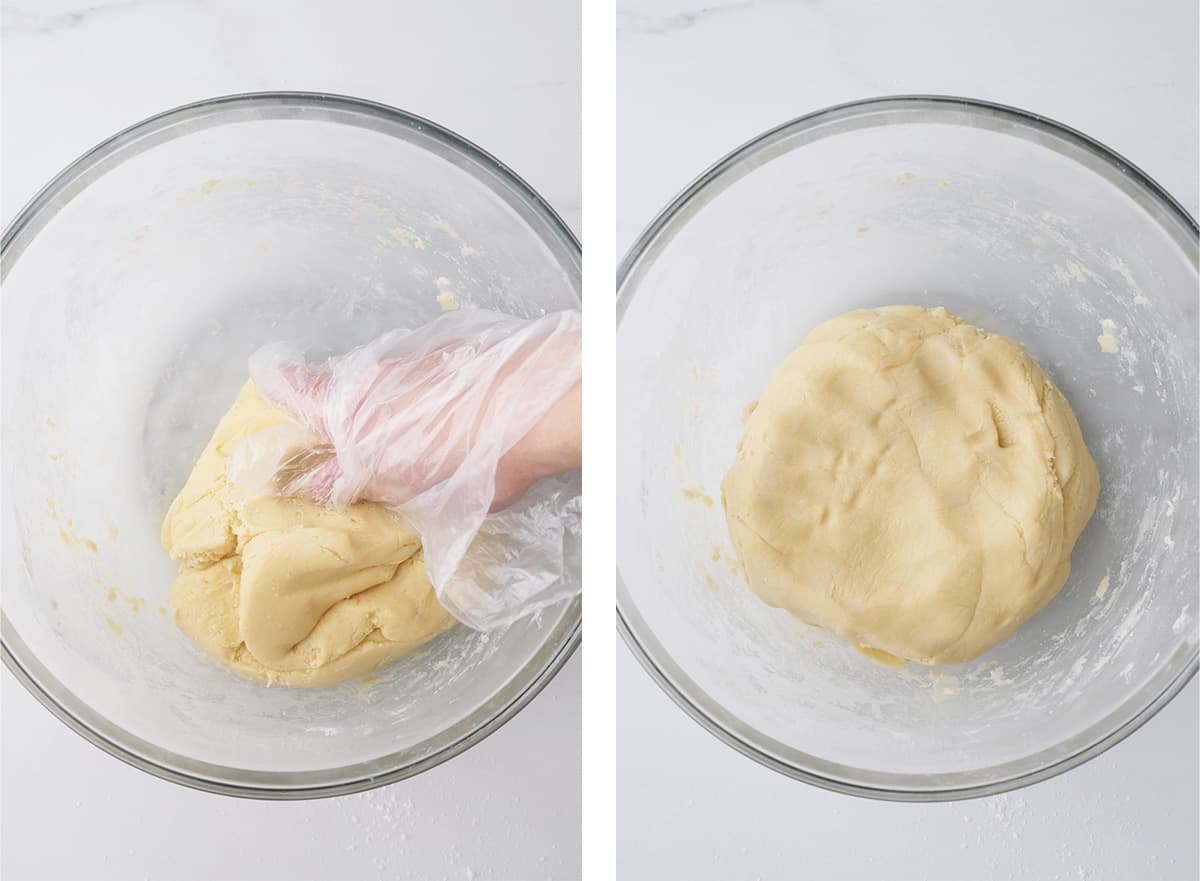
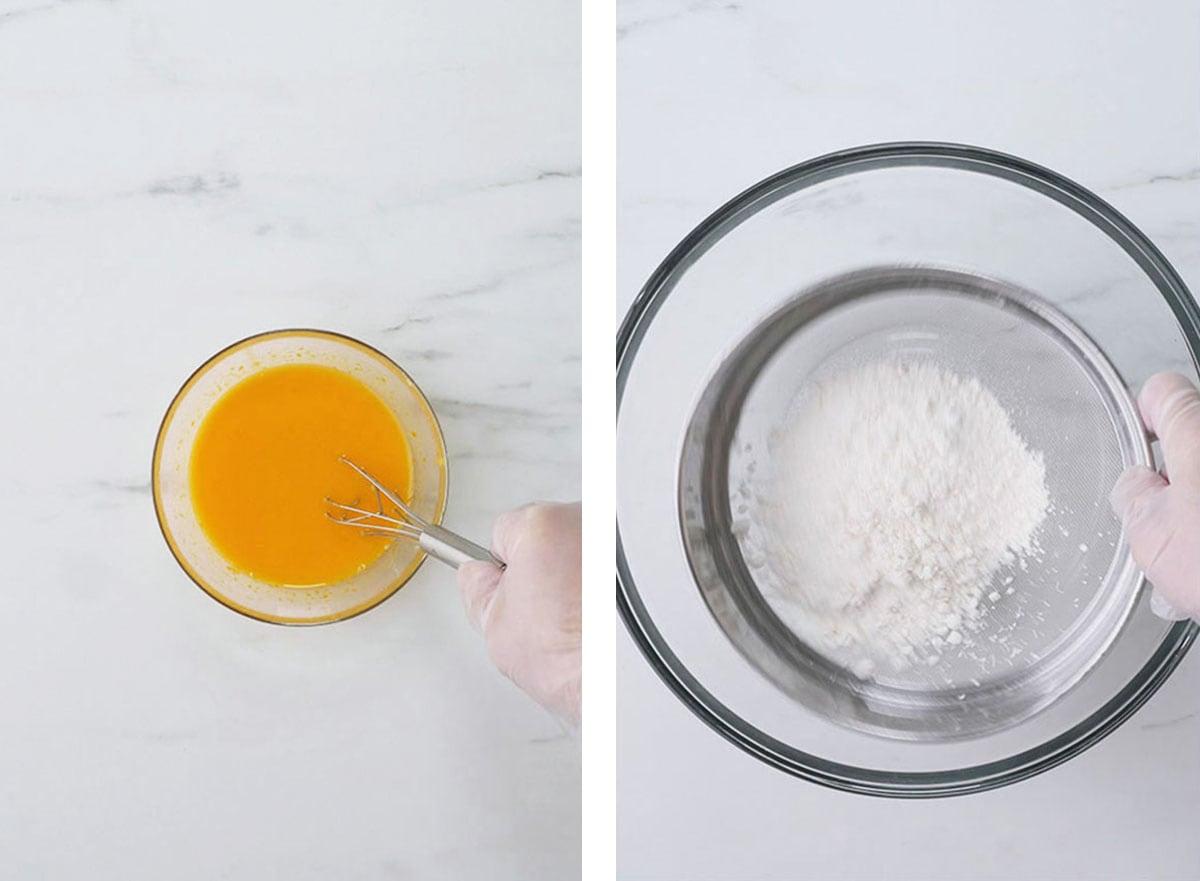
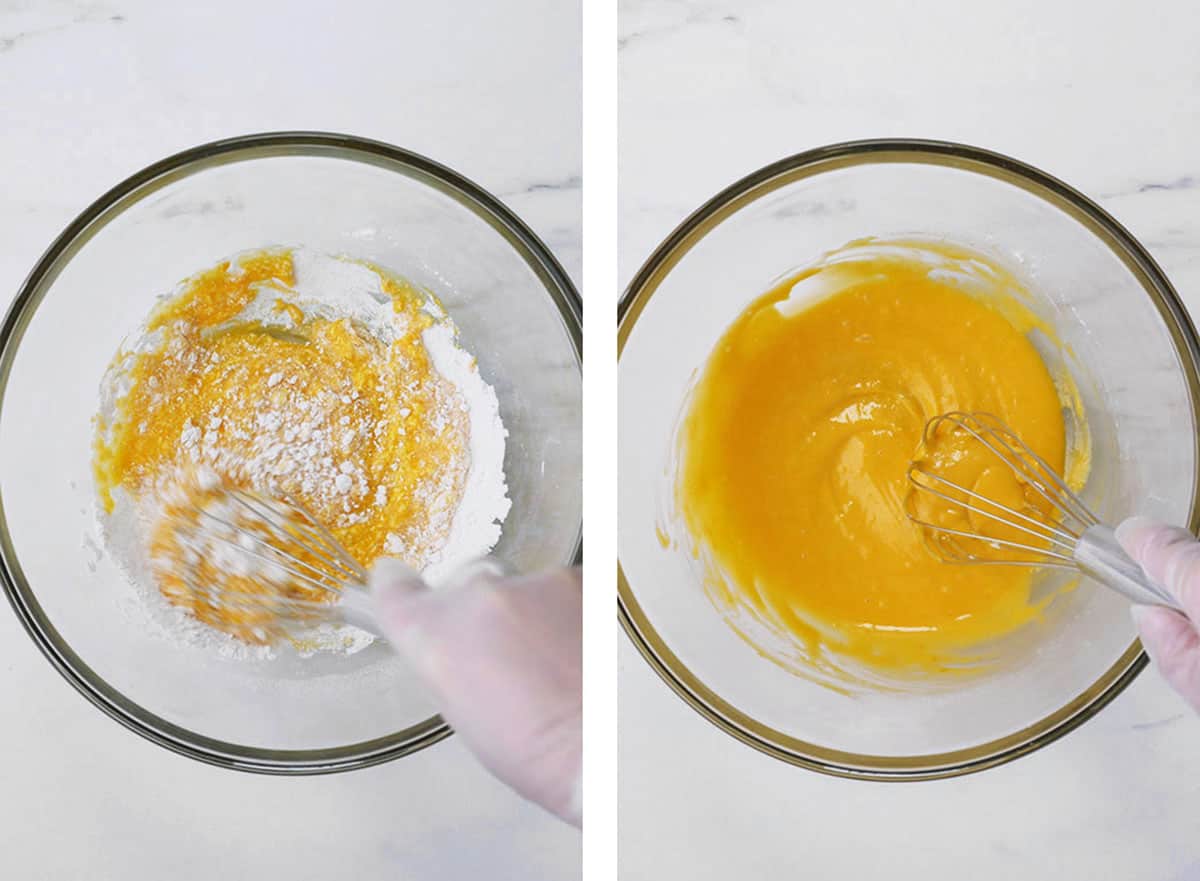
Combine Wet and Dry Ingredients Together
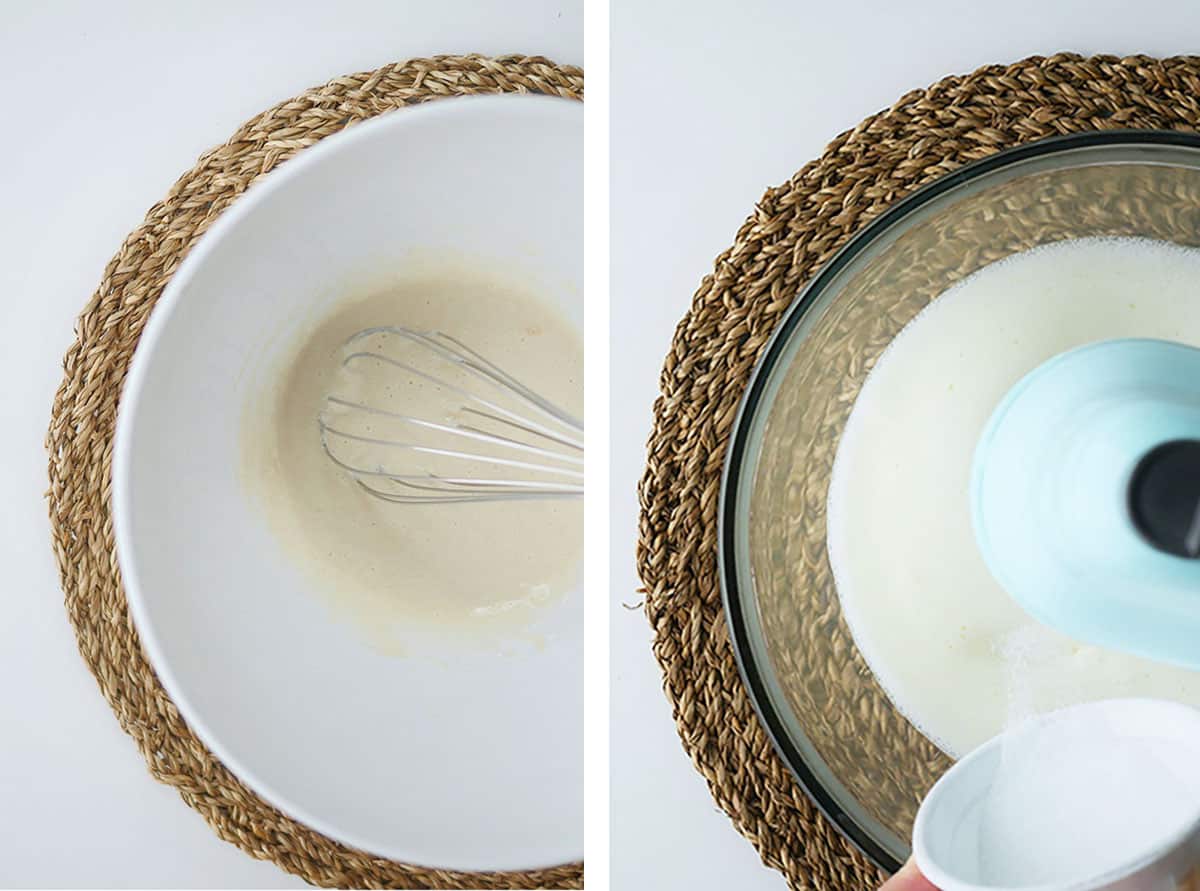
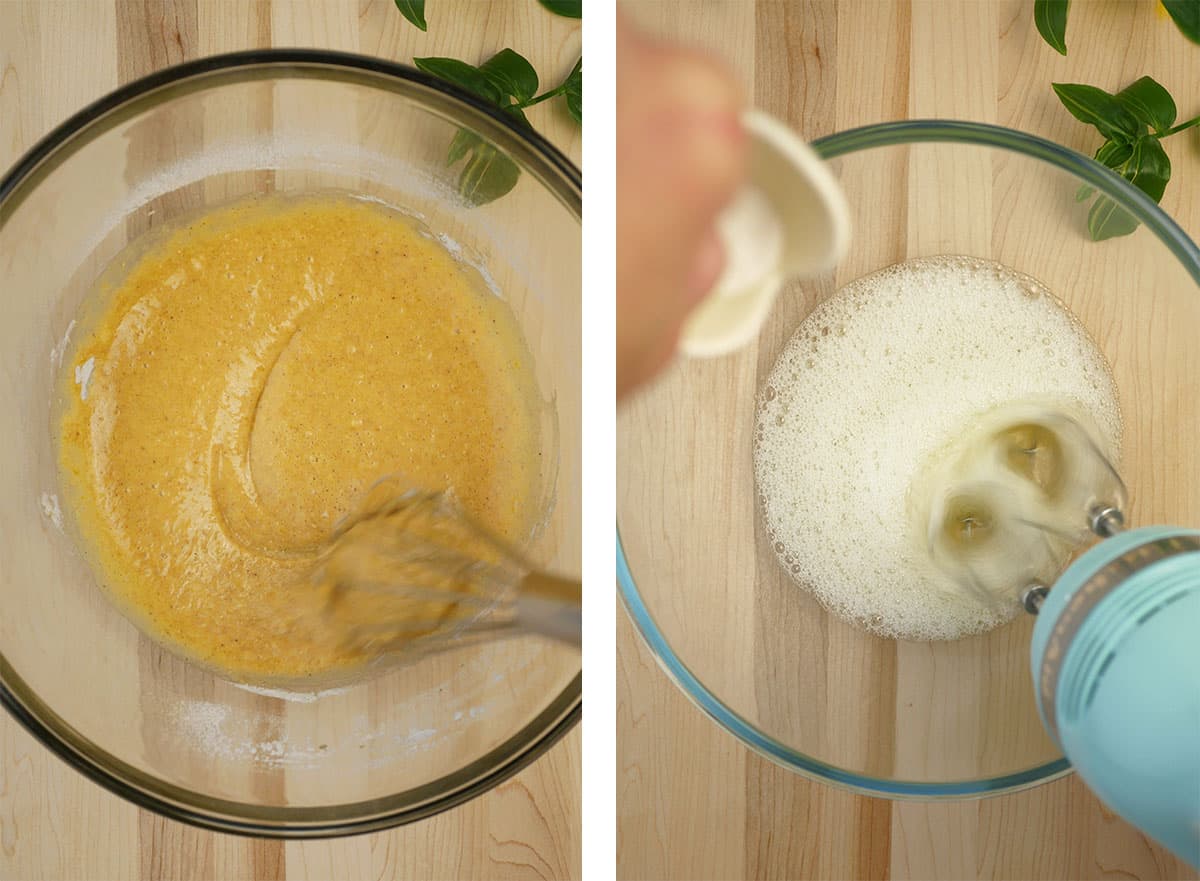
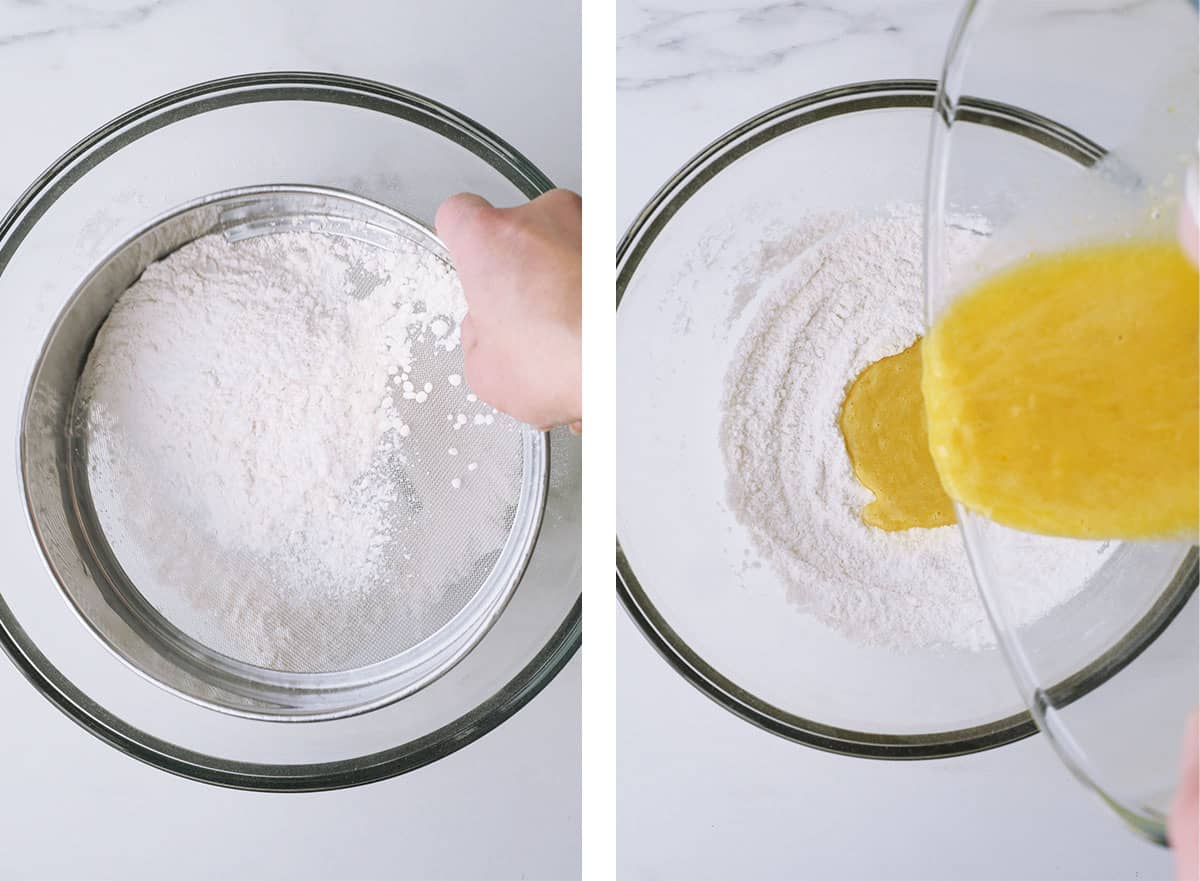
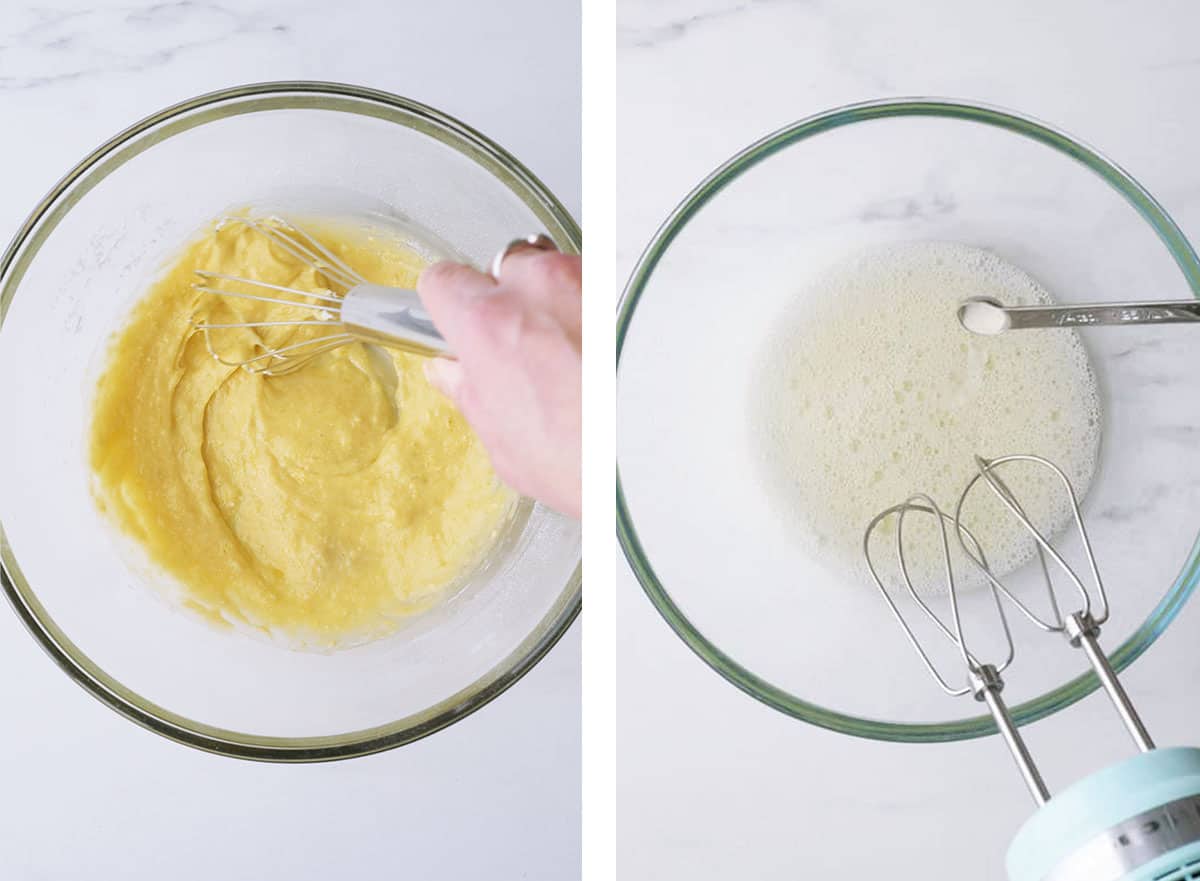
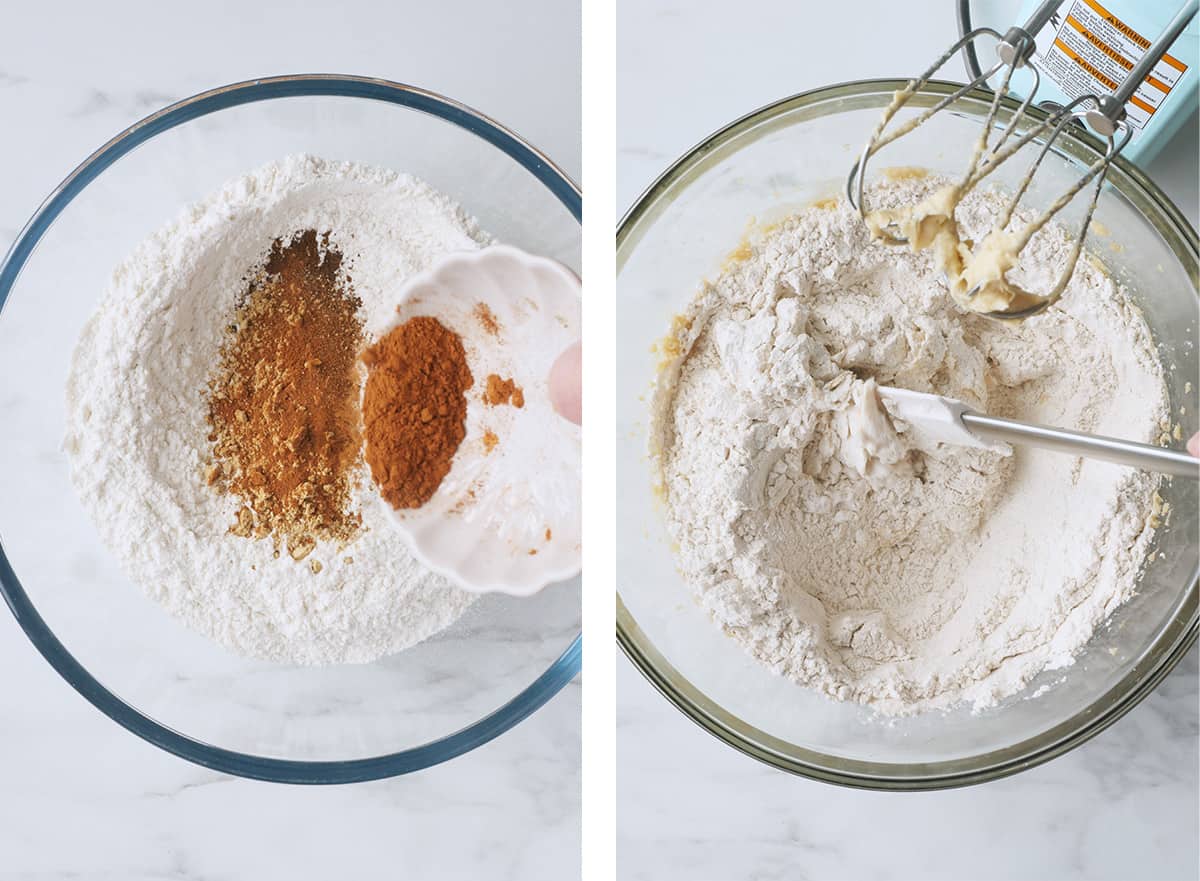
Line the bottom of the cake pan(s) with parchment paper. Preheat oven to 325 F. In a large mixing bowl, sift in dry mix. Stir to combine. Create a well in the center. Inside it, add the wet mix. With a whisk, stir to combine until fully incorporated with no visible lumps, do not over mix. Set this milk-flour mixture aside.
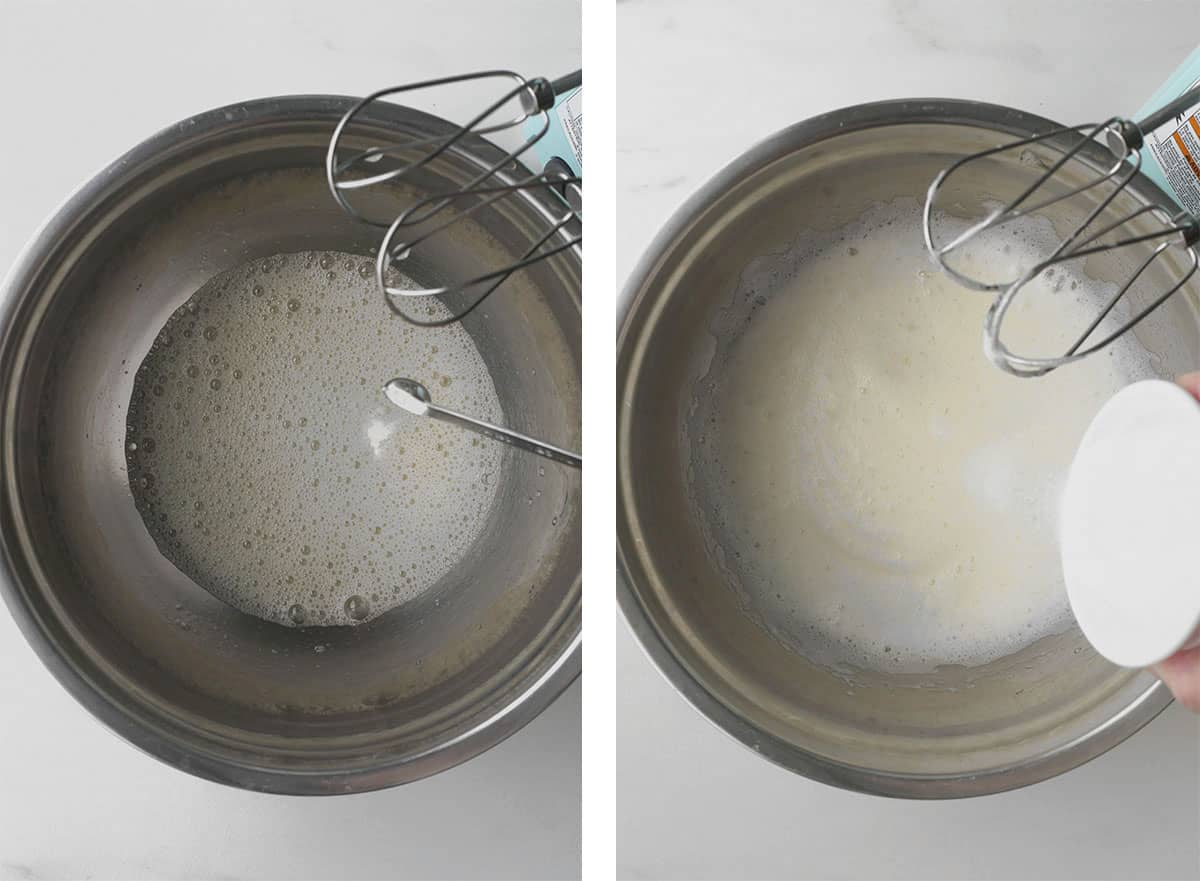
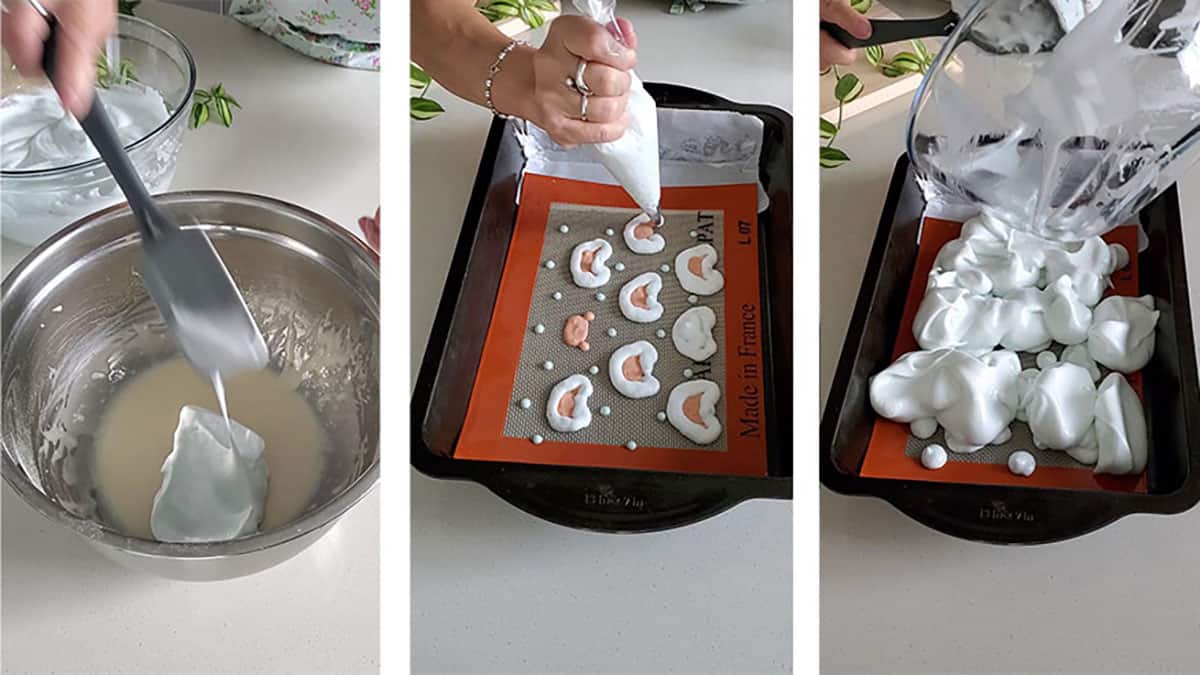
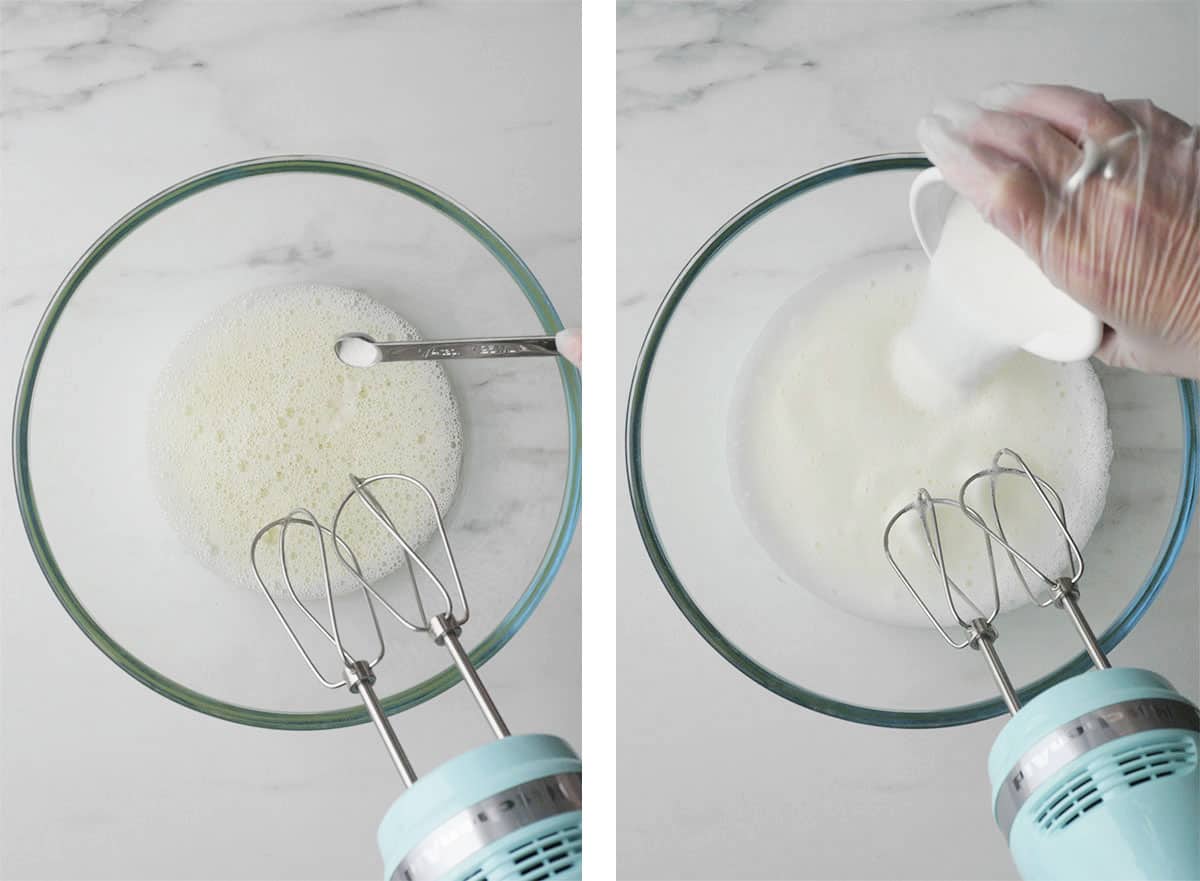
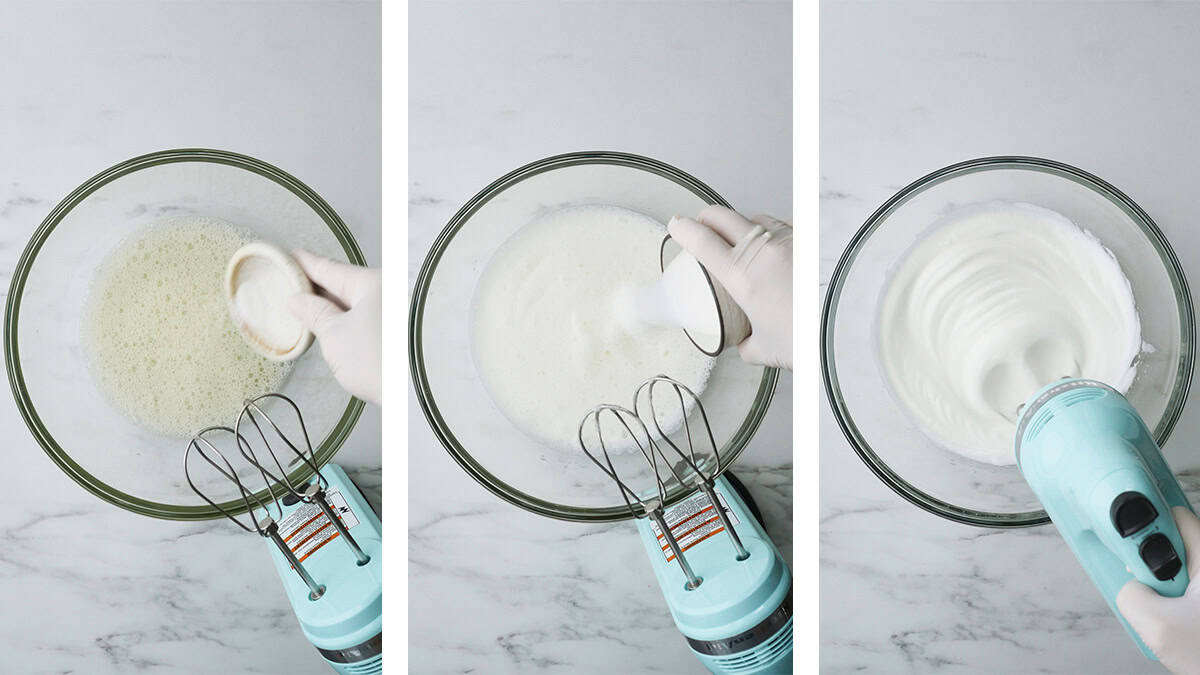
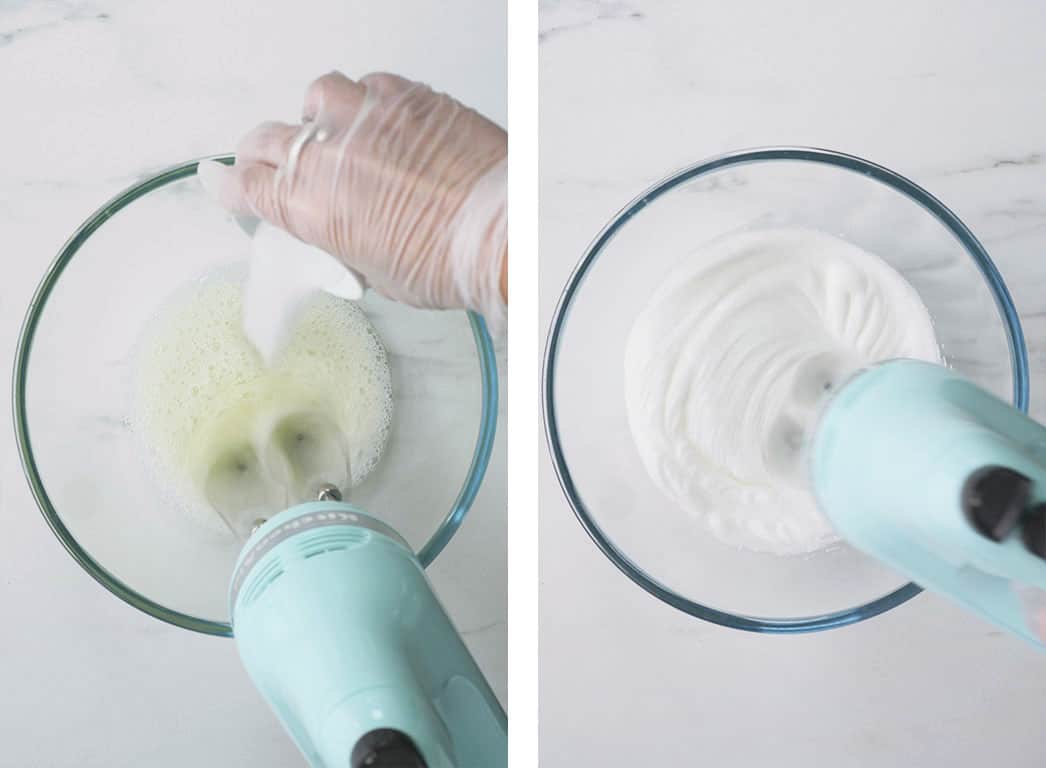
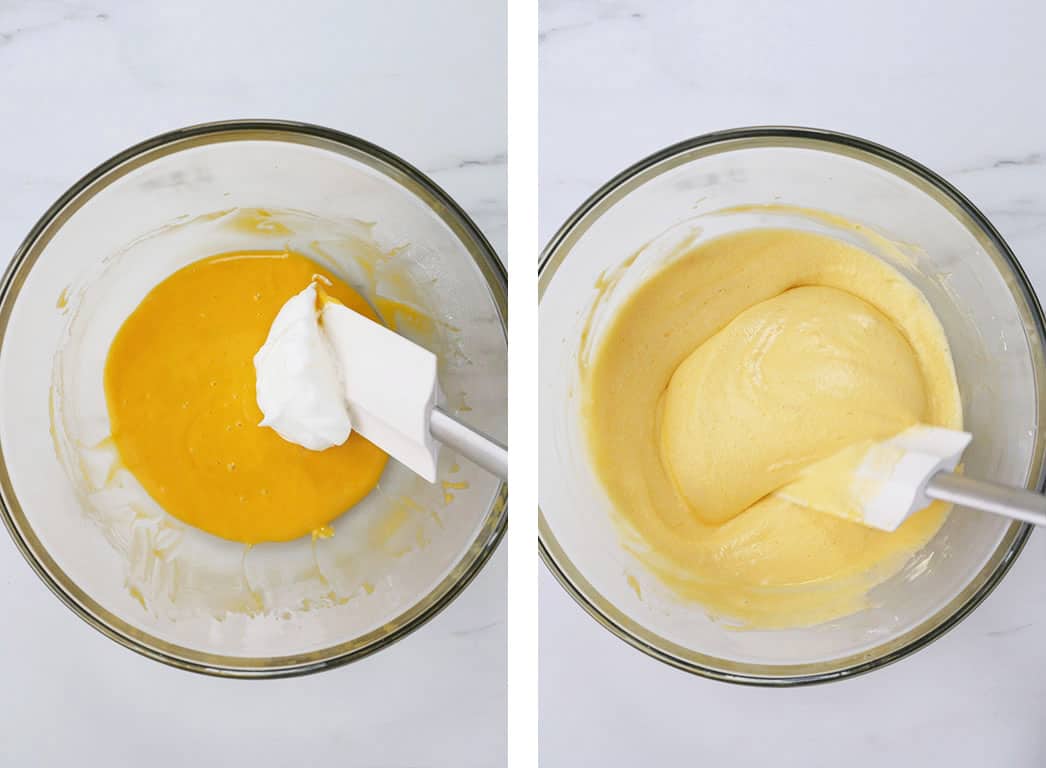
Make Meringue
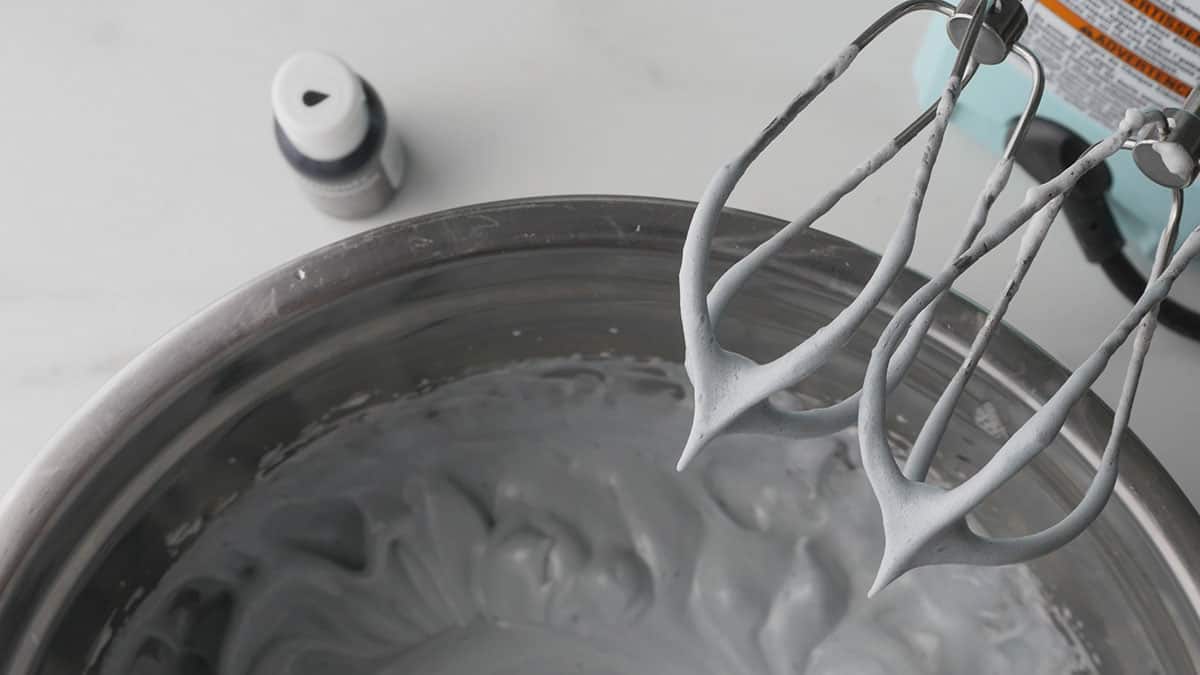
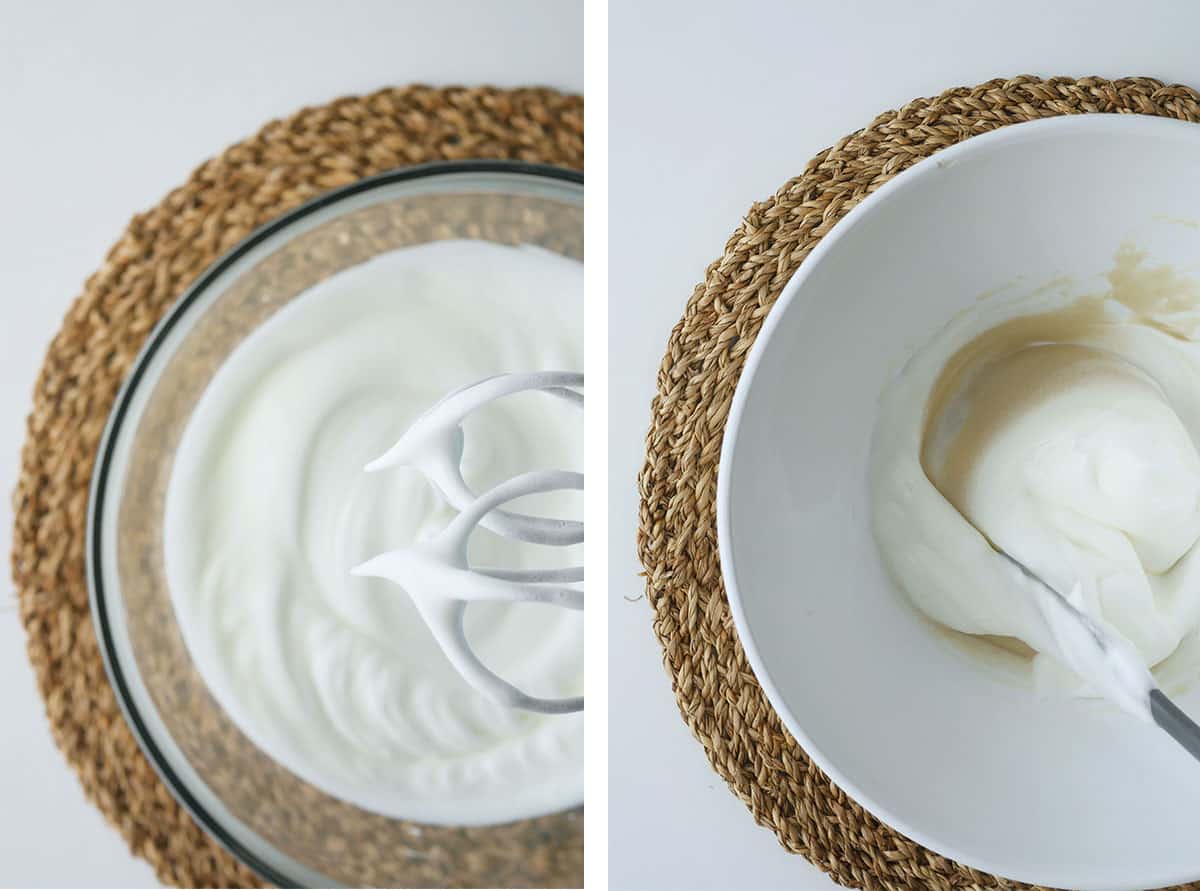
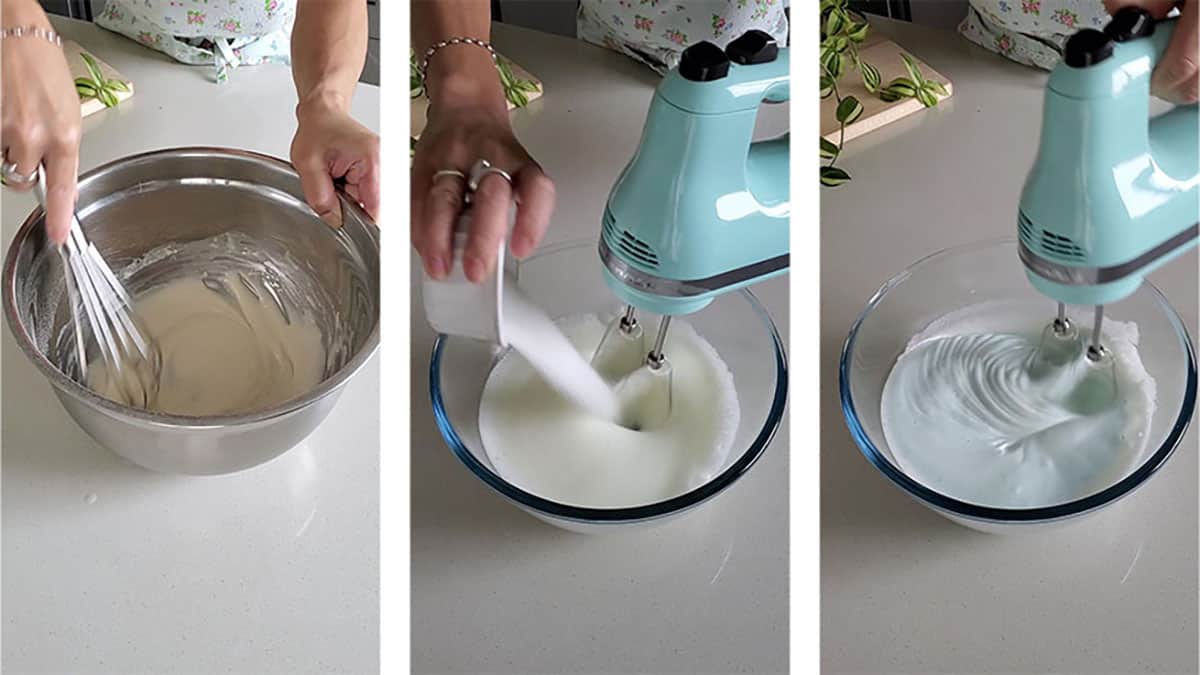
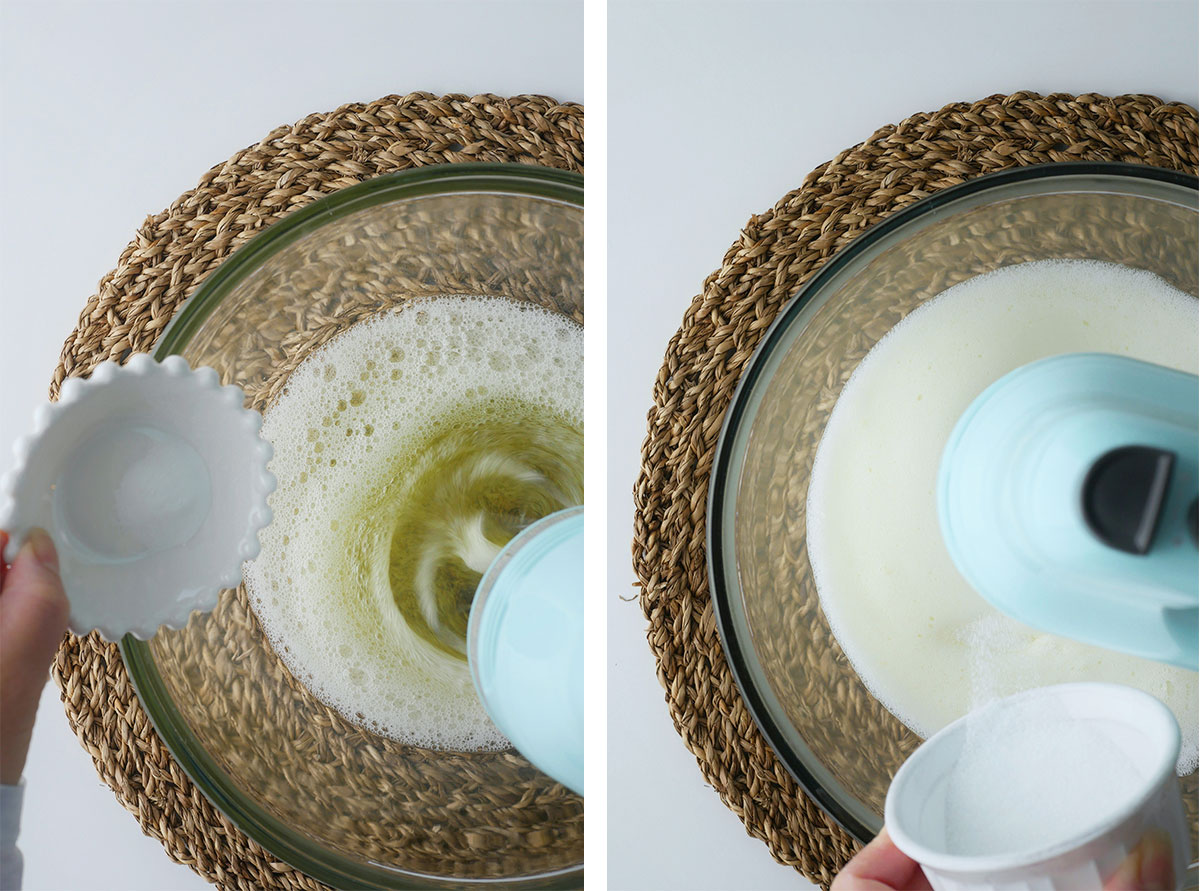
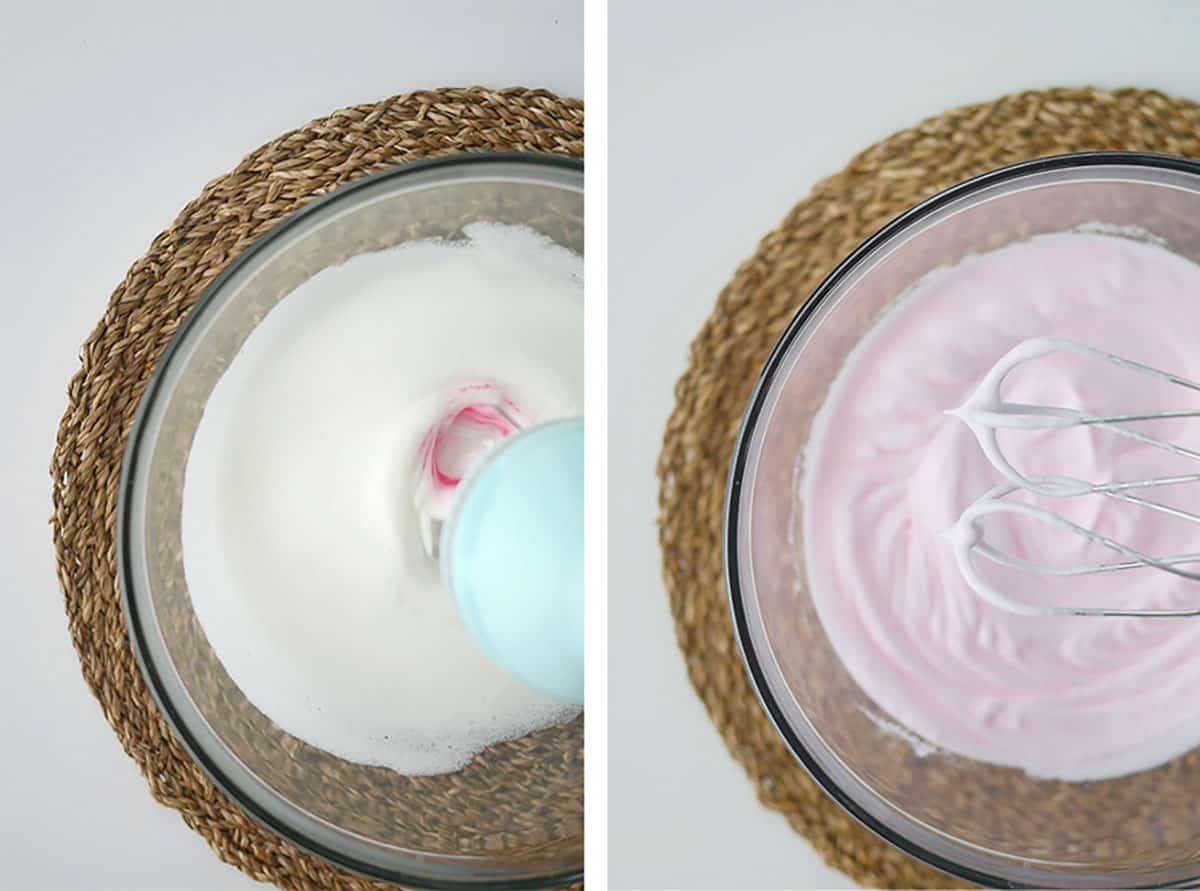
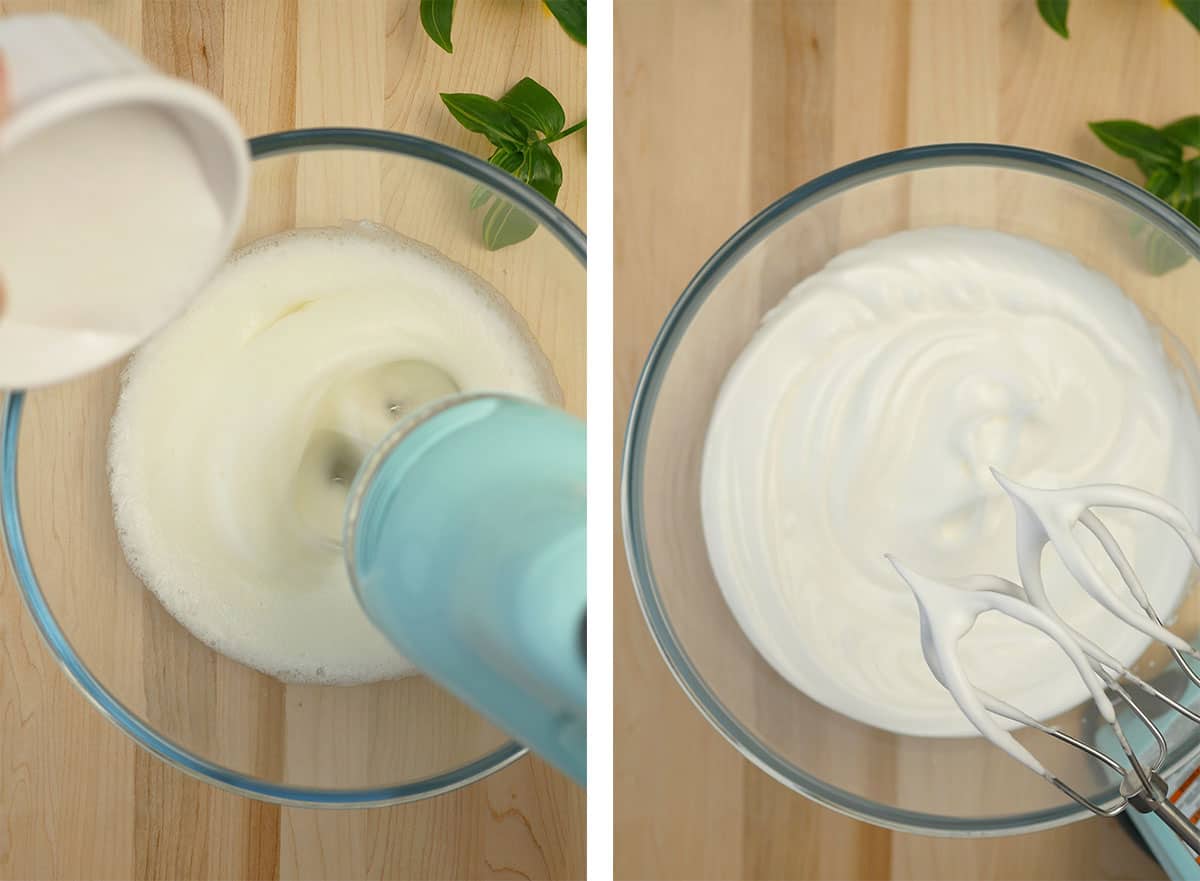
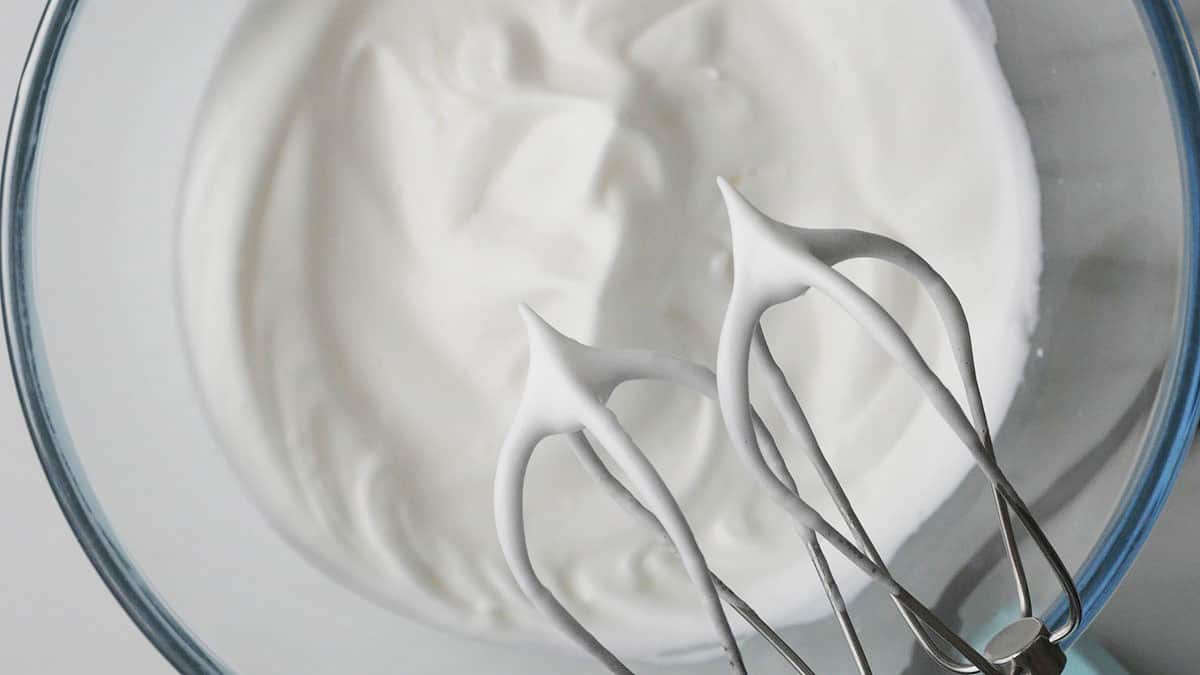
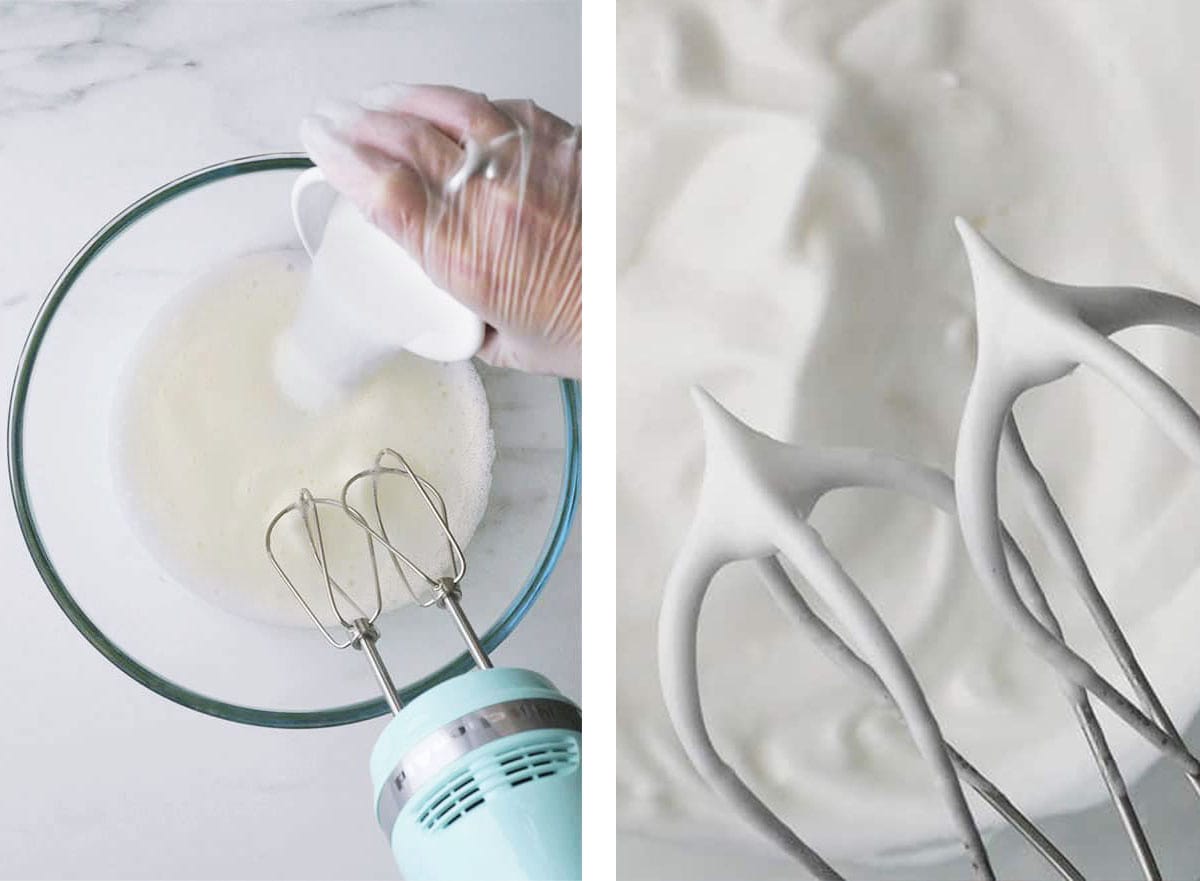
In a clean and dry, non-plastic mixing bowl, whip egg whites on slow speed until frothy, add cream of tartar. Increase speed to medium, once the whites become opaque and bubble size have decreased, add sugar a little bit at a time. Increase speed to med-high, whip until stiff peaks.* This is the meringue.
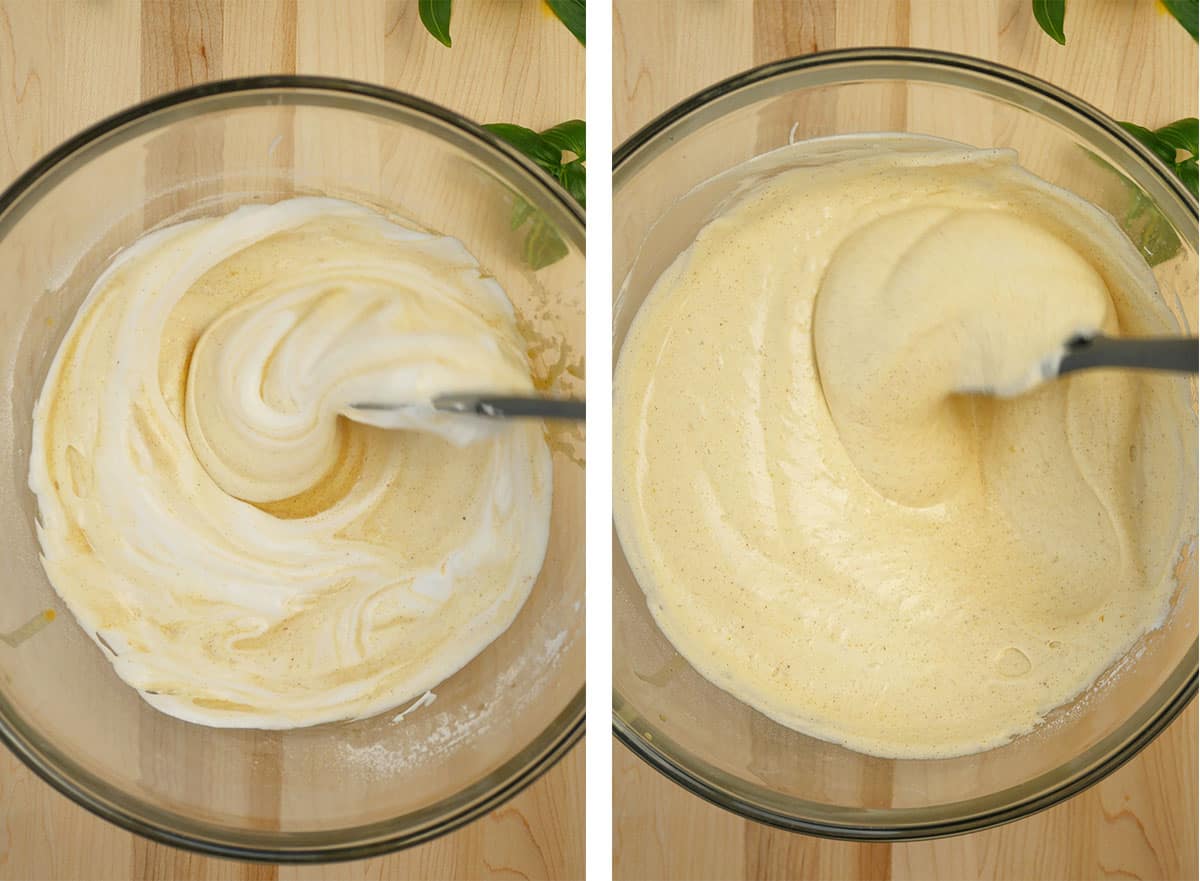
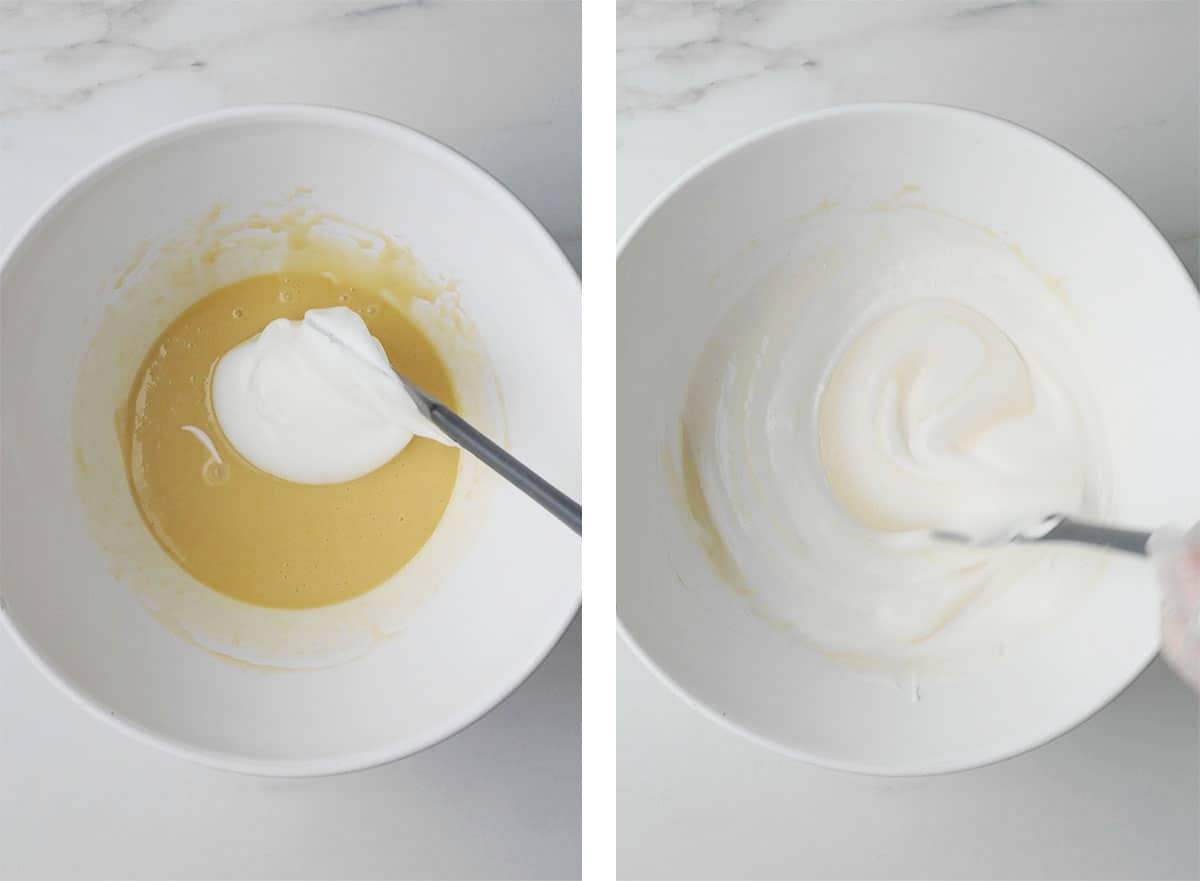
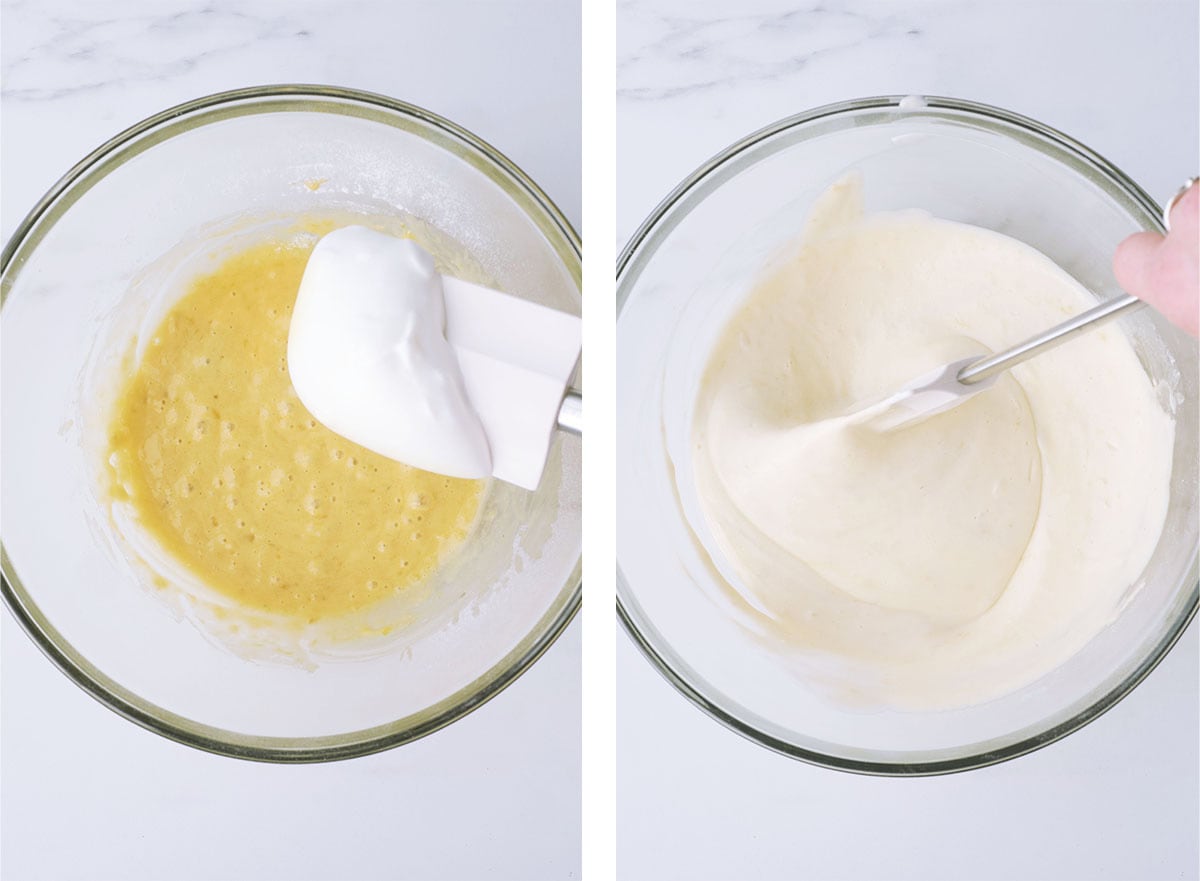
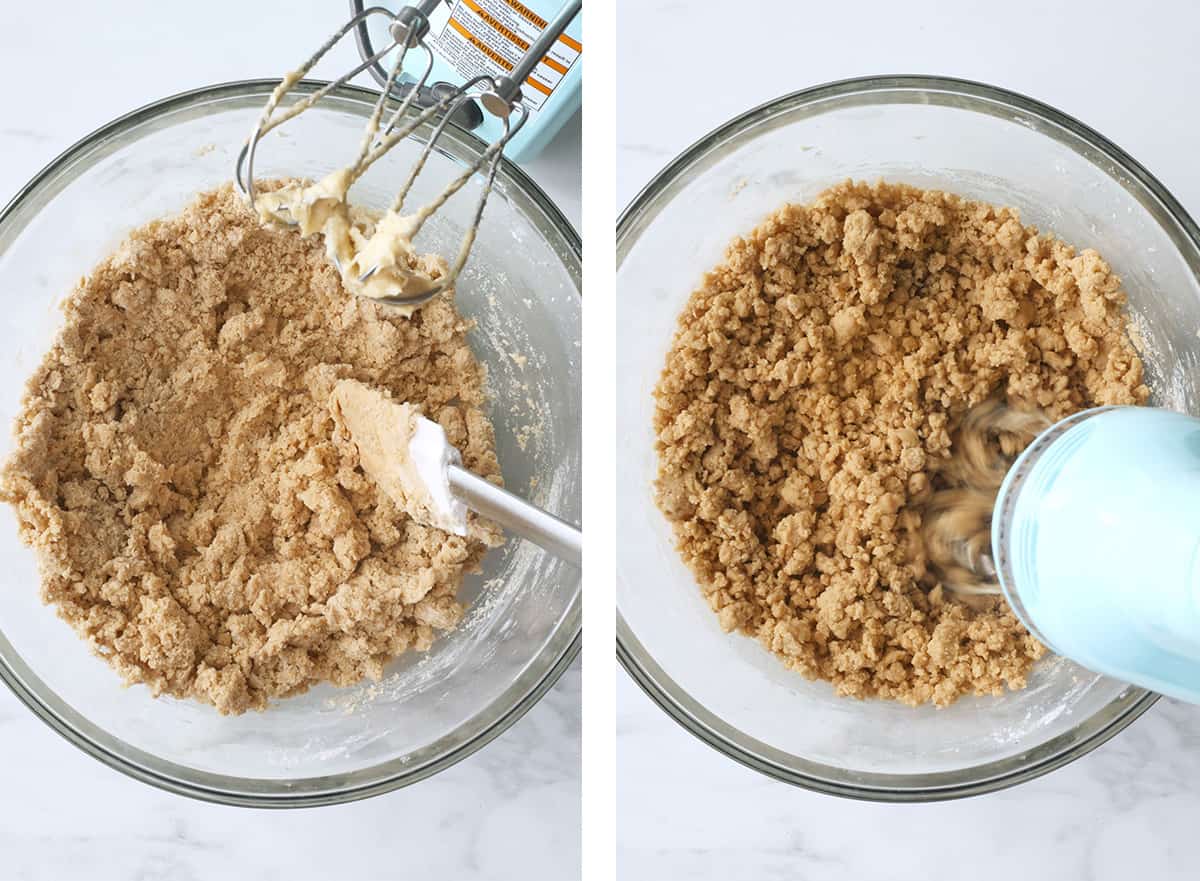
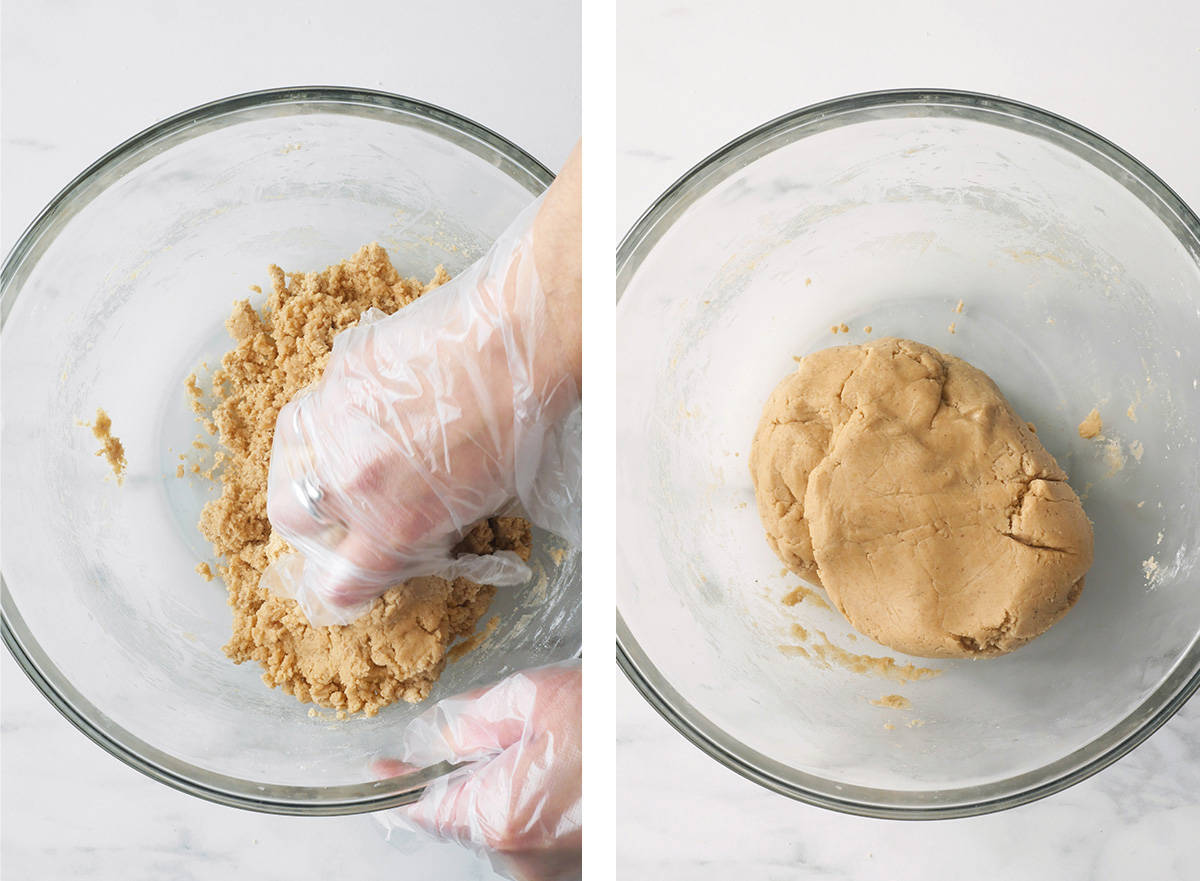
Fold Meringue Into Batter
Gently fold ⅓ of the meringue into the milk-flour mixture to get it moving. Once incorporated, fold in the rest of the meringue. Do not stir. Use batter immediately.
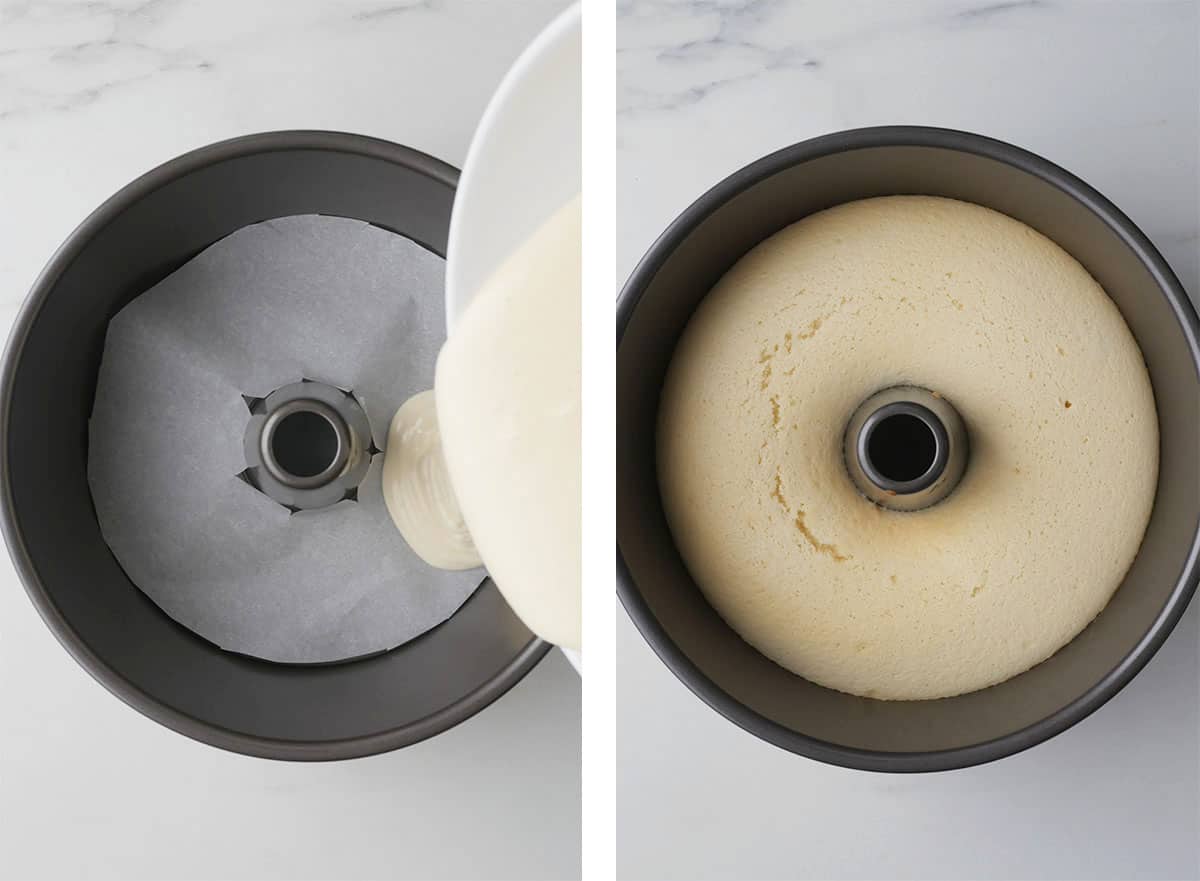
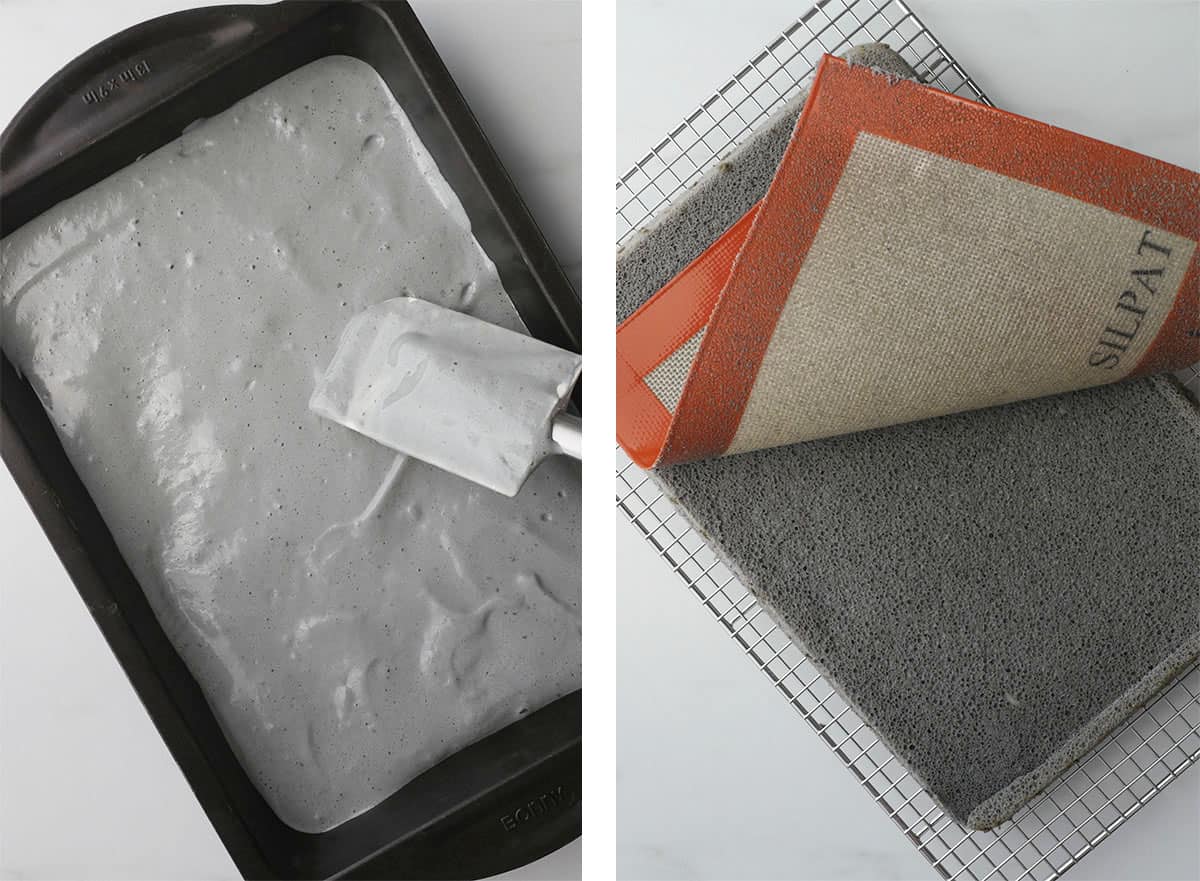
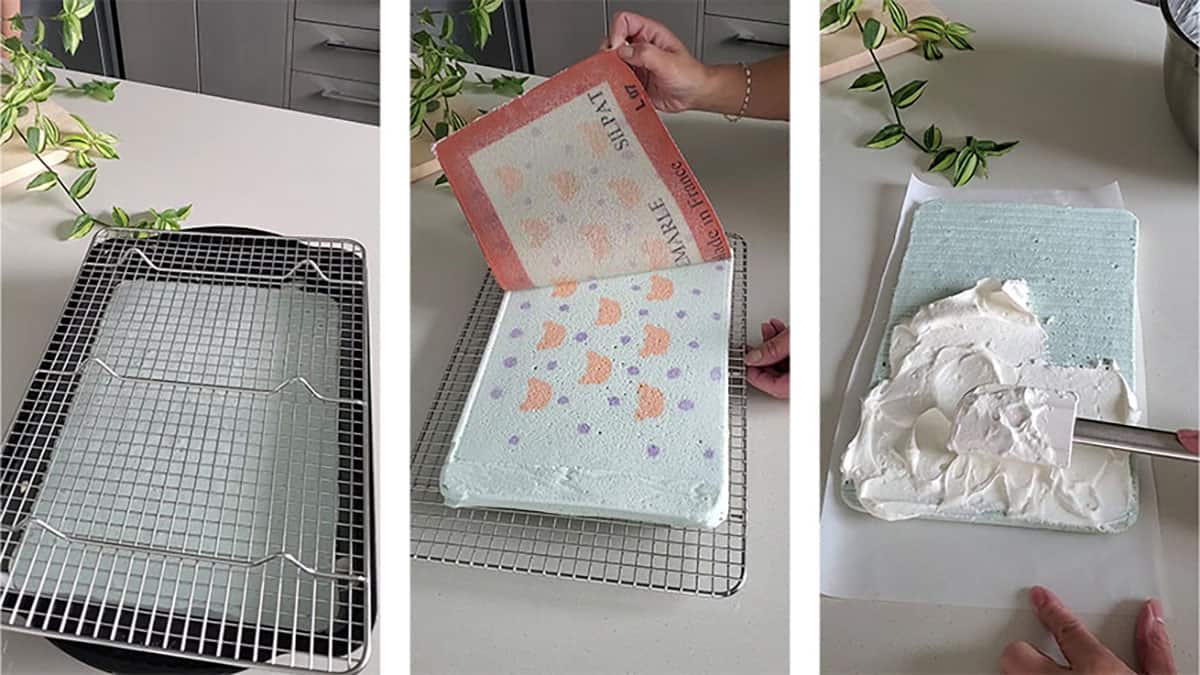
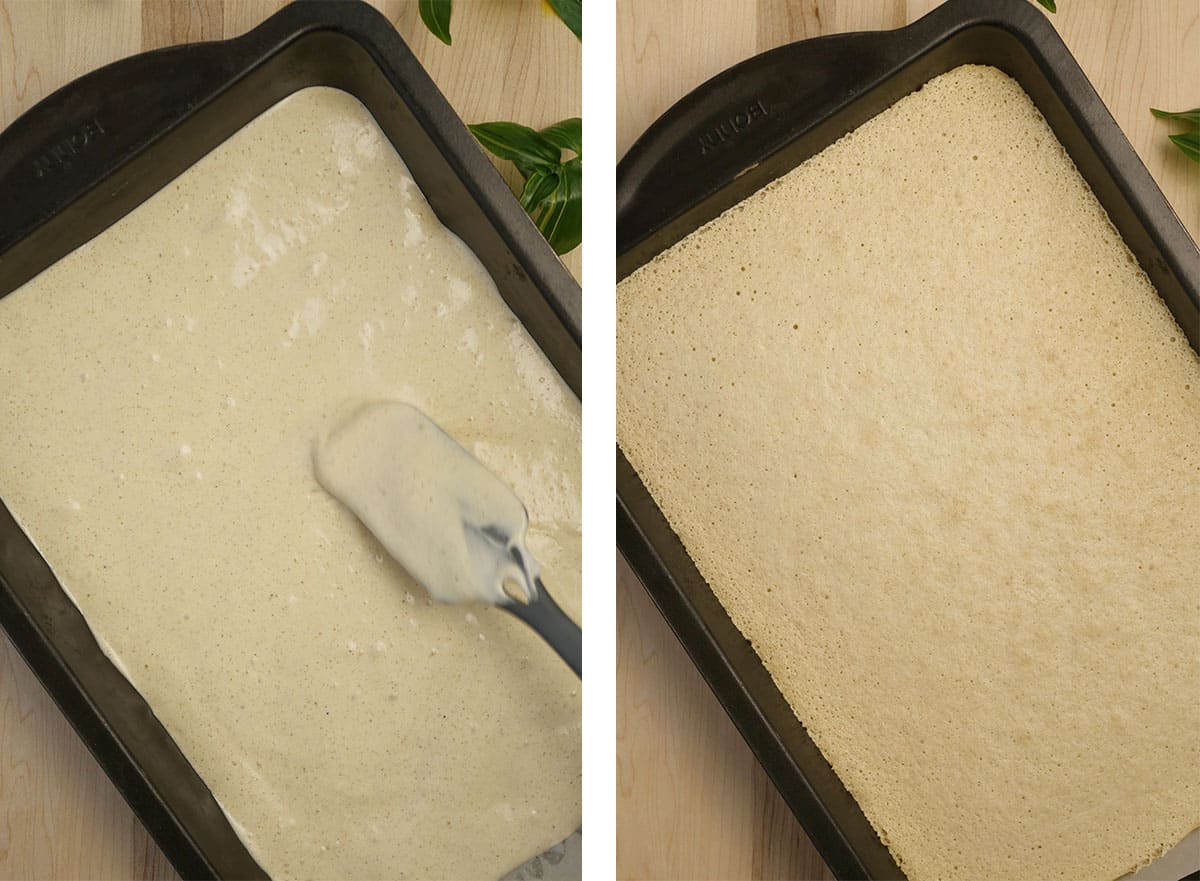
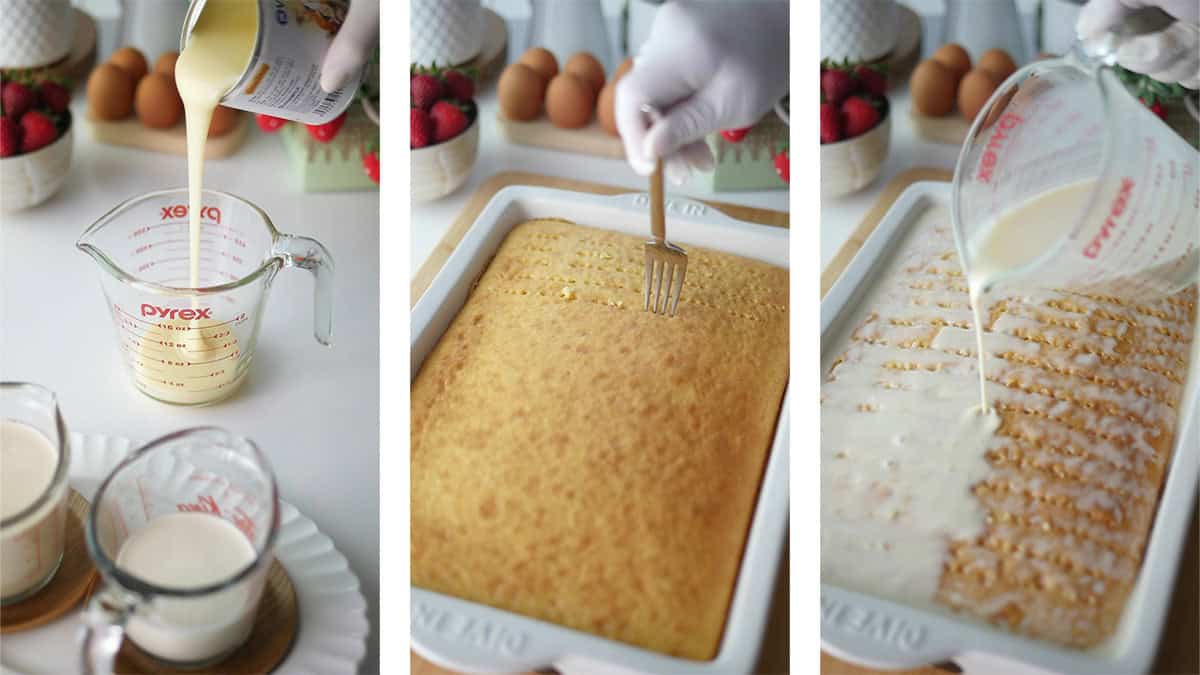
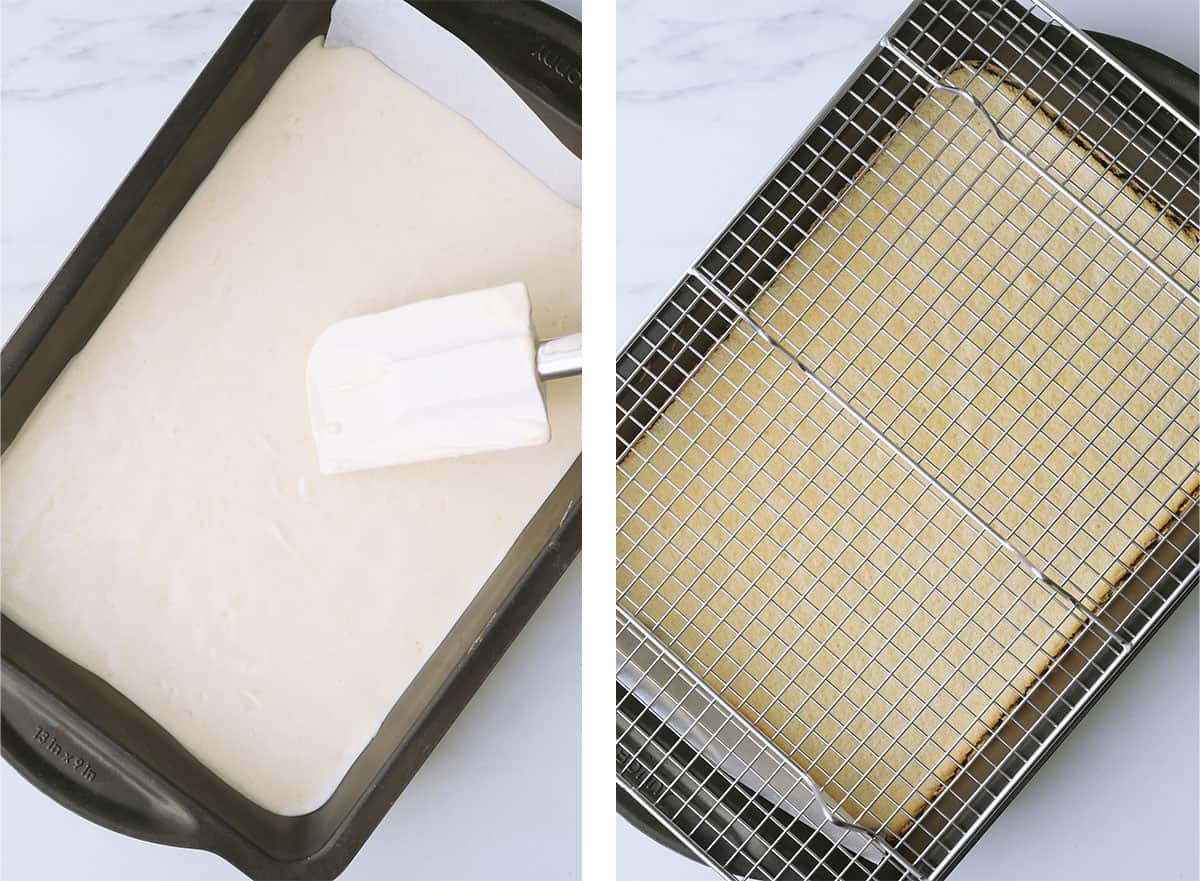
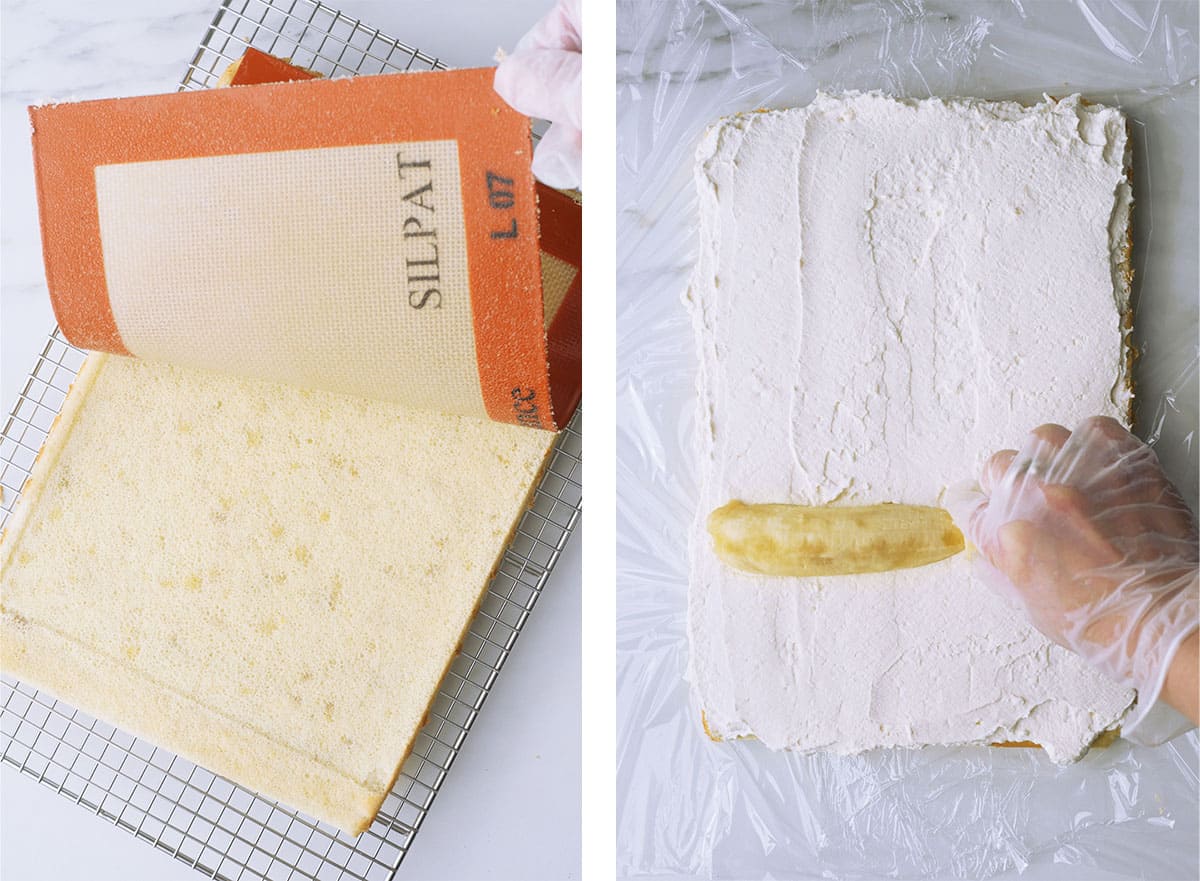
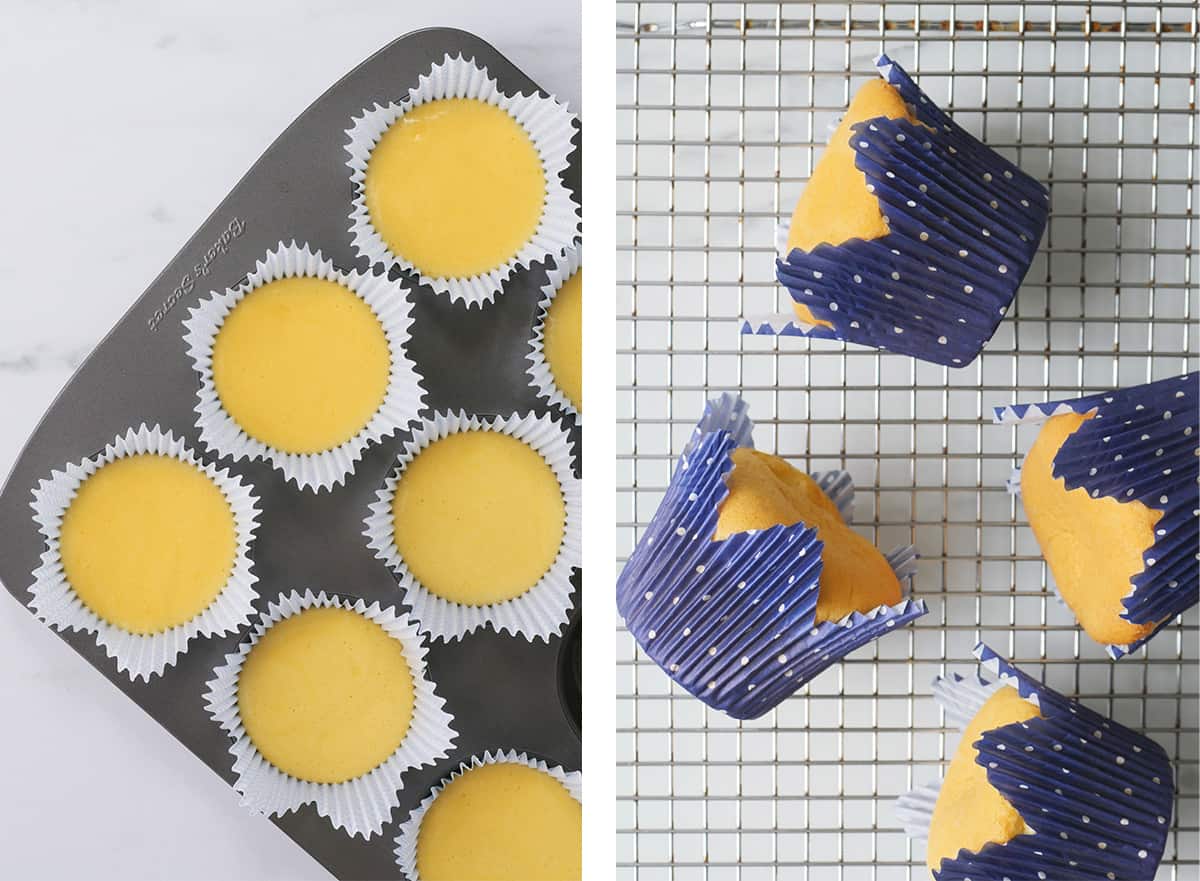
Bake
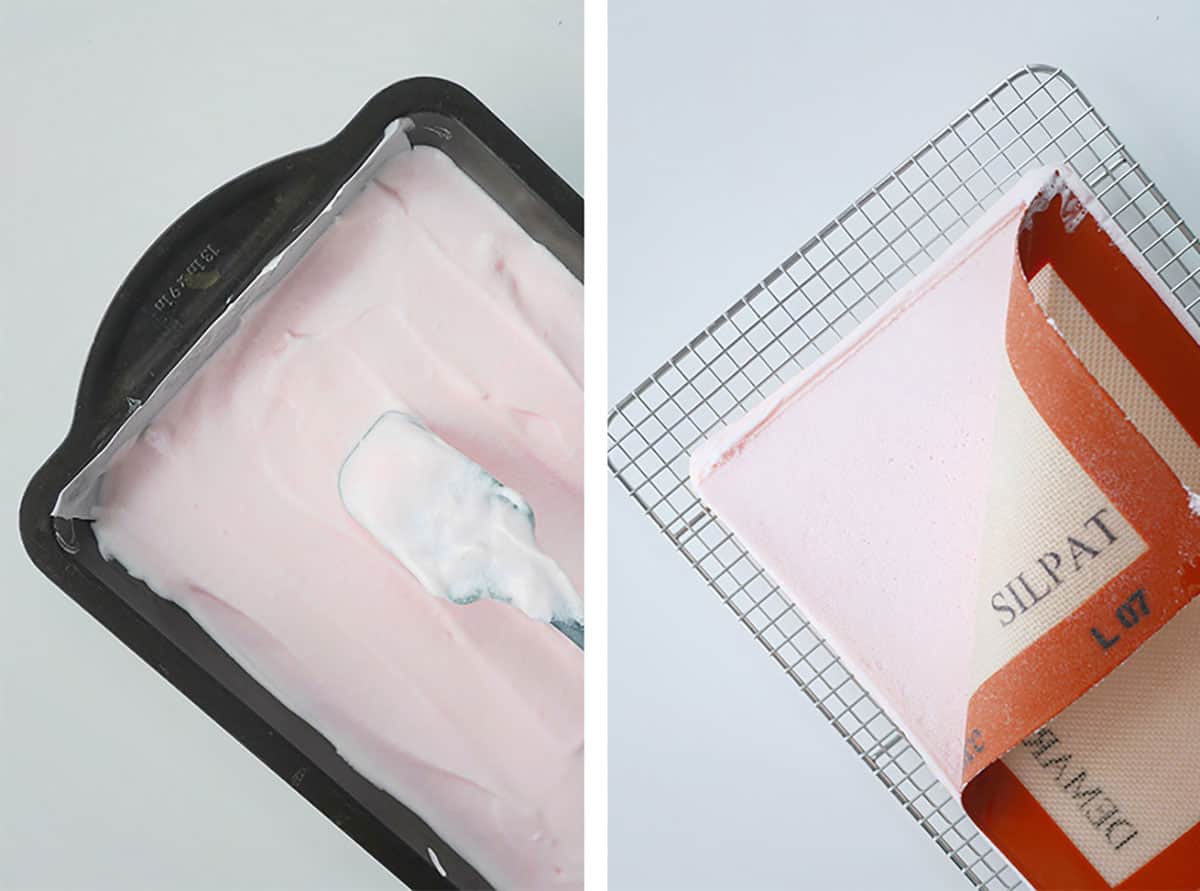
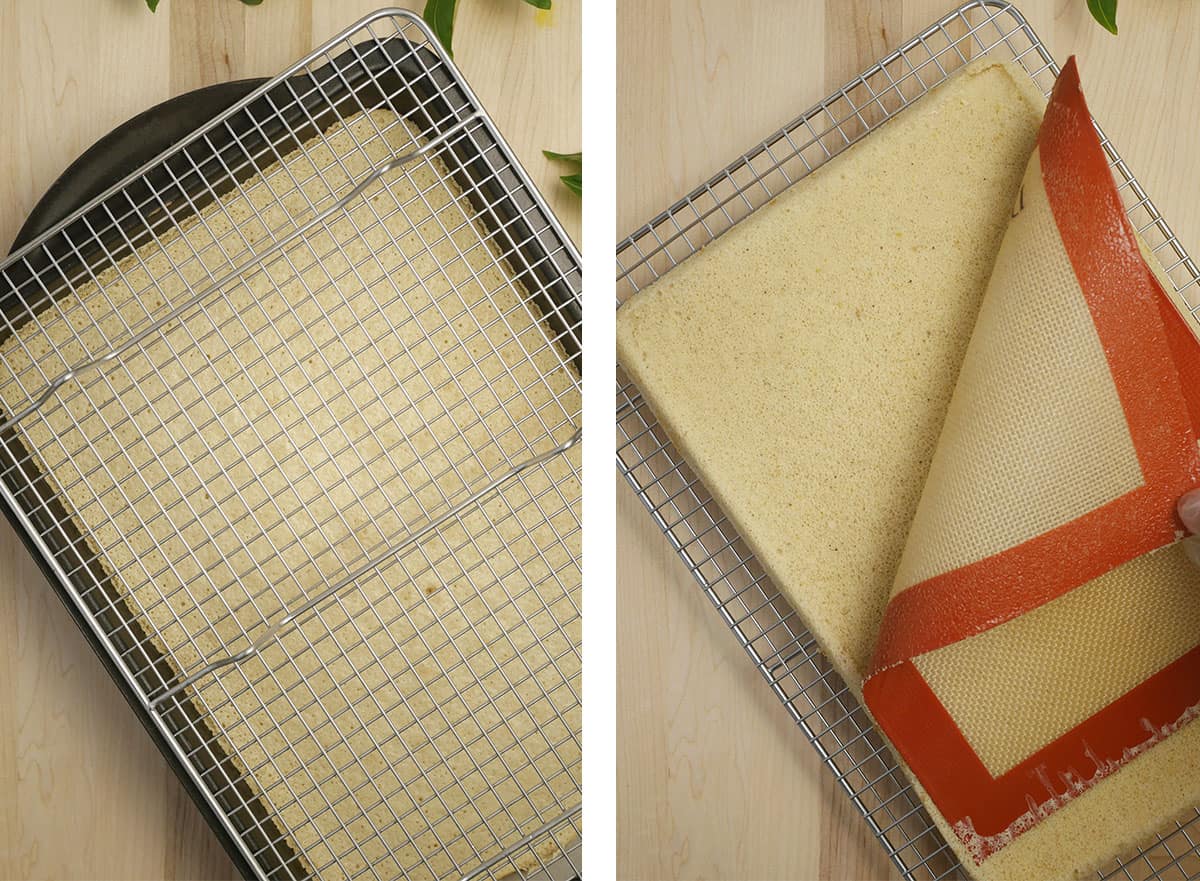
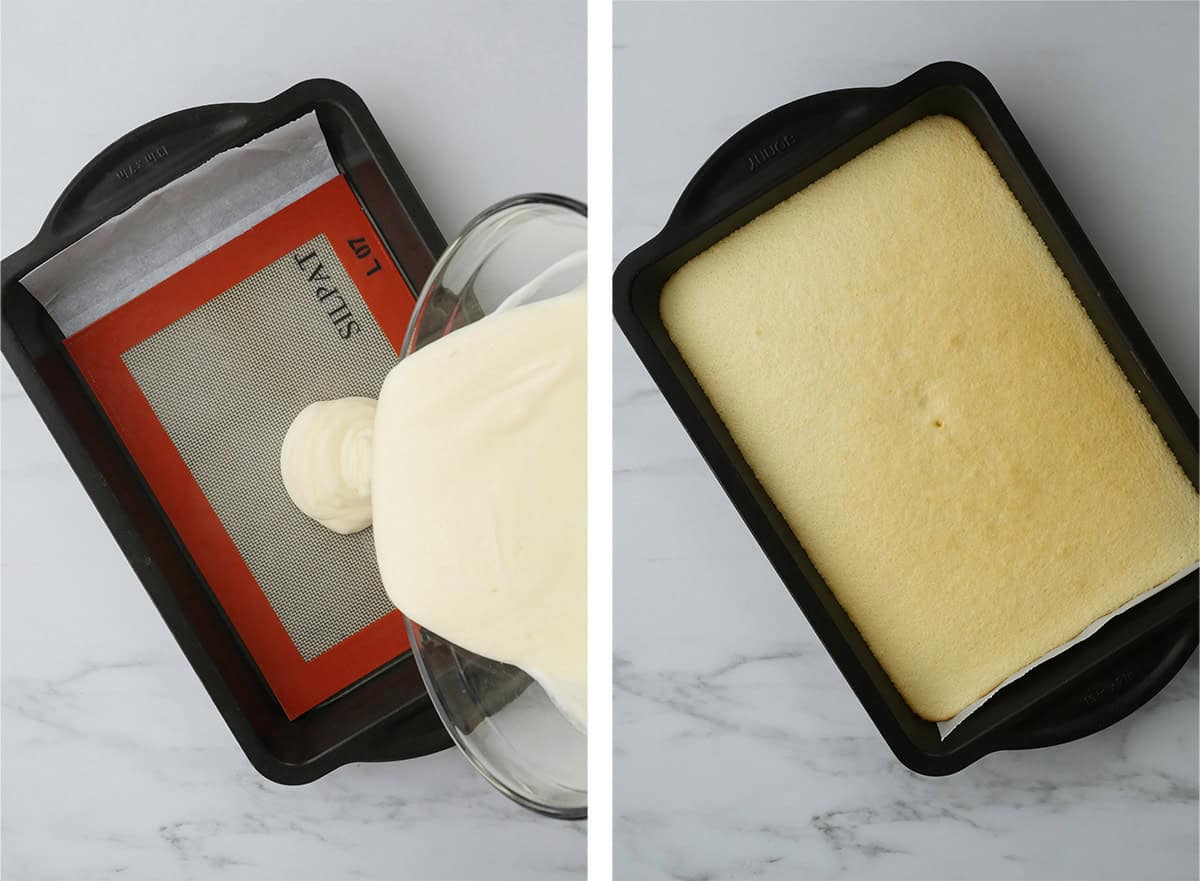
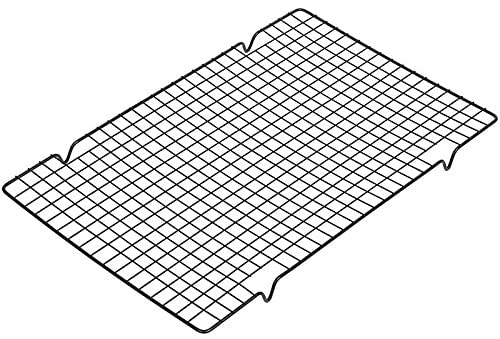
Pour batter into lined cake pan from one spot, spread out the batter evenly with an angled spatula. Tap the pan on the counter to release large air pockets. Bake for 25-28 min. until a skewer pulls out clean and the cake springs back in the center. Flip the cake pan upside down on the cooling rack and let cool for 30 min. before removing cake from pan. While the cake is cooling, prepare ingredients and supplies for the mango mousse and then work on Step 1-3 of the Assembly BEFORE starting the mousse.

Mango Mousse
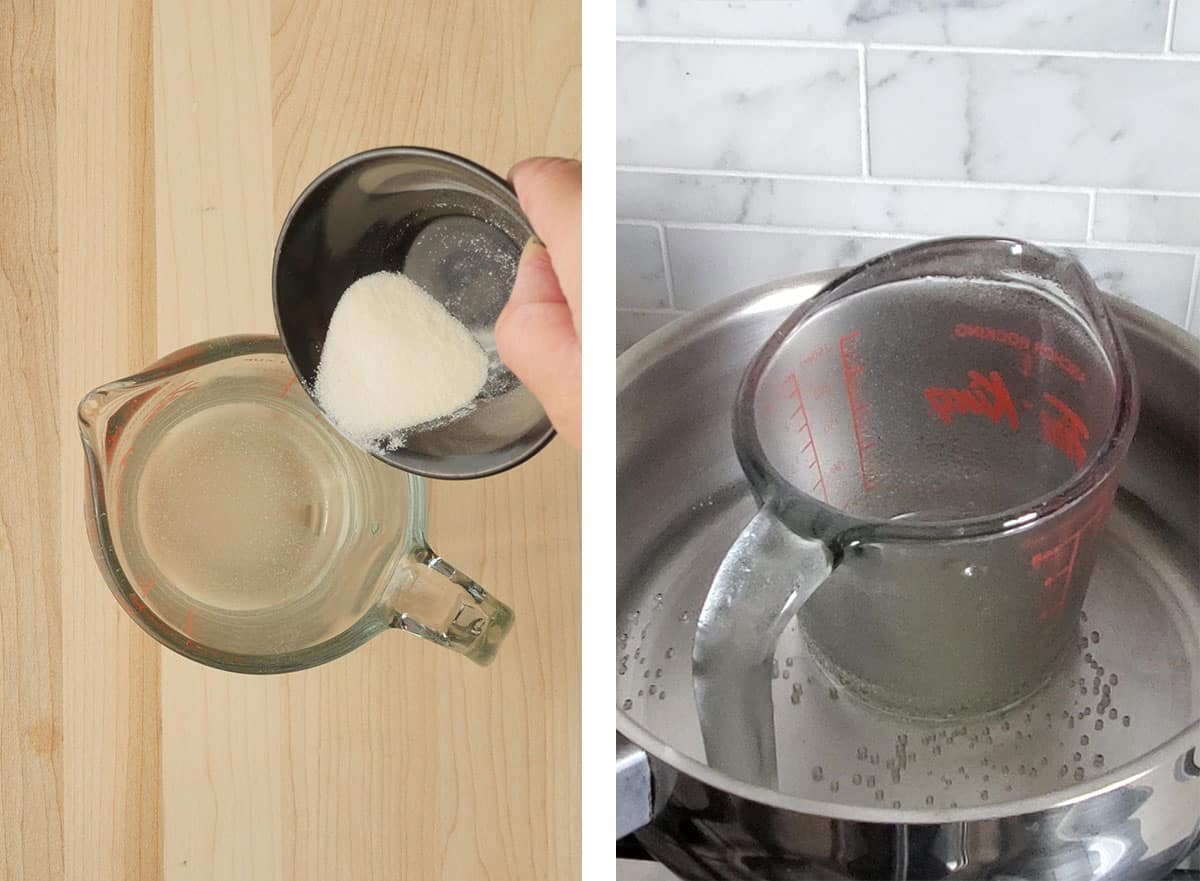
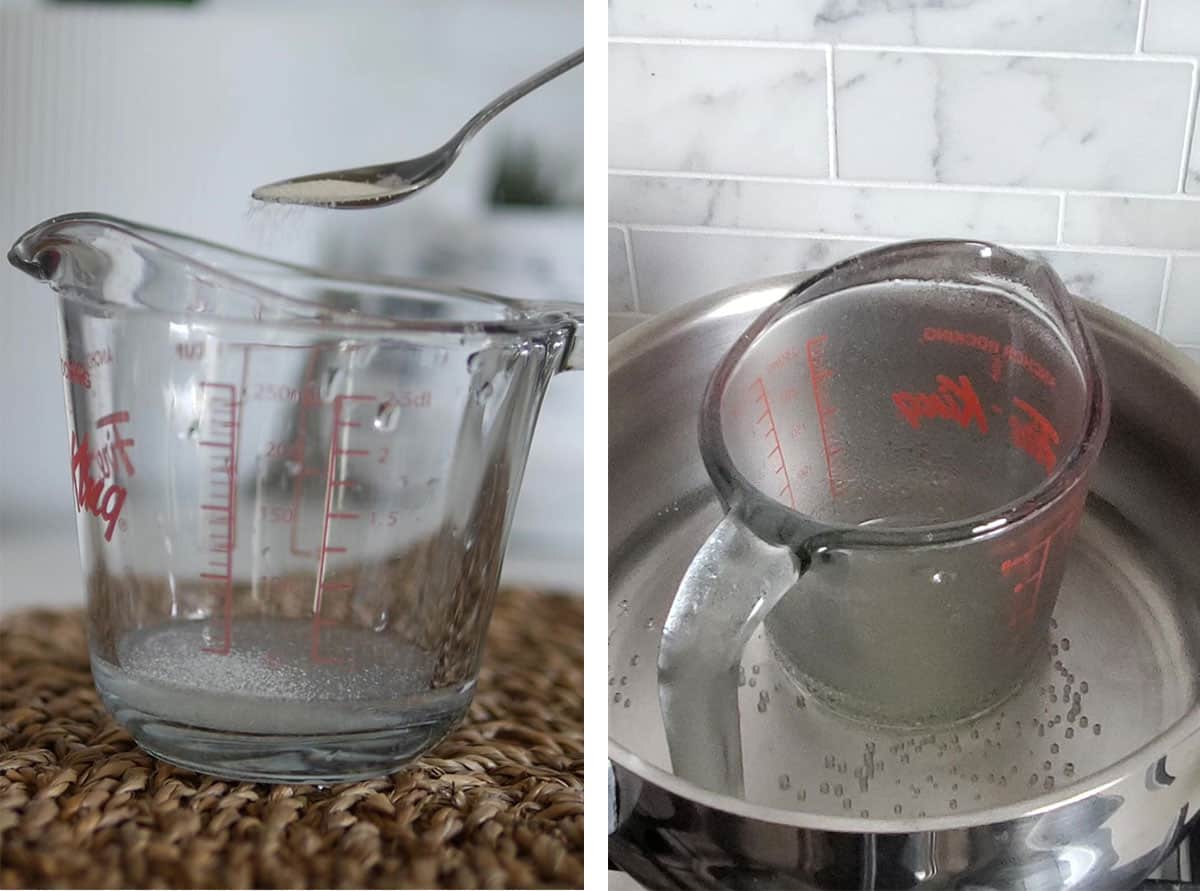
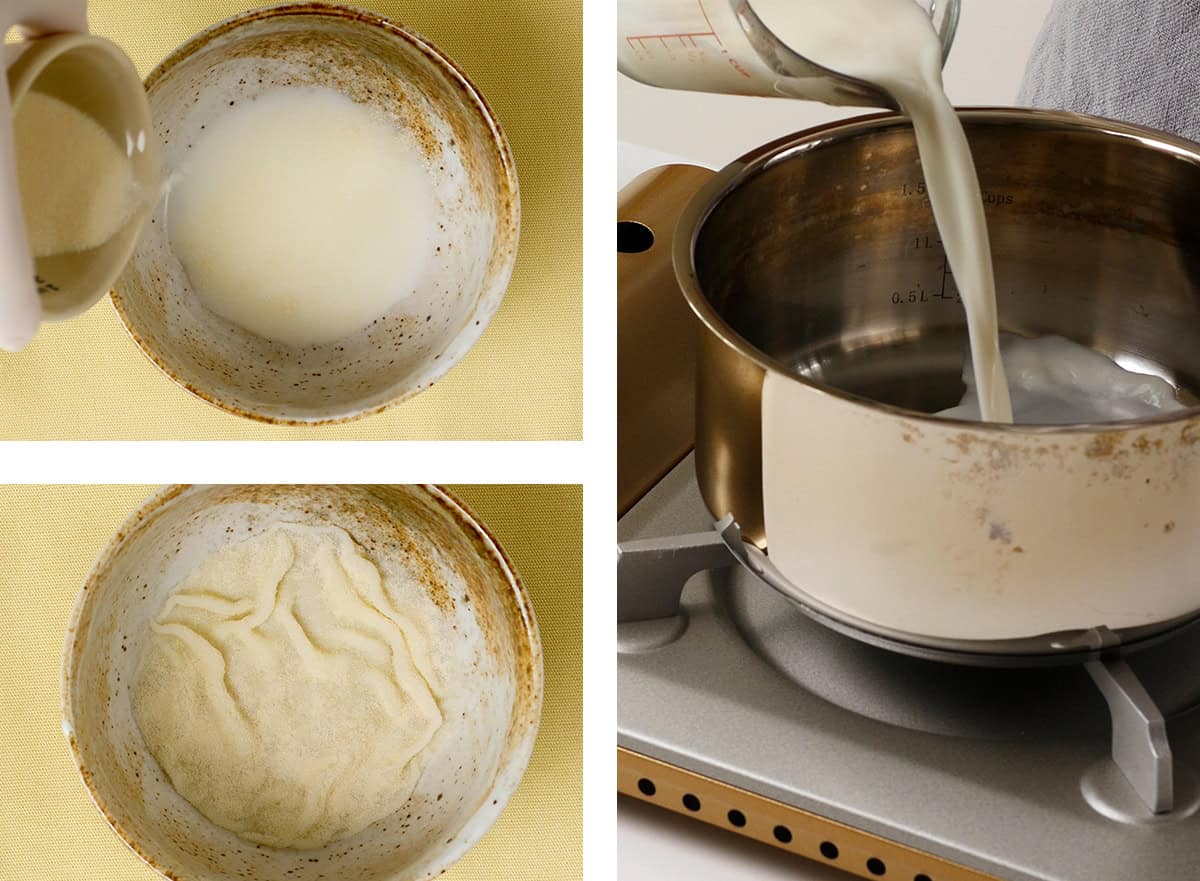
Ensure that Step 1-3 of the Assembly is completed before you start the mousse, this will prevent it from setting prematurely inside the bowl. Chill beaters and mixing bowl in fridge. In a heat-proof cup, sprinkle the gelatin into the water. Let it bloom for 5 minutes.

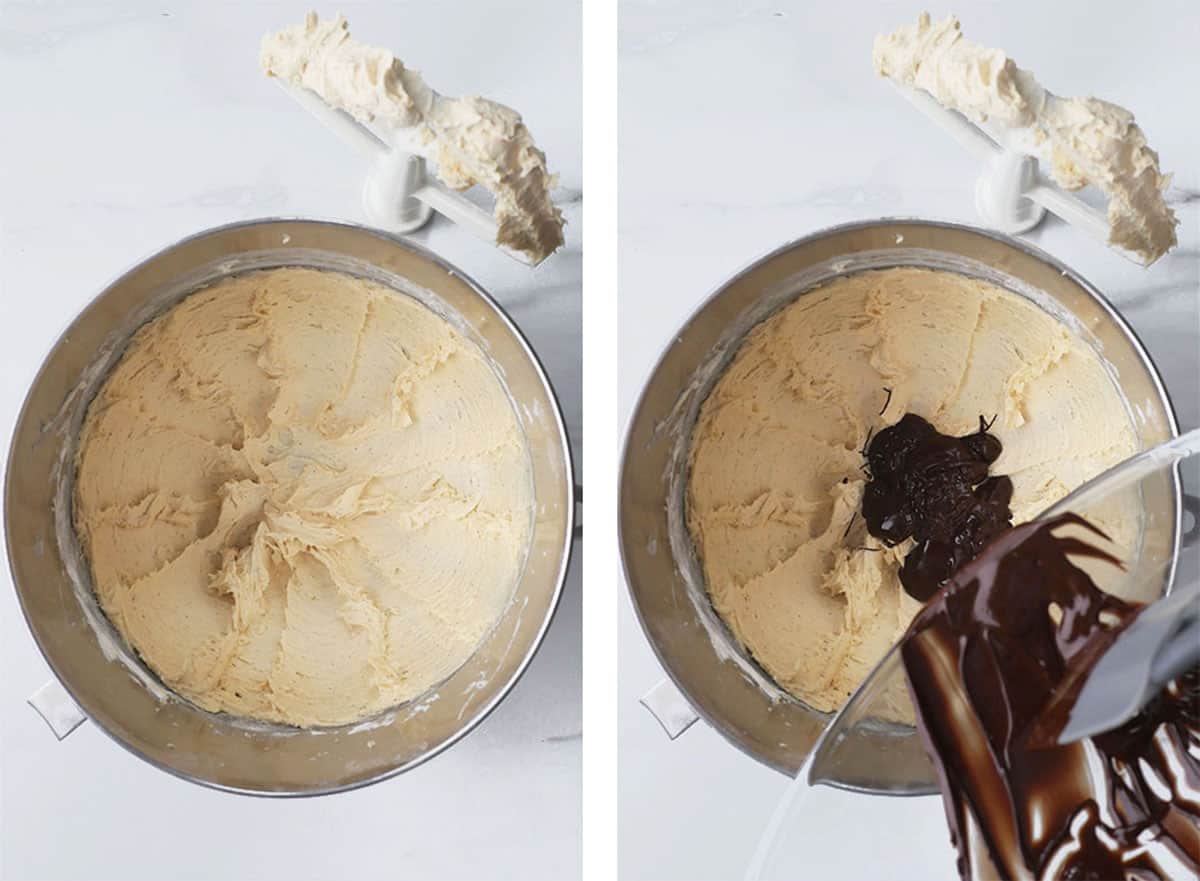
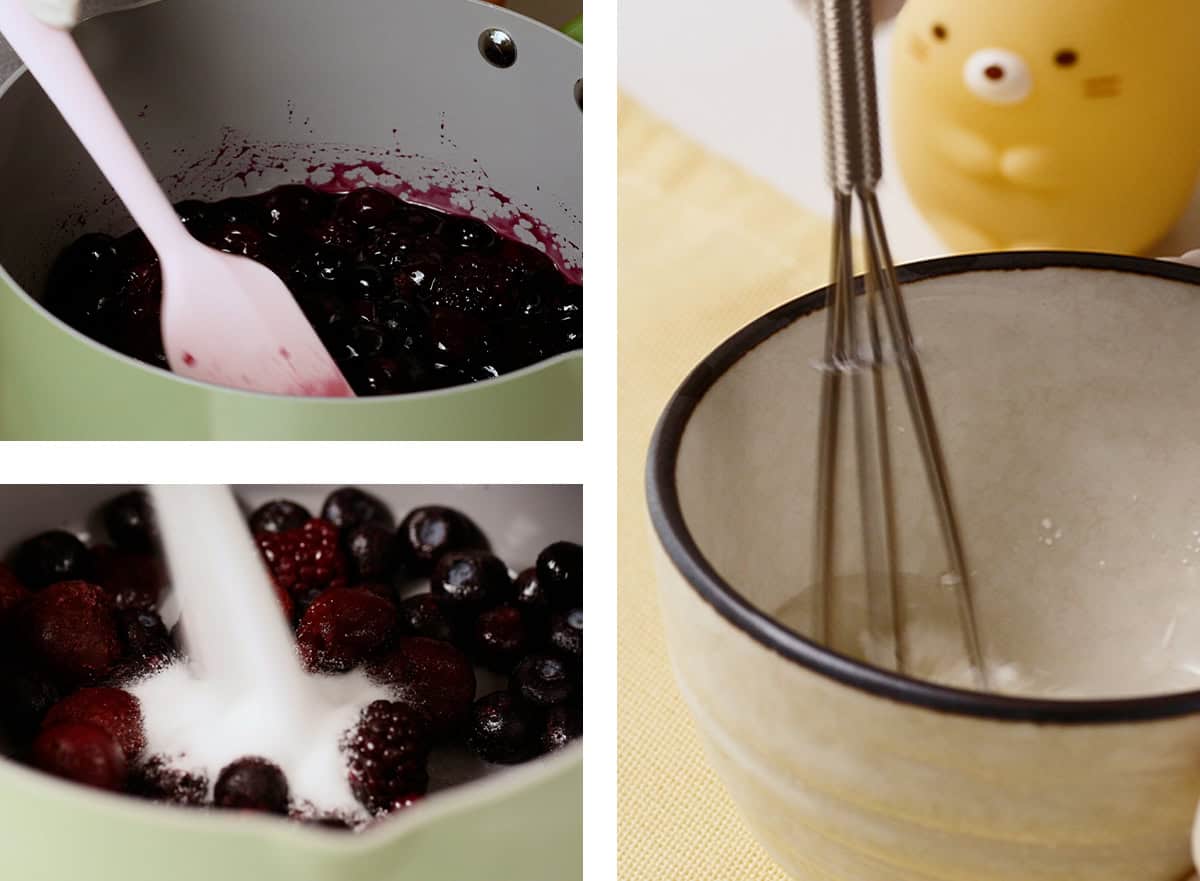
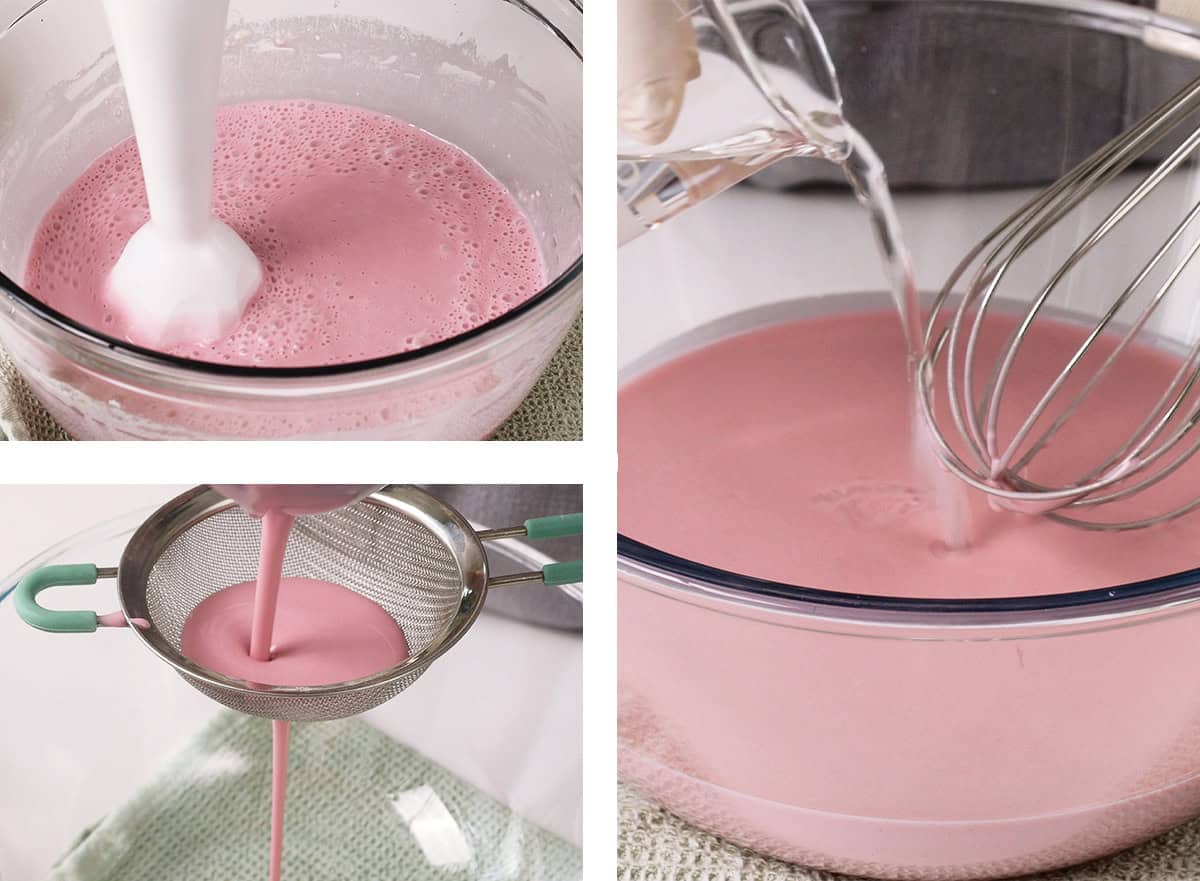
Puree mango cubes in the food processor/blender until smooth. In a small pot, add the mango puree and sugar, heat on low heat until the sugar is dissolved. Do NOT let boil, a low warm temperature is sufficient.
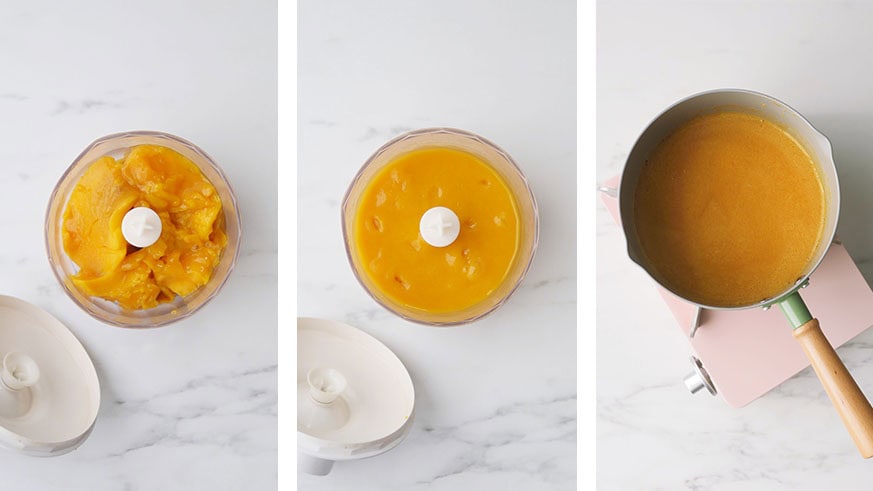
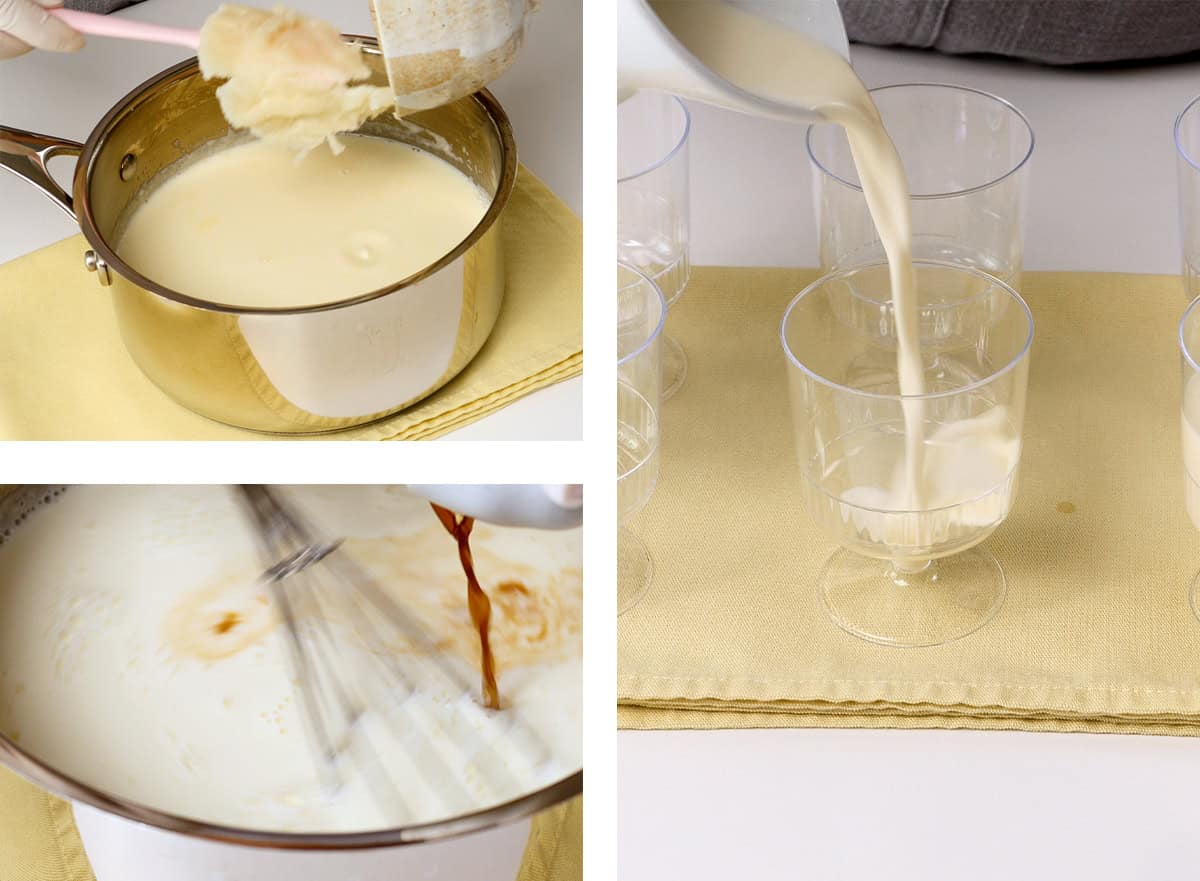
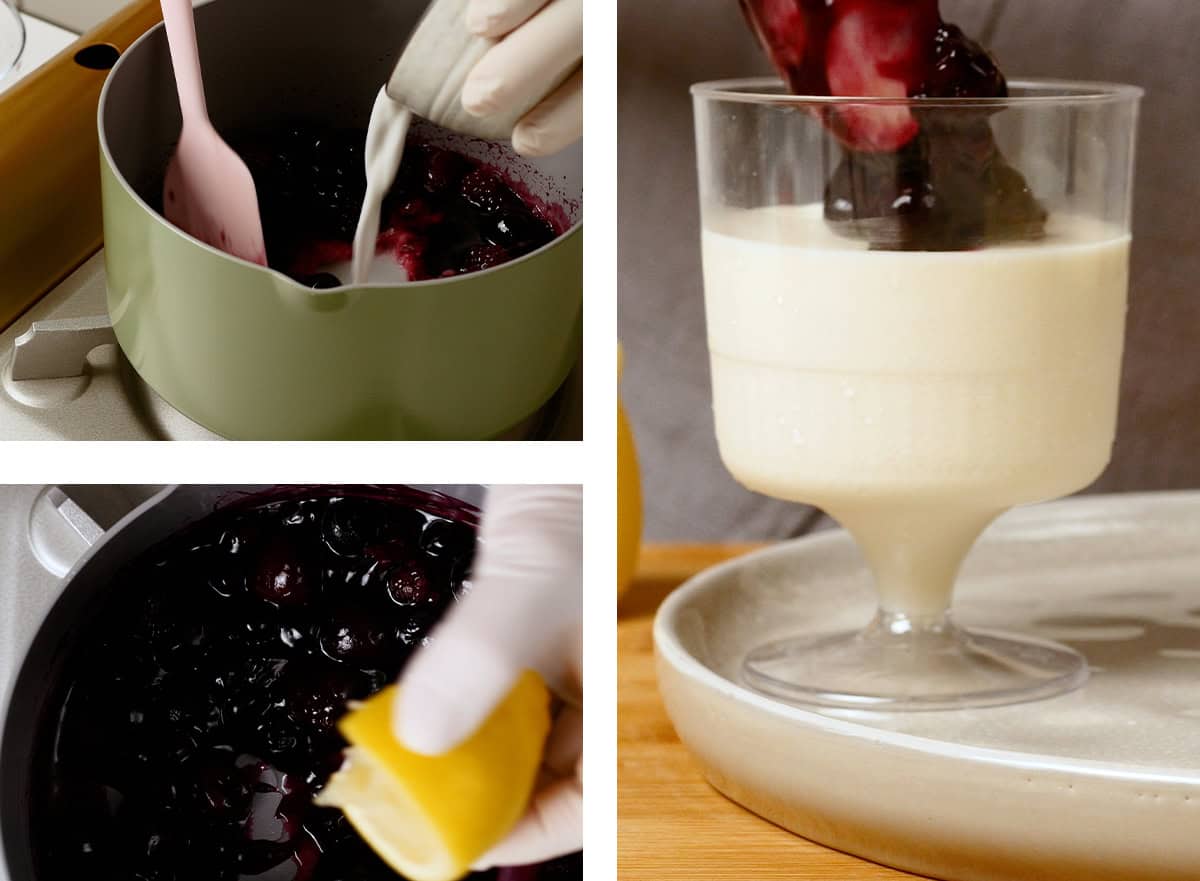
Turn off heat and add the bloomed gelatin. Stir to fully dissolve. Pour the puree through a sieve, use a spatula to help push the puree through. Discard remaining pulp. Let cool on counter.

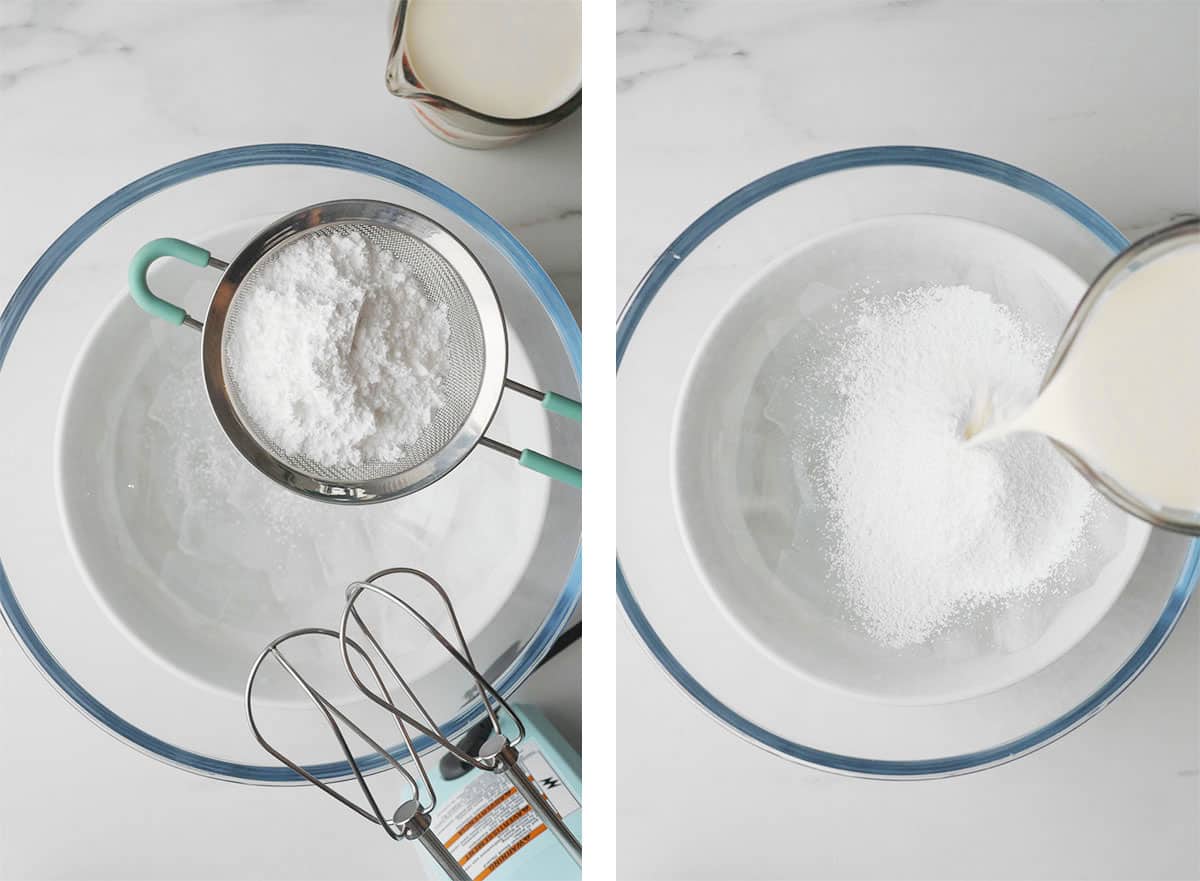
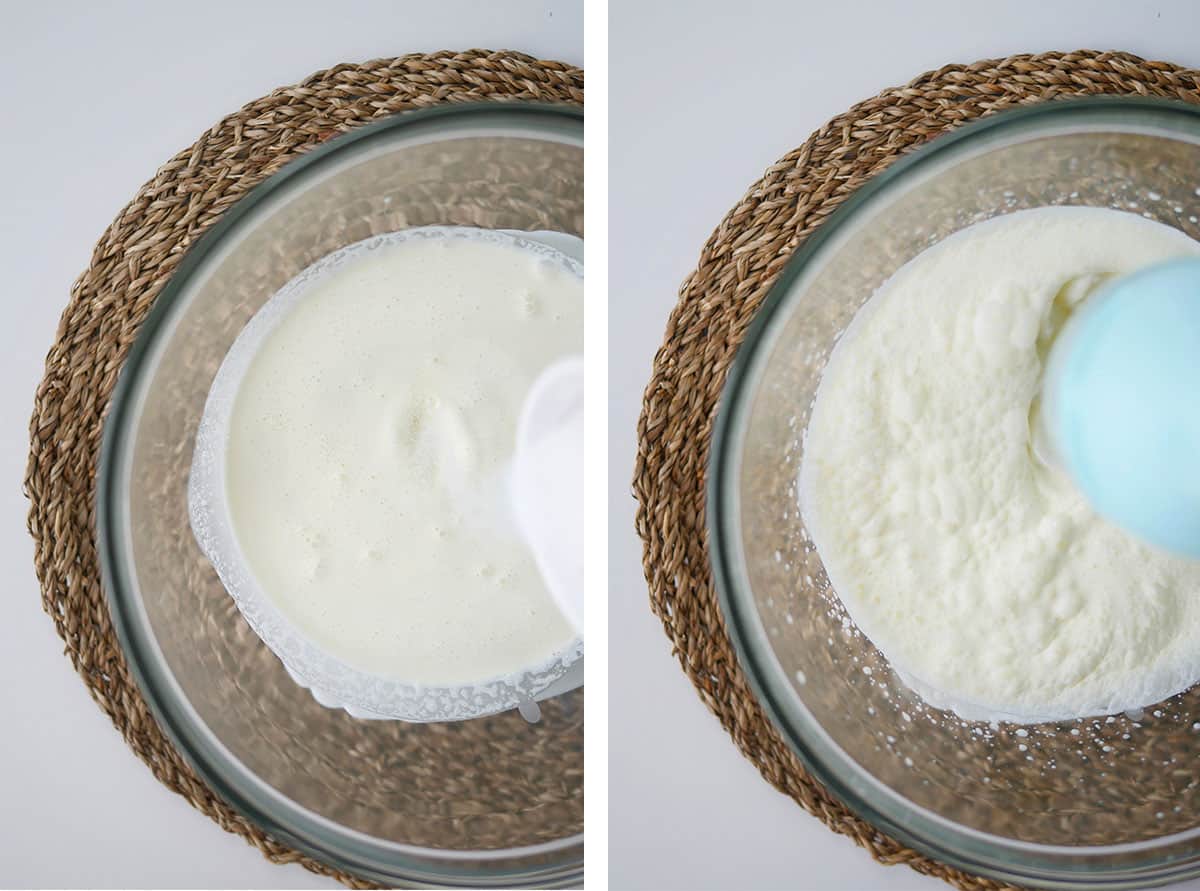
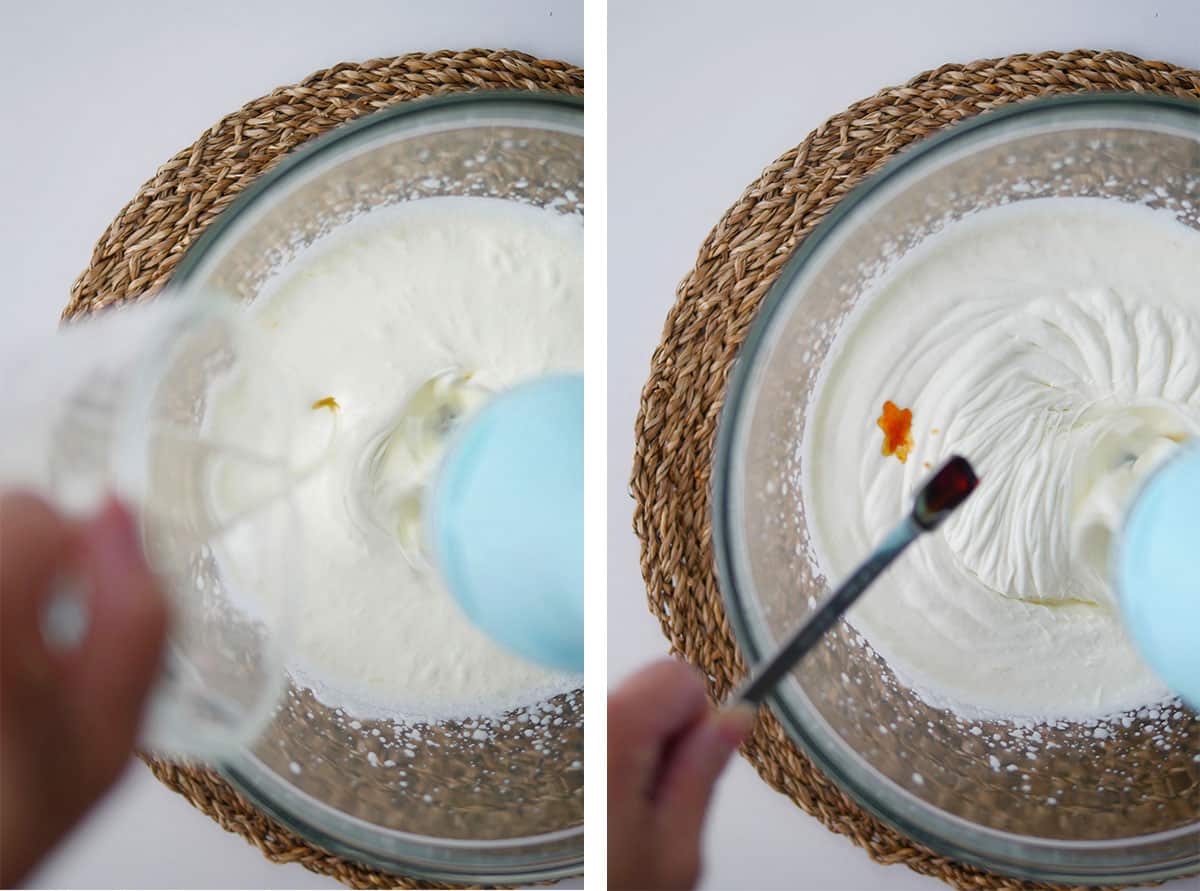
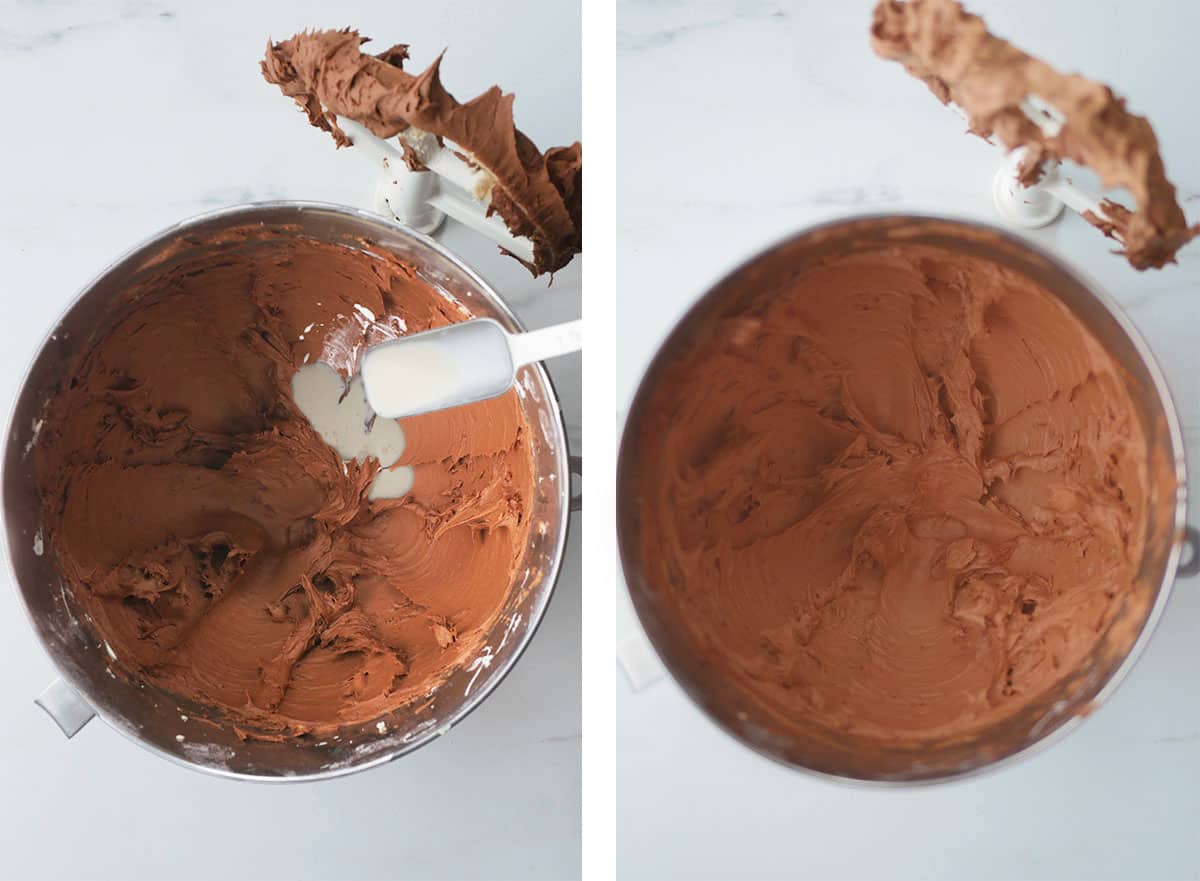
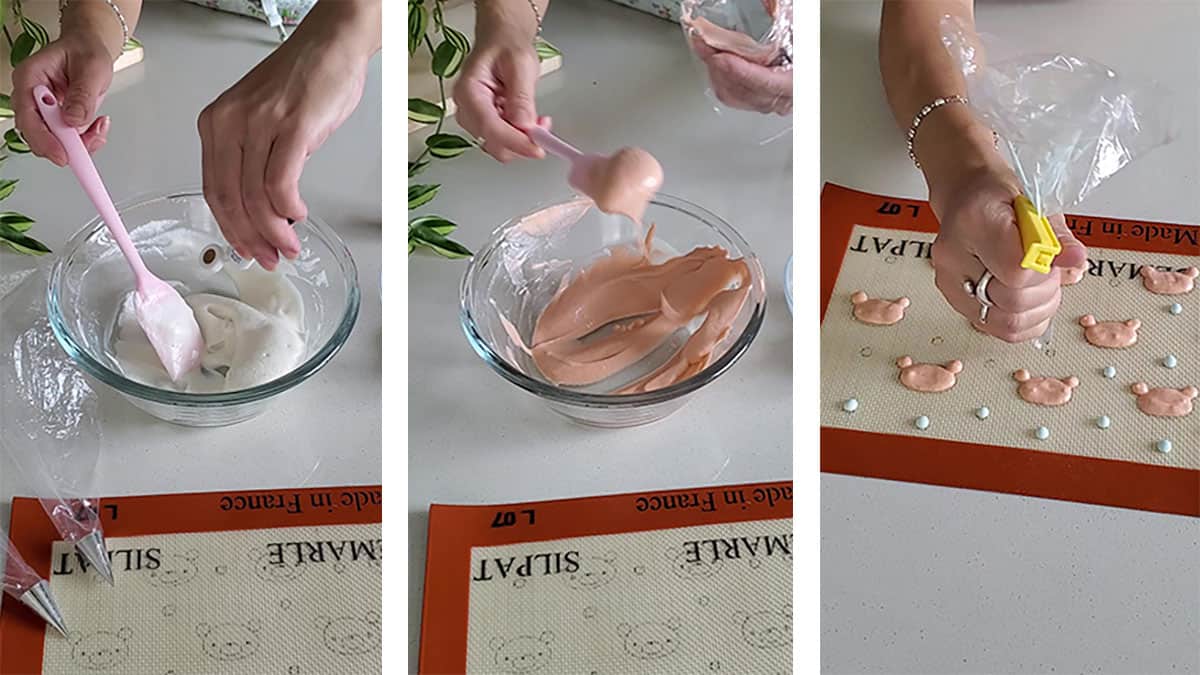
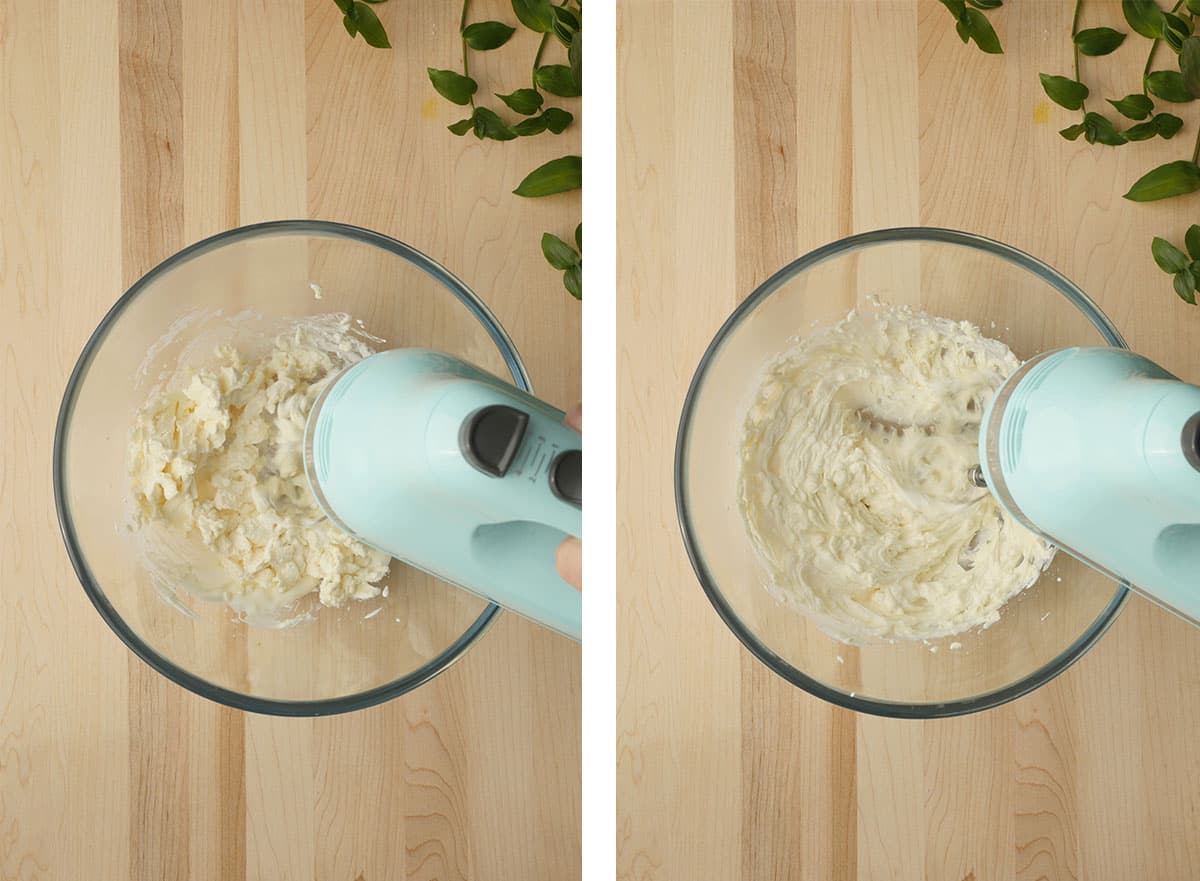
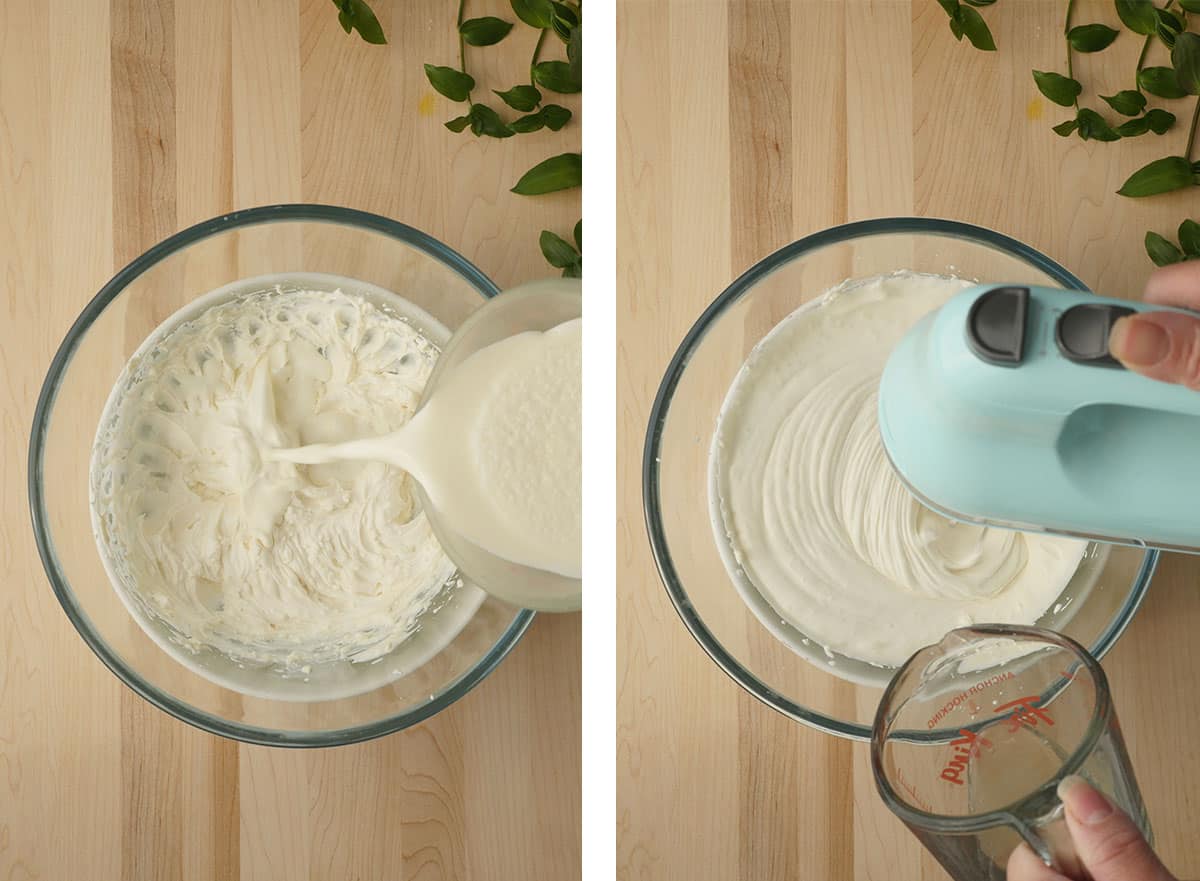
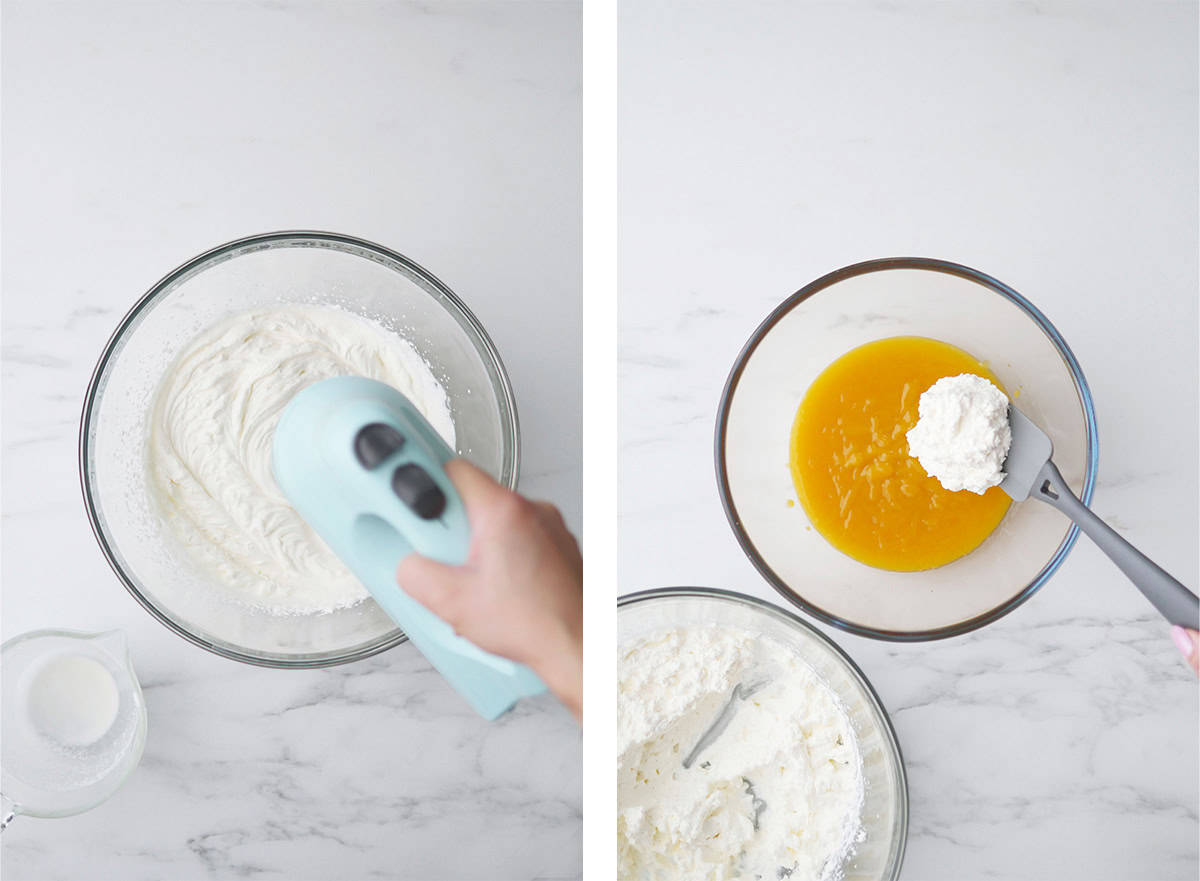
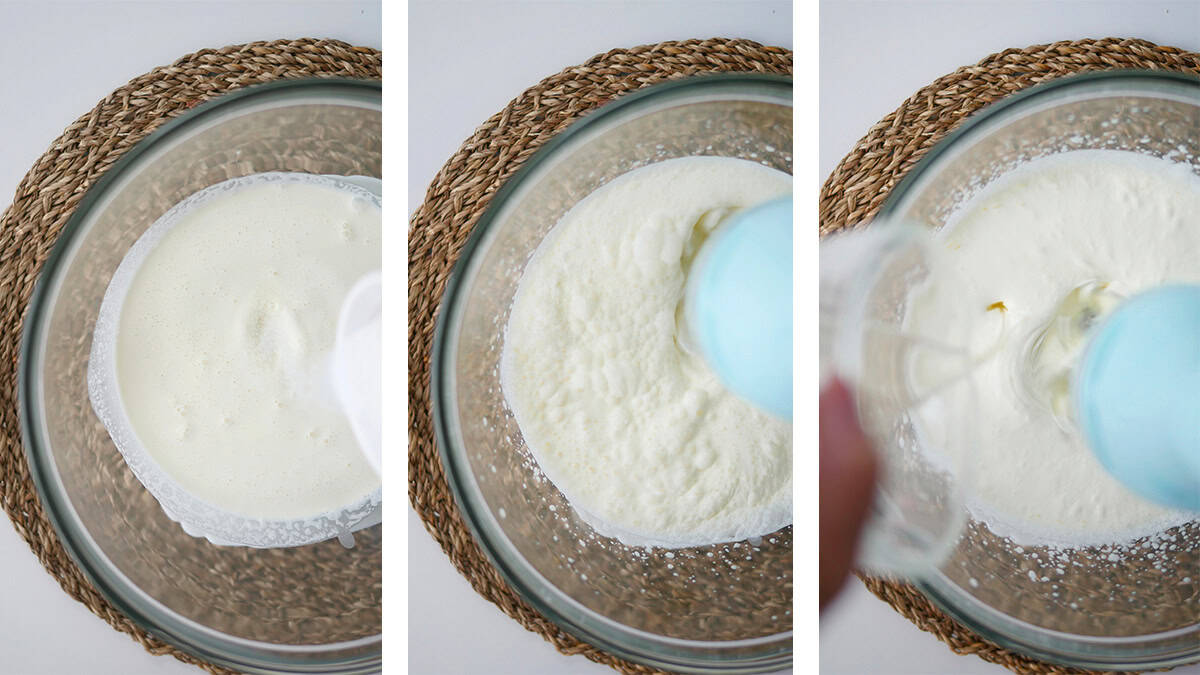
In the chilled mixing bowl, whip the whipping cream on med-high until stiff peaks form. Fold ¼ of the cream into the now cooled puree. Fold small portions at a time to temper the two ingredients. Use the mousse IMMEDIATELY to assemble the cake.

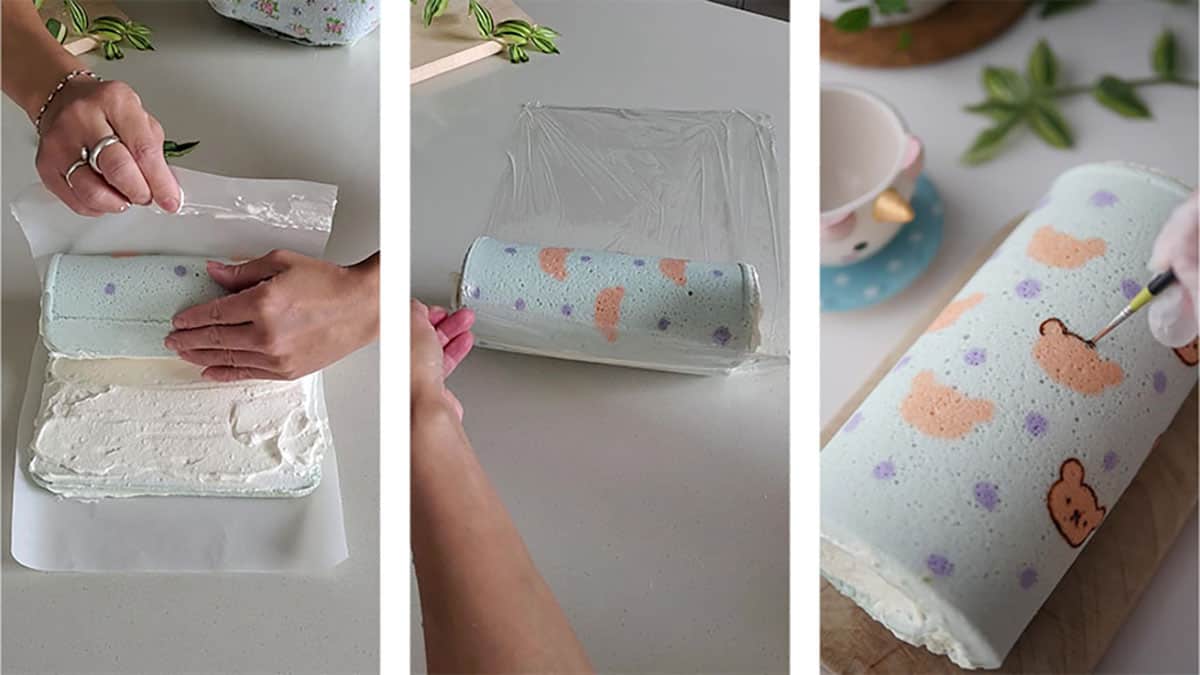
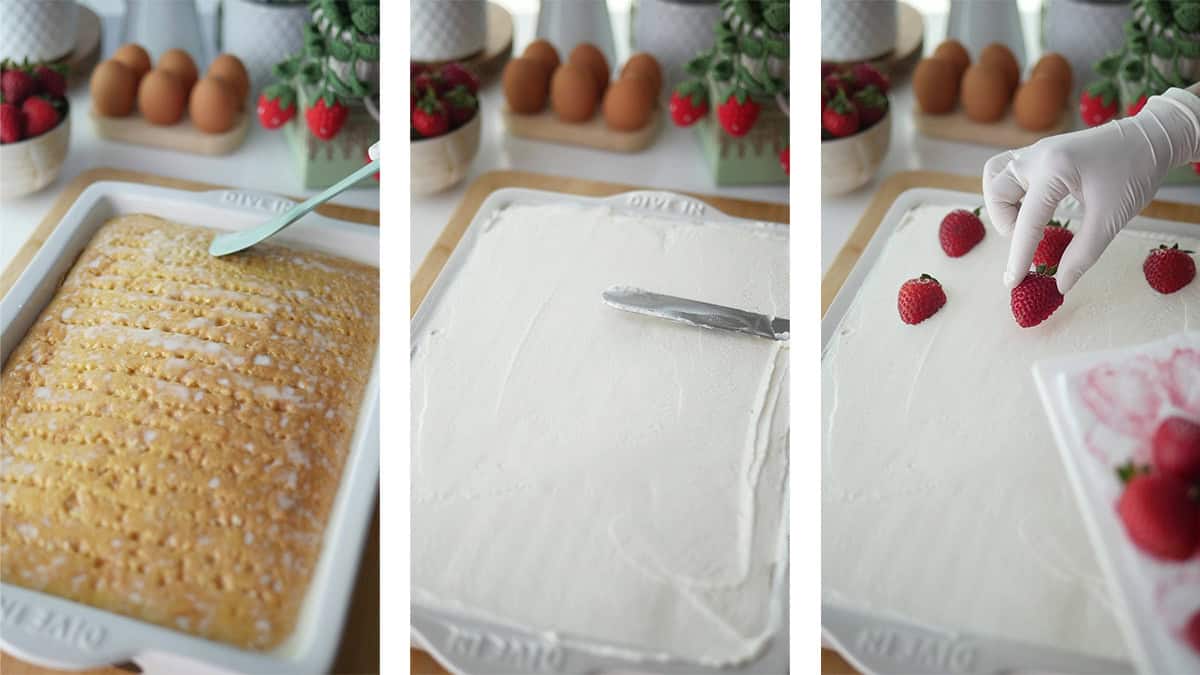
Assembly
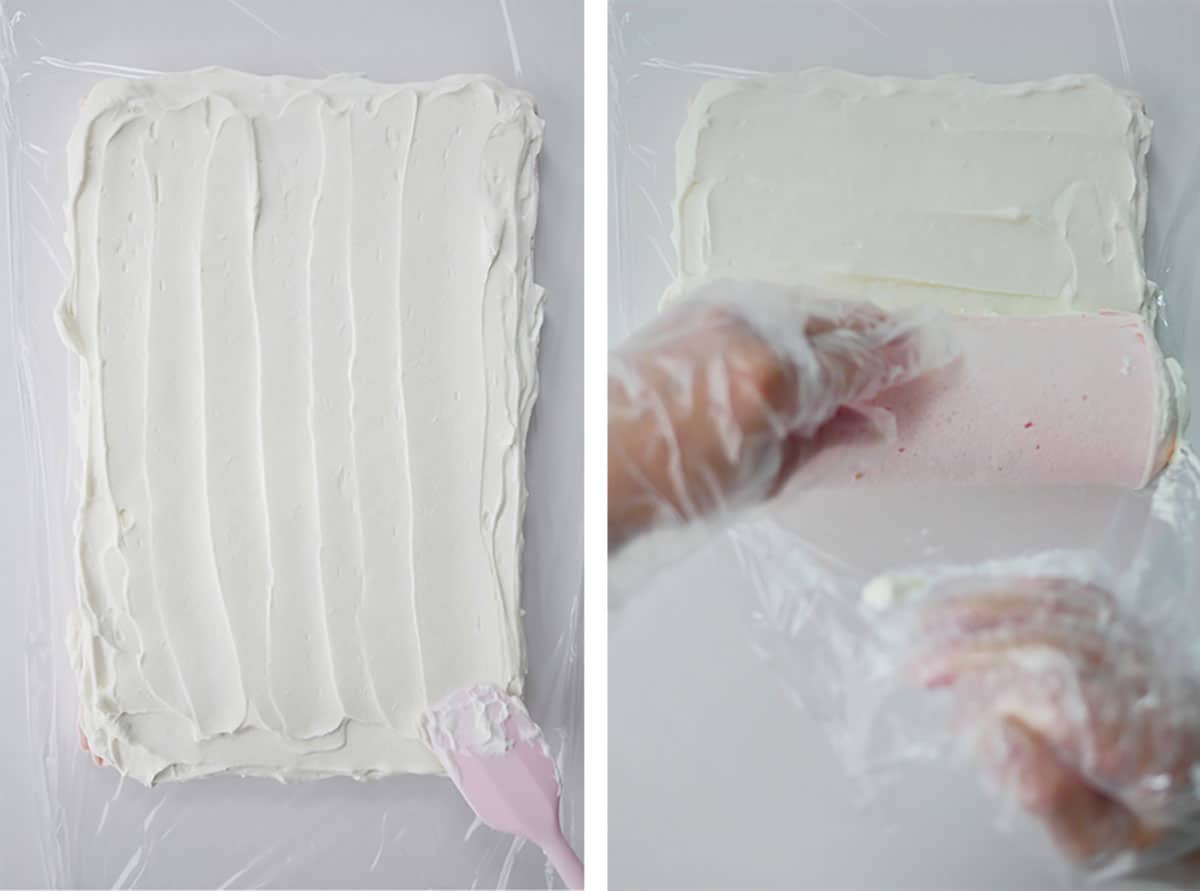
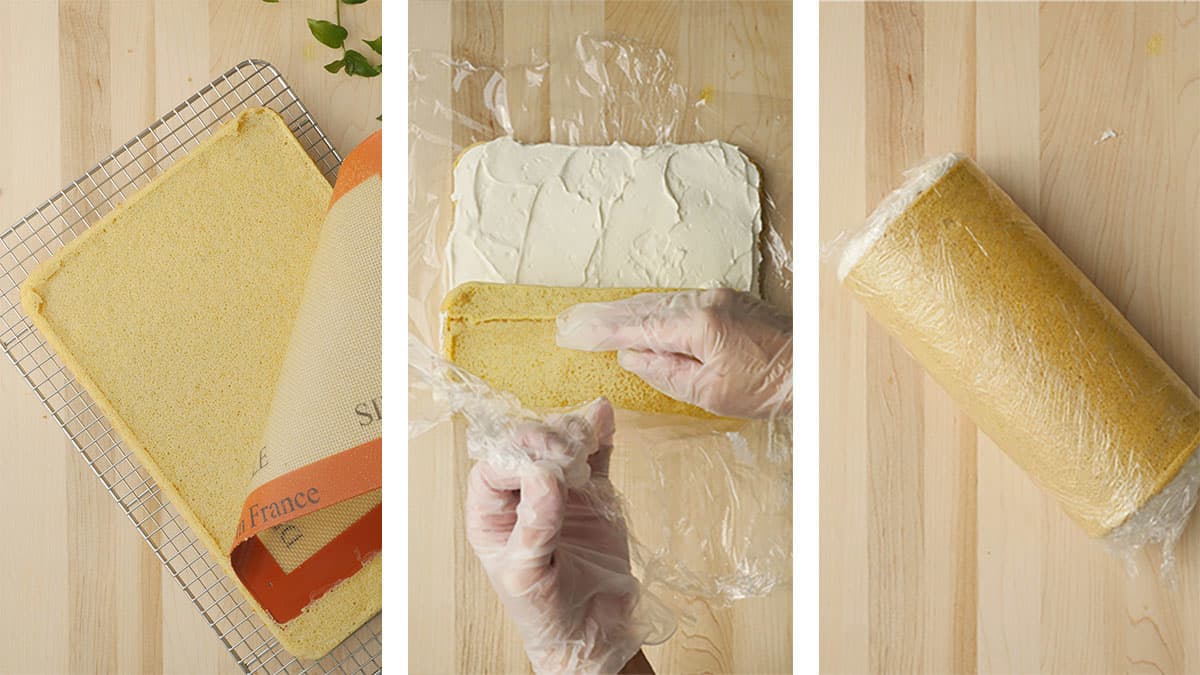
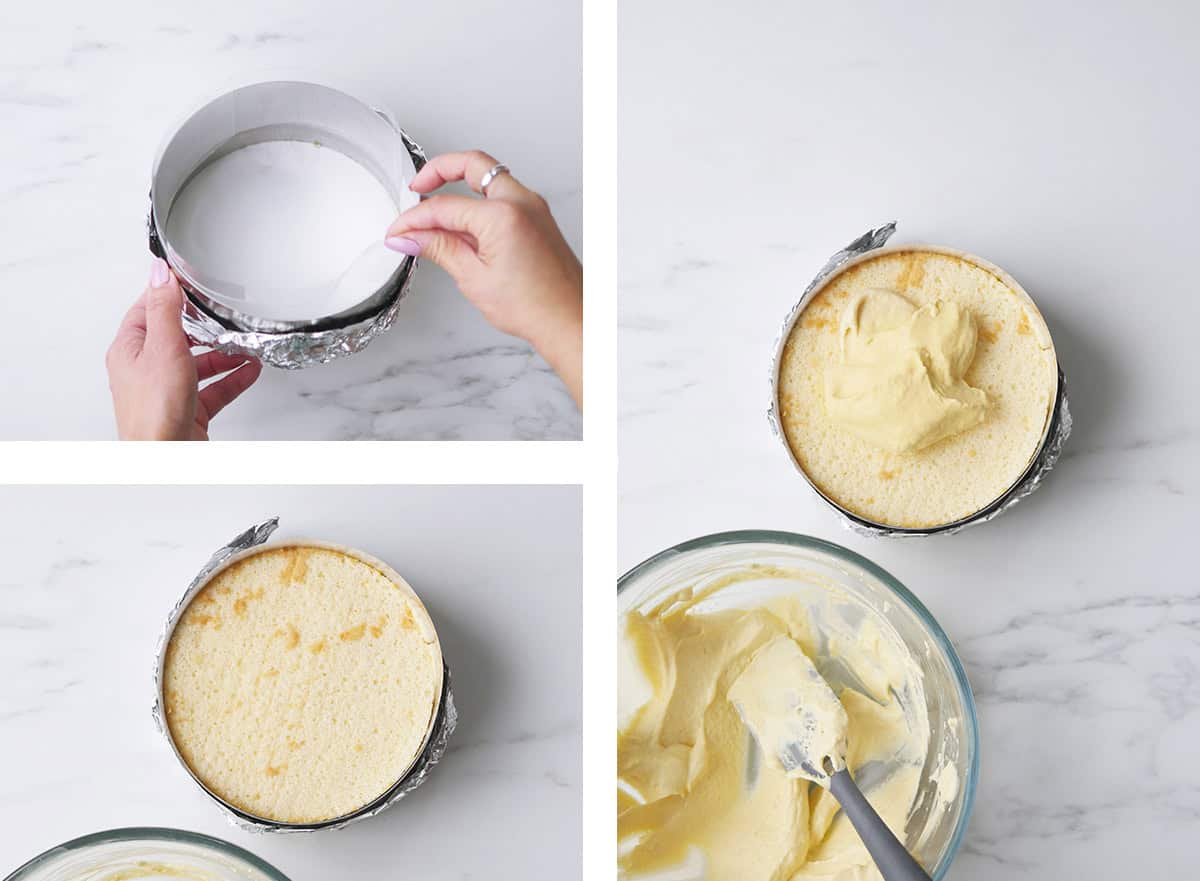
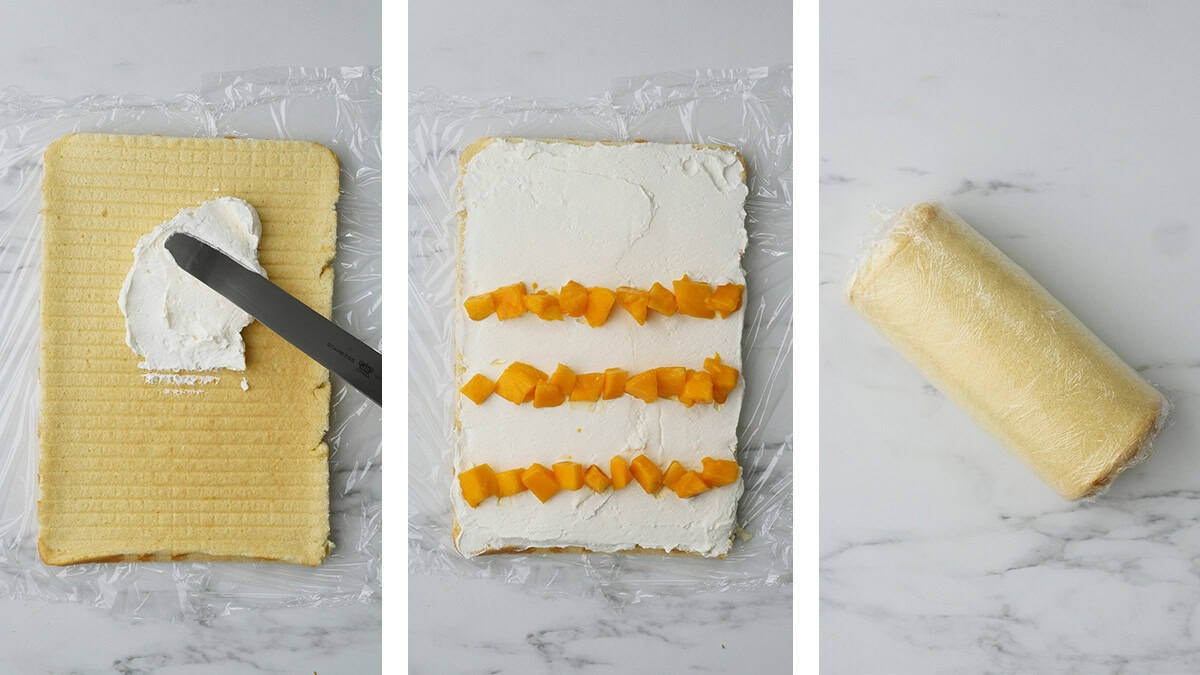
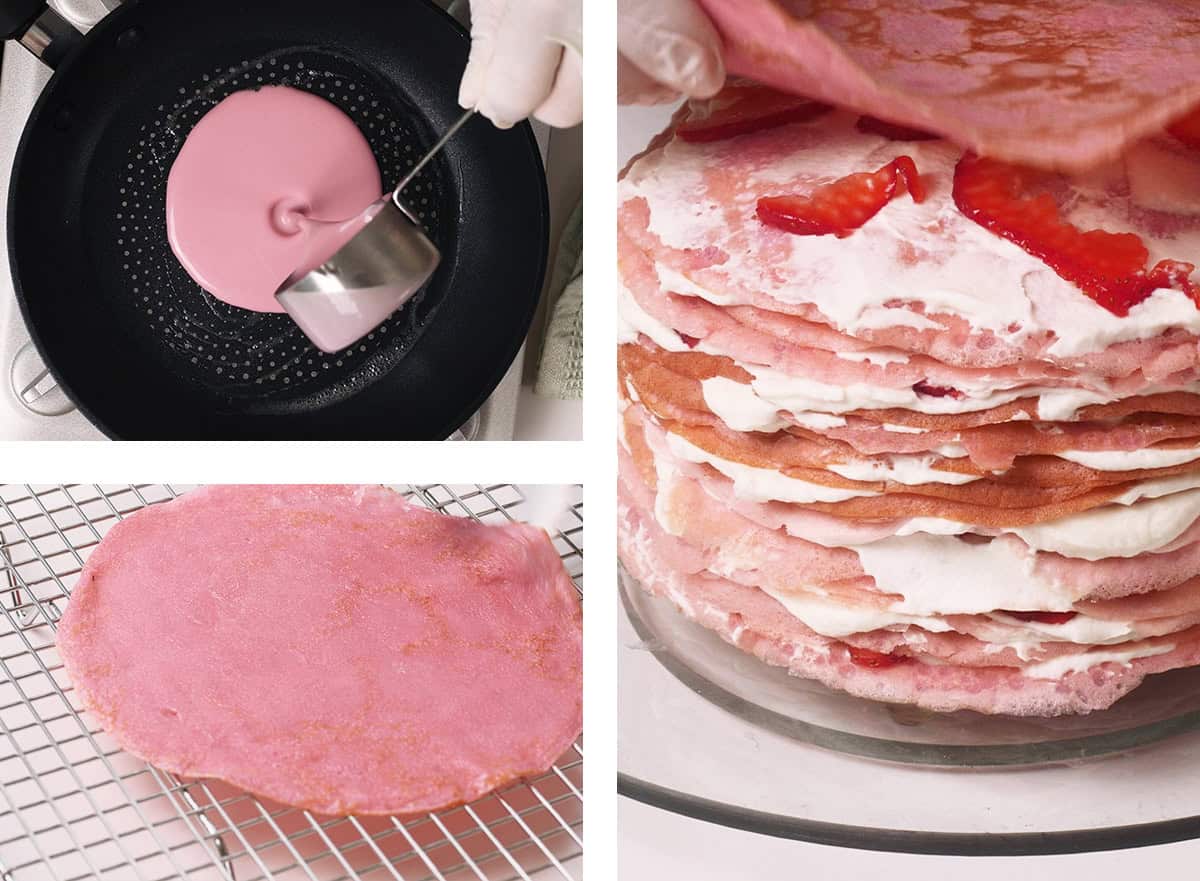
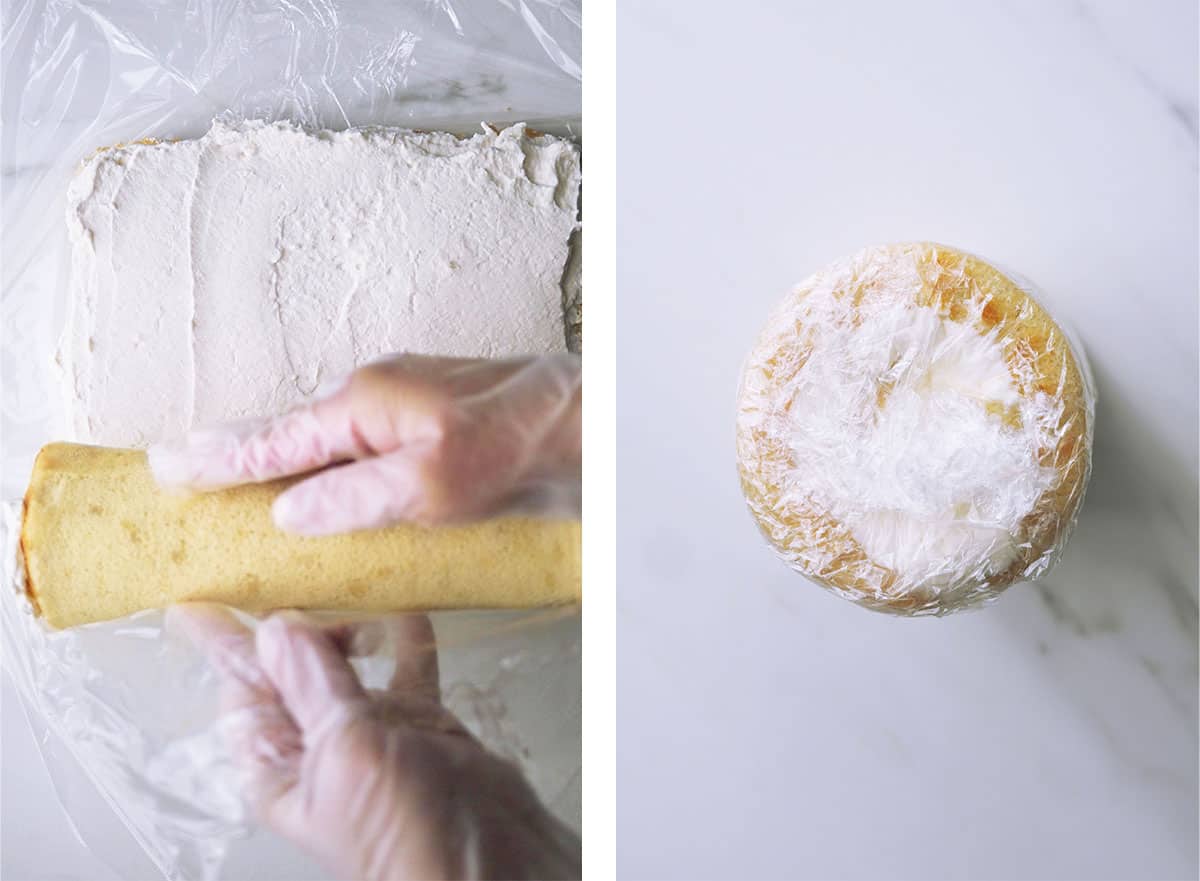
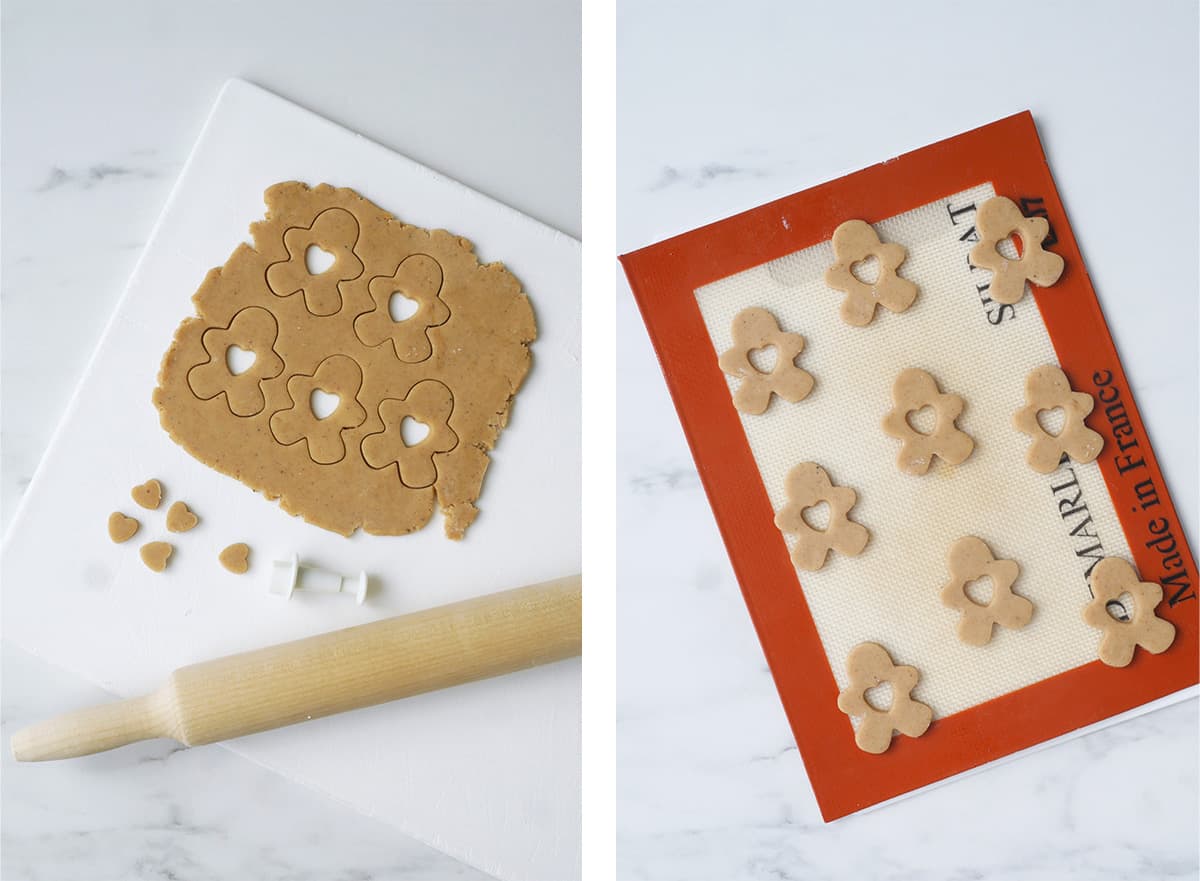
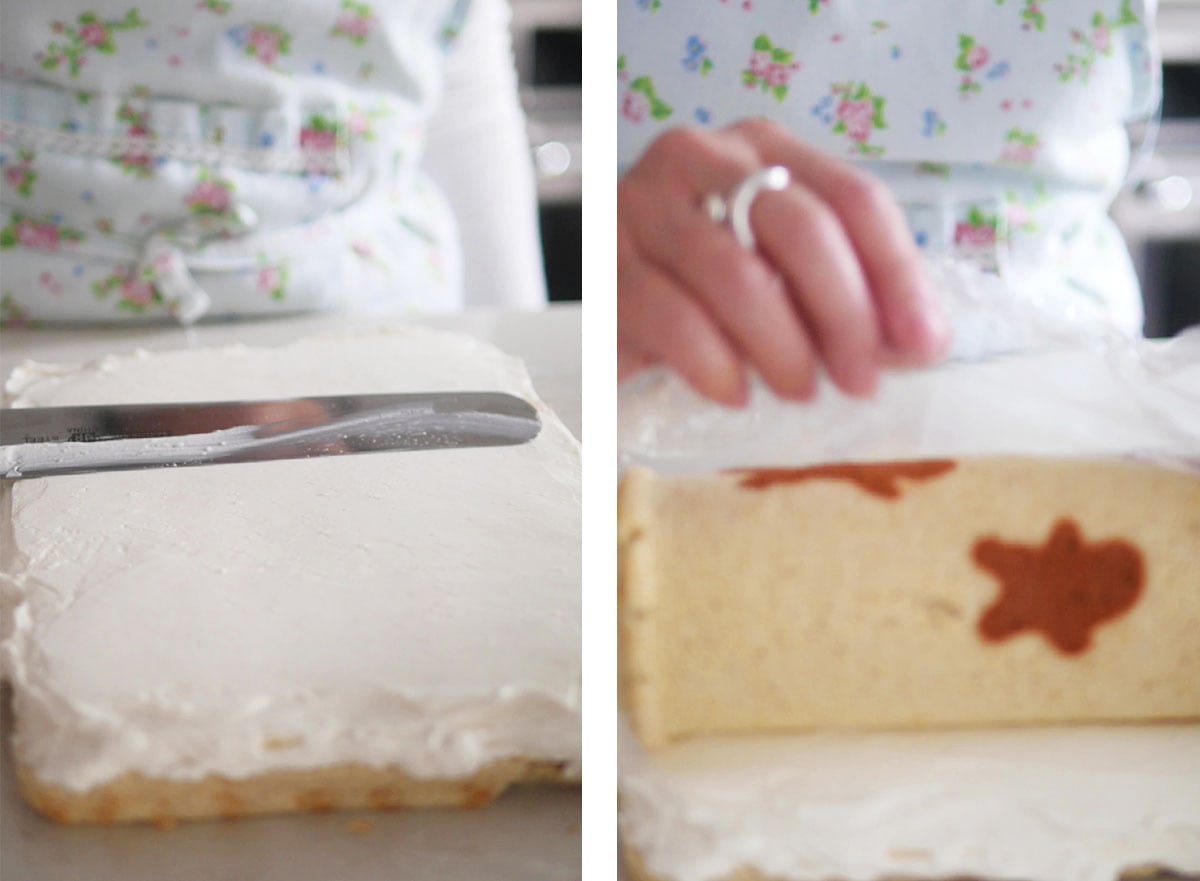
Use an offset spatula to gently release the sides of the cake from pan. Remove paper. Press the cake ring into the cake to trim off the edges. Line the cake ring with acetate strips and wrap the bottom with aluminum foil. Gently place the first layer of cake into the lined cake ring. Carefully add half of the mango mousse into the cake ring. Try to spread the mousse to the outside edge and level the top neatly with a scraper or angled spatula. Repeat with remaining layers.
Allow cake to set in fridge before cutting and decorating, minimum of 3 hours. For perfectly clean lines when removing the acetate strip and for cutting, transfer the cake to the freezer to chill for an additional 3 hours. Gently remove the cake ring and acetate strips (defrost in the fridge before serving). Wash and thinly sliced fresh mangoes, pat dry. Assemble desired pattern on top of the cake.
Recipe
Chinese Mango Mousse Cake

A light Chinese bakery-style mango mousse cake with fresh whipped cream, perfect for birthdays and celebrations.
Ingredients
Dry Mix for Chinese Bakery Cake Base
- 112 grams cake flour*
- 1 teaspoon baking powder
- ¼ teaspoon sea salt
Wet Mix for Chinese Bakery Cake Base
- 85 ml whole fat milk
- 75 ml neutral oil (e.g. canola, grapeseed, avocado)
- 75 grams granulated sugar*
- 4 egg yolks
- 1 teaspoon vanilla extract
Meringue for Chinese Bakery Cake Base
- 5 egg whites
- ½ teaspoon cream of tartar*
- 75 grams granulated sugar*
Mango Mousse
- 1 cup whipping cream
- 300 g ripened mangos, cubed (around 2)
- 1 tablespoon unflavored powdered gelatin
- ¼ cup cool water
- 15 g granulated sugar (see notes)*
Filling and Decorating
- 2 fresh ripened mangoes, sliced
Supplies
- Regular kitchen tools PLUS
- 8" round cake pans X 2
- 6" cake ring
- Acetate strips (4" tall)
- Food processor or blender
- Angled spatula
- Parchment paper
- Sieve
- Mixer (handheld or stand)
Instructions
Chinese Bakery Cake Base
- Line the bottom of the cake pan(s) with parchment paper.
- Preheat oven to 325 F.
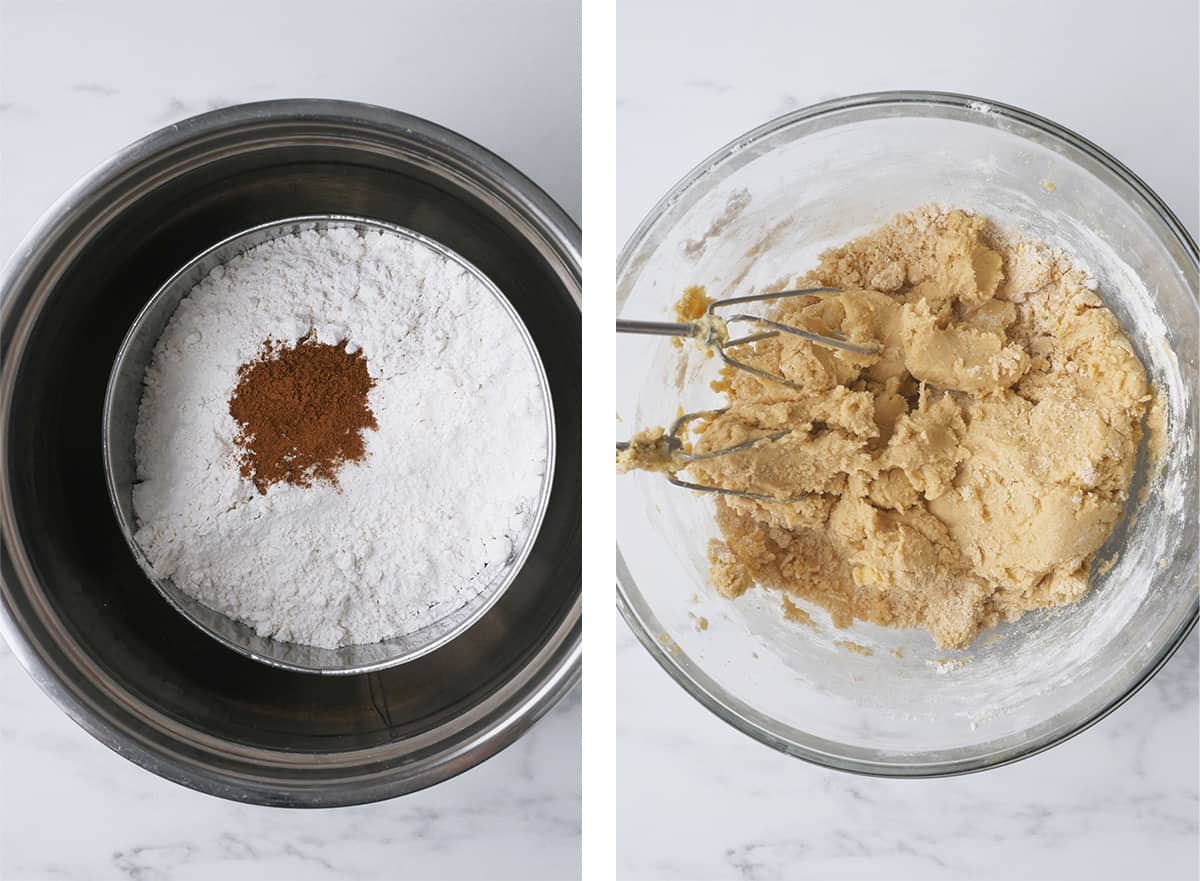
- In a large mixing bowl, sift in dry mix. Stir to combine.
- Create a well in the center. Inside it, add the wet mix.
- With a whisk, stir to combine until fully incorporated with no visible lumps, do not over mix. Set this milk-flour mixture aside.
- Now make the meringue. In a clean and dry, non-plastic mixing bowl, whip egg whites on slow speed until frothy, add cream of tartar.
- Increase speed to medium, once the whites become opaque and bubble size have decreased, add sugar a little bit at a time.
- Increase speed to med-high, whip until stiff peaks.* This is the meringue.
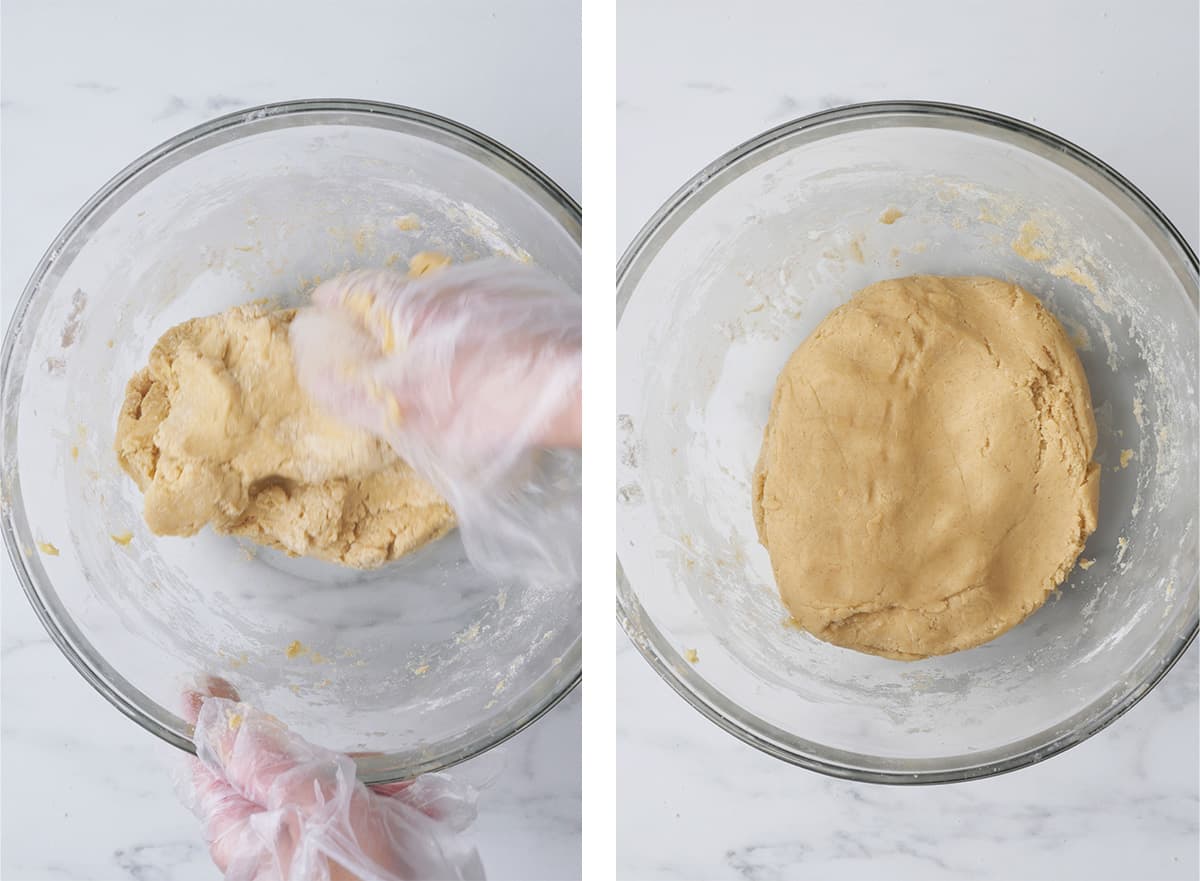
- Gently fold ⅓ of the meringue into the milk-flour mixture to get it moving. Once incorporated, fold in the rest of the meringue. Do not stir. Use batter immediately.
- Pour batter into lined cake pan from one spot, spread out the batter evenly with an angled spatula.
- Tap the pan on the counter to release large air pockets.
- Bake for 25-28 min. until a skewer pulls out clean and the cake springs back in the center.
- Flip the cake pan upside down on the cooling rack and let cool for 30 min. before removing cake from pan.
- While the cake is cooling, prepare ingredients and supplies for the mango mousse and then work on Step 1-3 of the Assembly BEFORE starting the mousse.
Mango Mousse
- Ensure that Step 1-3 of the Assembly is completed before you start the mousse, this will prevent it from setting prematurely inside the bowl.
- Chill beaters and mixing bowl in fridge.
- In a heat-proof cup, sprinkle the gelatin into the water. Let it bloom for 5 minutes.
- Puree mango cubes in the food processor/blender until smooth.
- In a small pot, add the mango puree and sugar, heat on low heat until the sugar is dissolved. Do NOT let boil, a low warm temperature is sufficient.
- Turn off heat and add the bloomed gelatin. Stir to fully dissolve.
- Pour the puree through a sieve, use a spatula to help push the puree through. Discard remaining pulp. Let cool on counter.
- In the chilled mixing bowl, whip the whipping cream on med-high until stiff peaks form.
- Fold ¼ of the cream into the now cooled puree. Fold small portions at a time to temper the two ingredients. Use the mousse IMMEDIATELY to assemble the cake.
Assembly:
- Use an offset spatula to gently release the sides of the cake from pan. Remove paper. Press the cake ring into the cake to trim off the edges.
- Line the cake ring with acetate strips and wrap the bottom with aluminum foil.
- Gently place the first layer of cake into the lined cake ring.
- Carefully add half of the mango mousse into the cake ring. Try to spread the mousse to the outside edge and level the top neatly with a scraper or angled spatula. Repeat with remaining layers.
- Allow cake to set in fridge before cutting and decorating, minimum of 3 hours.
- For perfectly clean lines when removing the acetate strip and for cutting, transfer the cake to the freezer to chill for an additional 3 hours. Gently remove the cake ring and acetate strips (defrost in the fridge before serving).
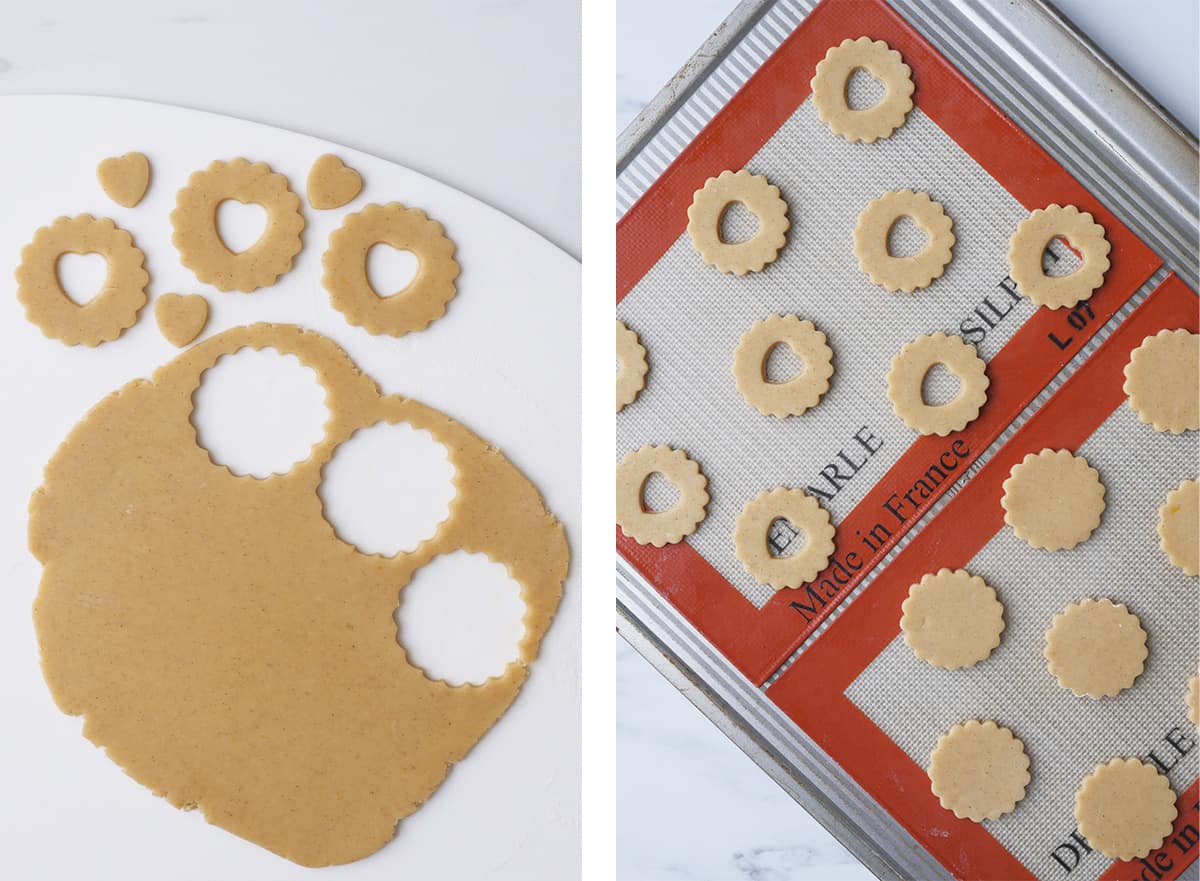
- Wash and thinly sliced fresh mangoes, pat dry. Assemble desired pattern on top of the cake.
- Mango mousse cake will stay fresh inside the fridge for 4-5 days. Refer to post body on how to make cake in advance and how long it keeps at room temperature.
Notes
- Cake flour is a low protein flour which yields soft fluffy cakes. It is preferred but can be substituted with AP Flour.
- Granulated sugar can be substituted with extra fine granulated sugar a.k.a berry sugar for a finer textured cake.
- Cream of tartar in the meringue helps stabilize it. It can be substituted with double the amount in lemon juice or vinegar.
- Whipping cream has a milk fat content of 33% (denoted as M.F. 33) and above. It can be substituted with heavy cream which will make the mousse set more firmly (M.F. 36%).
- For the meringue, stiff peaks is characterized by the egg whites having pointed peaks that point upwards without drooping when the whisk is pulled out.
- The timing and temperature provided for this cake recipe is based on a medium-dark pan. For lighter pans, you might need bake it a few minutes longer. Use appearance to gauge doneness: springy center and skewer inserted into cake comes out clean.
- For the mango puree, use sugar to taste. If mangos are too tart, use all 15 g of sugar (or more if desired). For more ripened mangos, 5 g may be sufficient.
- The most accessible cake ring/pan sizes were used for this recipe. 8" for the cake pan and 6" for the ring. There will be excess cake leftover after using the 6" ring to cut into the 8" cake, it can be used to assemble smaller cakes in a jar etc.
Recommended Products
As an Amazon Associate and member of other affiliate programs, I earn from qualifying purchases.
-
 Amazon Basics Parchment Paper for Baking, Non-Stick, 90 Sq Ft Roll, 1 Pack
 -
Cake Collars 4 x 394inch (5.9 mil thick) Transparent Acetate Sheets Rolls for Baking Surrounding Edge Decorating
-
Fat Daddio's SSRD-6030 Cake & Pastry Ring, 6 x 3 Inch, Silver
-
Tebery 3 Pack Round Cake Pan Set for Baking, 8 Inch Nonstick Circle Cake Pans with Wide Handle, 3 Pieces Layer Cake Tin Cheesecake Mold for Birthday Wedding
-
PaperChef Culinary Parchment Multipurpose Non-Stick Paper, 205 sq ft
-
Ateco 1385 Offset Spatula with 4.5-Inch Stainless Steel Blade, Wood Handle, 4.5 Inch, natural


Nutrition Information
Yield
8Serving Size
1Amount Per Serving Calories 890Total Fat 44gSaturated Fat 12gTrans Fat 0gUnsaturated Fat 29gCholesterol 215mgSodium 498mgCarbohydrates 118gFiber 3gSugar 88gProtein 11g
This information is provided as a courtesy and is an estimate only. This information comes from online calculators. Although indulgewithmimi.com attempts to provide accurate nutritional information, these figures are only estimates.


![[Nordic Paper] 200pcs Natural Tulip Cupcake Liners for Baking Cups Unbleached EU Parchment paper Tulip Muffin Liners, Cupcake Wrapper for Party, Christmas by Bake Choice](https://m.media-amazon.com/images/I/41NCoHZoqHL._SL500_.jpg)