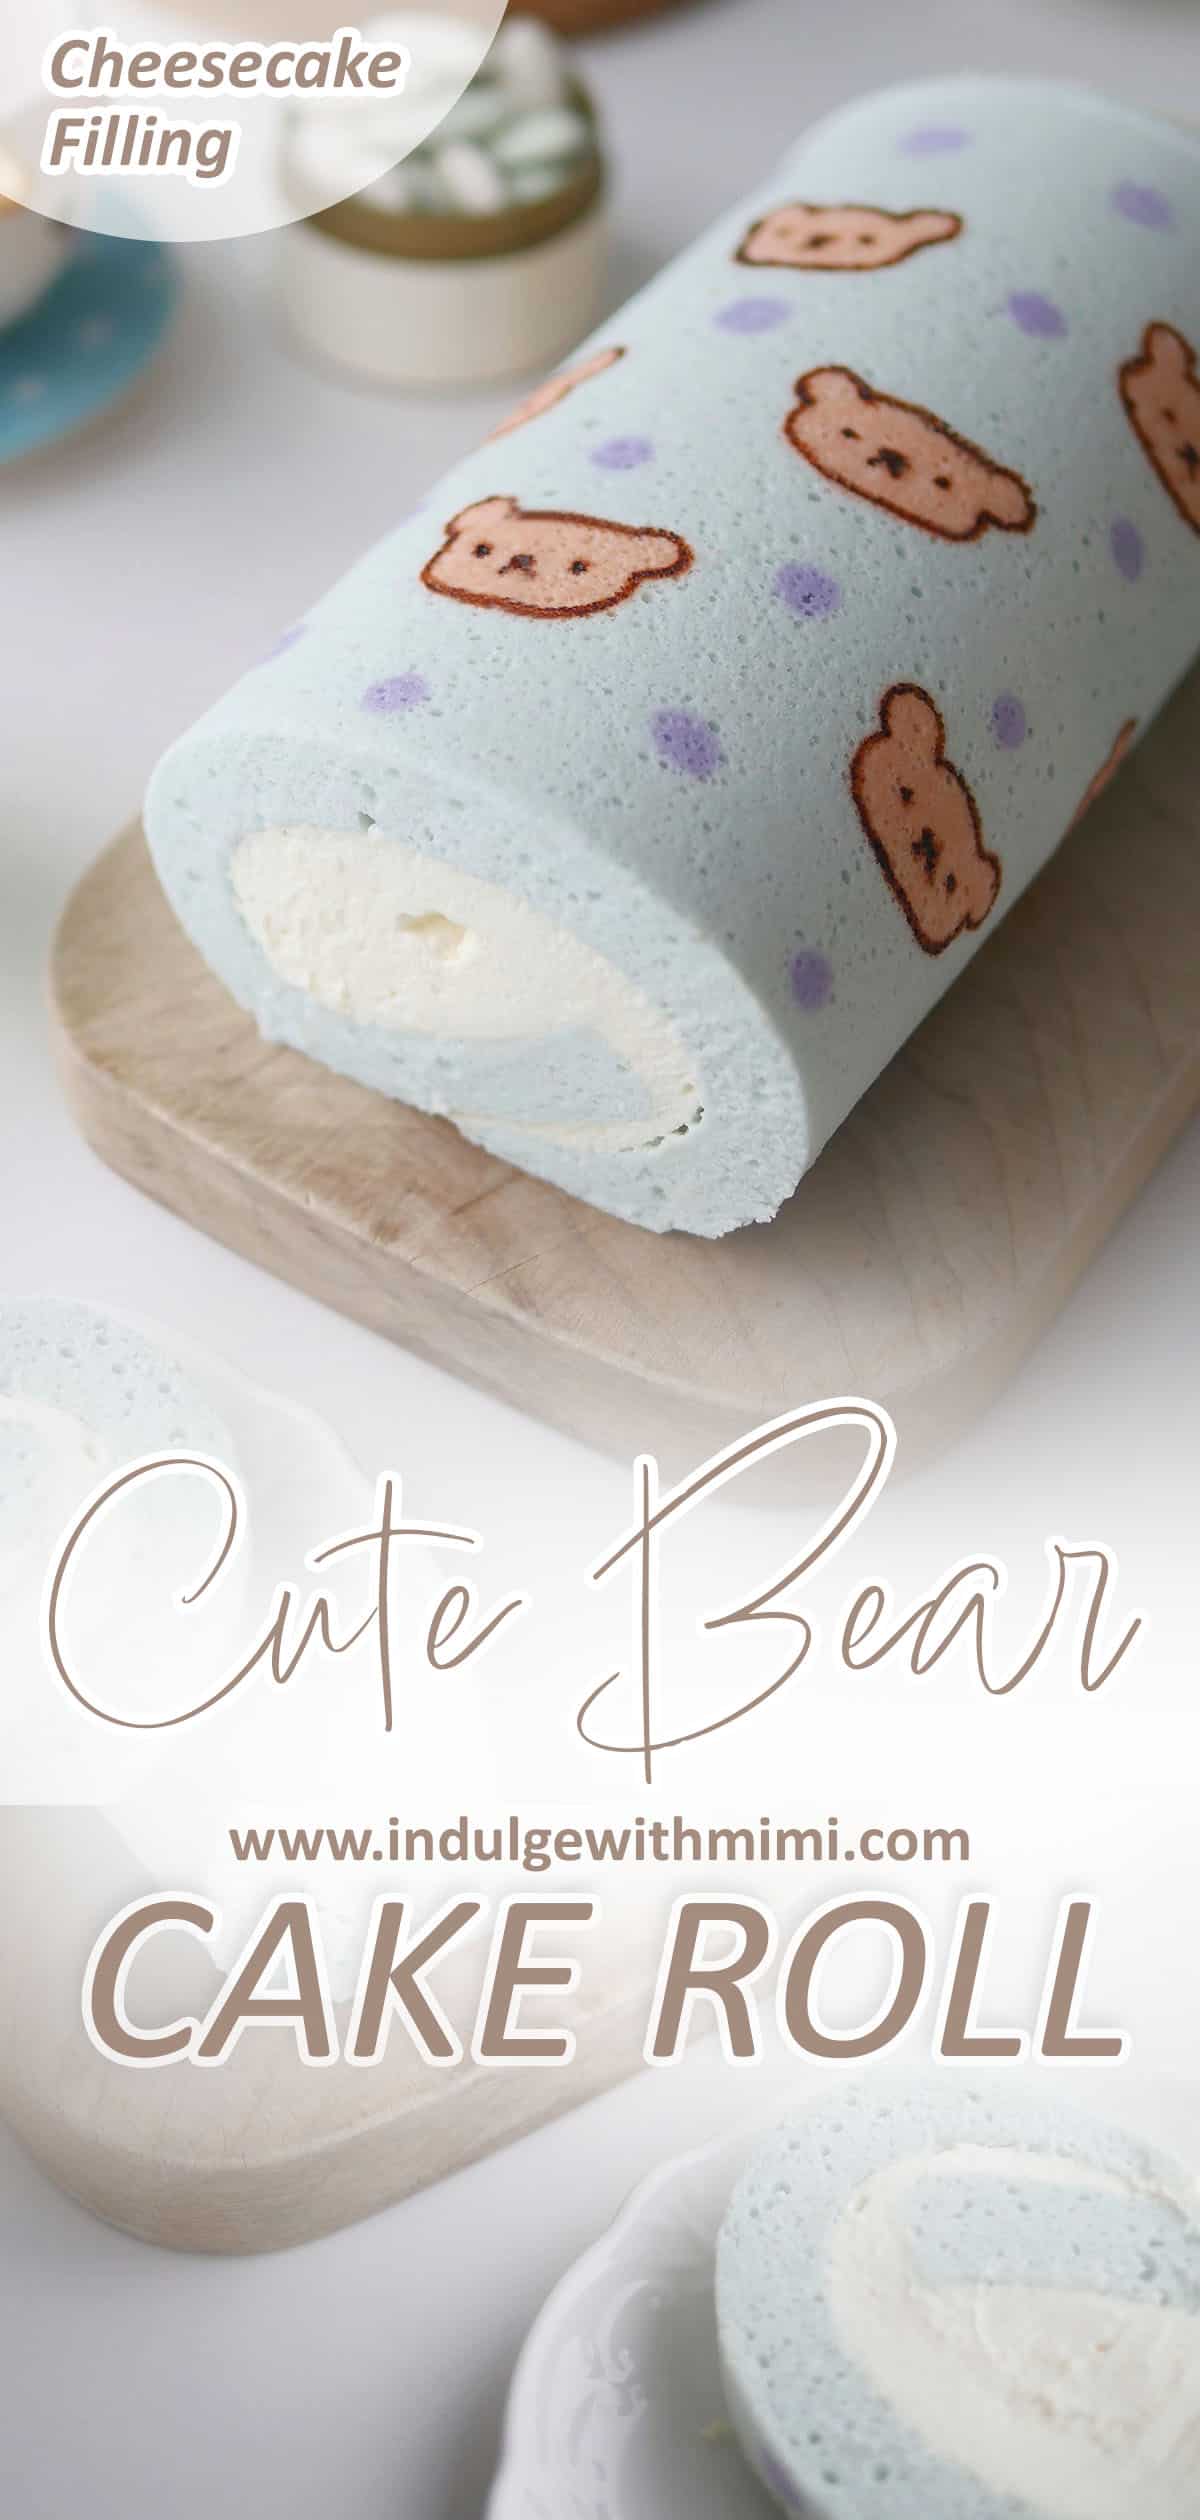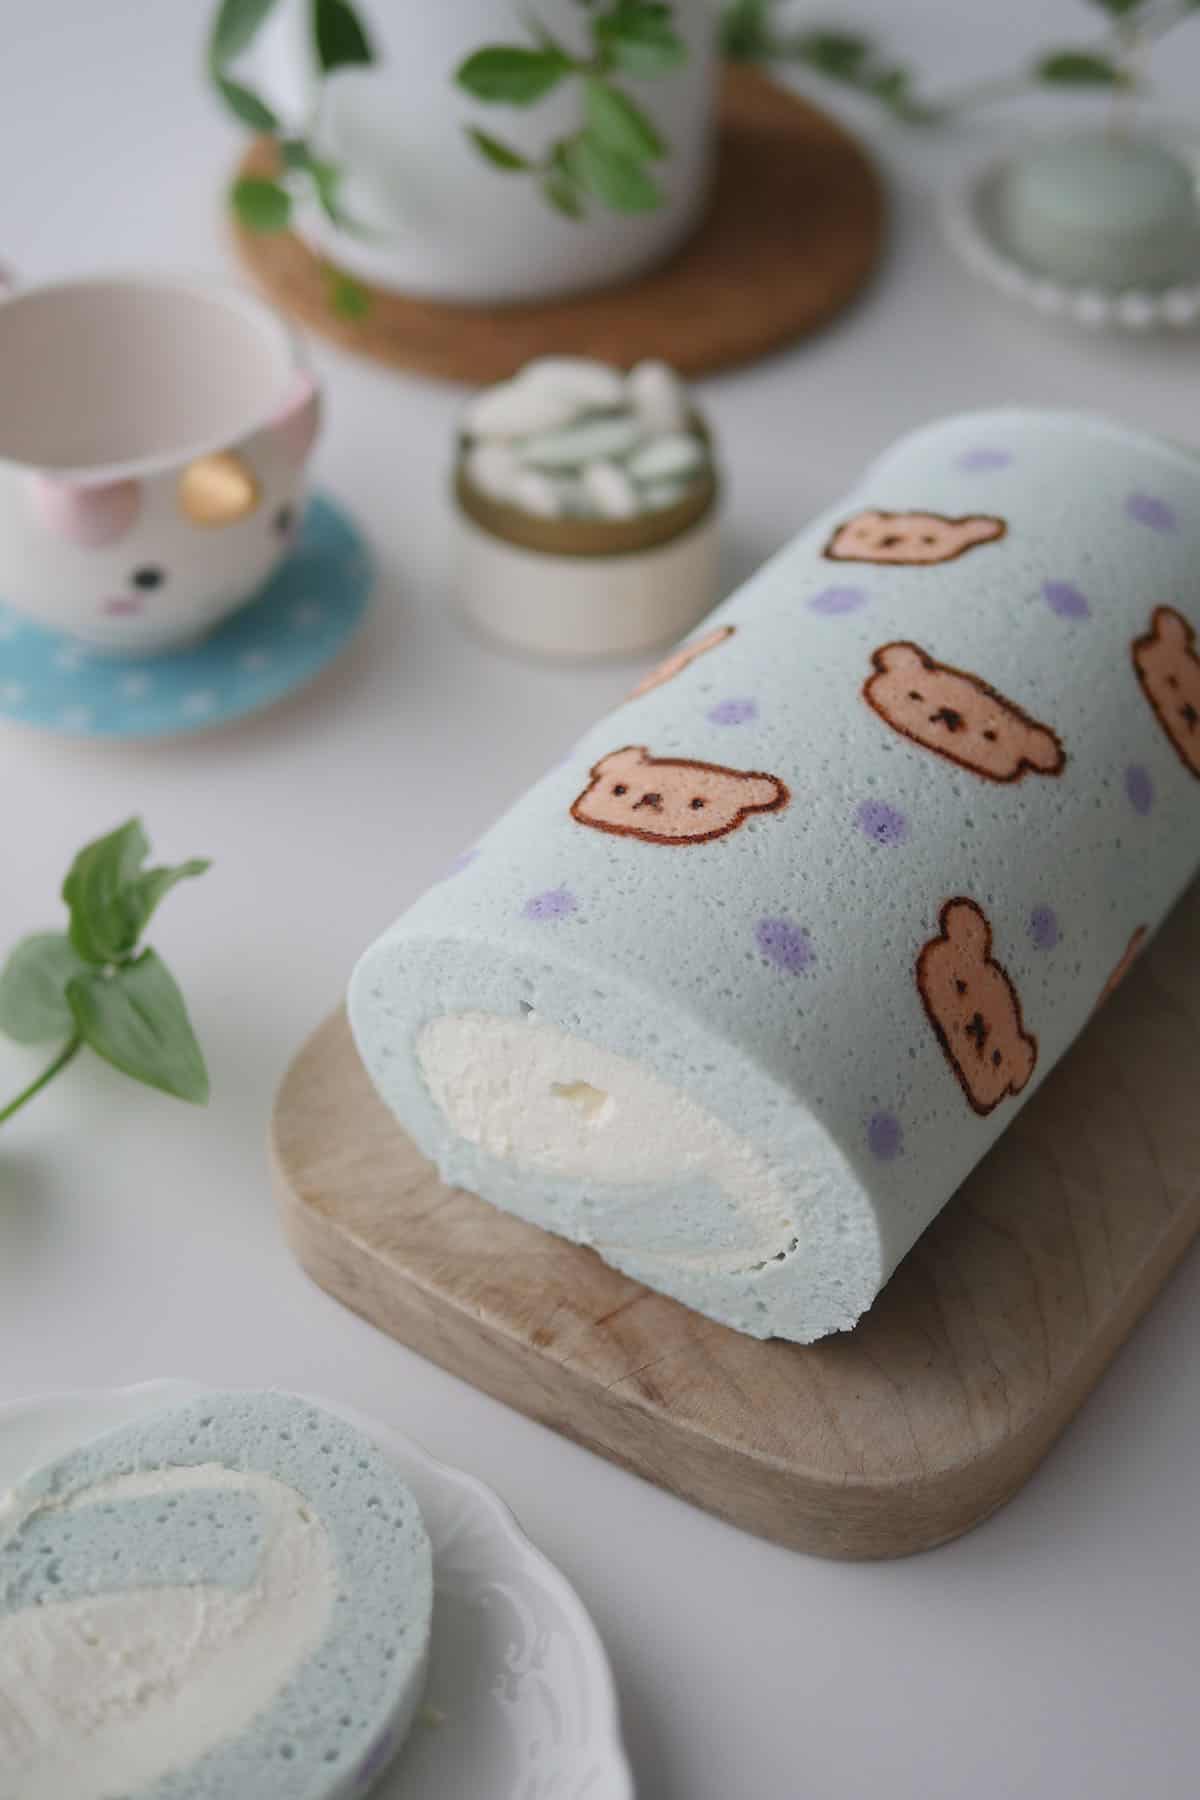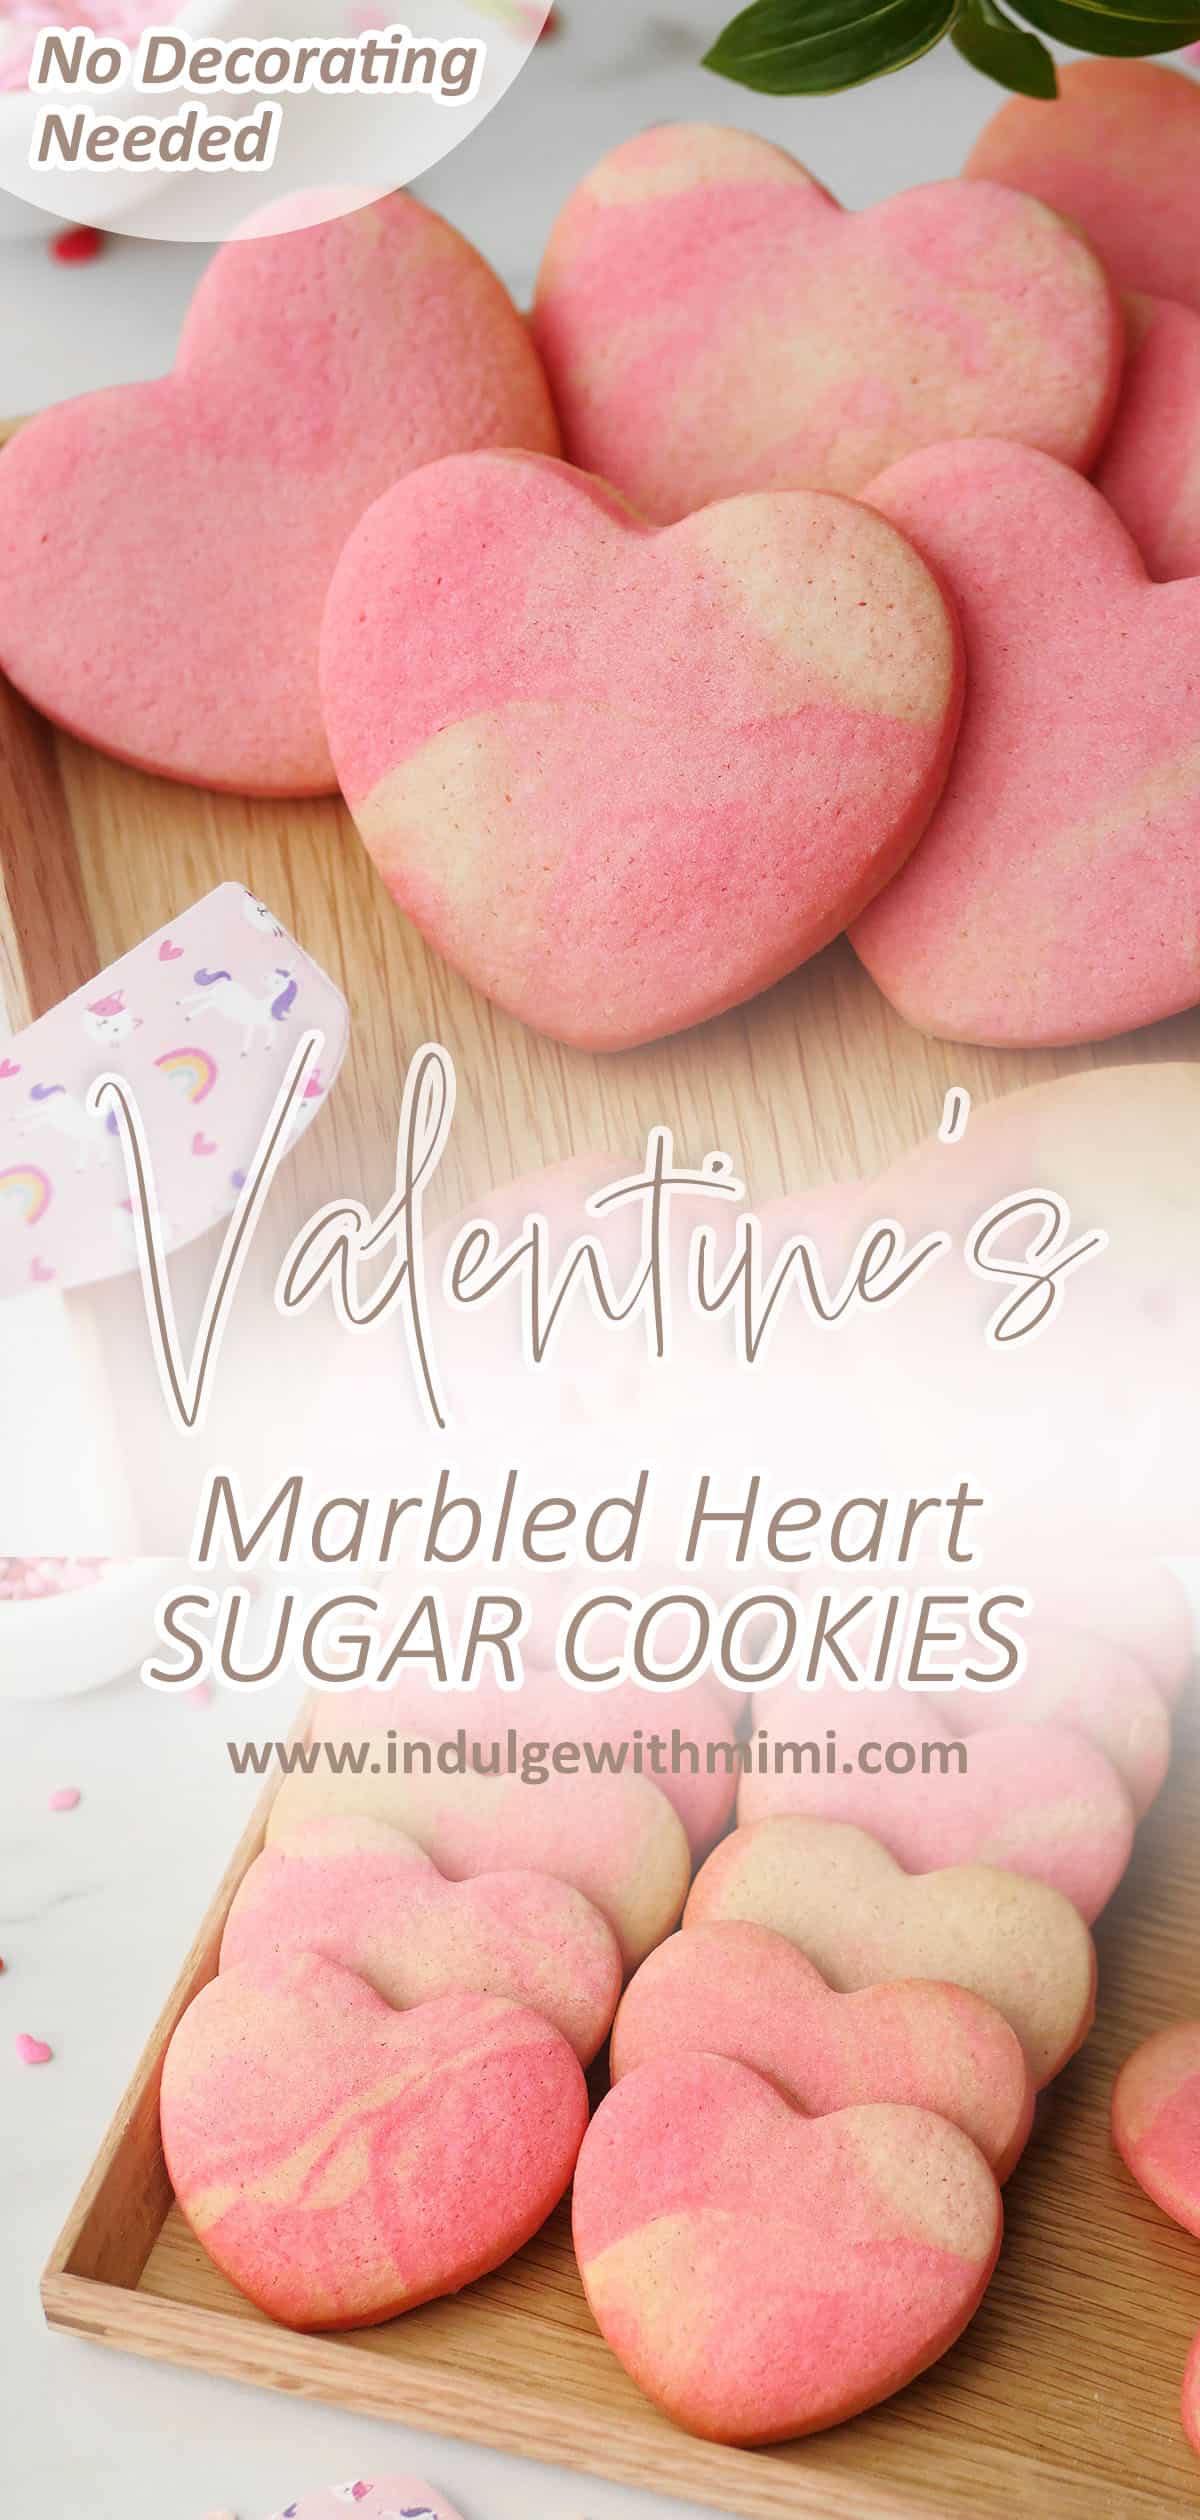
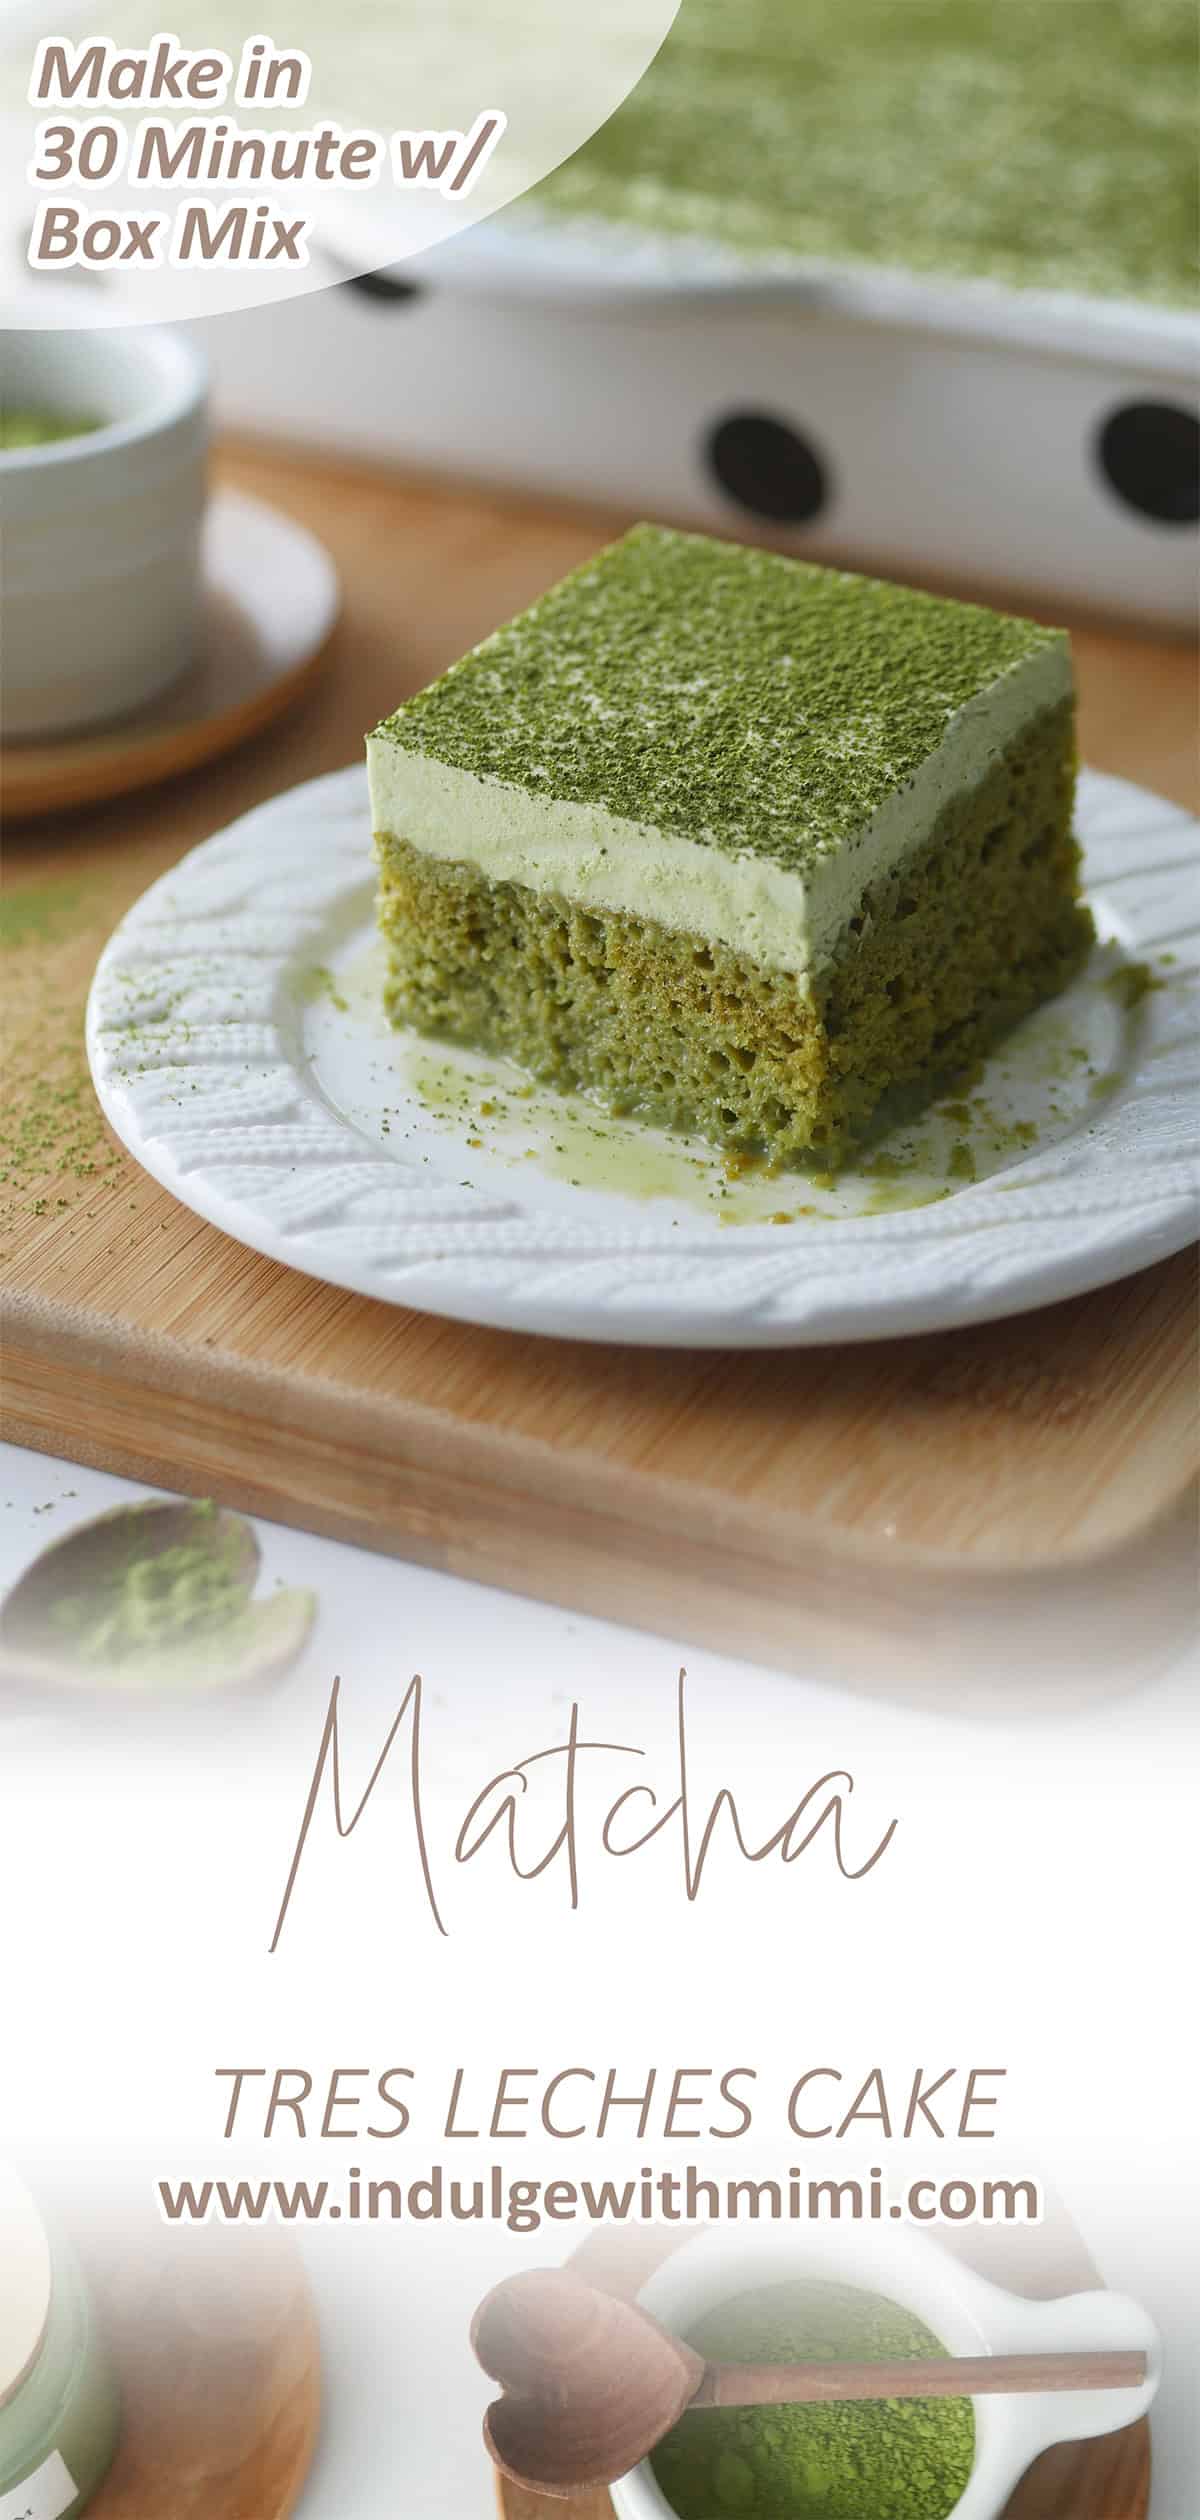
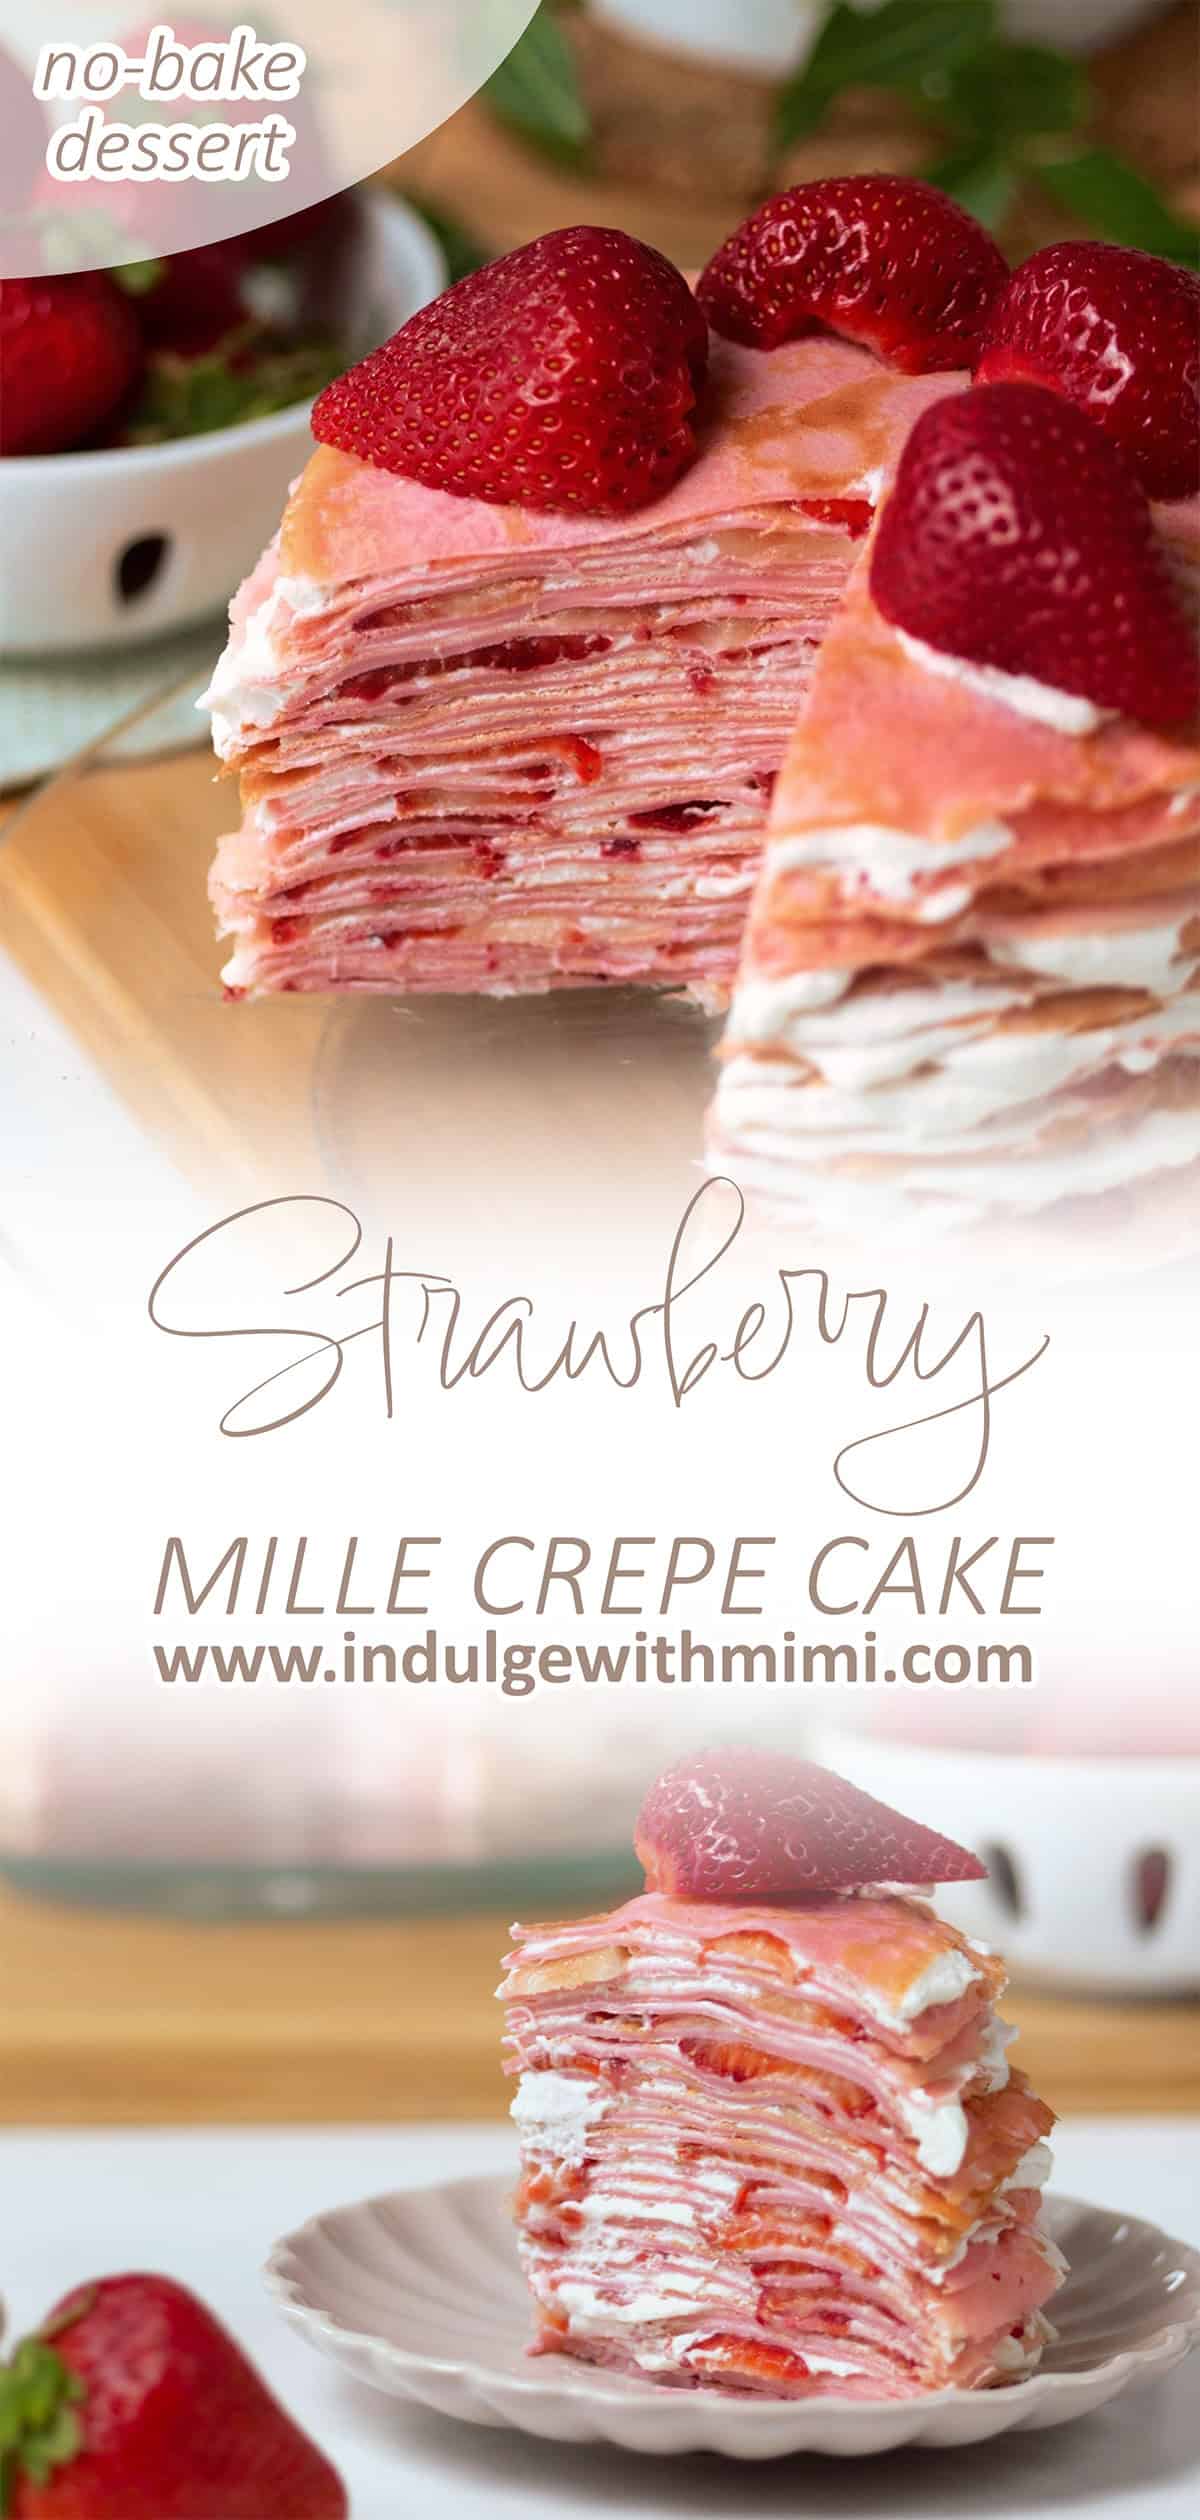
Super easy and moist Matcha green tea Tres Leches cake using box mix. Only 30 minutes active time with simple year-round ingredients.
This Matcha green tea Tres Leches was adapted from my original box cake mix Tres Leches cake. My friends and family really enjoyed the unique moist texture and sweet taste of that cake. I thought it would be interesting to adapt it for a green tea flavor since its slightly astringent taste would pair well with the naturally sweet Tres Leches cake. Because I didn't personally have any authentic references to go off of, I felt so lucky to have the opportunity to share and receive feedback for this creation with a fellow home baker who has South American roots. She told me this Matcha Tres Leches was better than many of the ones she's had in the past because the flavor and texture was just right and it was not soggy. I just love how this adaptation turned out and I think you will find it is a delicious and approachable dessert to bring to your next gathering.
XOXO,
Mimi
Why You'll Love This Recipe
- Easy - minimal ingredients to measure, make it with 30 minutes active time!
- Year-round Ingredients - many are shelf stable too!
- Delicious - The texture comes out moist and tender every time.
- Unique - Matcha's vegetal, grassy and earthy flavors may be novel to some palettes.
- Easily Transportable - just cover the tray and go! No worrying about it tipping over.
What is Tres Leches Cake?
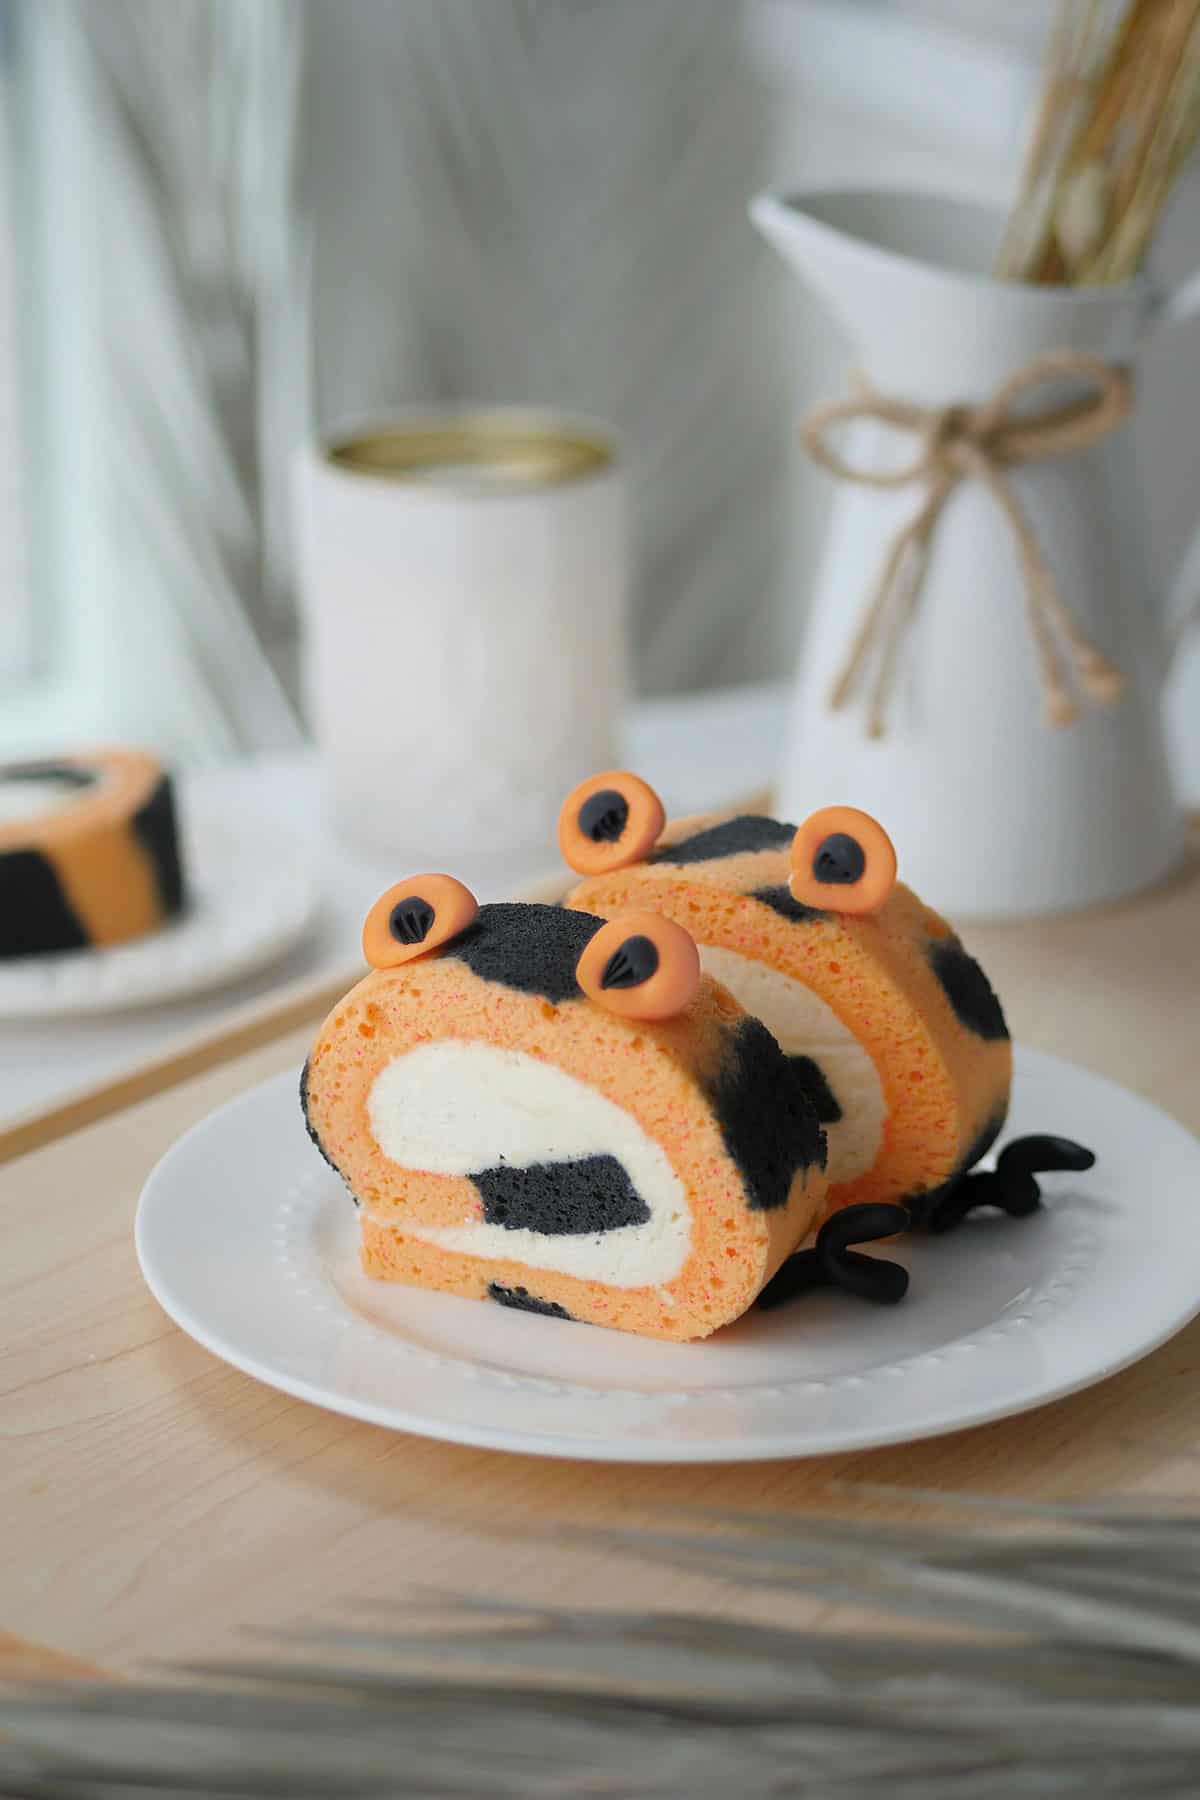
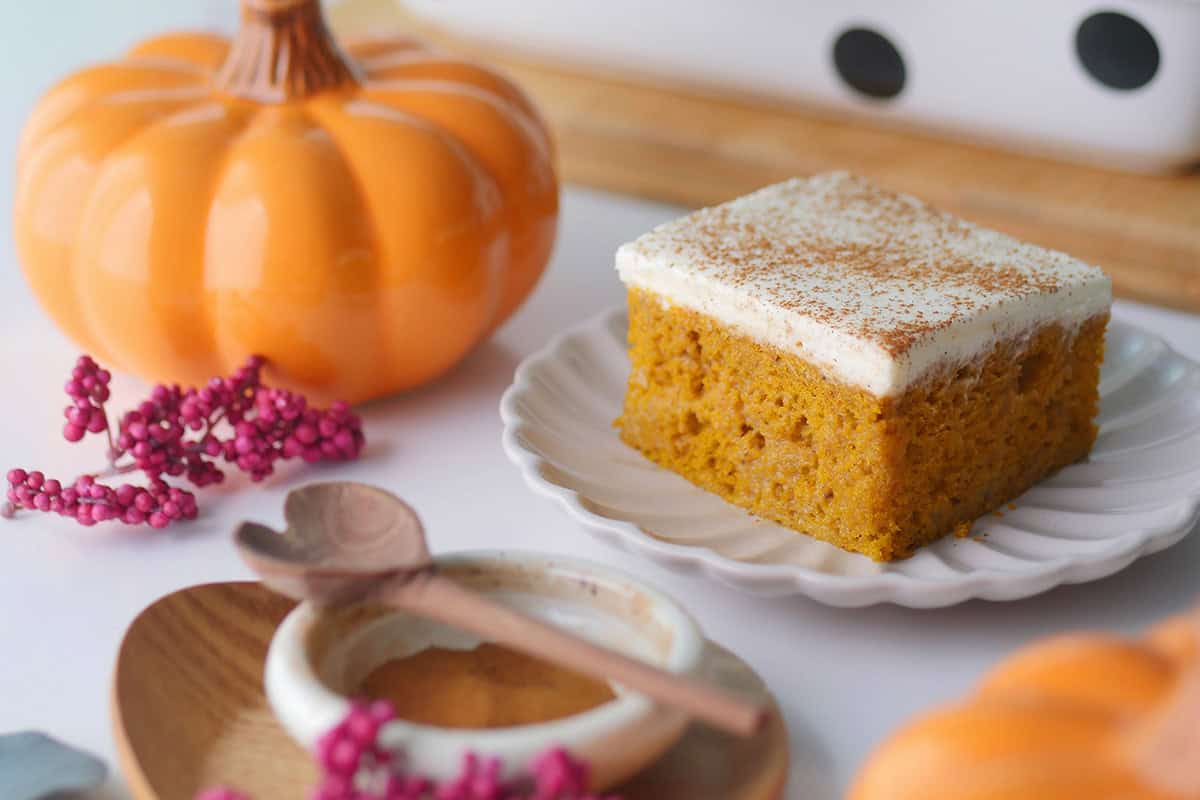
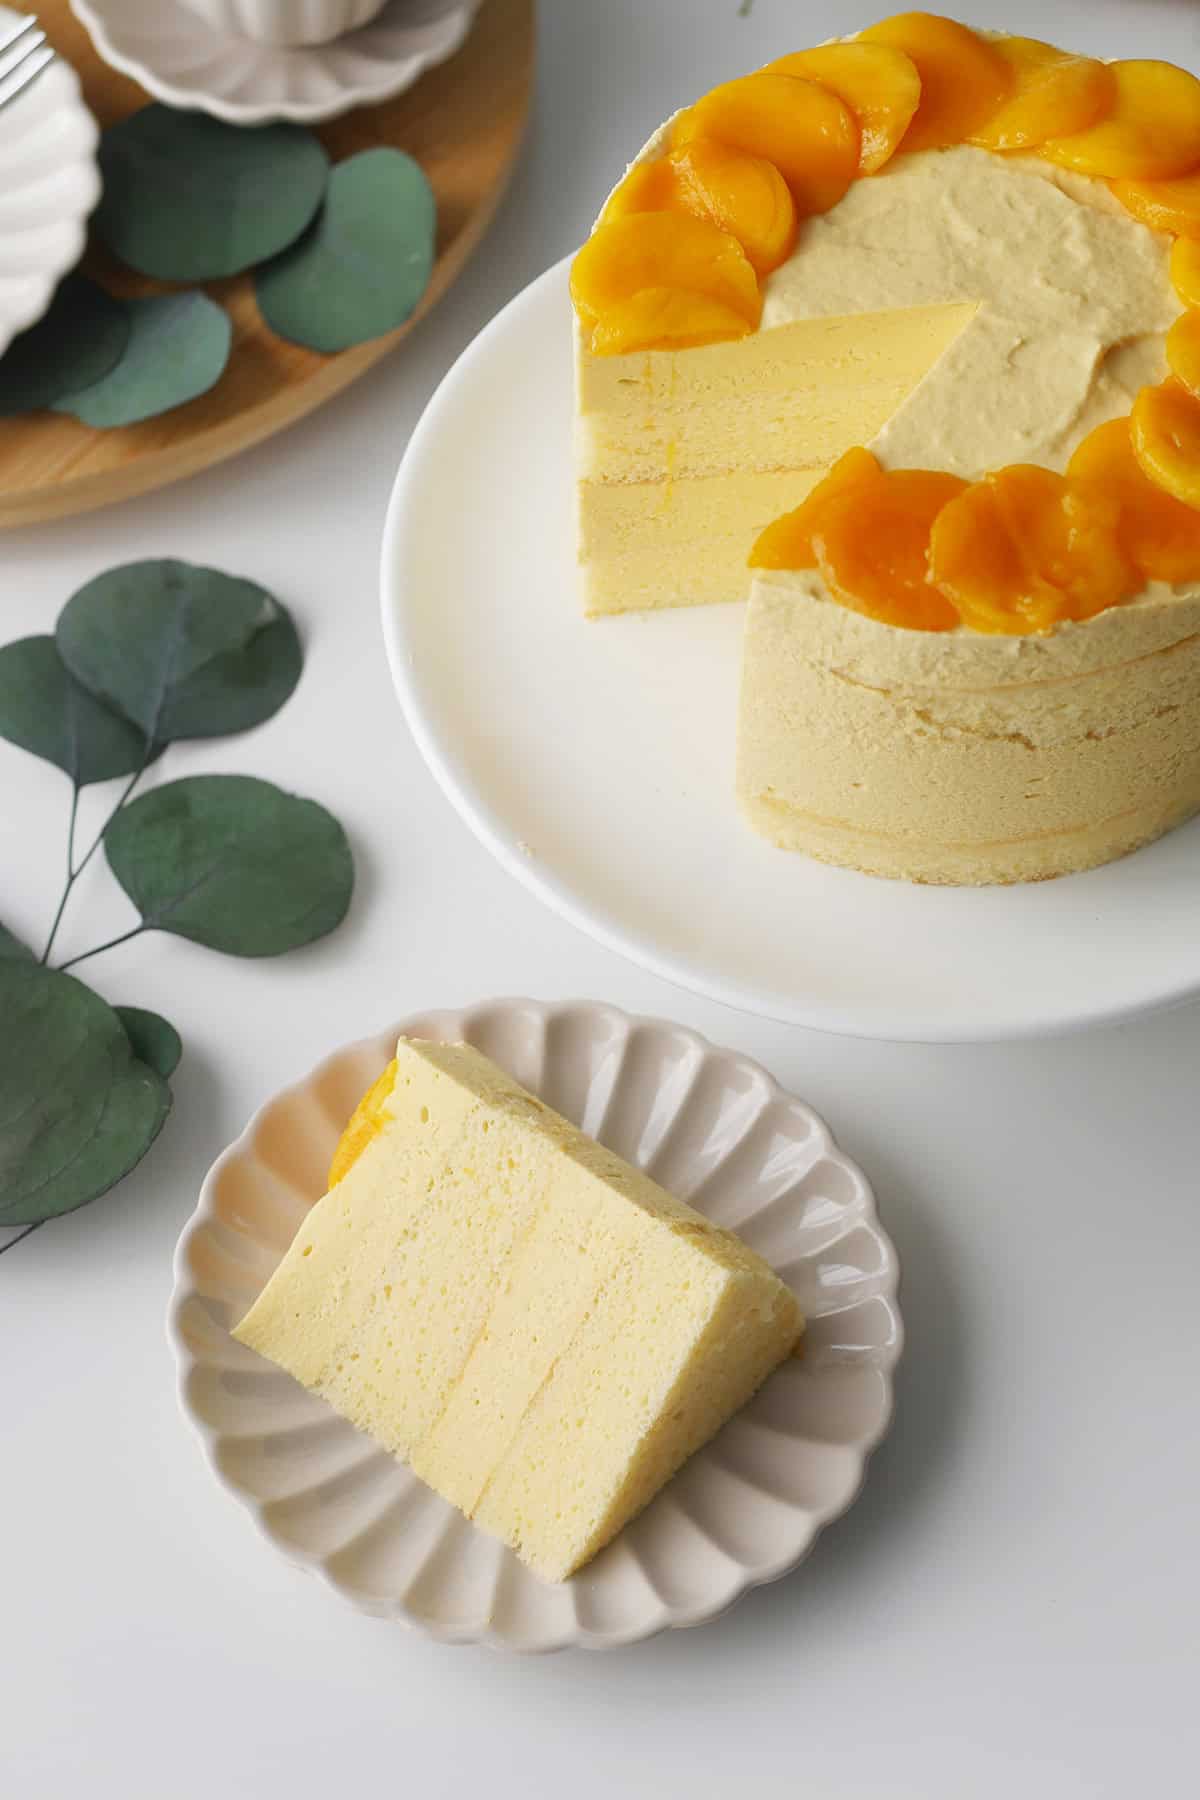
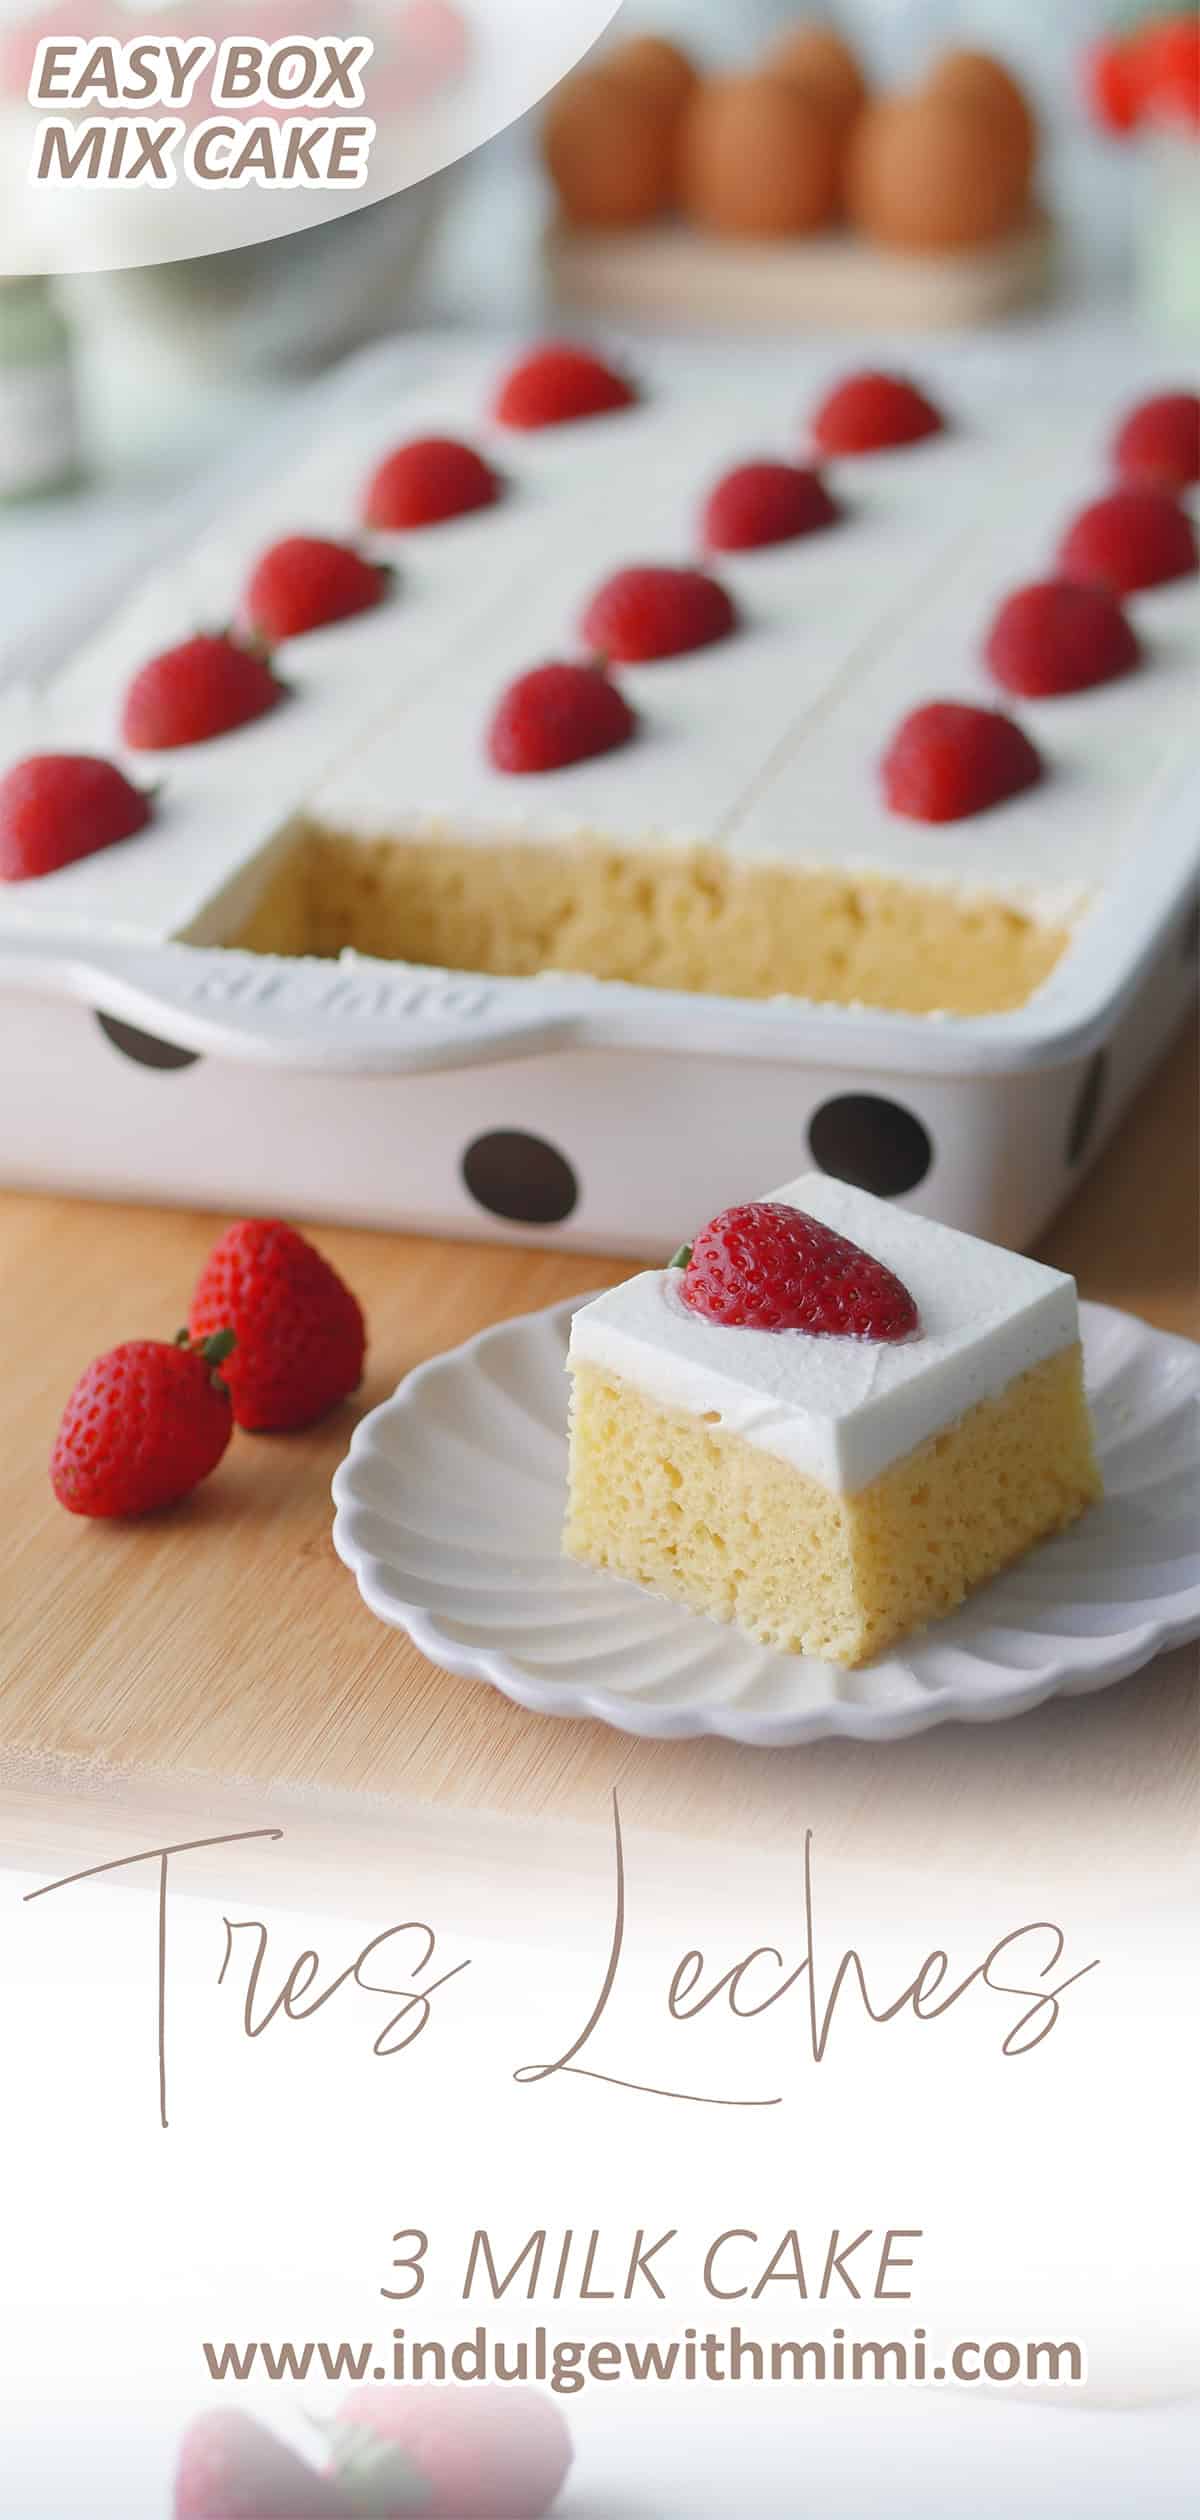
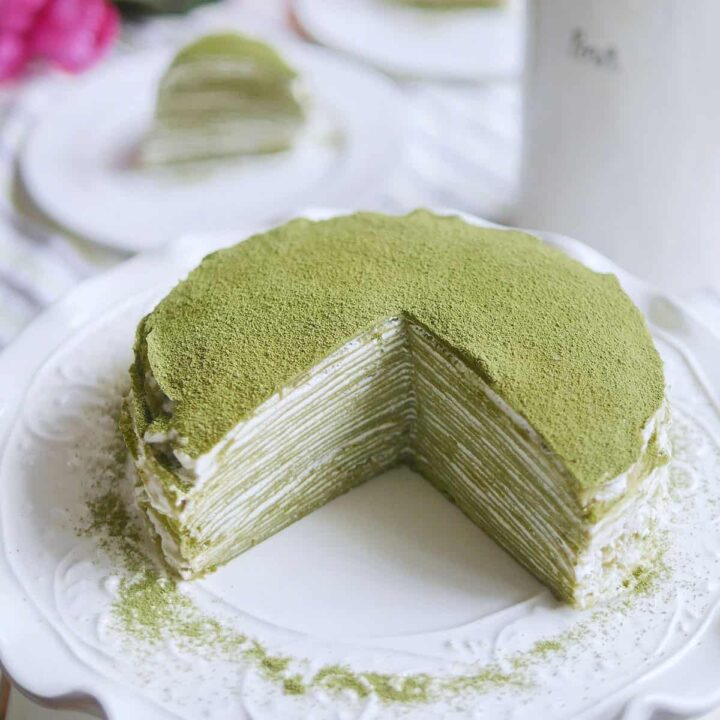
Tres Leches is Spanish for "three milks". Translated, Tres Leches cake literally means 3 milks cake. This milk-soaked dessert is popular in Latin America, especially Mexico. To make Tres Leches cake, a sponge cake is soaked with three types of milk: condensed milk, evaorated milk and milk or cream. It's then topped with whipped cream and optionally with fresh fruits or a dusting of spices or tea powder. In this recipe, there is an addition of Matcha powder in all 3 components of the cake: cake body, milk soak and the frosting to give it it's Japanese green tea flavor.
What Does Matcha Tres Leches Taste Like?
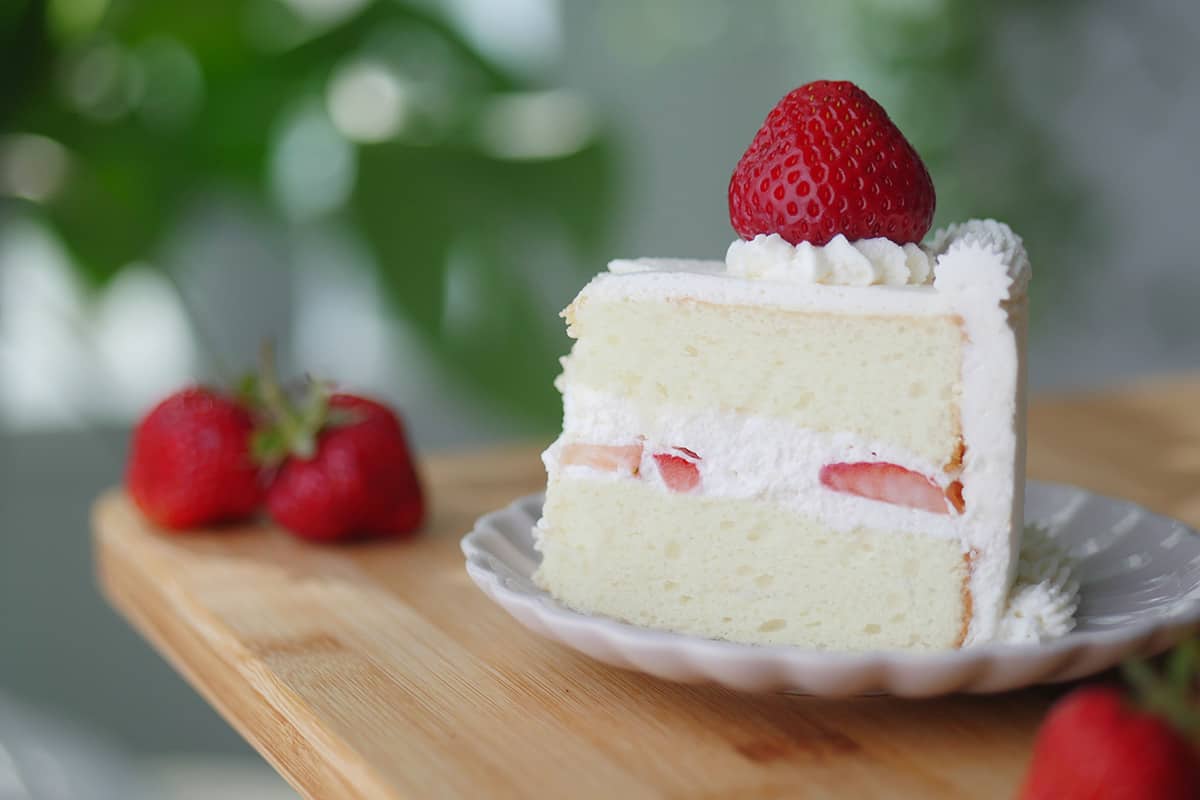
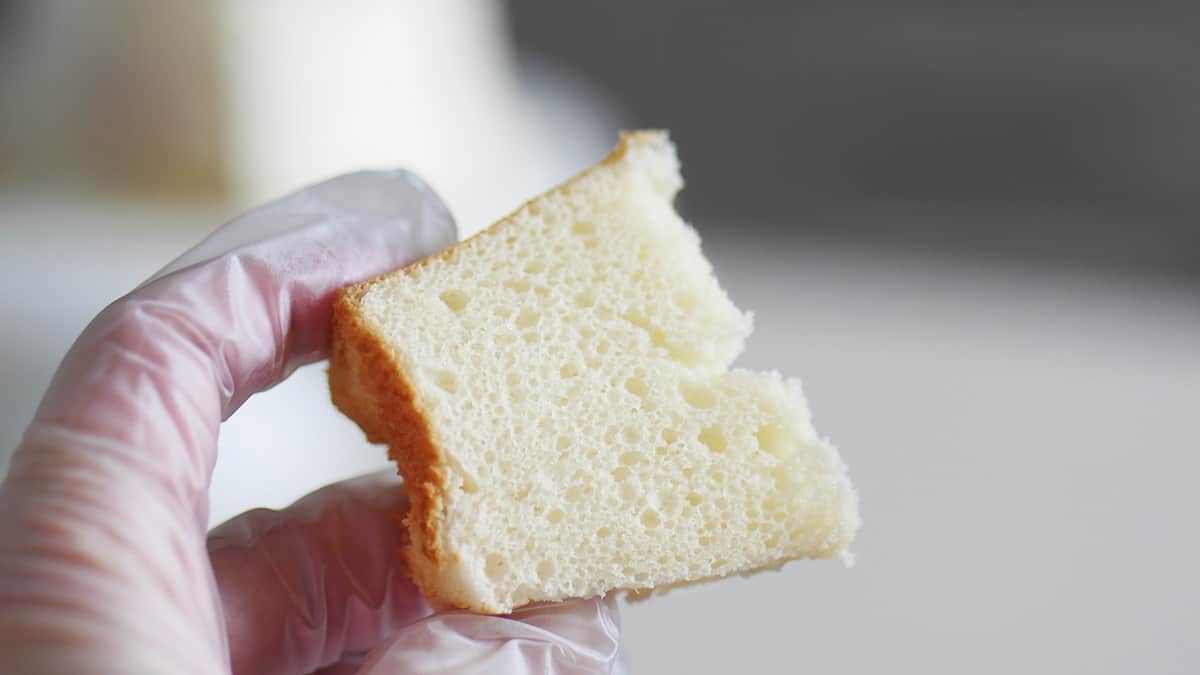
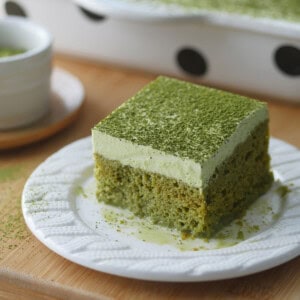
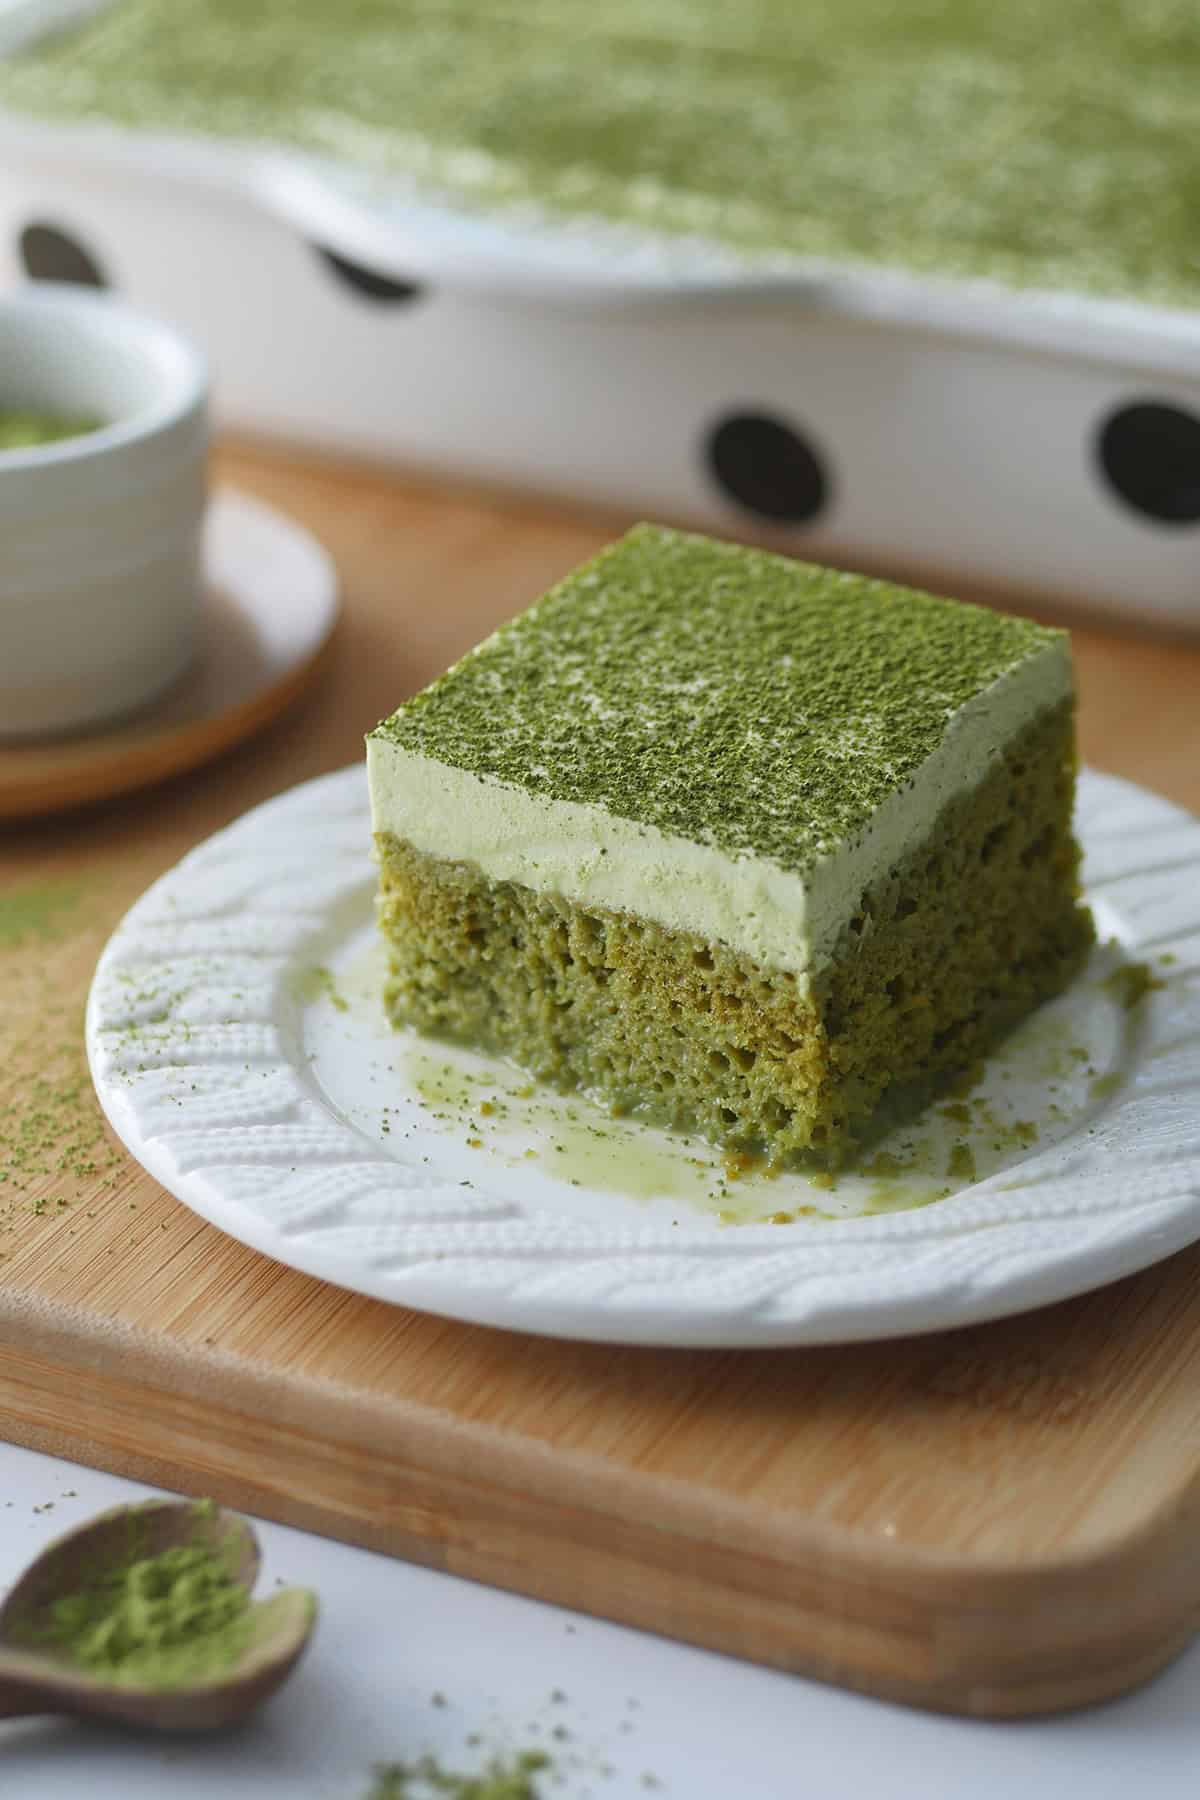
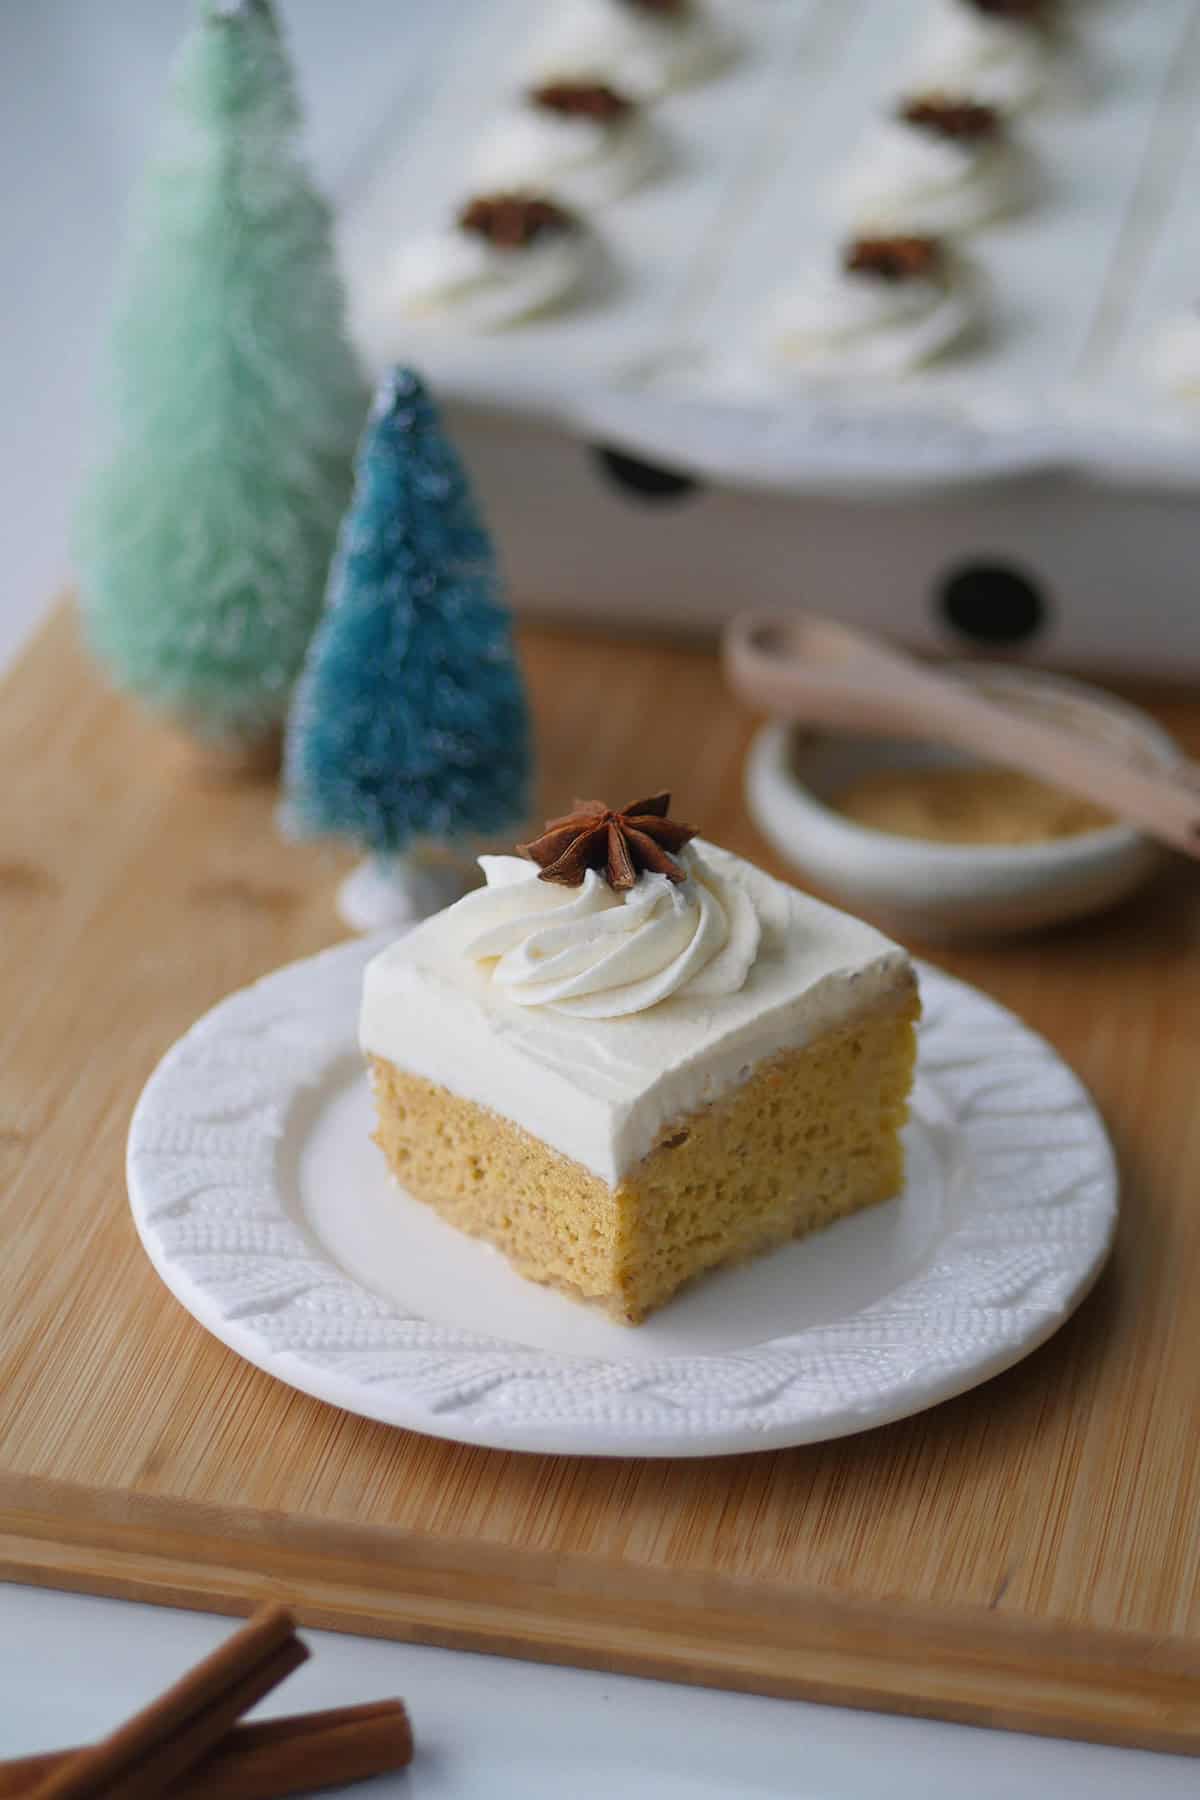
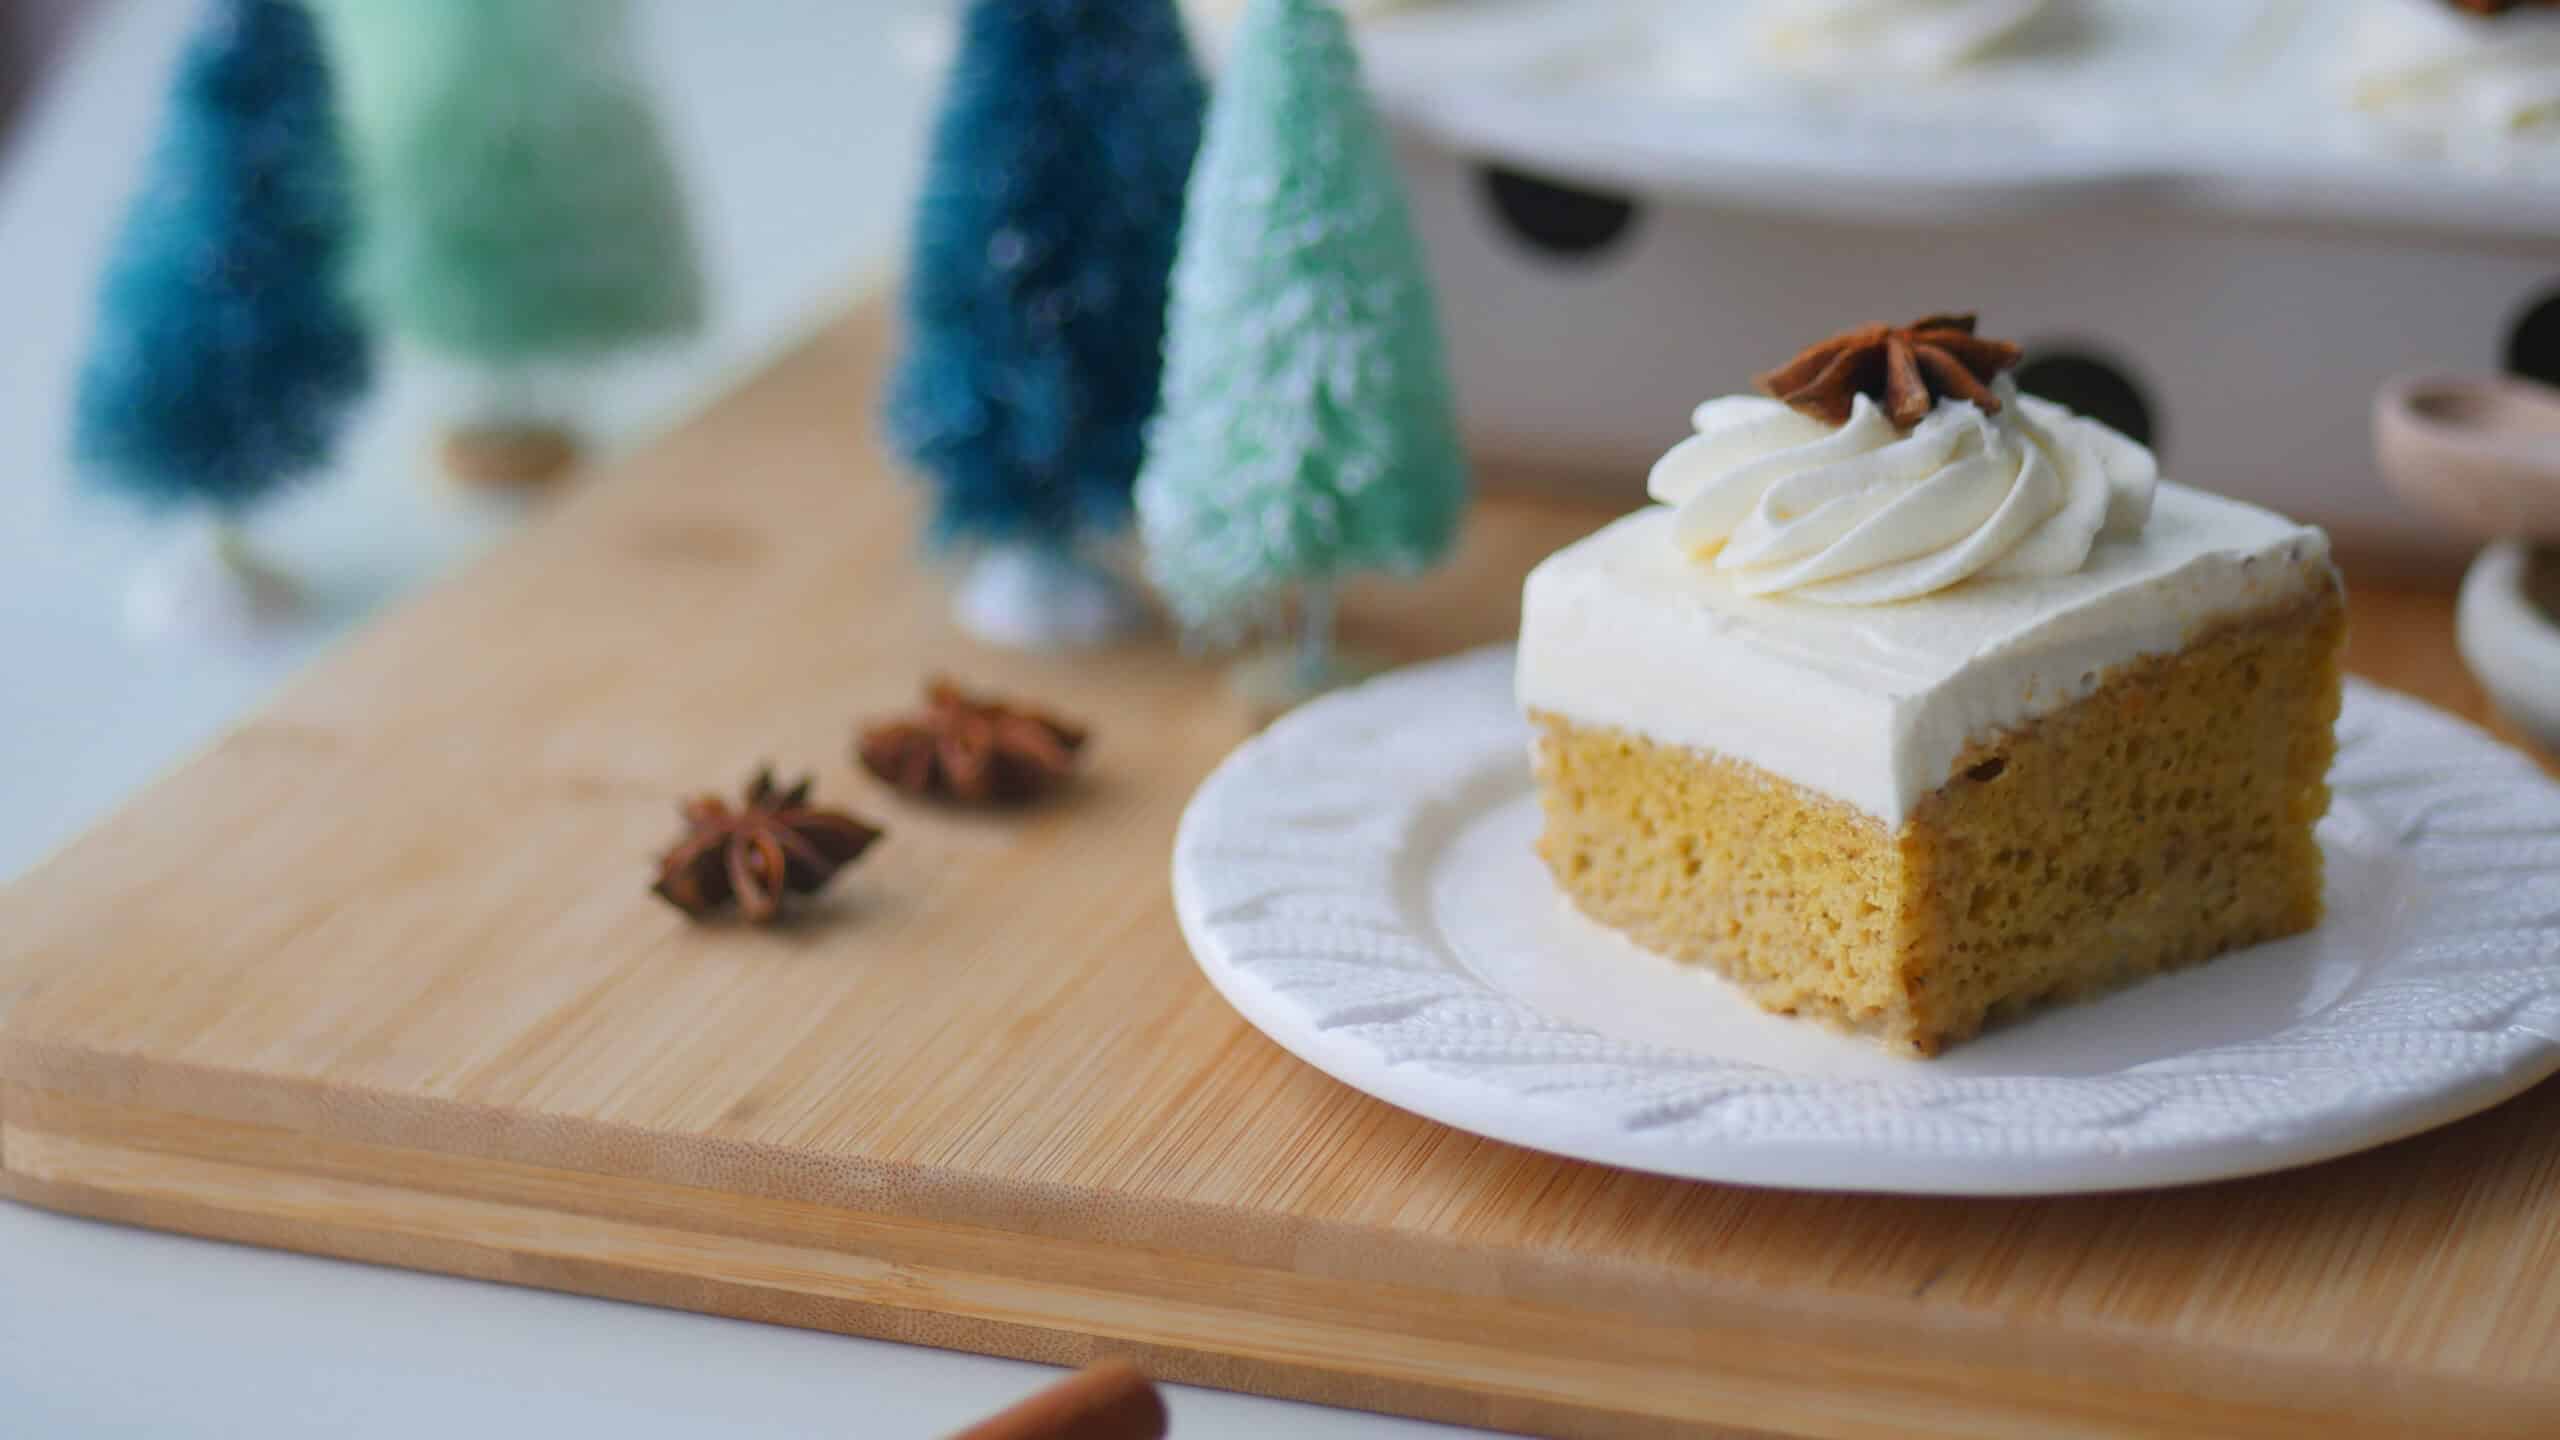
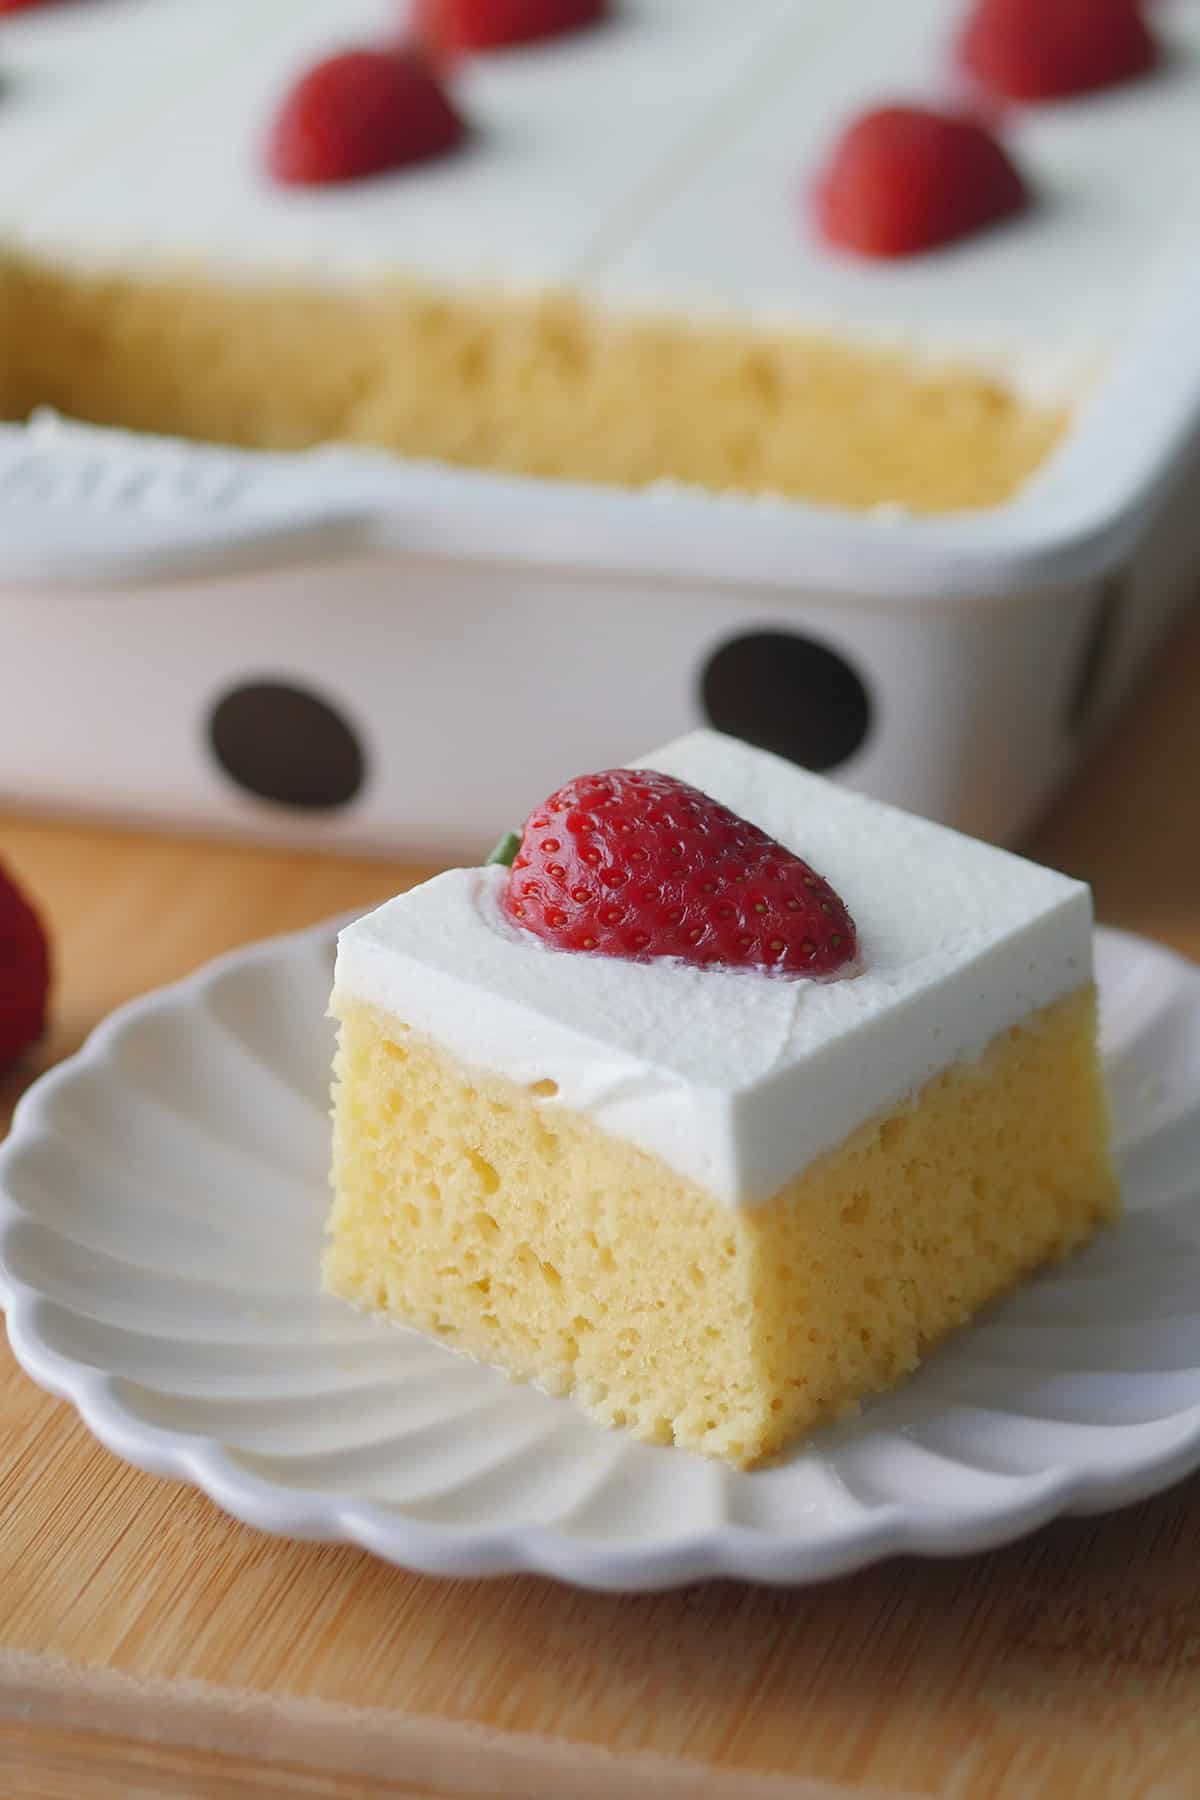
Because this cake has been soaked in Matcha flavored milk, it is soft and extra moist but not soggy due to the sponge cake's ability to properly absorb the liquids. The cake itself is sweet because of the sweetened condensed milk but it's nicely balanced with the slightly bitter taste of Matcha powder that adds unique vegetal notes and a grassy and earthy flavor due to its presence in every component of this cake. Additionally, the frosting is a light and airy Matcha flavored whipped cream that is just lightly sweetened. This cake is sweet and creamy without being overly rich.
Does Soaking Tres Leches with Milk Make it Soggy?
Soaking Tres Leches with 3 types of milk give it its moist texture. It won't be soggy if it's baked using the proper cake body (sponge cake with AP flour) and soaked with the proper ratio of milk once the cake is cooled. Consuming it within the first 2 days is important too as the cake tends to get softer as time progresses. Updated: I've since made this cake multiple times and I have found that the cake still remains acceptably sturdy even up to the 5 day mark.
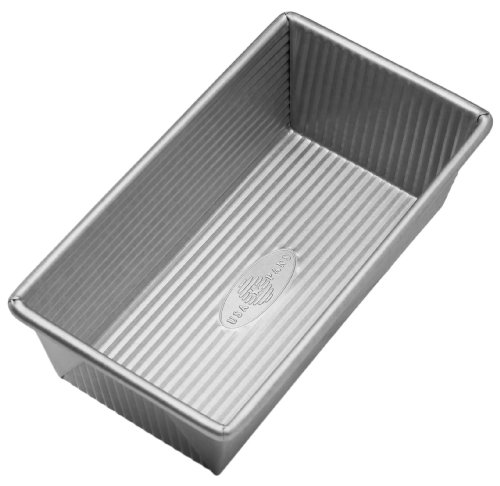
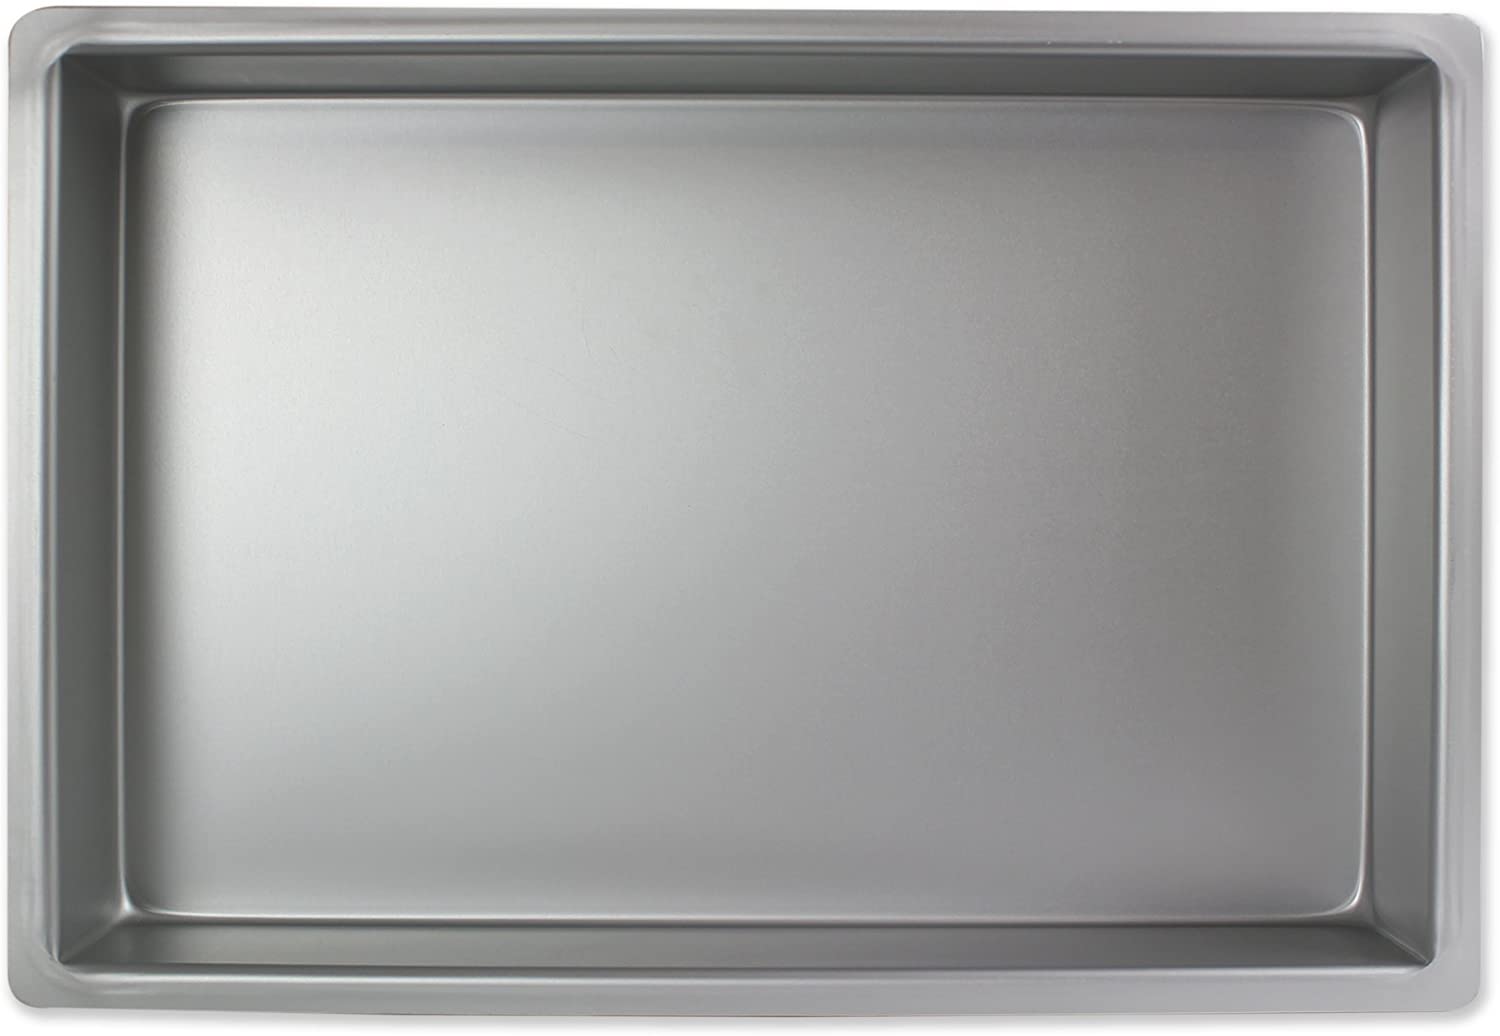
Which Pan Size Should I Use?
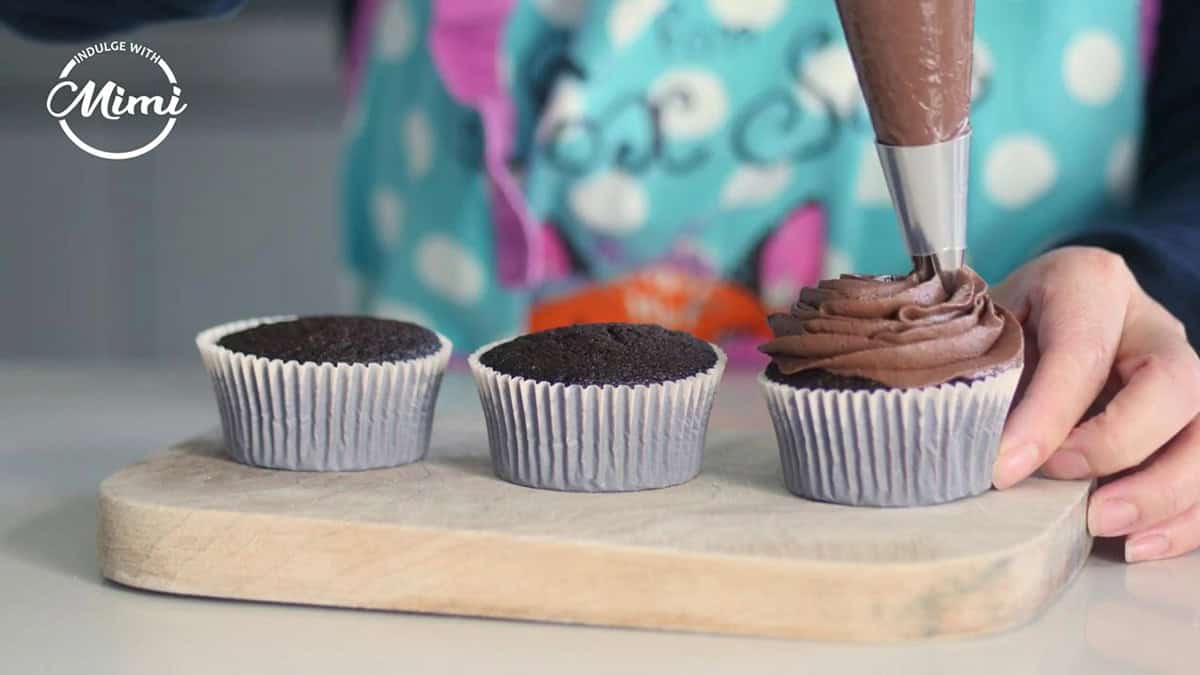
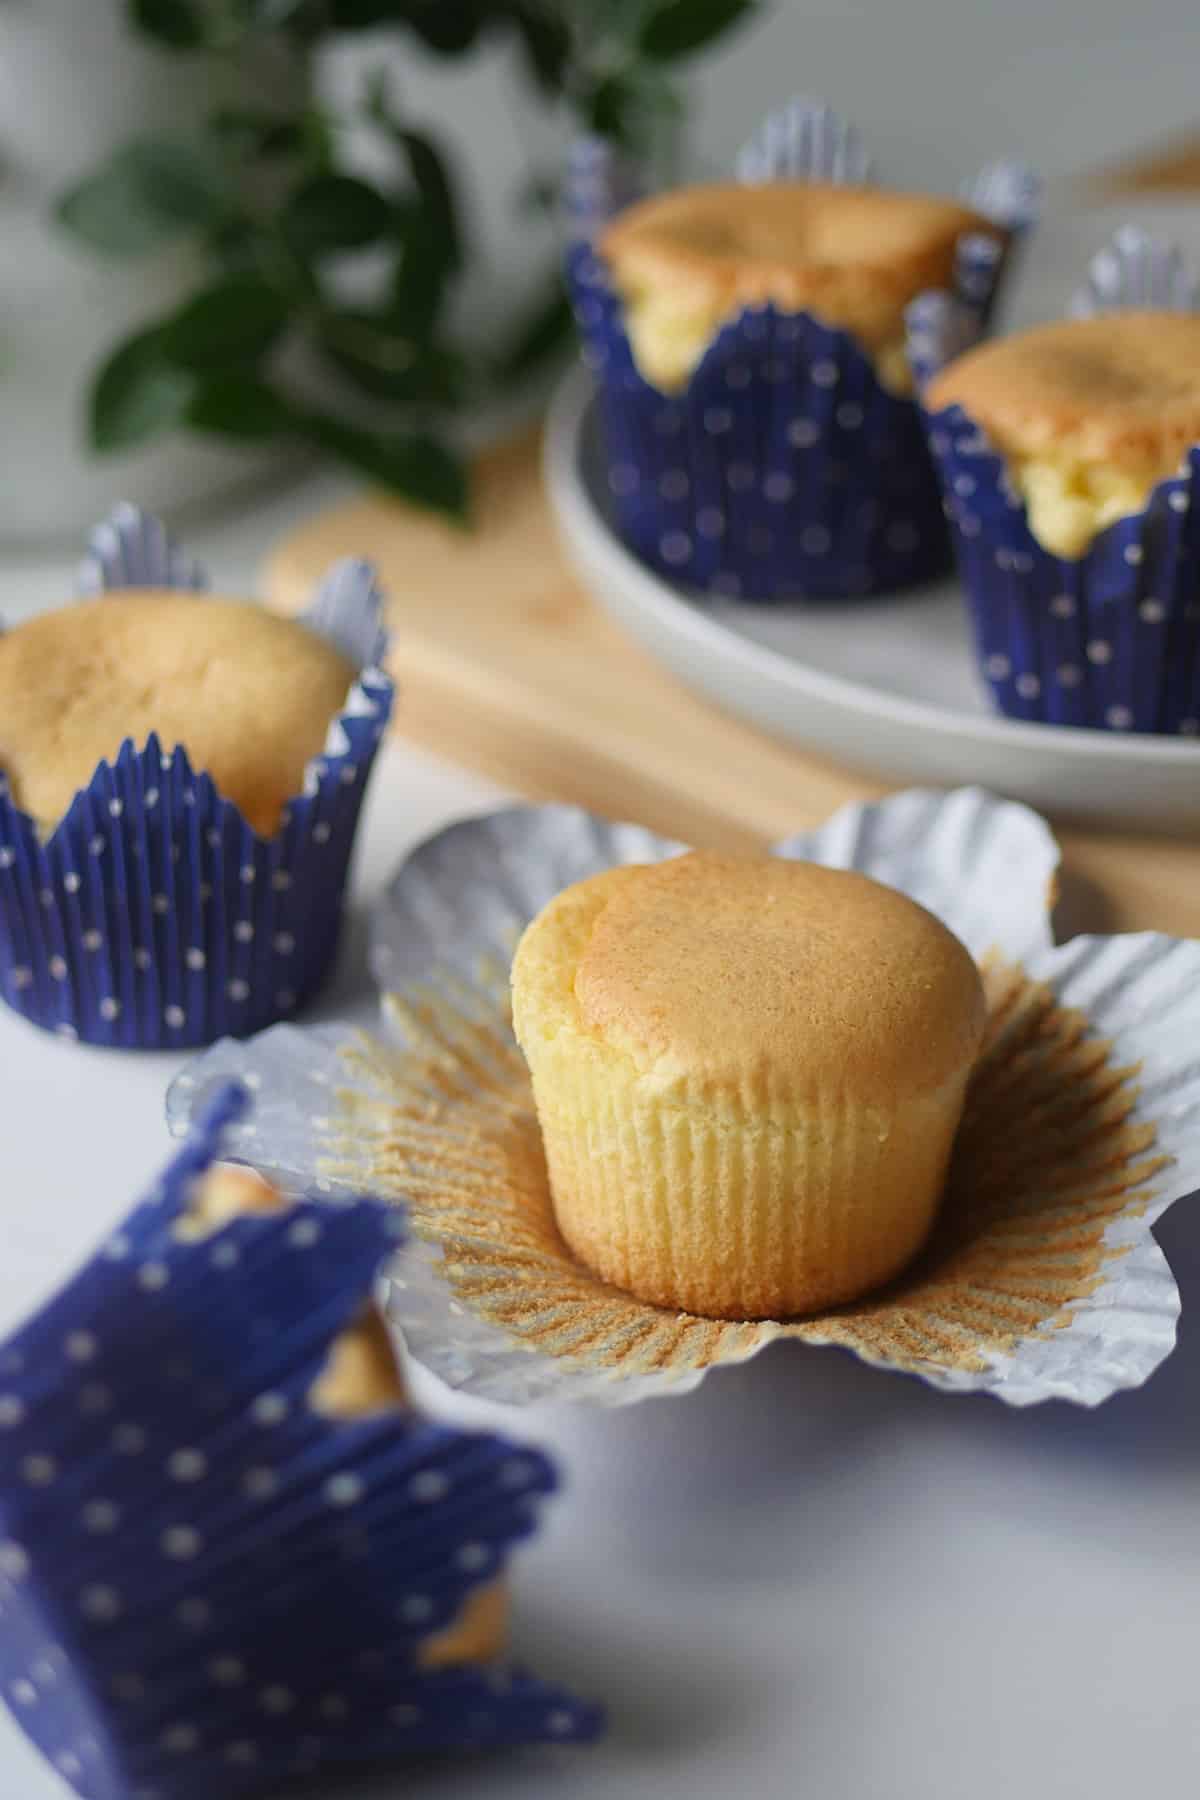
This recipe was created for a 13X9 baking pan that is at least 2" high. Other pan sizes that can be used are: two 8" rounds or two 9" rounds. I do not recommend making Tres Leches as cupcakes since the milk soak will make the cake too soft to handle on it's own without support of a knife and fork. To bake Tres Leches in individual serving sizes, bake it in an oven-safe ramekin or other heat-proof vessels.
Tips to Elevate Boxed Cake Mix
Cake mixes are not only convenient to use but they are also delicious with a great texture. Much research and development go into making these mixes for mass consumption that they've really perfected the flavor and texture. So much so that it's a well-known secret that many custom cakes, including wedding cakes, are made starting with boxed cake mix. Of course, they go through additional modifications by each individual baker depending on their level of expertise but here are some general guidelines on how you can elevate your own boxed cake mix at home:
- Replace the water with milk or buttermilk for extra flavor (done in this recipe).
- Add one extra egg for a richer and moistertexture (done in this recipe for extra structural integrity).
- Replace the oil with melted butter, ratio 1:1.2, for extra flavor (This was skipped in this recipe as Tres Leches already contains so much milk, adding more fat may make it too stodgy. Most Tres Leches recipes do not use butter.)
- Add vanilla essence for extra flavor (done in this recipe.)
- Add espresso powder for chocolate boxed mix to highlight flavors.
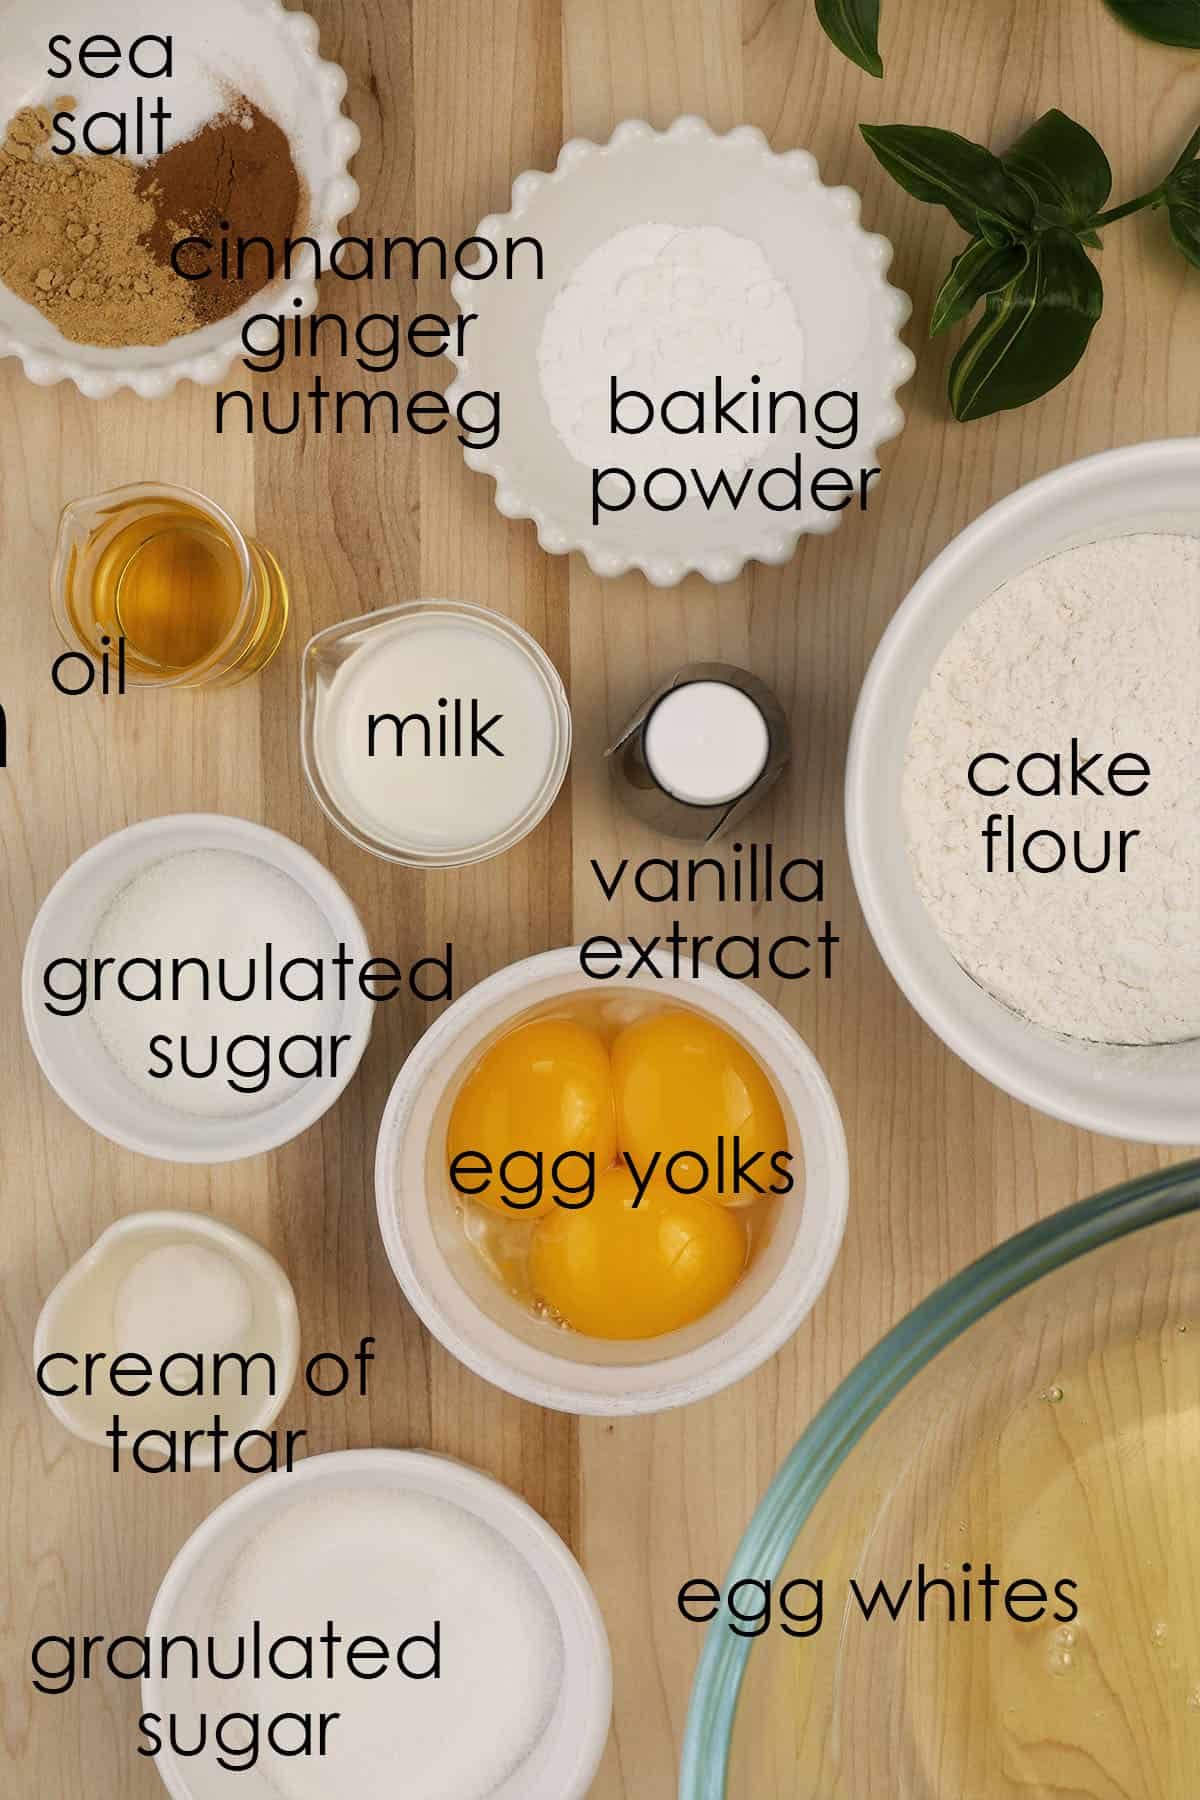
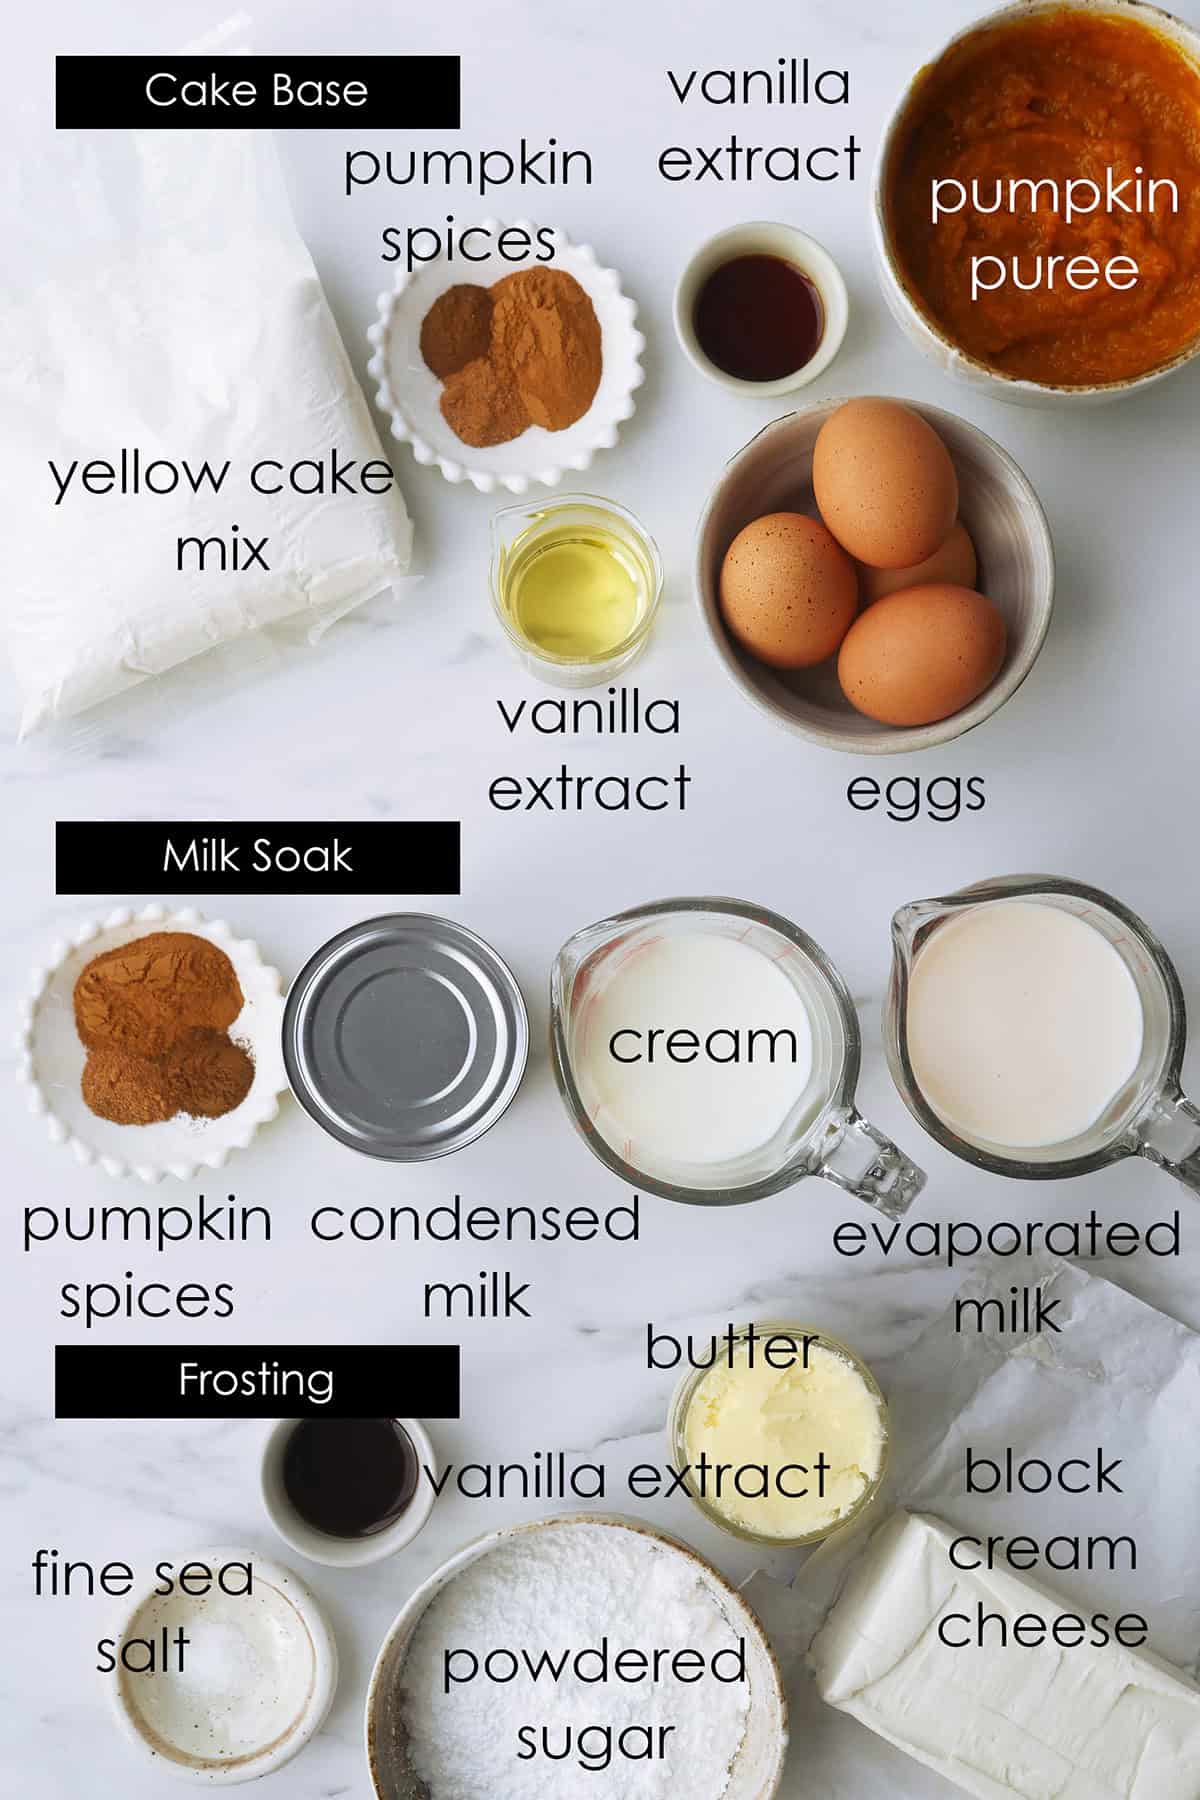
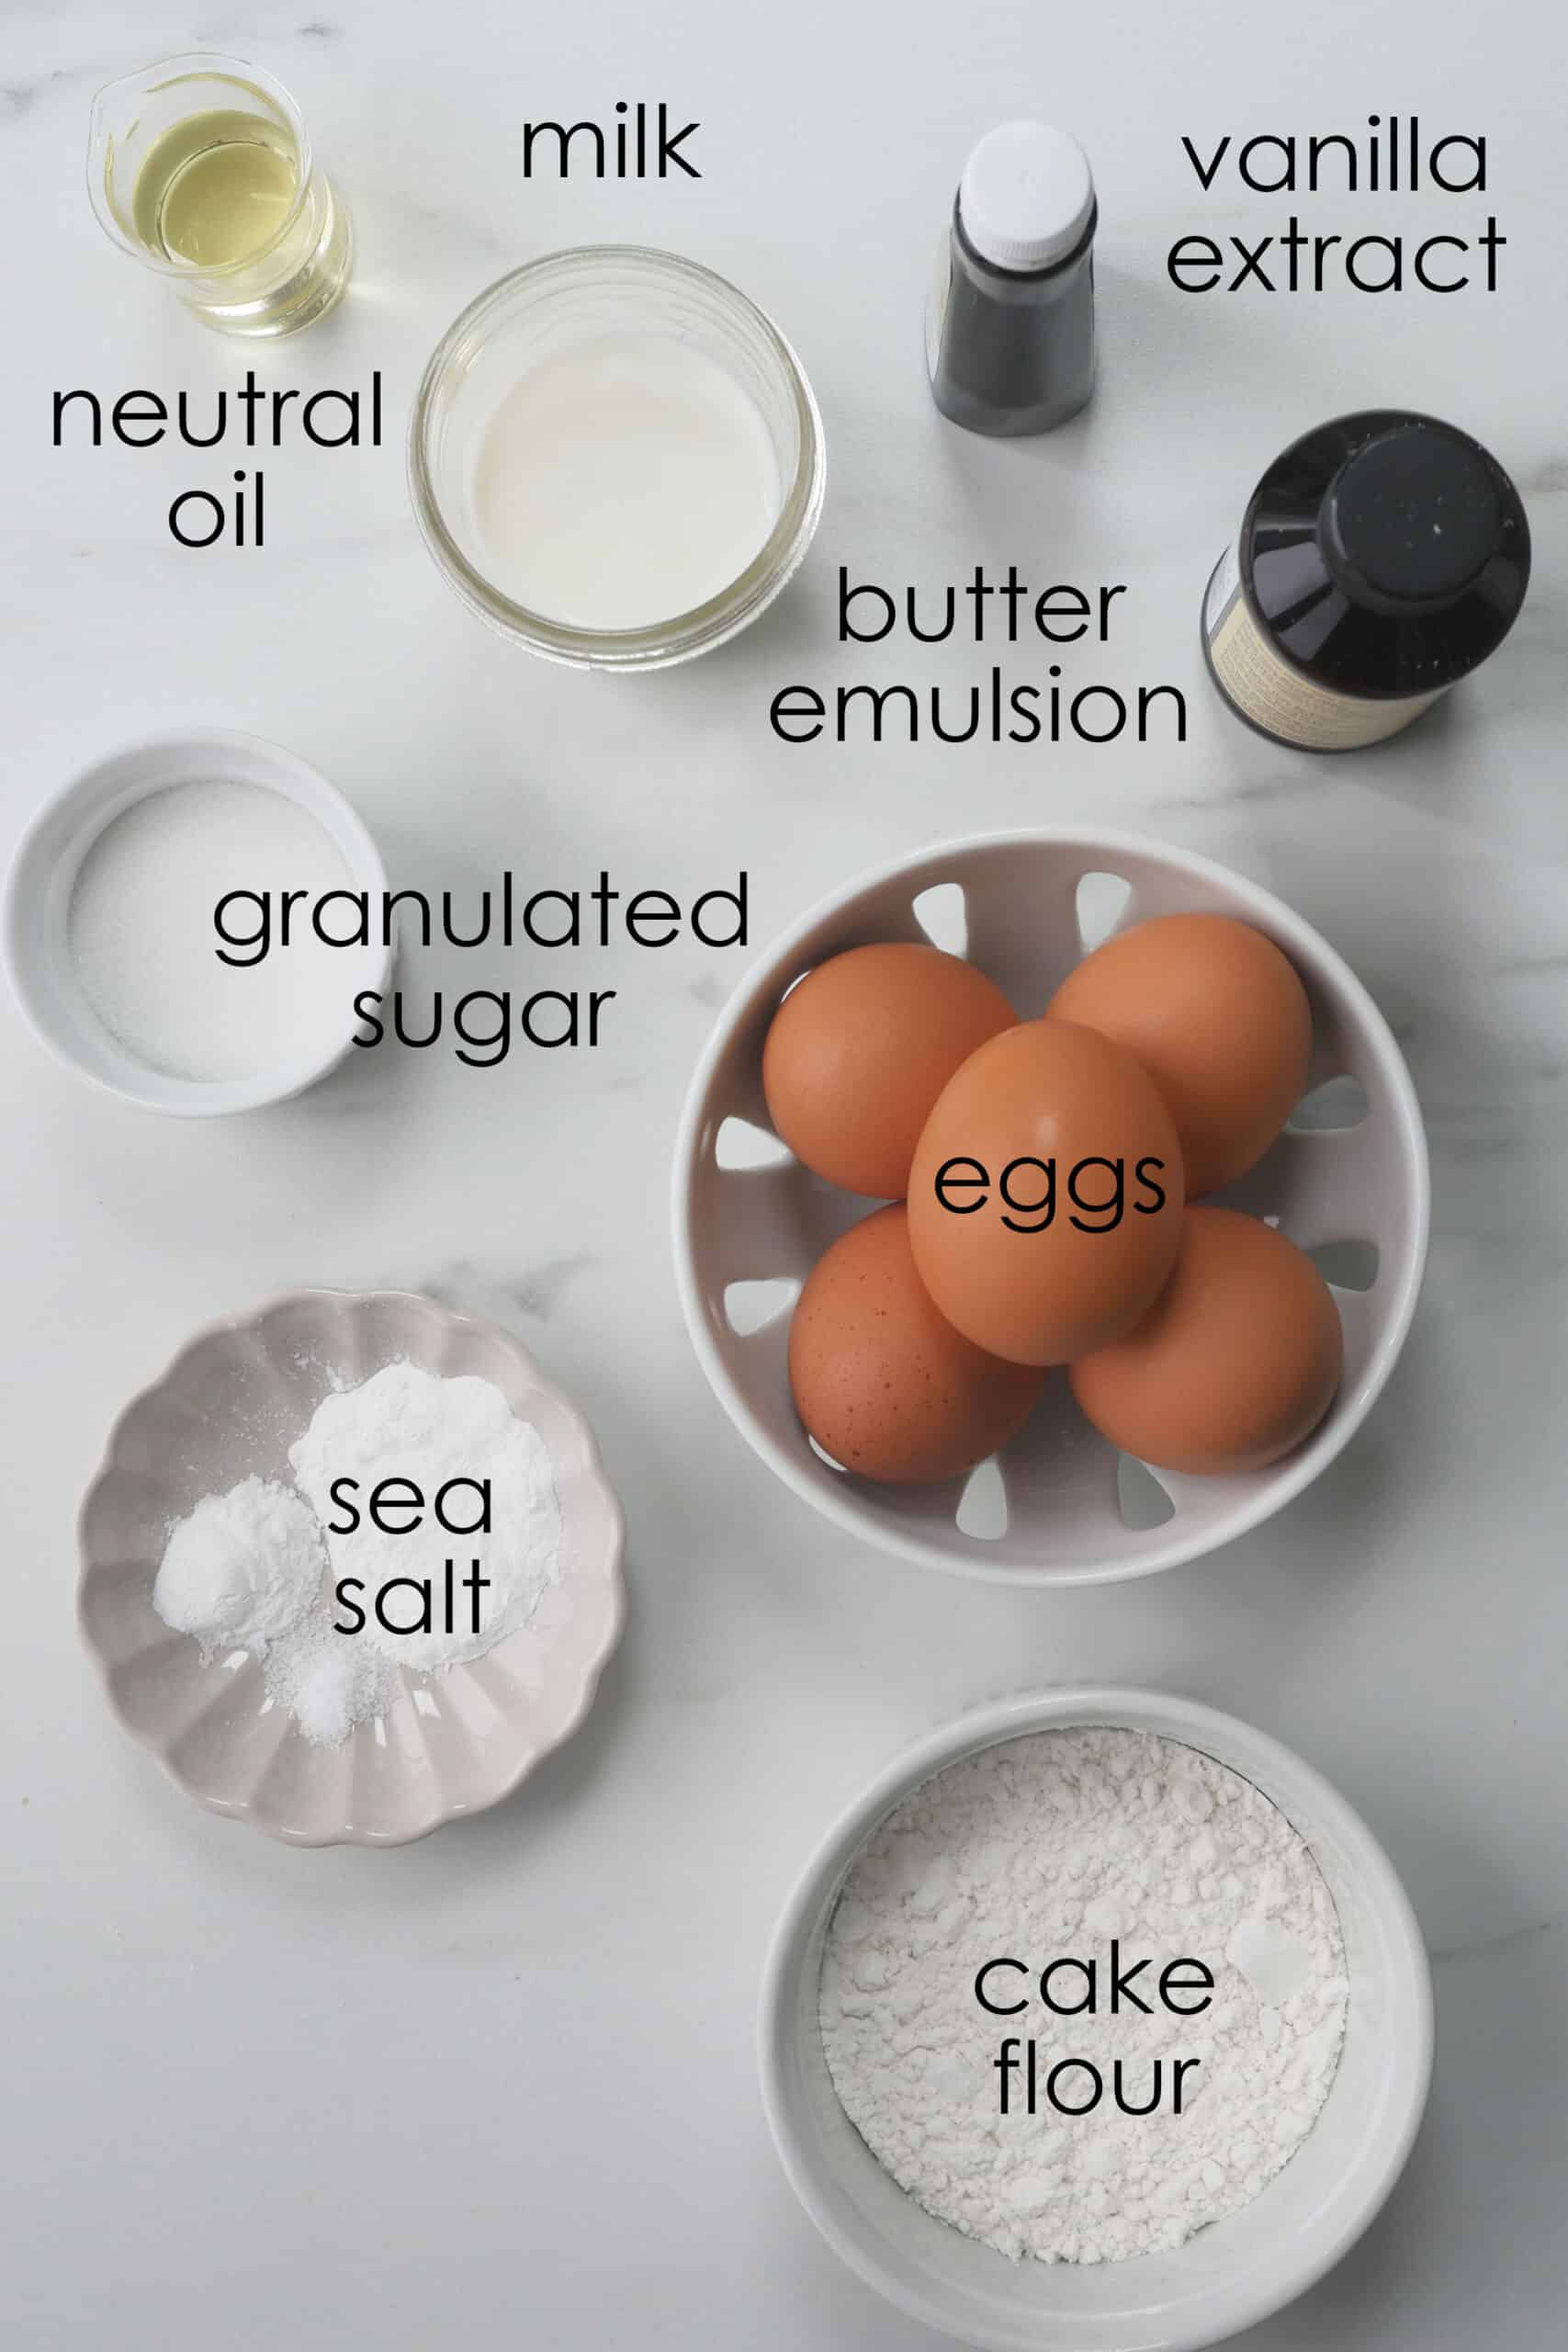
Preparing Ingredients and Substitutions
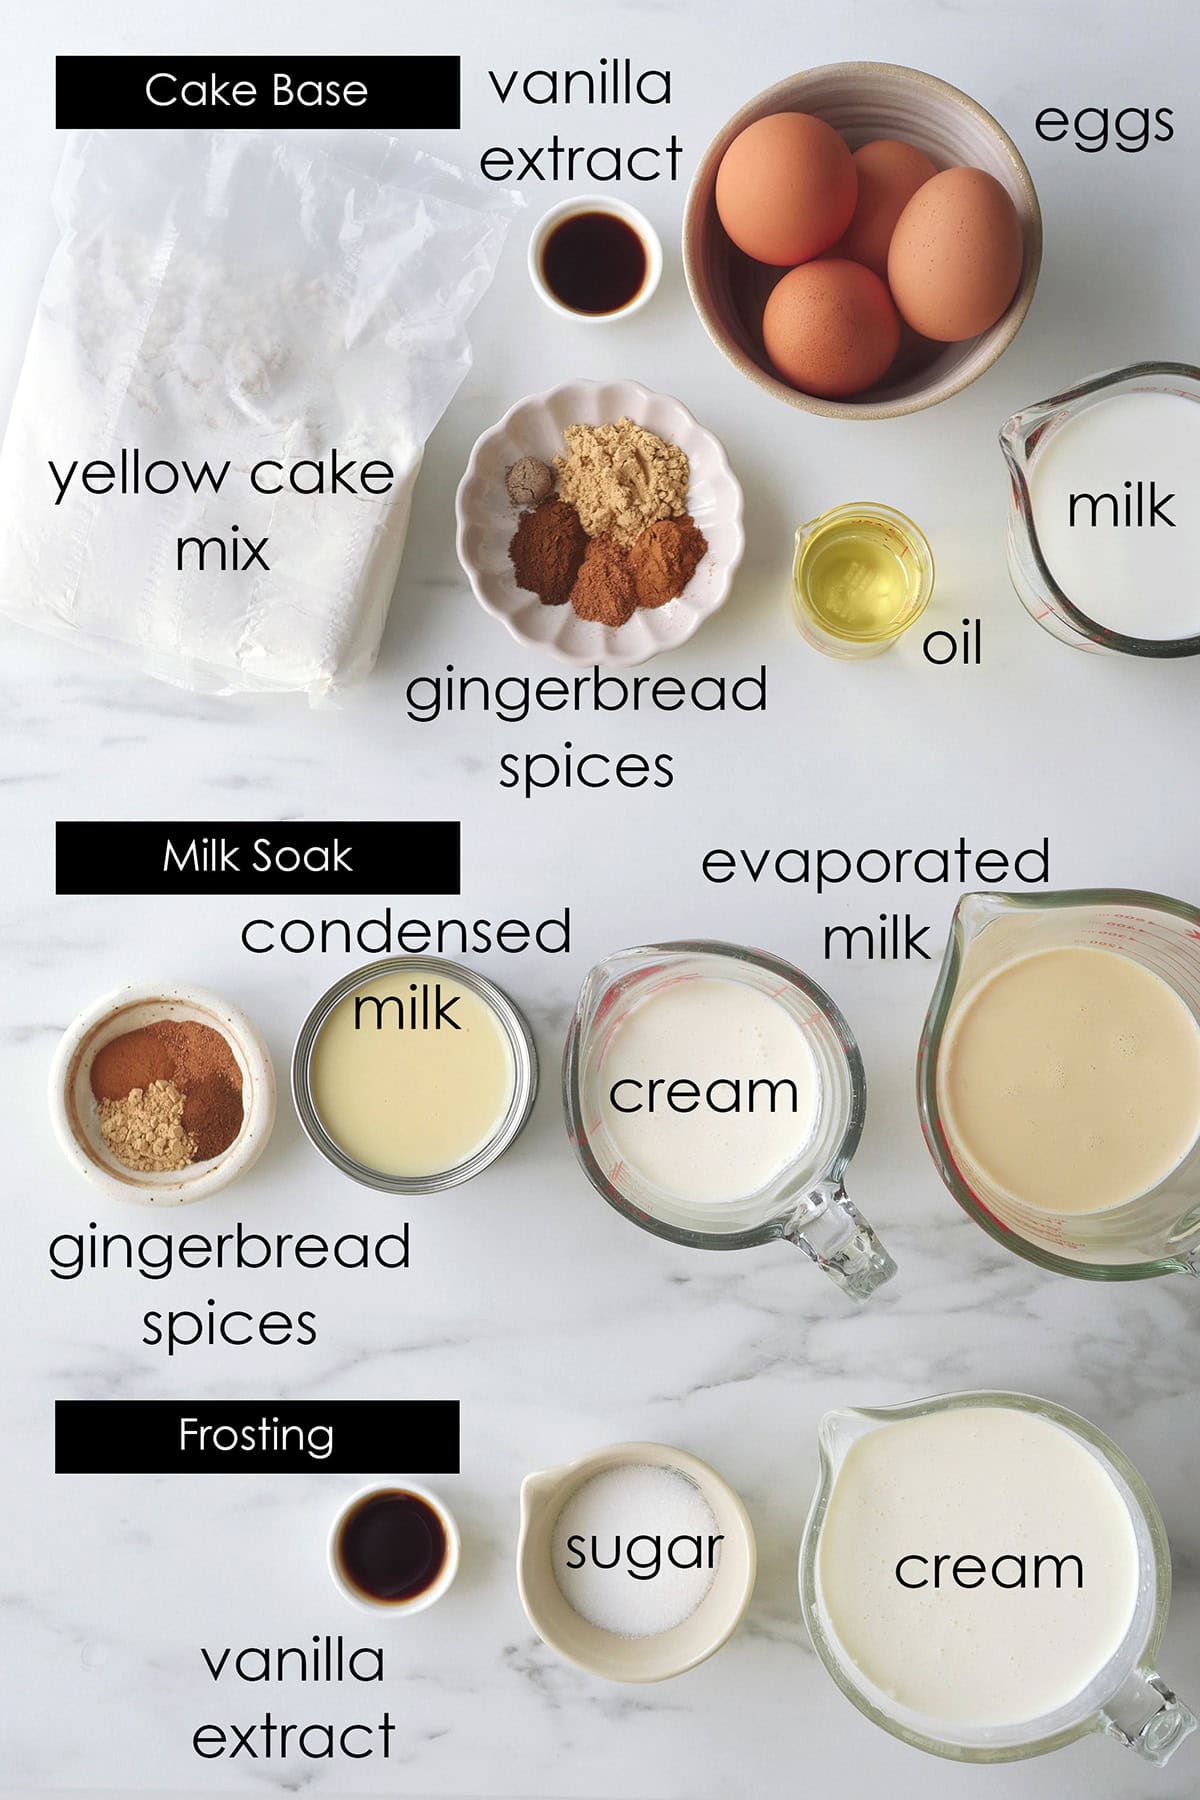
- Yellow Cake box mix: Tres Leches is normally made with a sponge cake. Yellow cake mix will usually resemble that flavor and texture profile. Yellow cake mix contains yolks while white cake mix does not. The flour in yellow cake usually has a heavier protein content making the texture more ideal for use with the milk soak. Betty Crocker brand was used in this recipe. If using another cake mix that weighs more, mix the powder very well and weigh out 375 g for use in this recipe.
- Matcha powder: see below on what type of Matcha and where to buy.
- Milk, Oil, Eggs: Provided quantity for these ingredients are for use with the Betty Crocker brand cake mix. Refer to your own cake mix instructions for precise quantity required for your own brand. A general rule of thumb to elevate box mixes is to replace the required water with milk and add an extra egg than what is called for, which is what I've done in this recipe.
- Milk: whole milk , skimmed milk or buttermilk
- Oil: choose neutral ones like grapeseed, canola and avocado.
- Eggs: large size.
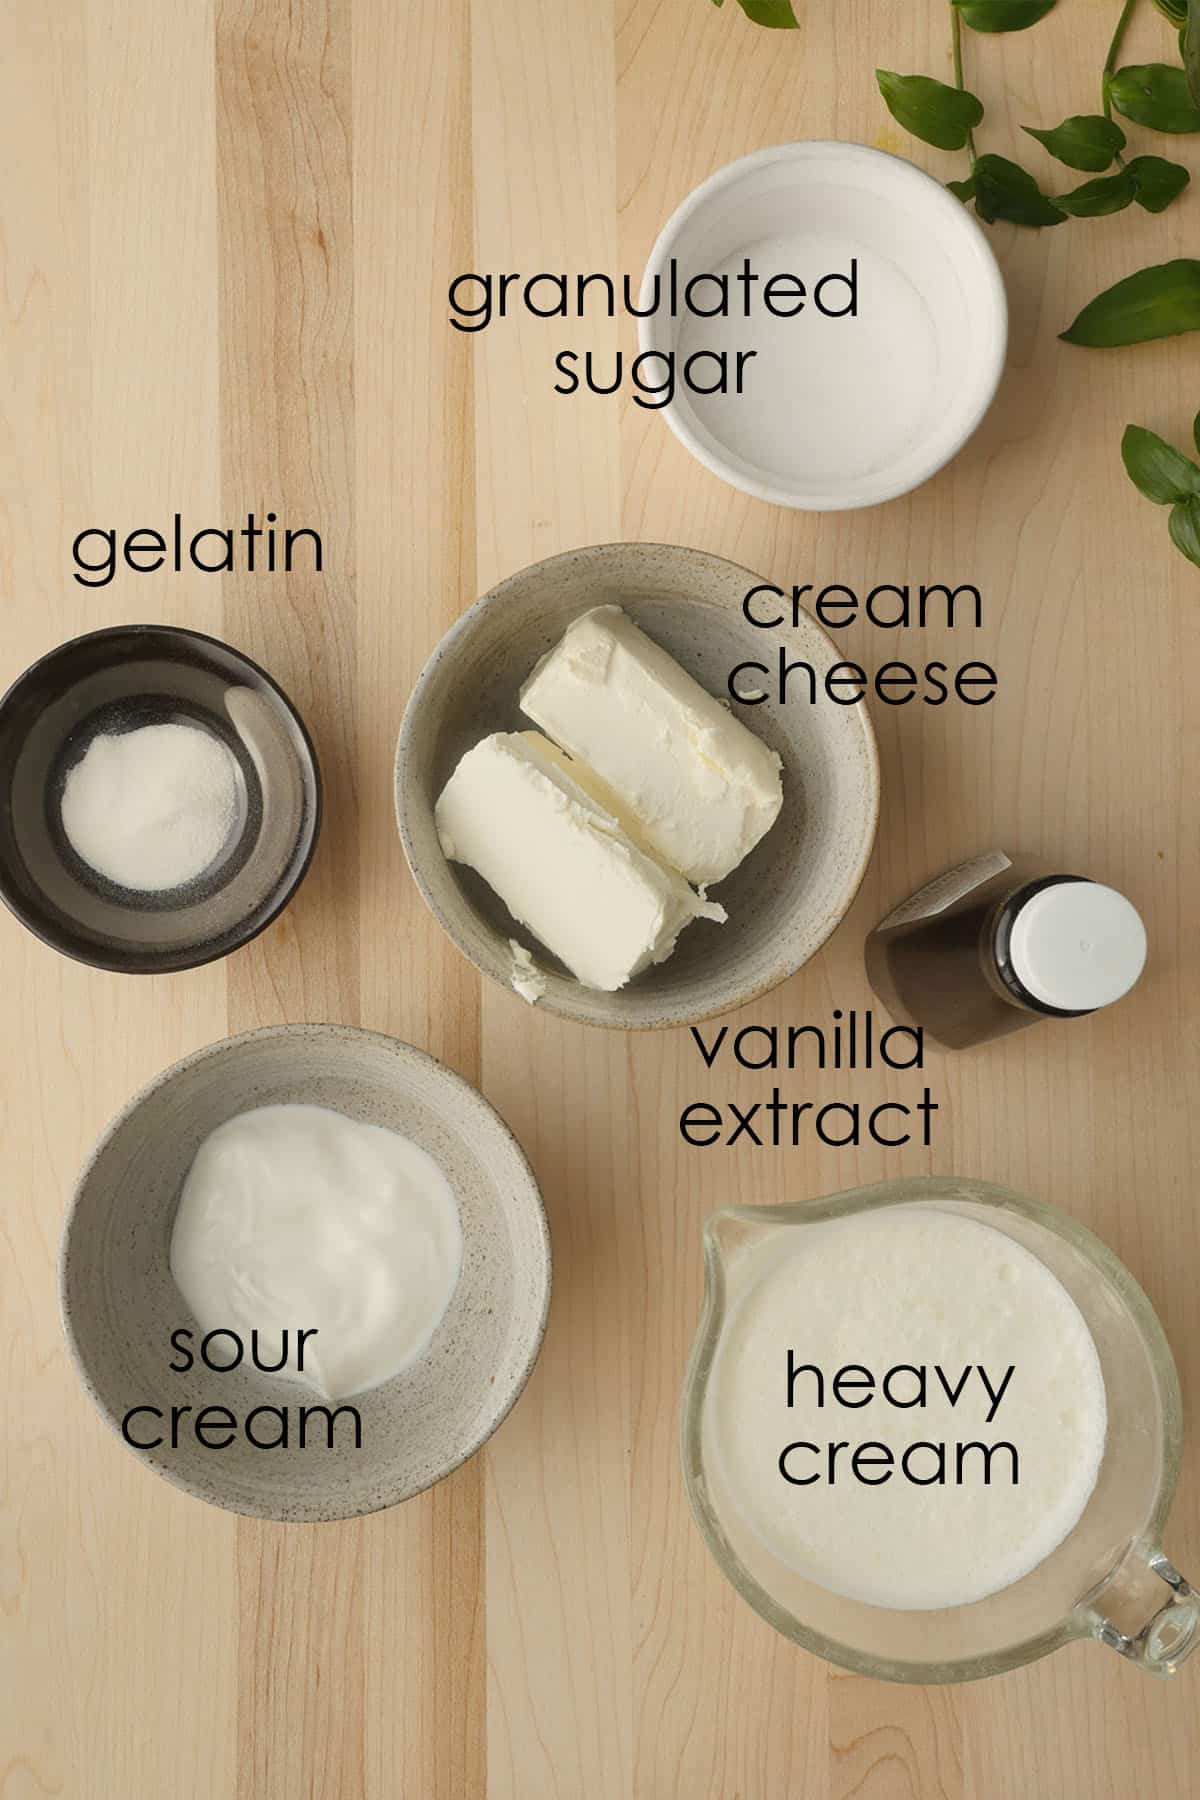
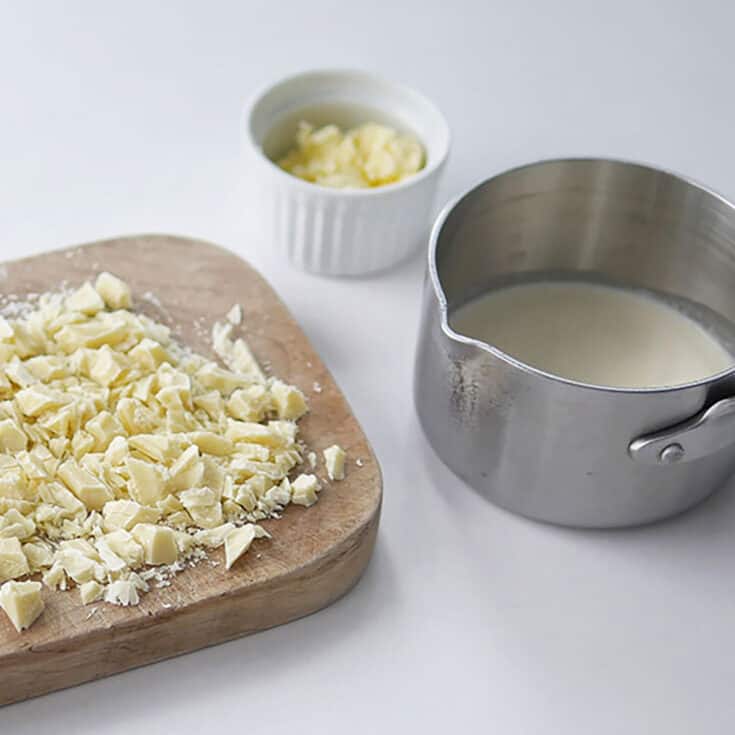
- Condensed milk: is a sweetened form of milk that has water evaporated from it. It is usually sold in a can form, found in the baking aisle of the grocery store.
- Evaporated milk: is a milk that has water evaporated from it but it's unsweetened. It is usually sold in a can form, found in the baking aisle of the grocery store.
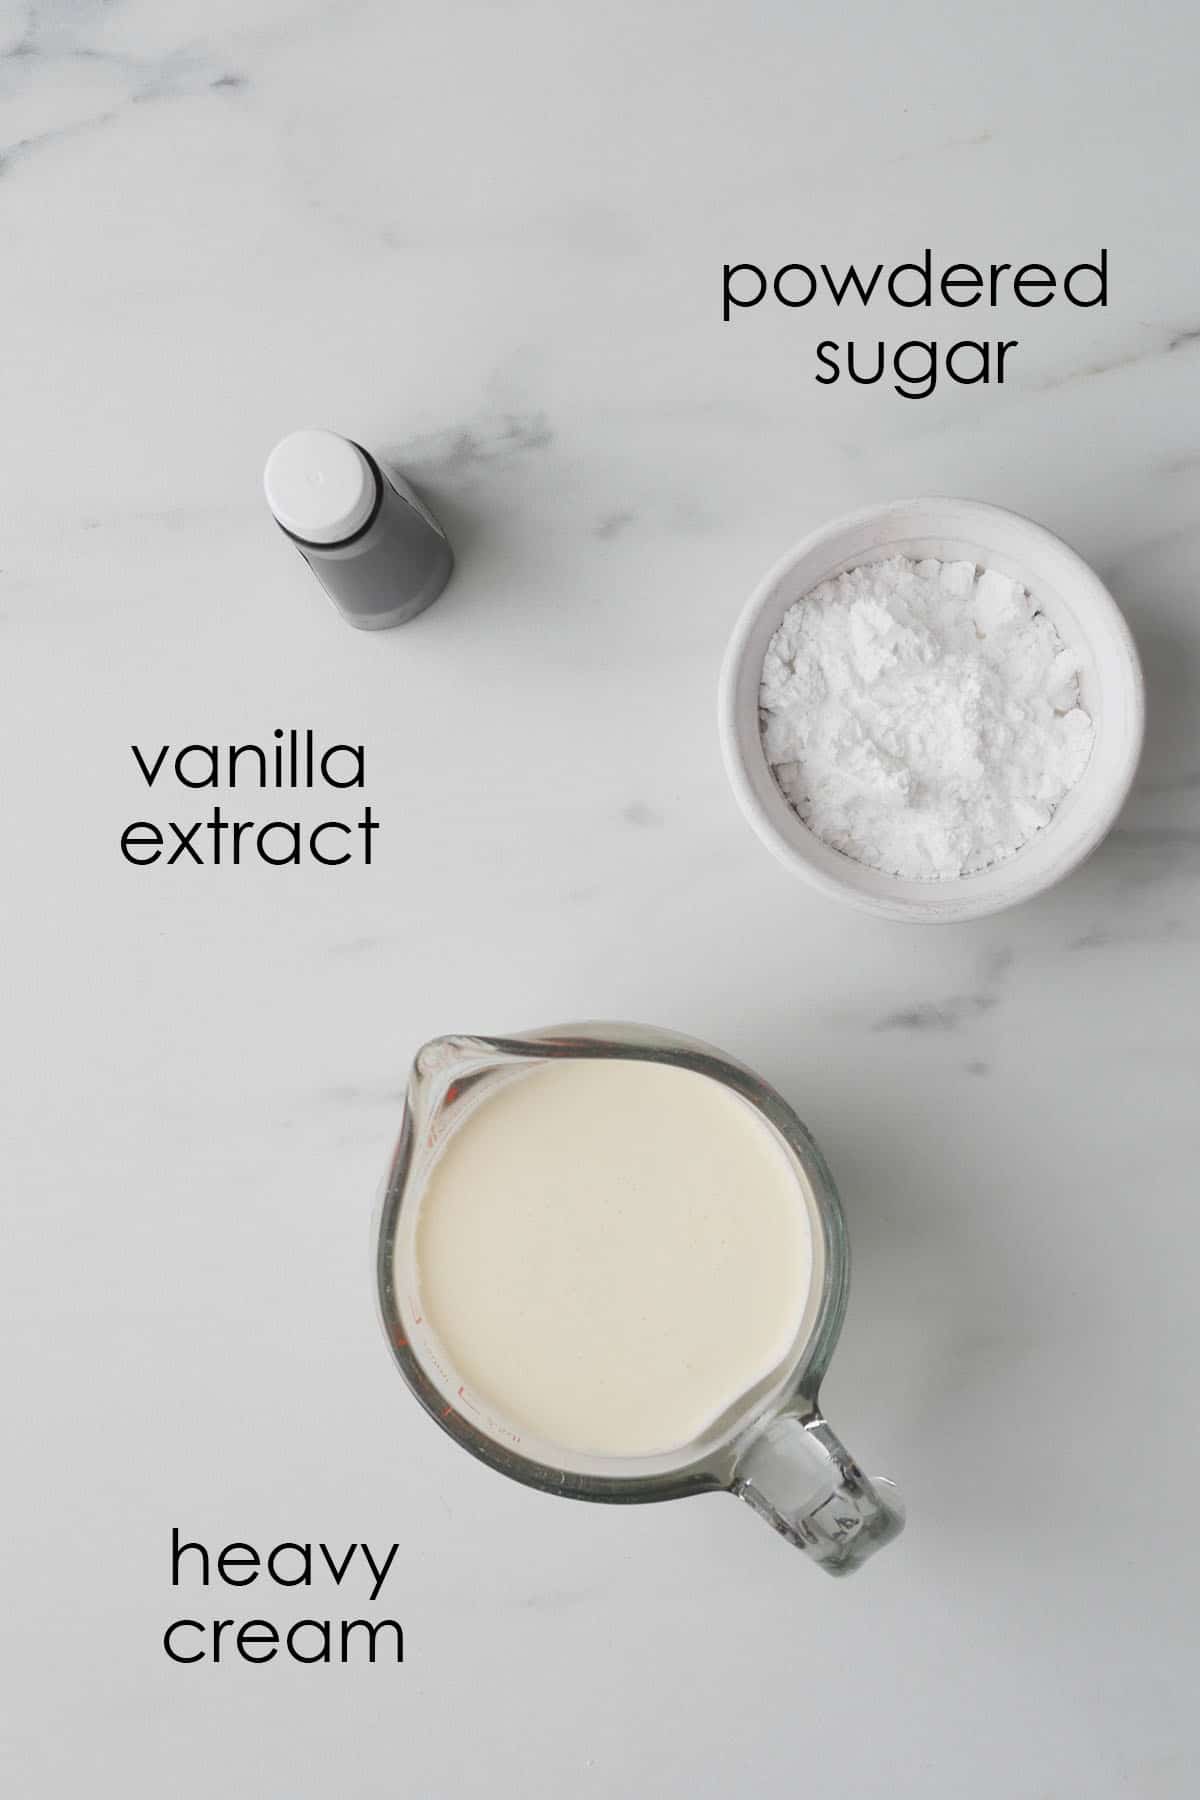
- Heavy cream: has a milk fat content of at least 36% (labelled as 36% M.F.). It can be substituted with whipping cream (with minimum 33% milk fat) but heavy cream is a little more rich in flavor and produces a more stable frosting. It must be completely chilled before whipping or it won't gain volume.
- Granulated sugar: The amount of sugar in the frosting makes the cream taste mildly sweetened and creamy when paired with this naturally sweet cake. It's ideal for those who prefer a less intense sweetness level. Double the amount of sugar if you prefer a truly sweet tasting cake.
- Vanilla extract: adds to and rounds out flavors.
Supplies
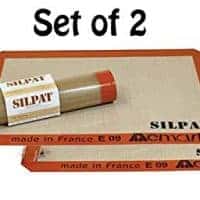
- Regular baking tools PLUS:
- 13X9 baking pan - other pan sizes can be used, see here.
- Handheld mixer - if you don't have a mixer, mixing vigorously with a balloon whisk will work just fine as well. A mixer will just make the frosting more smooth and creamy.
- Large mixing bowl, chilled
- Angled offset spatula - helps to smooth out the frosting into an even layer.
What is Matcha?
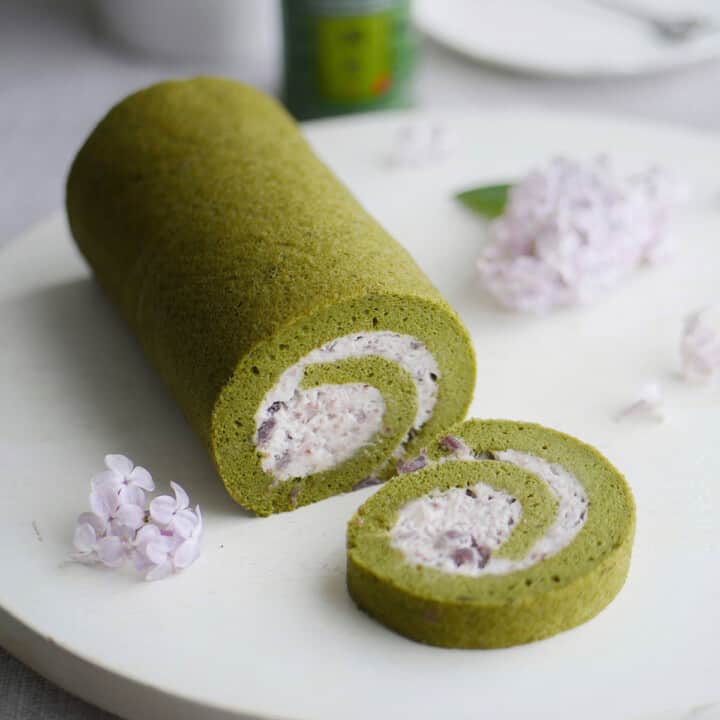
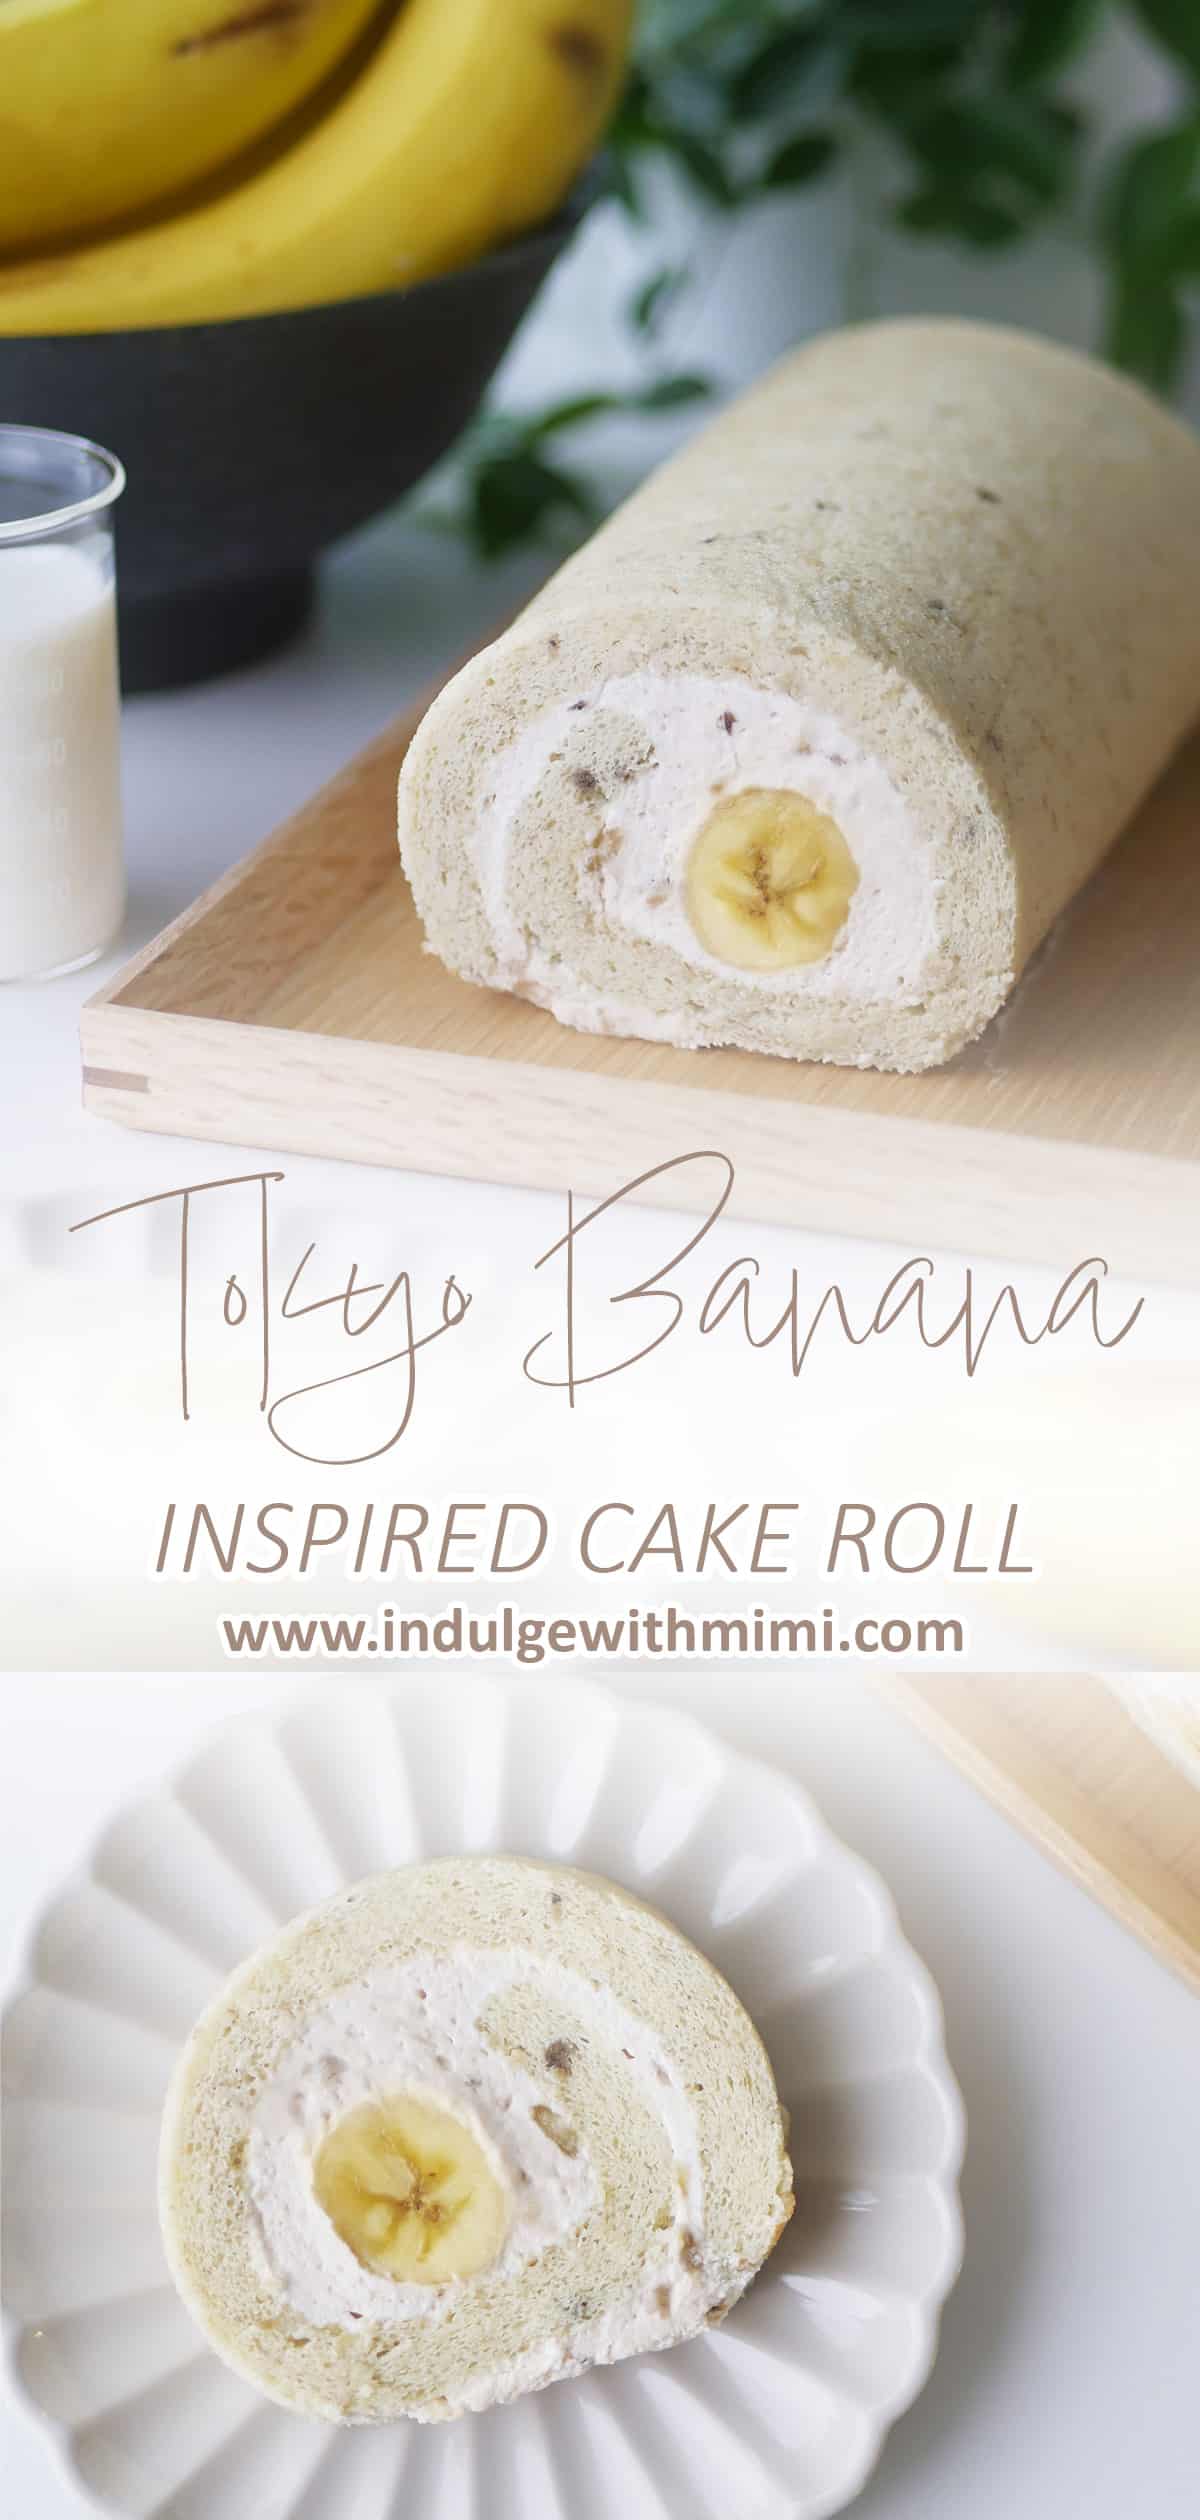
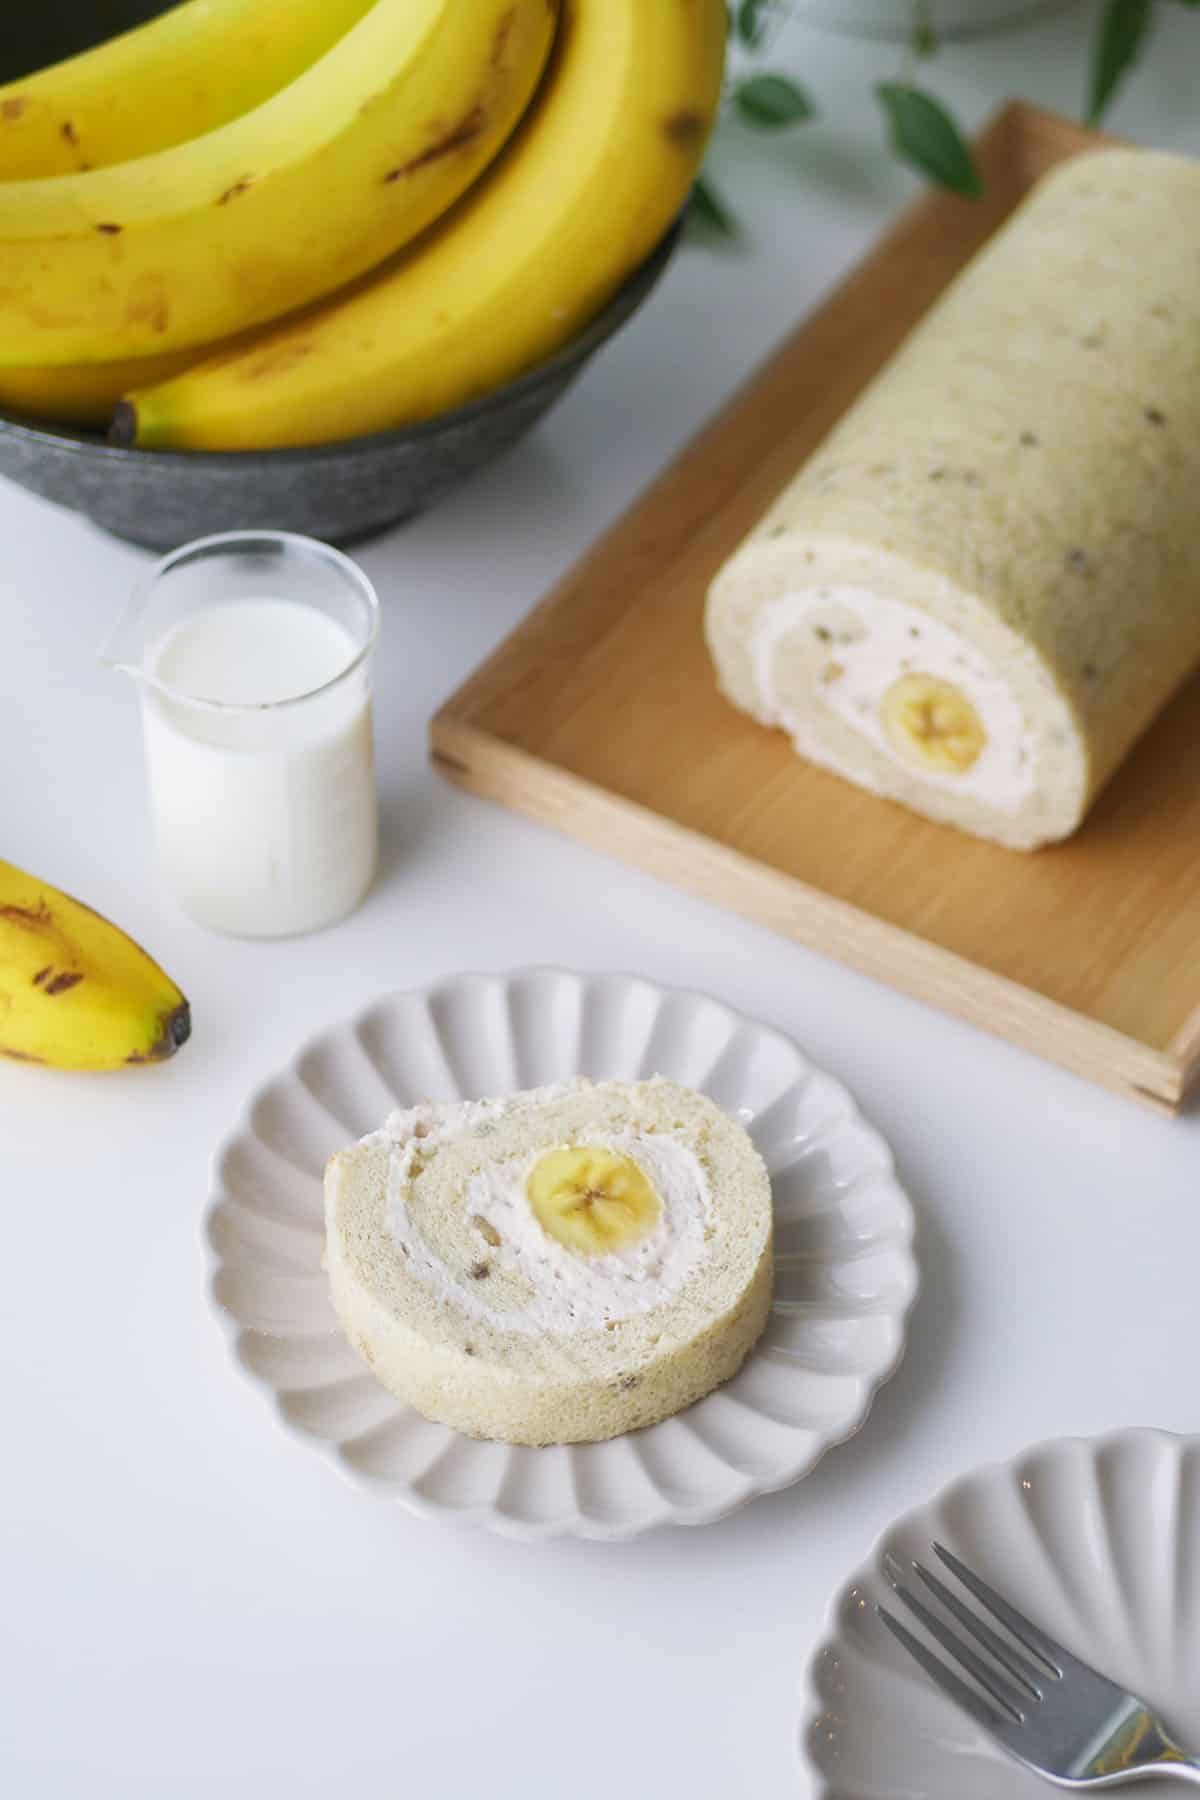
Matcha is a finely ground powder of specially cultivated green tea leaves. These tea leaves come from trees that are grown in the shade for several weeks before undergoing a special processing technique which involves stem removal and de-viening. It is then ground up into a fine green tea powder and consumed with water or milk, like in Matcha latte. It is also a beloved flavor used in desserts because the earthy profile and astringency contrasts extremely well with the sweetness in desserts. Here are a few reader favorites for Matcha desserts: Matcha red bean cake roll, Matcha mille crepe cake, Matcha macarons, Matcha coconut cookie.
Where Do I Buy Matcha Powder?
Matcha powder is easy to find in Japan and other East Asian countries with a strong tea culture. Here in North America, it is usually sold in well stocked grocery stores selling Asian produce. Some specialty tea shops also sell Matcha powder. Alternatively, Amazon offers a good selection to choose from, like this highly rated organic one with Japanese origins. A culinary grade (as opposed to ceremonial grade) Matcha is sufficient. Because it is meant for food preparation, it has a bolder flavor. It is also more cost efficient. Return to ingredients & substitutions.
Step By Step Photos
Stir and Bake Cake
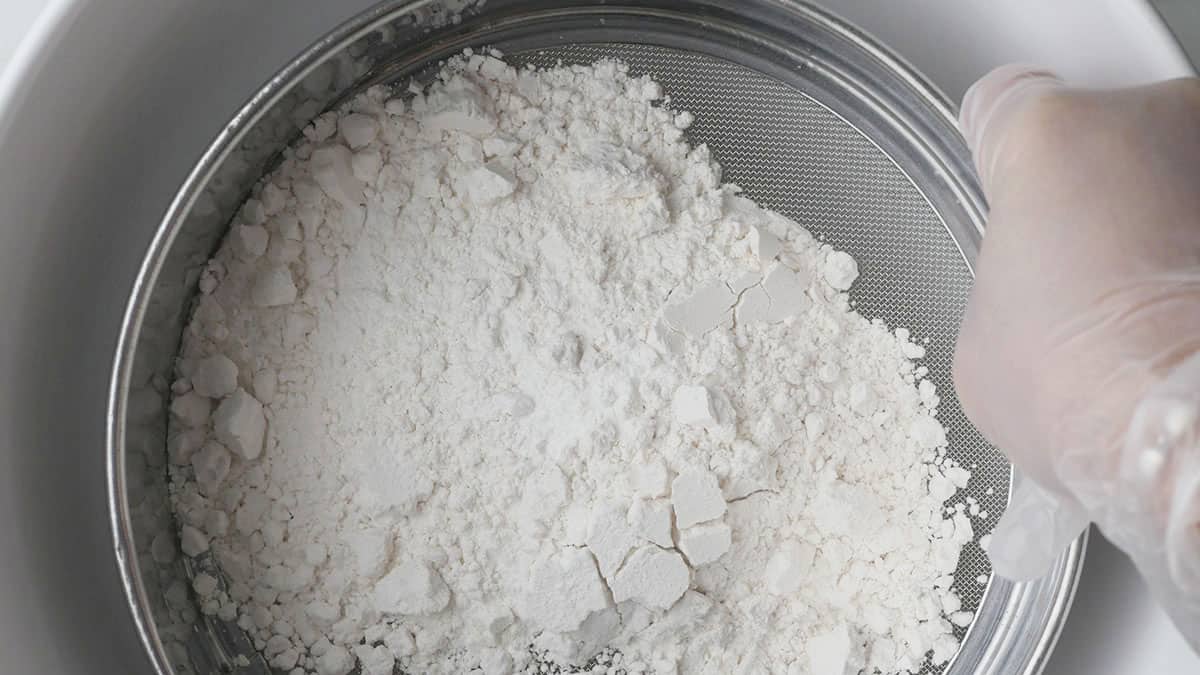
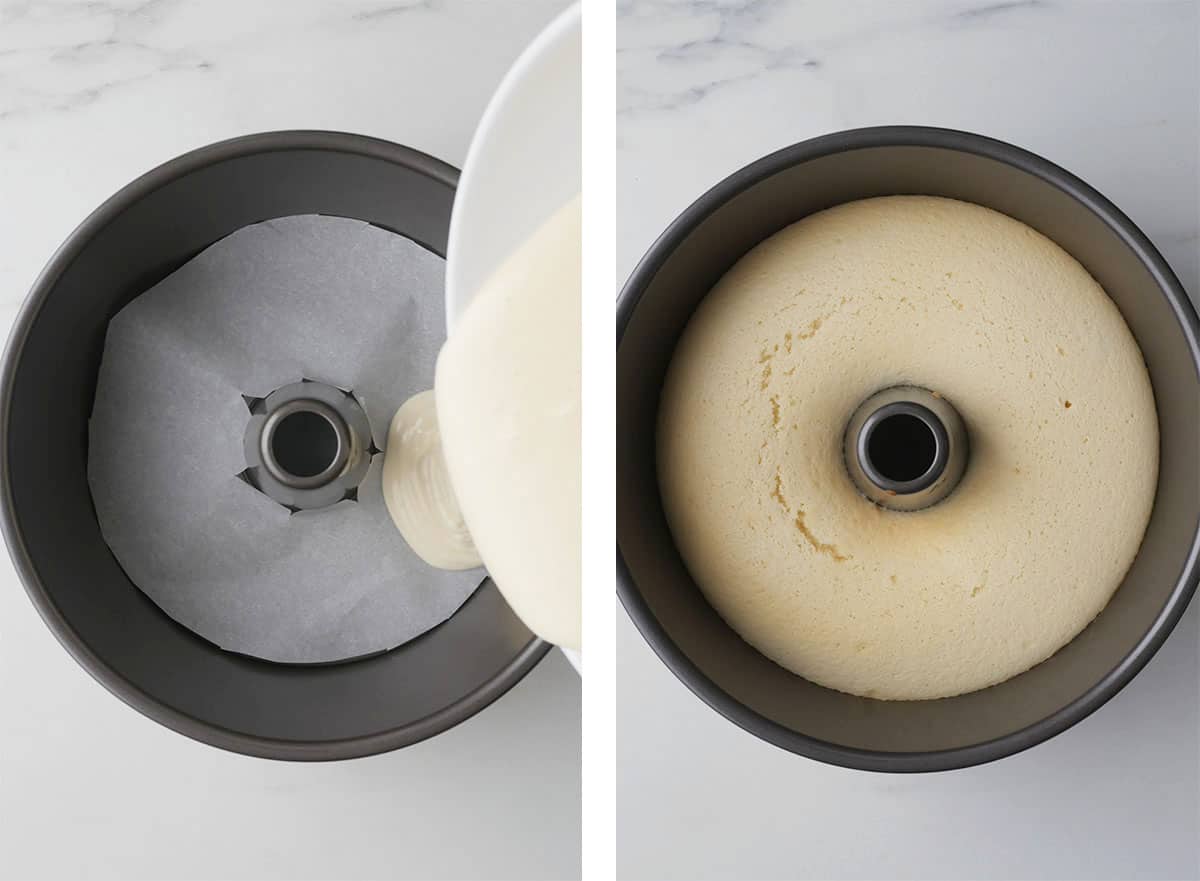
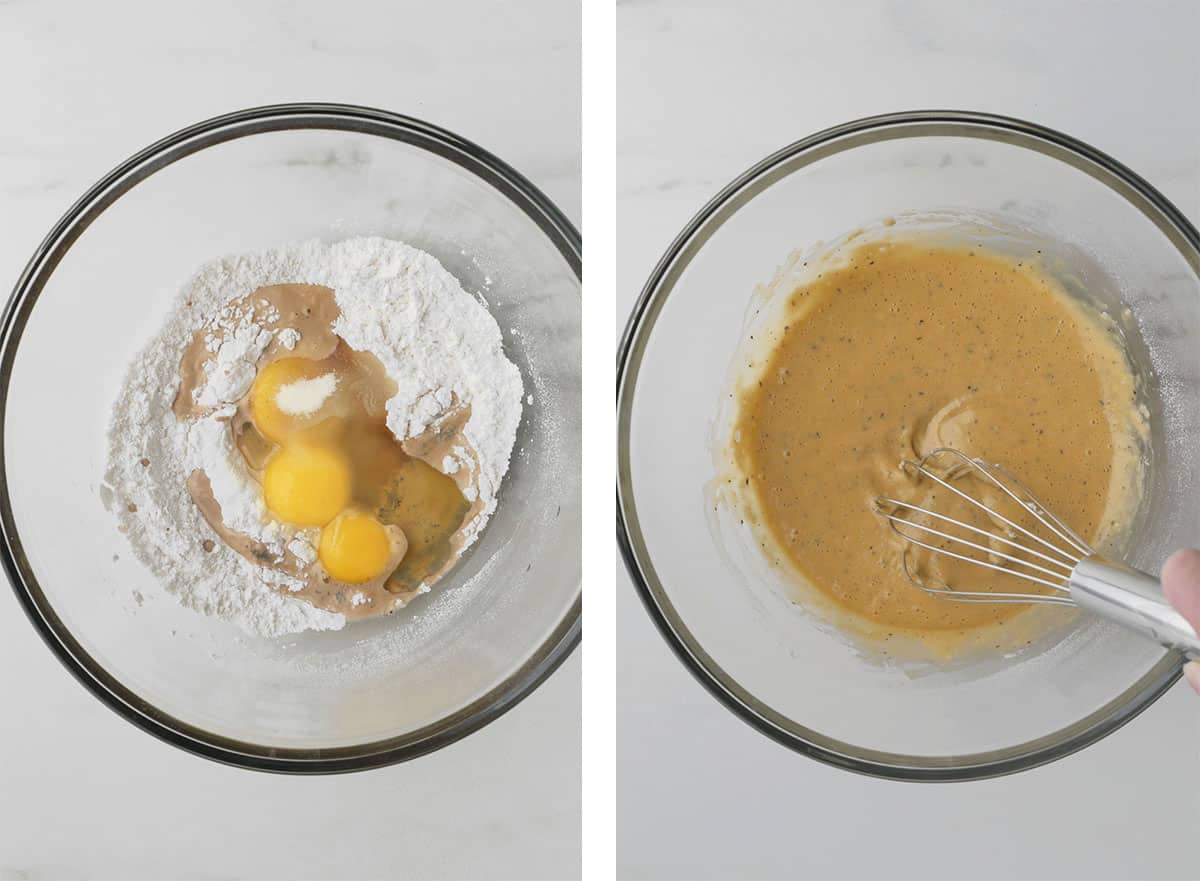
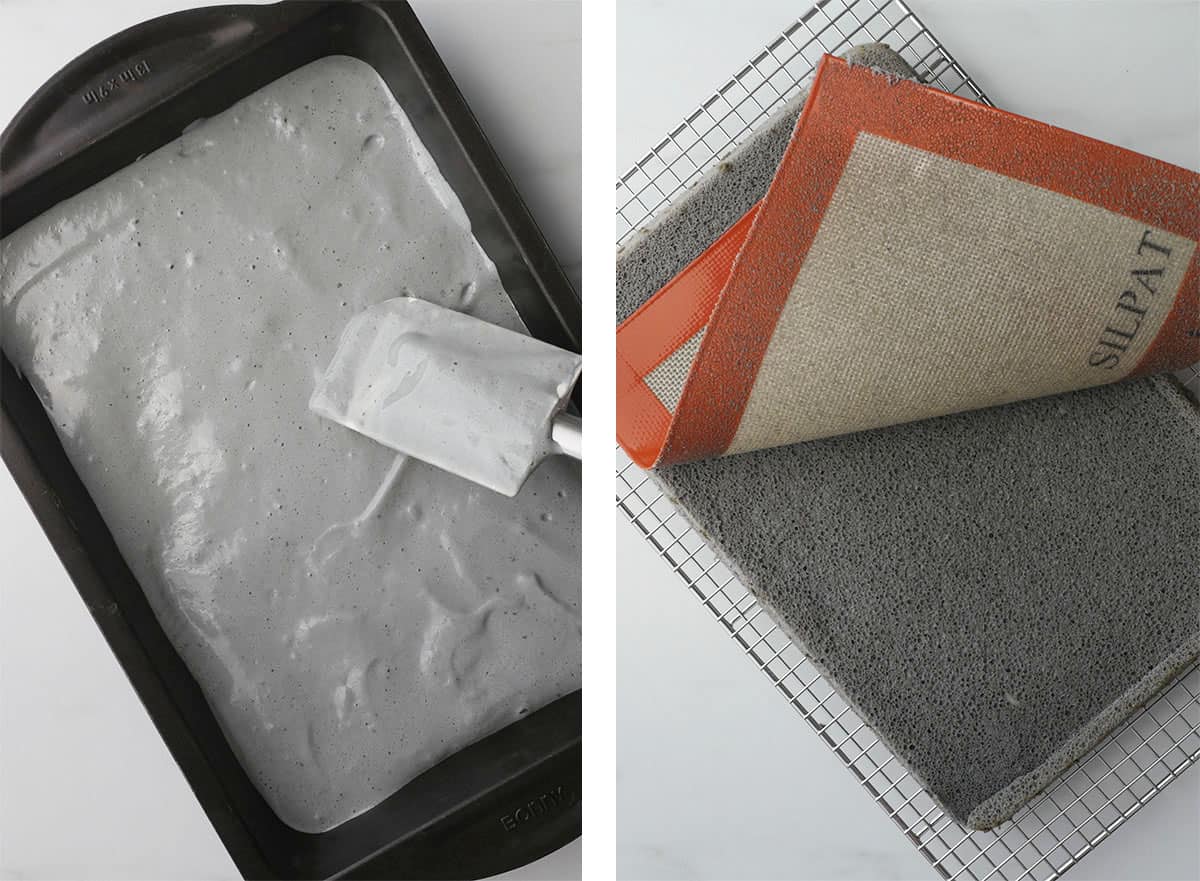
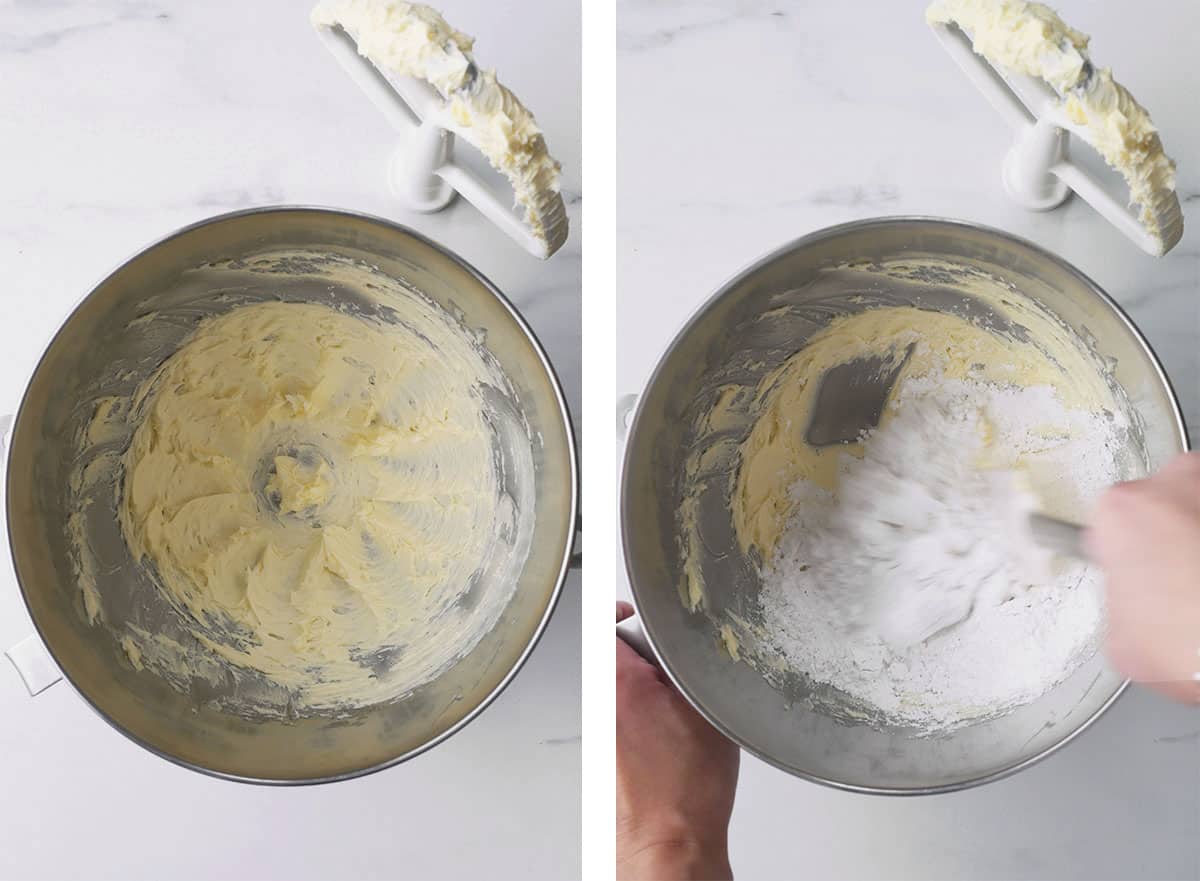
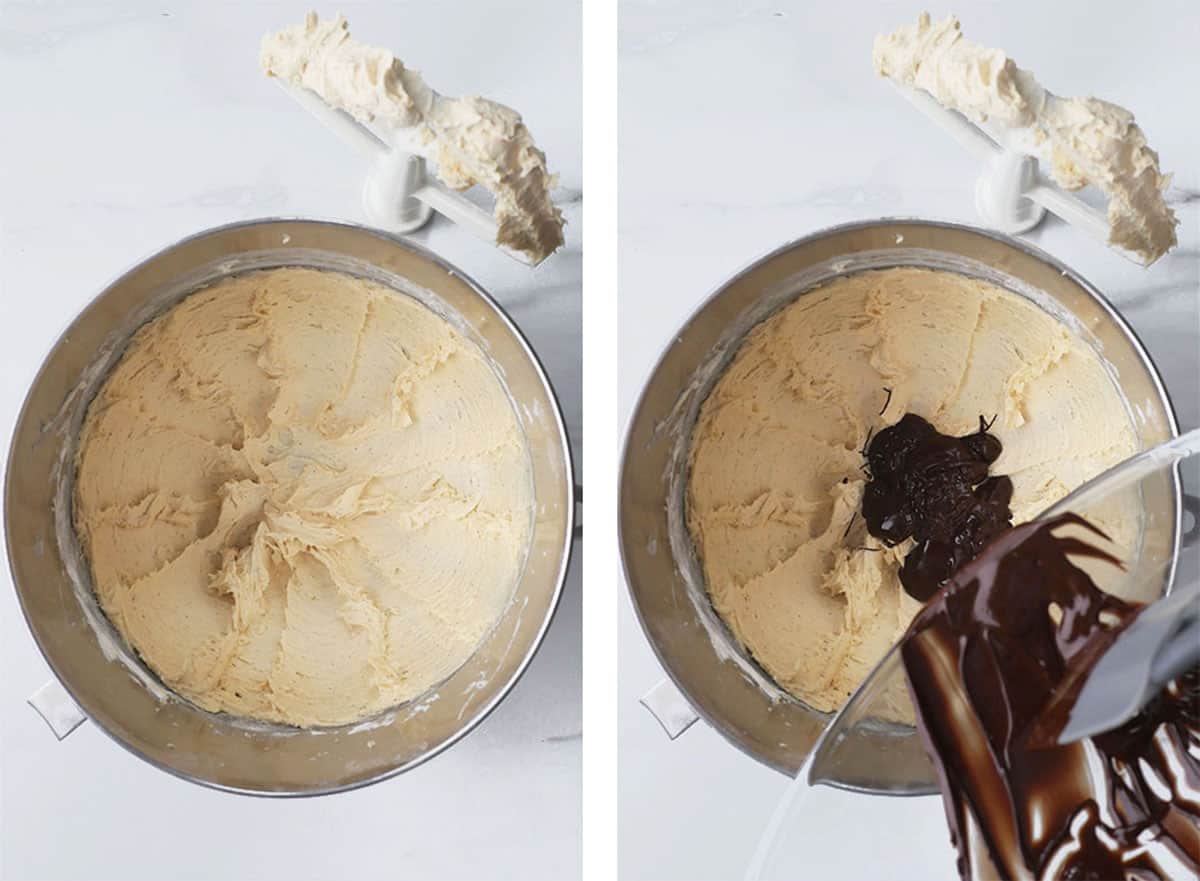
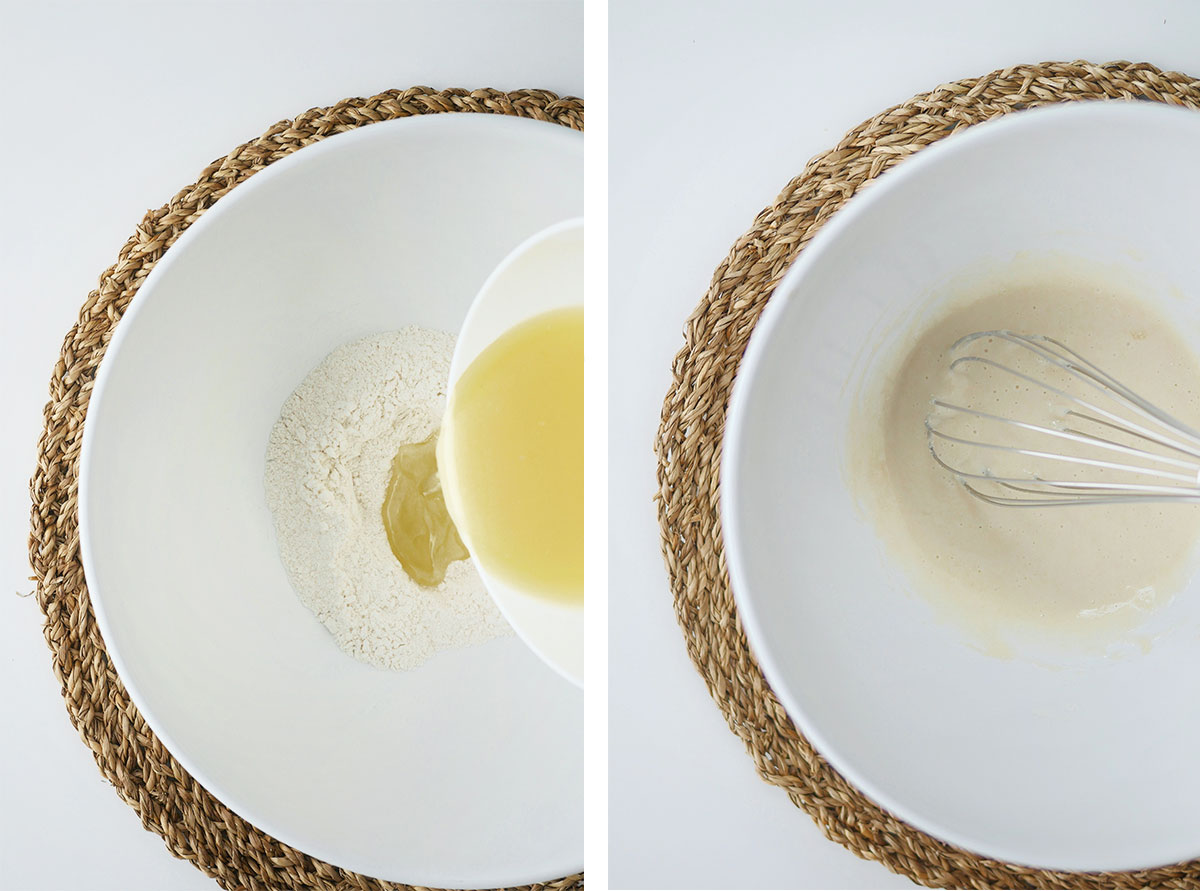
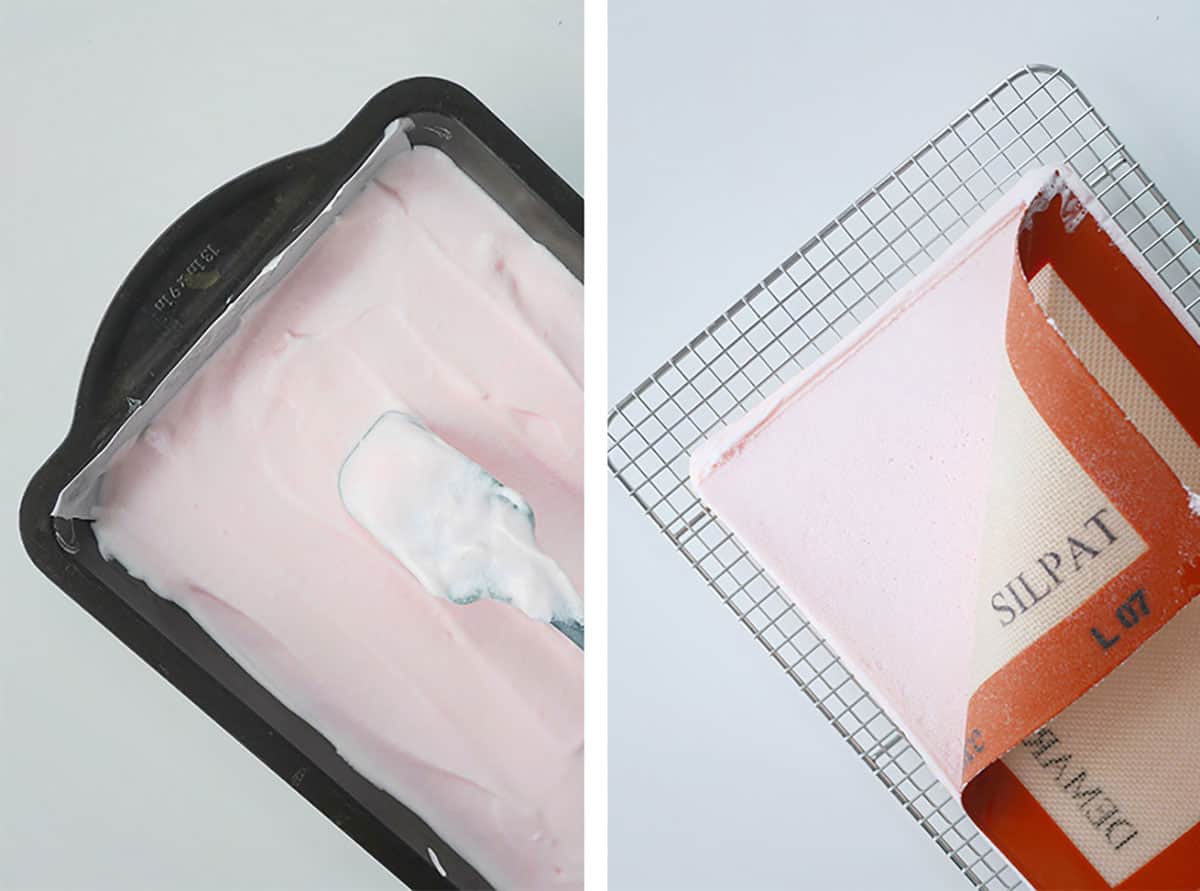
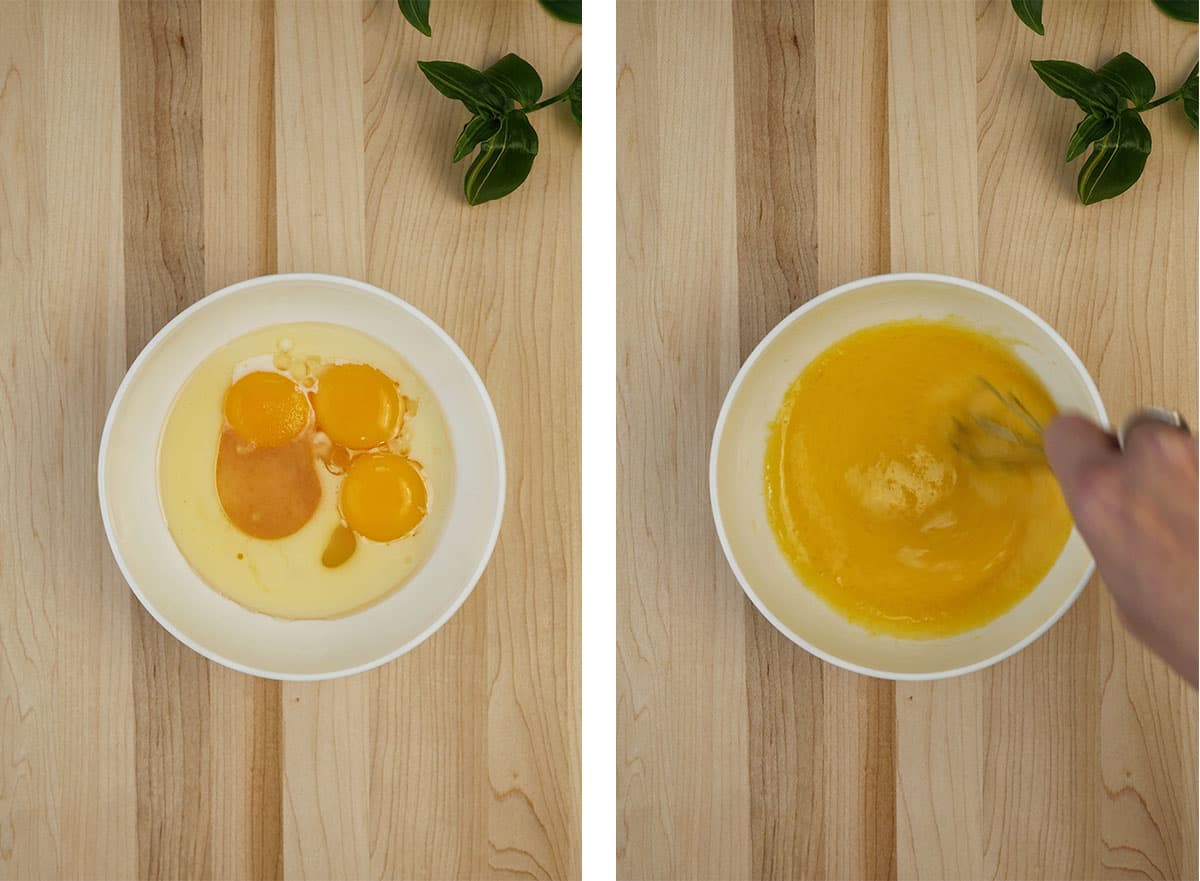
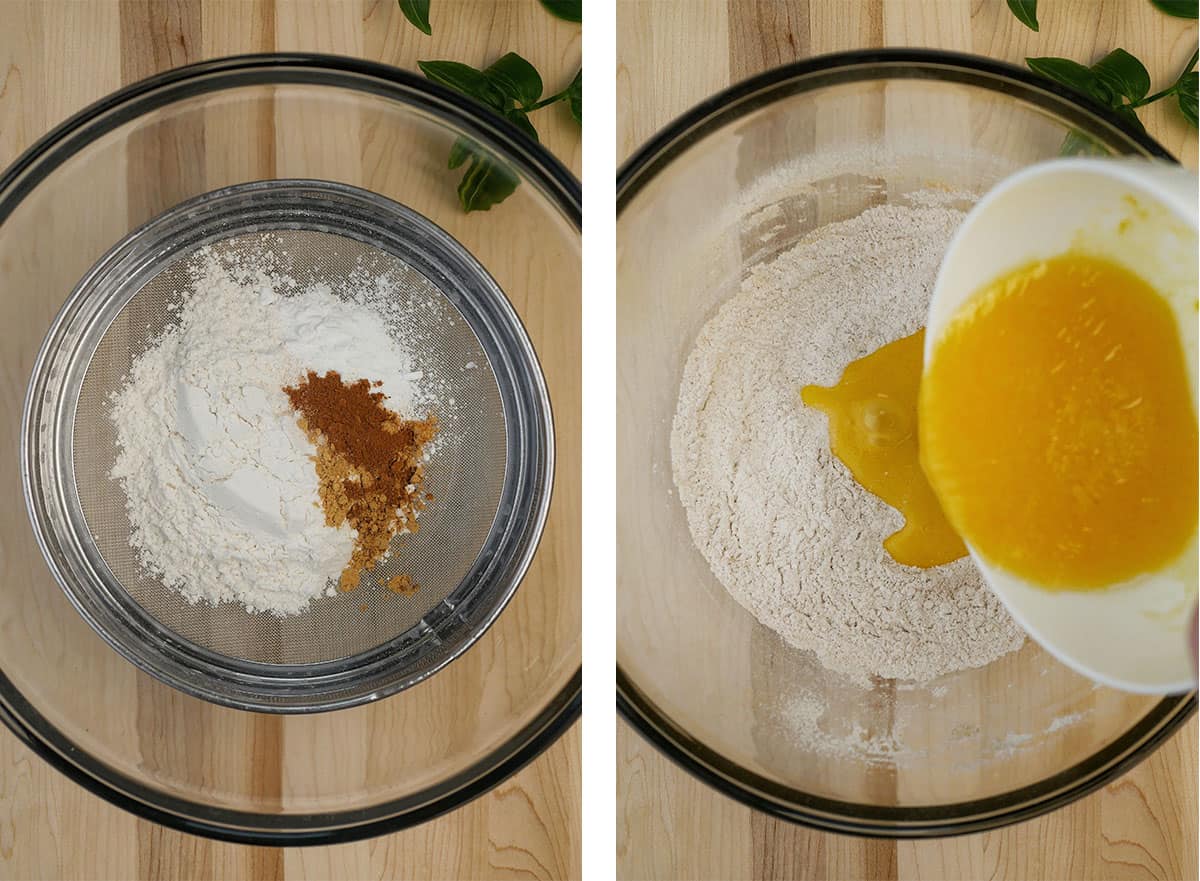
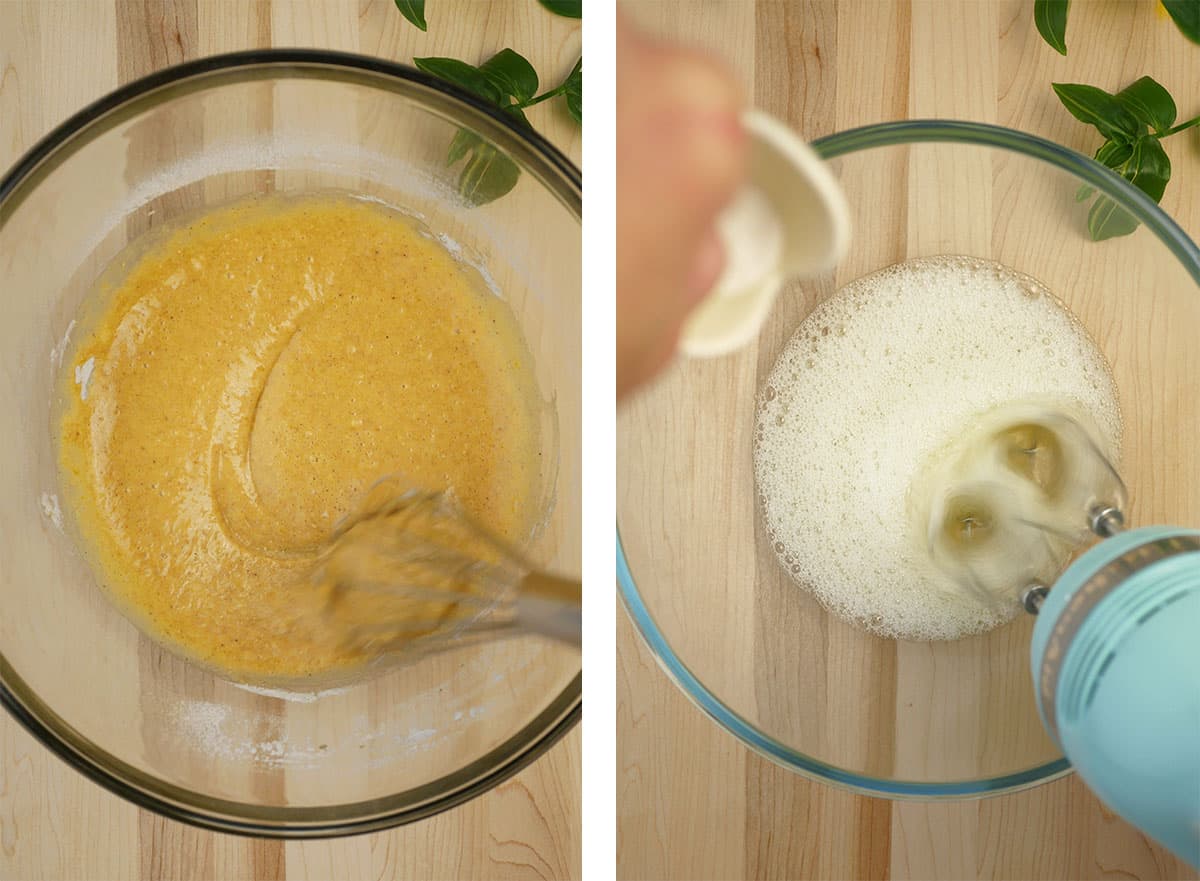
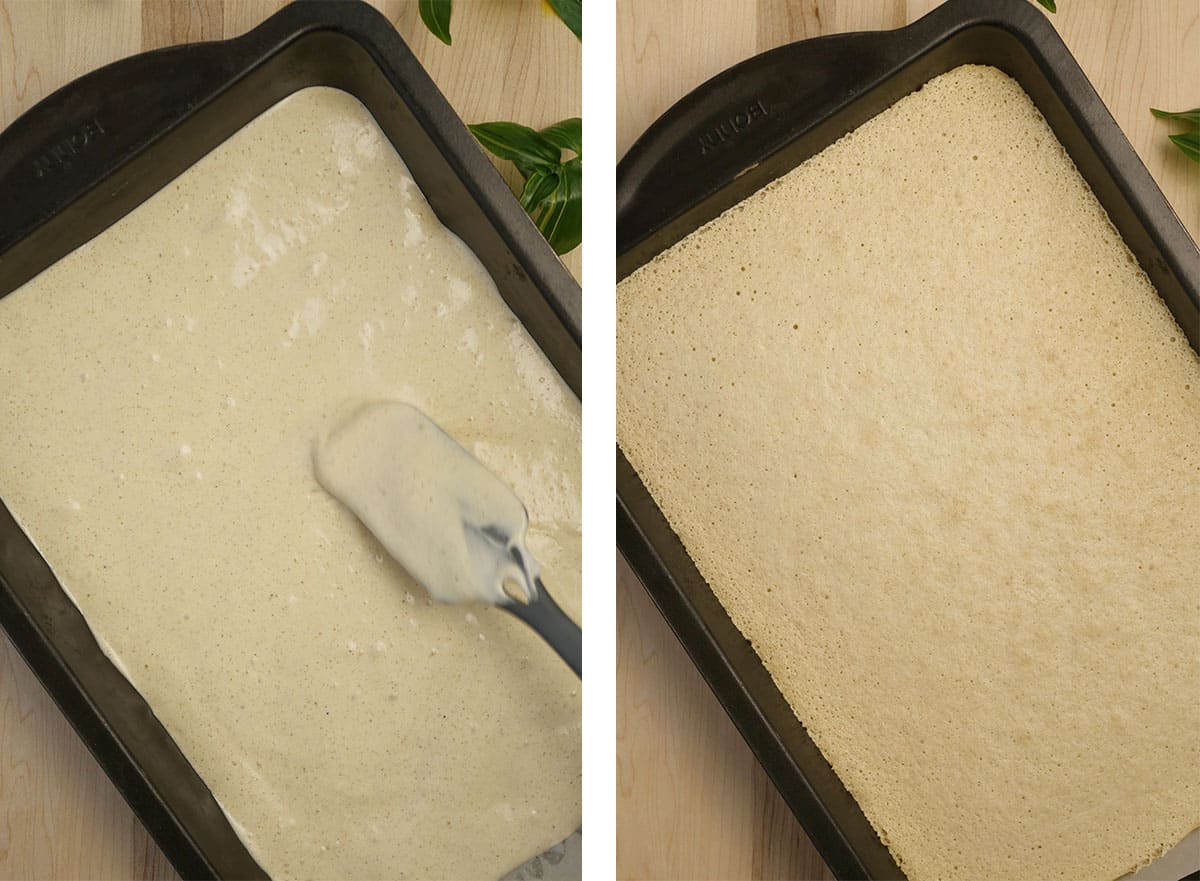
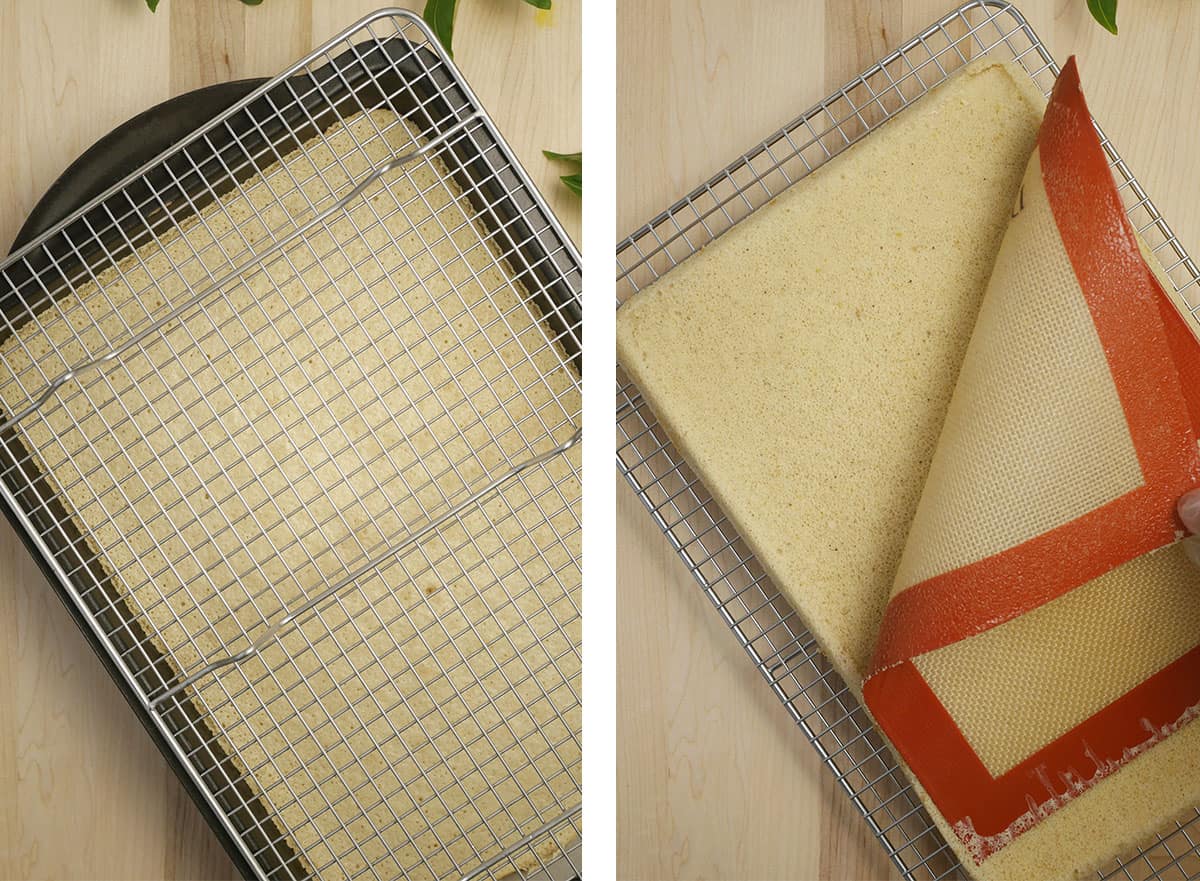
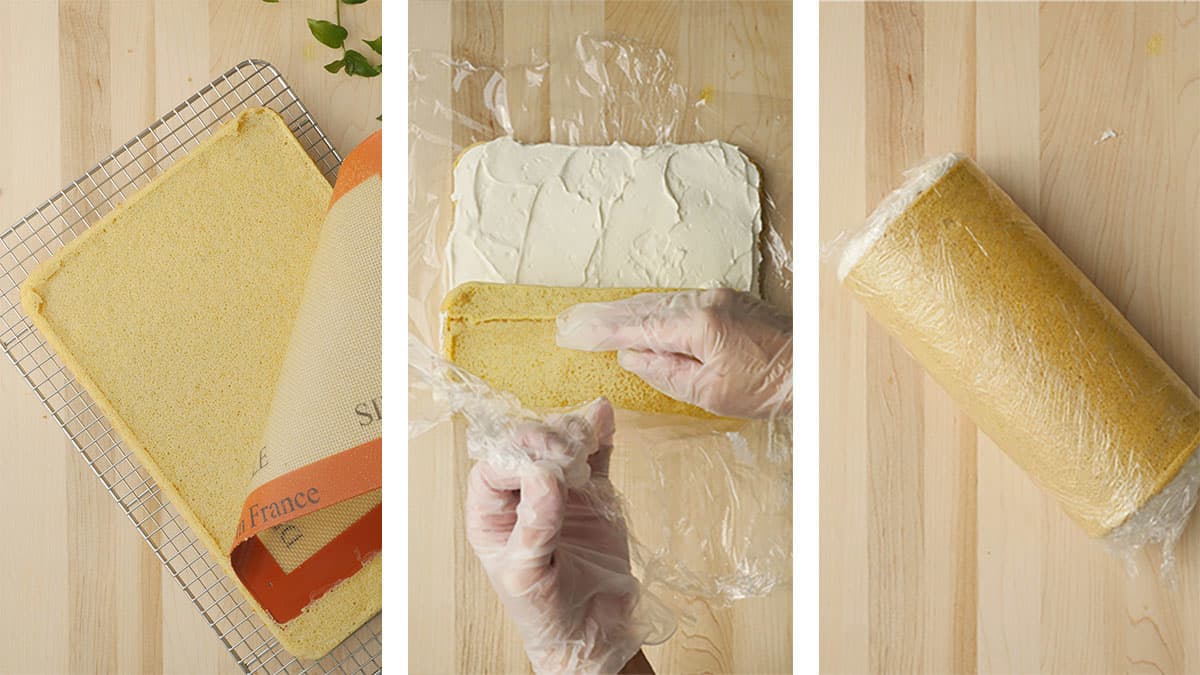
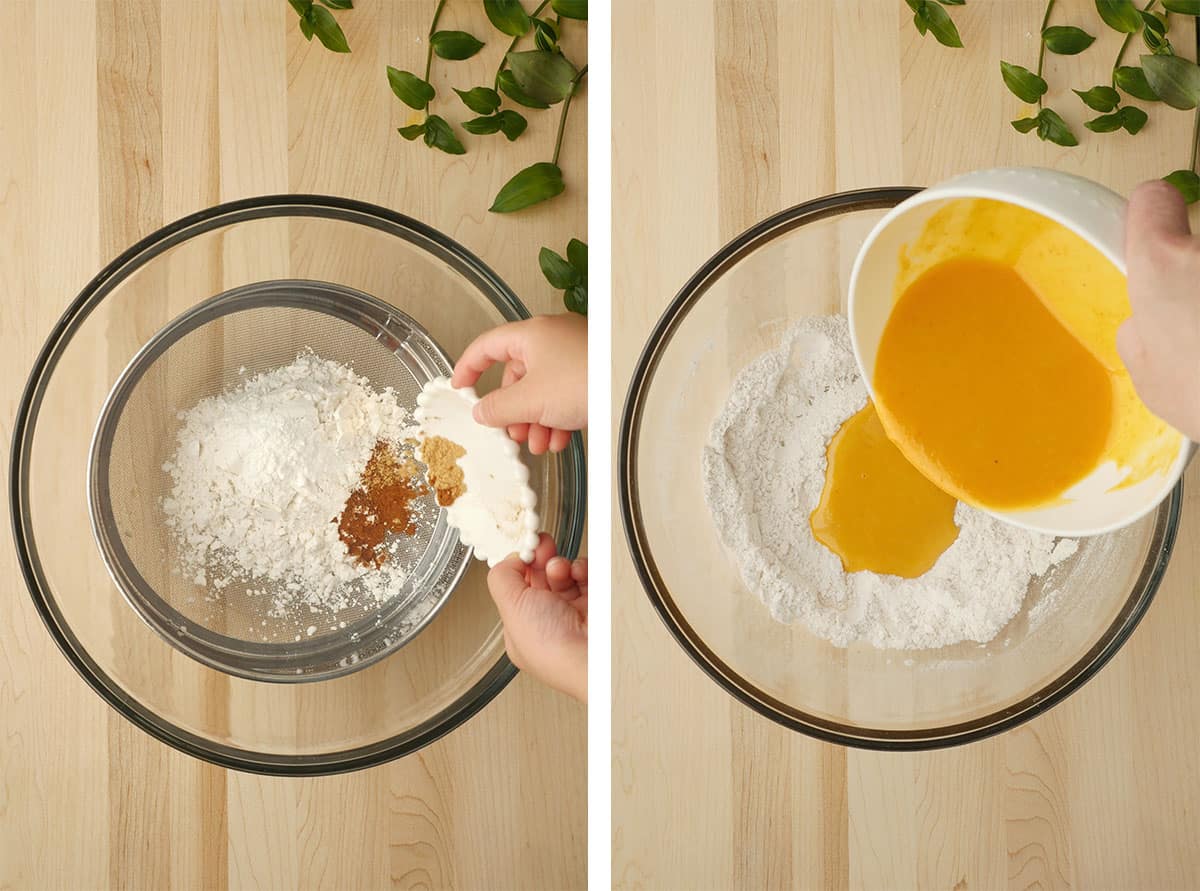
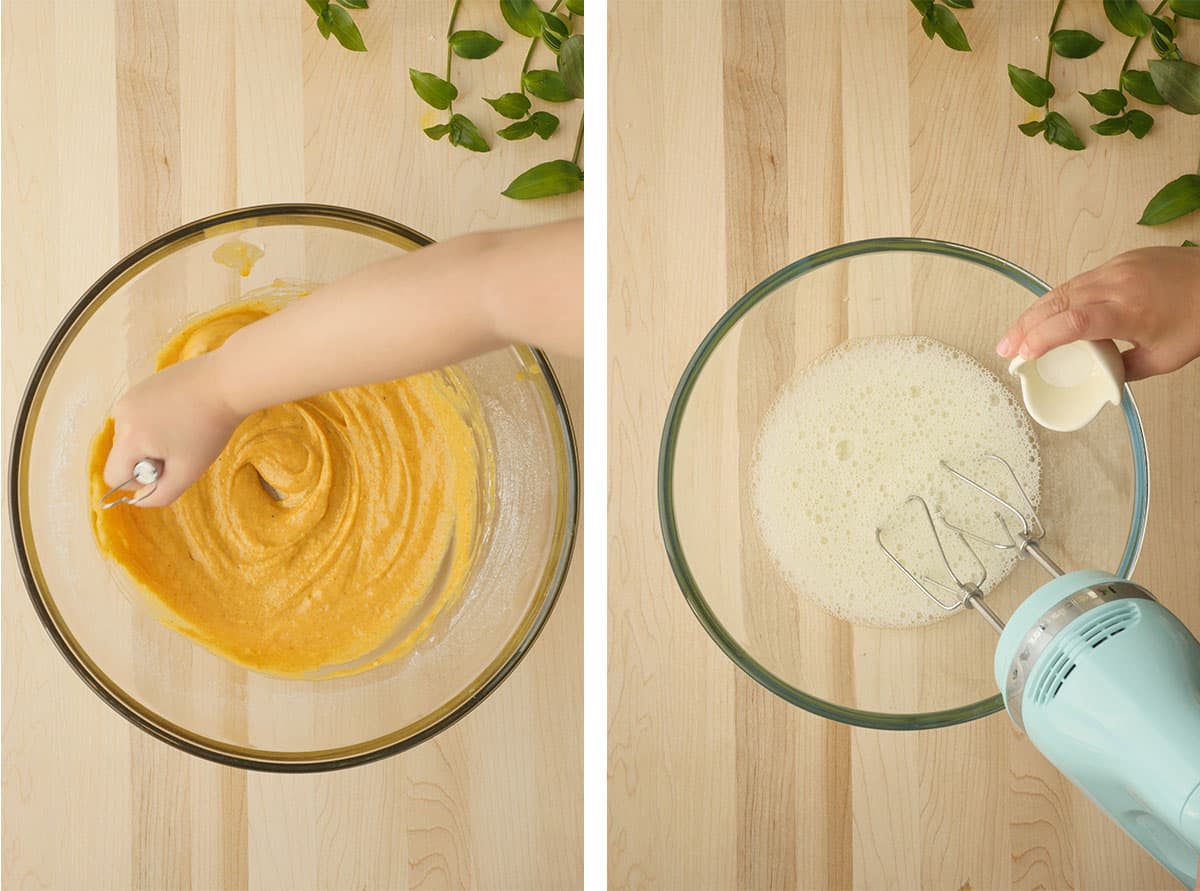
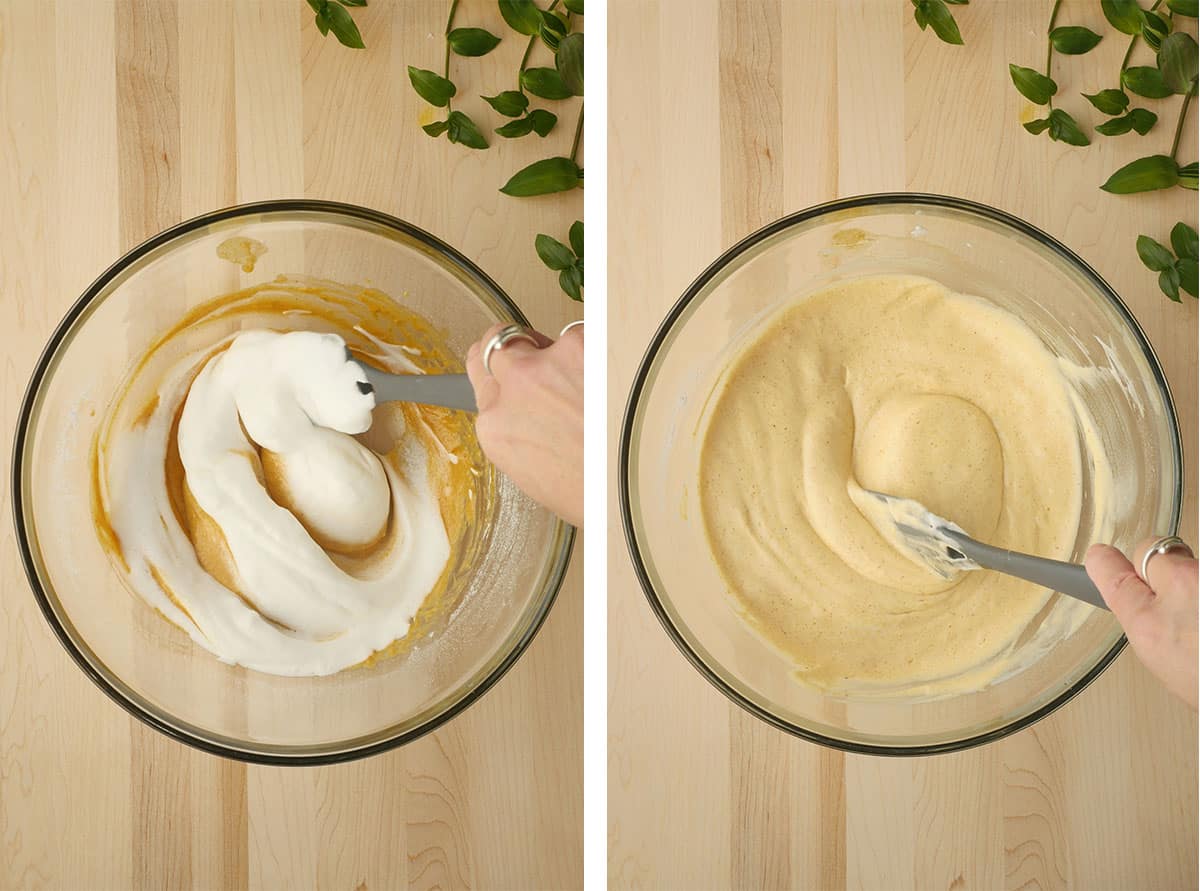
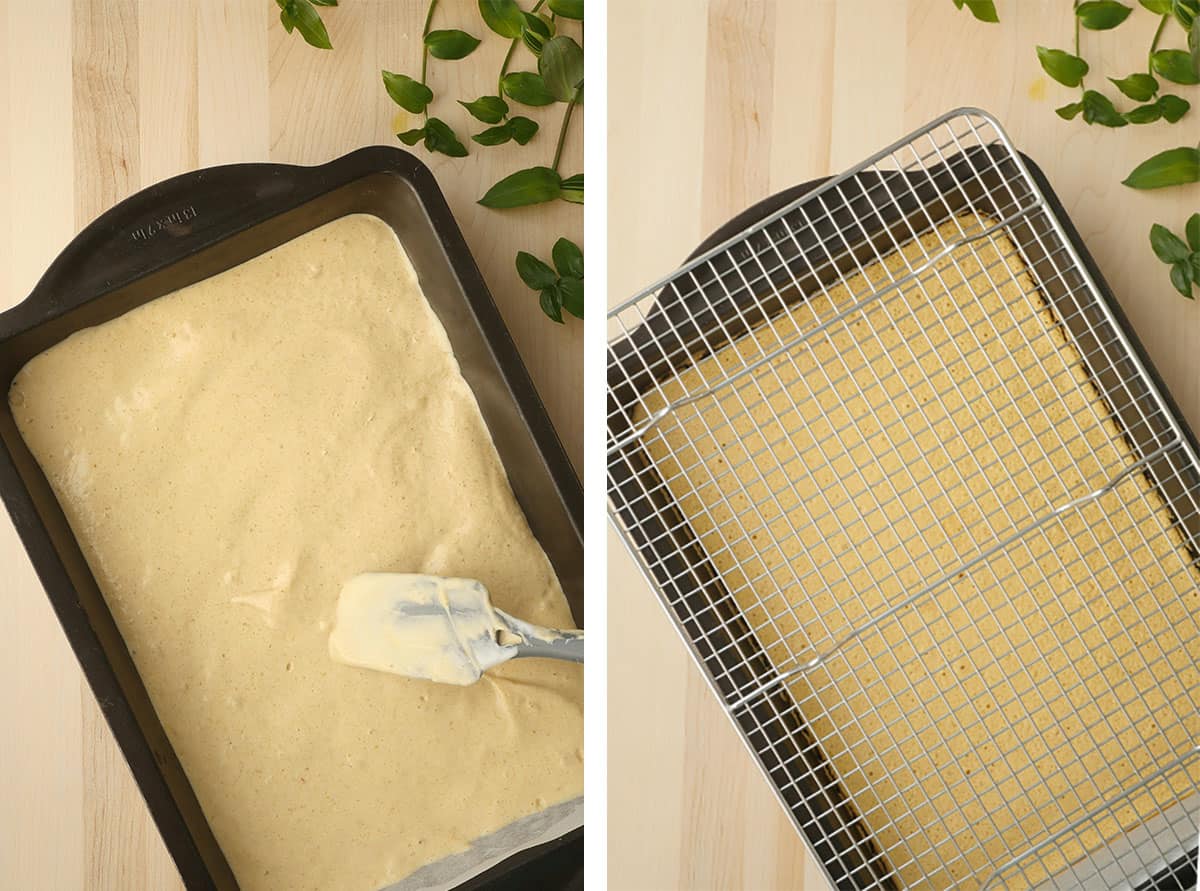
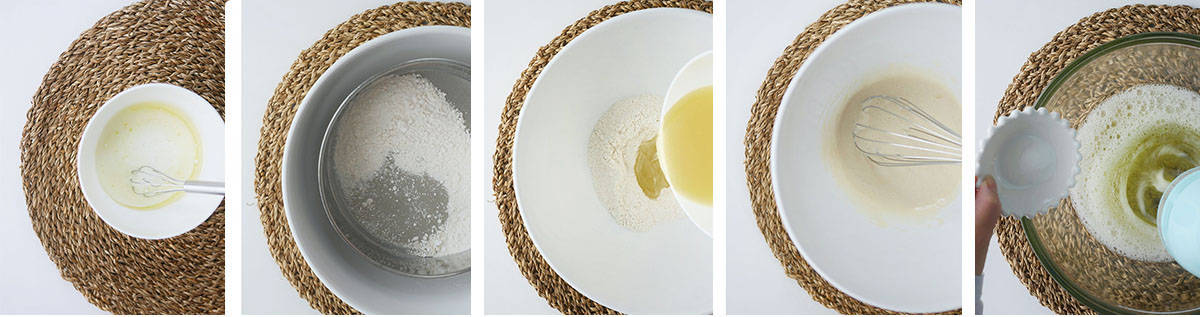
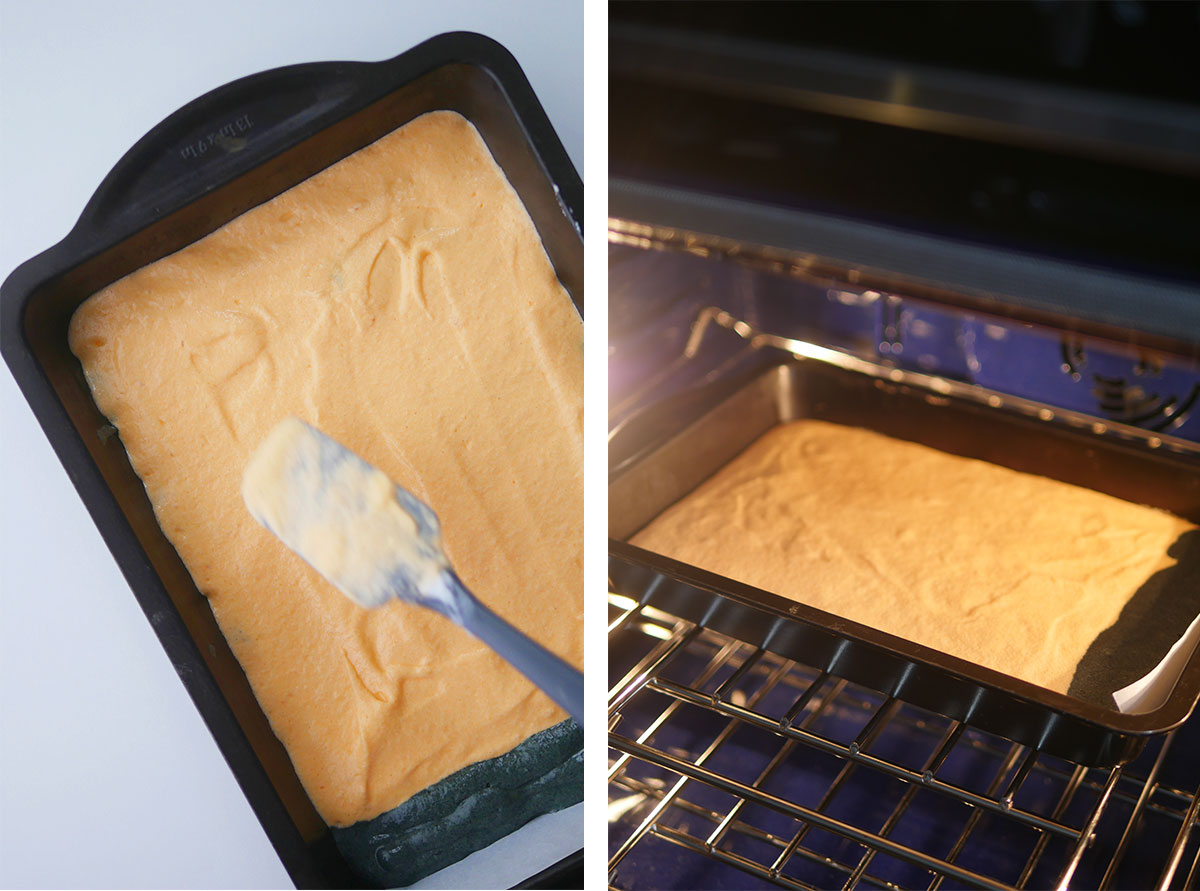
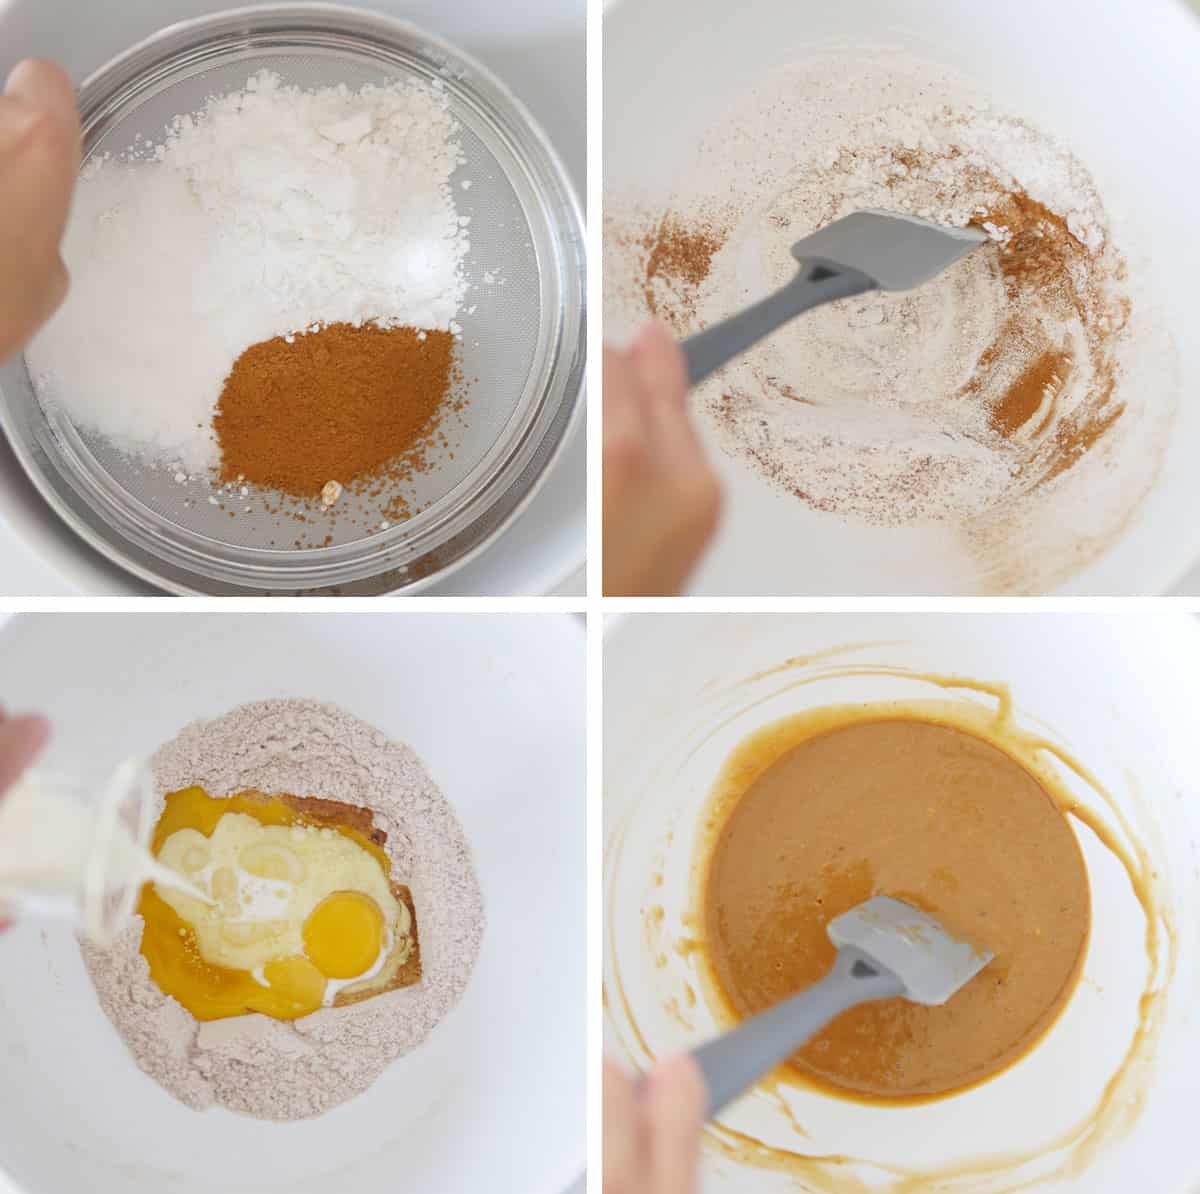
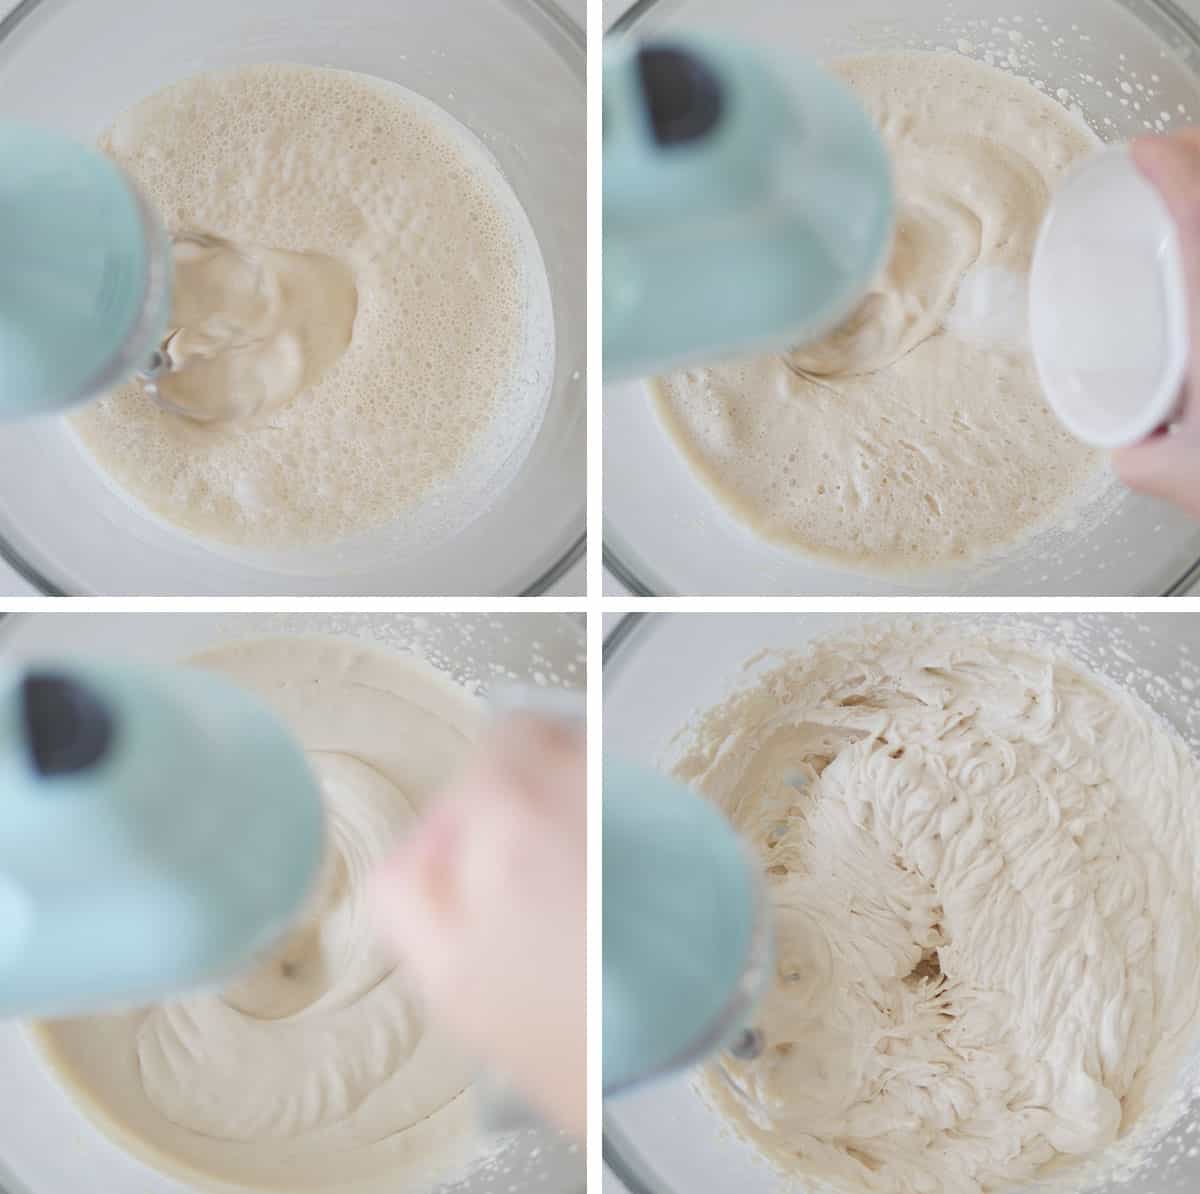
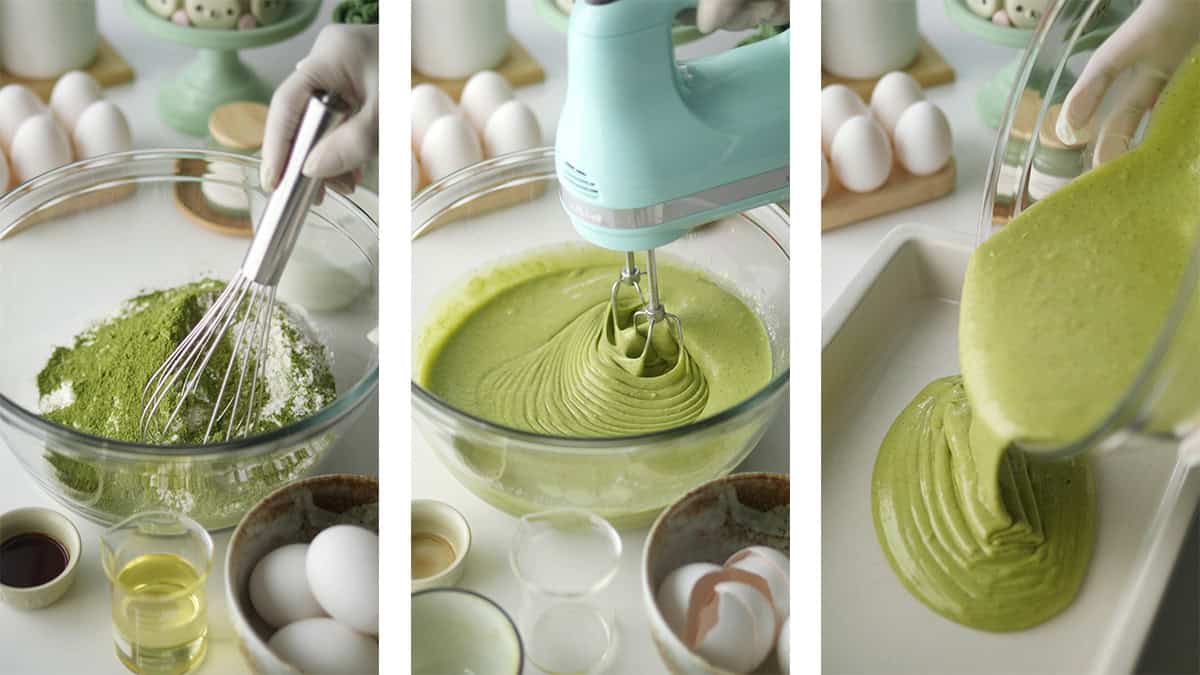
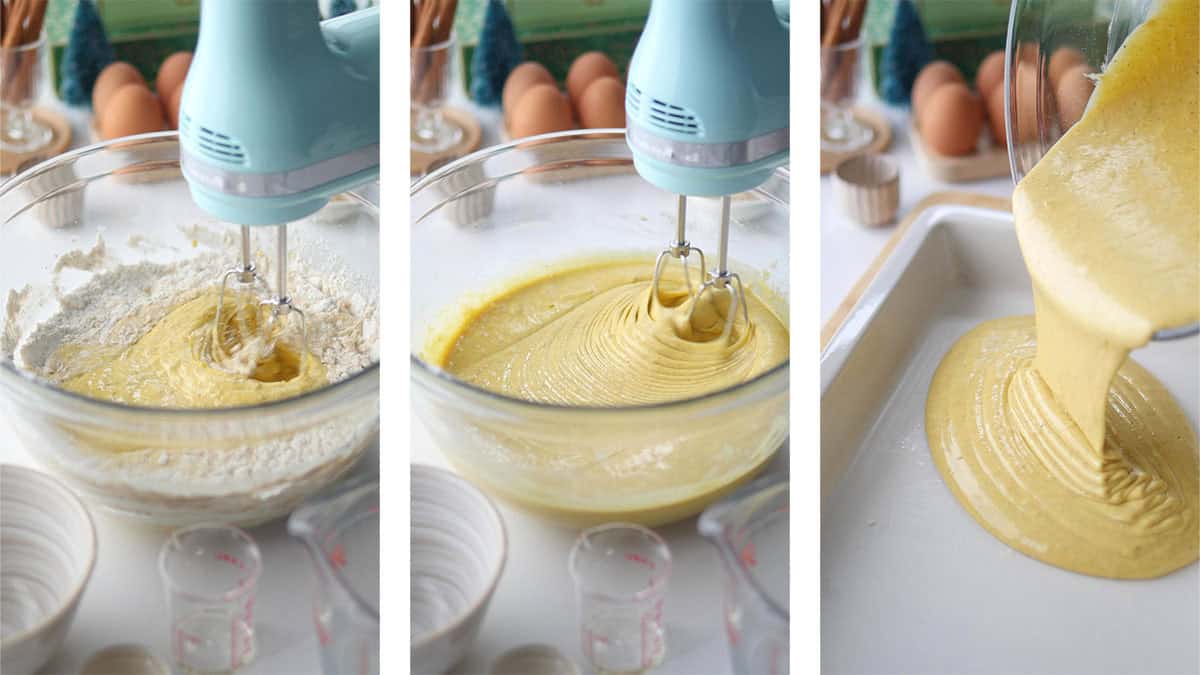
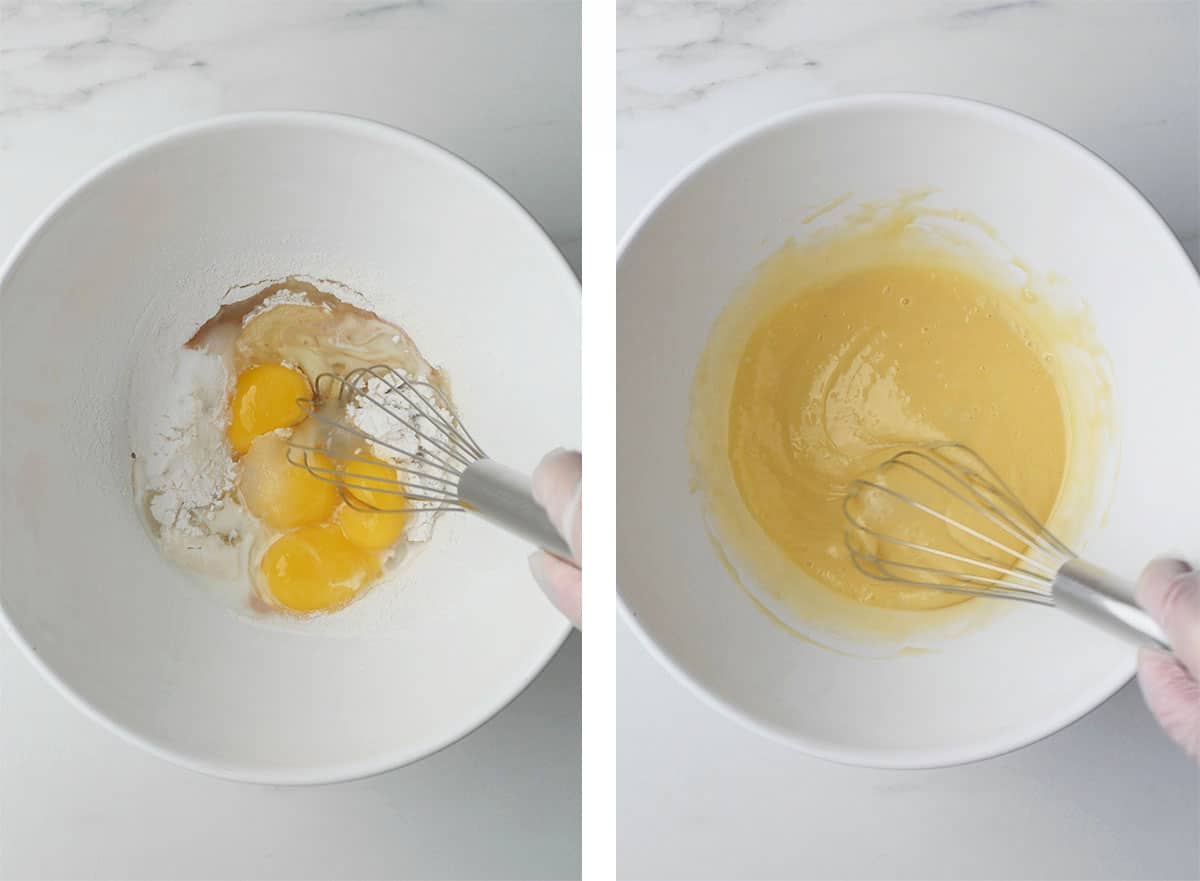
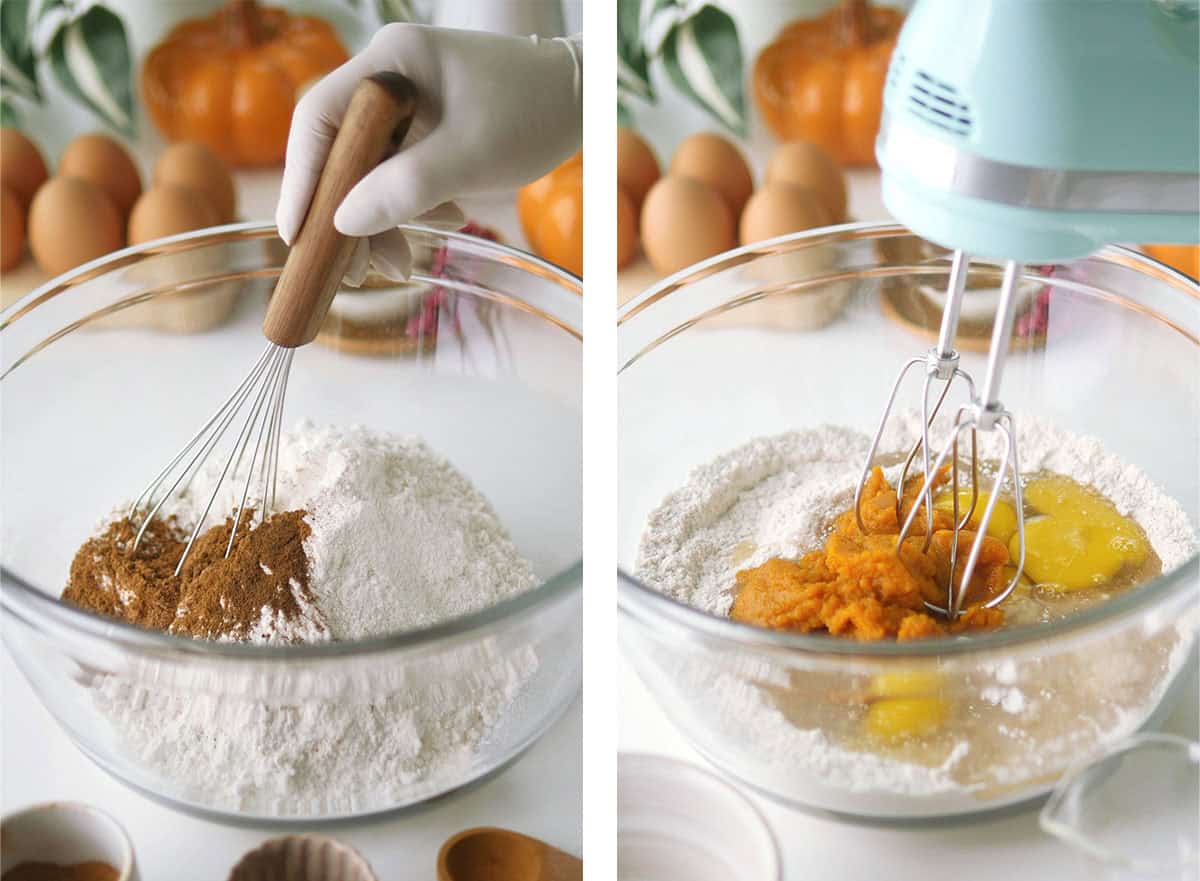
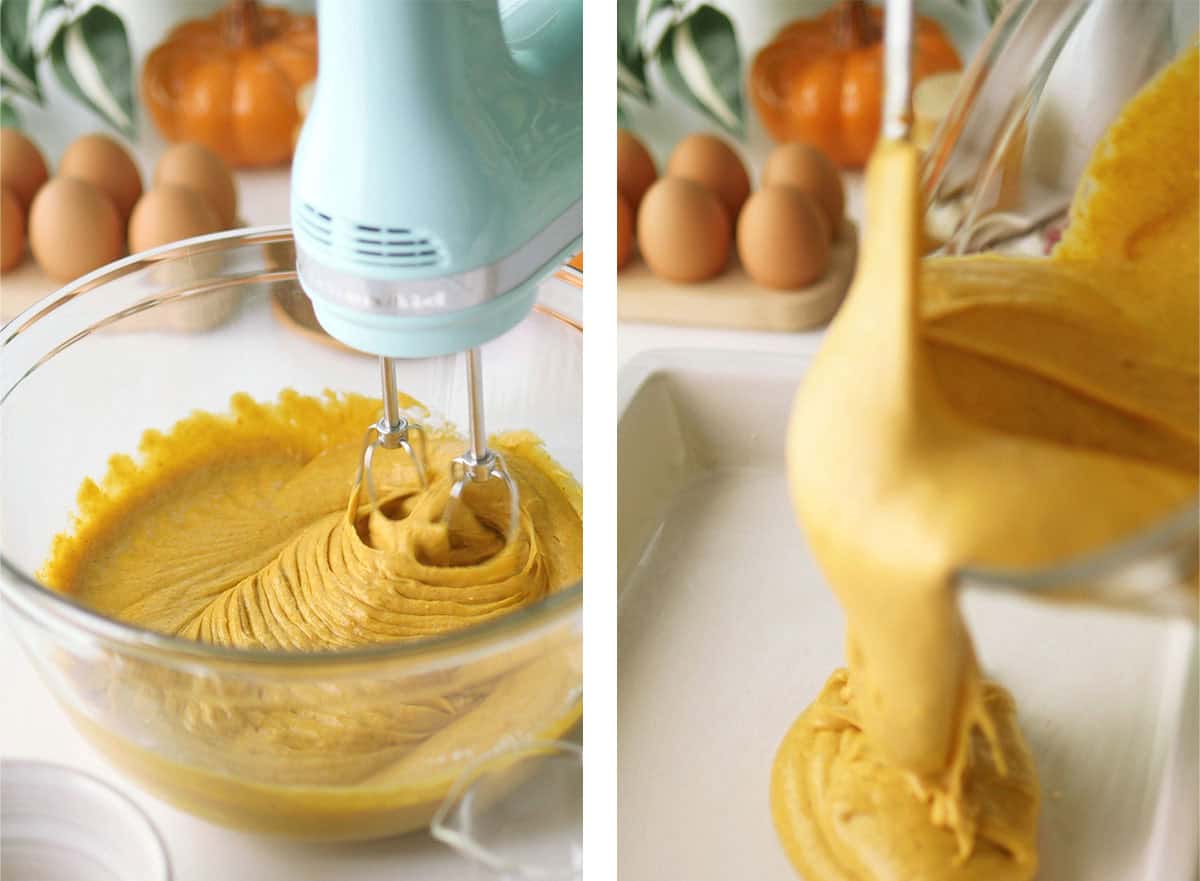
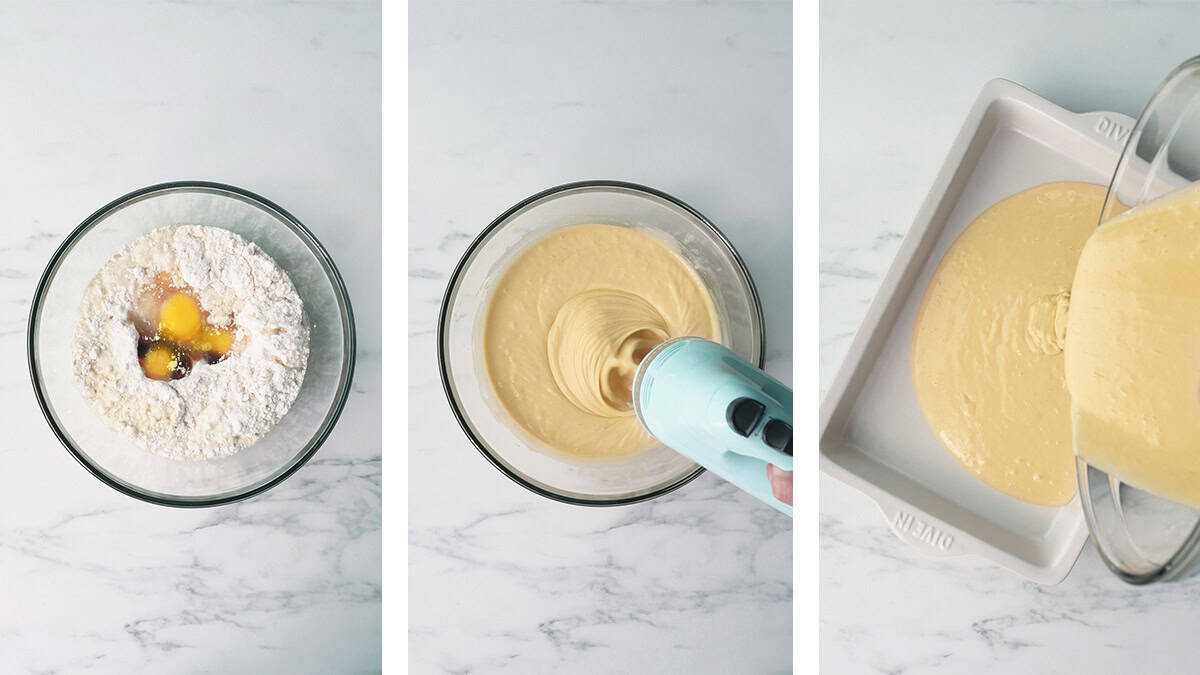
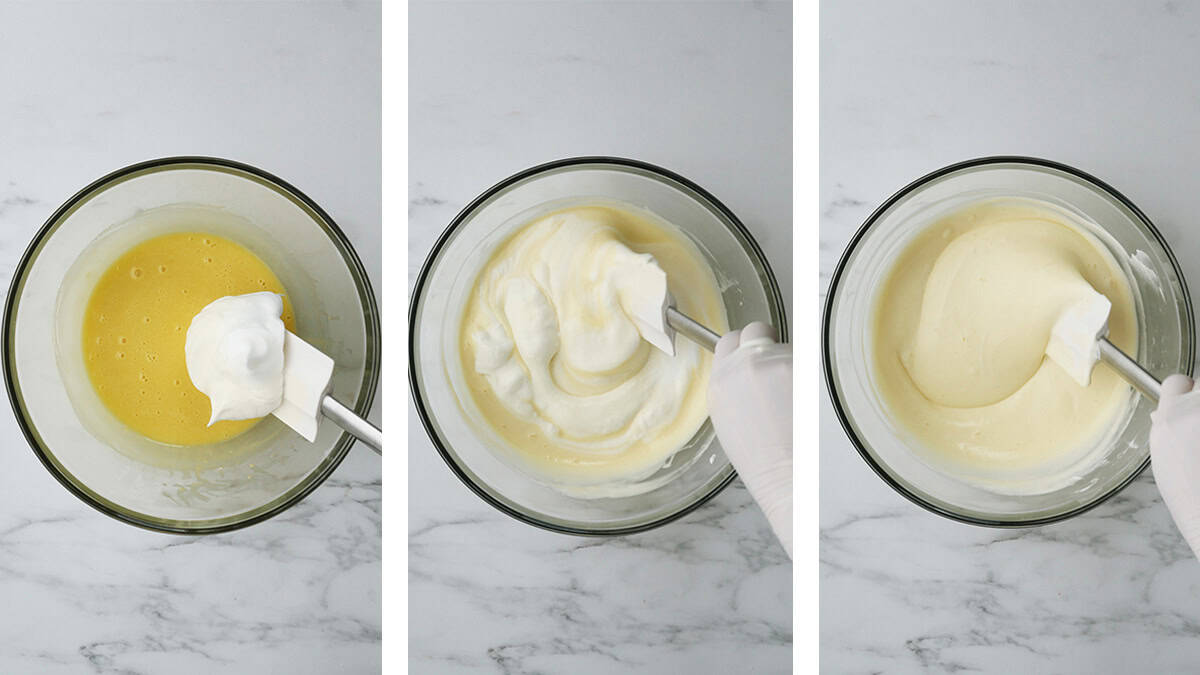
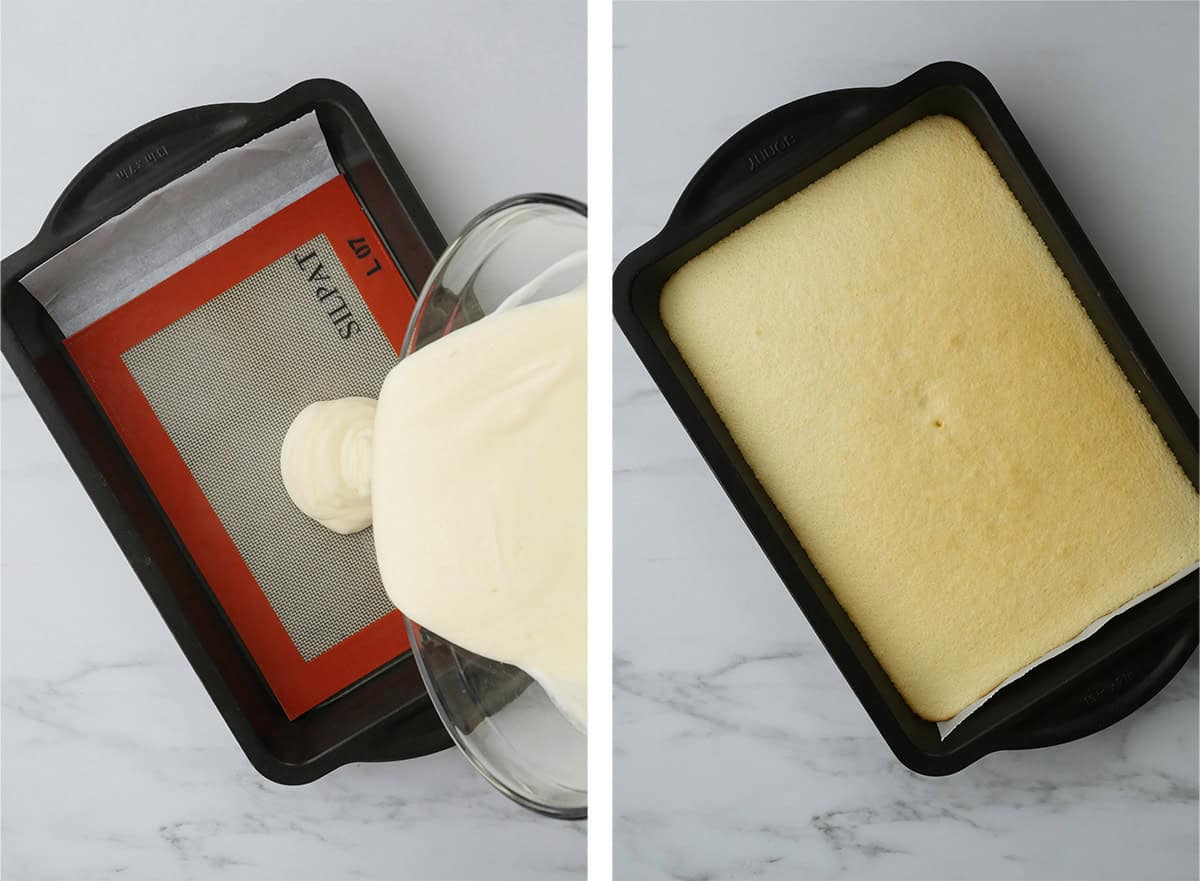
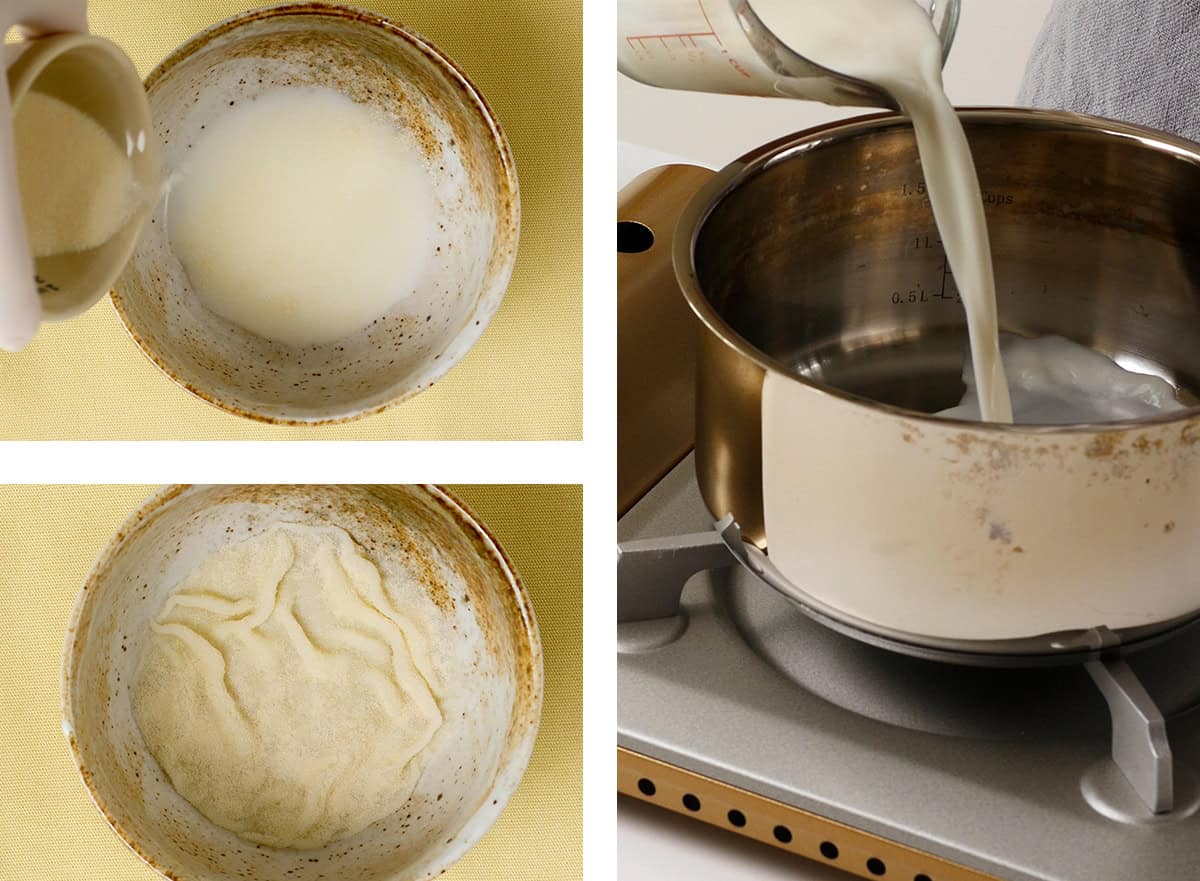
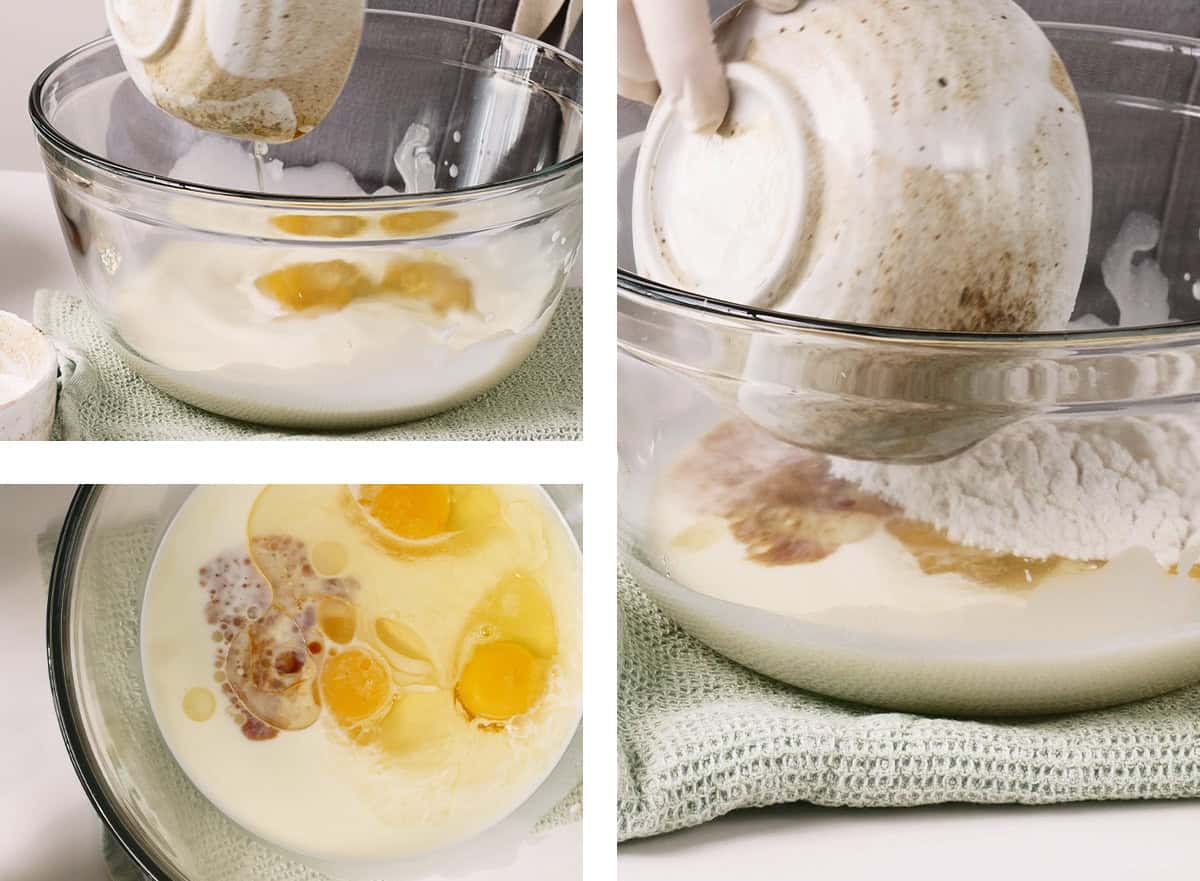
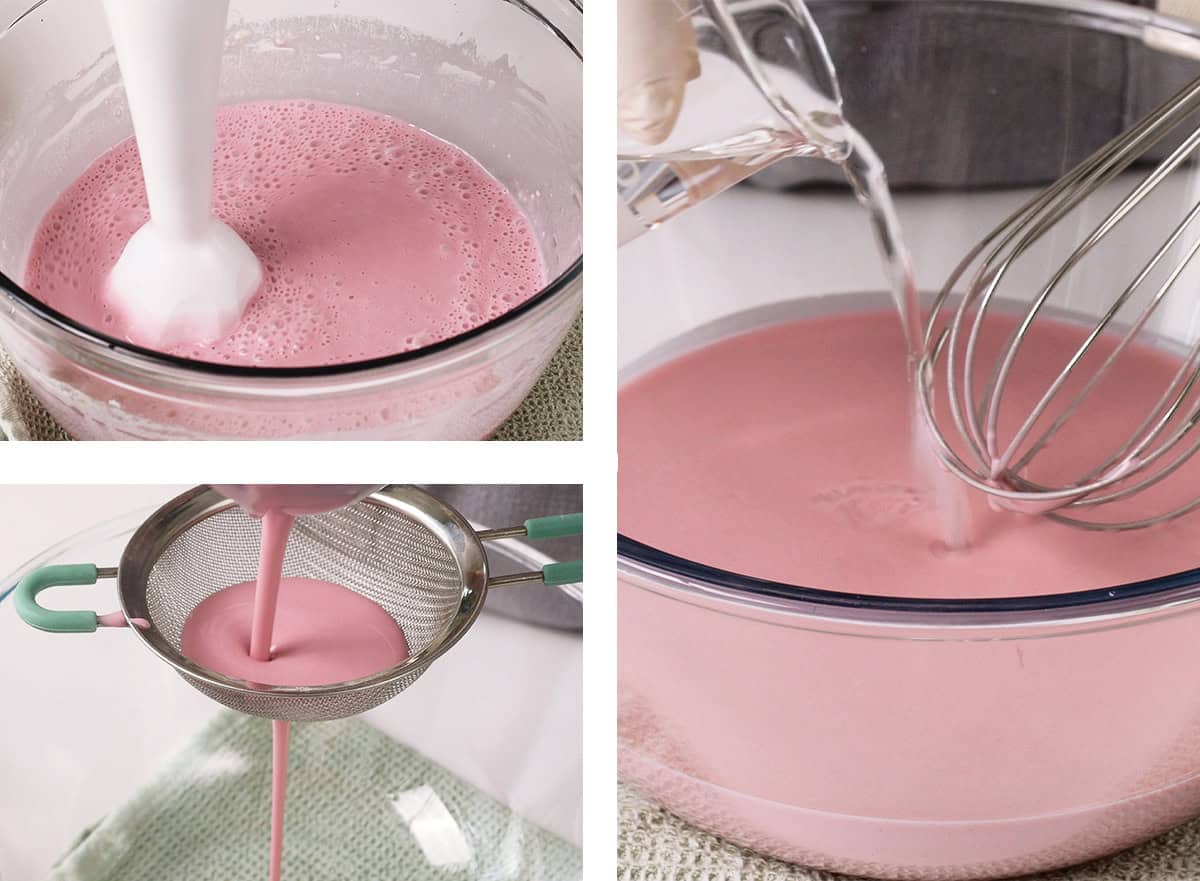
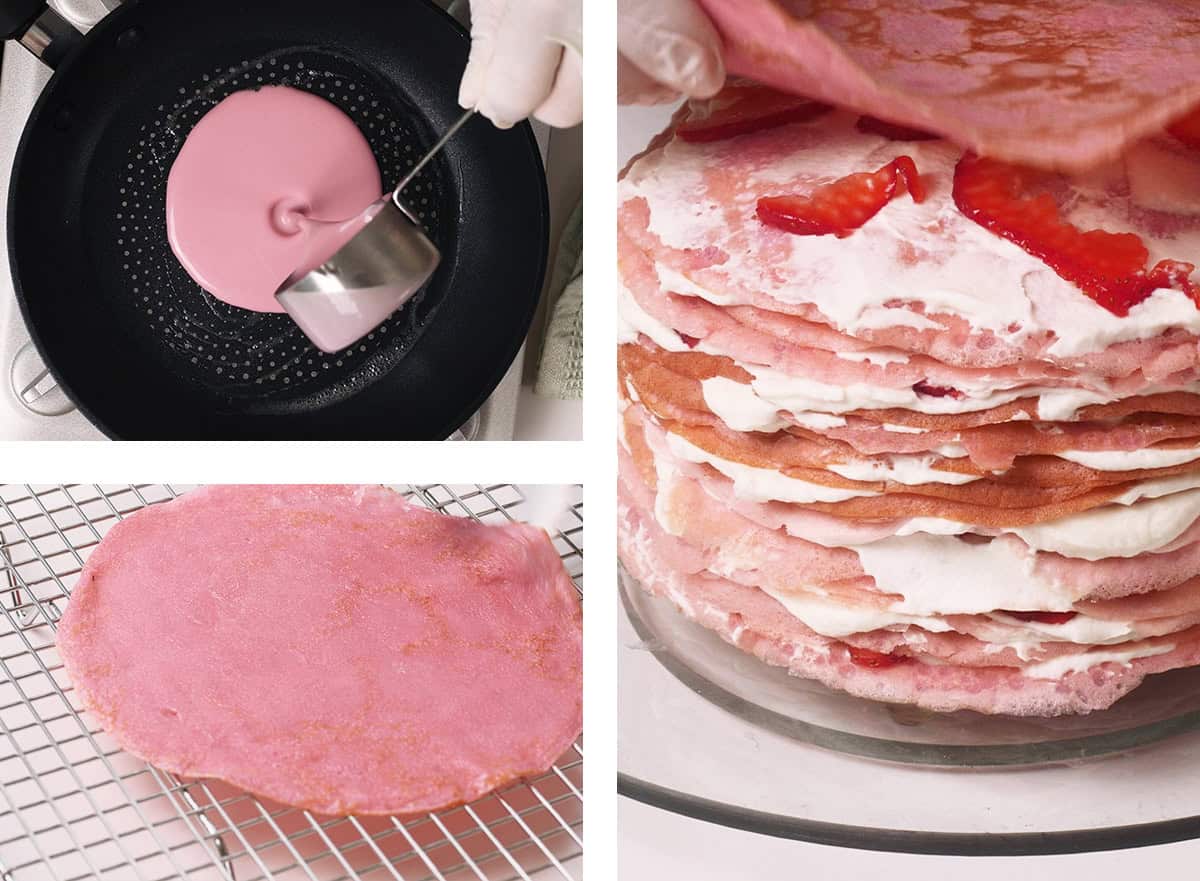
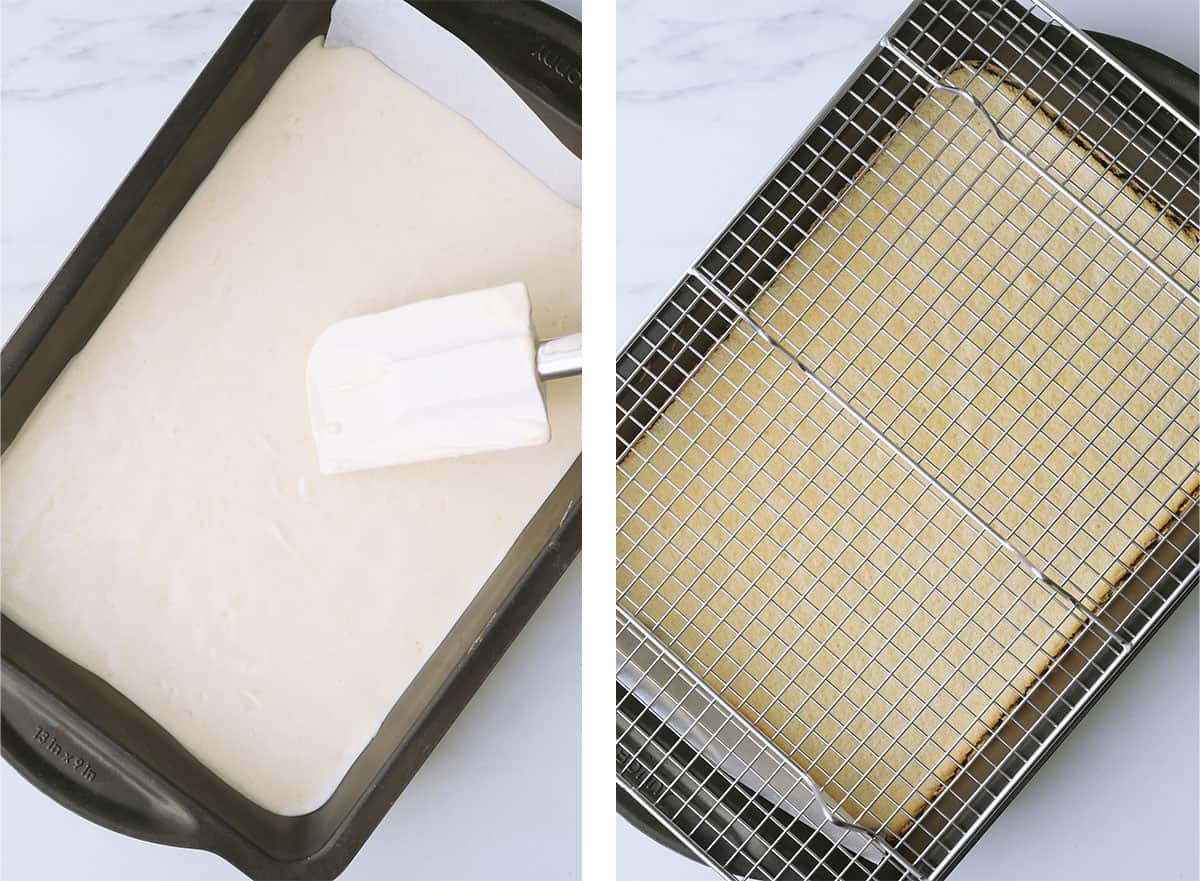
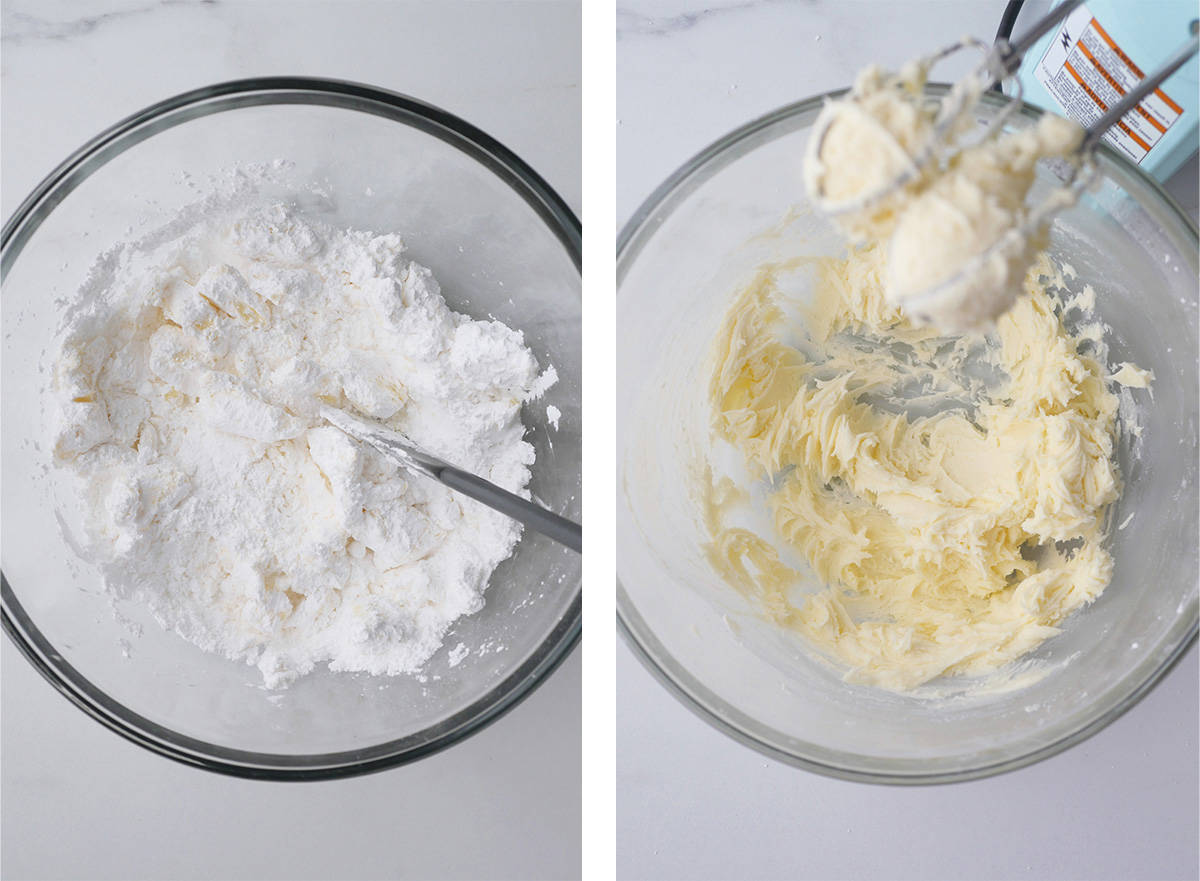
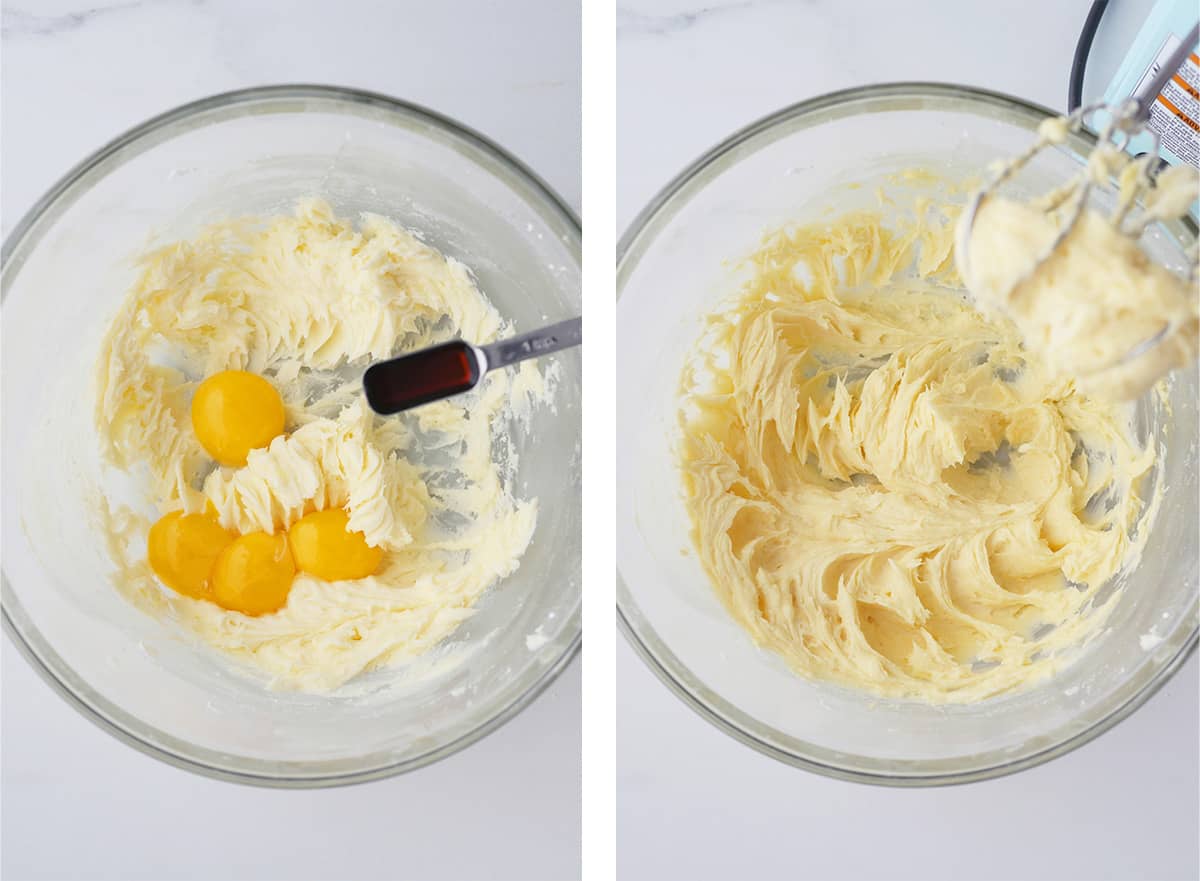
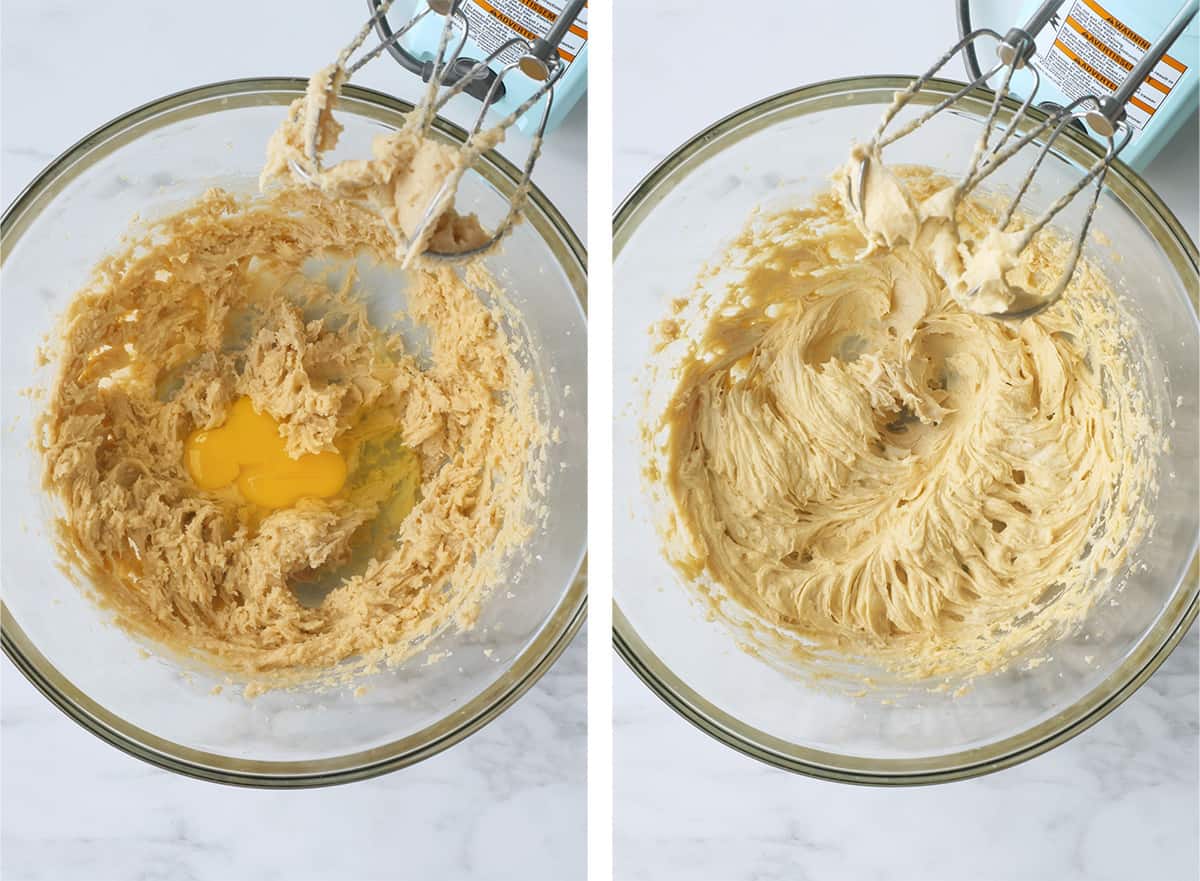
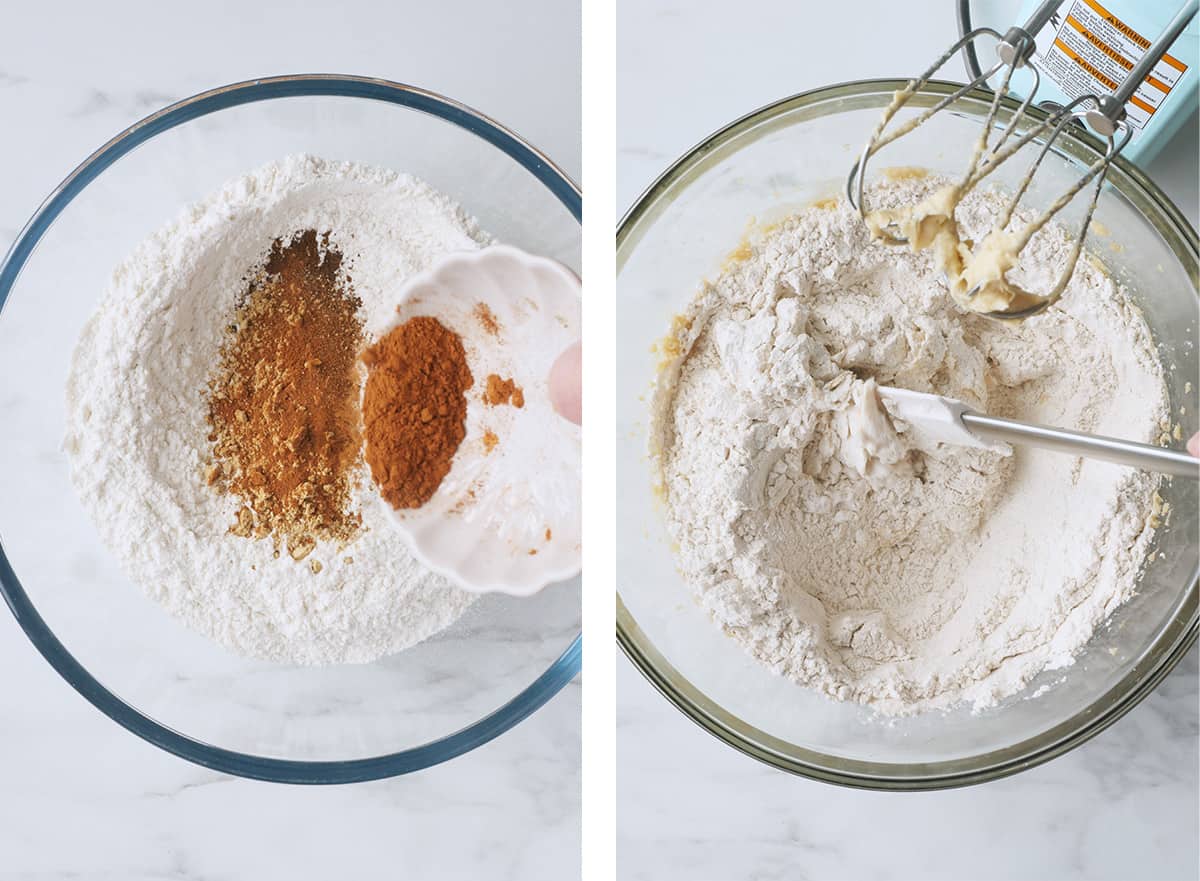
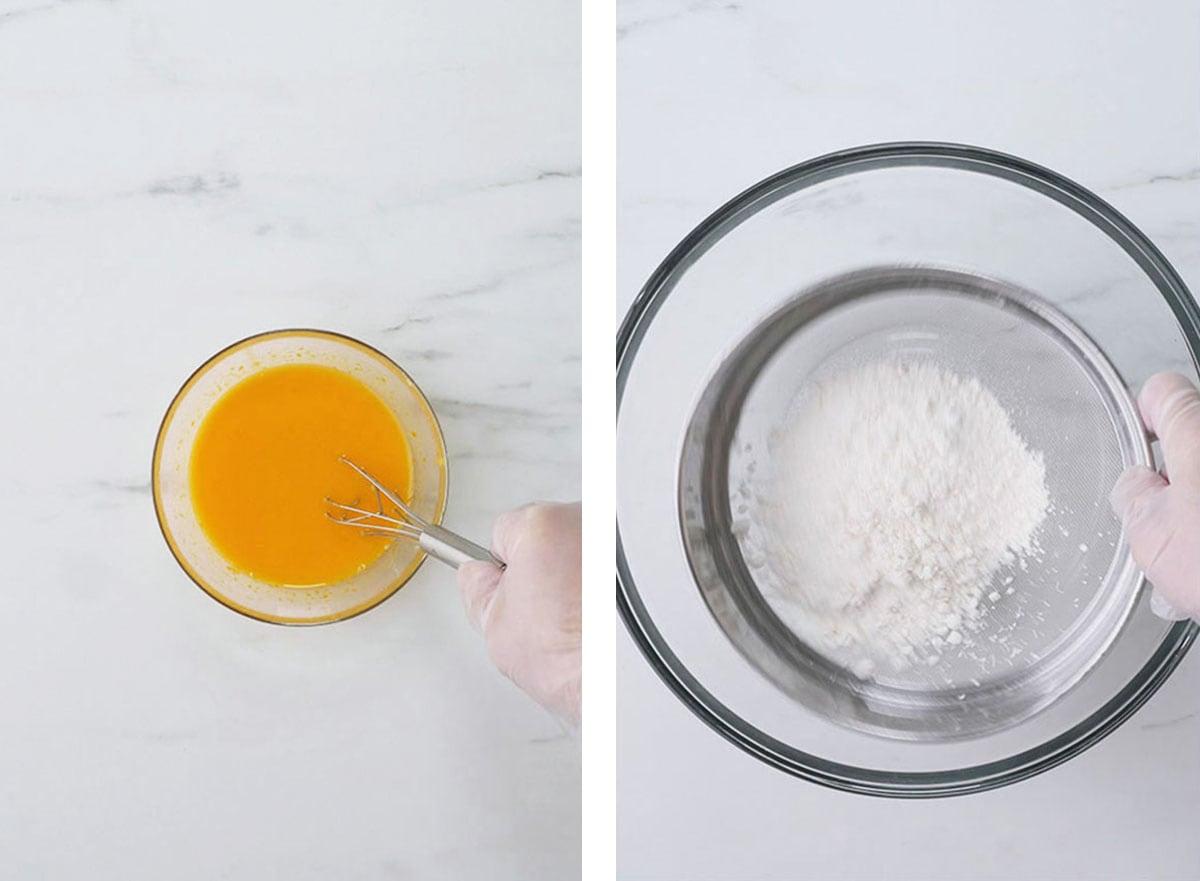
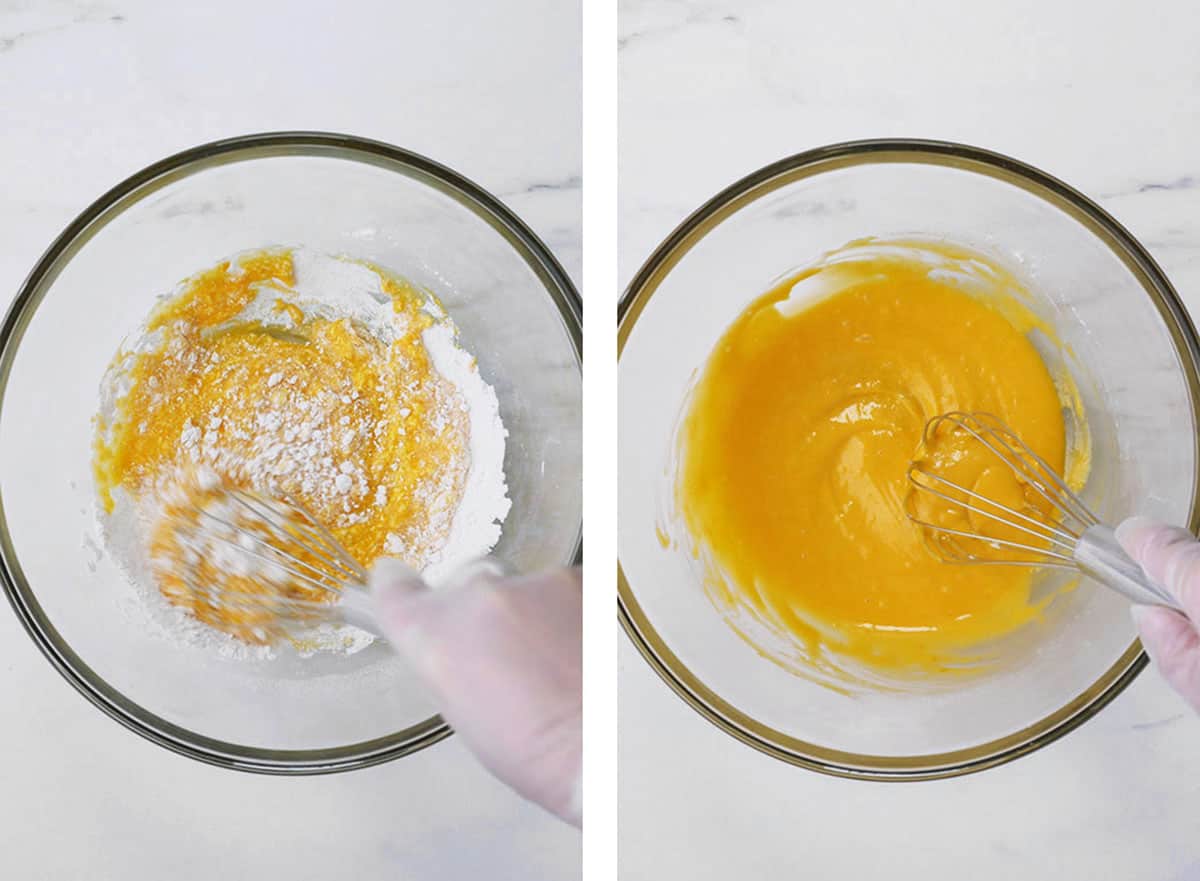
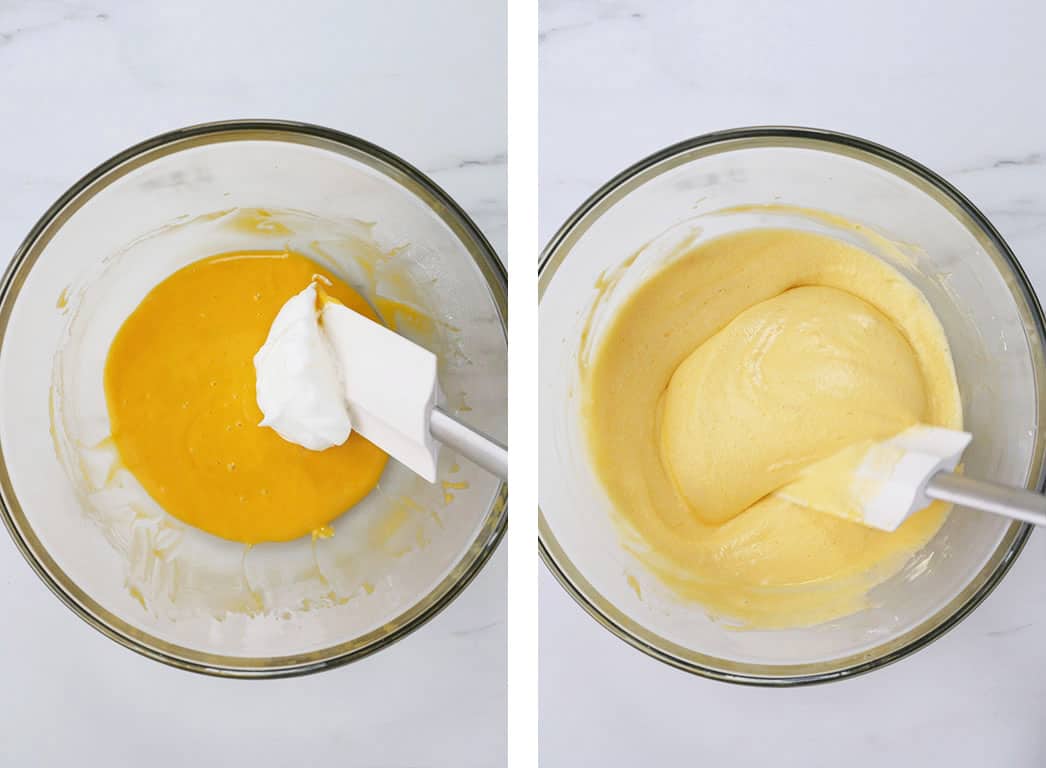
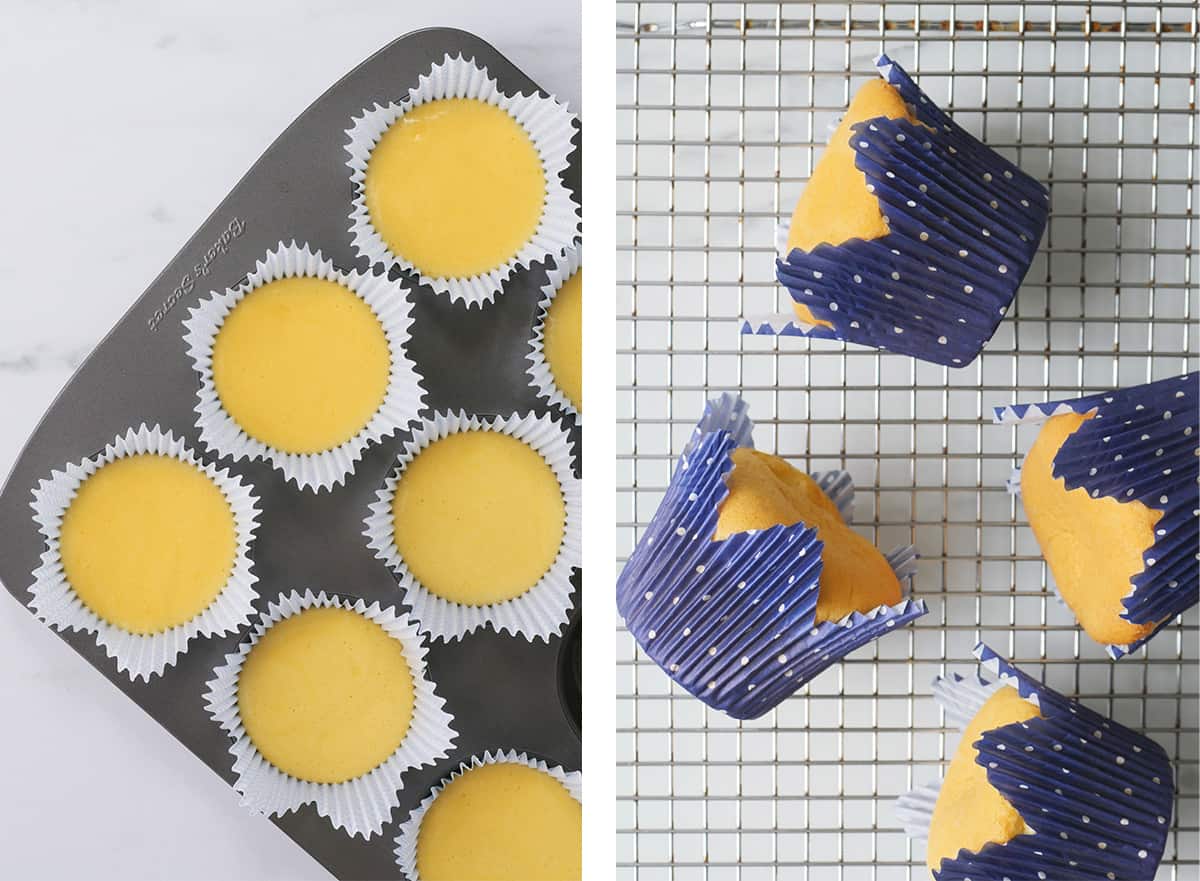
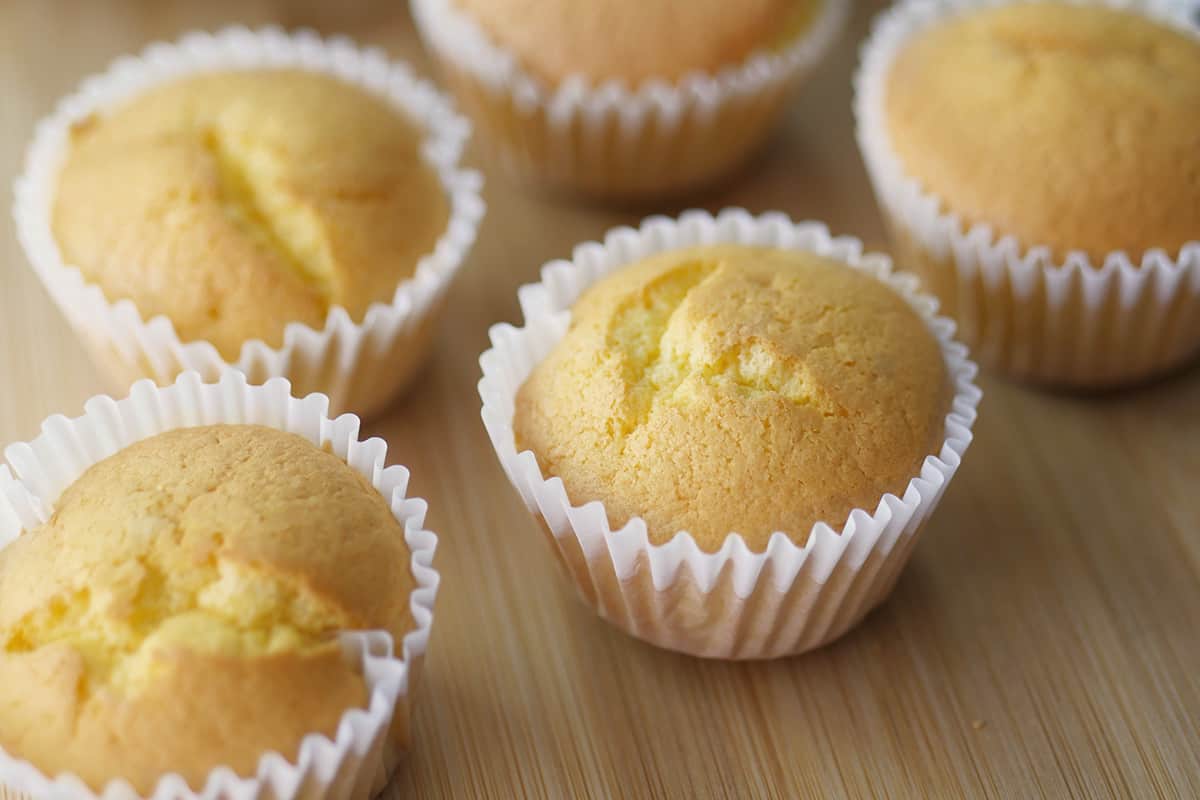
Heat oven to 325F. Grease only the bottom of the pan with a little bit of butter or oil. In a large bowl, stir together the cake mix and Matcha powder. Add in milk, oil, eggs and vanilla, beat together using a handheld mixer at medium speed for 2 minutes. It should look thick and homogenous. Pour batter into cake pan. Bake cake for 25-30 min. until it's golden brown and a toothpick inserted in the center comes out clean. Let the cake cool inside the pan as you prepare the milk soak.
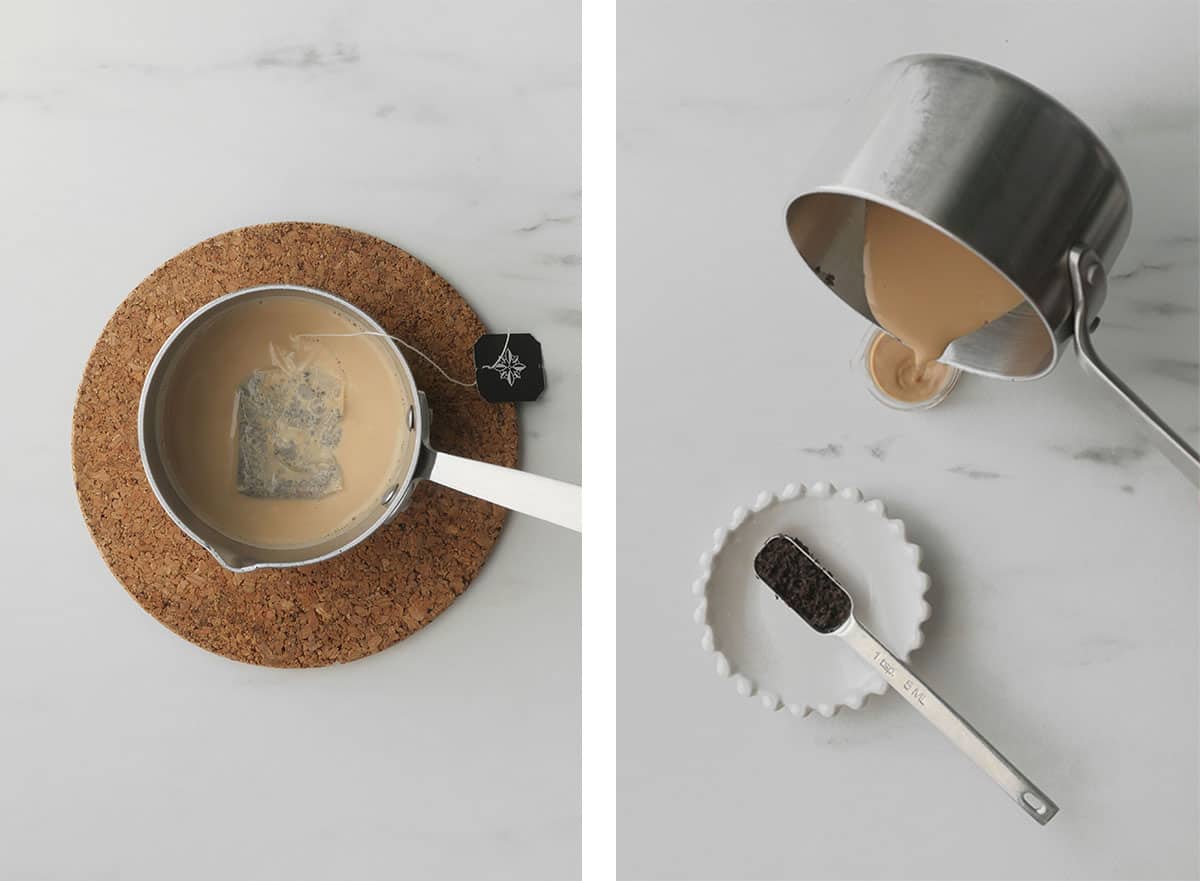
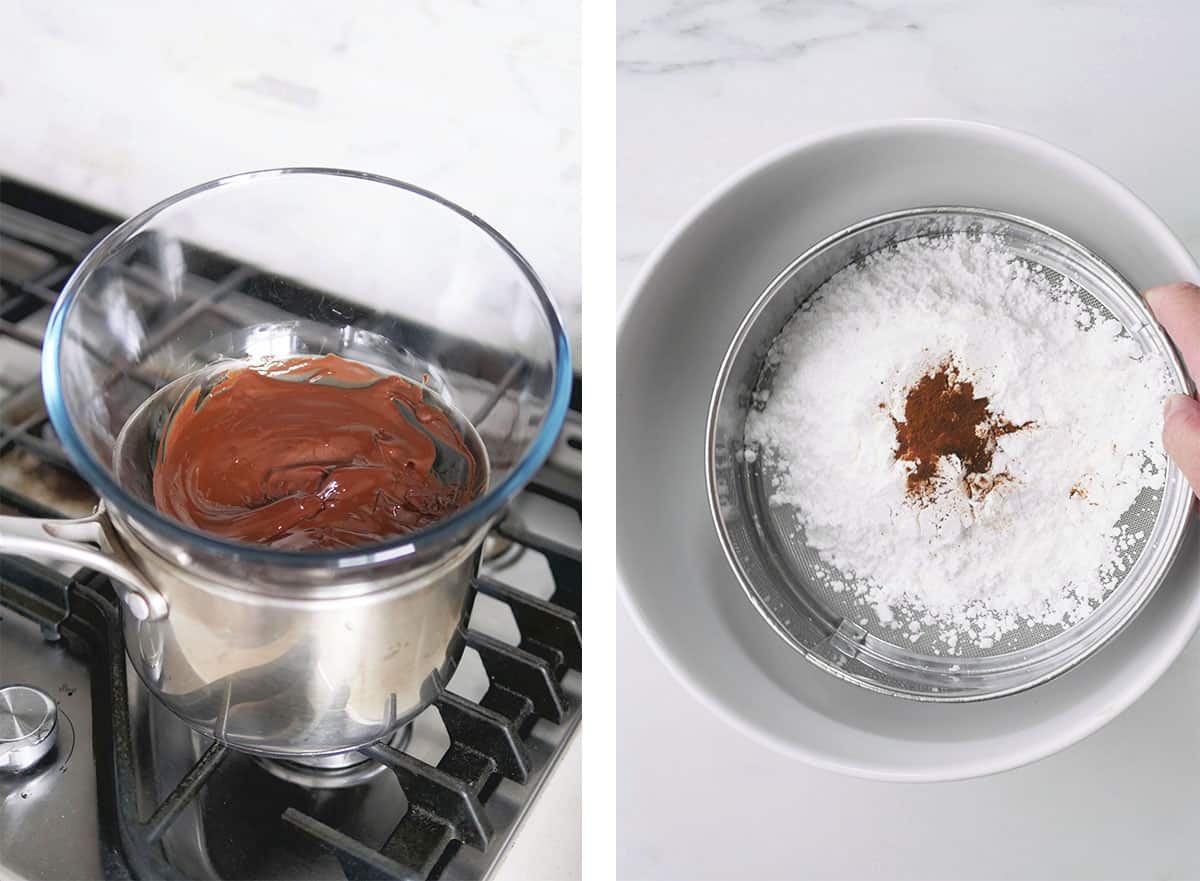
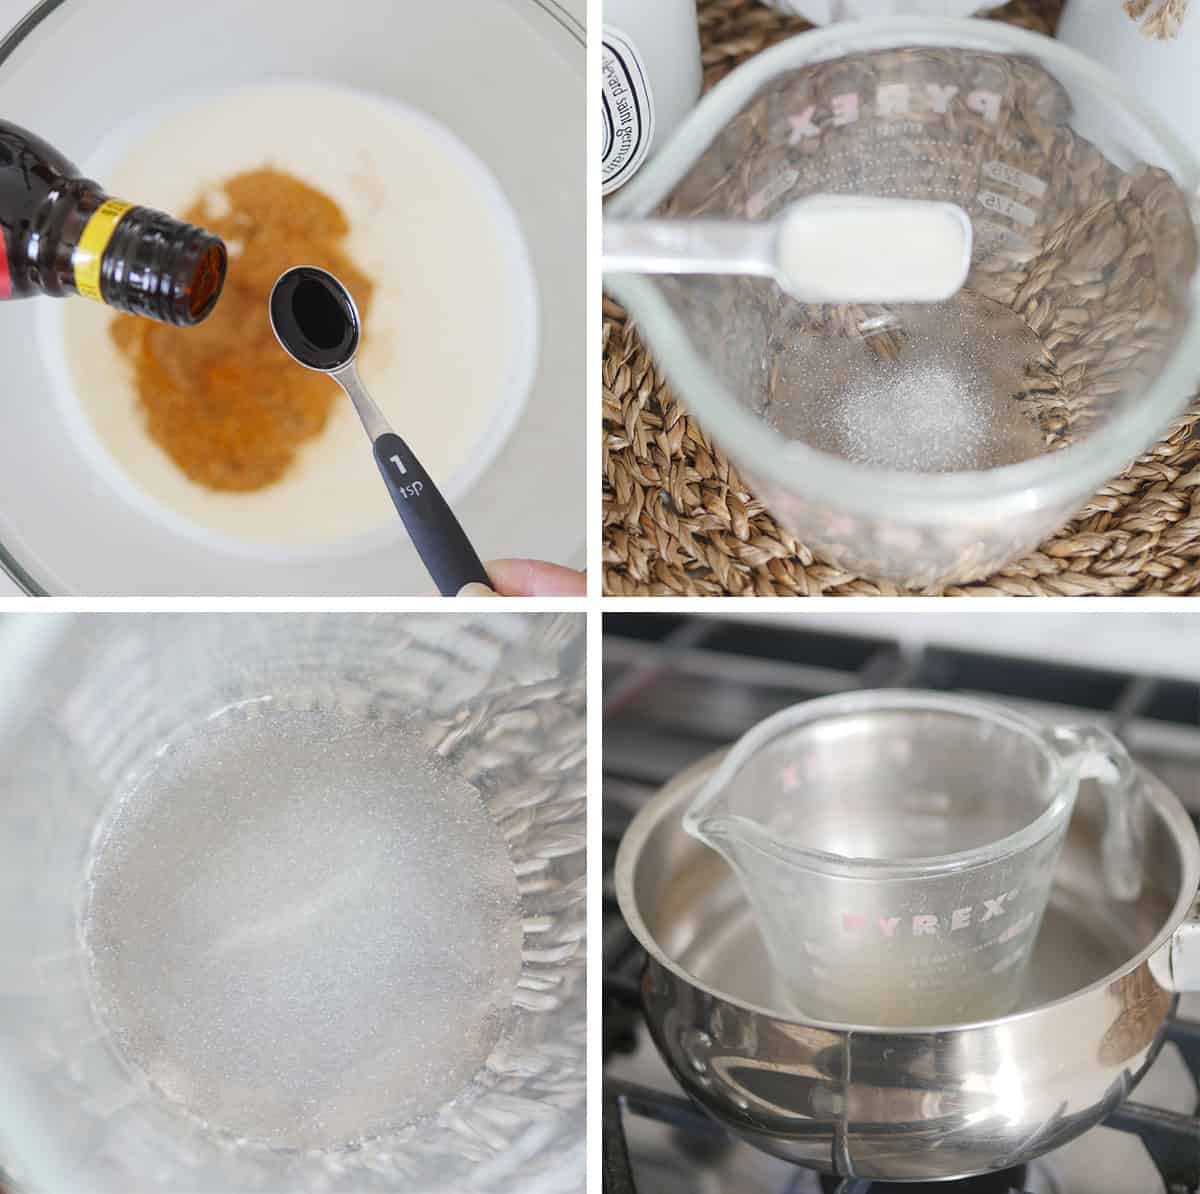
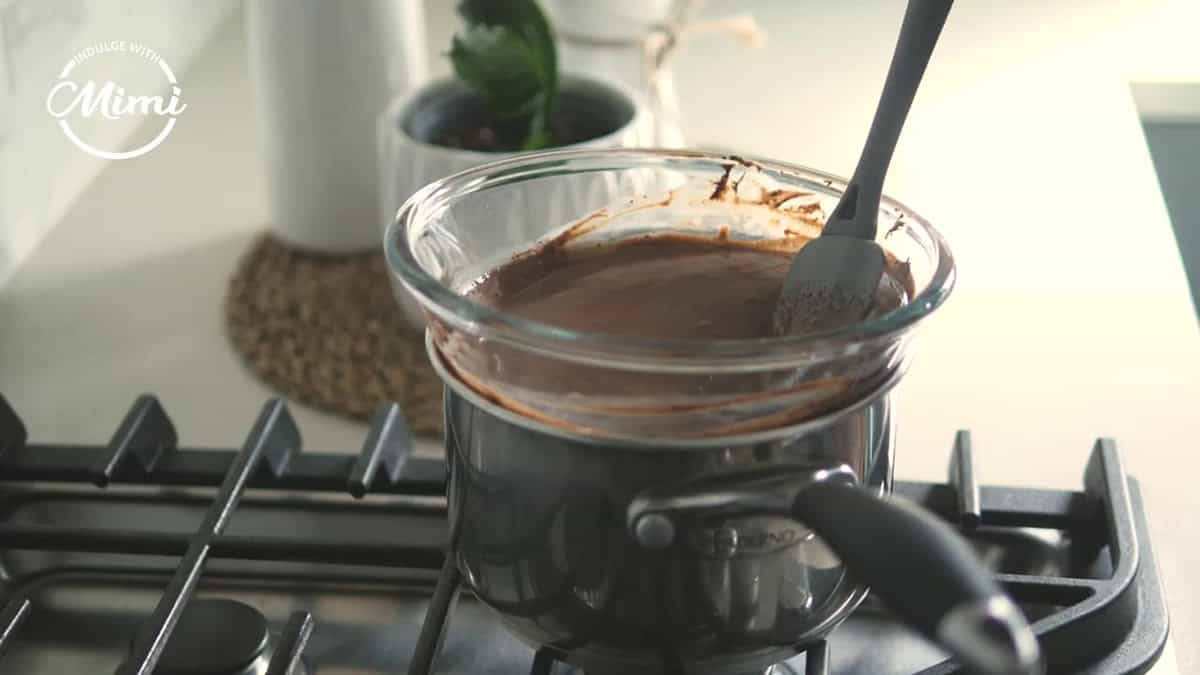
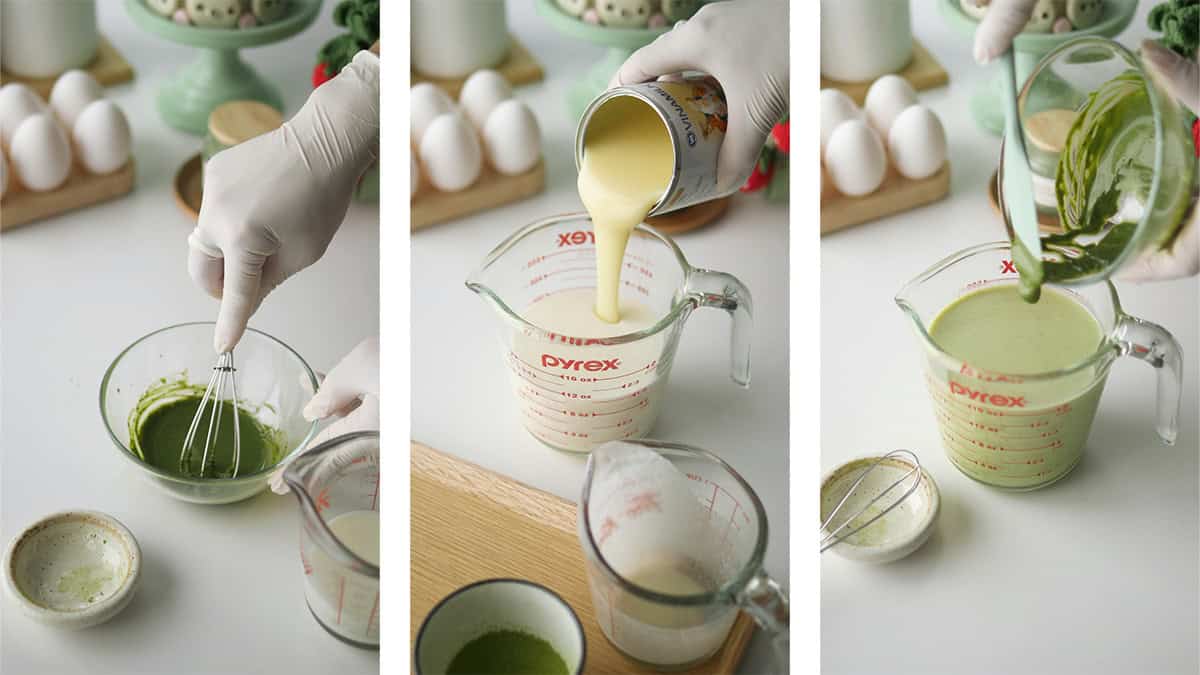
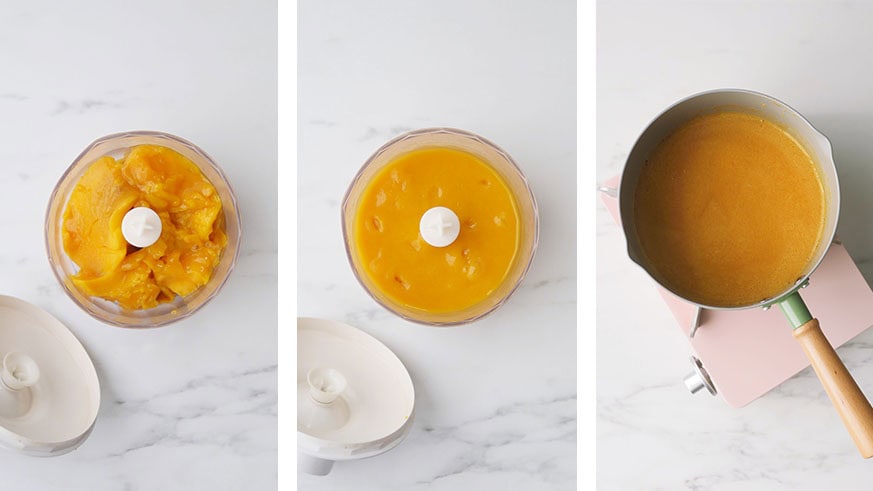
Whisk Matcha Milk
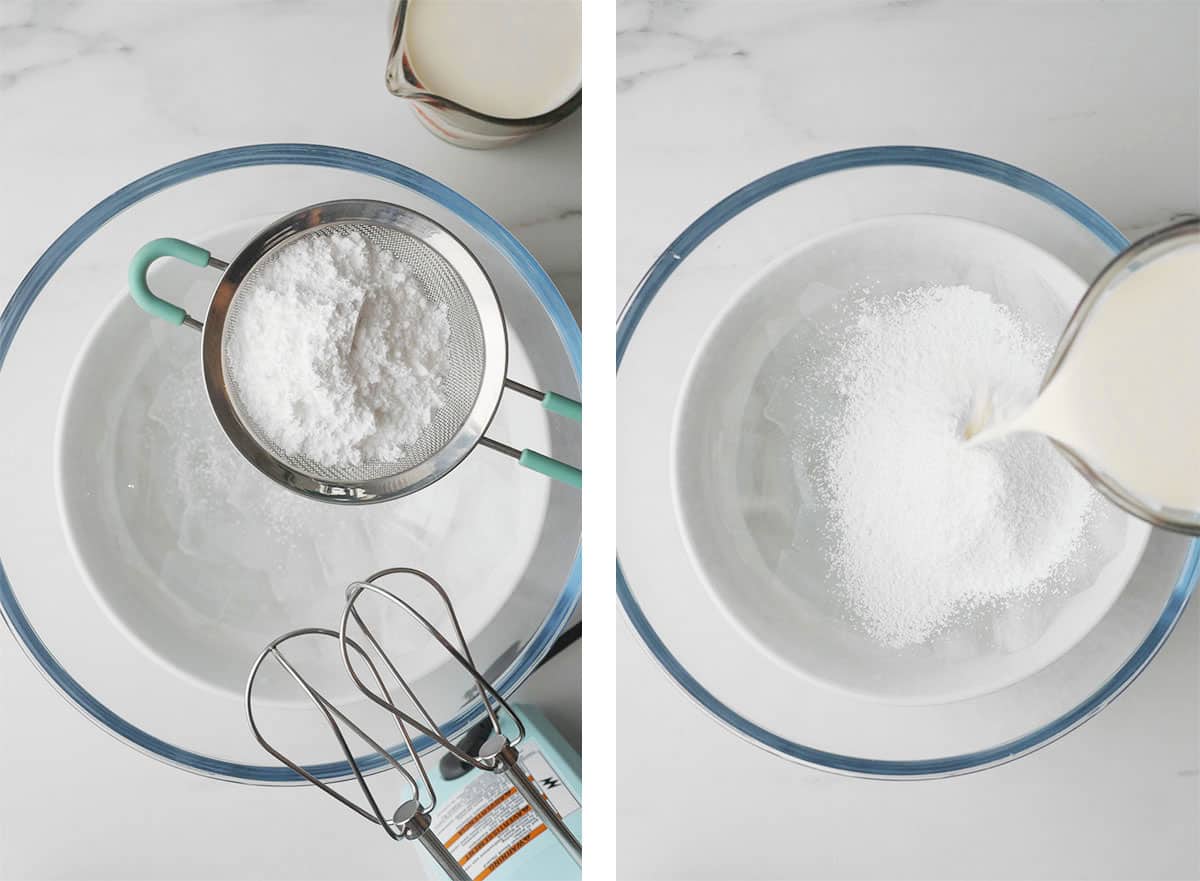
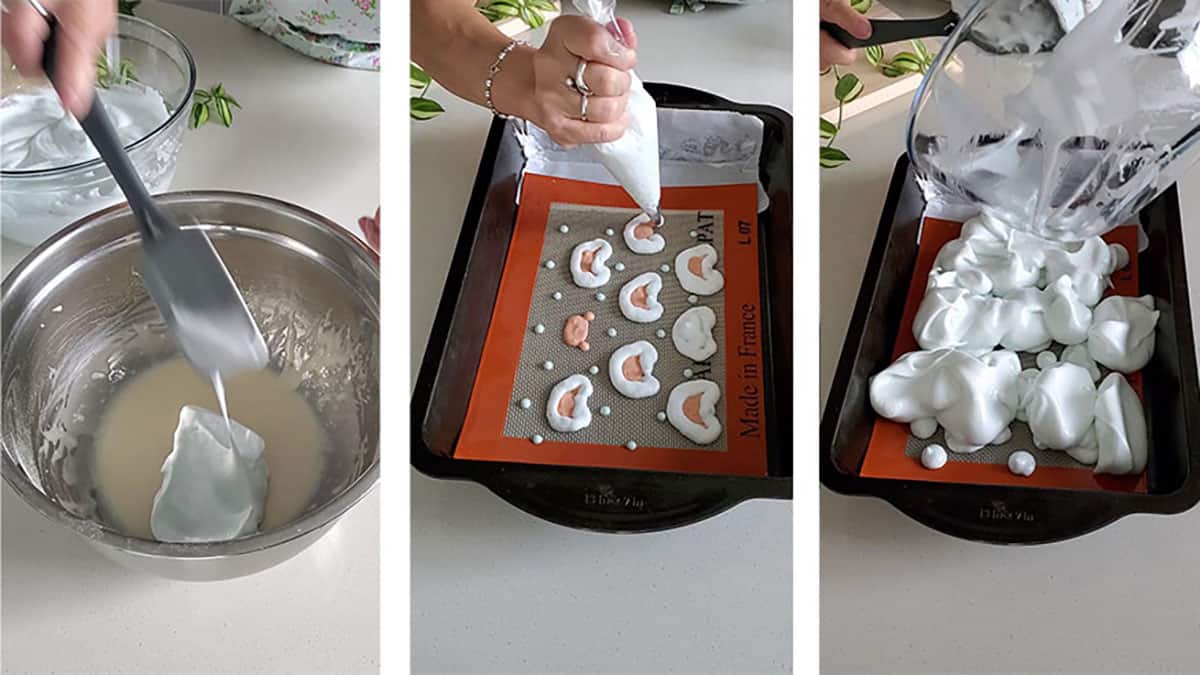
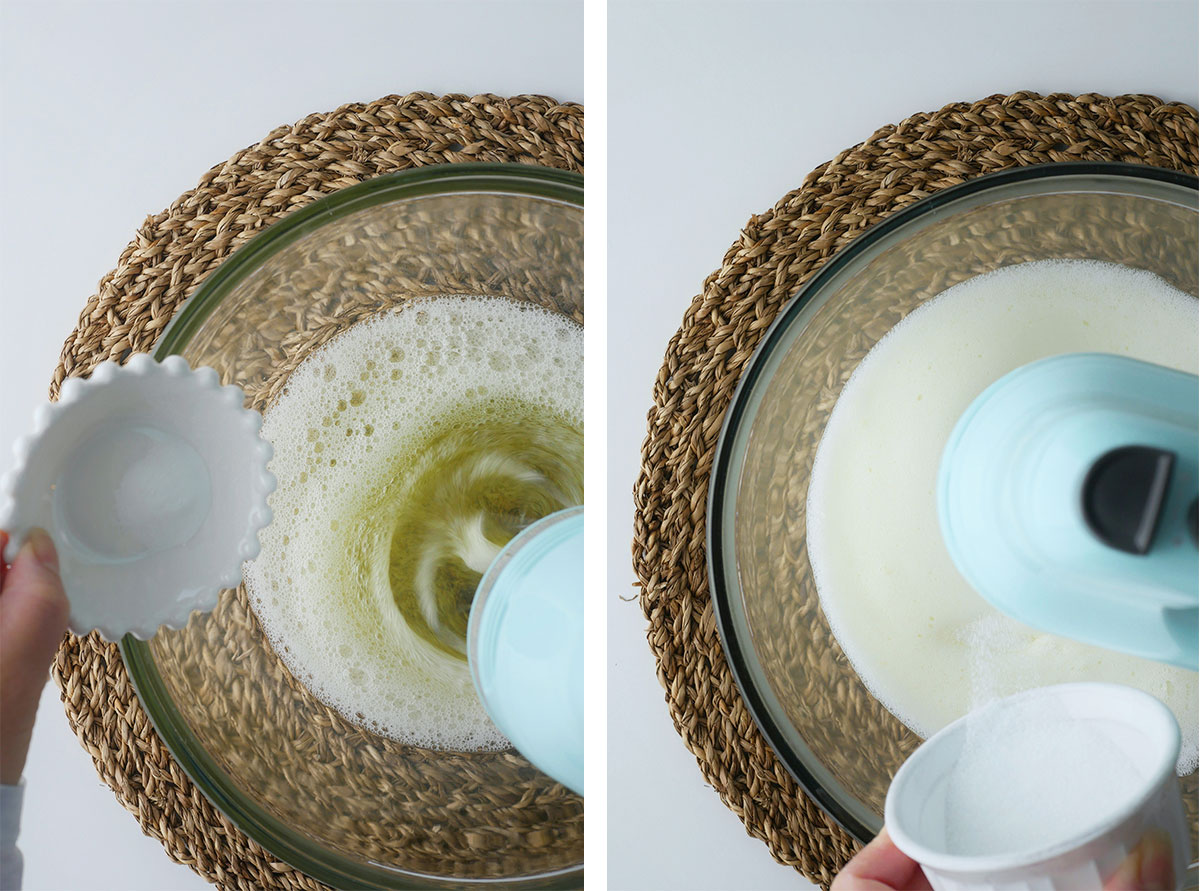
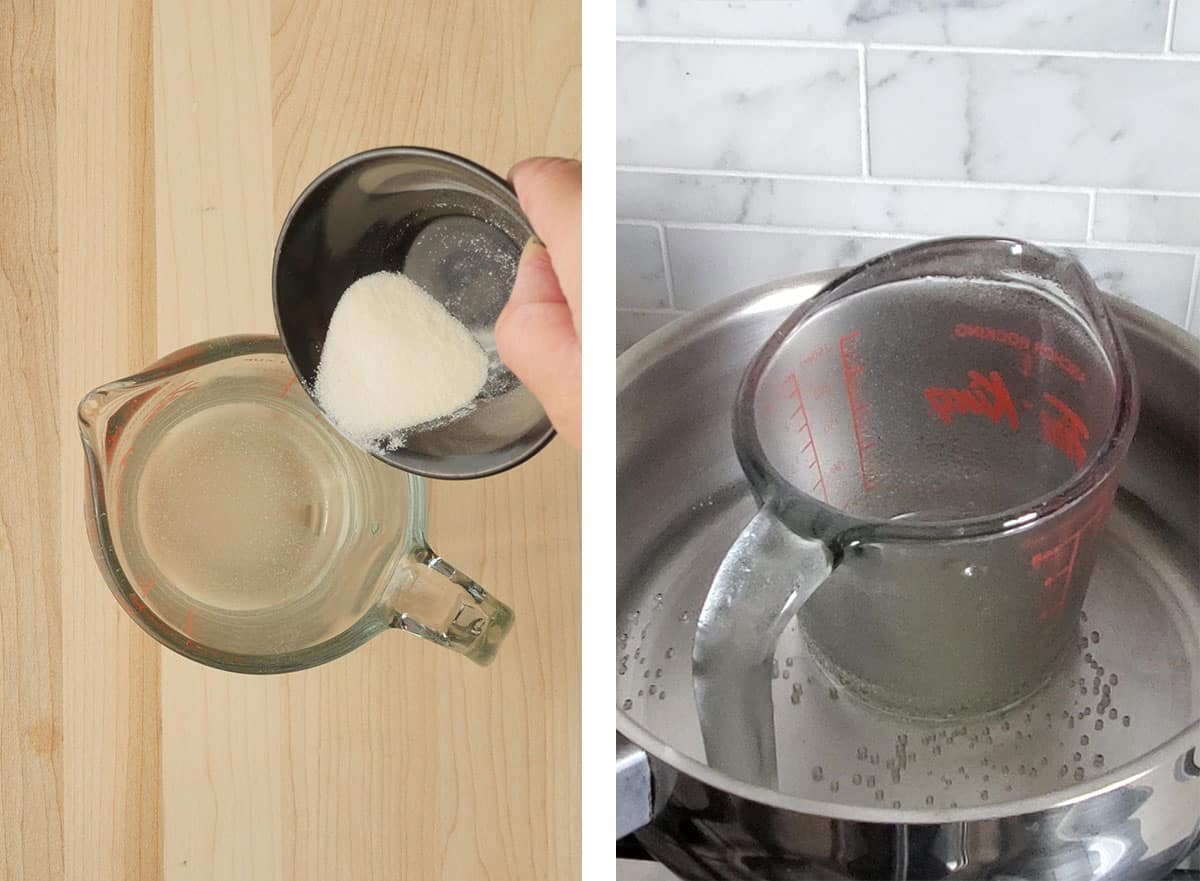
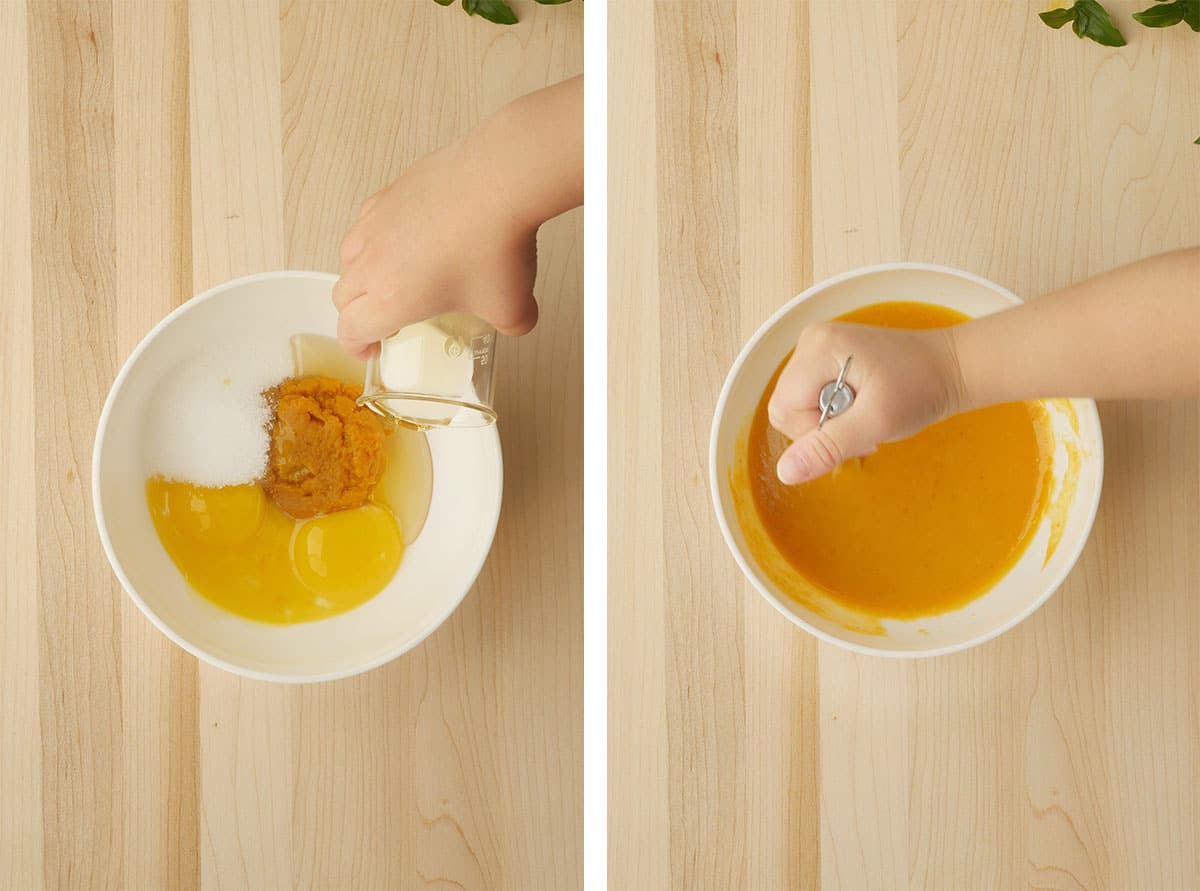
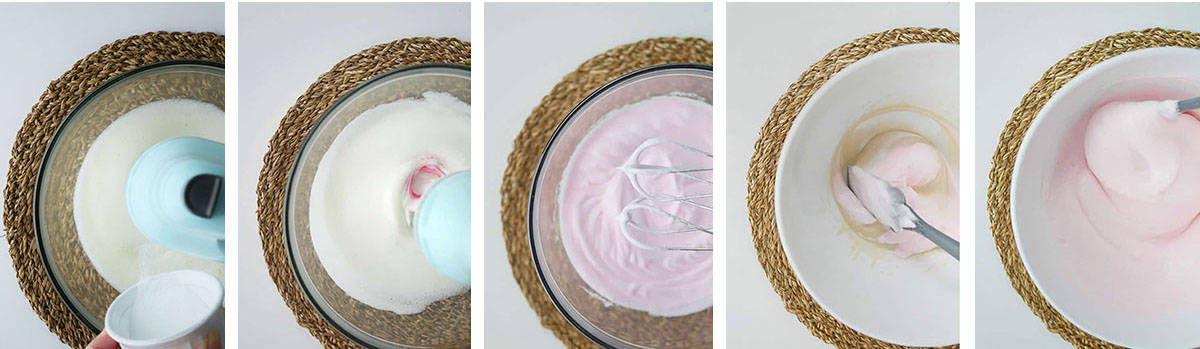
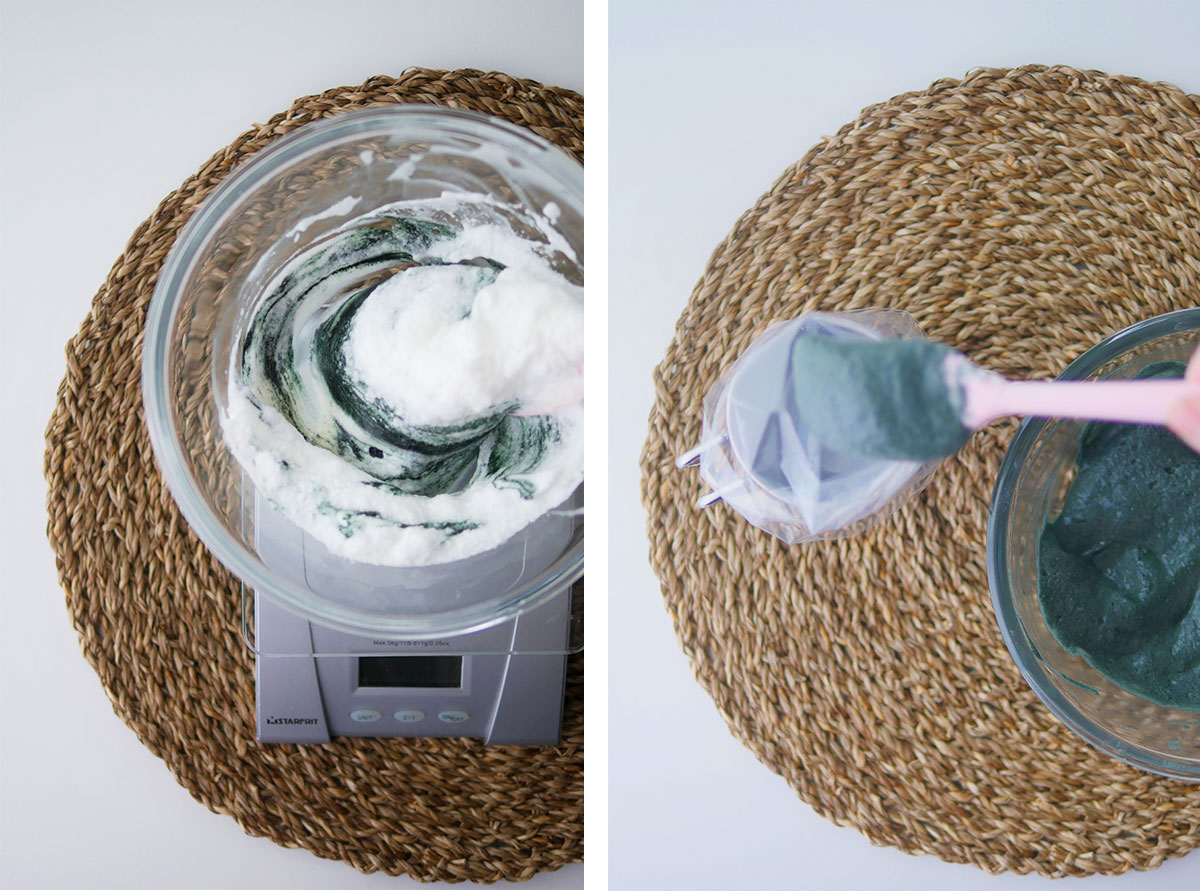
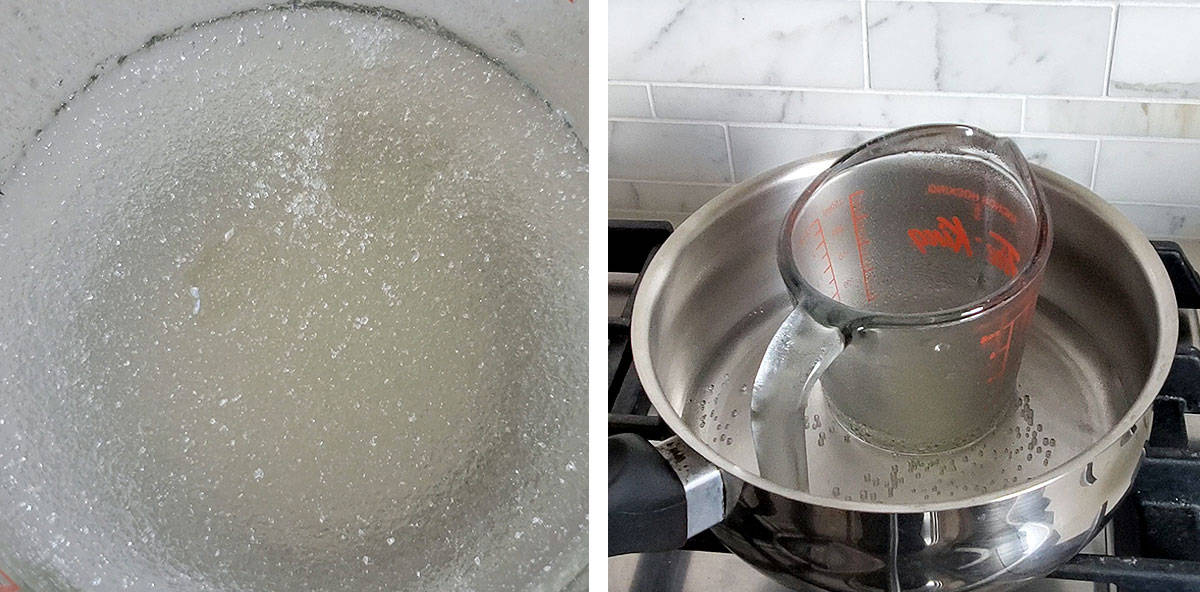
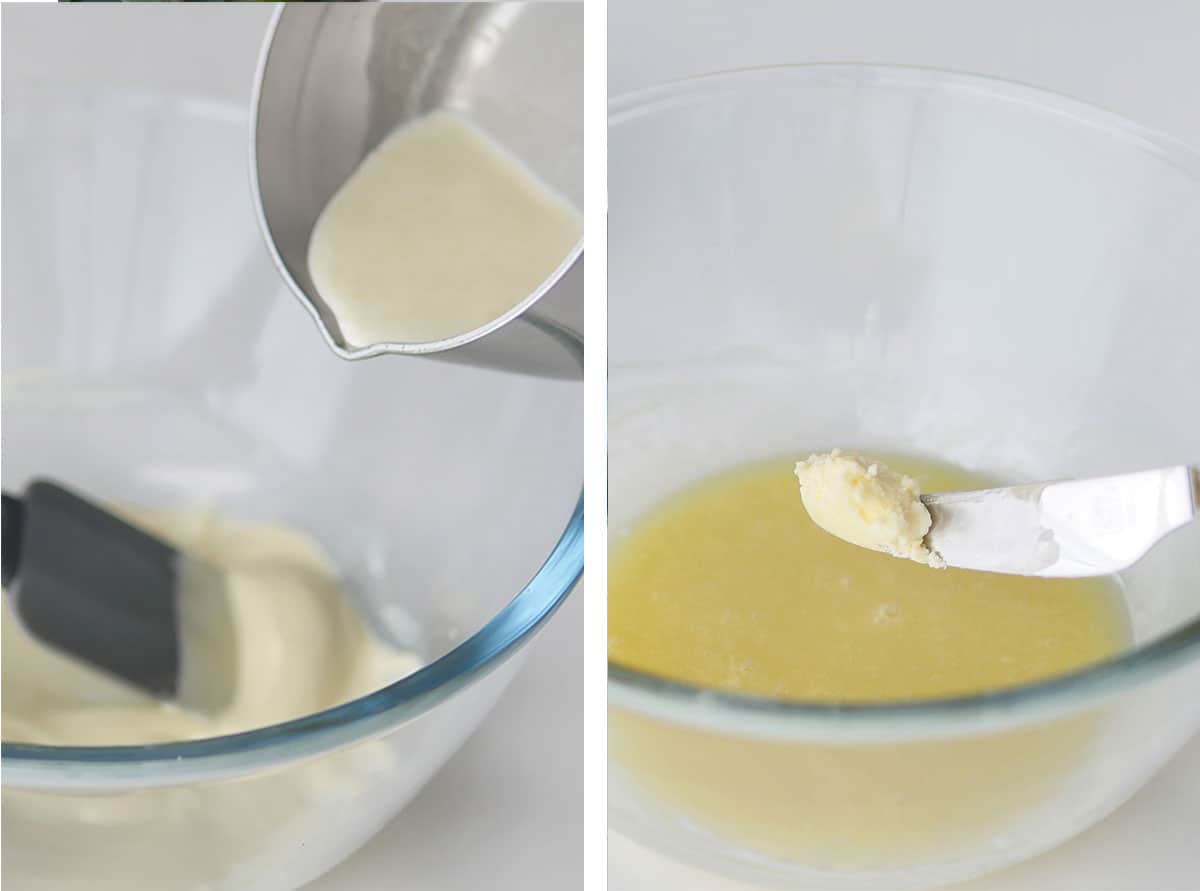
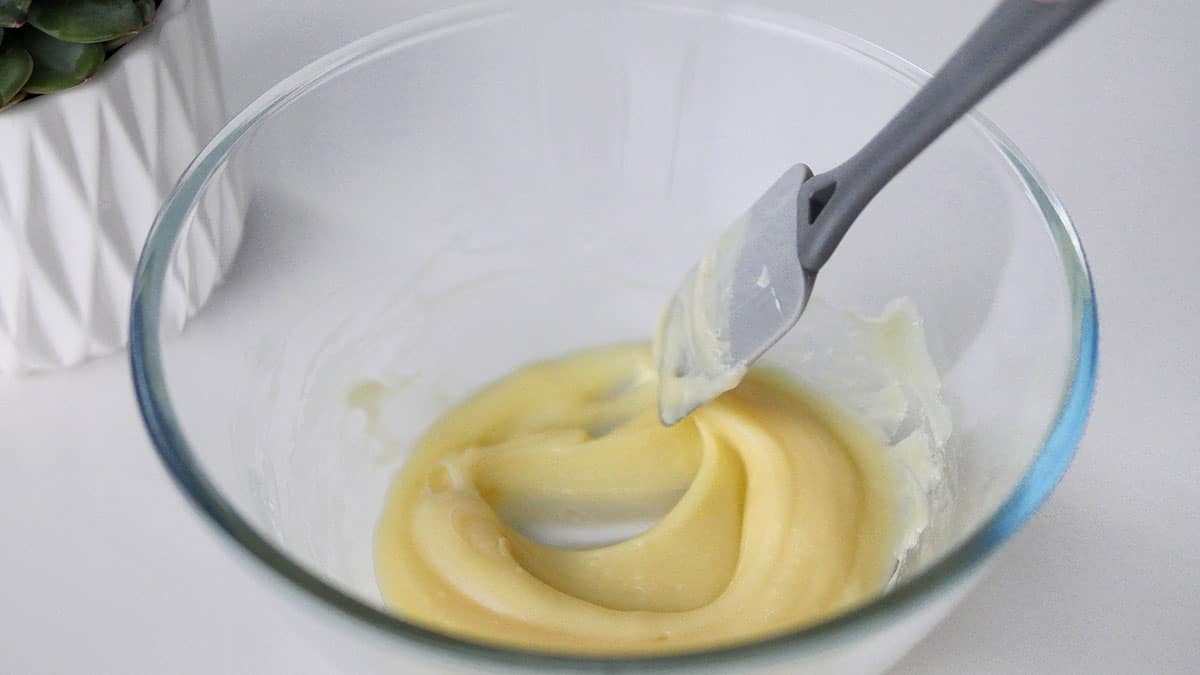
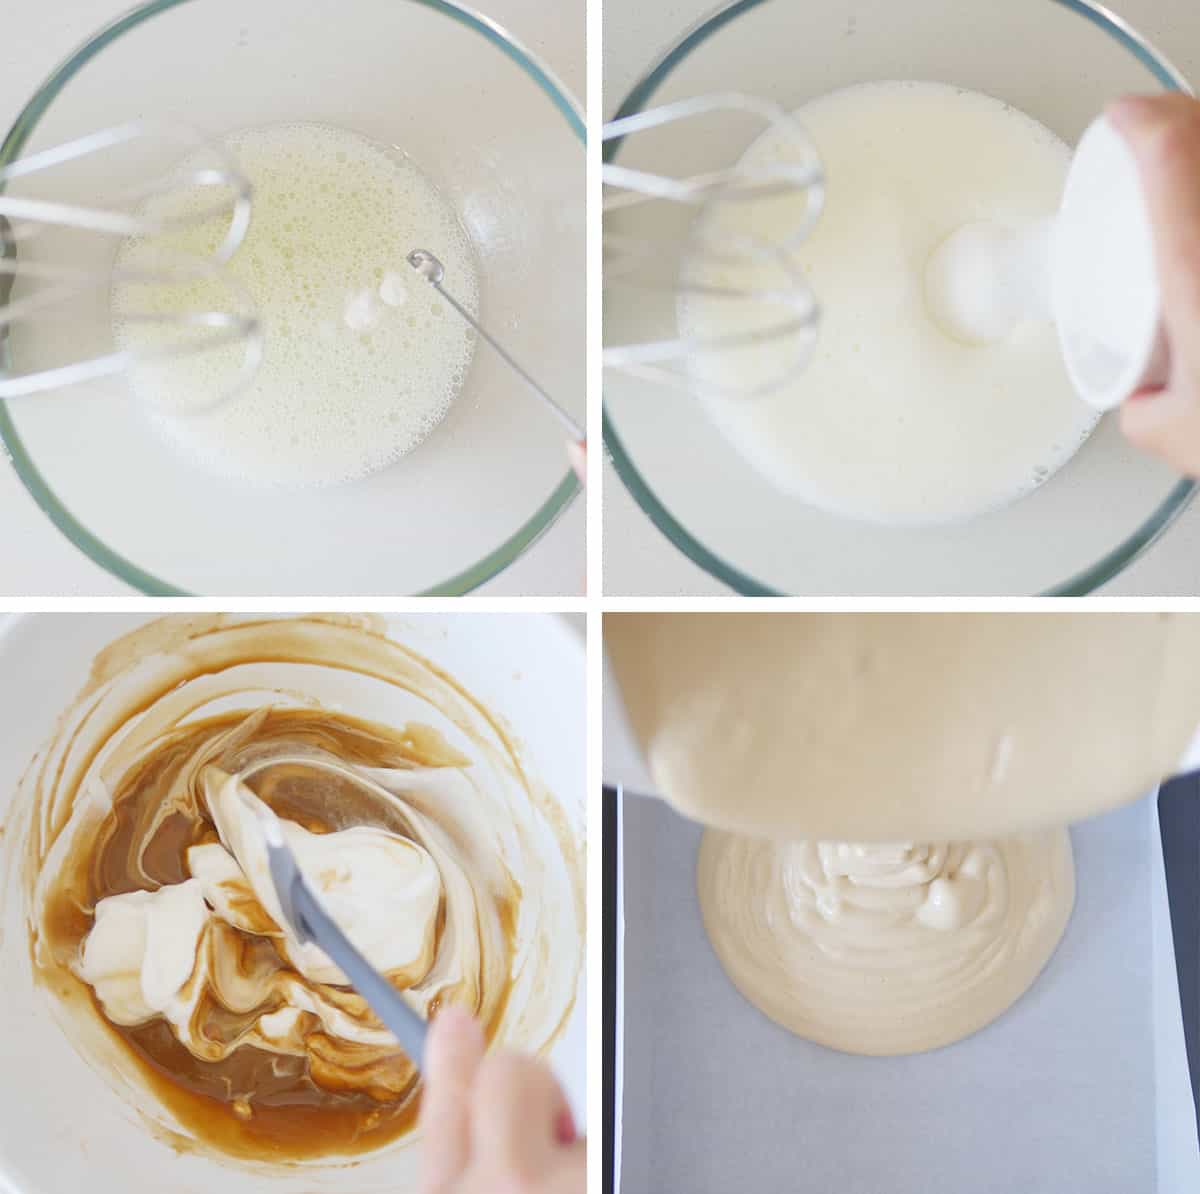
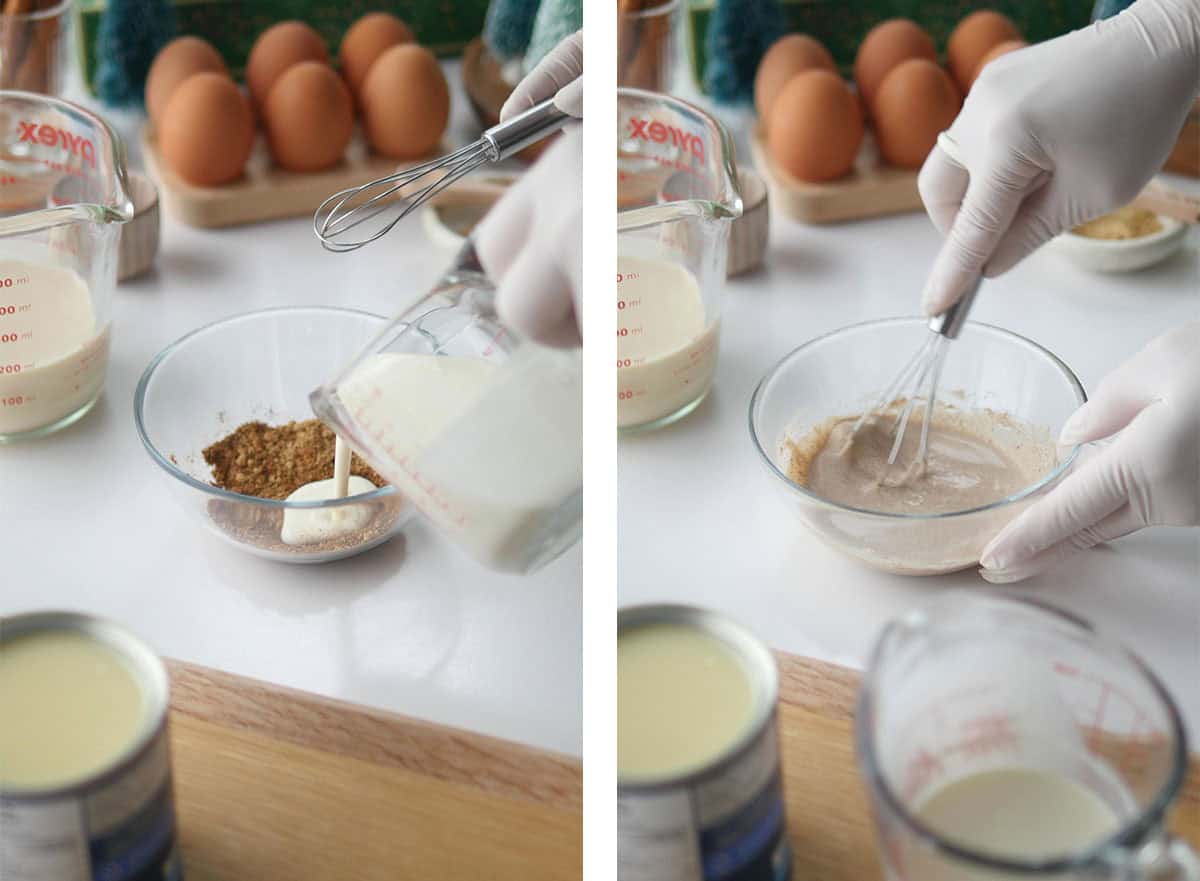
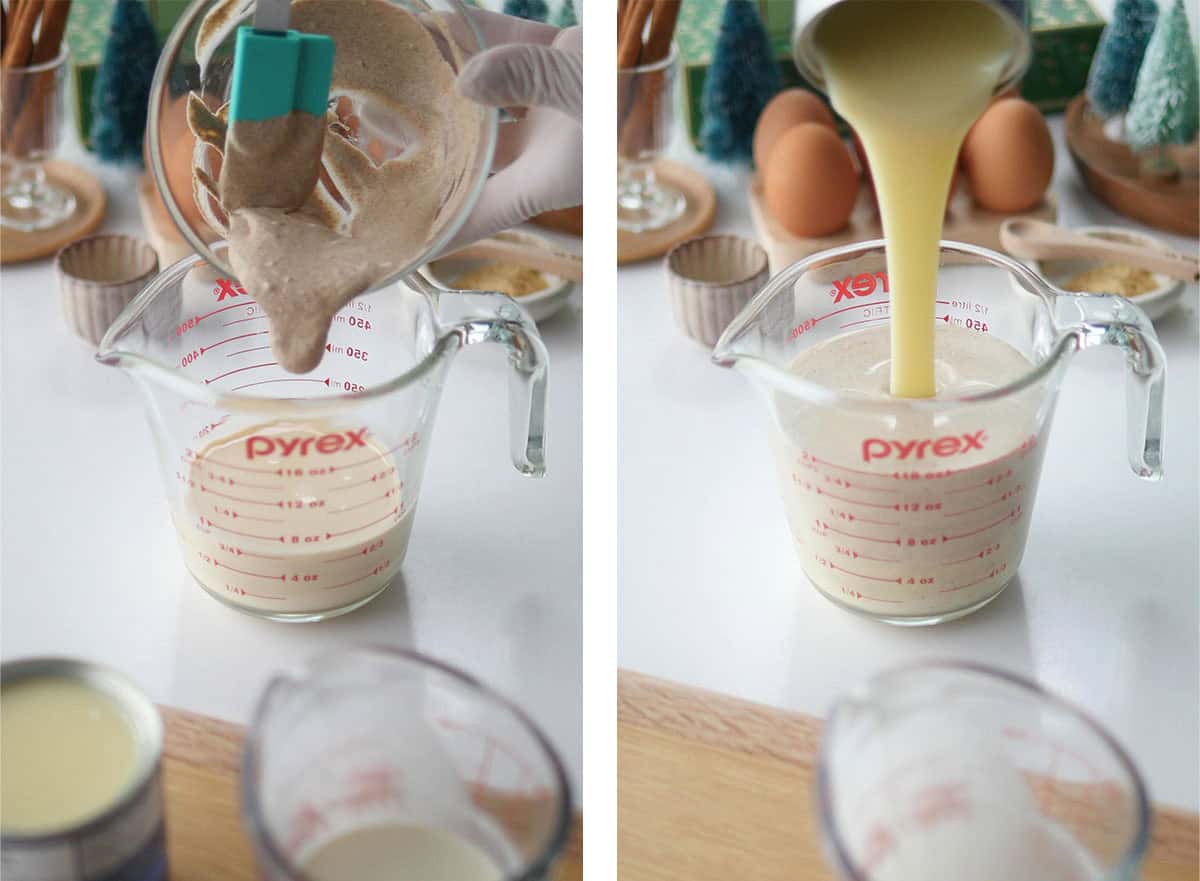
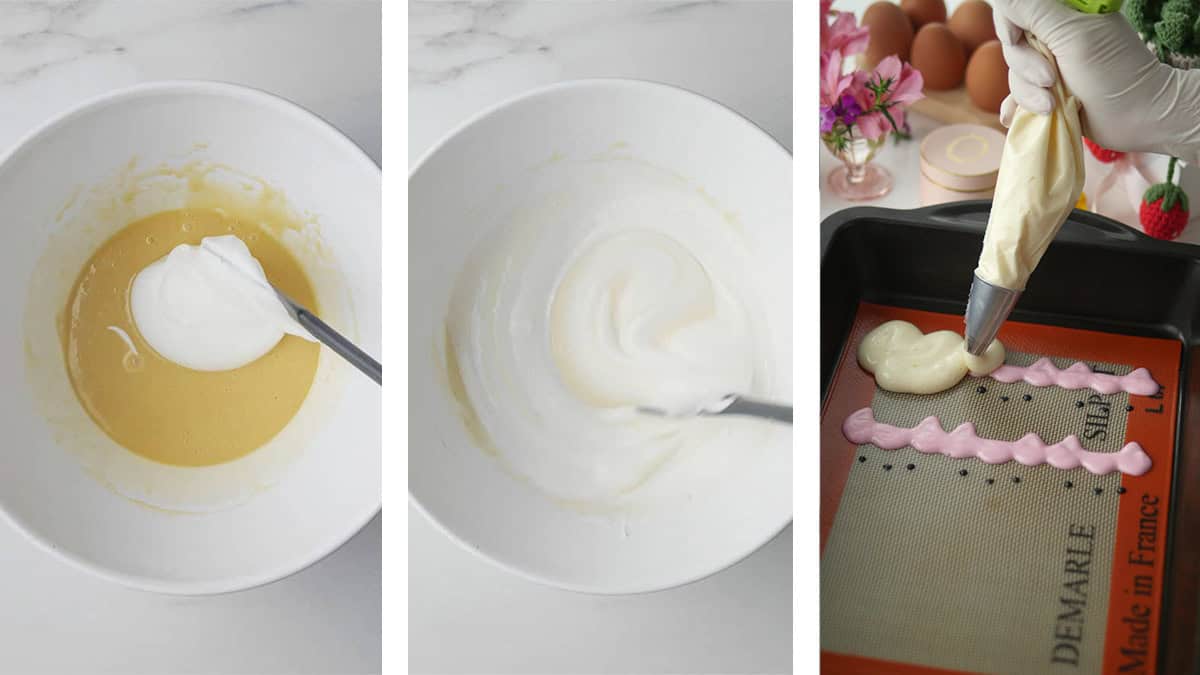
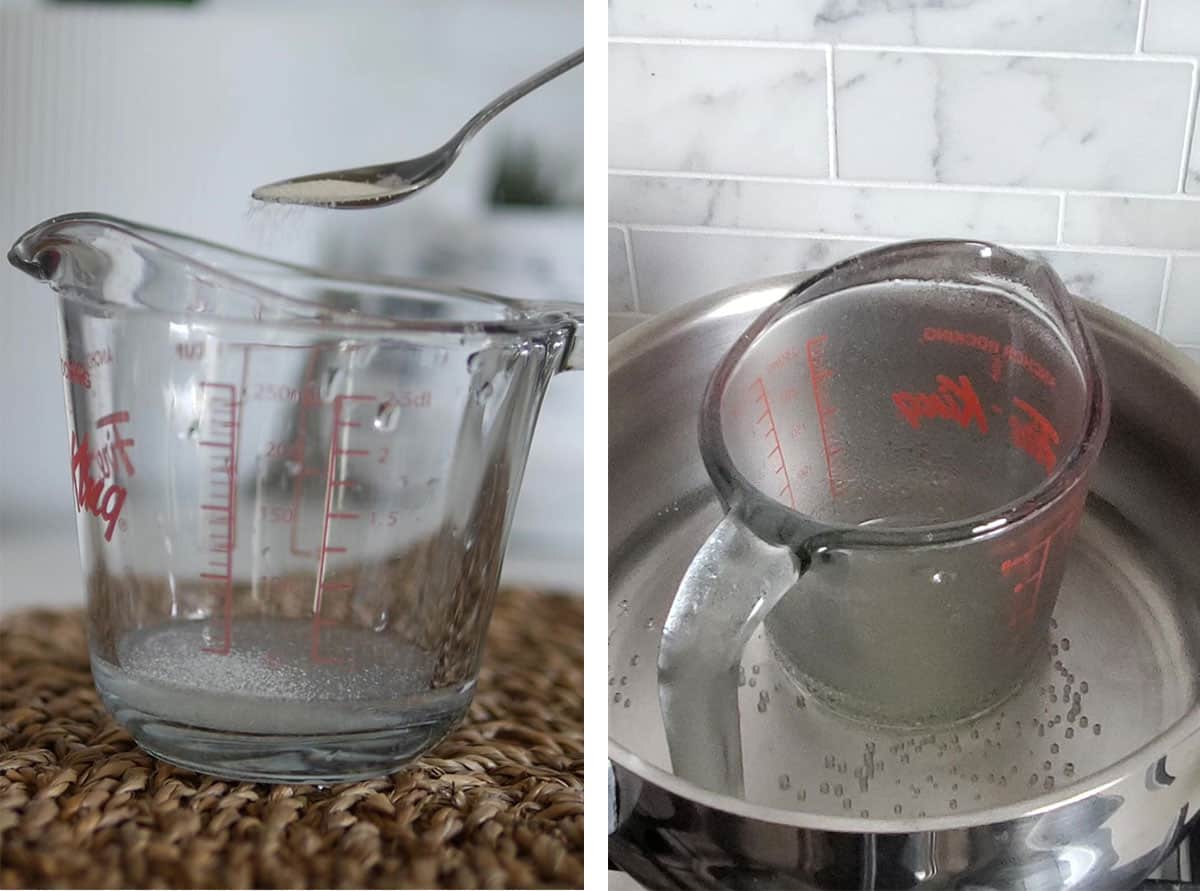
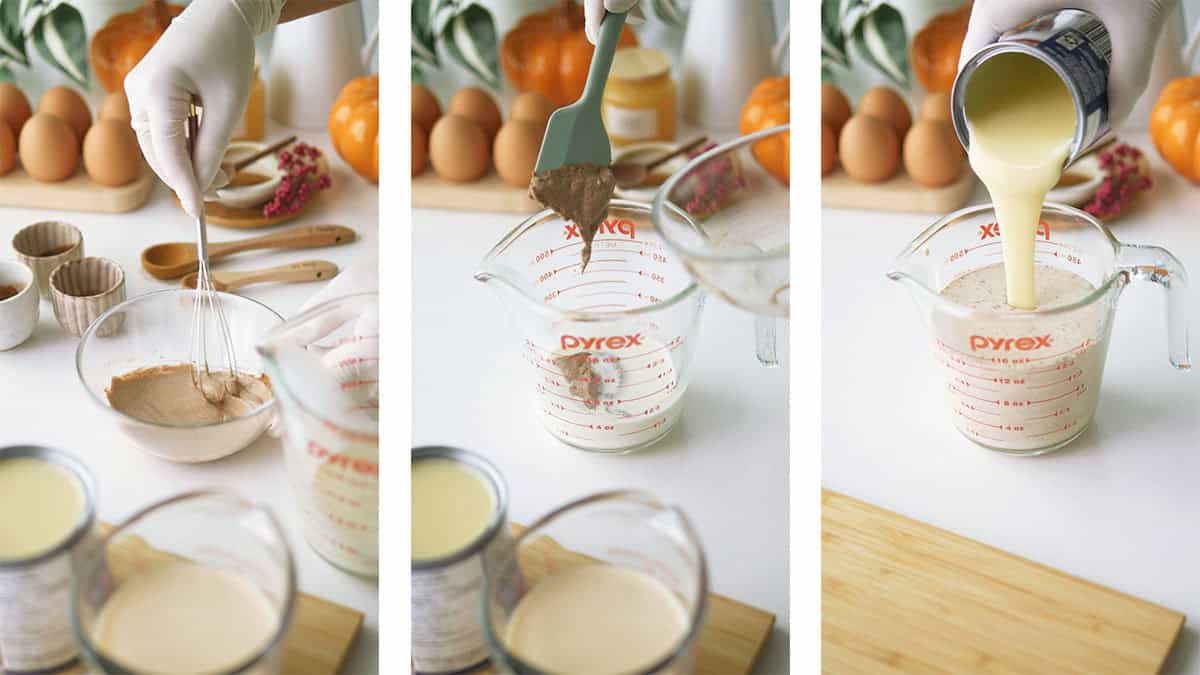
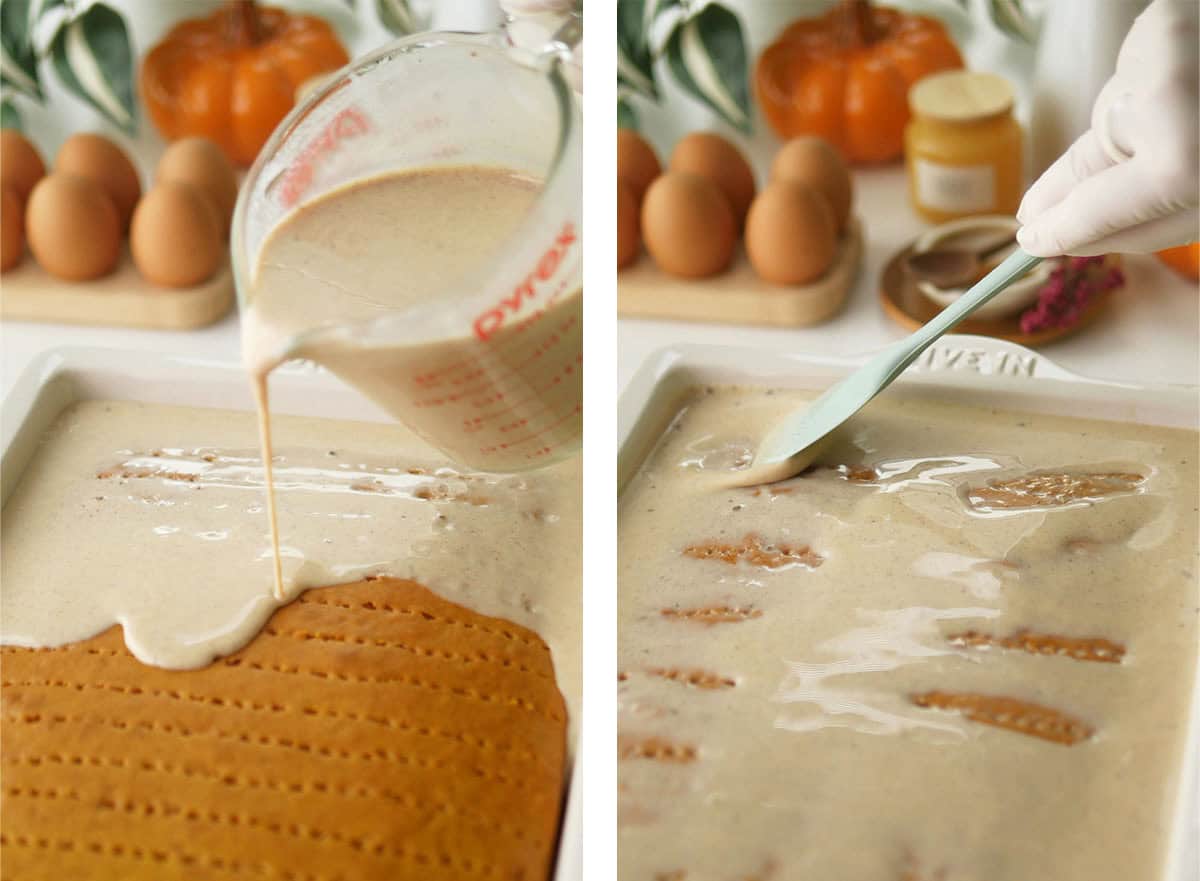
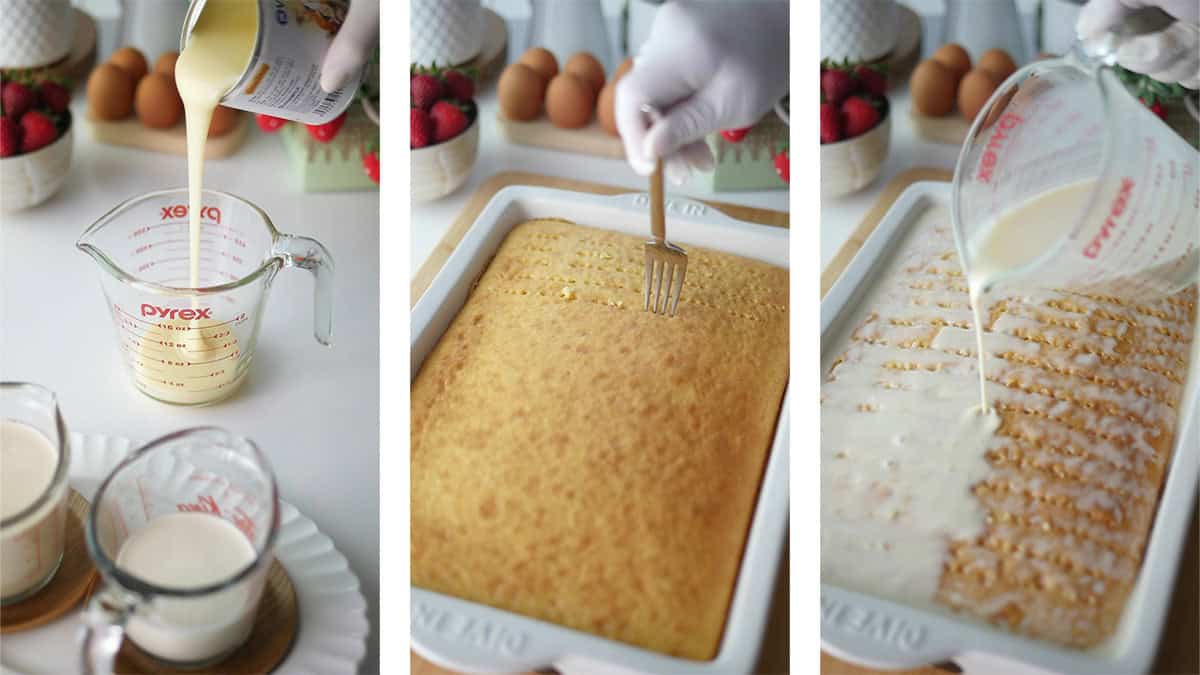
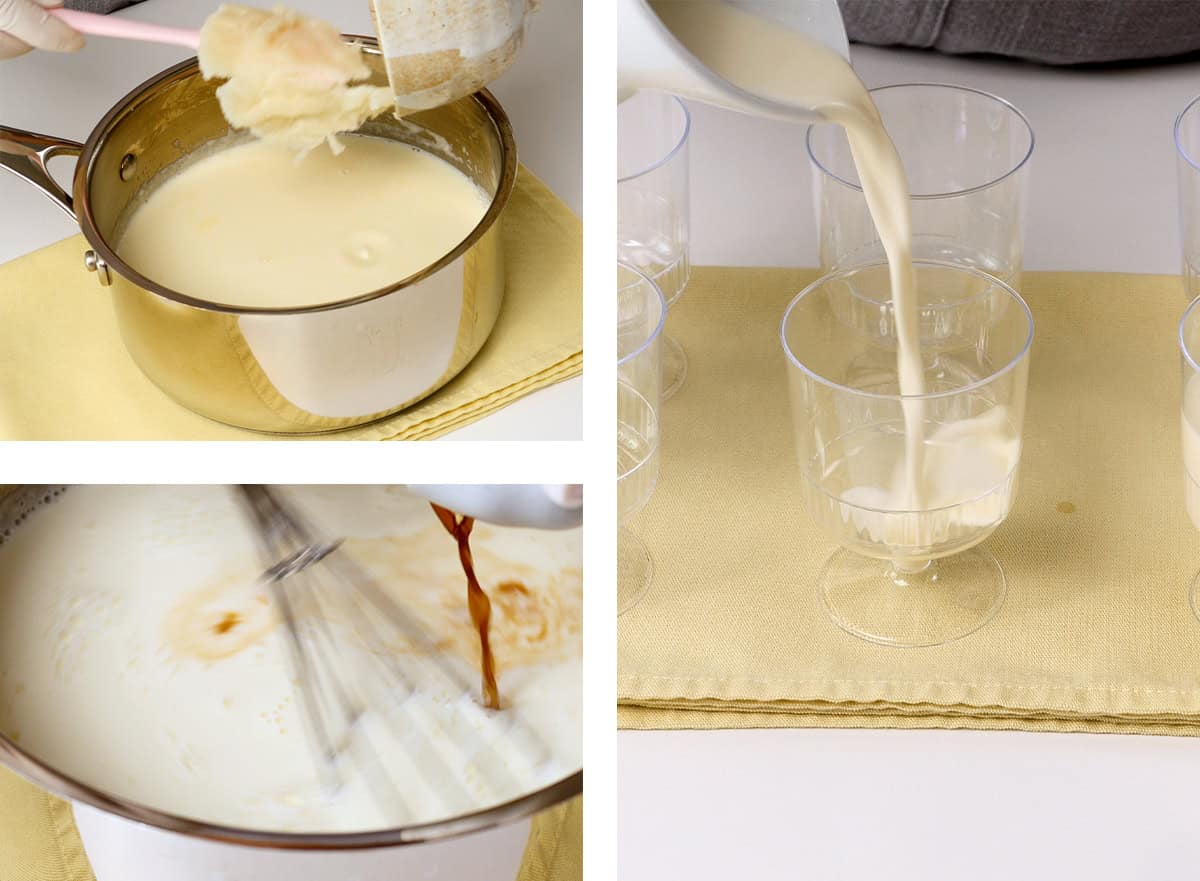
In a small bowl, whisk together the Matcha powder with 1-2 tablespoon of heavy cream to create a wet paste. The goal is to fully dissolve the powder with vigorous whisking. There shouldn't be any clumps. Pour the matcha paste, condensed milk, evaporated milk and the rest of the heavy cream into a large measuring cup, stir it until it becomes homogenous. Stir well as the heavier condensed milk tends to stay at the bottom.
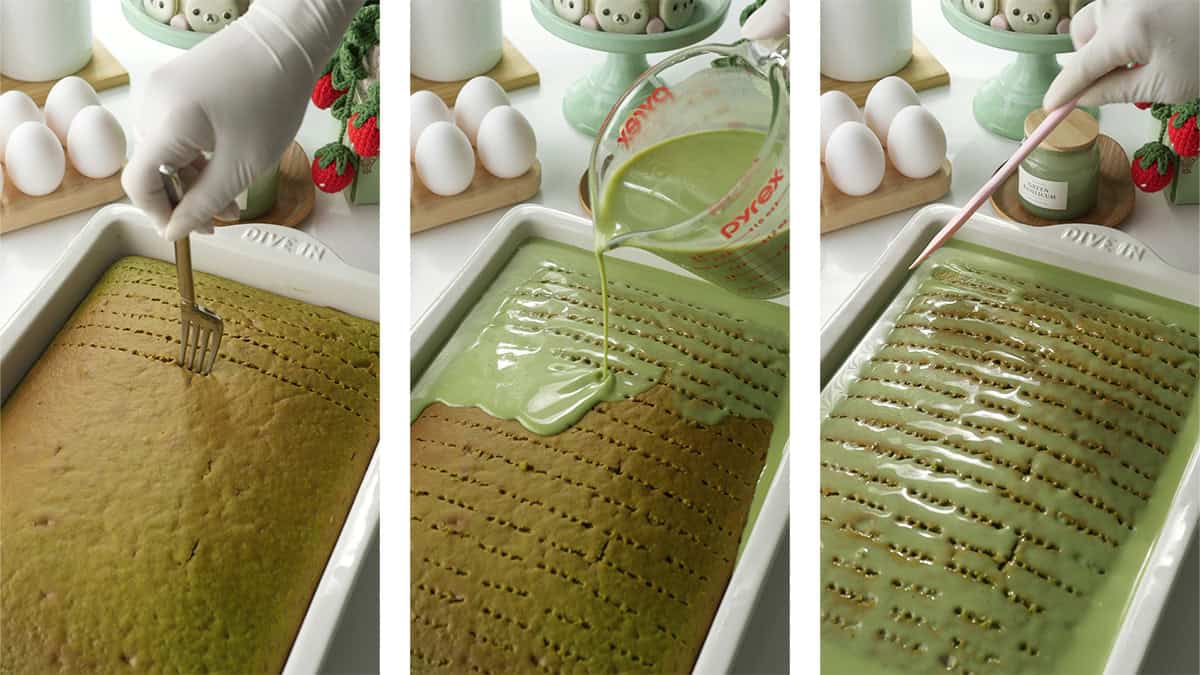
Pour Milk
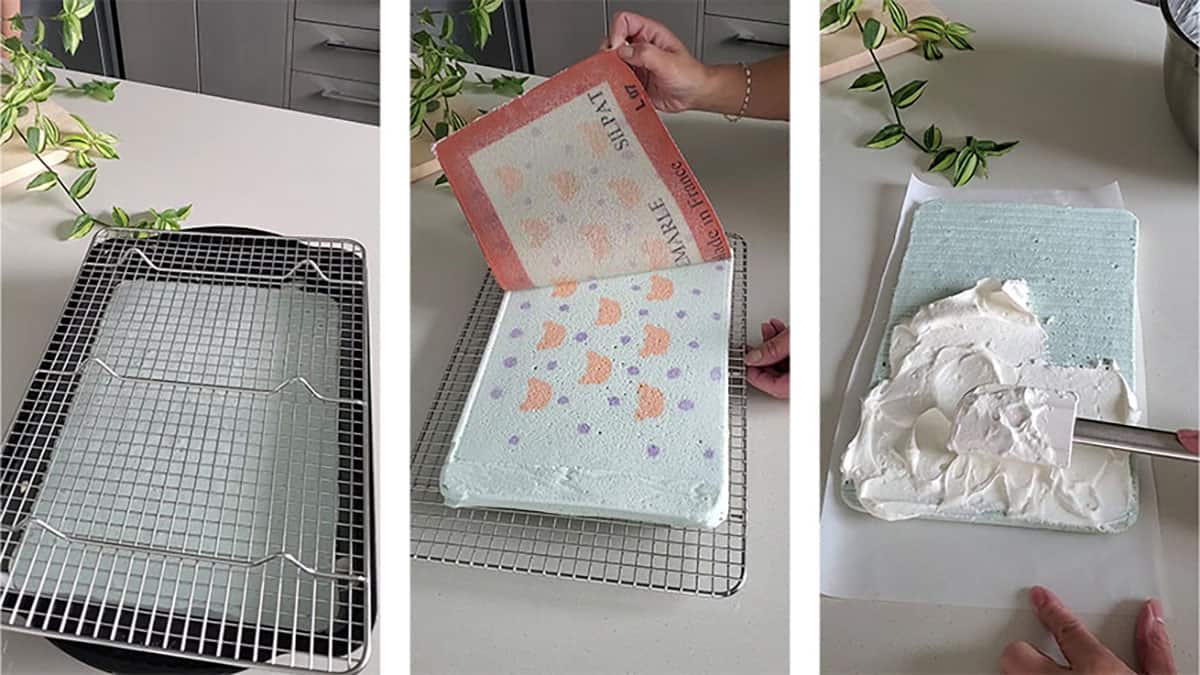
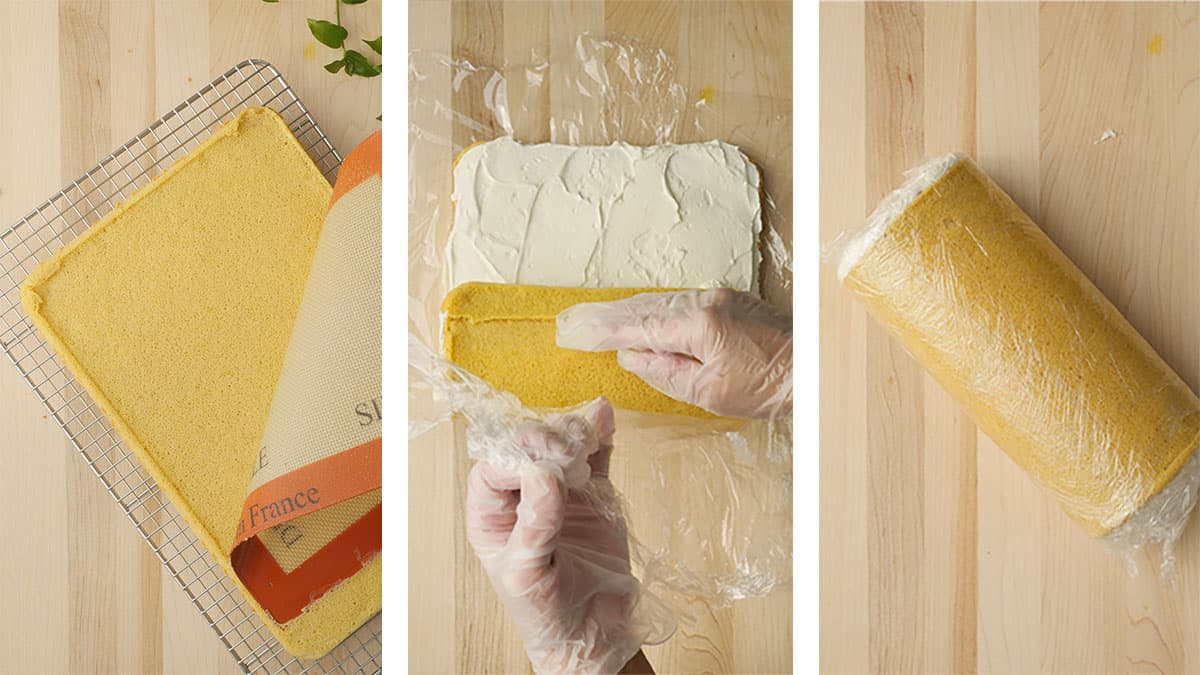
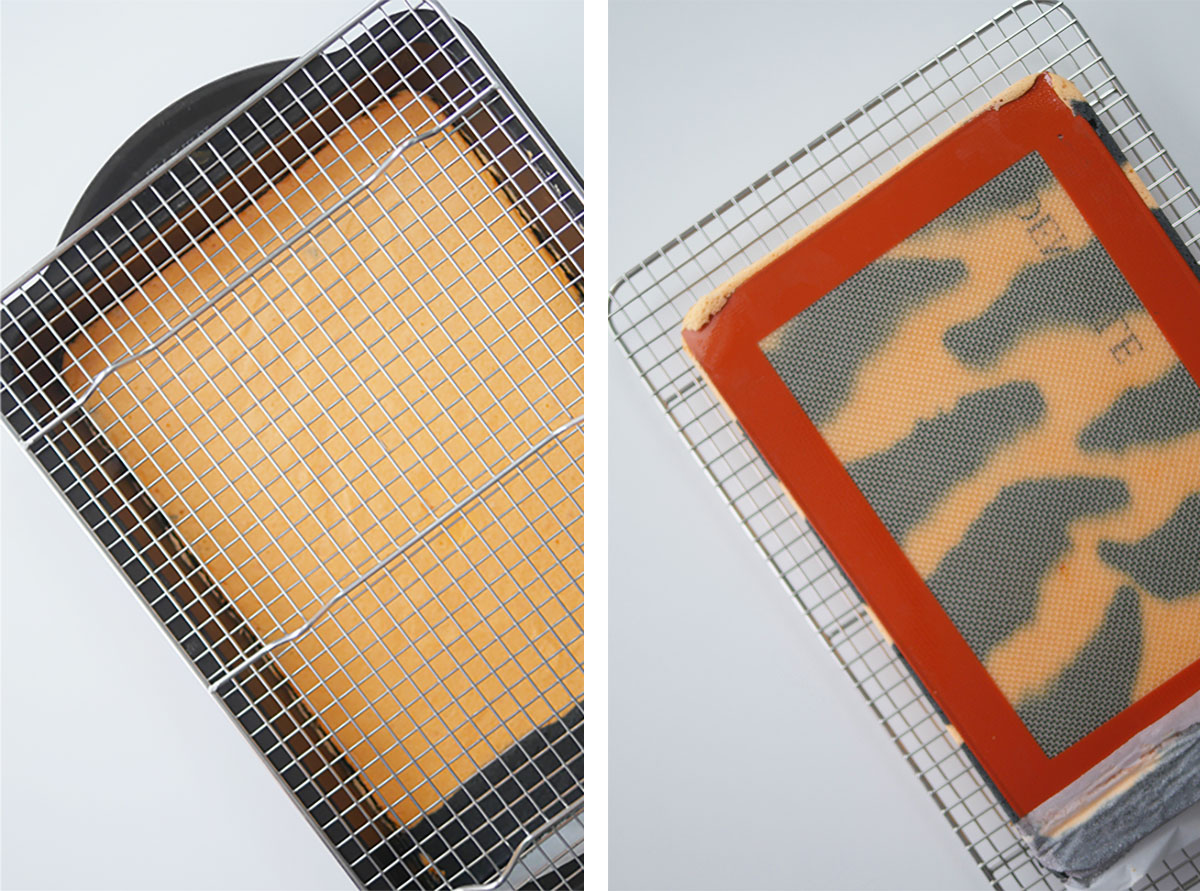
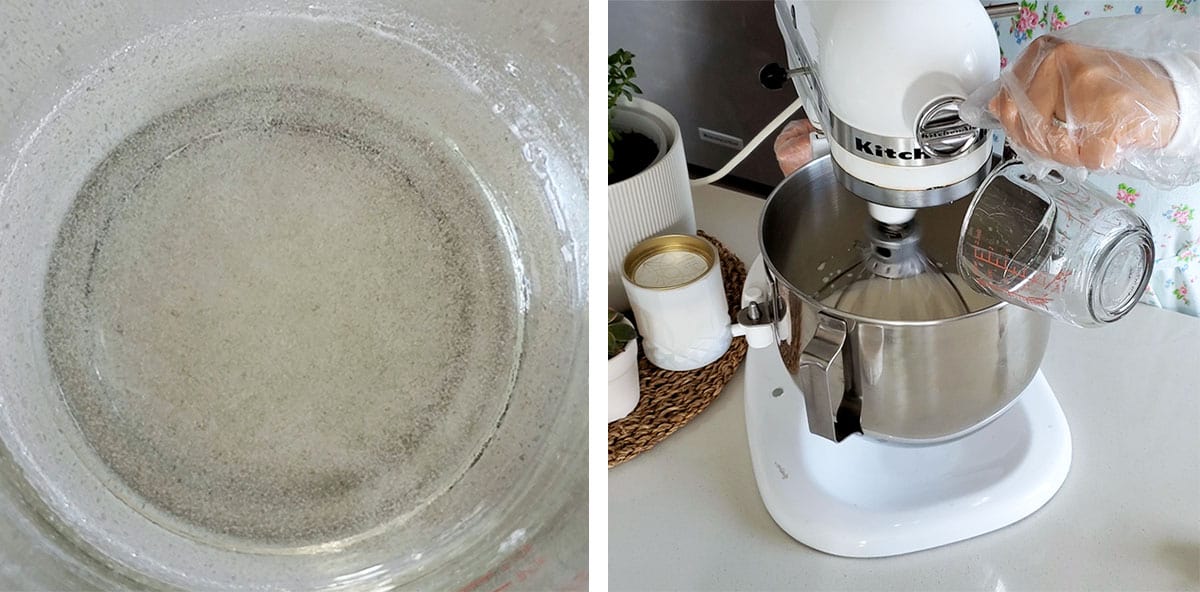
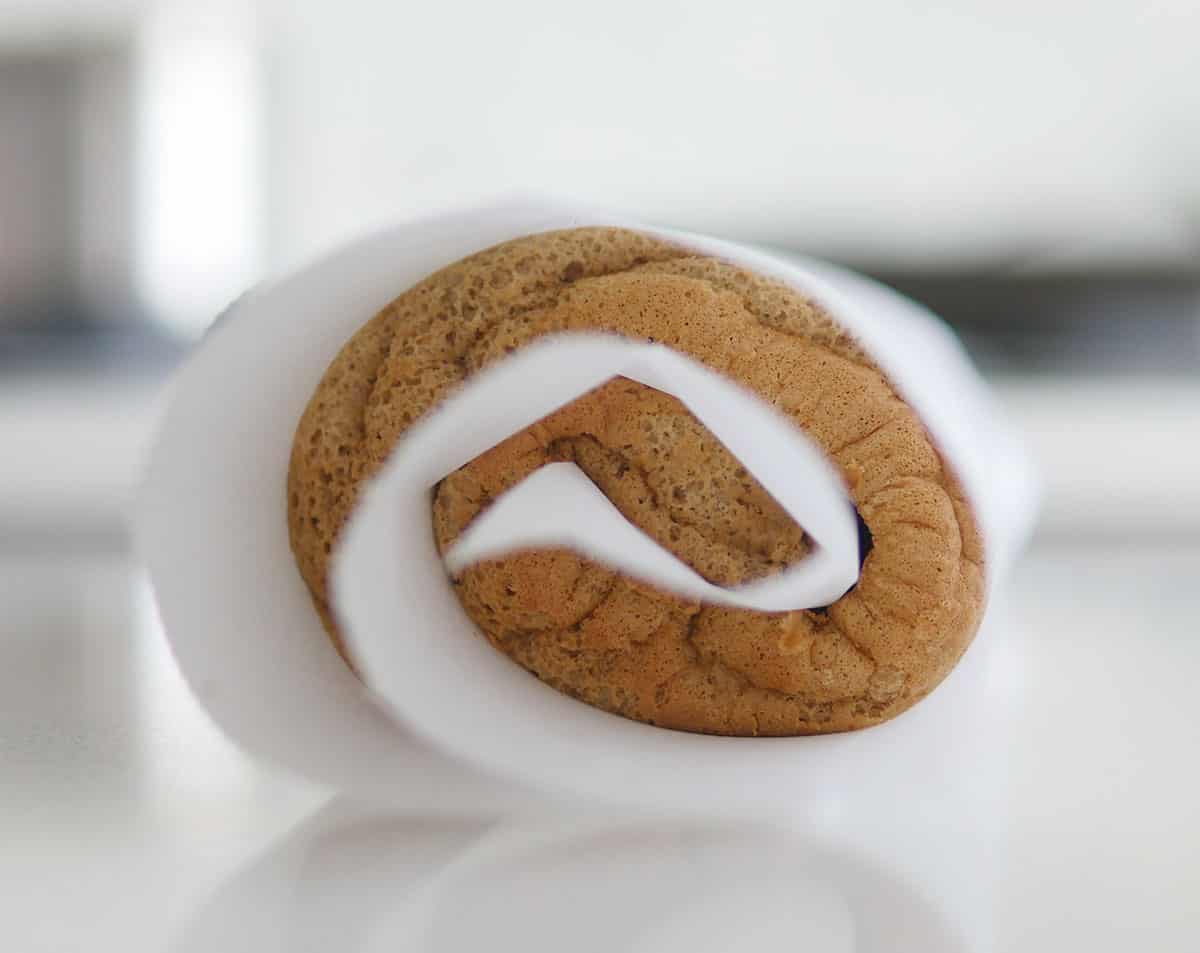
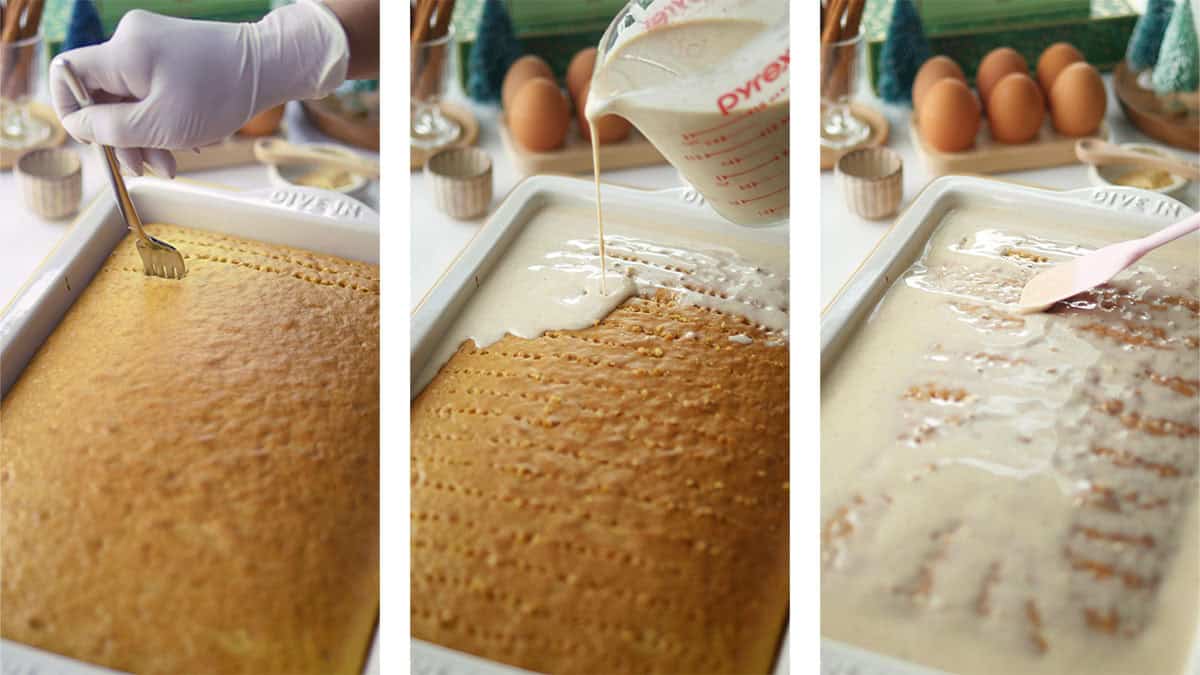
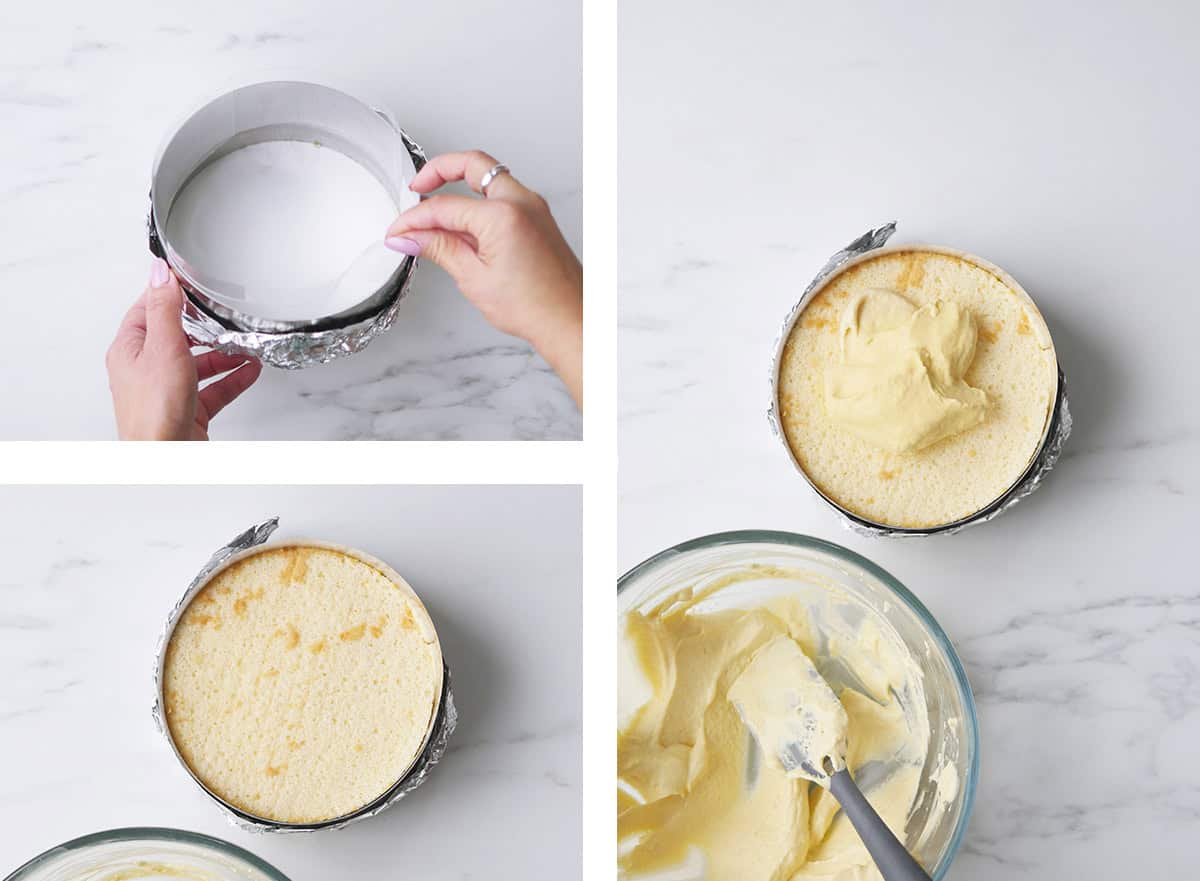
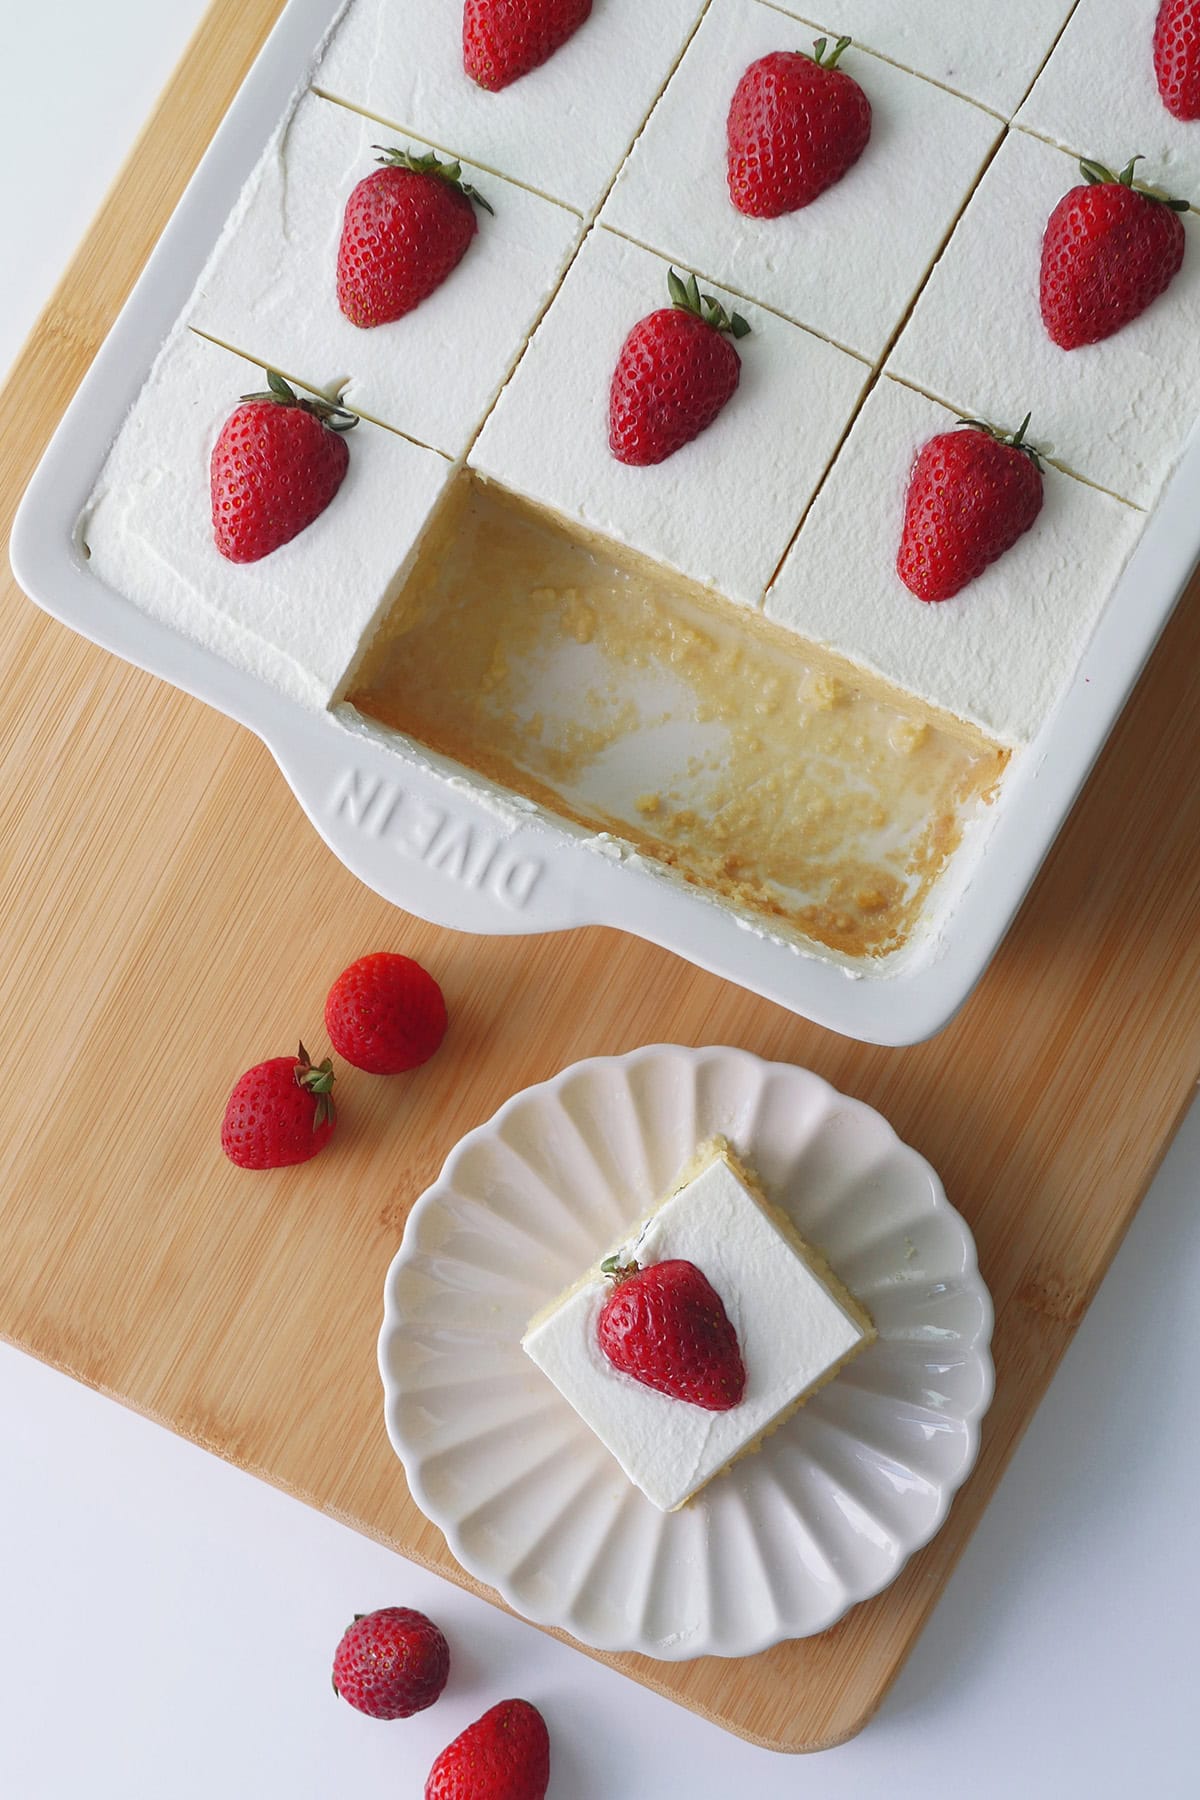
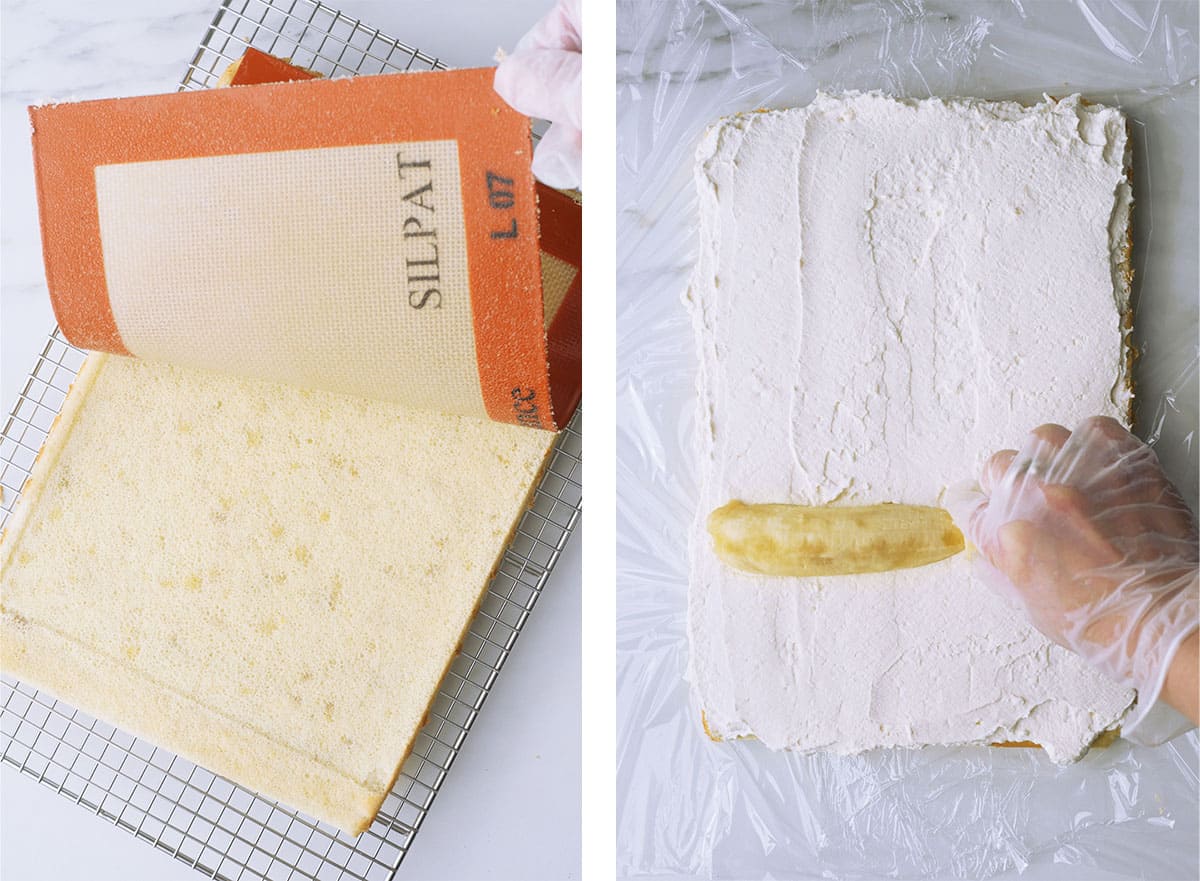
Once the cake has completely cooled, use a fork to poke holes into the cake in evenly spaced rows about half inch apart. Pour the mixture slowly and evenly onto the cooled cake (do this only when the cake is cool). The milk will start to get absorbed into the cake through the holes. If your cake is domed, the milk will start to pool on the sides, take a spatula and gently guide the milk to all parts of the cake. Cover the cake and let it sit in the fridge for at least 2 hours before serving or frosting. Take this time to chill the mixing bowl and beaters in the fridge. This will help the heavy cream whip better.
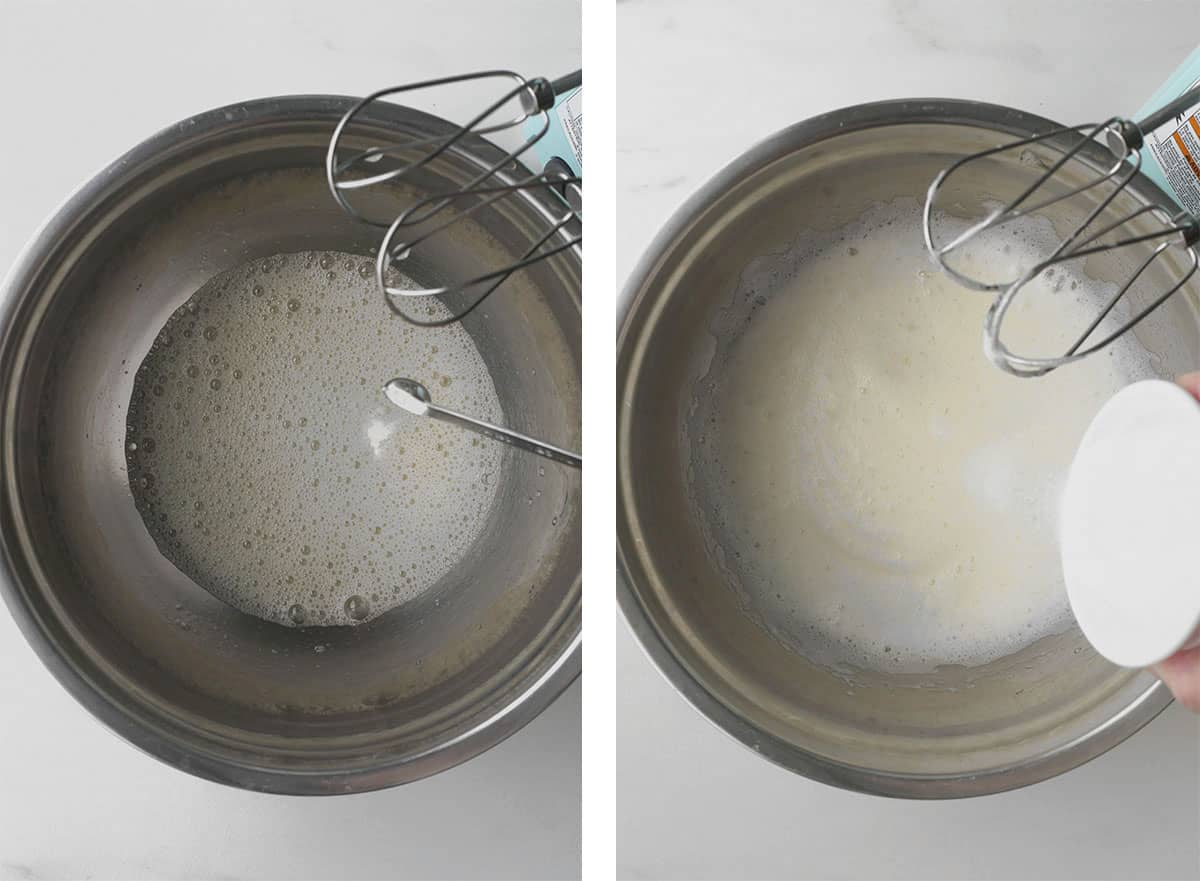
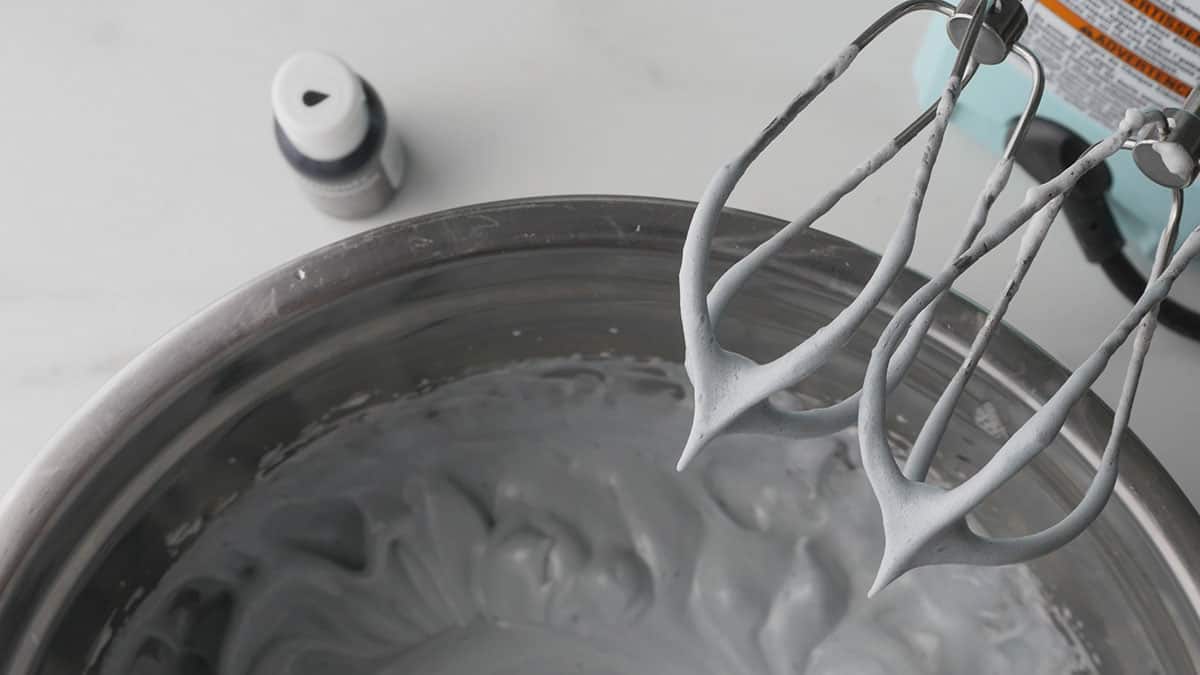
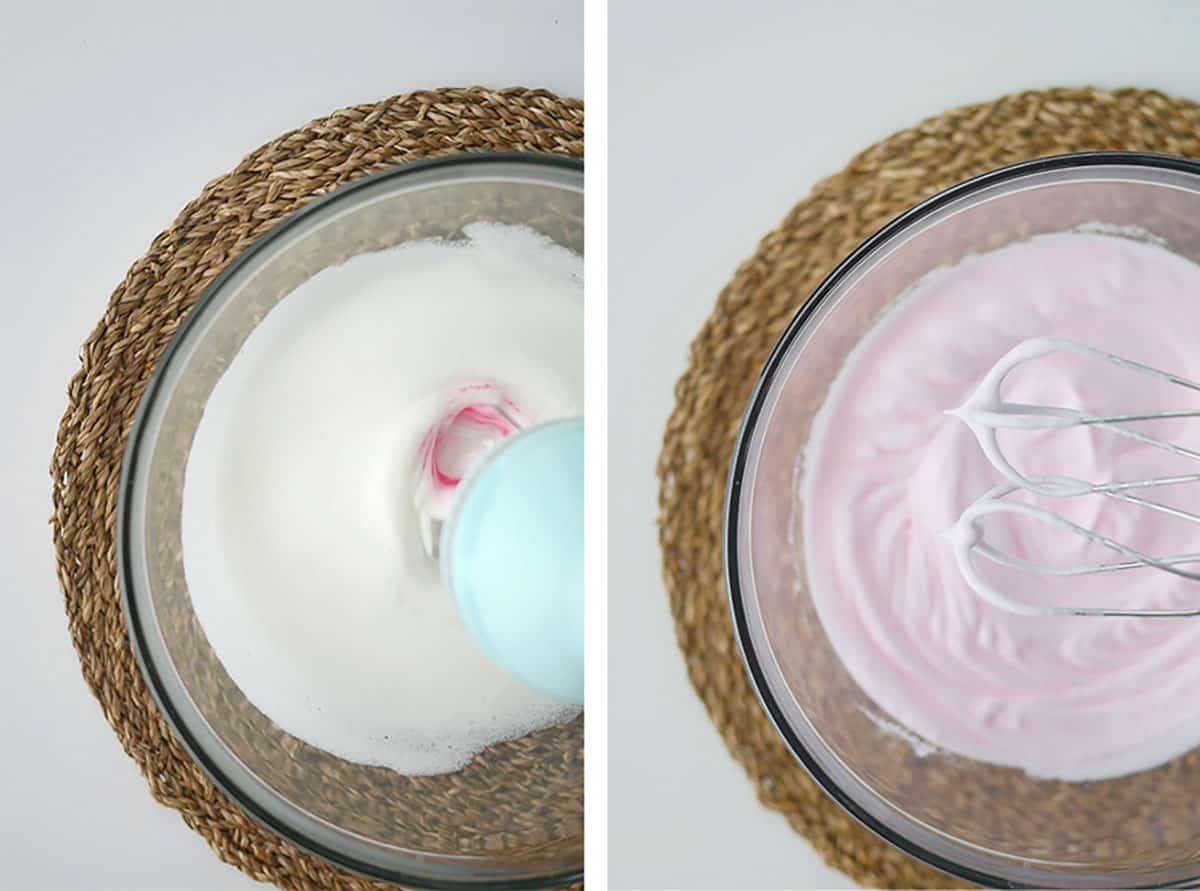
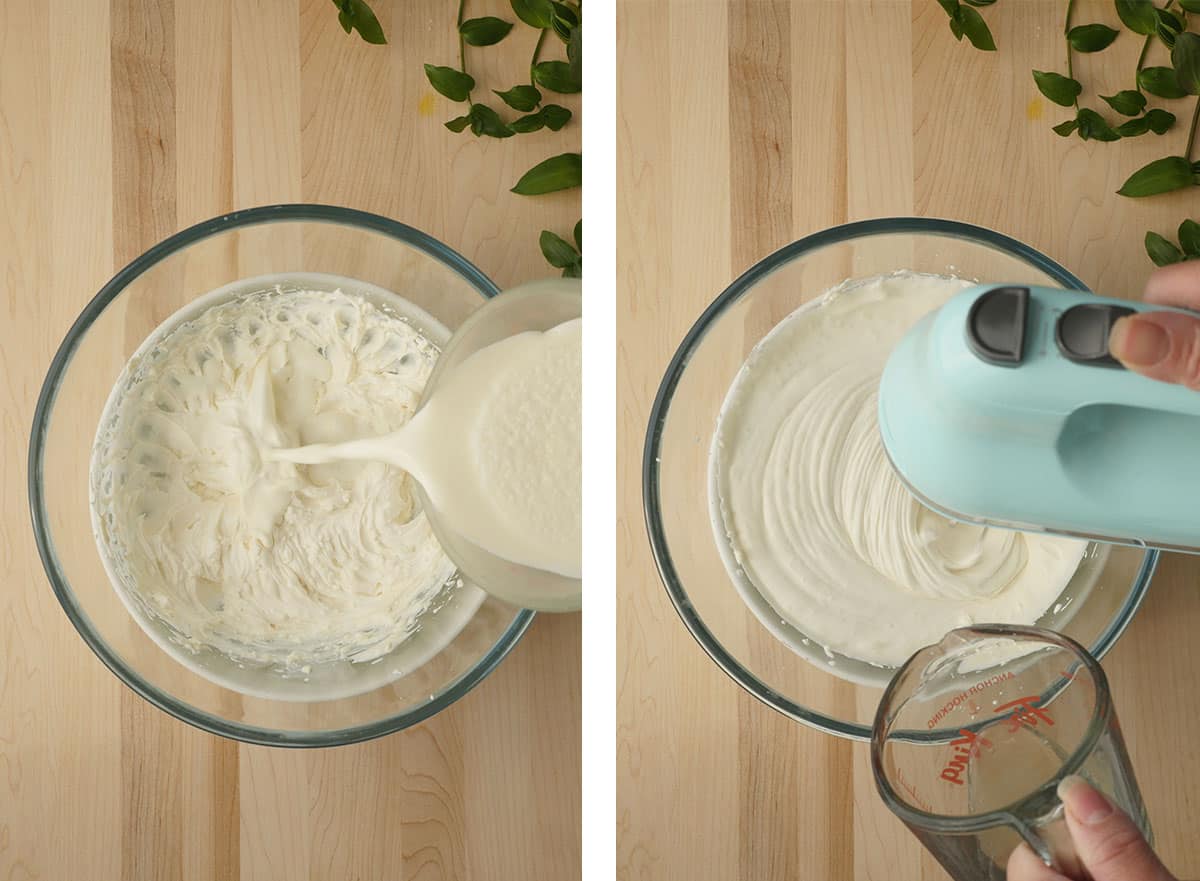
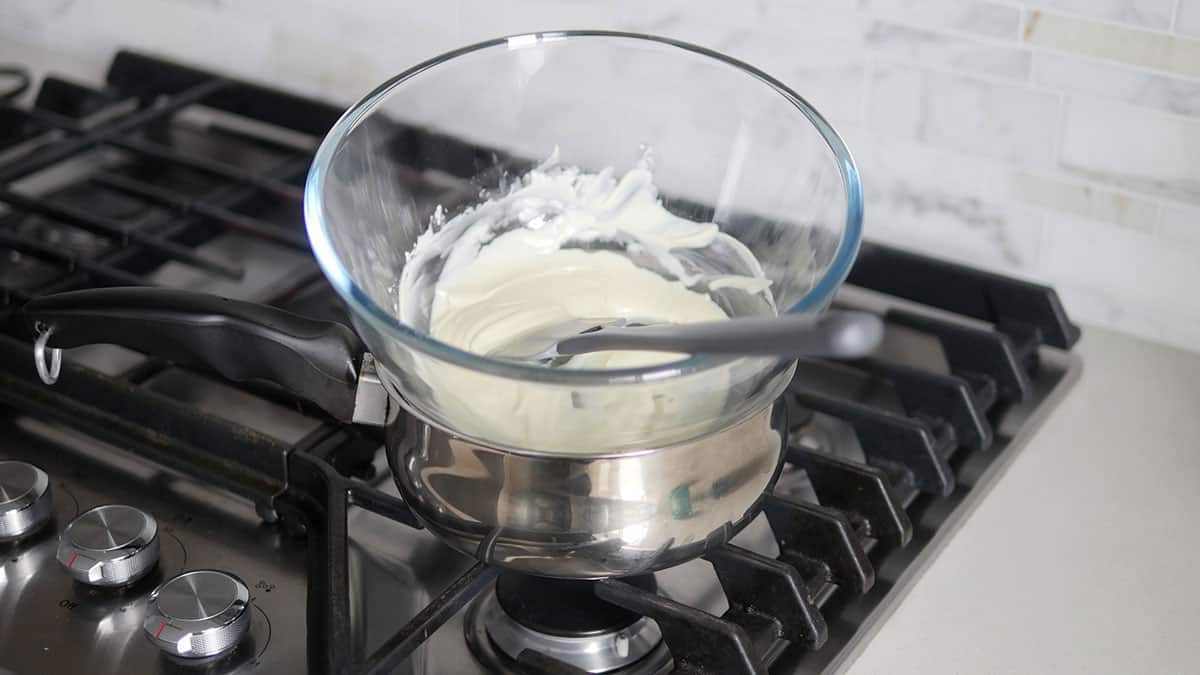
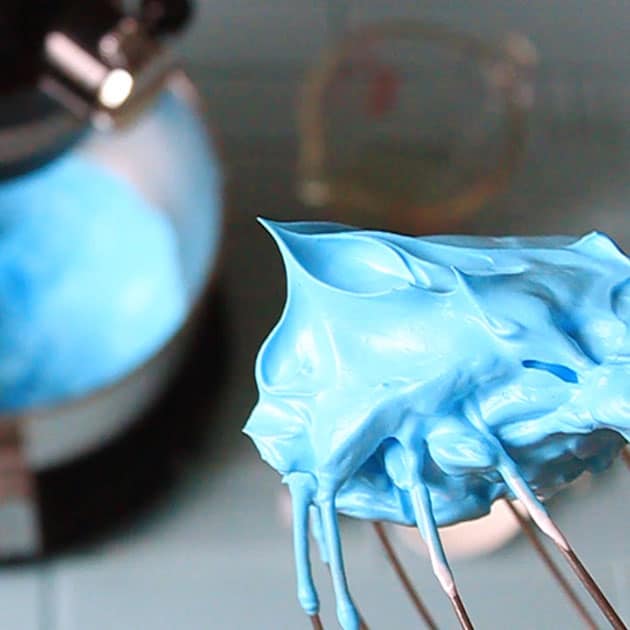
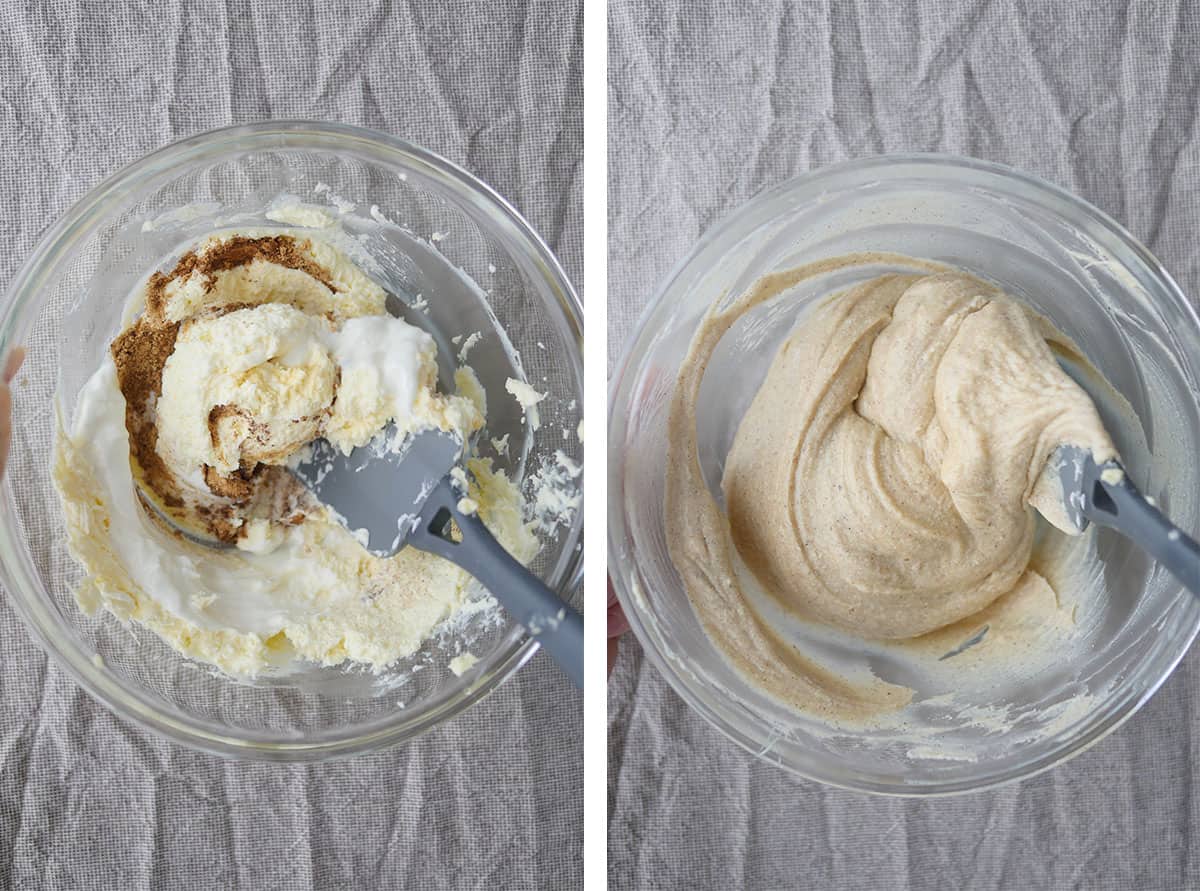
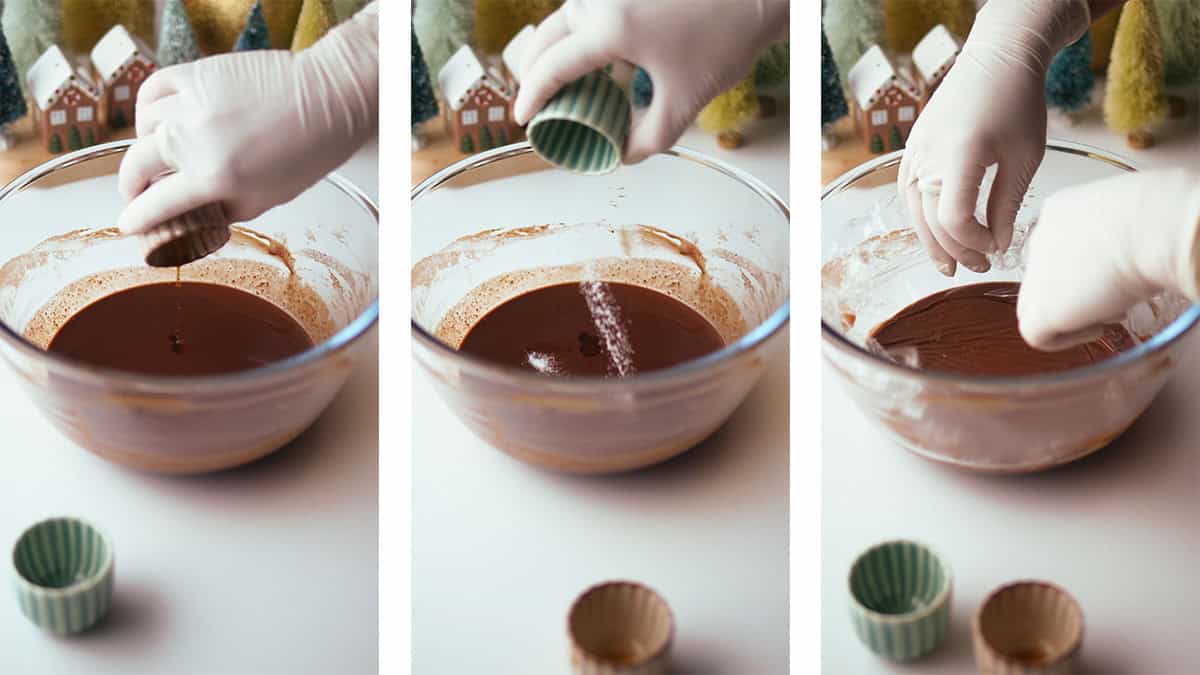
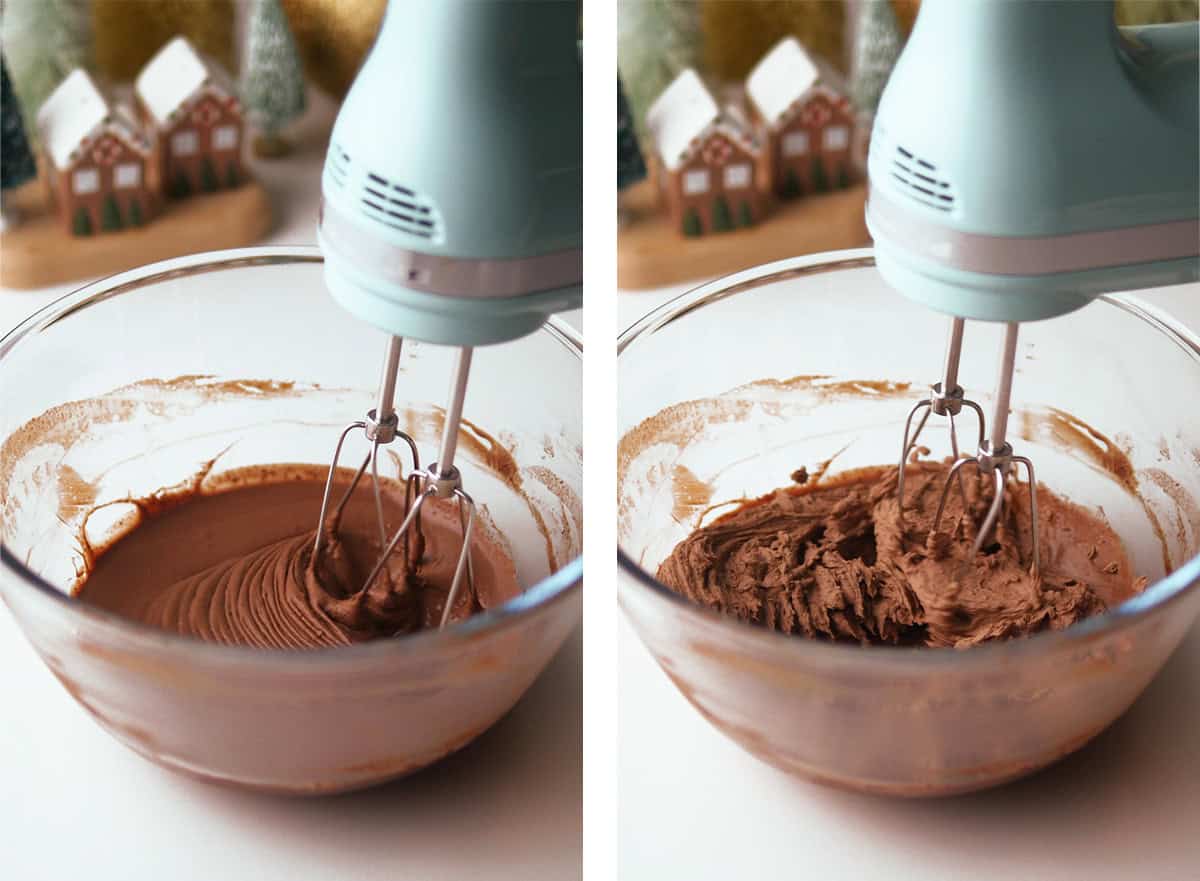
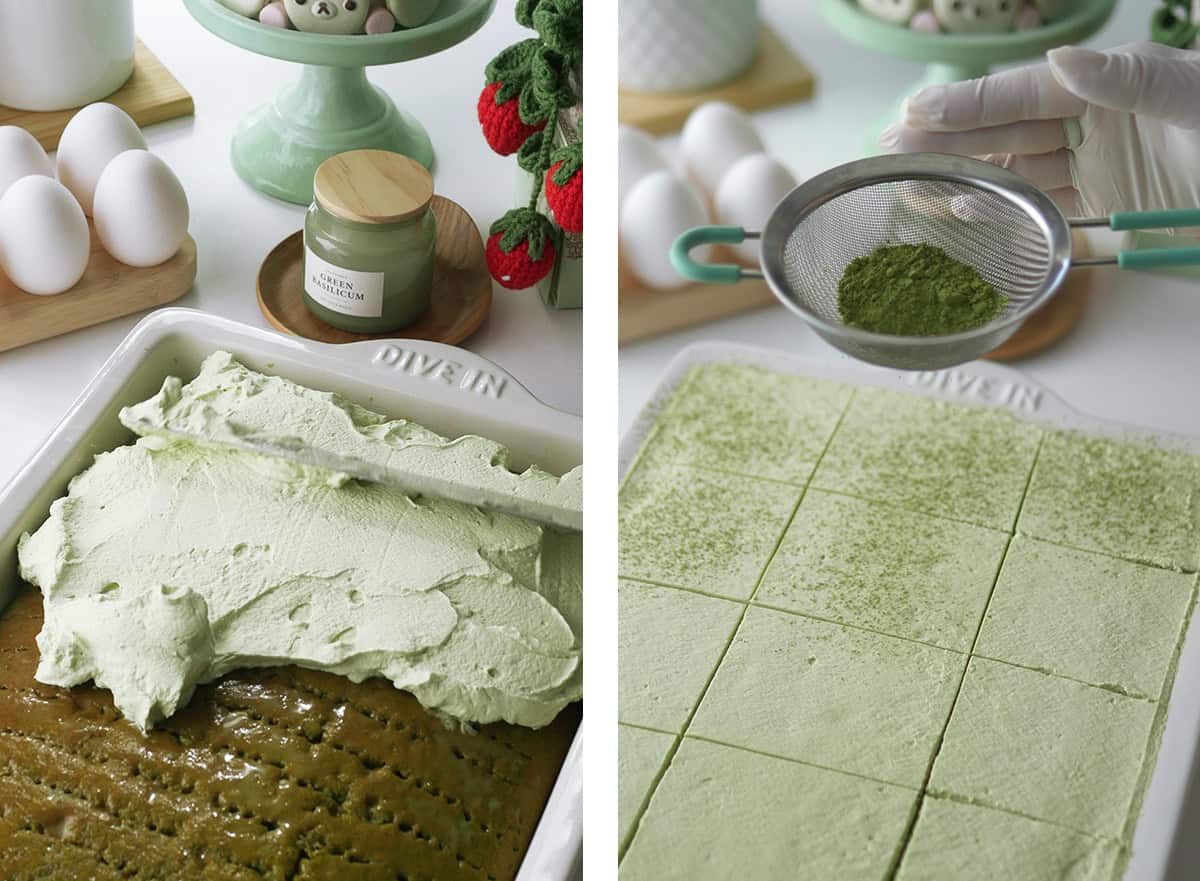
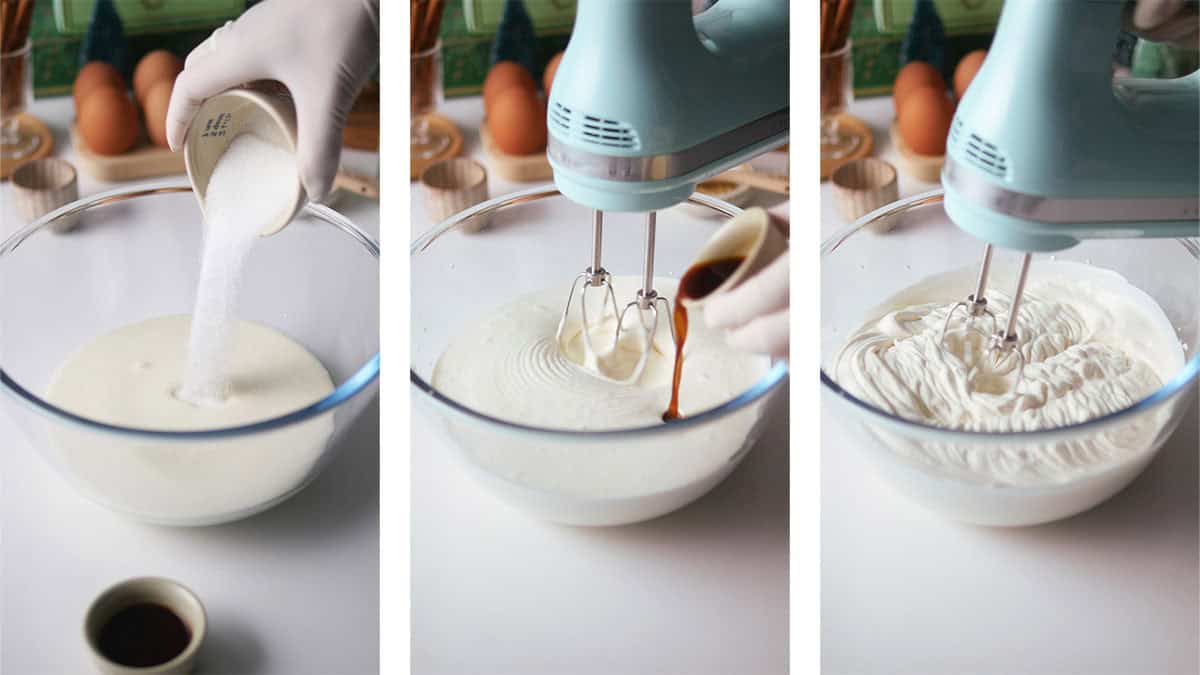
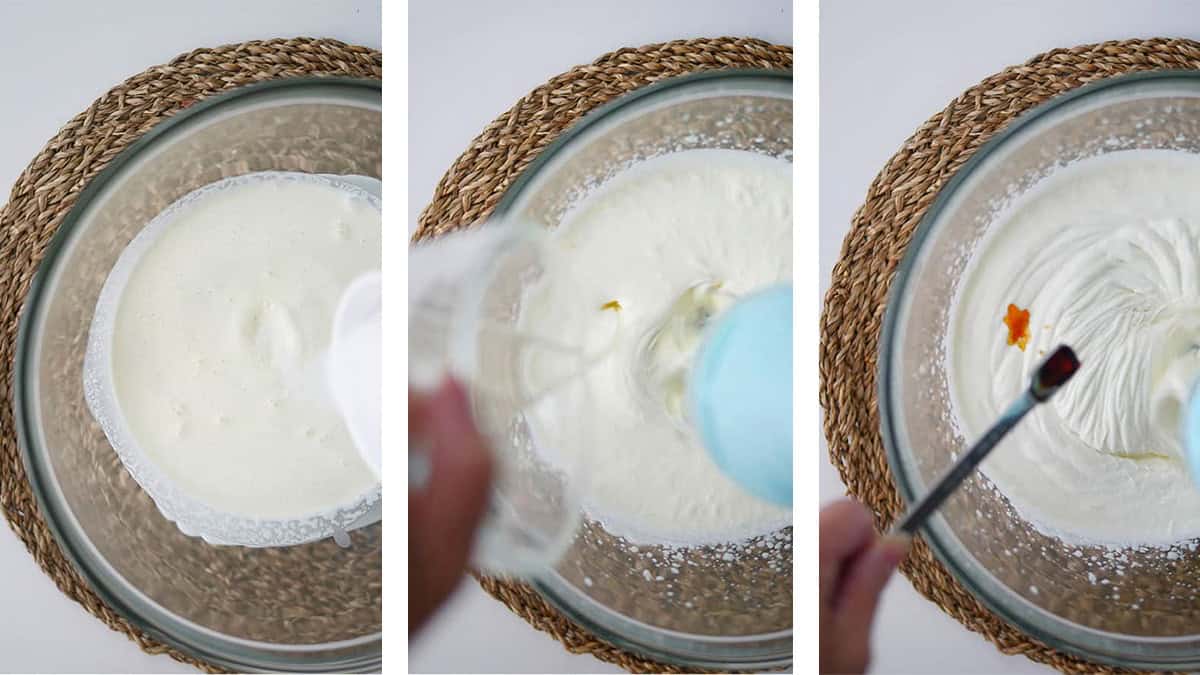
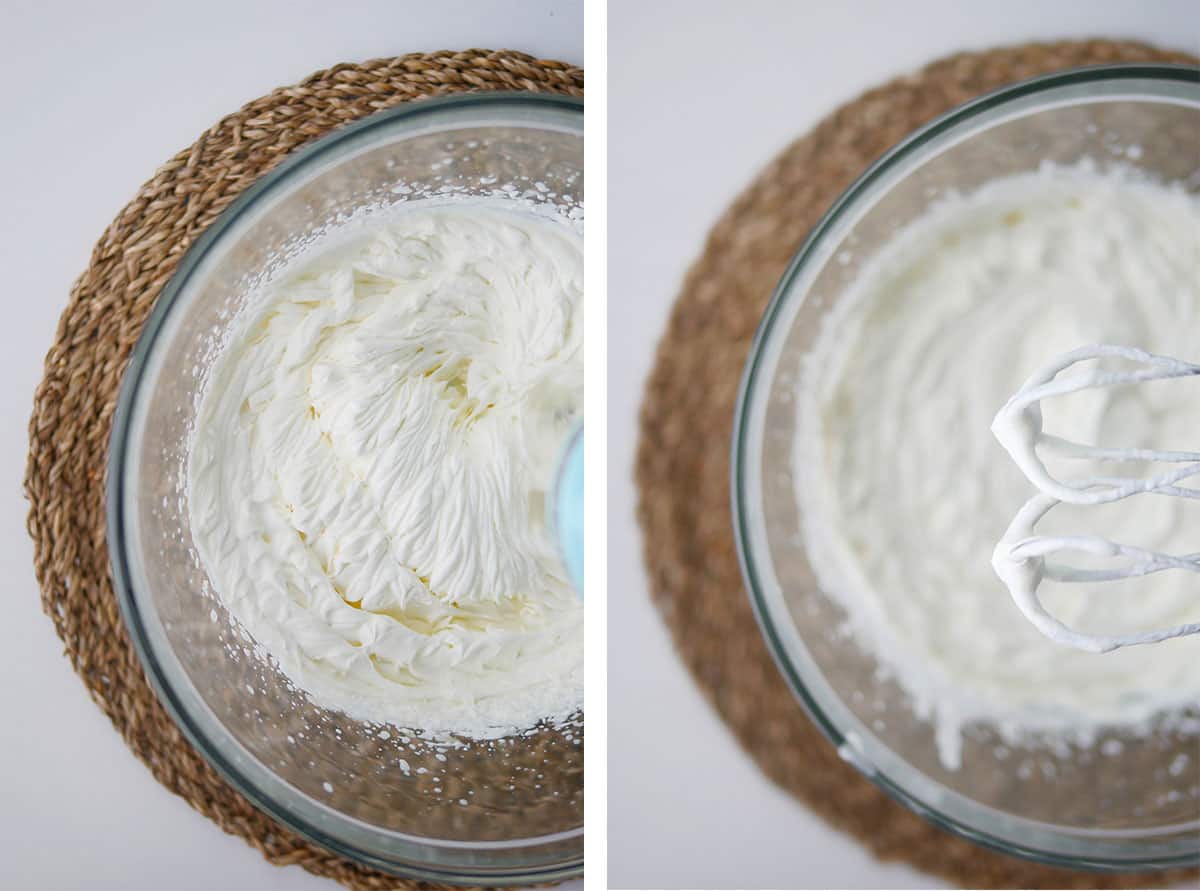
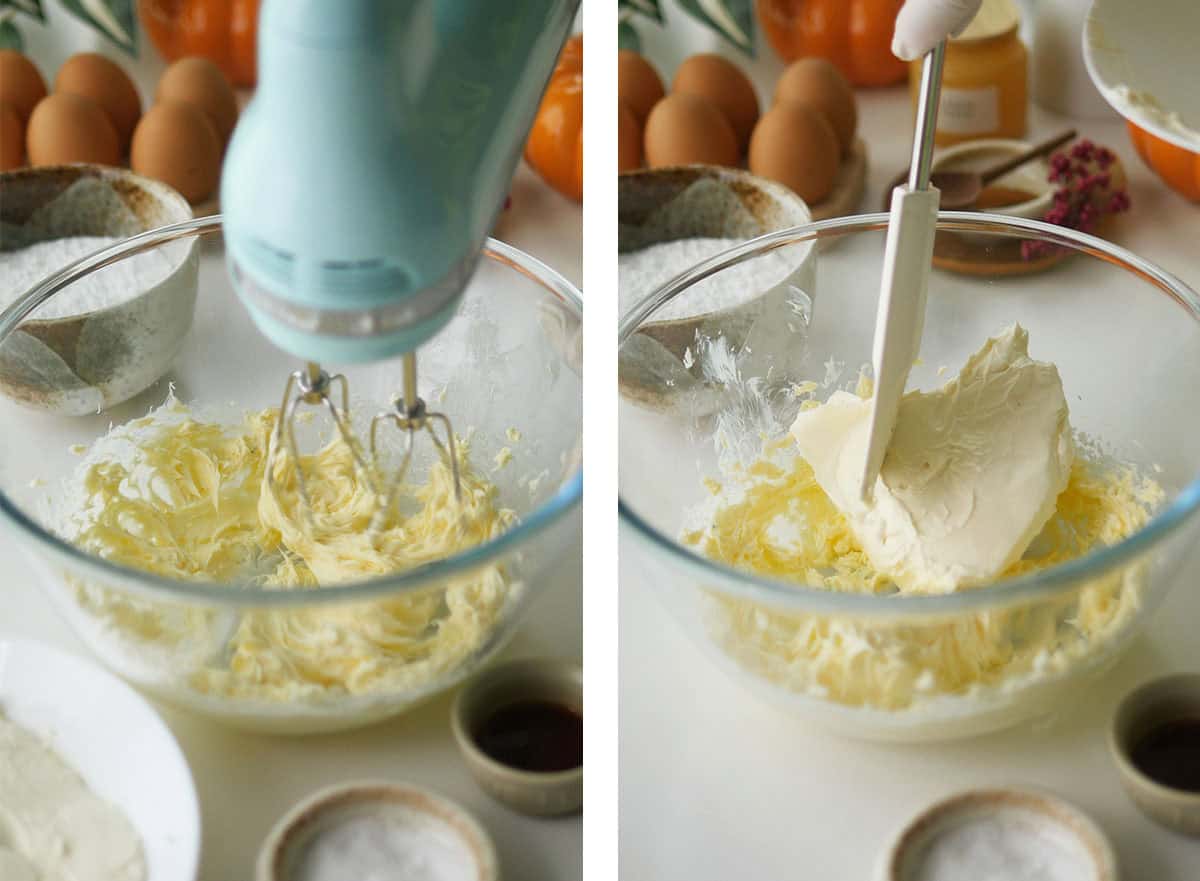
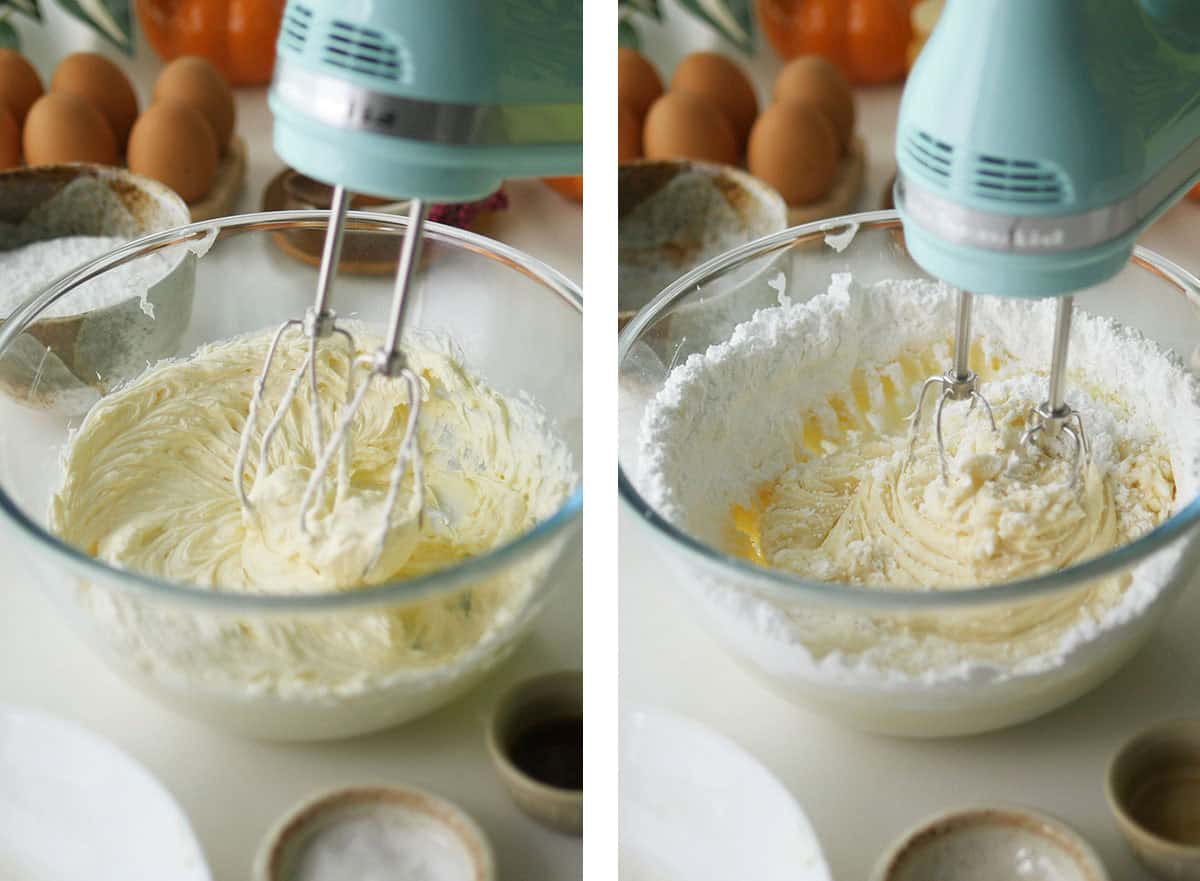
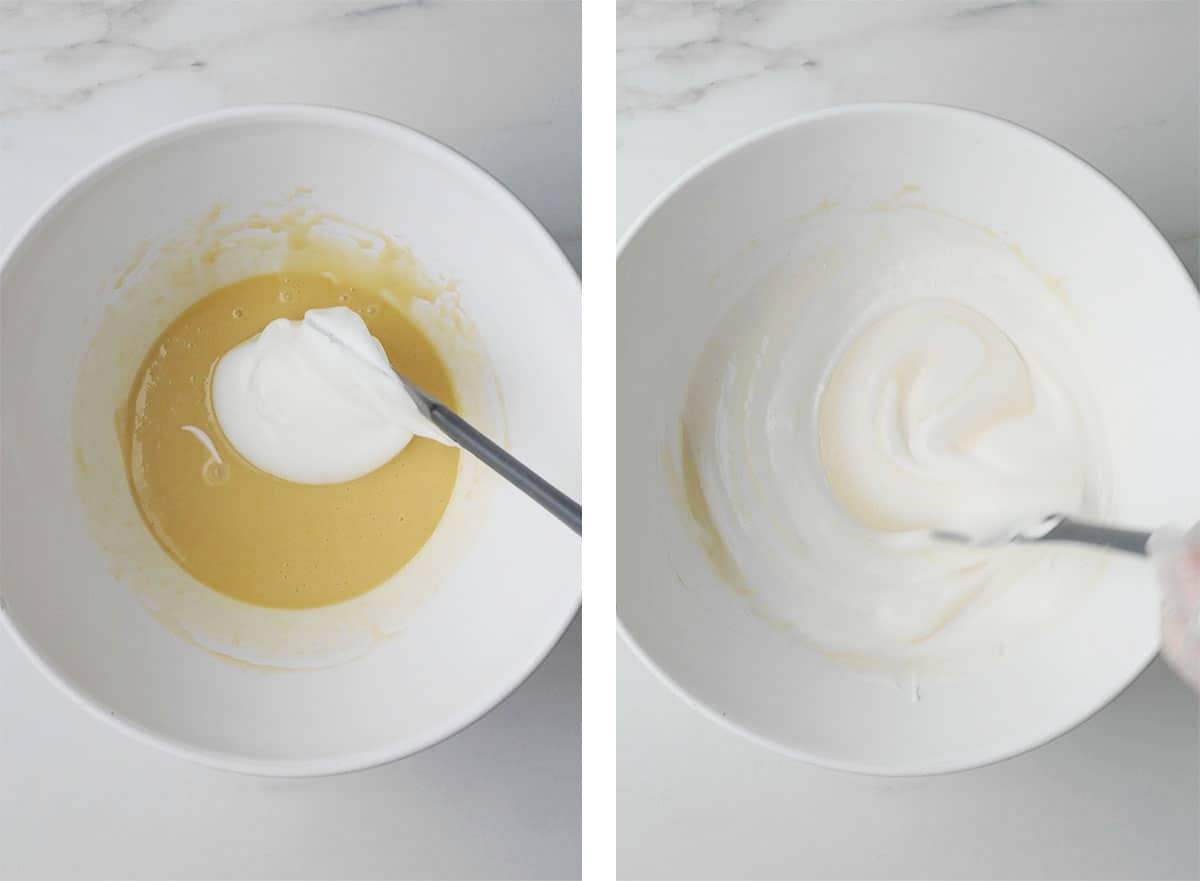
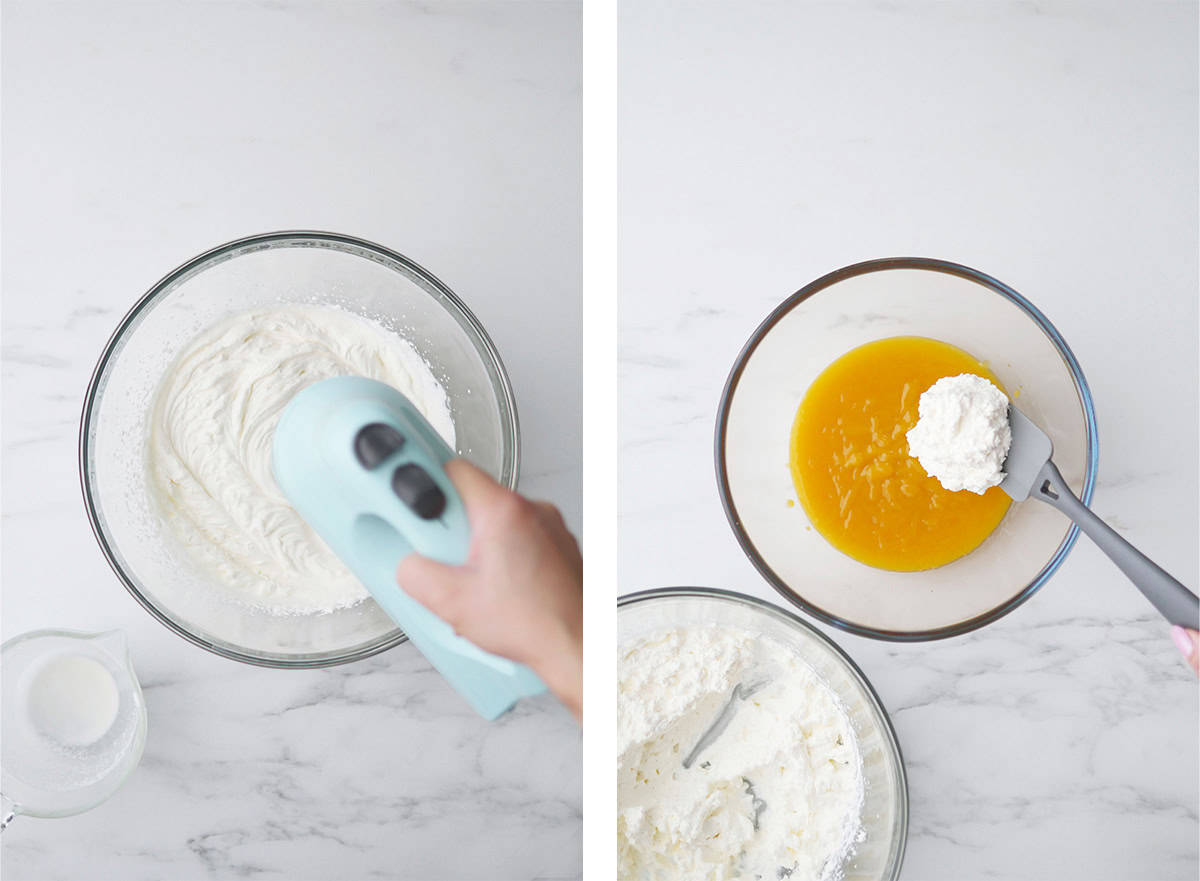
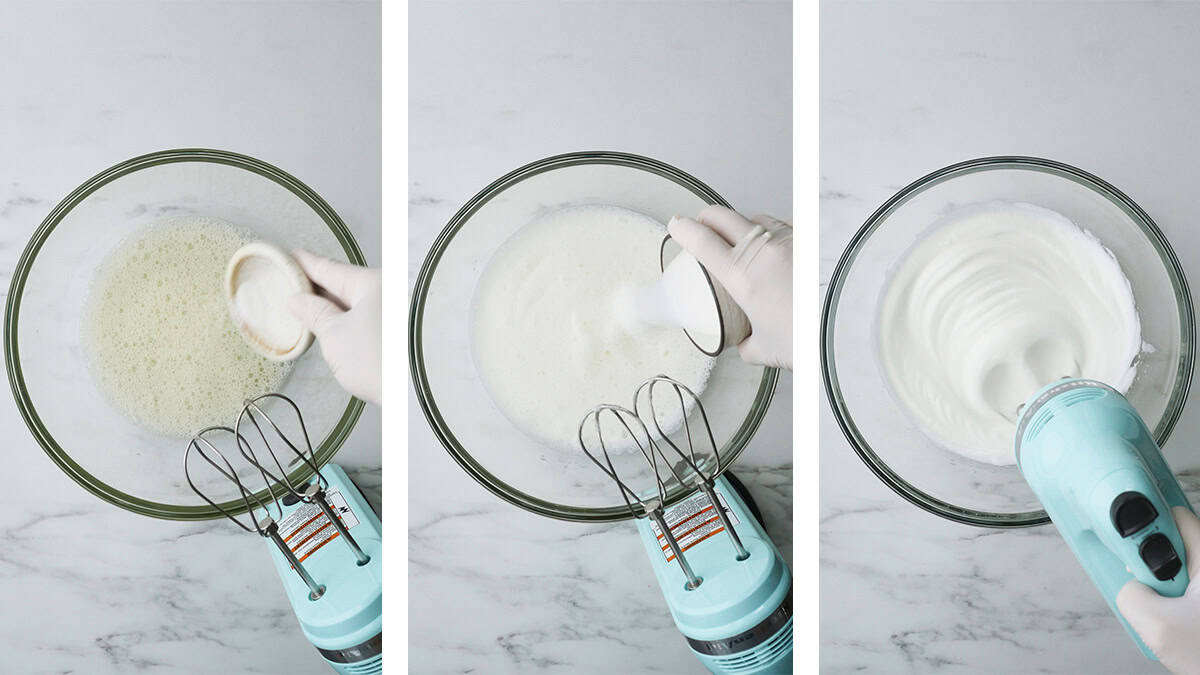
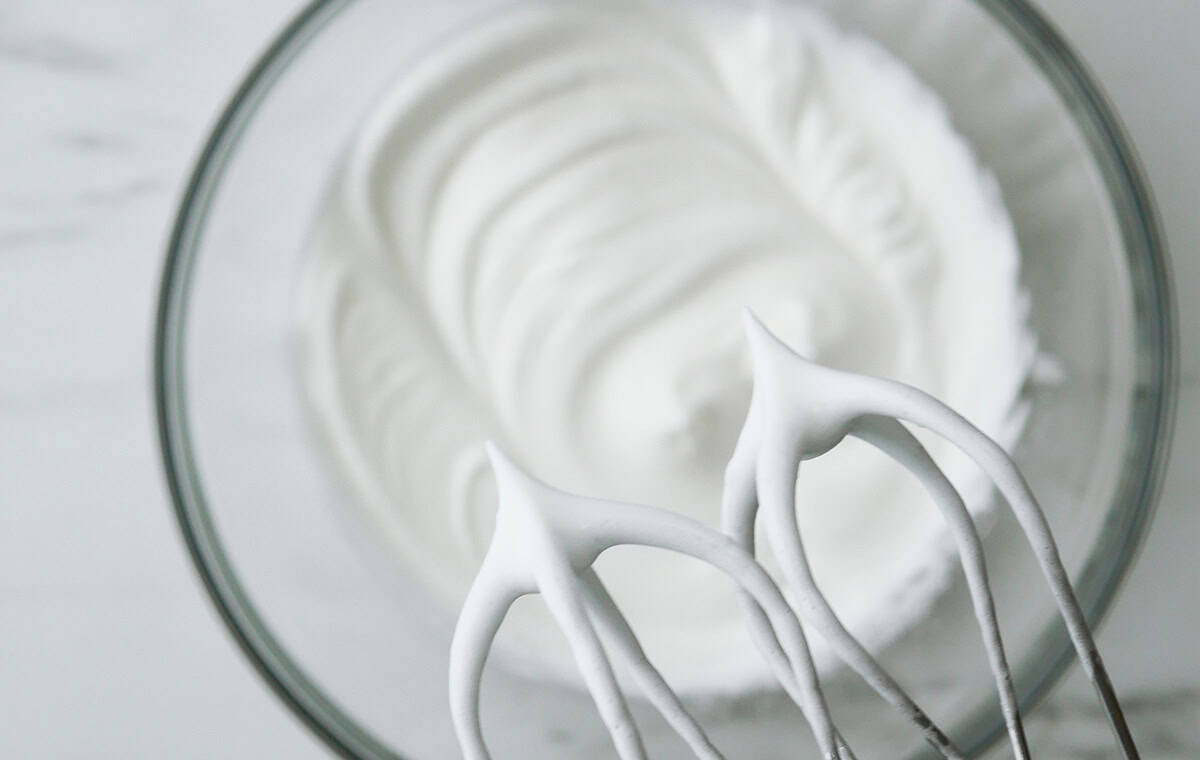
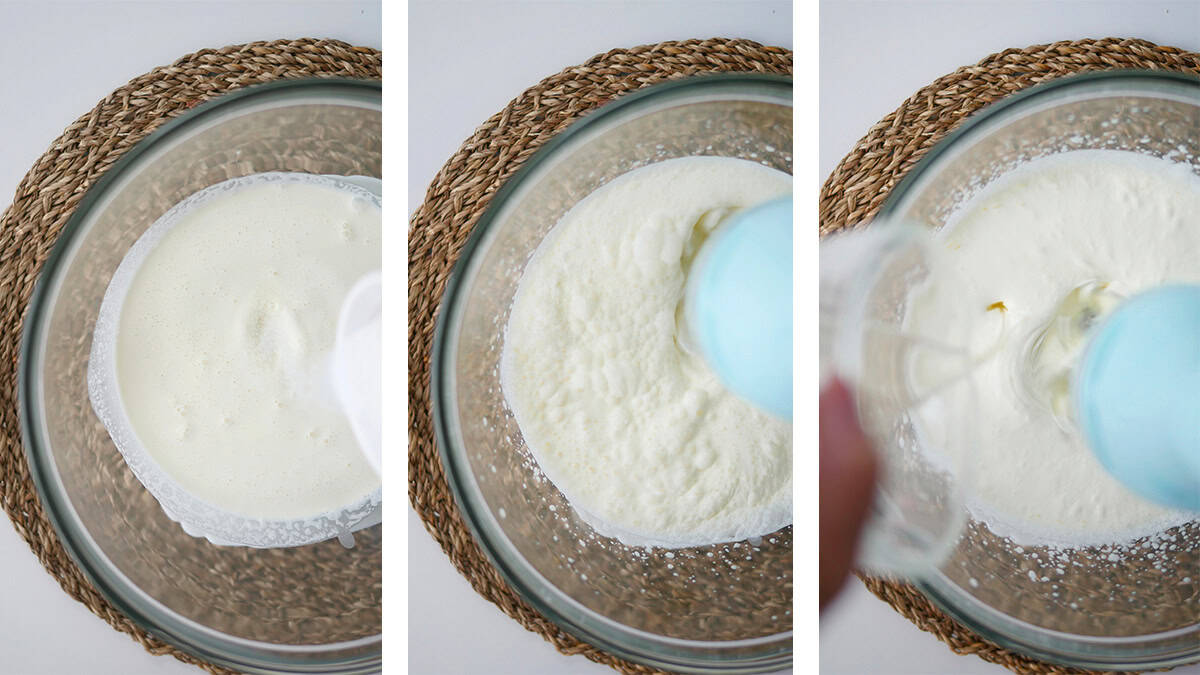
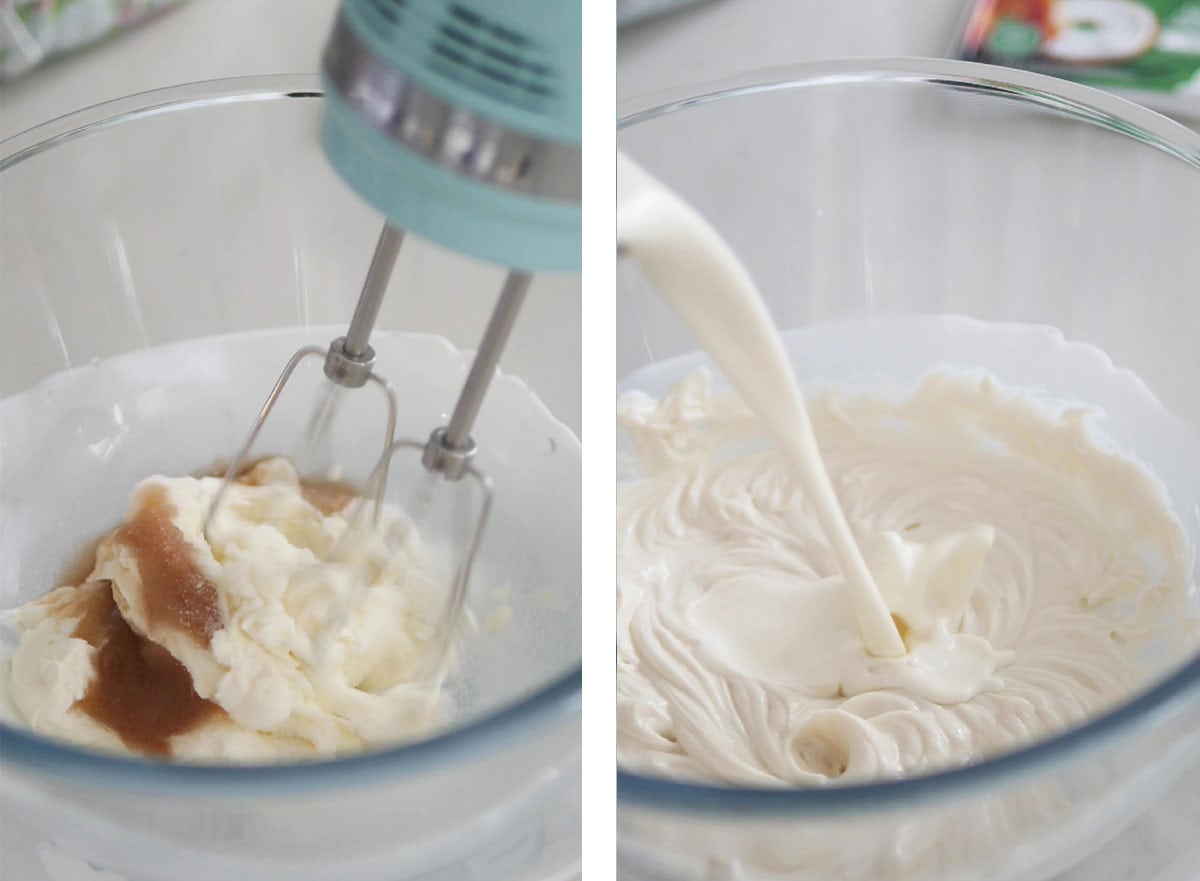
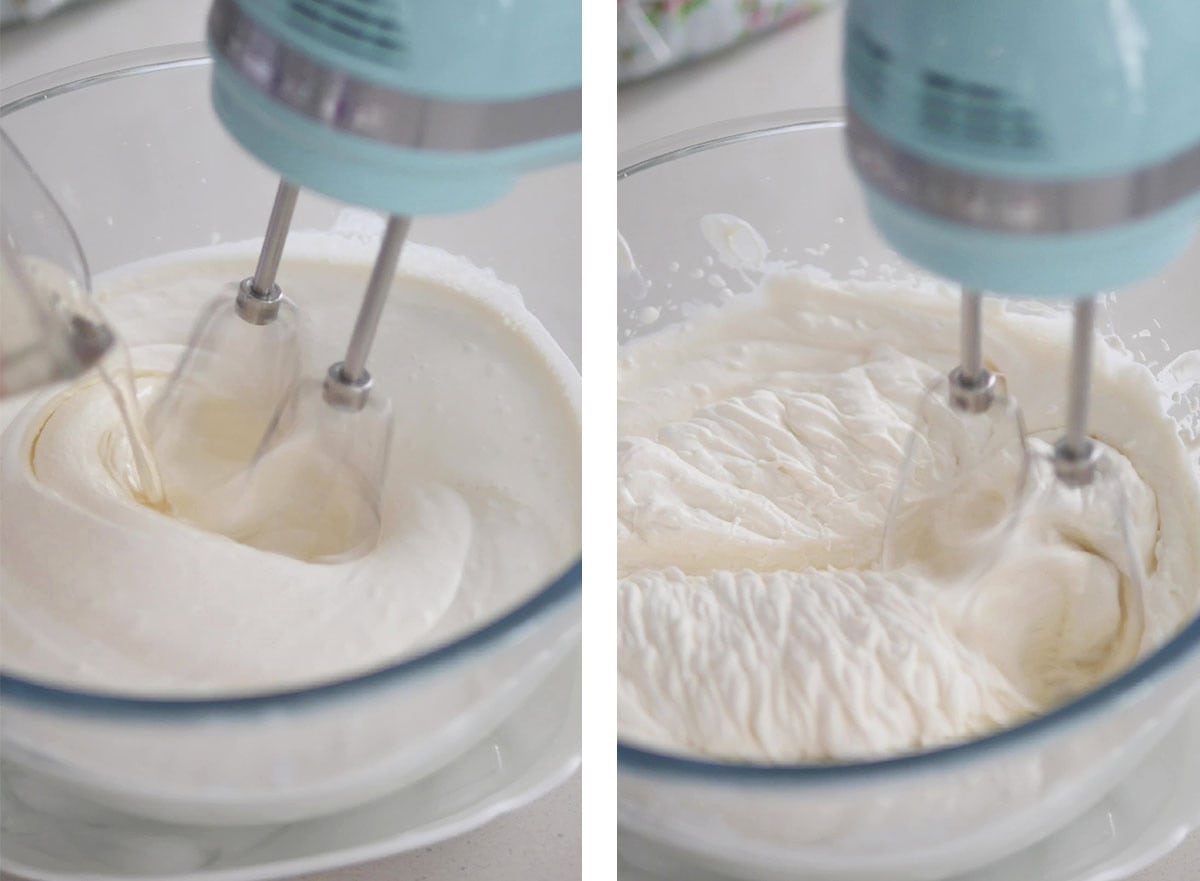
Prepare Matcha Frosting
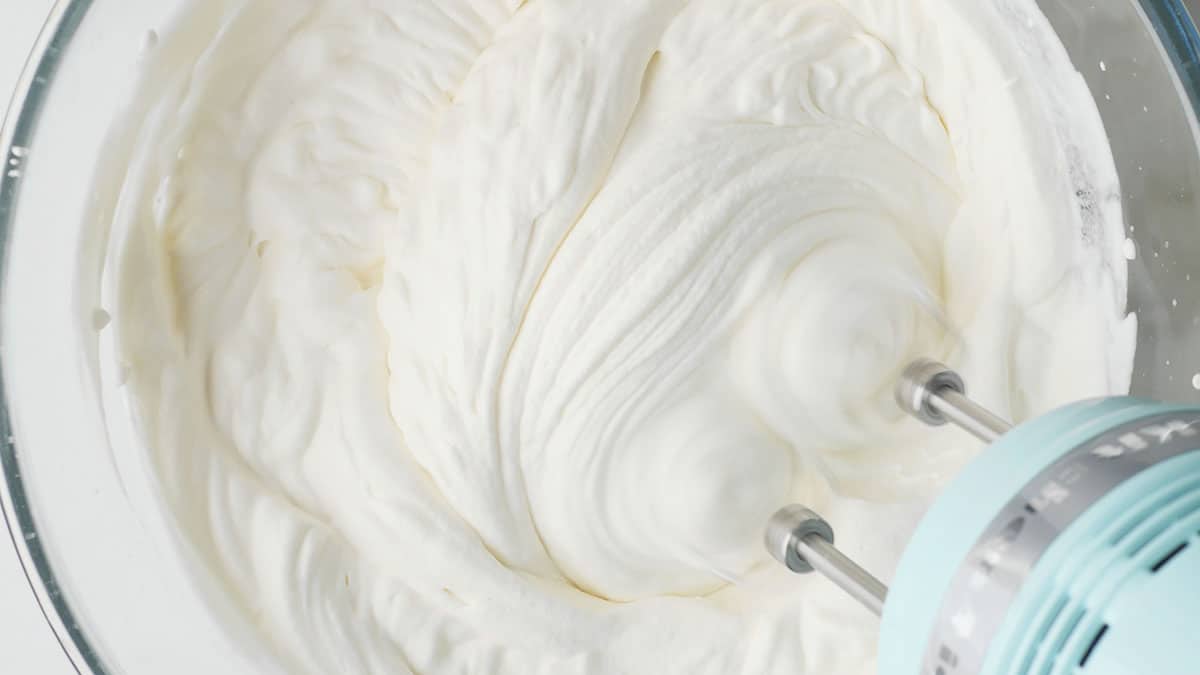
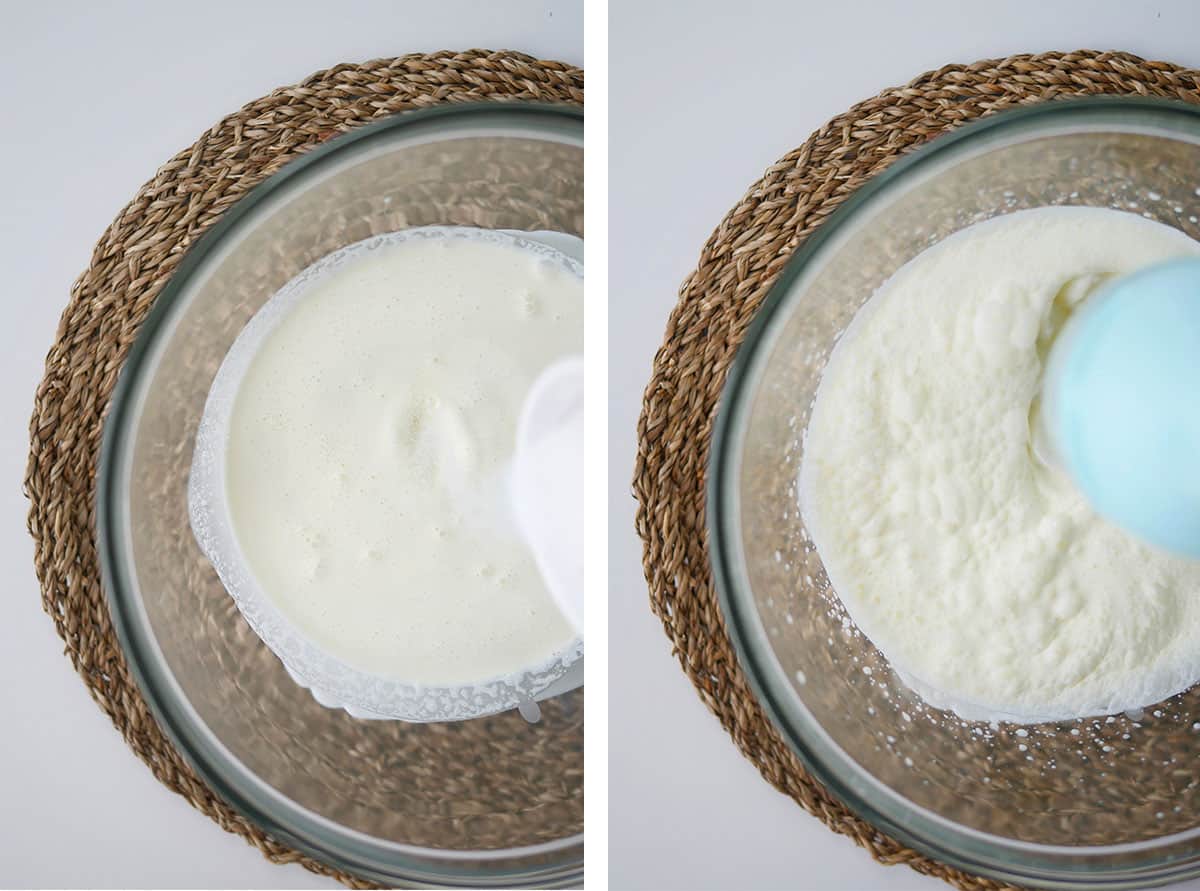
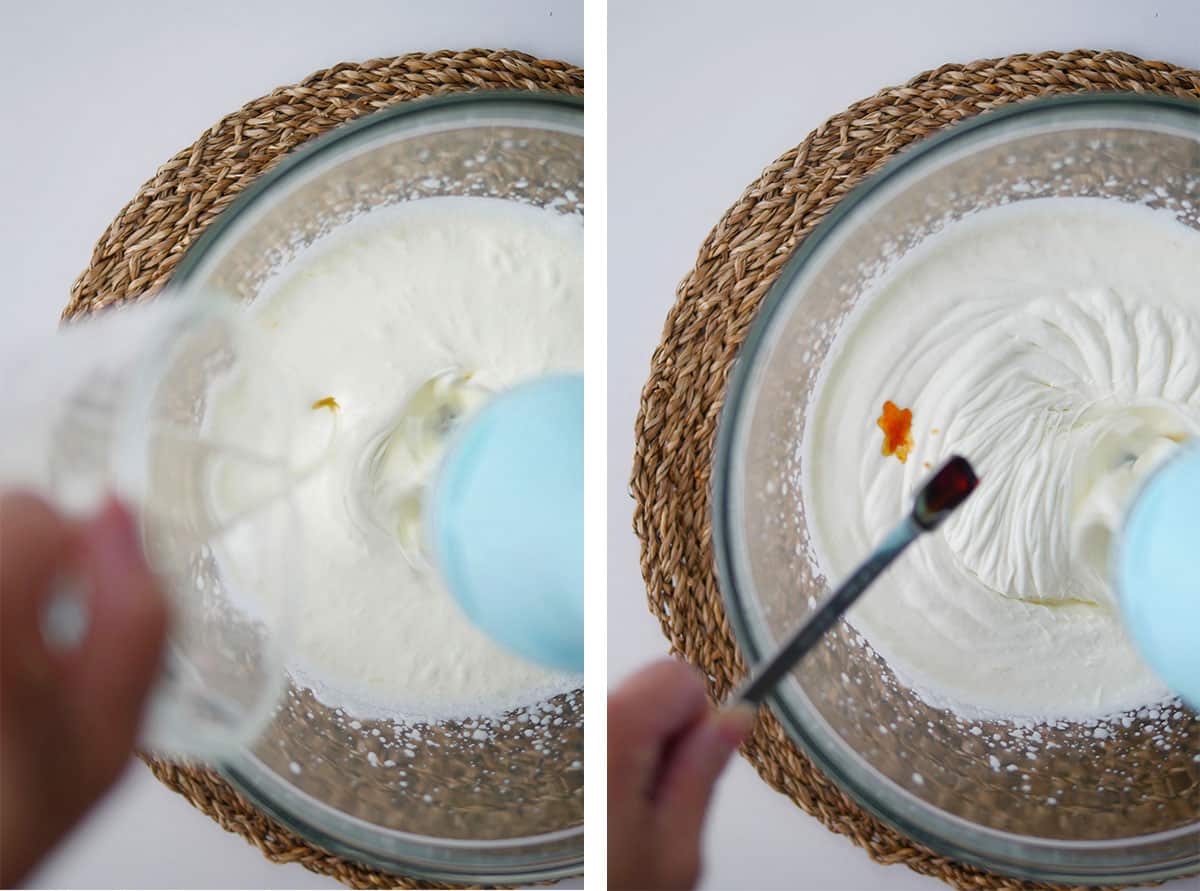
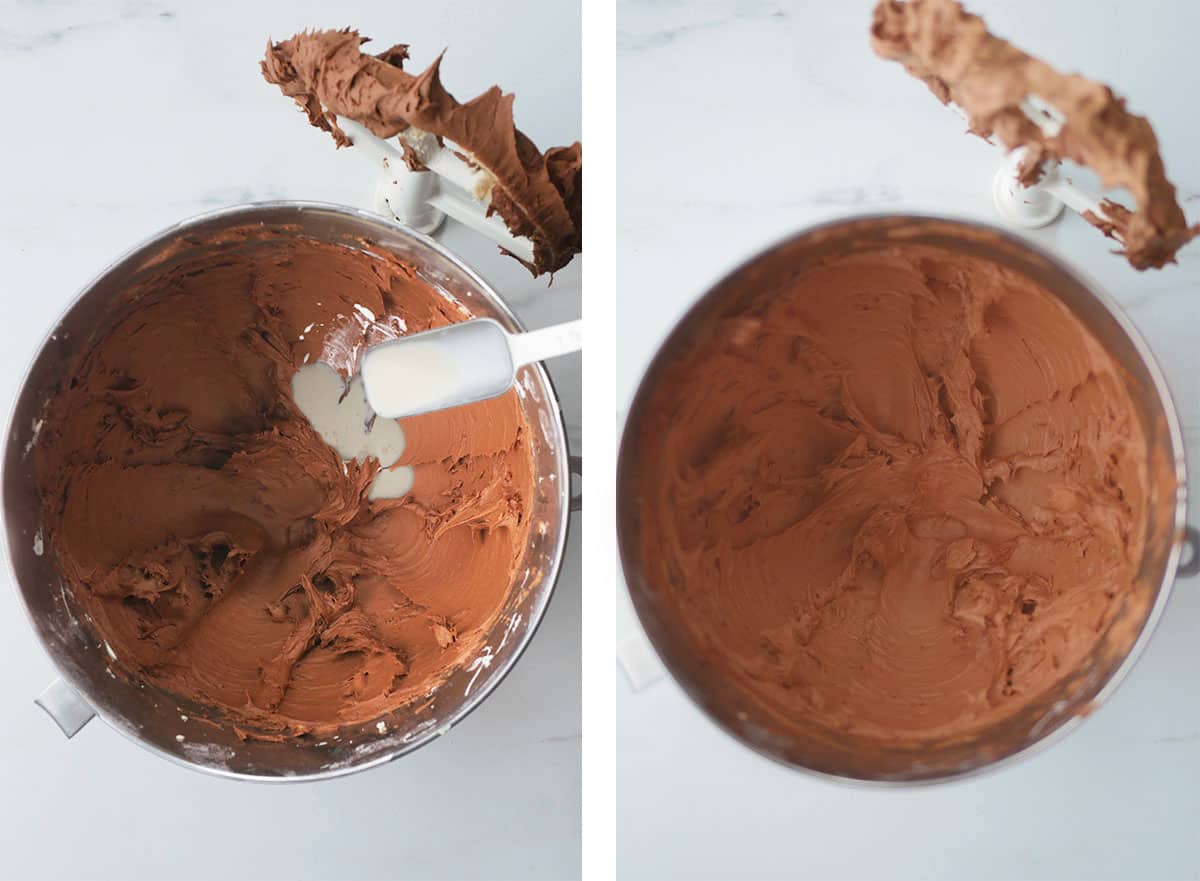
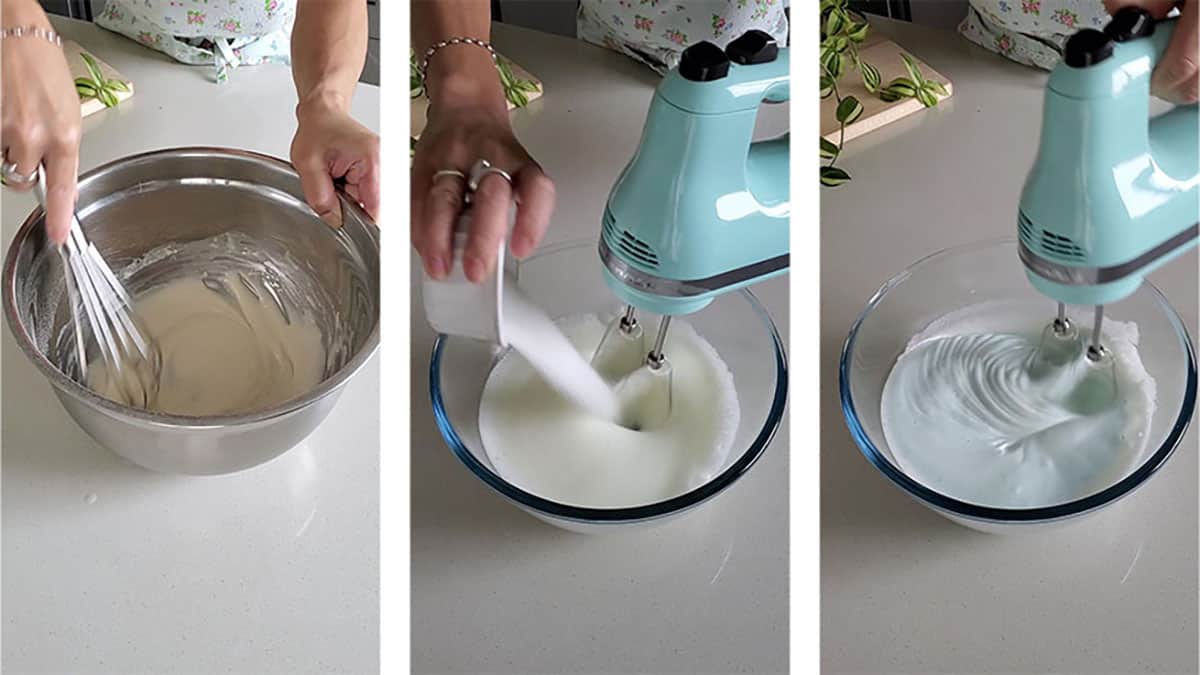
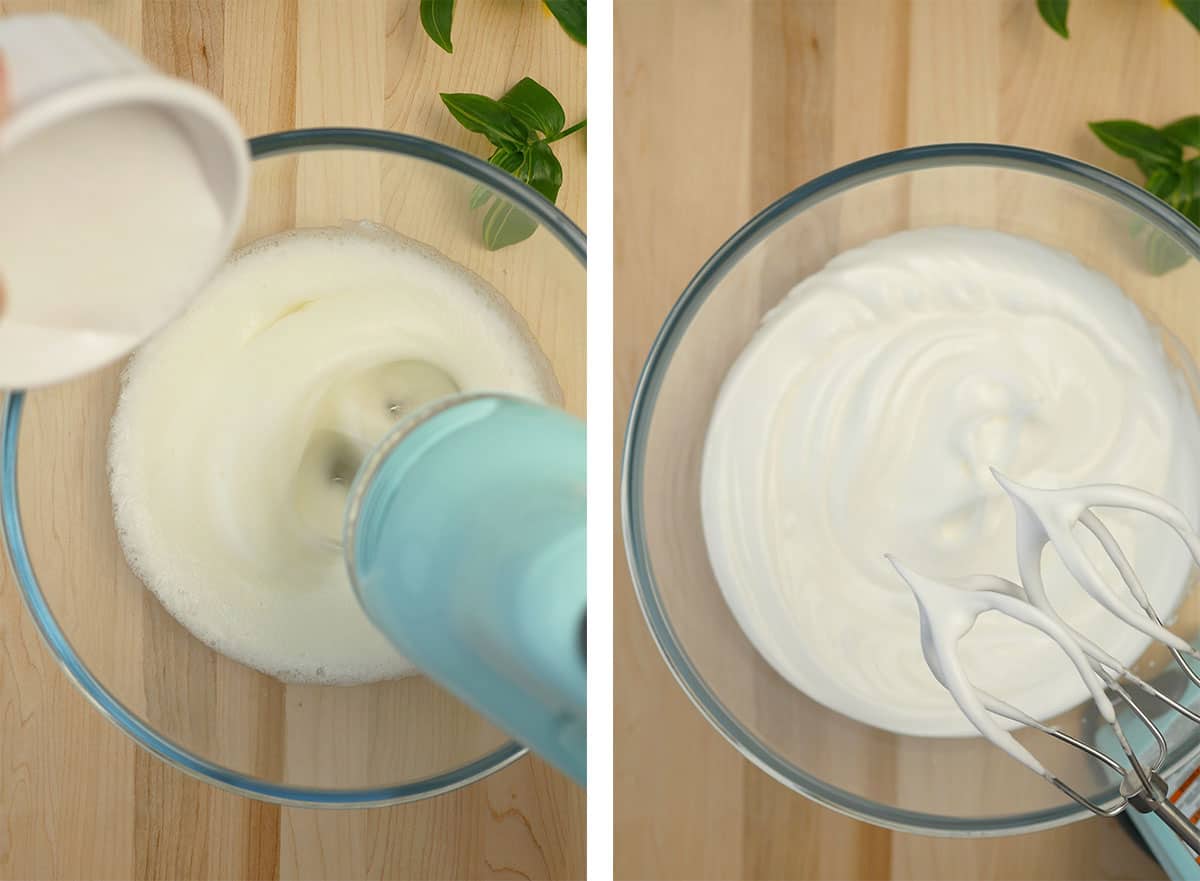
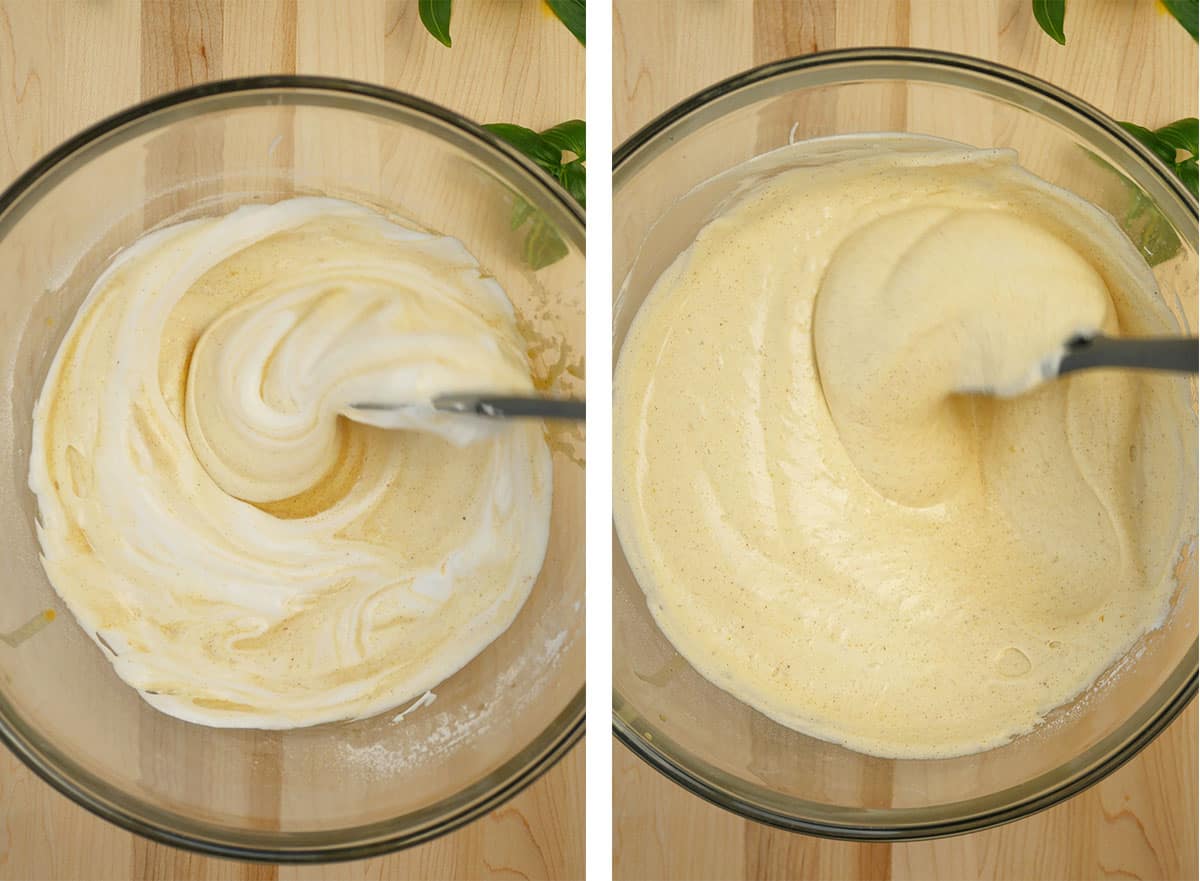
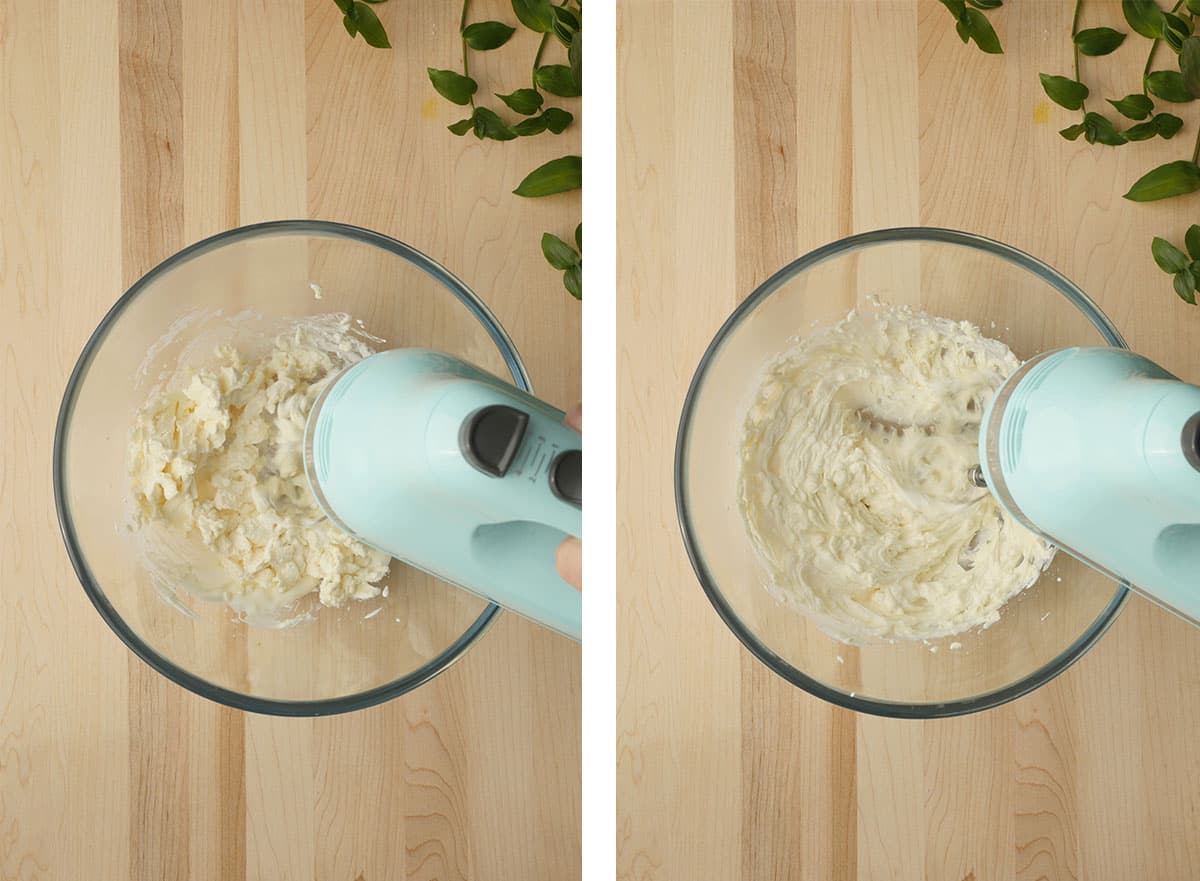
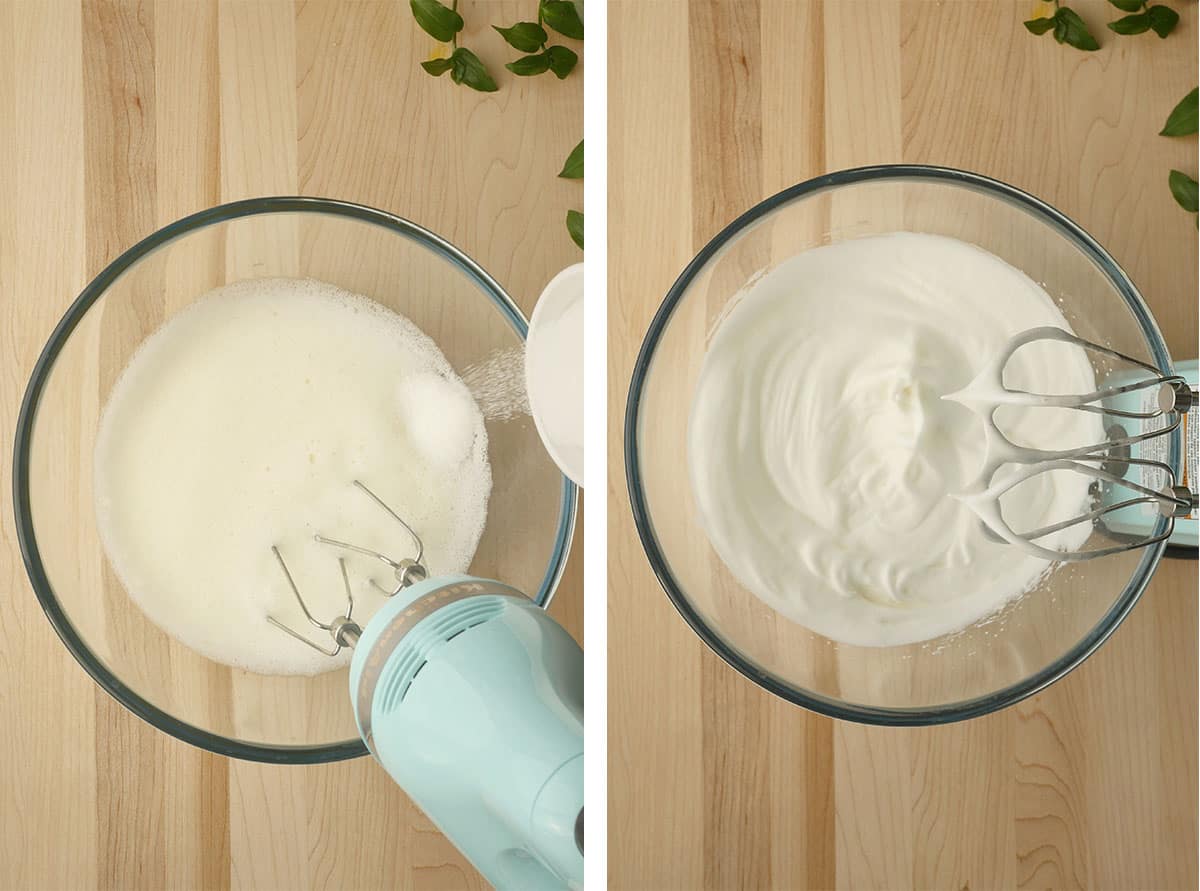
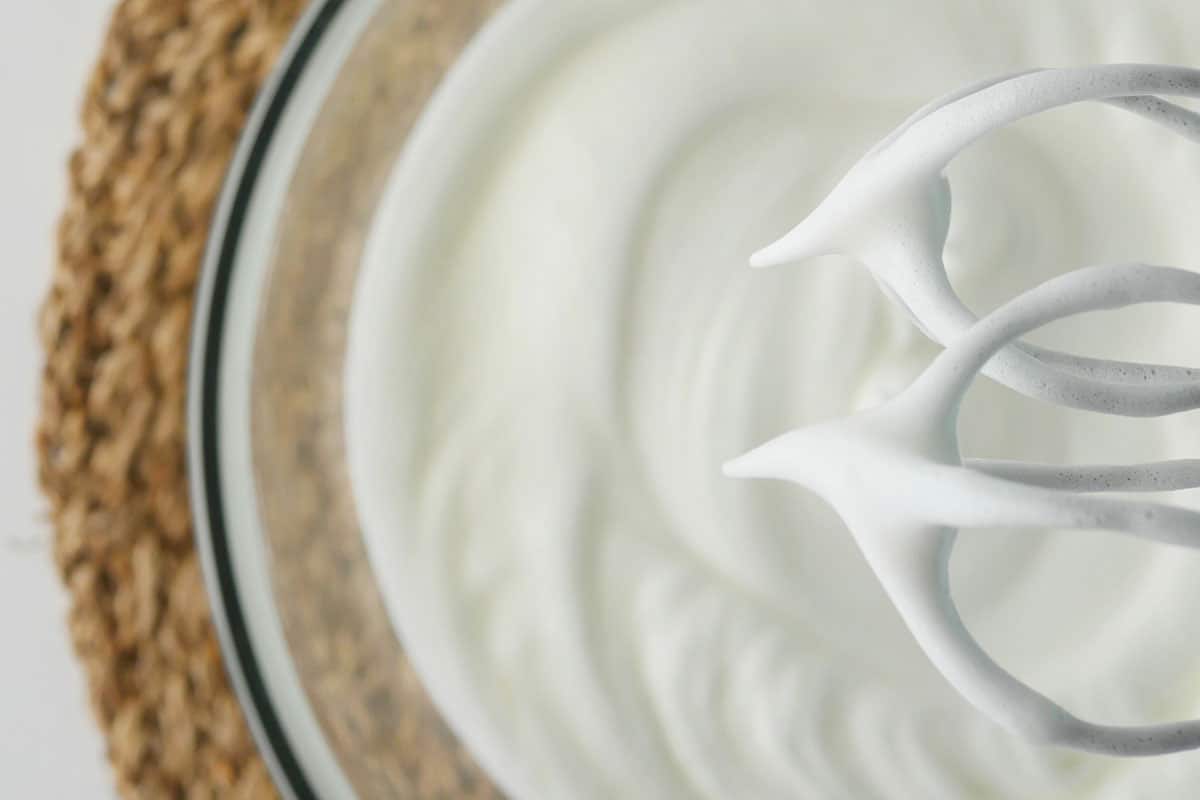
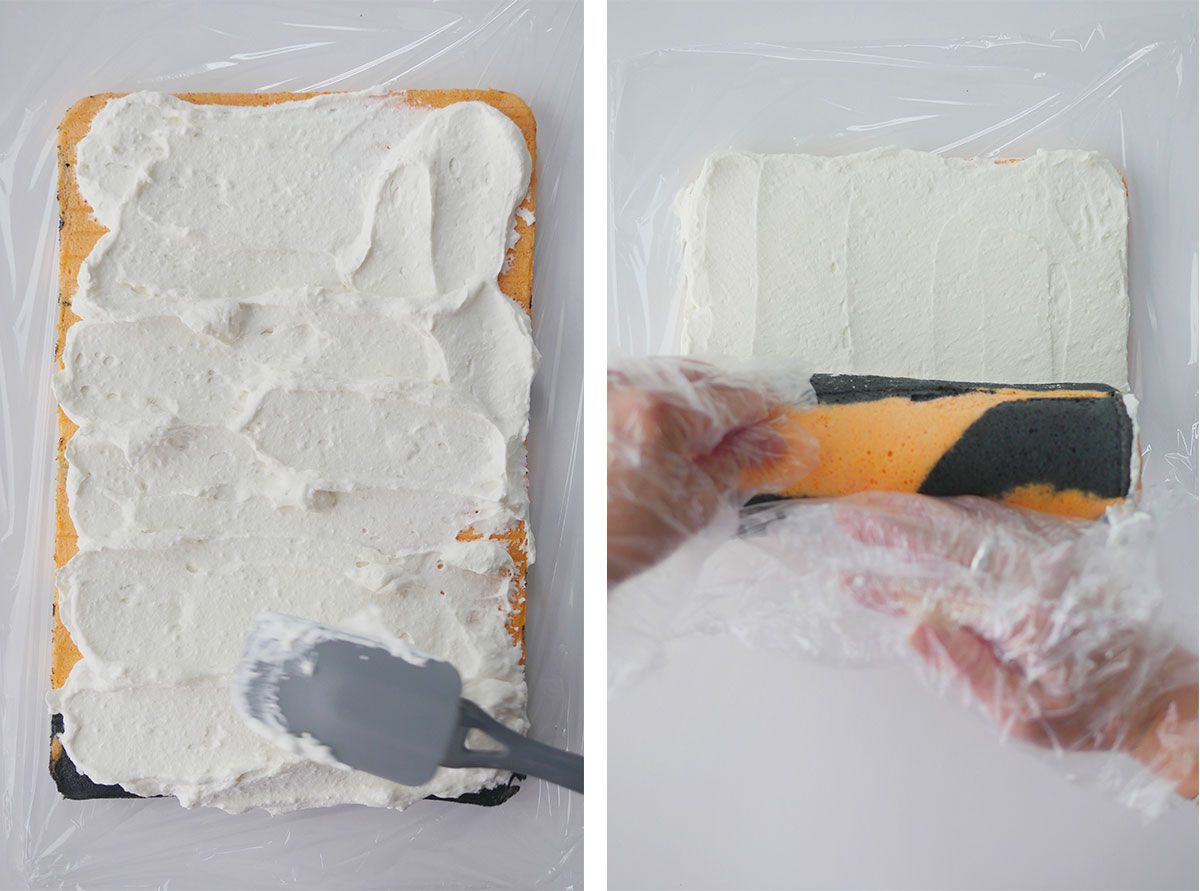
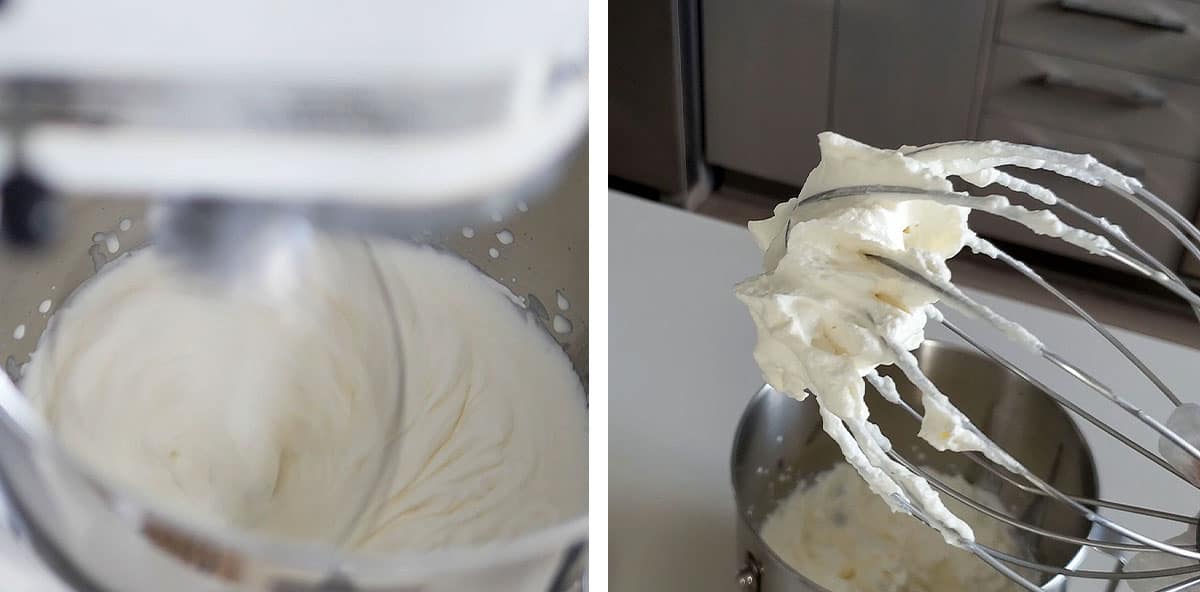
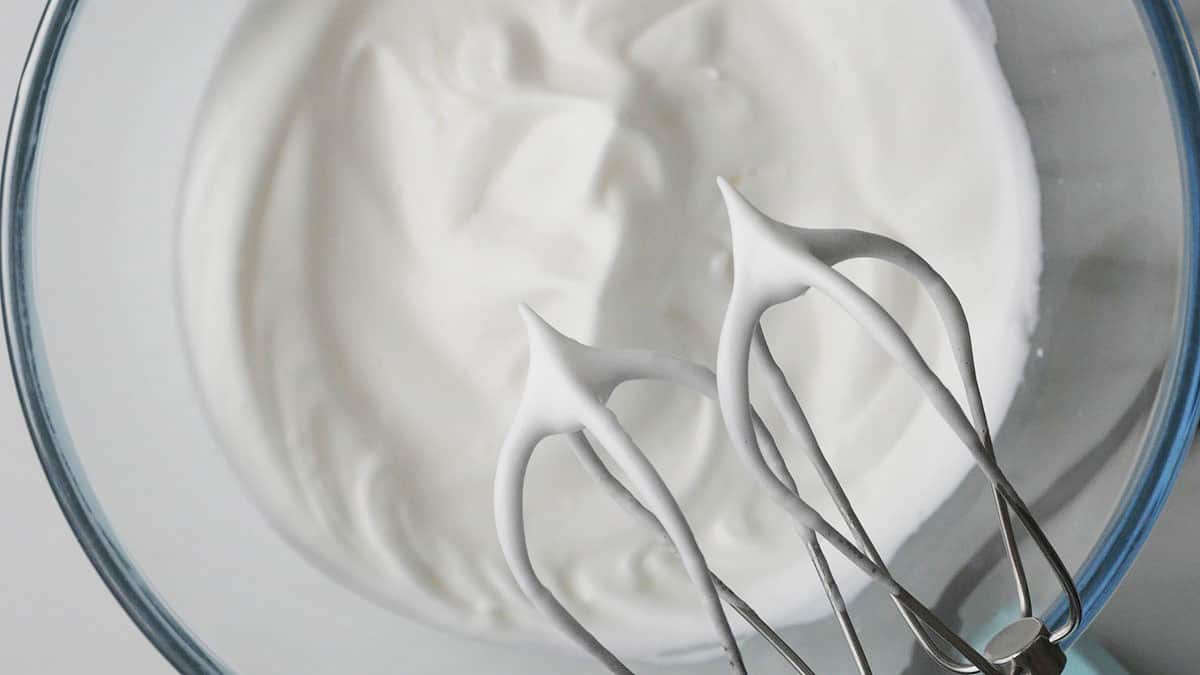
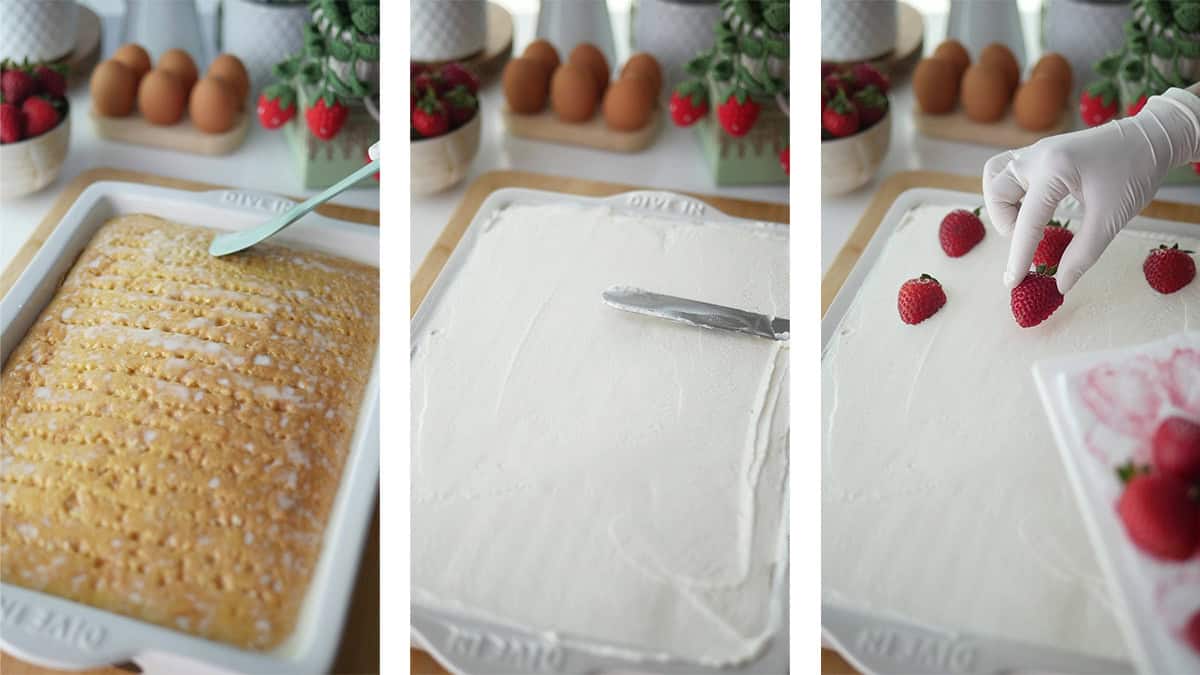
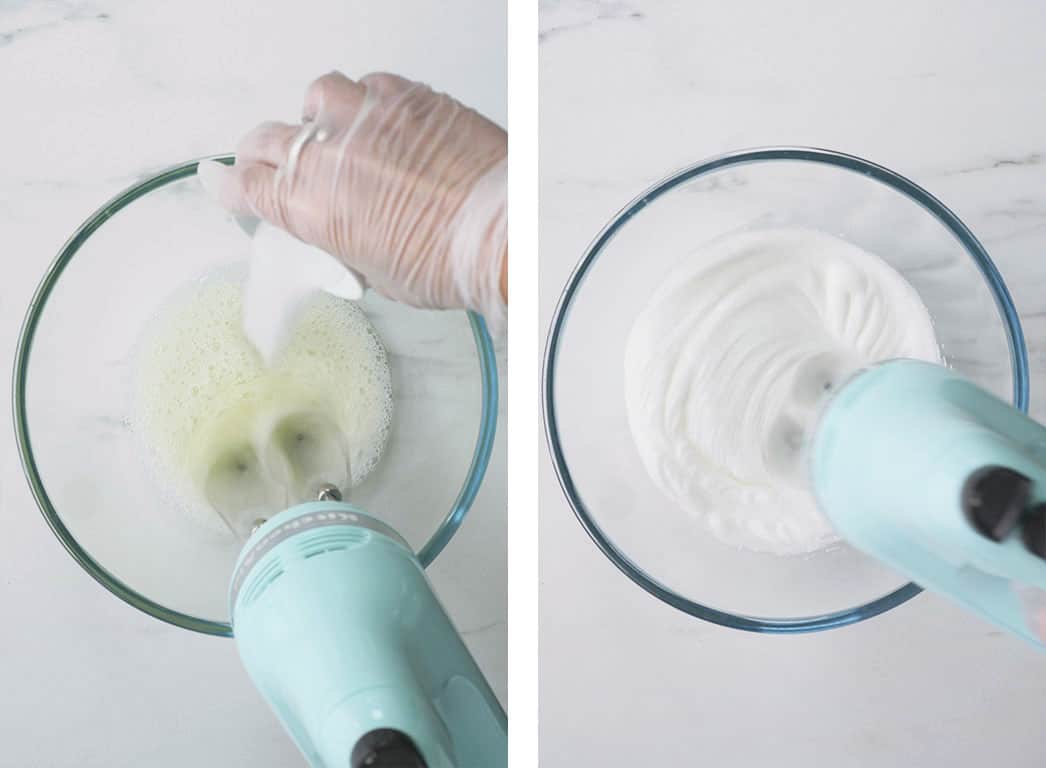
In a small bowl, whisk together the Matcha powder with 1-2 tablespoon of heavy cream to create a wet paste. The goal is to fully dissolve the powder with vigorous whisking. There shouldn't be any clumps. In the chilled mixing bowl, whip the Matcha paste, the rest of the heavy cream and sugar on med-high speed until stiff peaks. Use cream immediately for assembly.

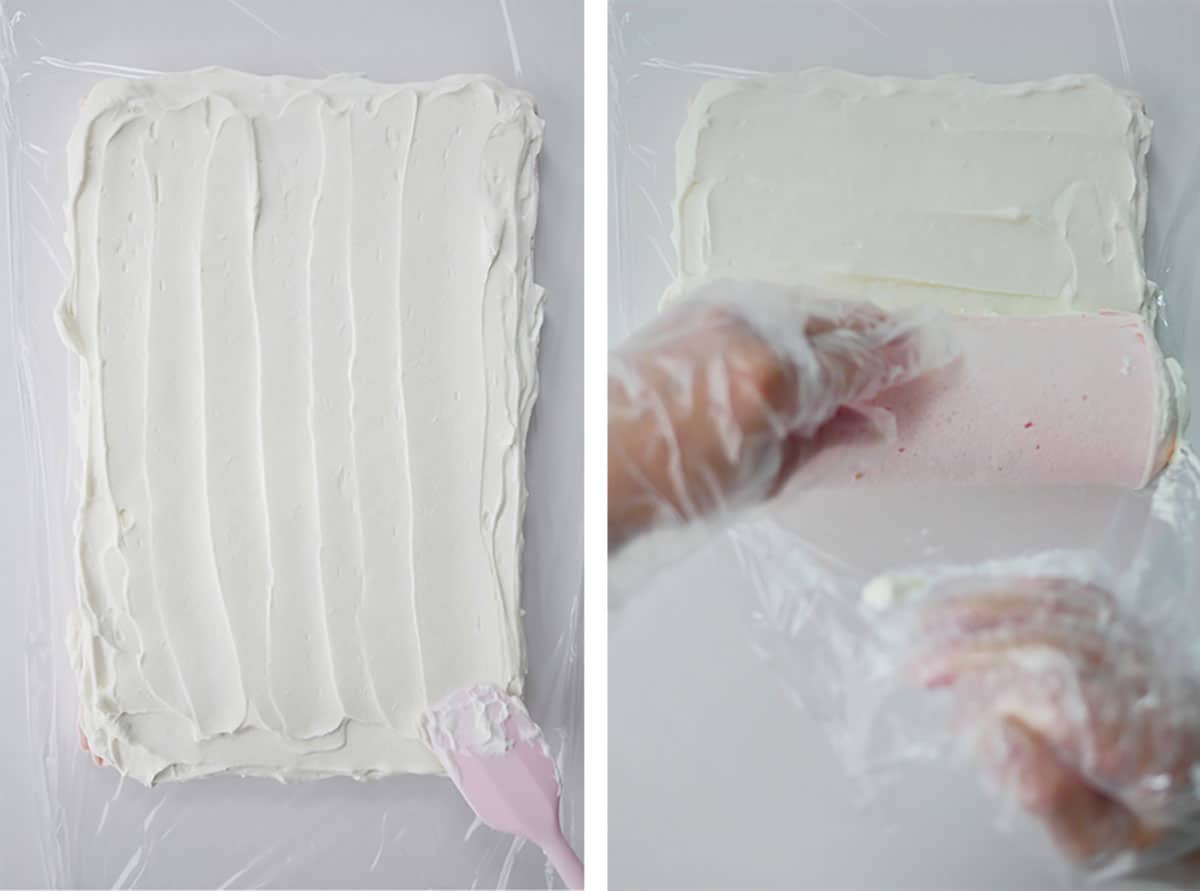
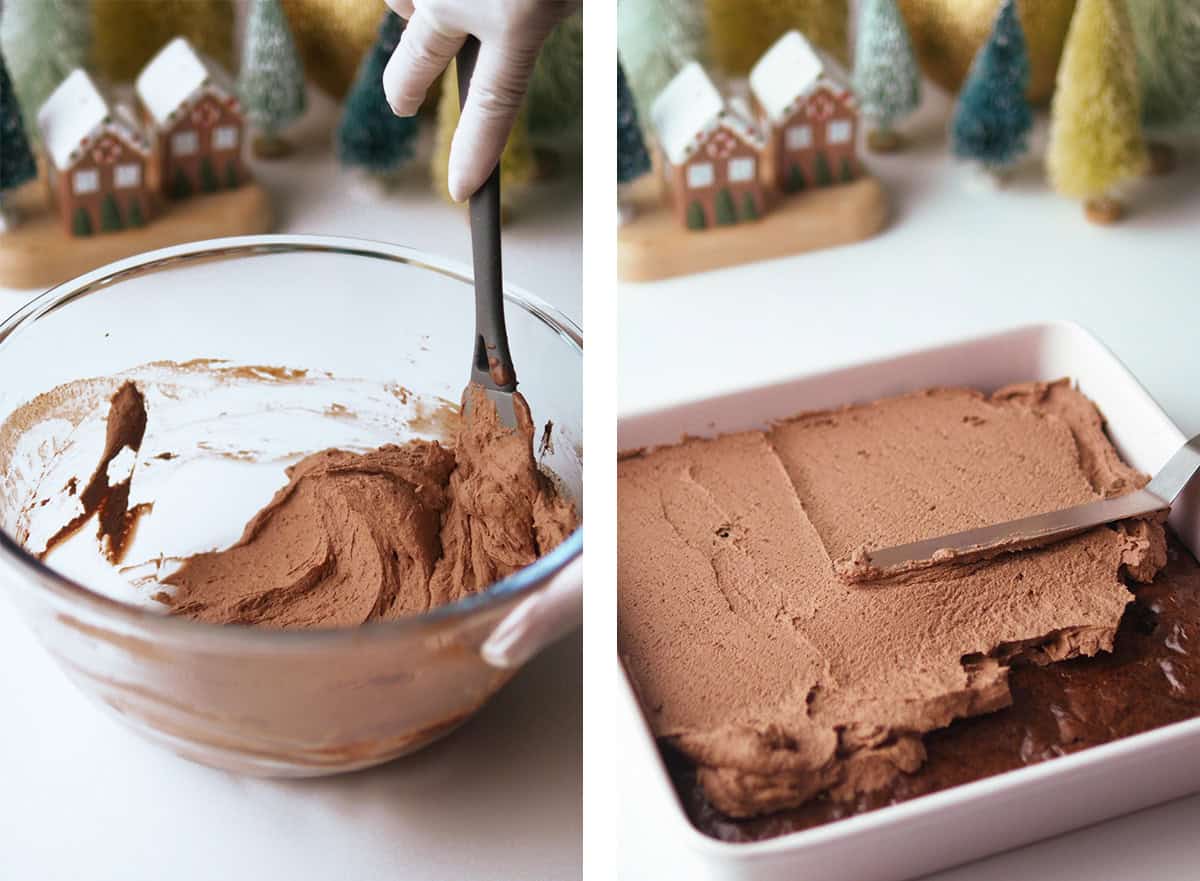
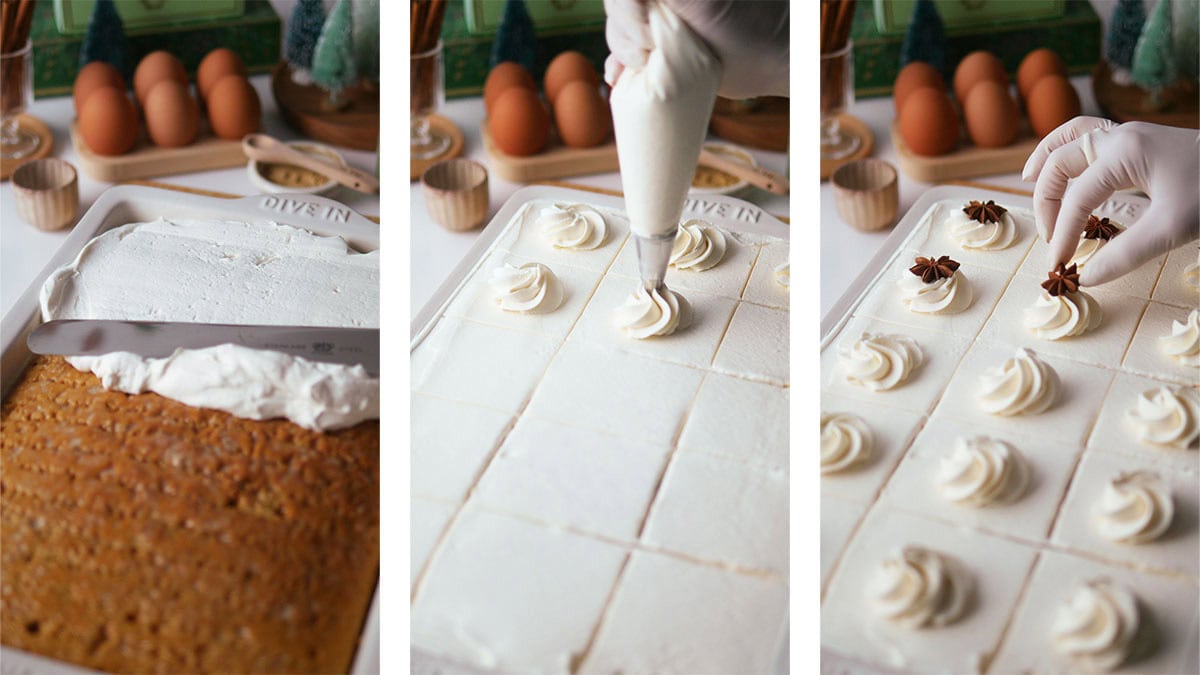
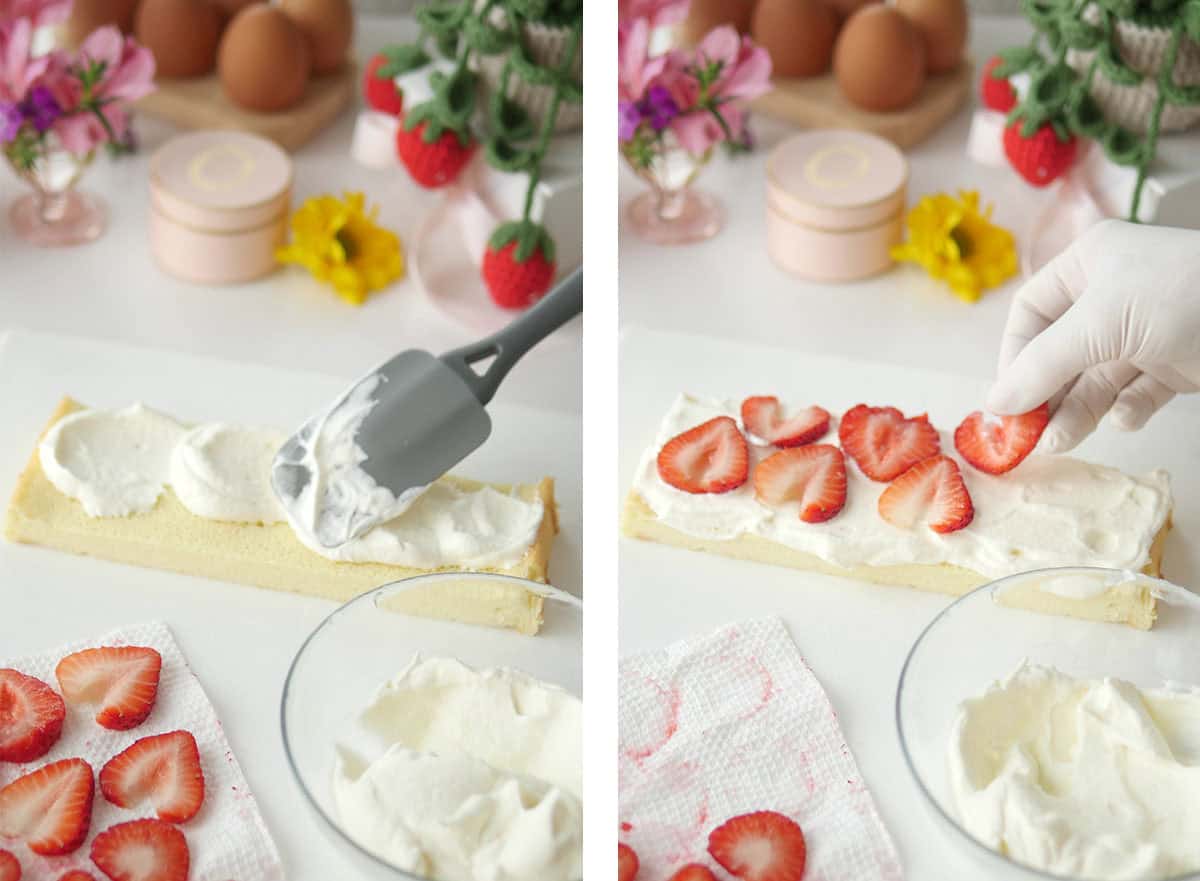
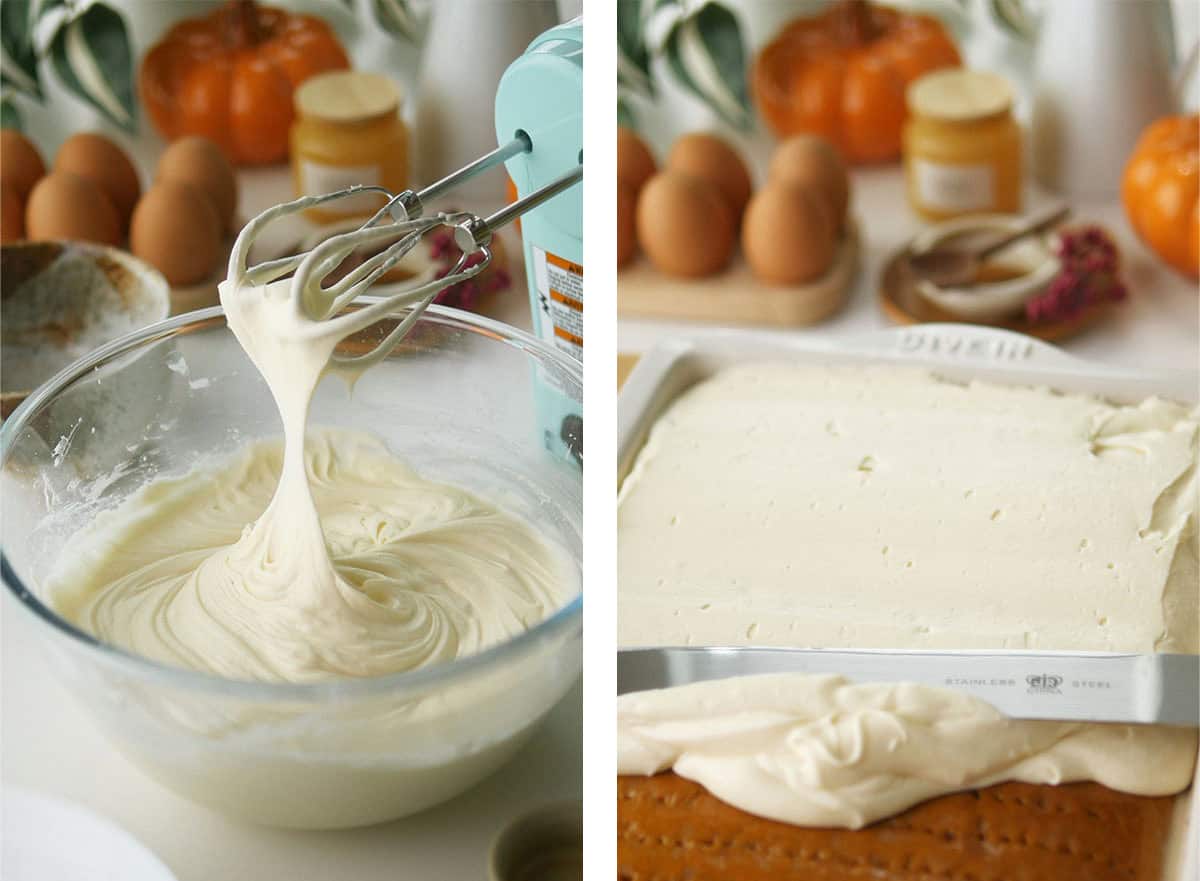
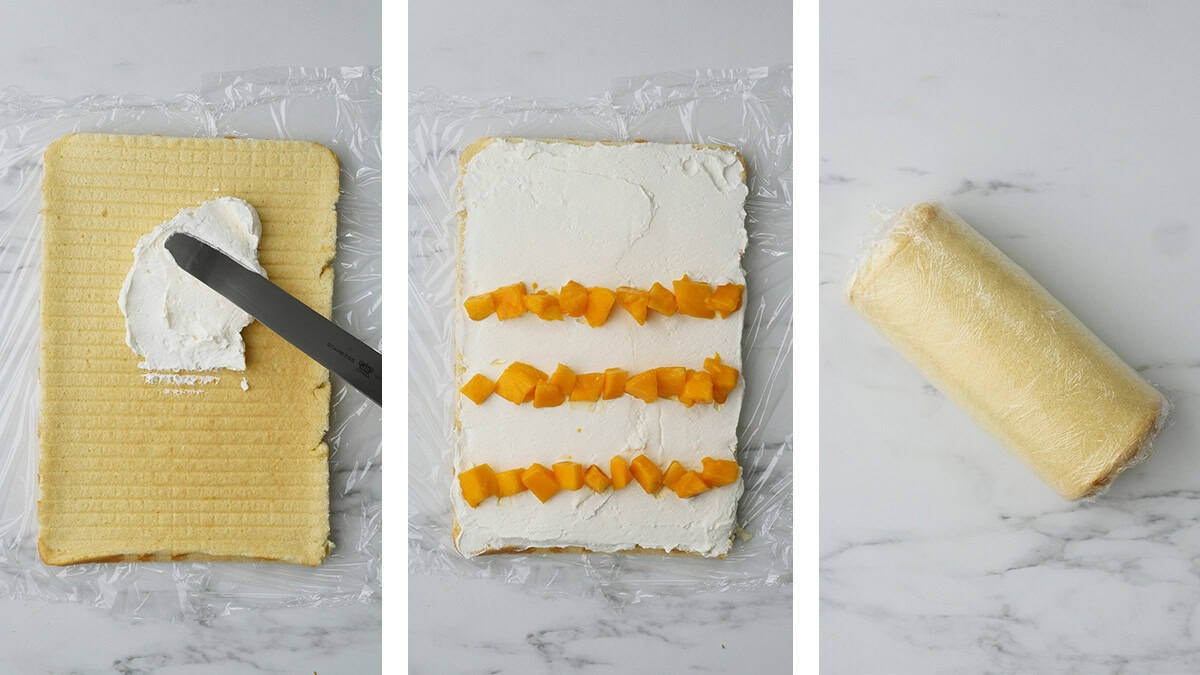
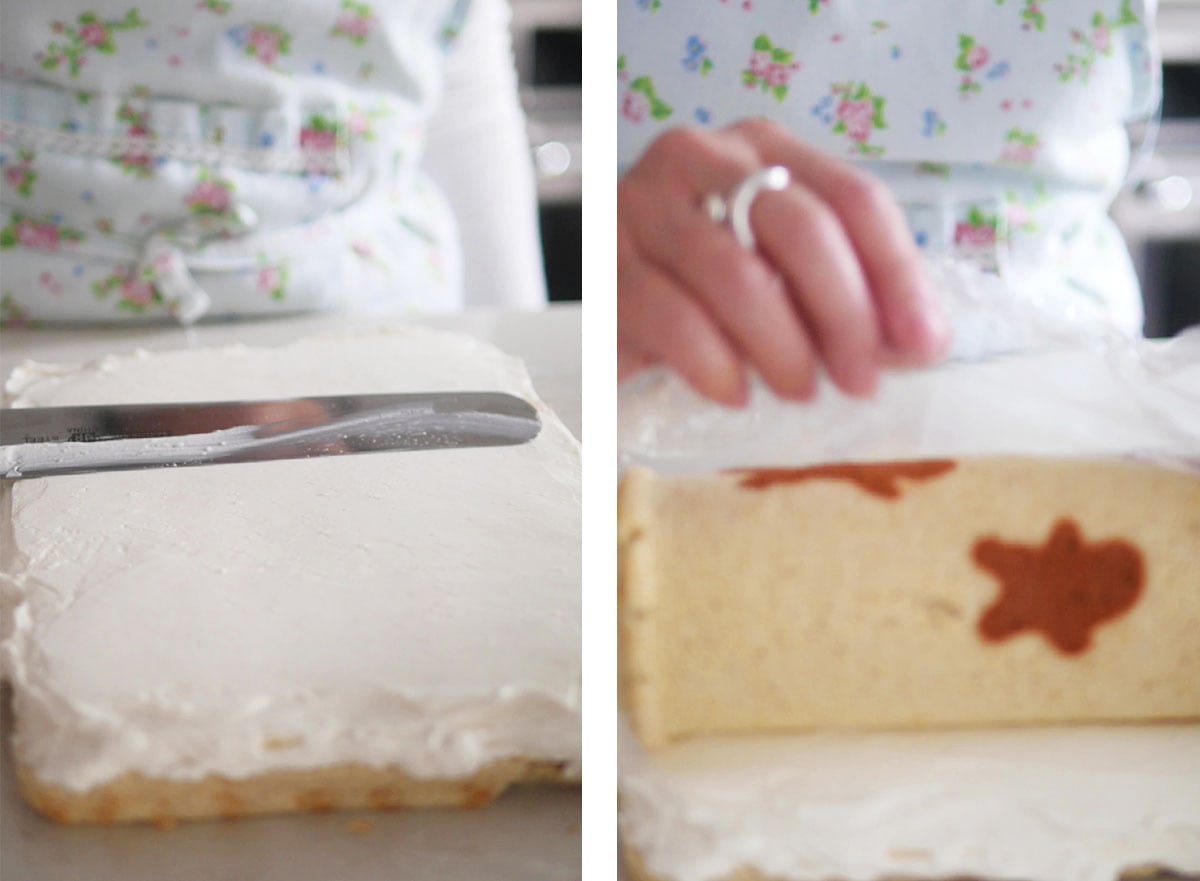
Frost Cake
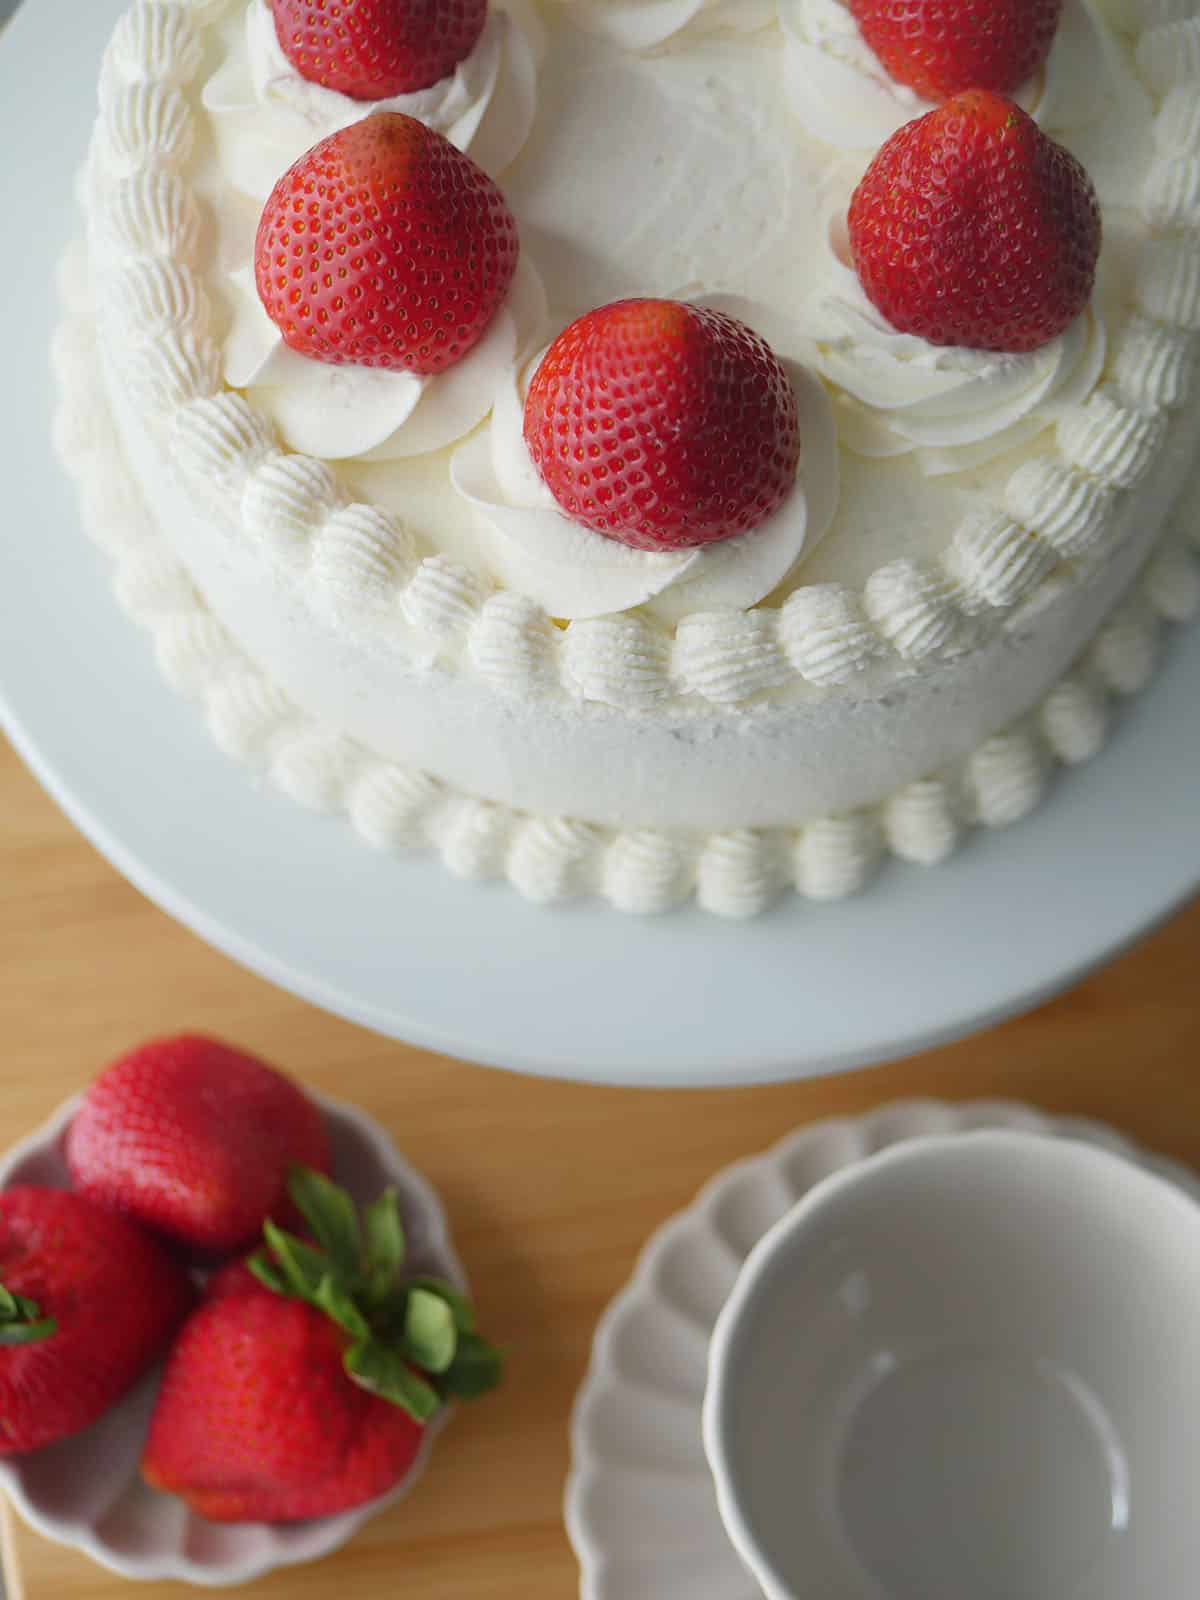
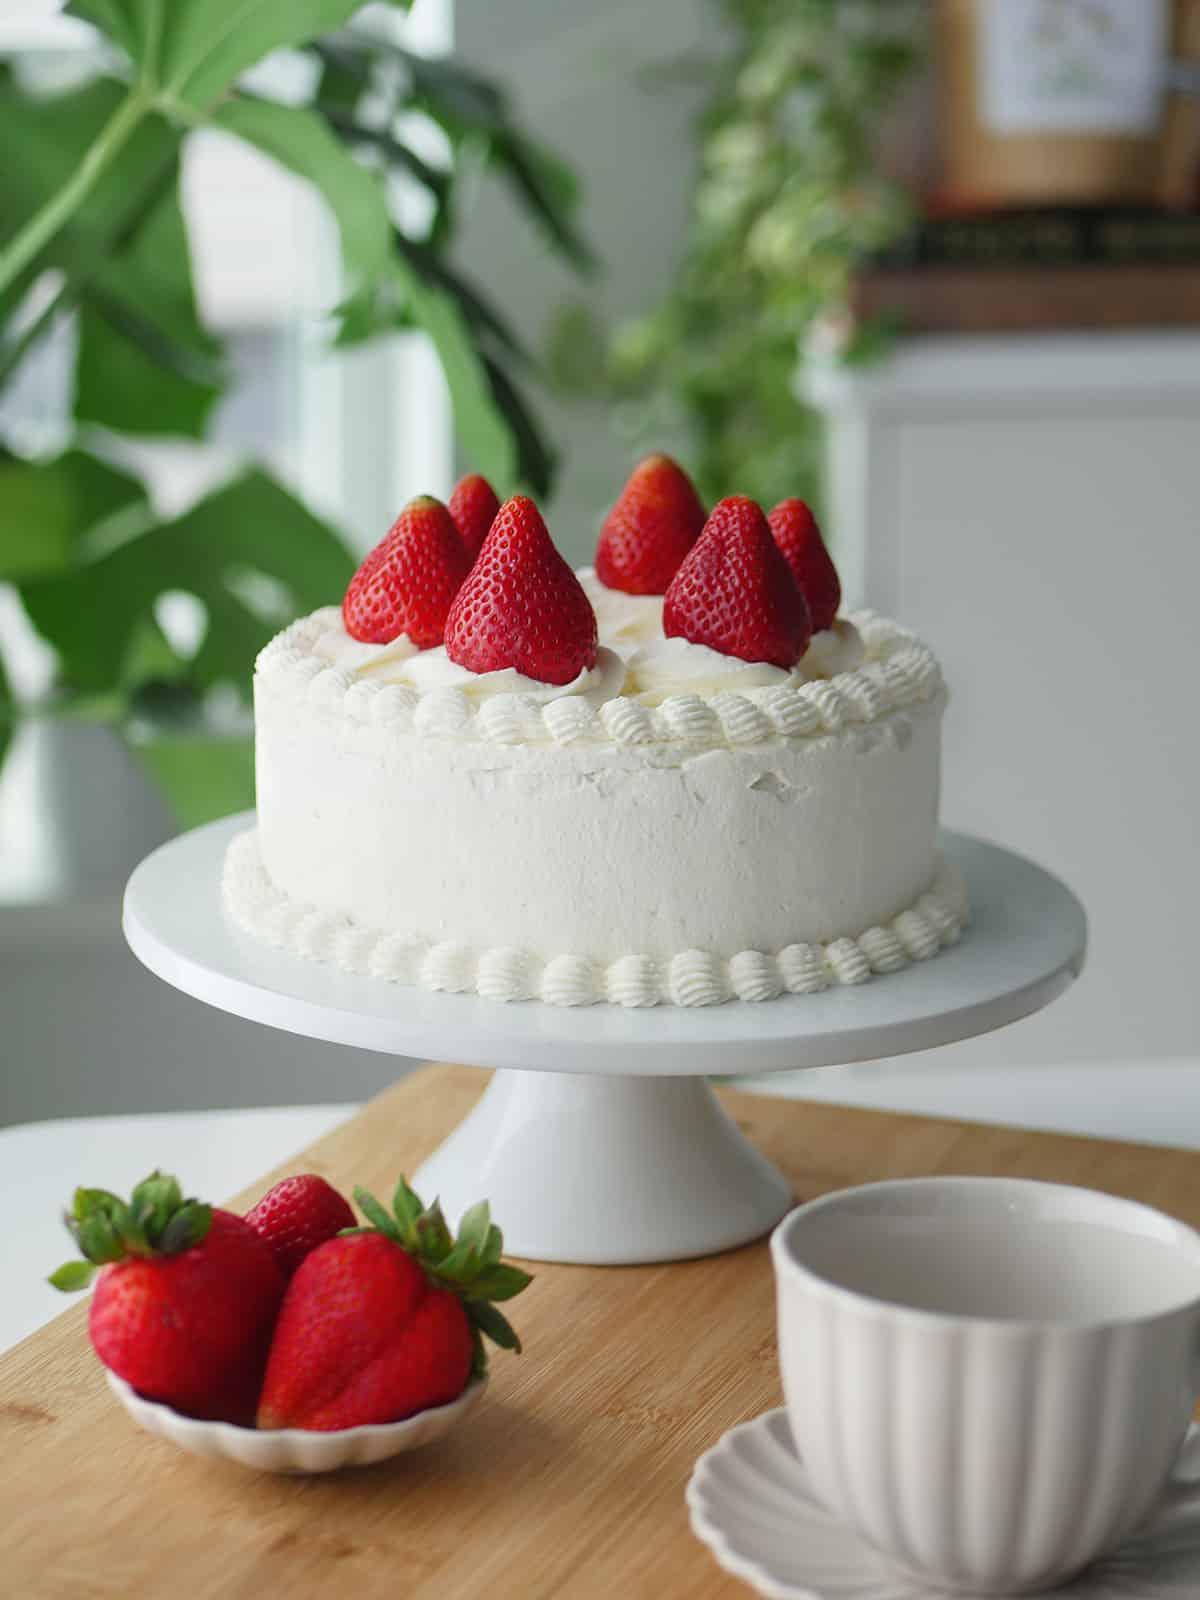
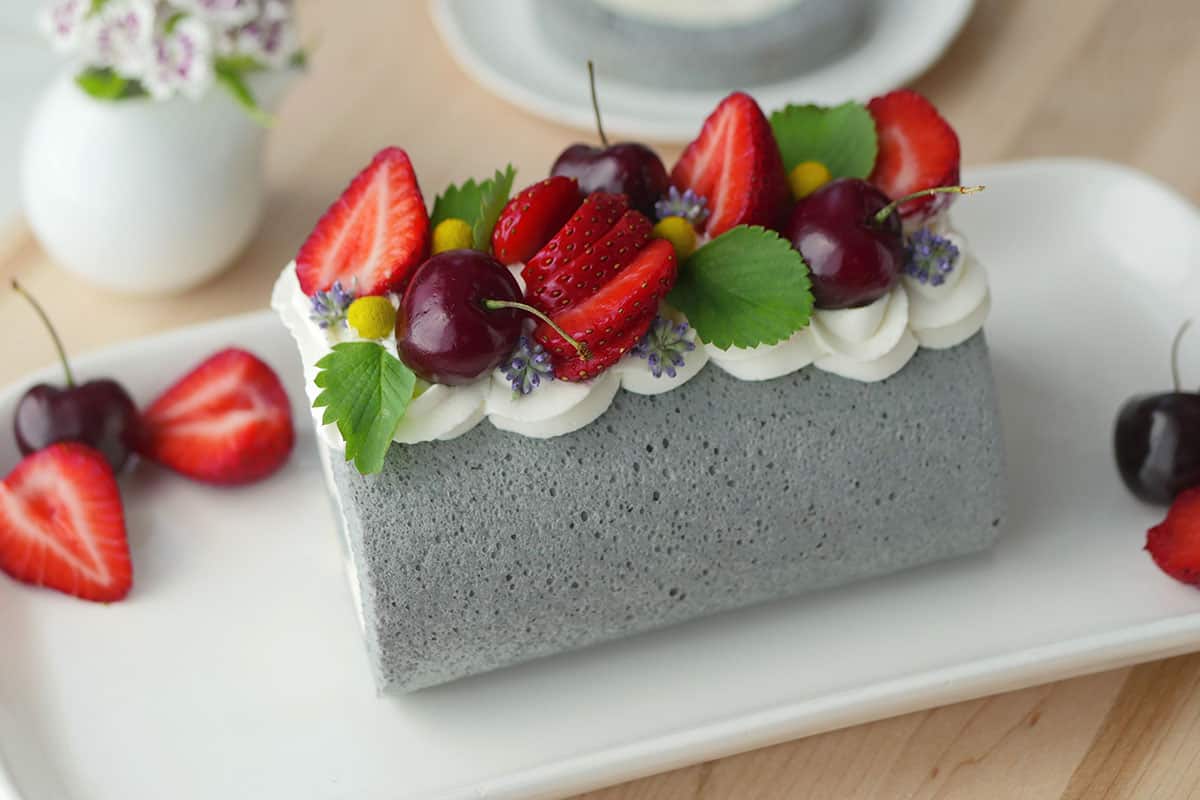
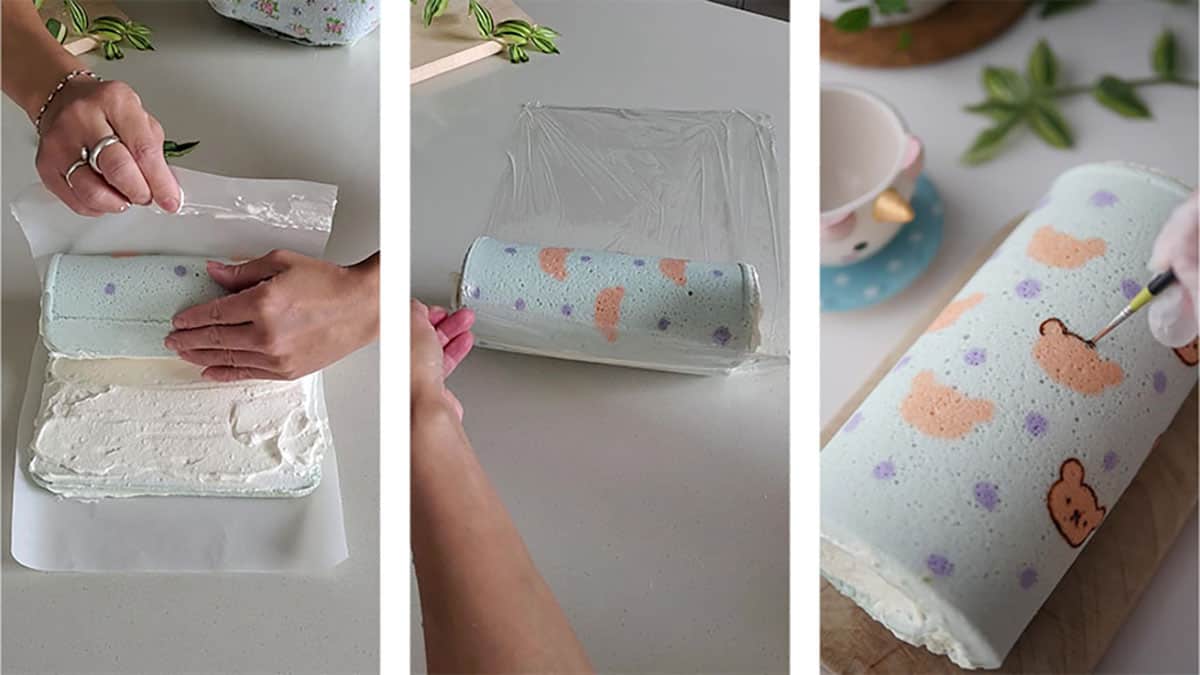
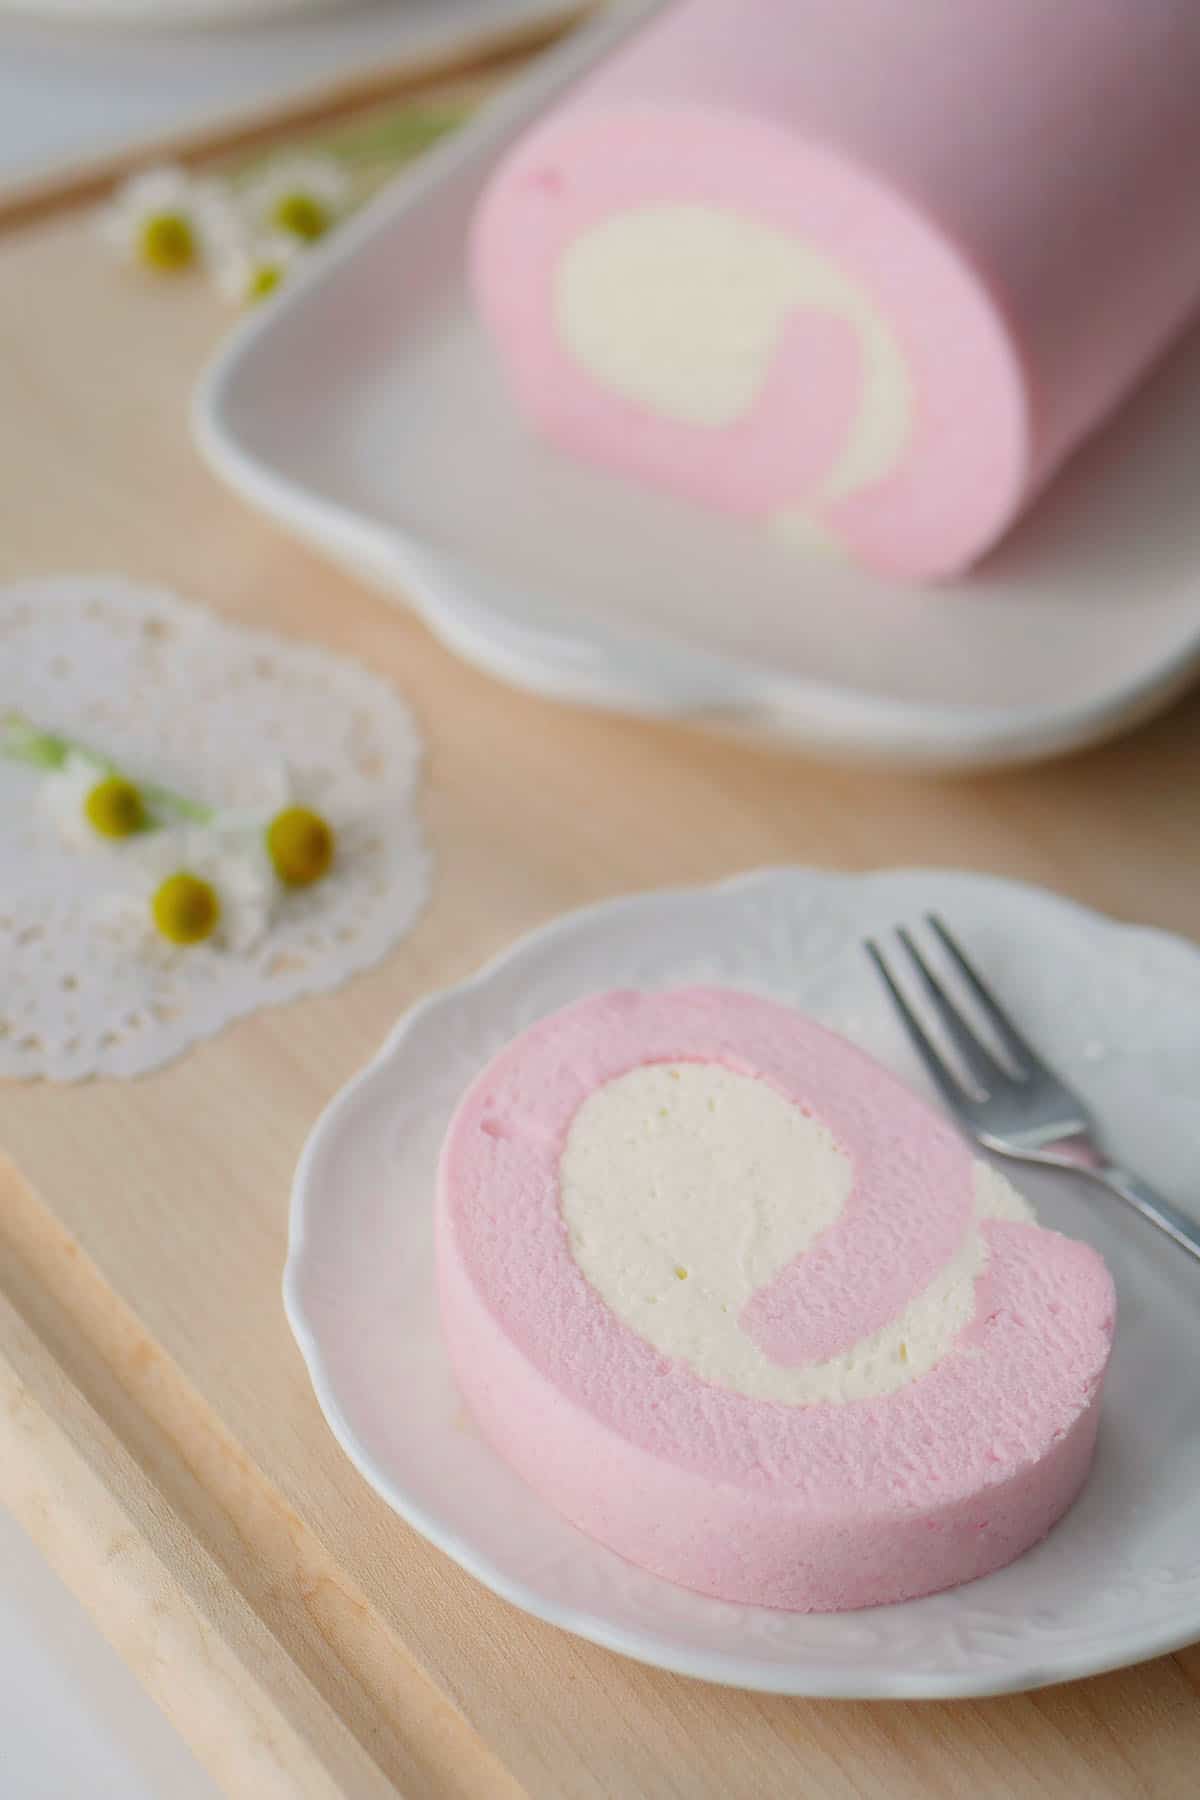
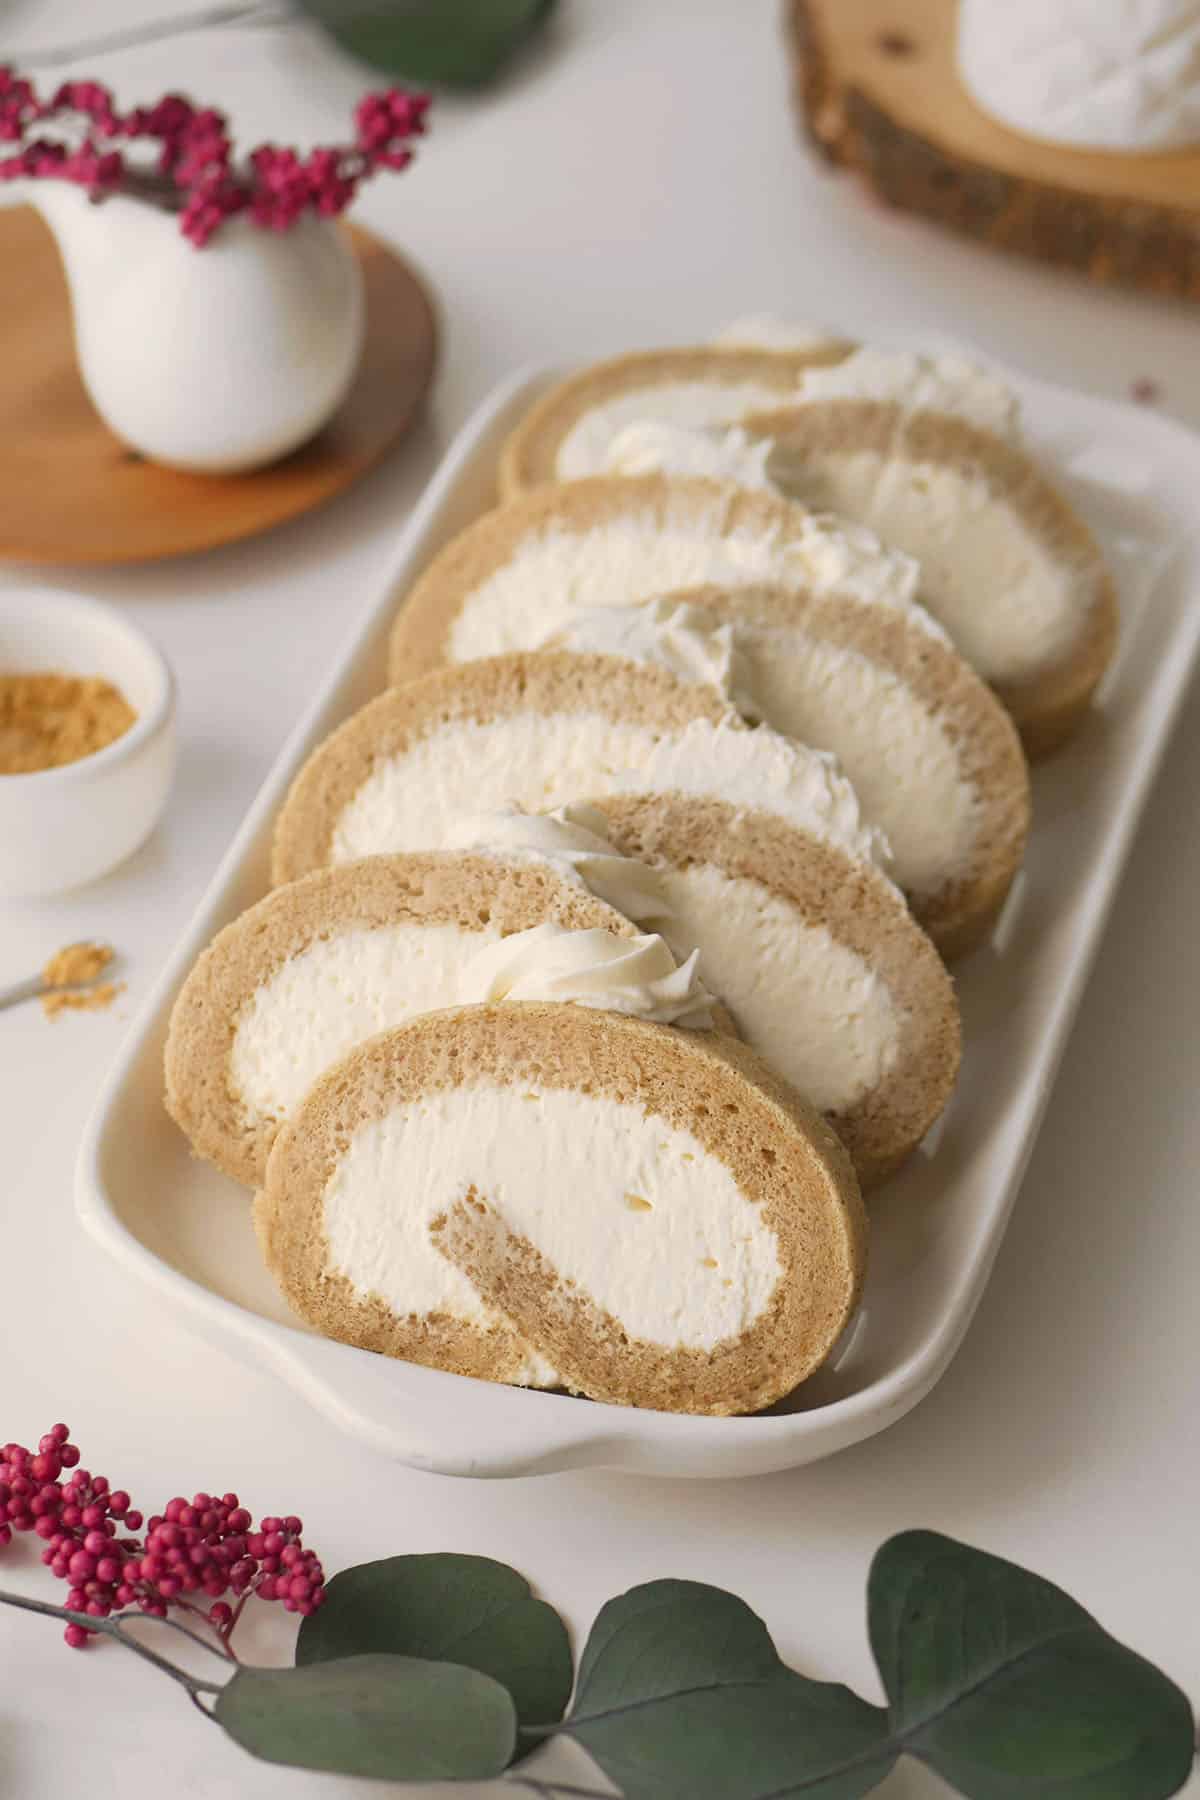
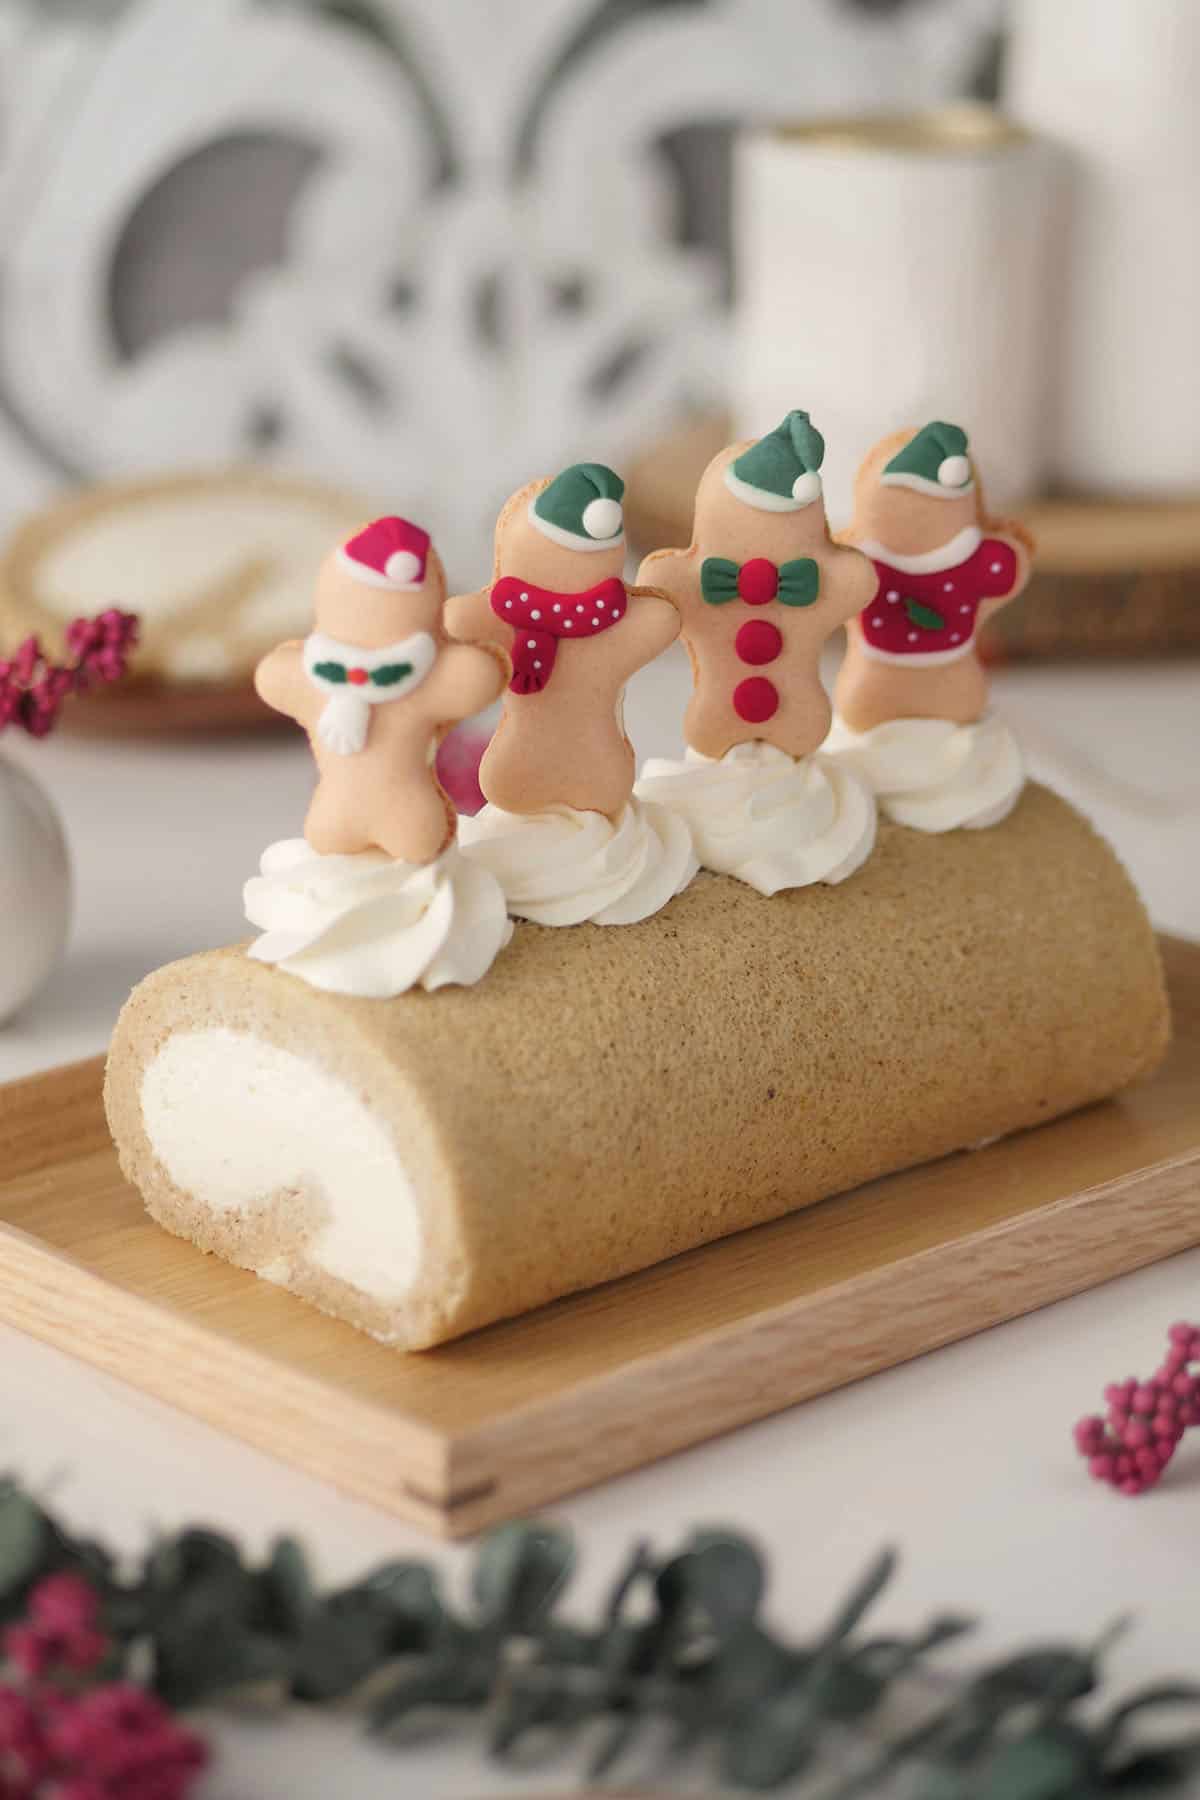
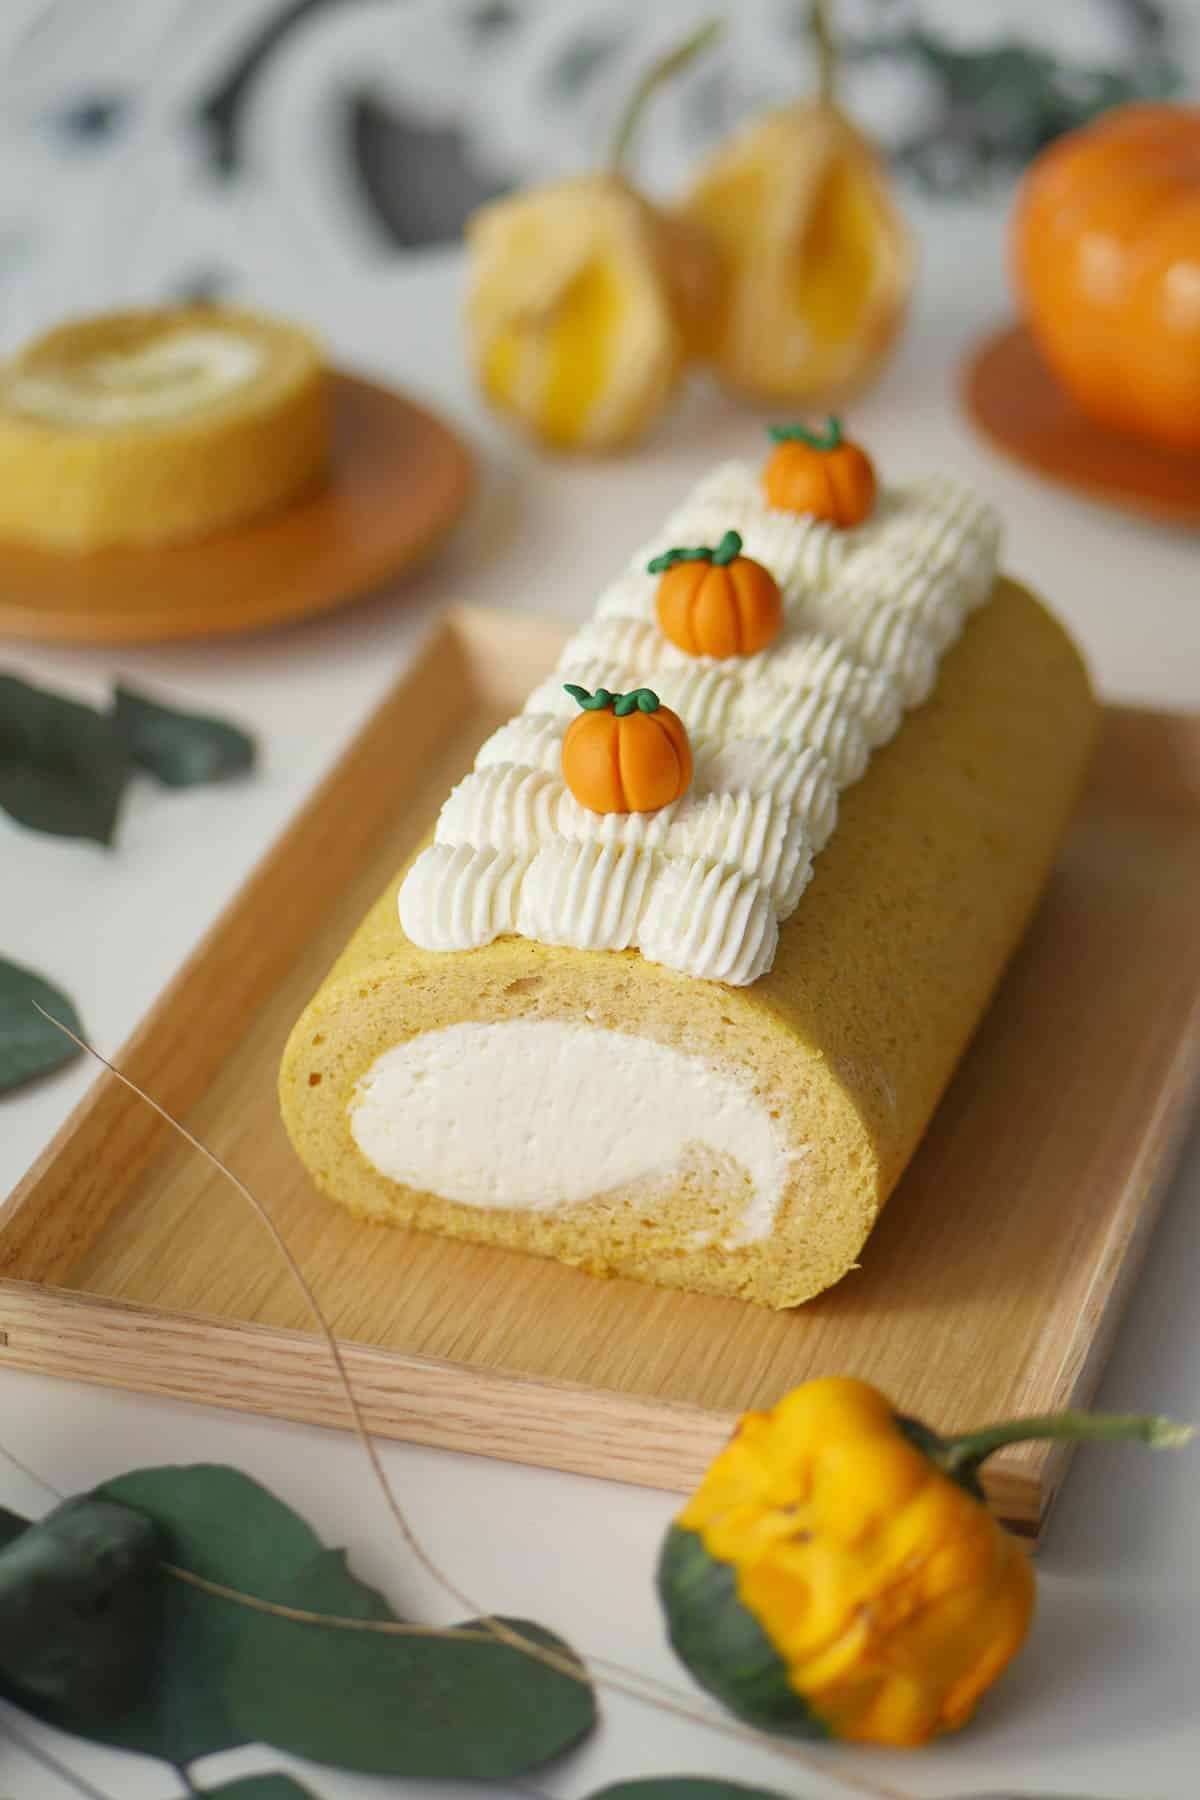
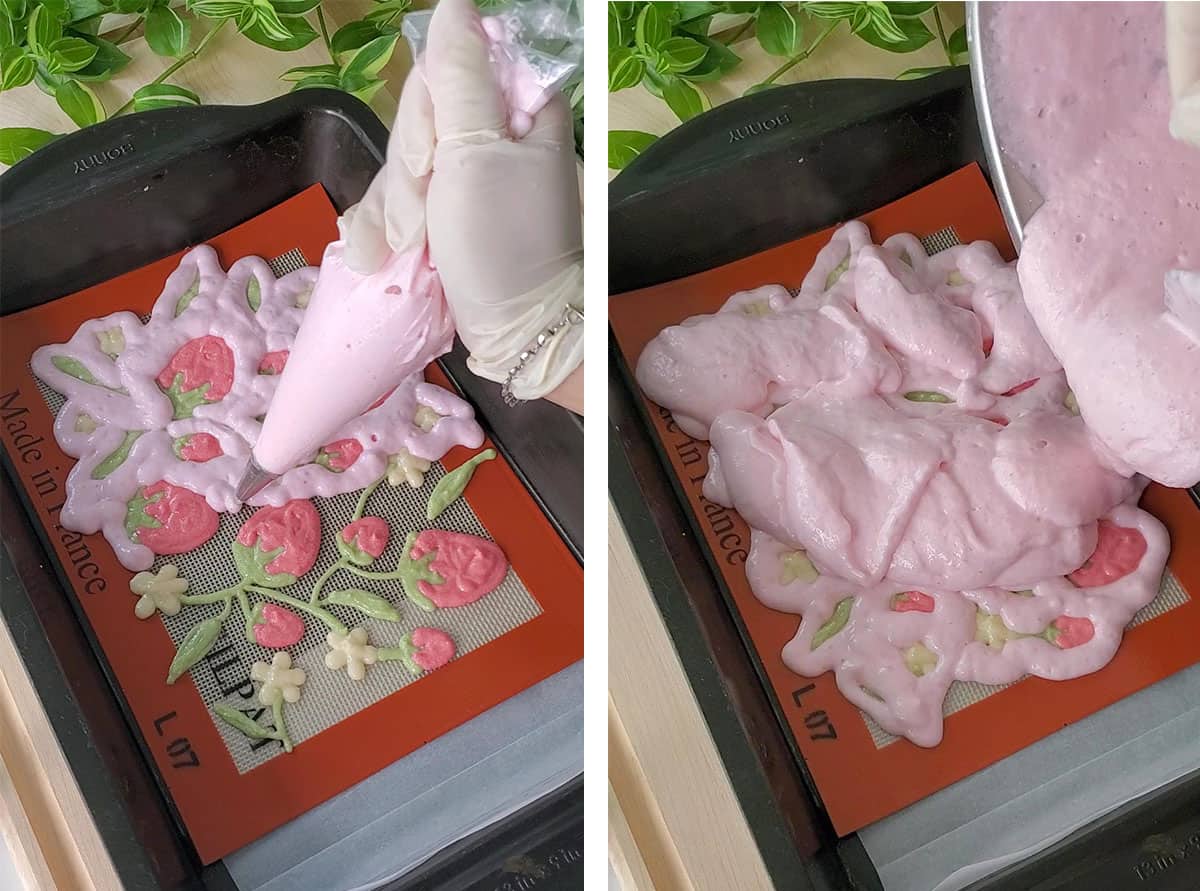
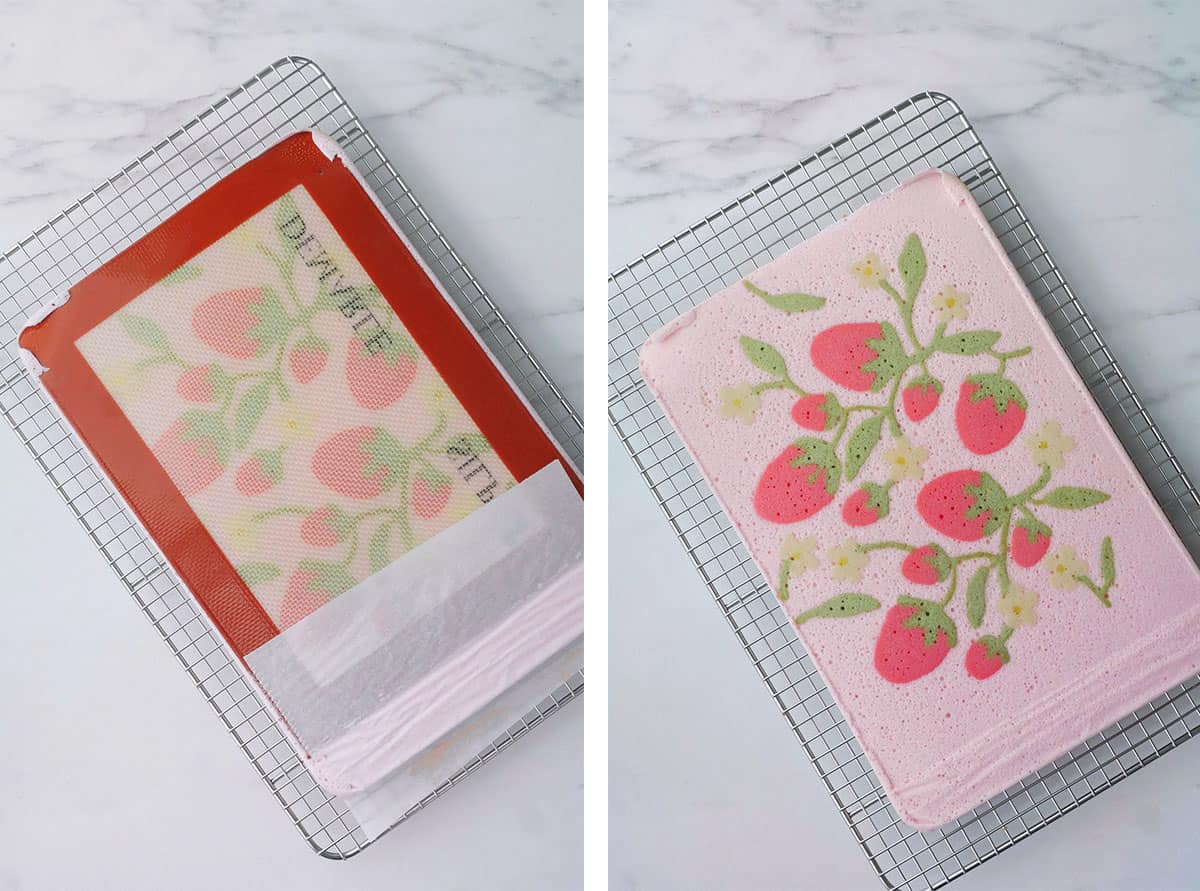
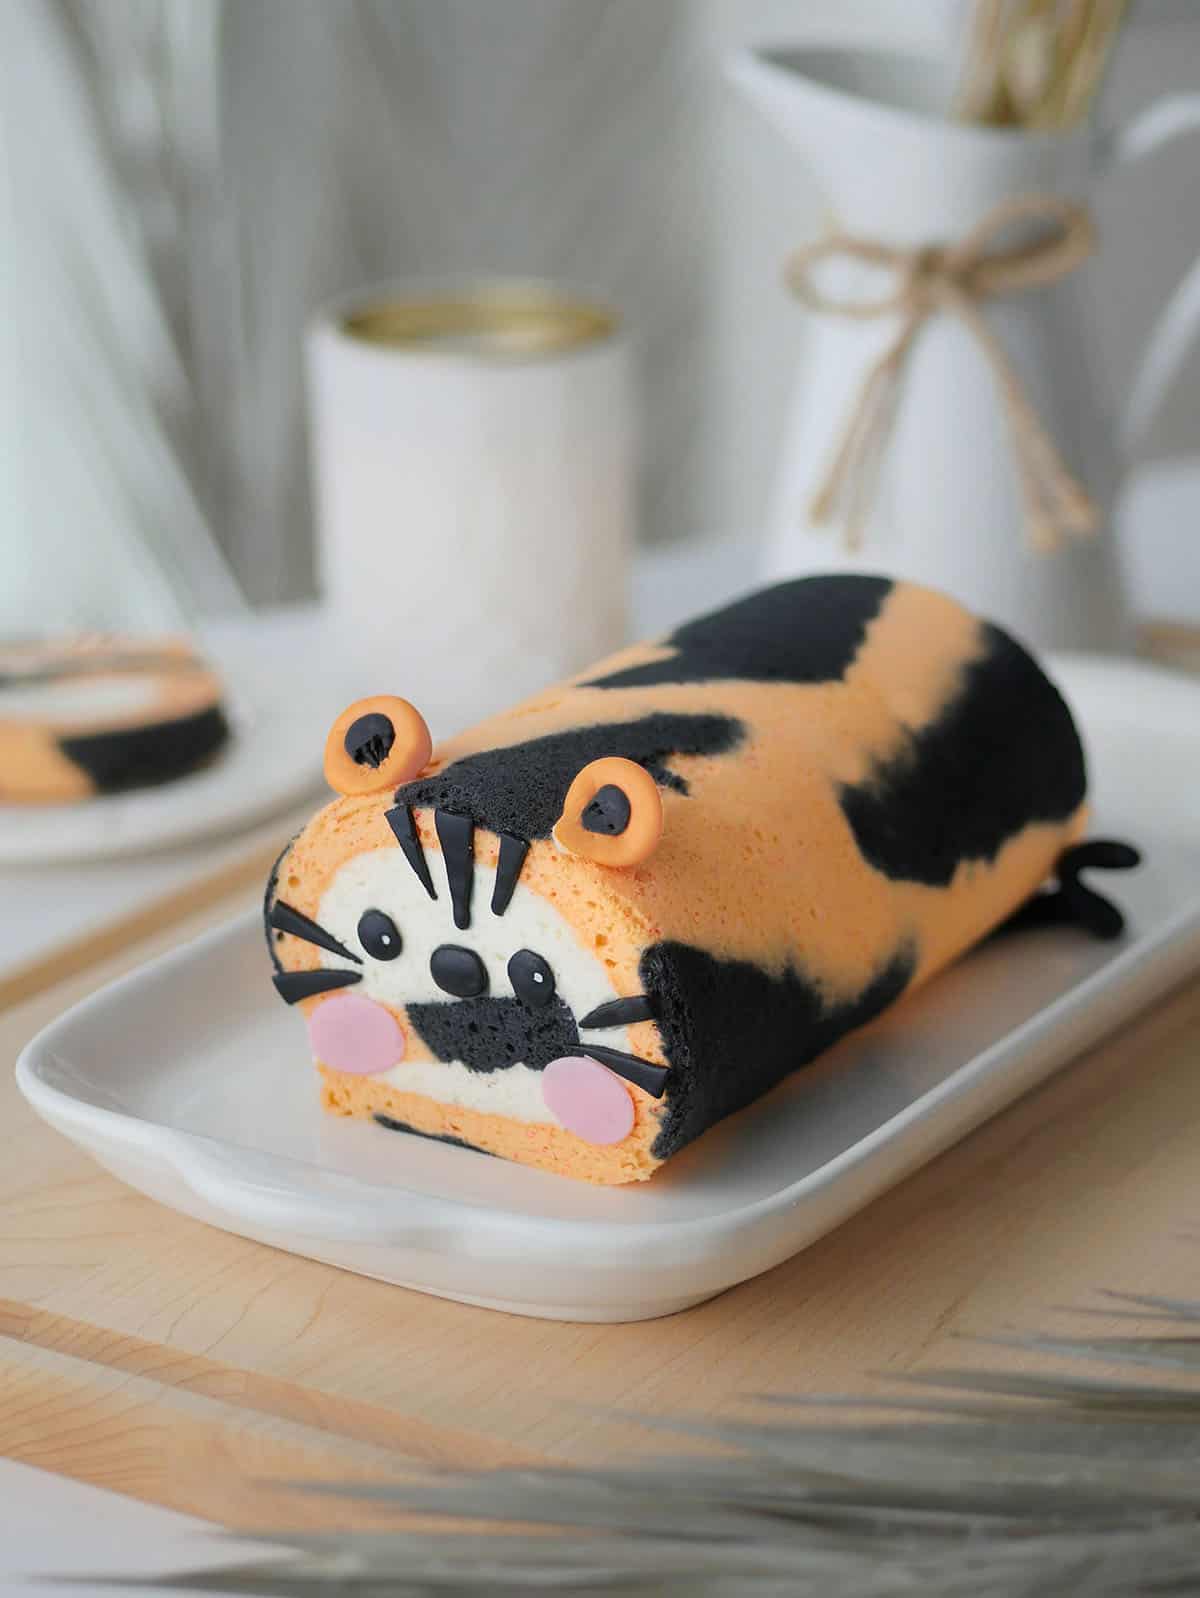
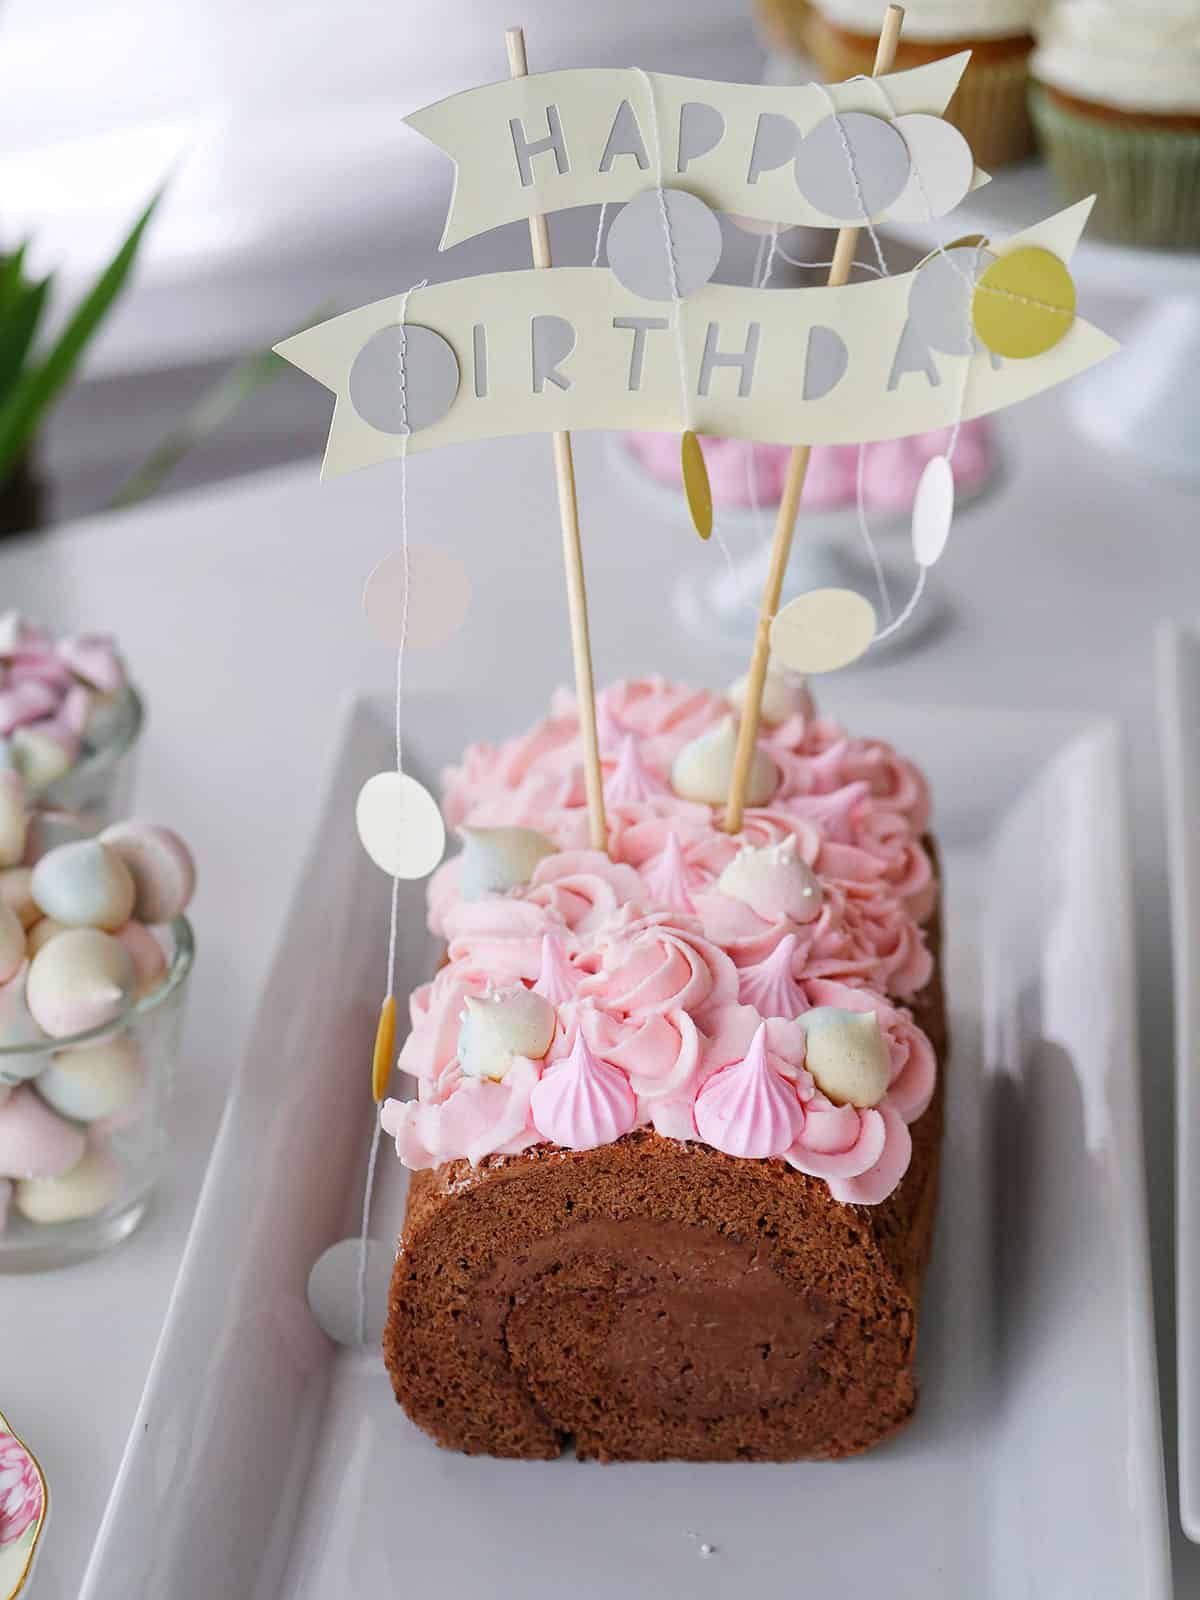
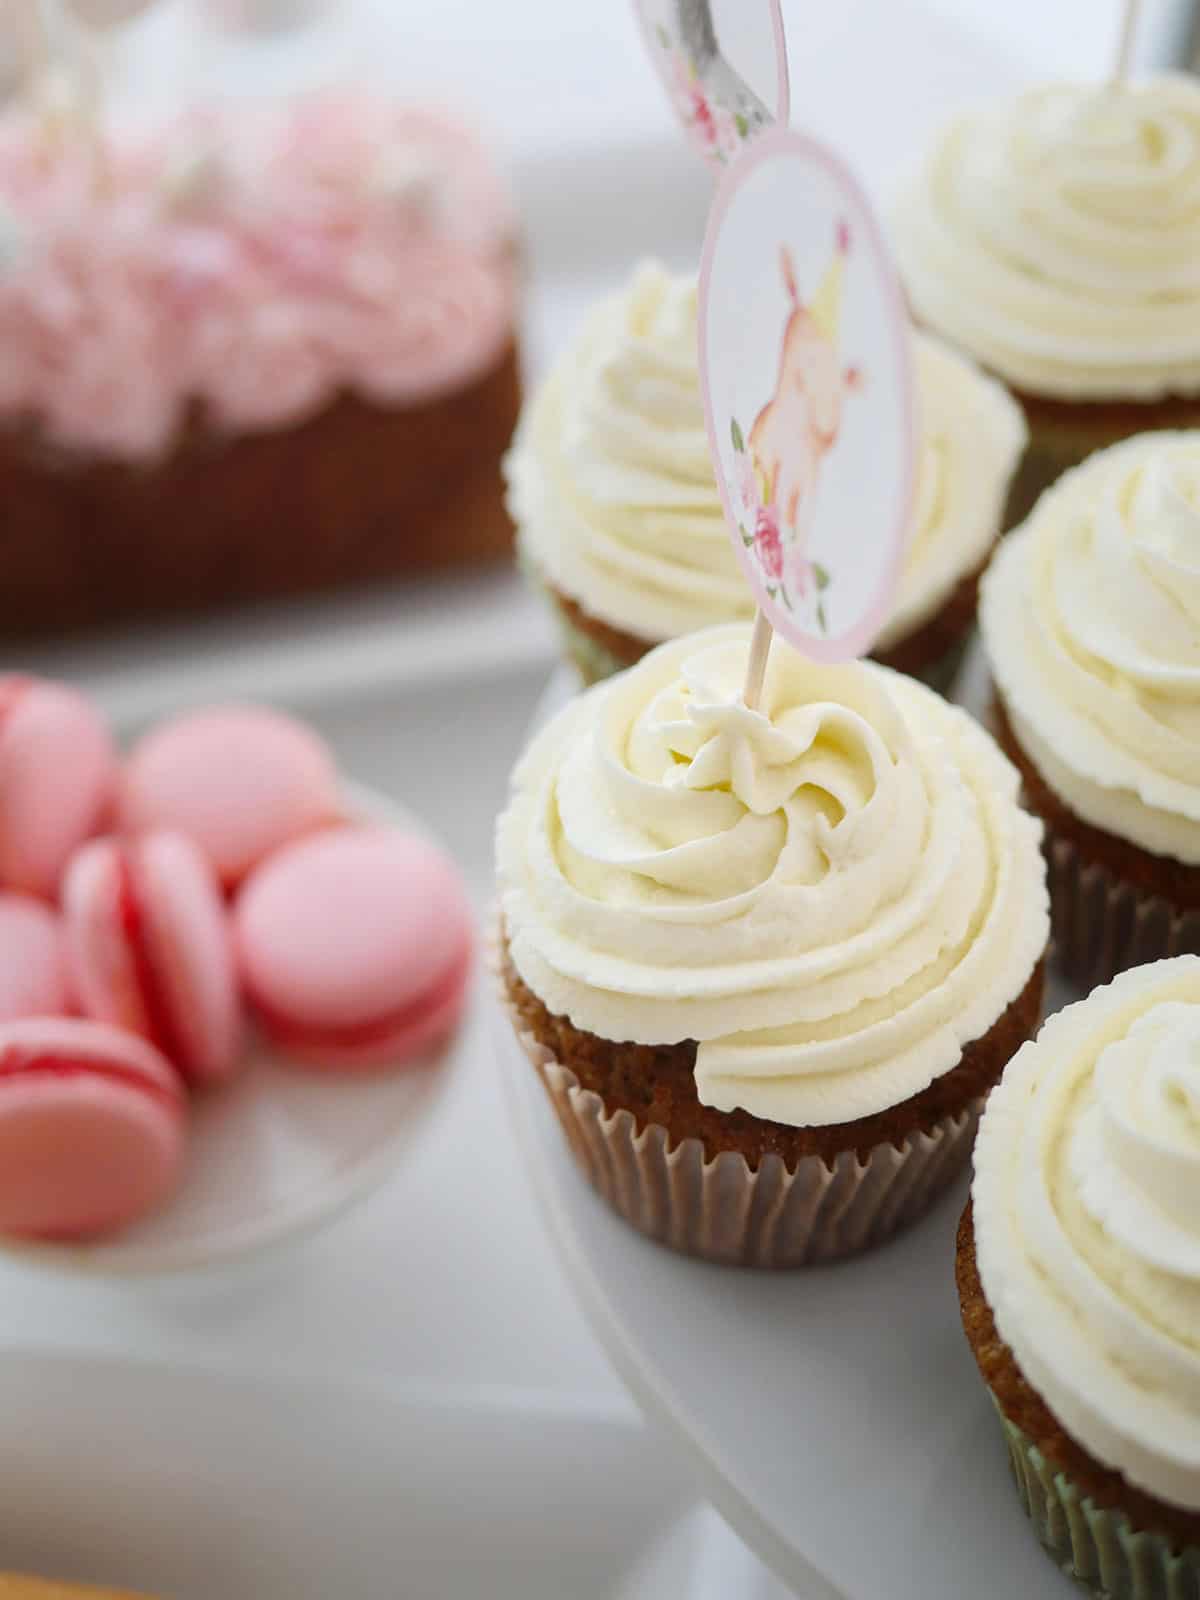
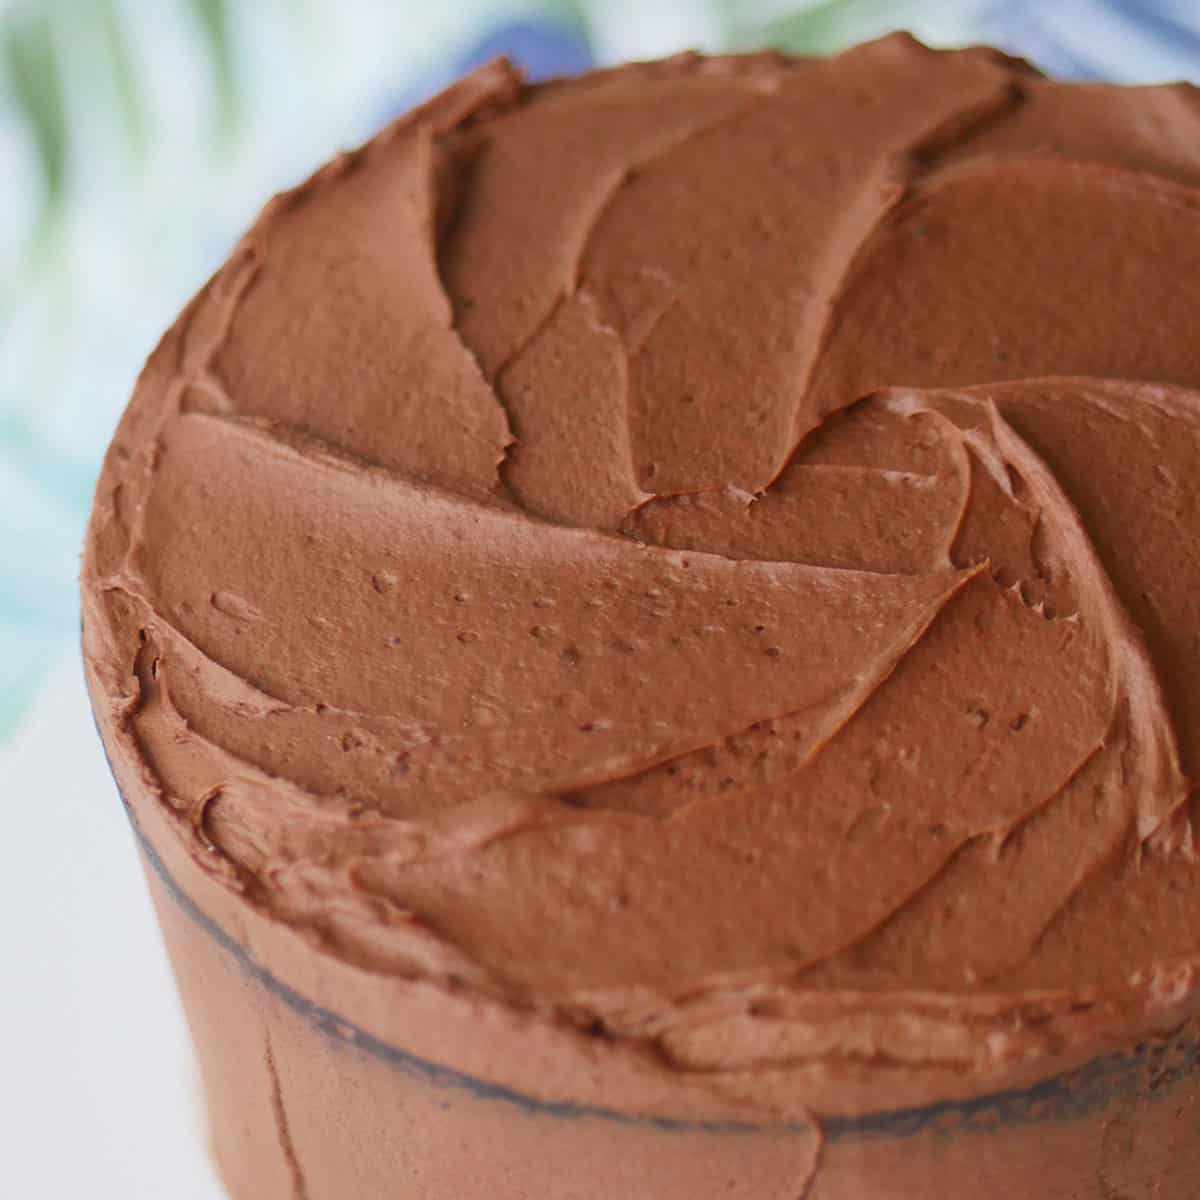
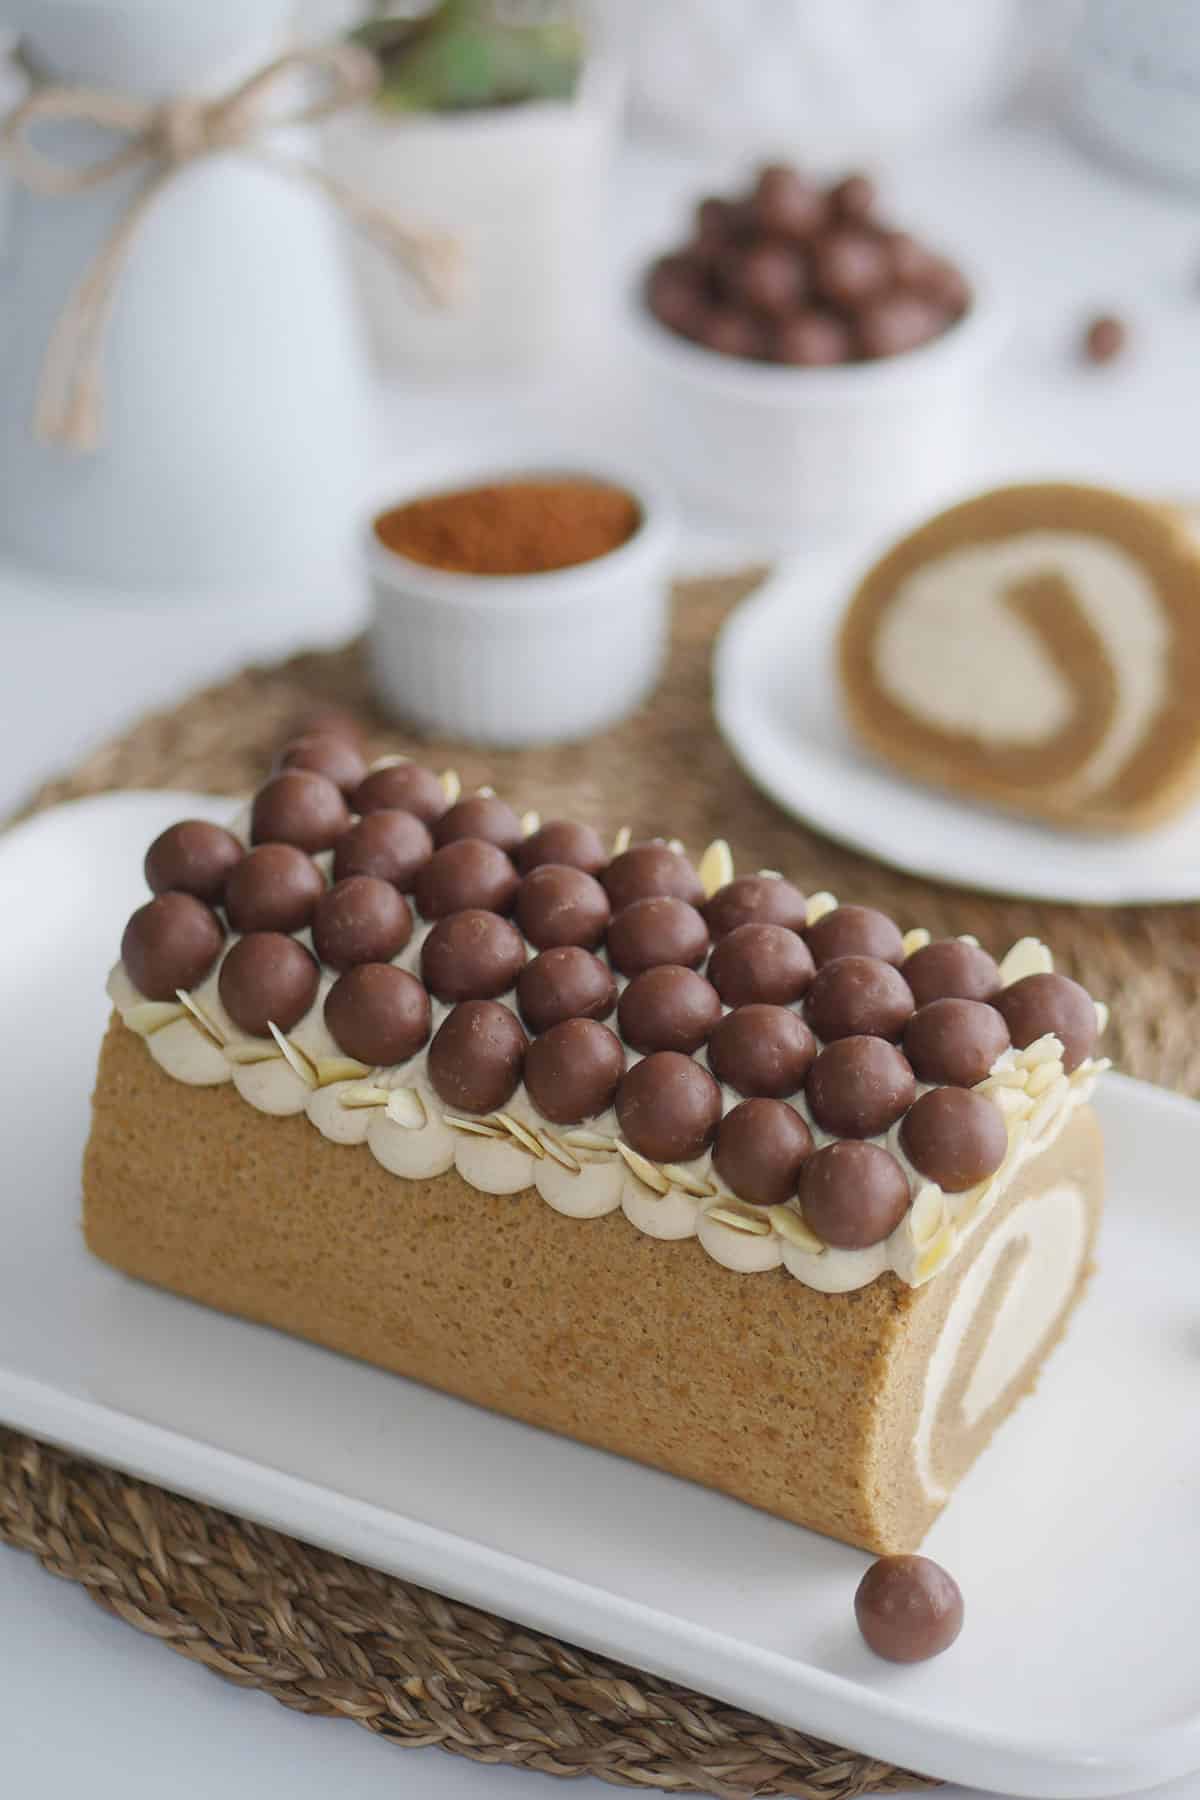
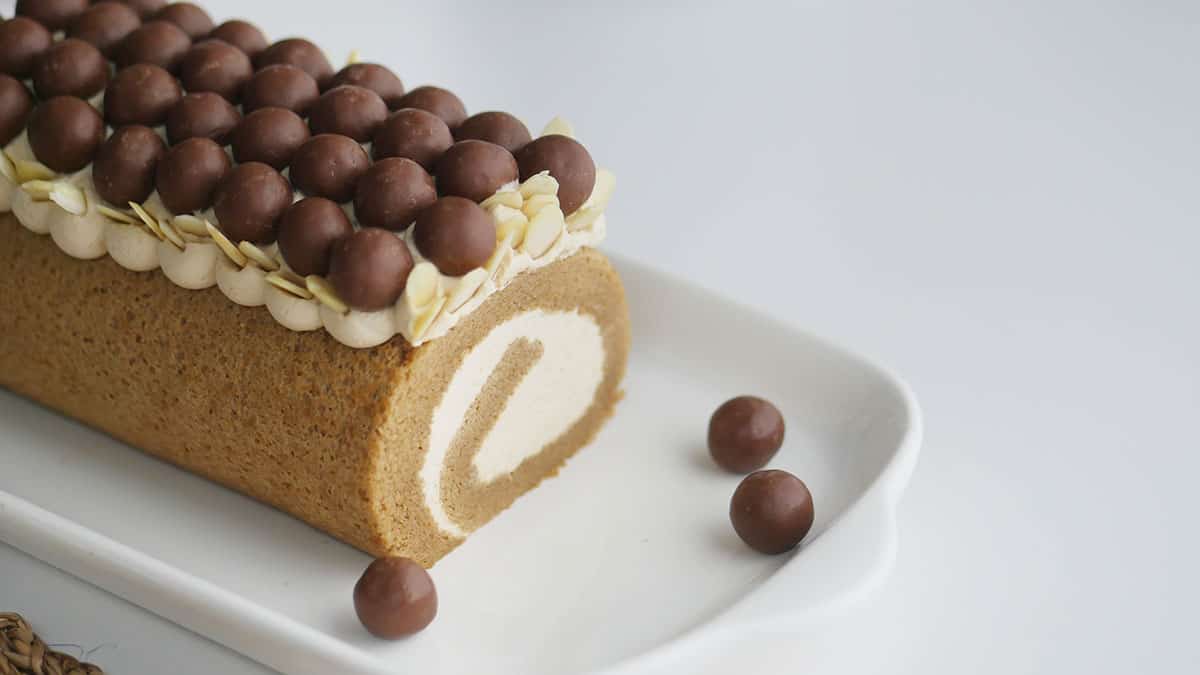
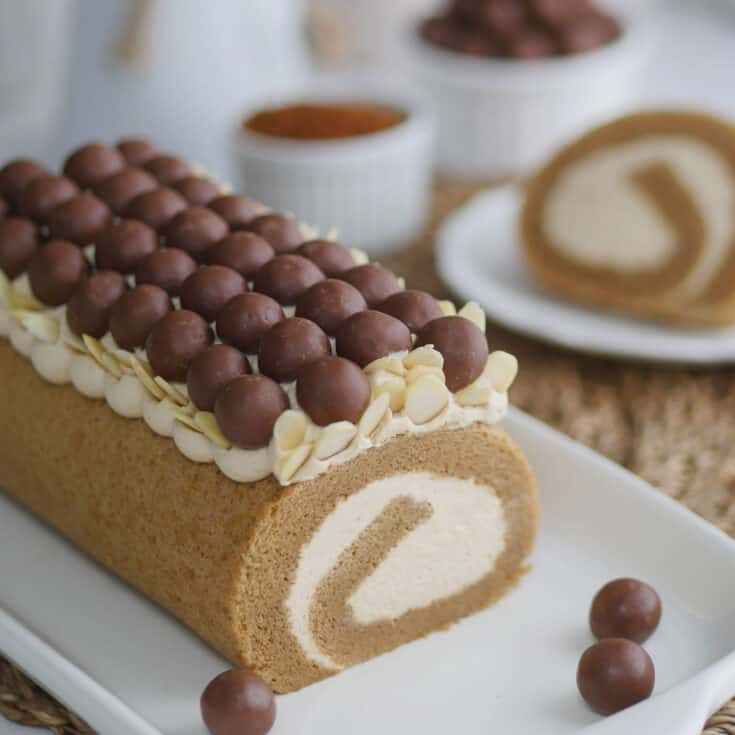
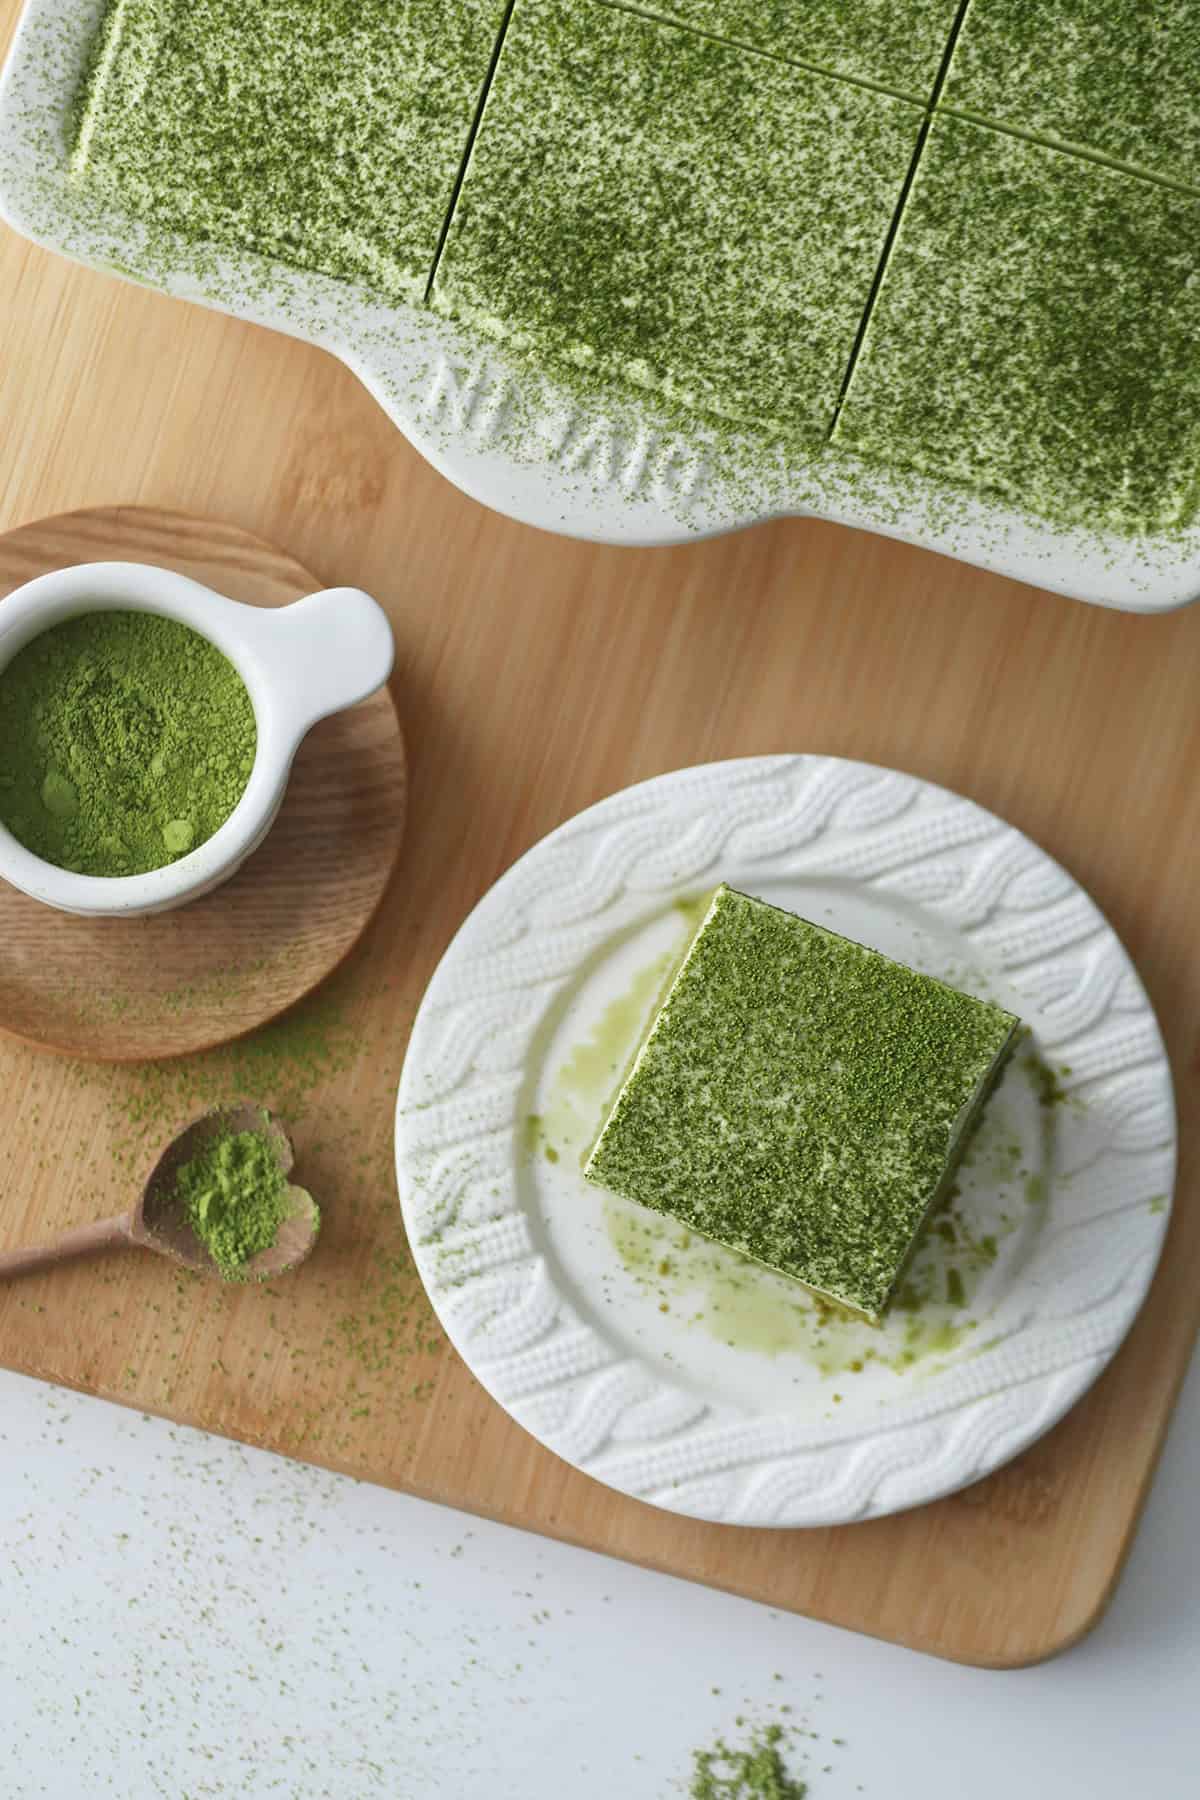
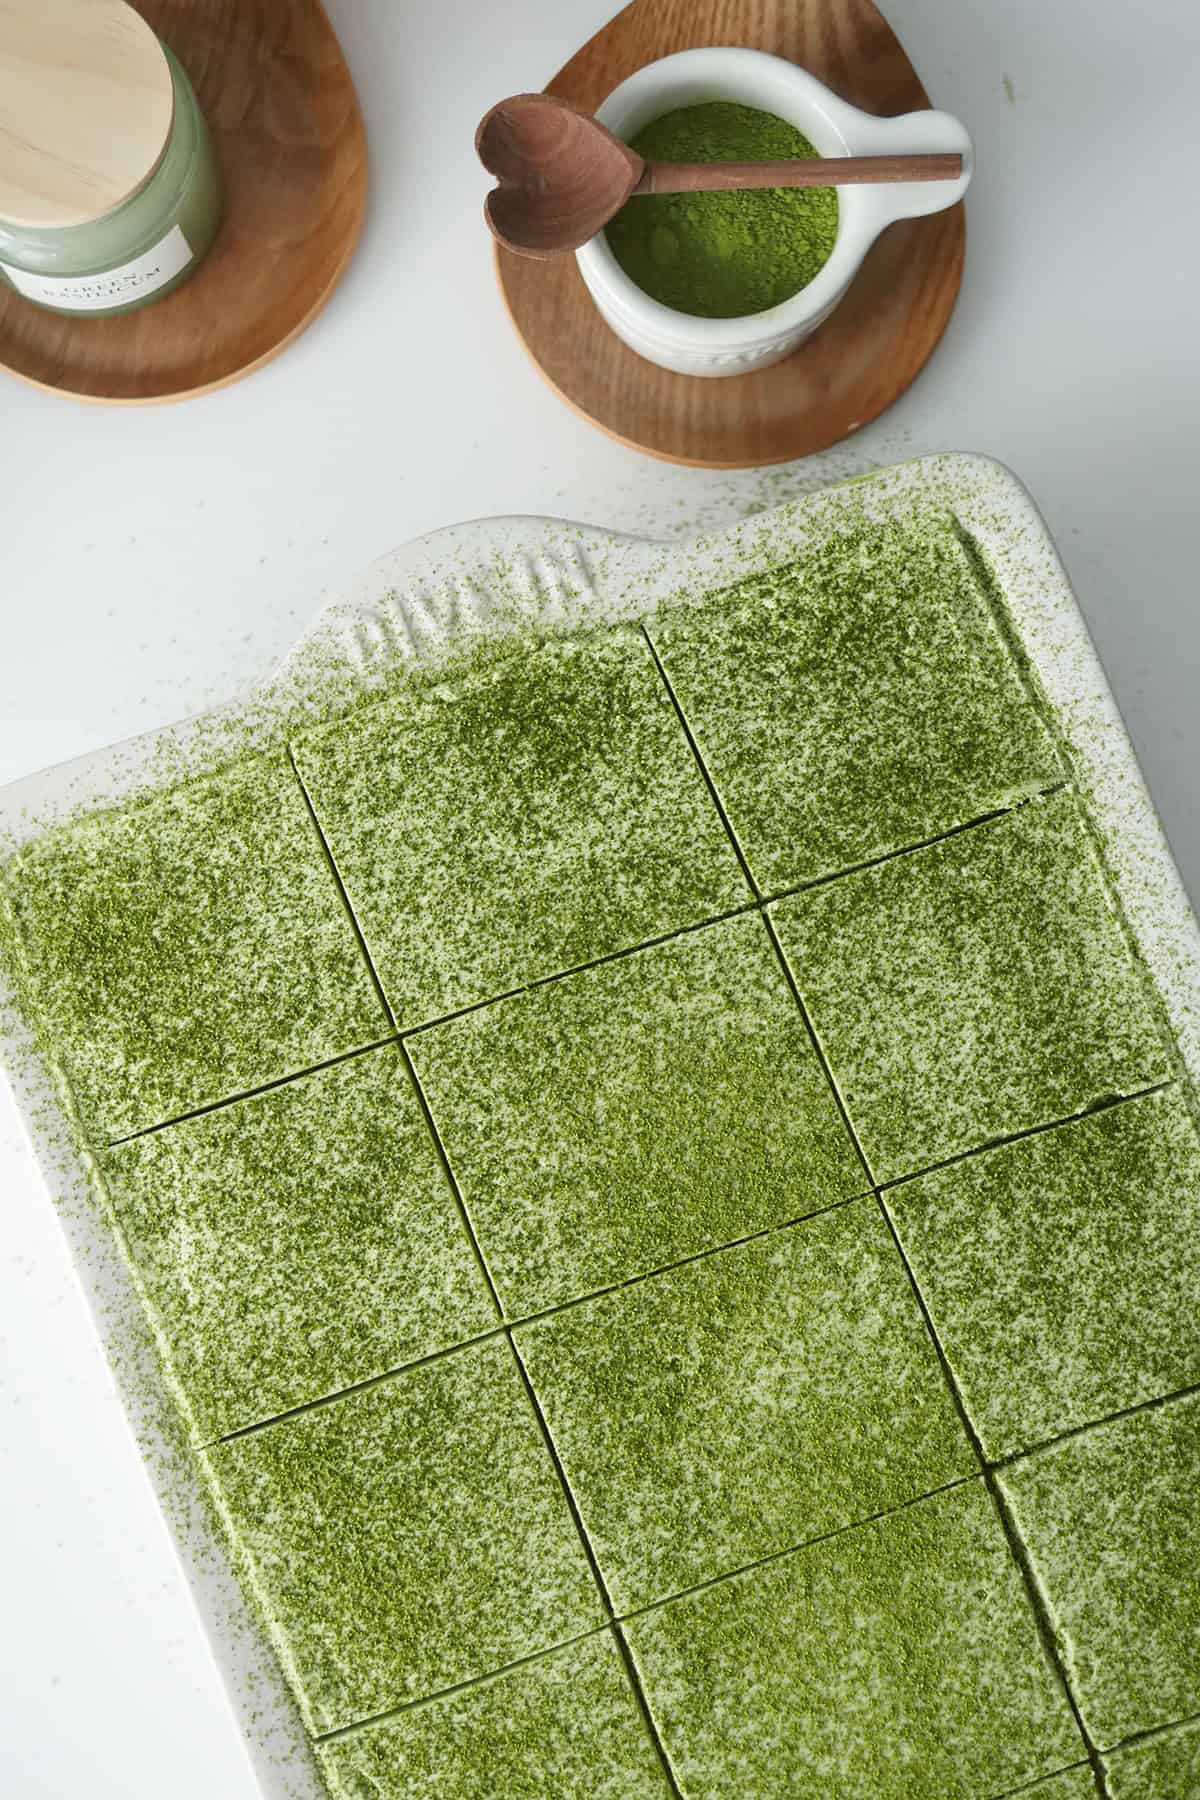
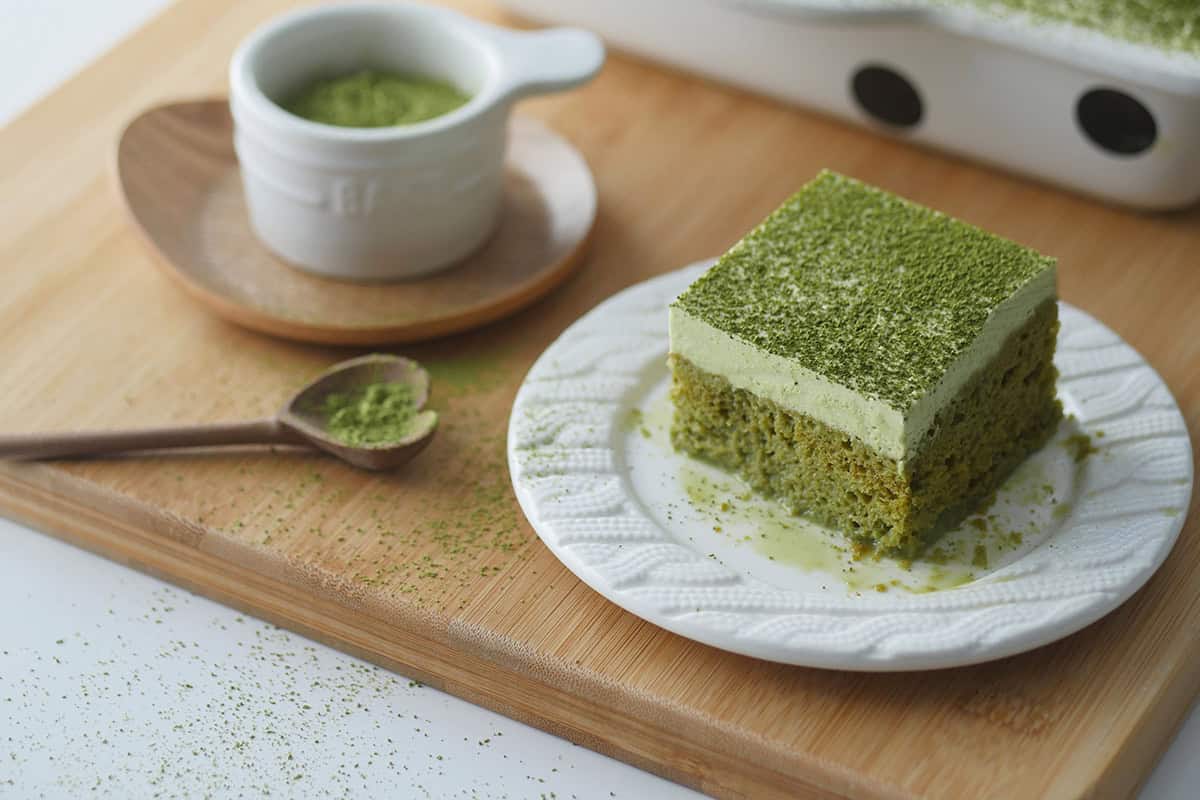
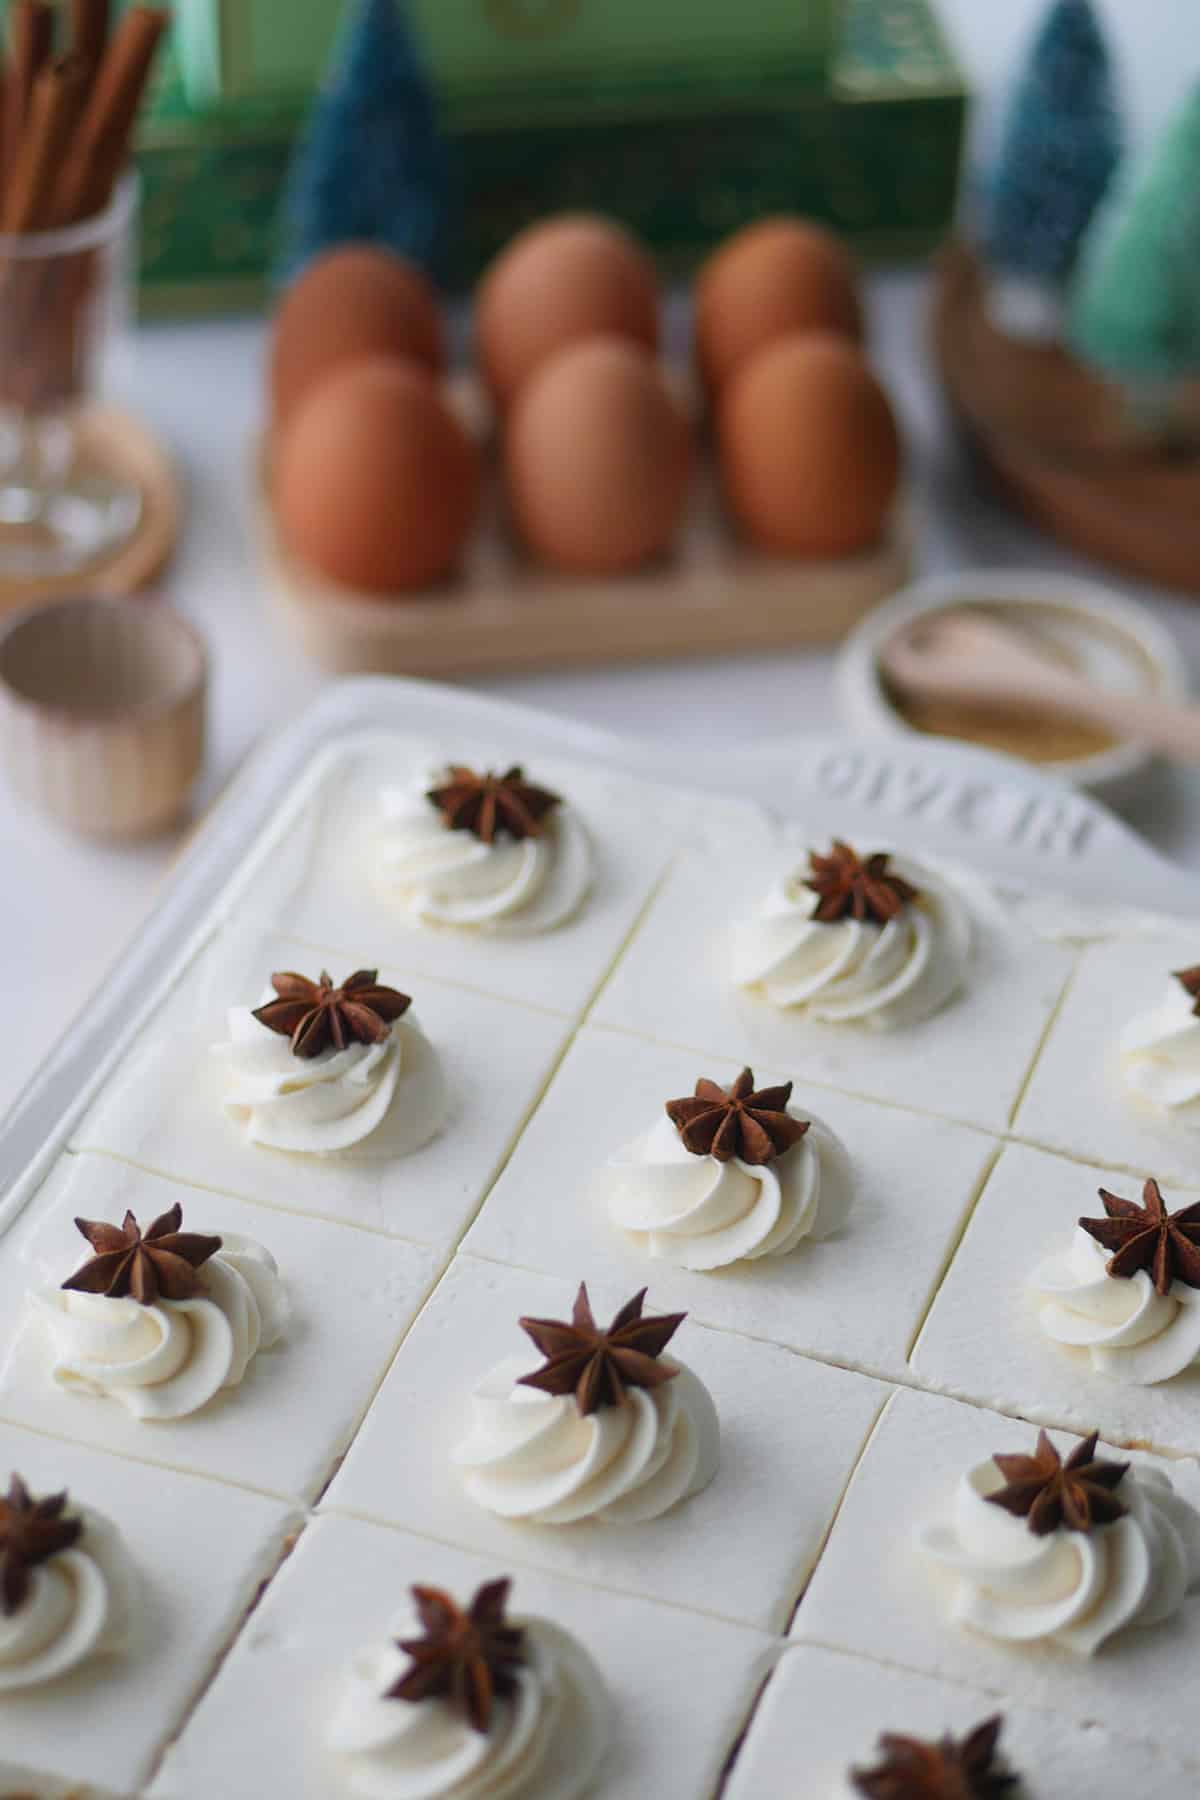
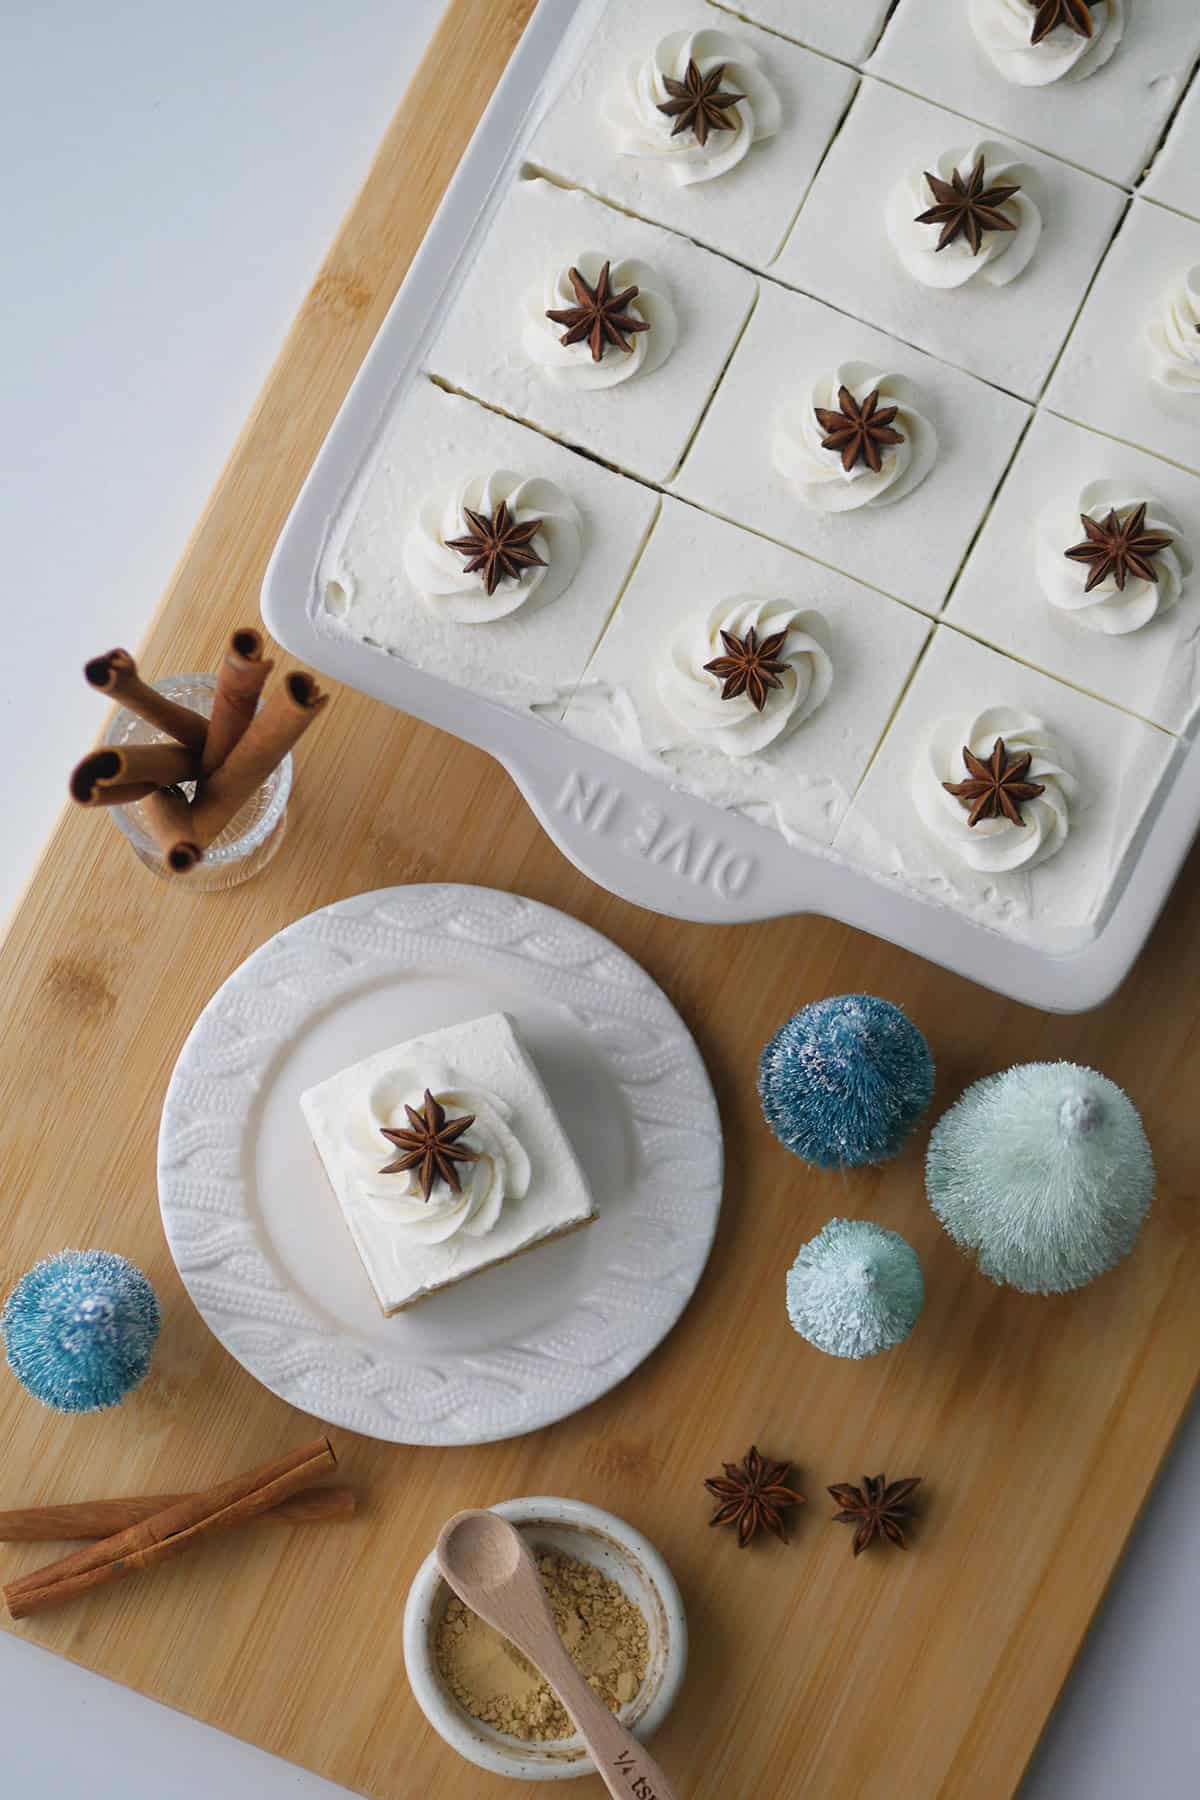
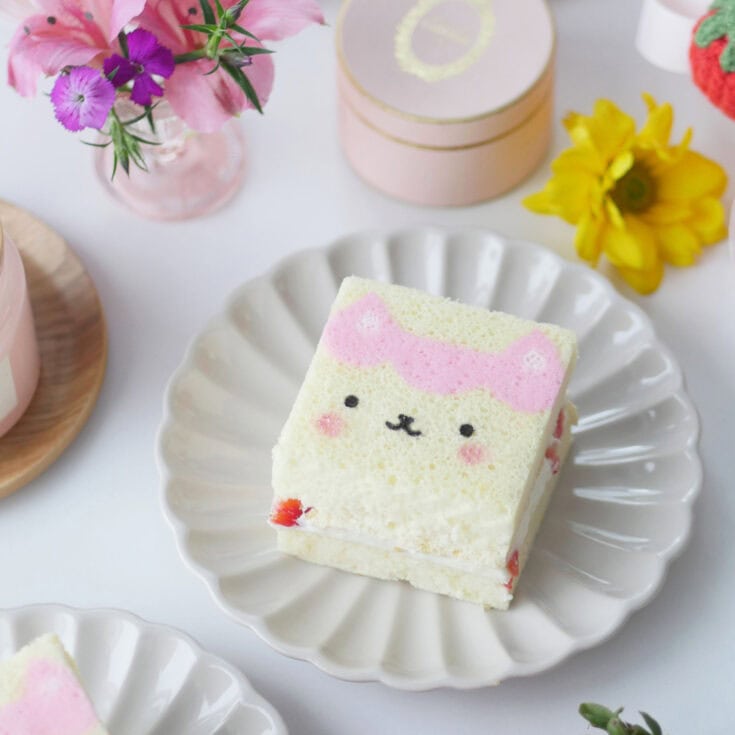
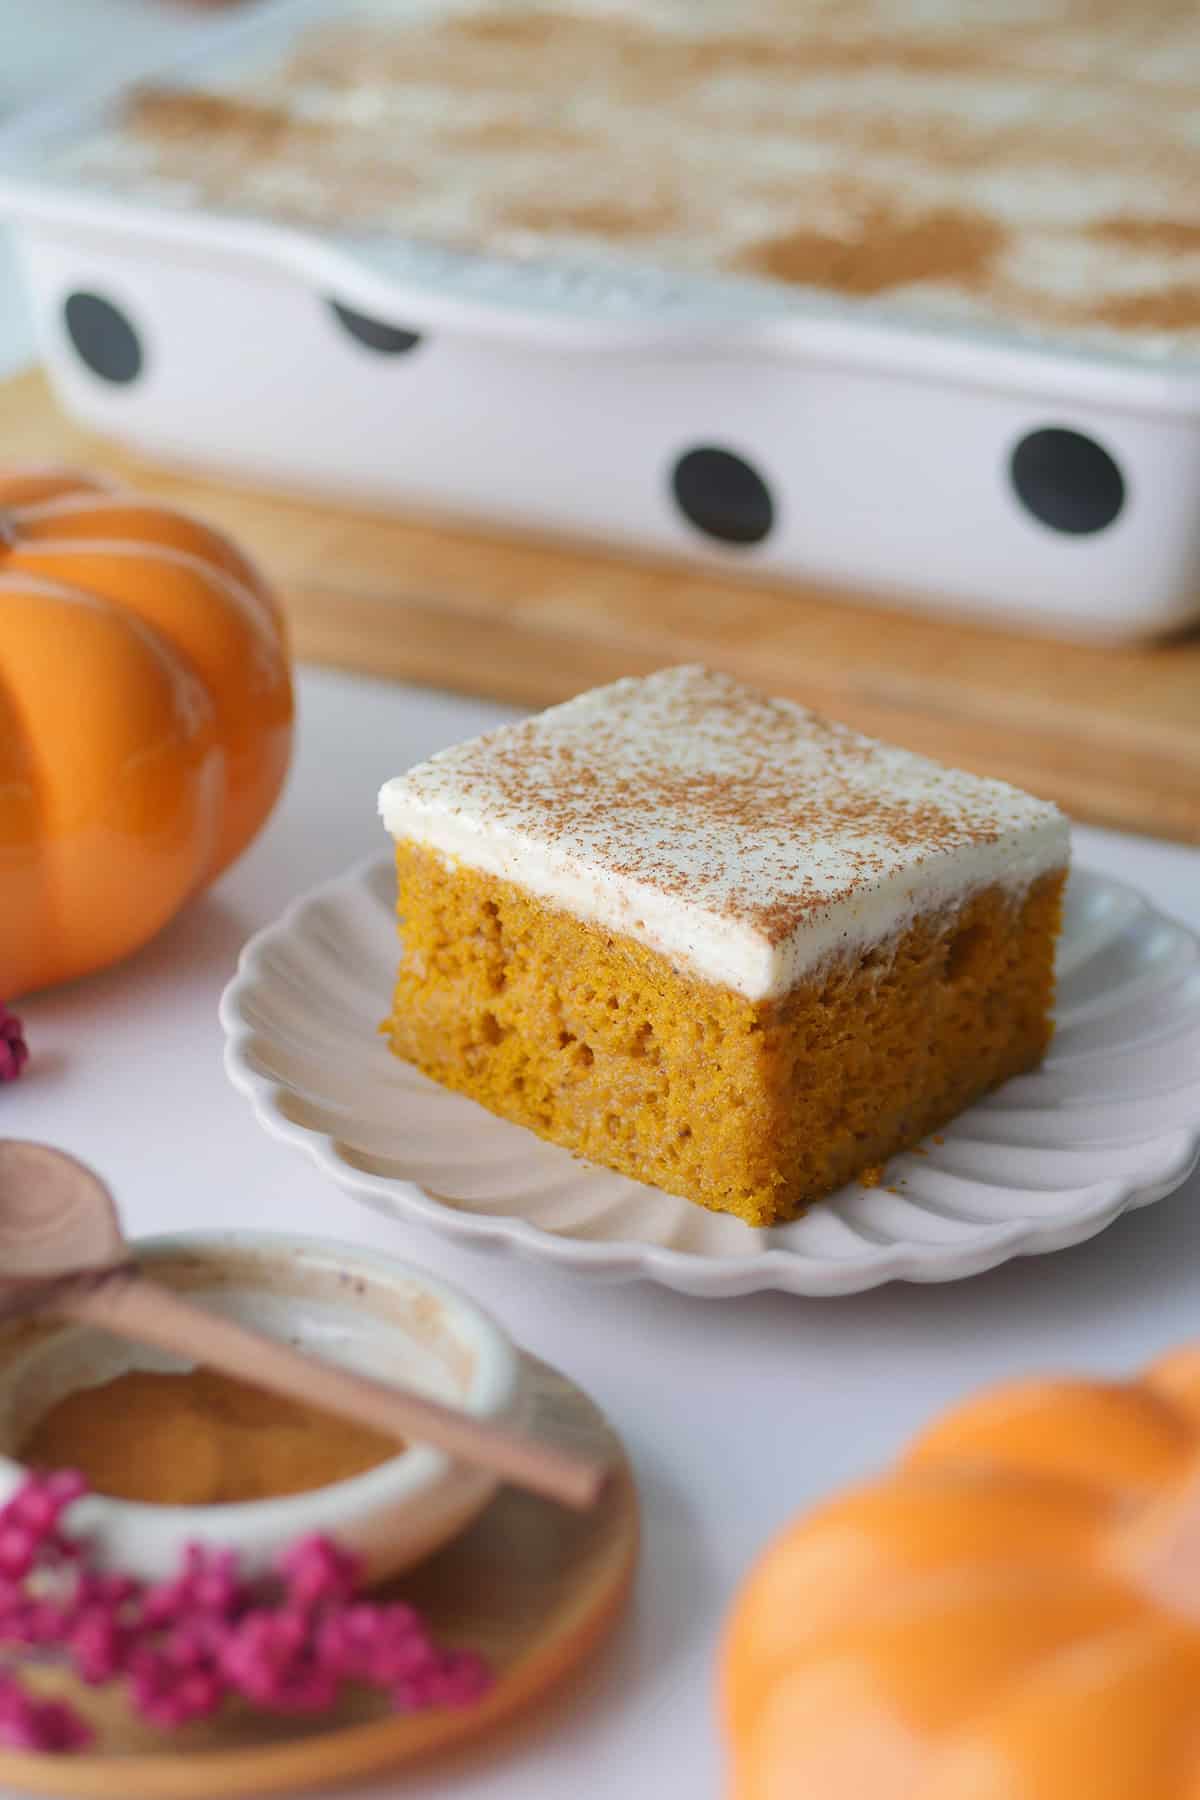
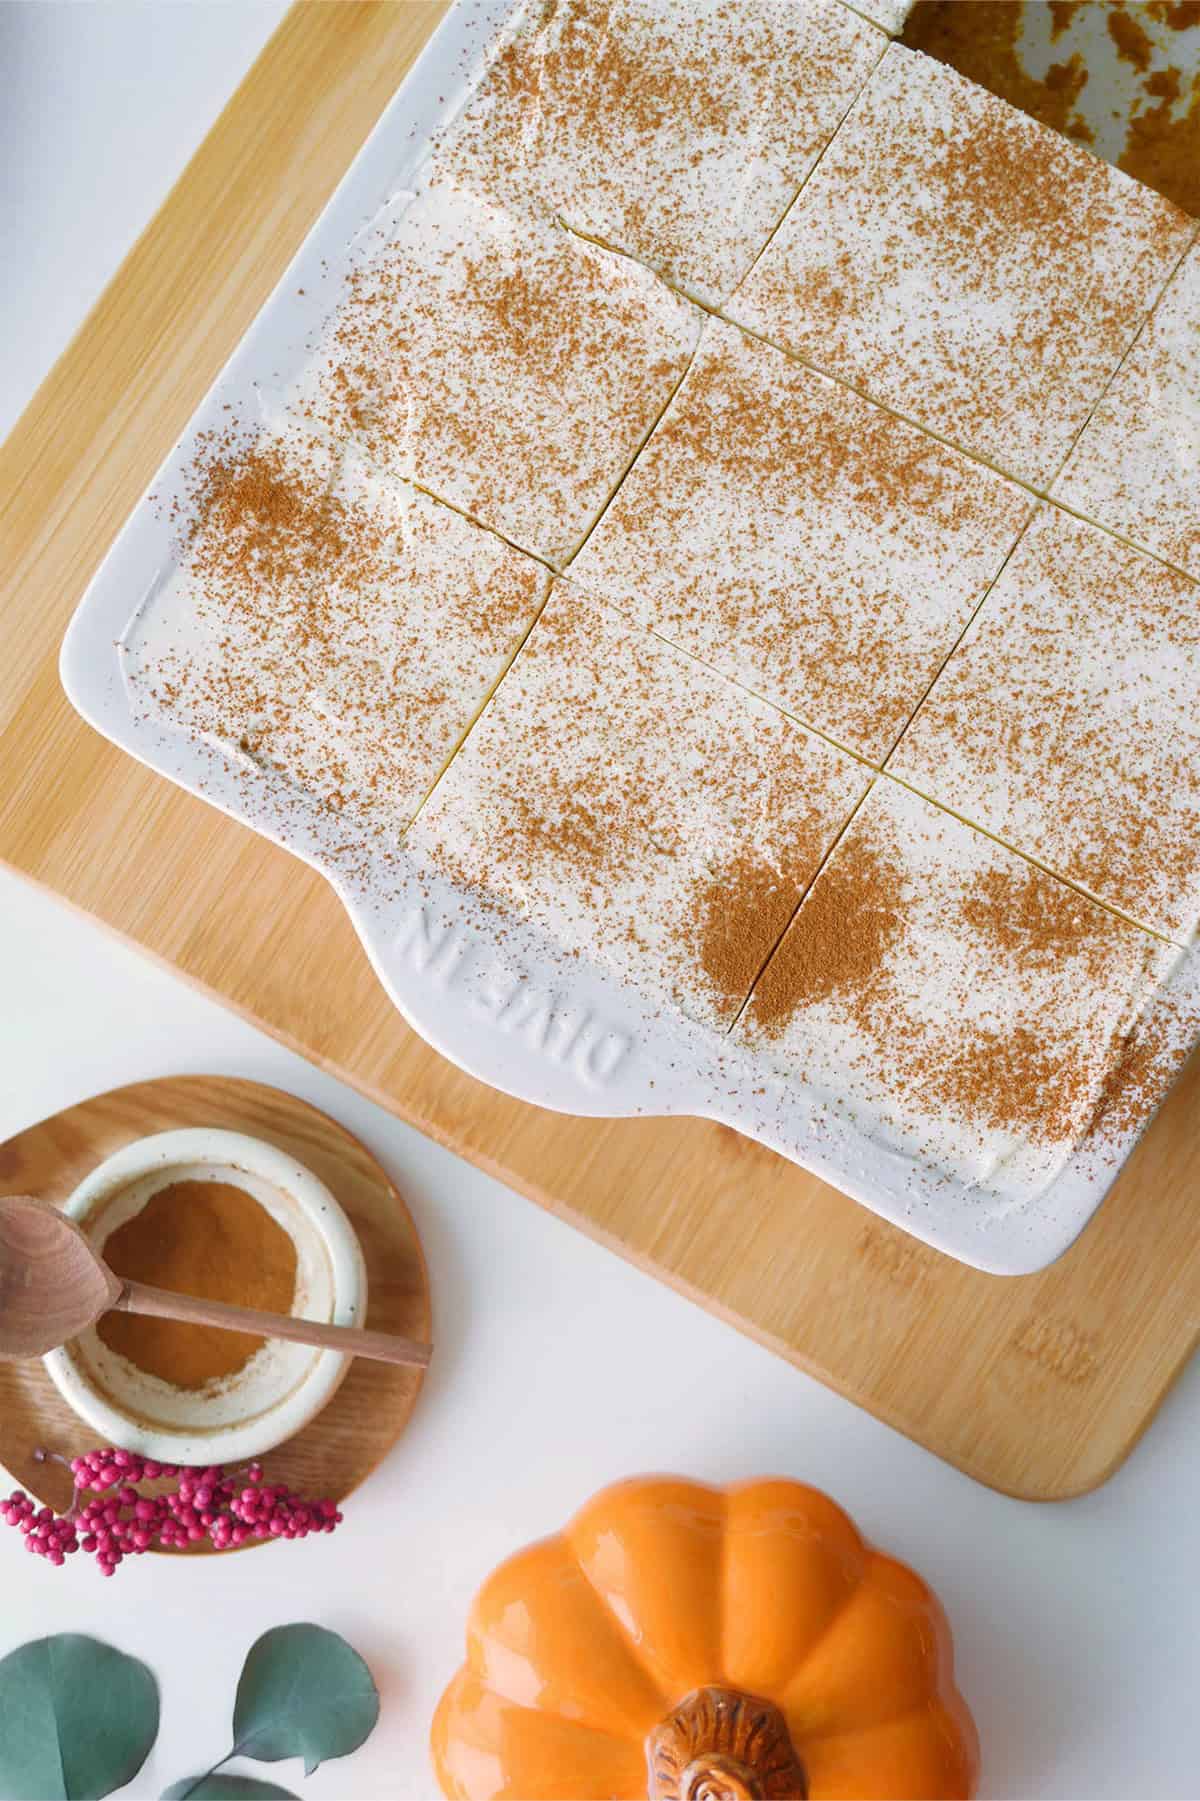
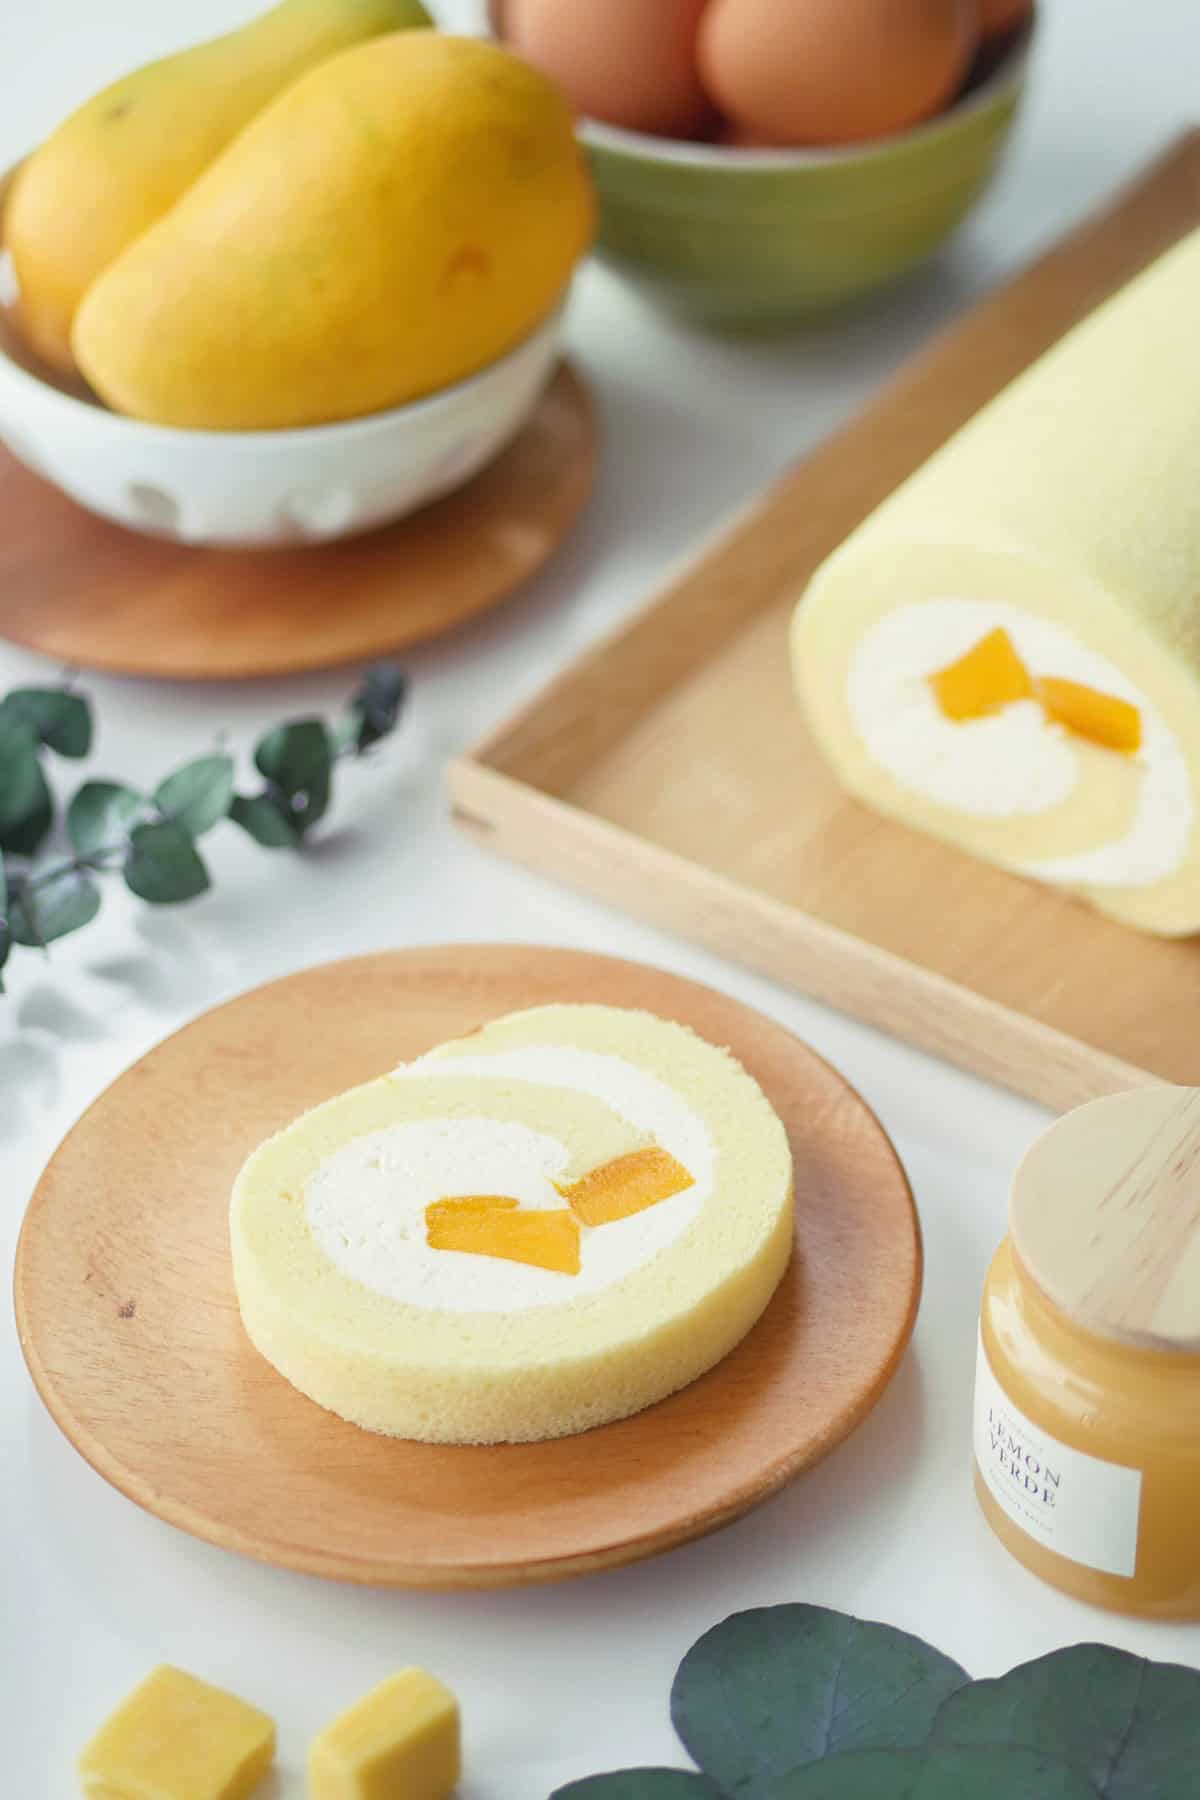
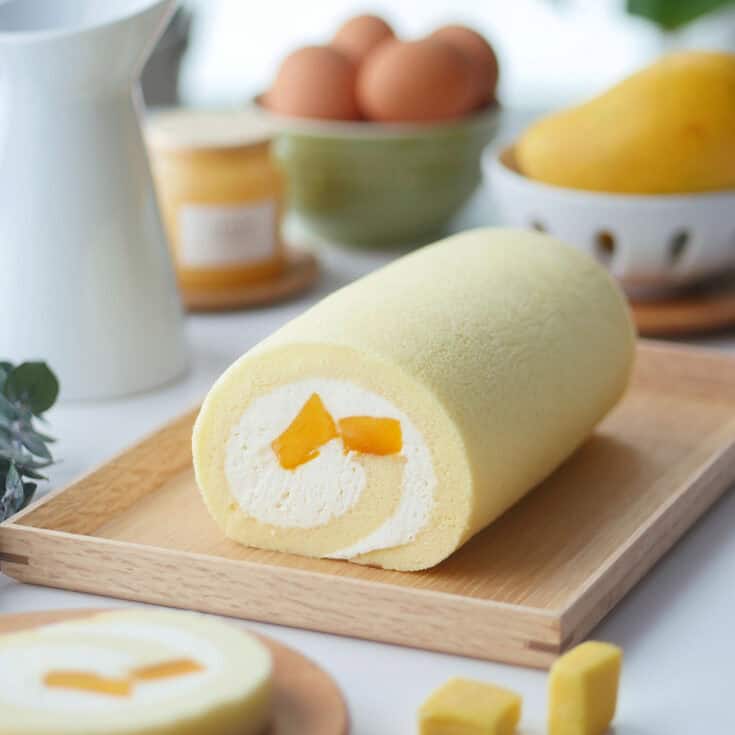
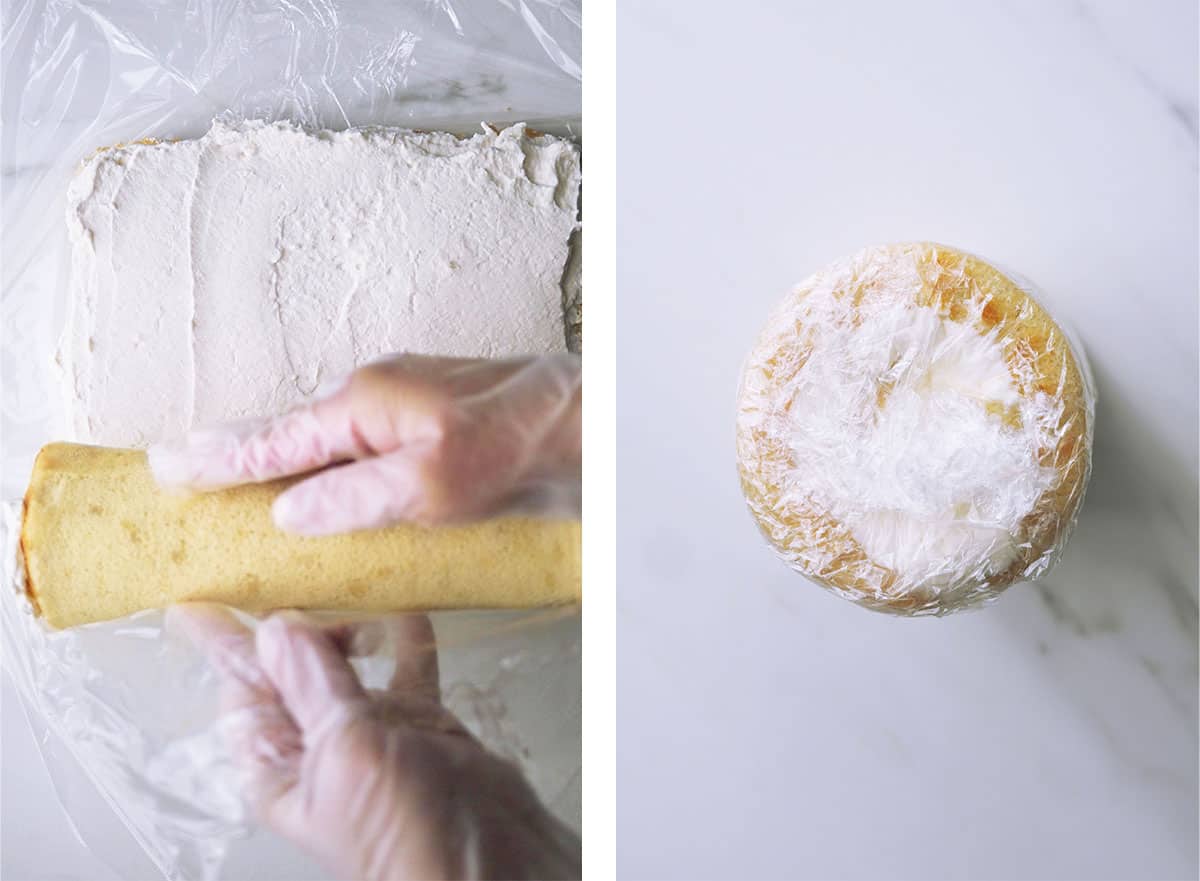
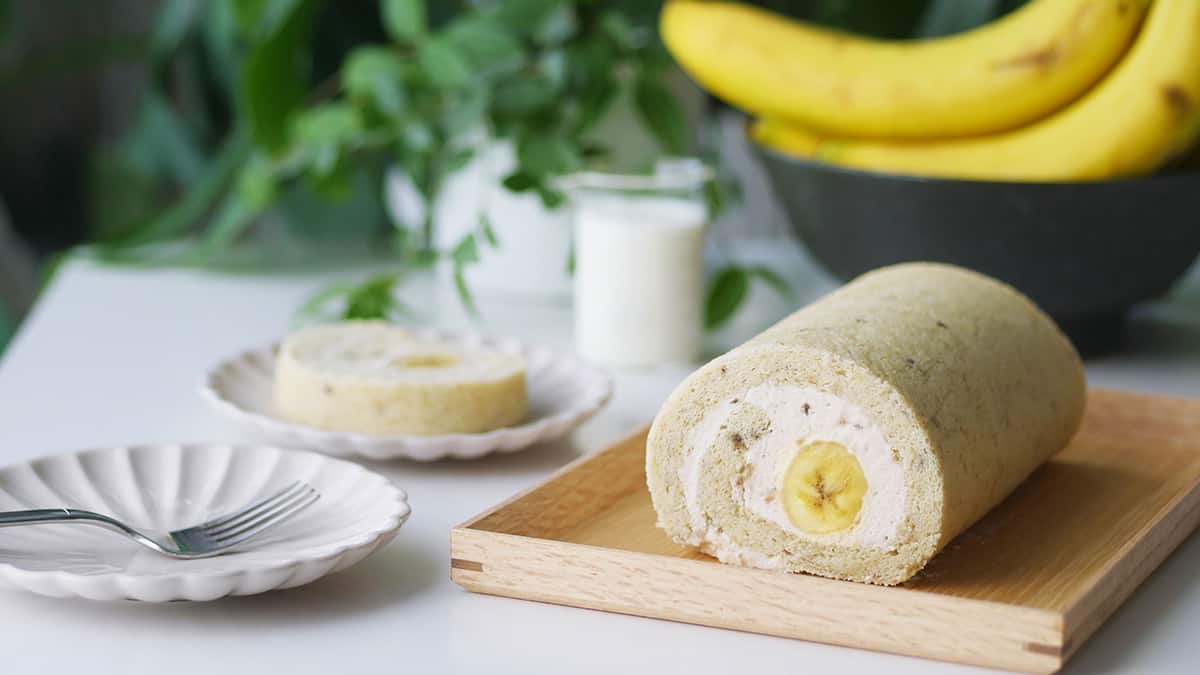
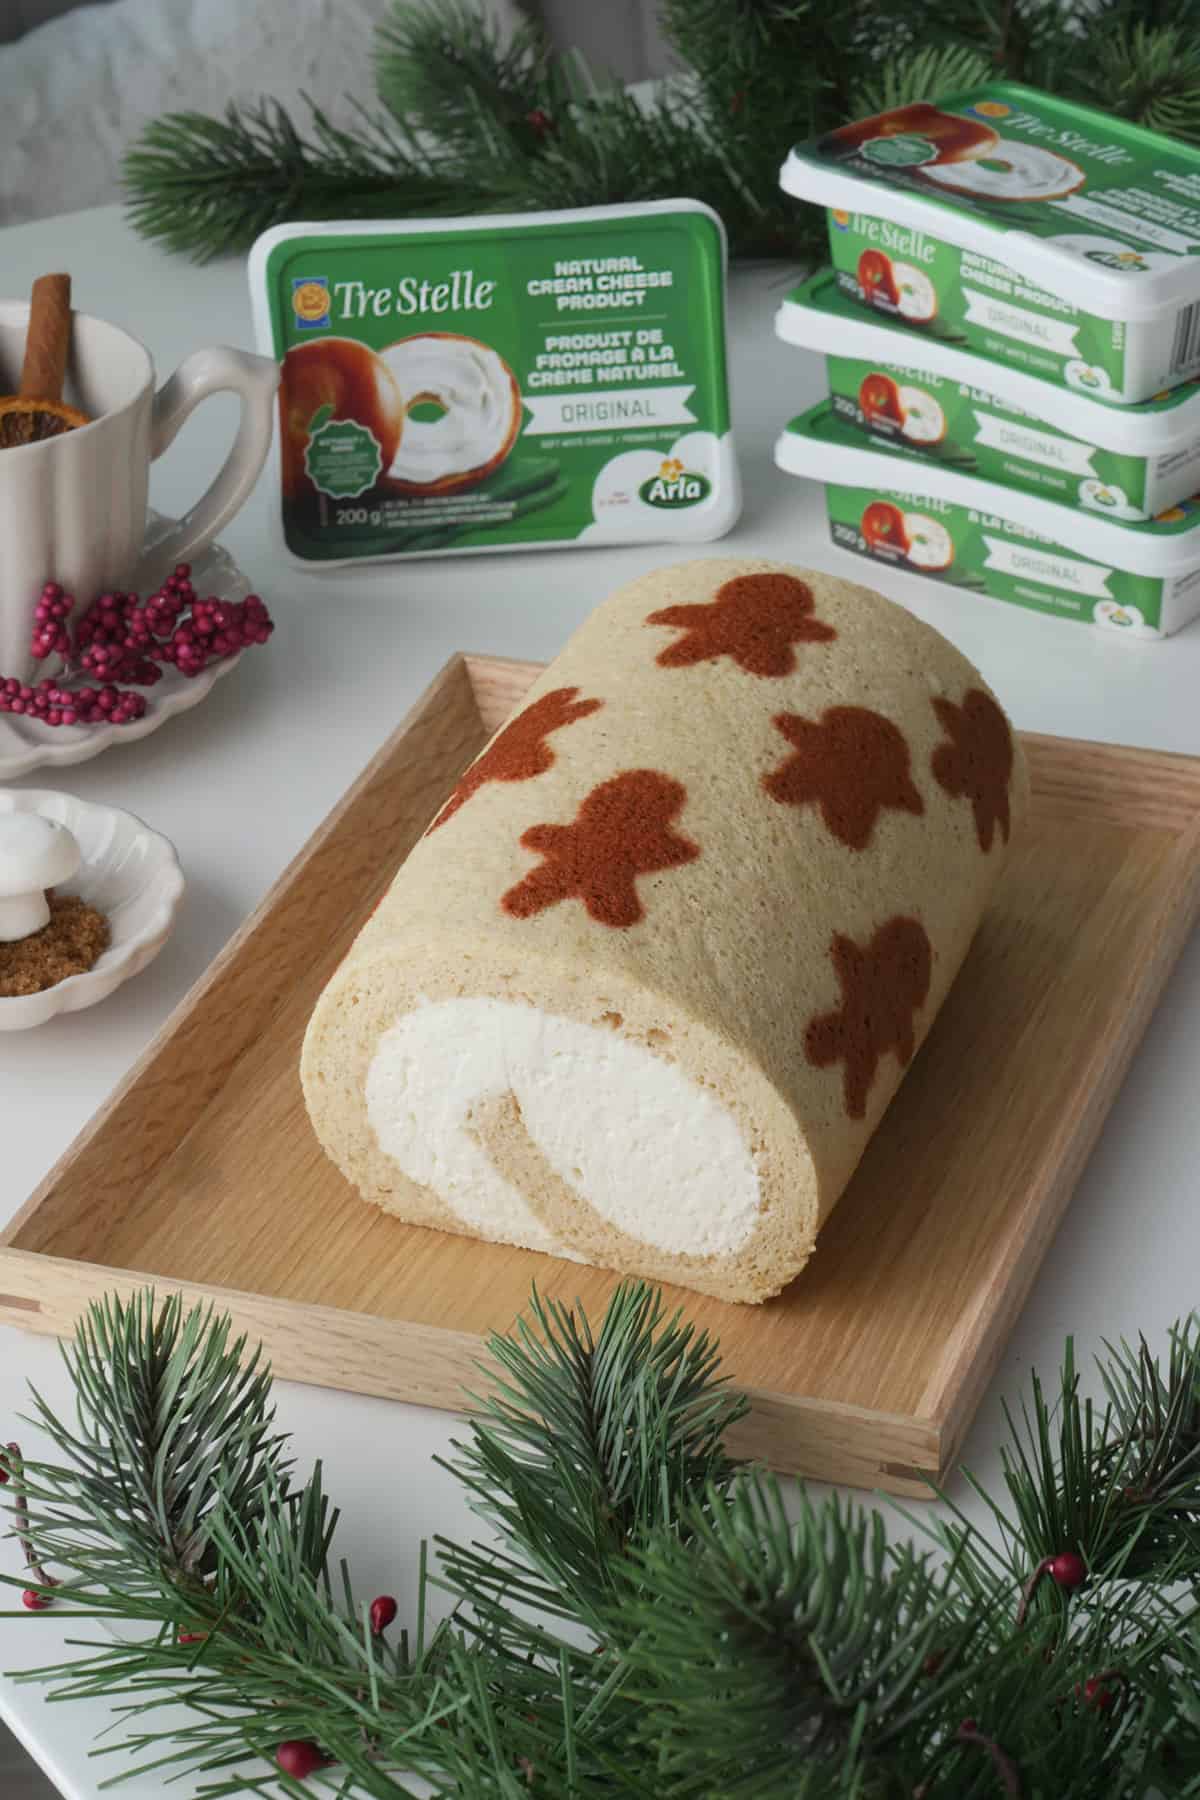
Add a few big dollops of cream onto one short end of the cake. Use an angled spatula to spread the cream in just one direction to prevent dragging off any crumbs from the top layer of the cake. The trick is to add lots of cream each time and gently spread it out in sections. An angled spatula really helps to create a flat top. If desired, top with fresh fruits, Maraschino cherries or a dusting of Matcha powder. Matcha Tres Leches should be kept in the fridge where it will stay fresh for 2-3 days. It's best to serve it within the first two days as the moist texture will be just right. Read post body on how to freeze and make in advance.
Topping Ideas for Matcha Tres Leches
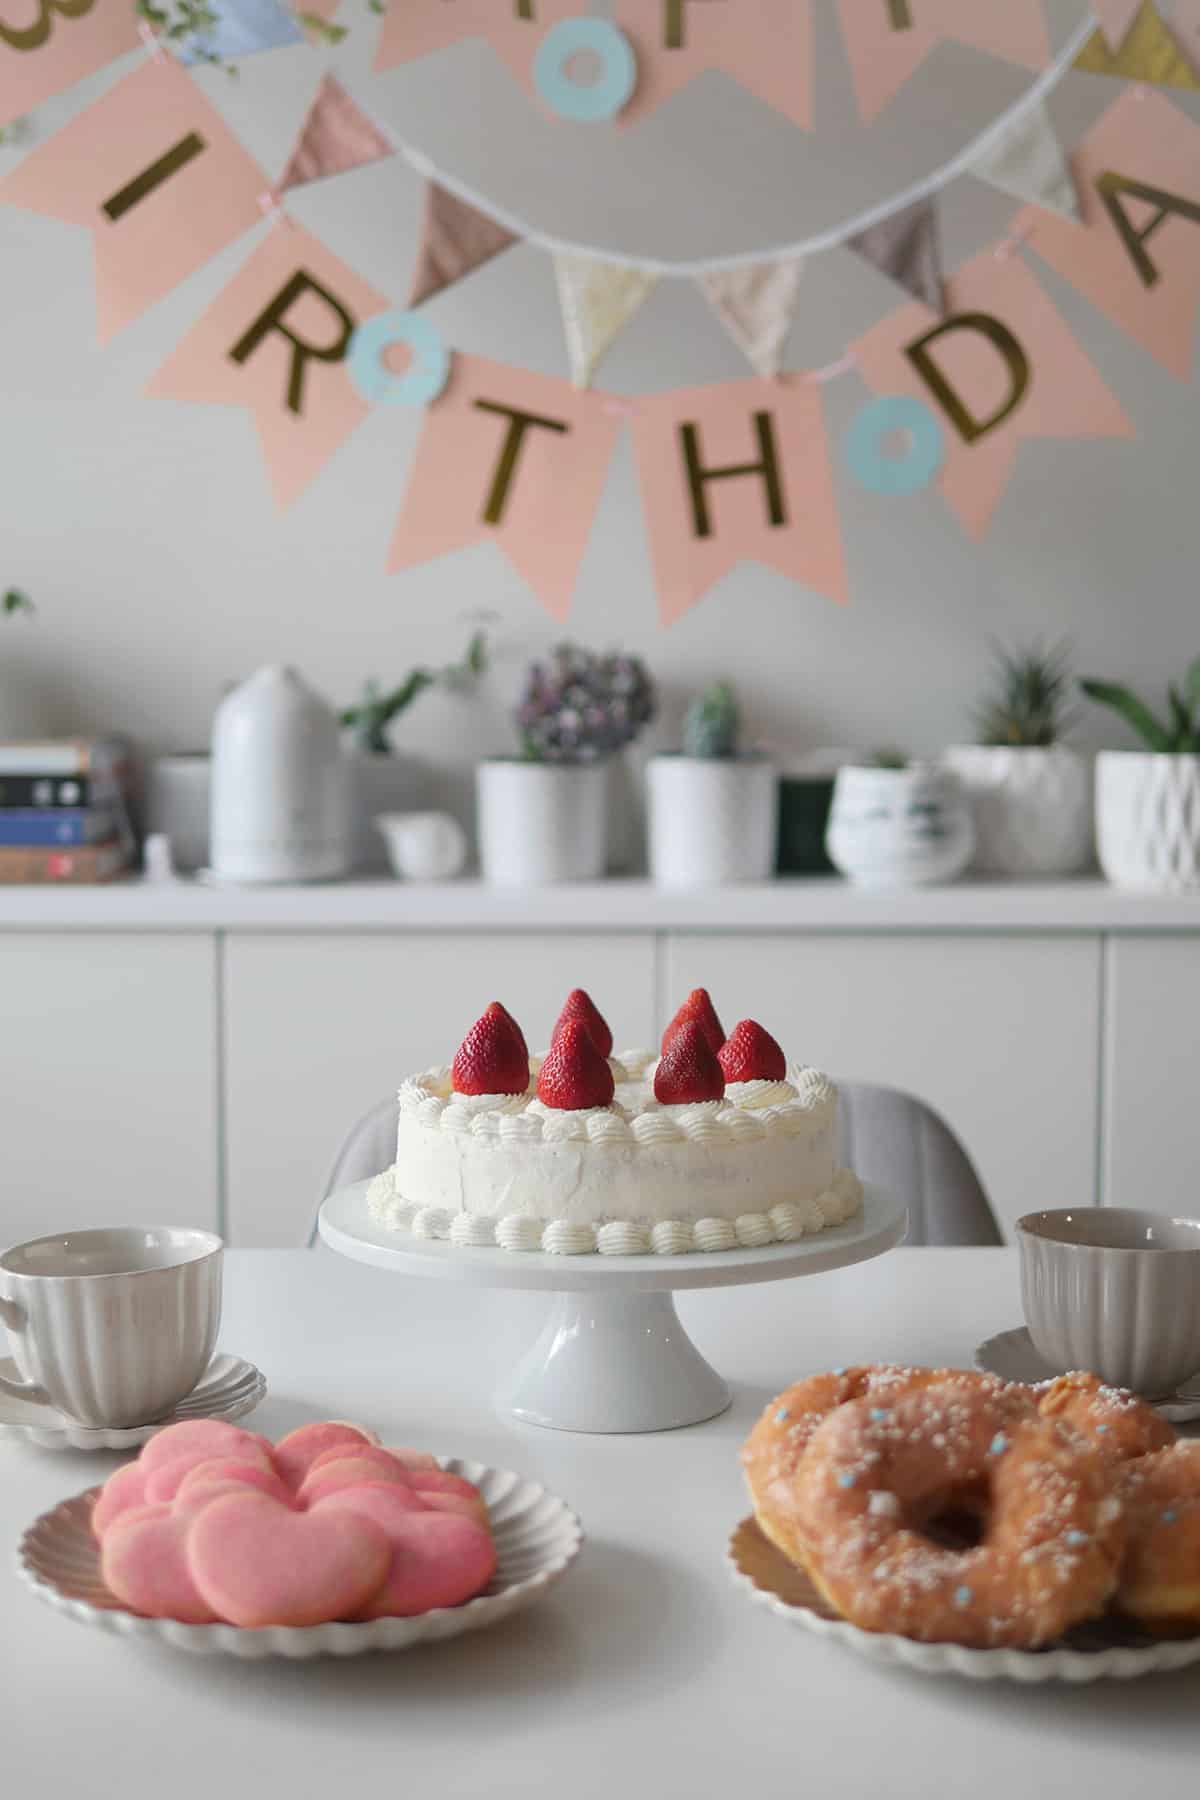
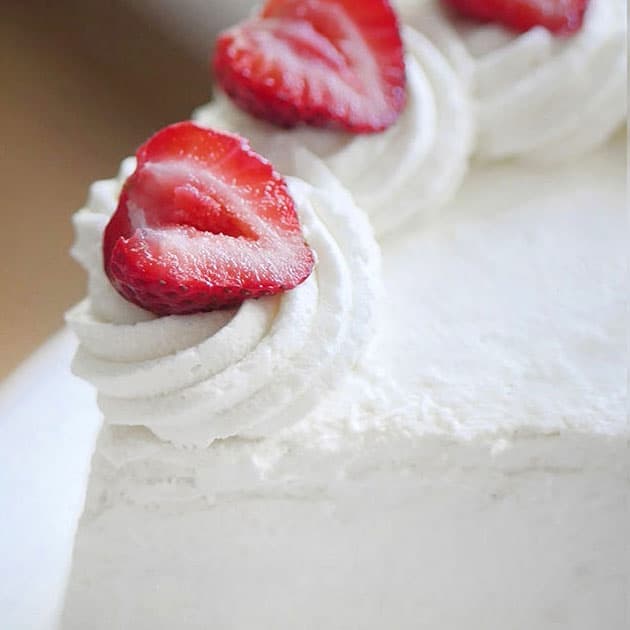
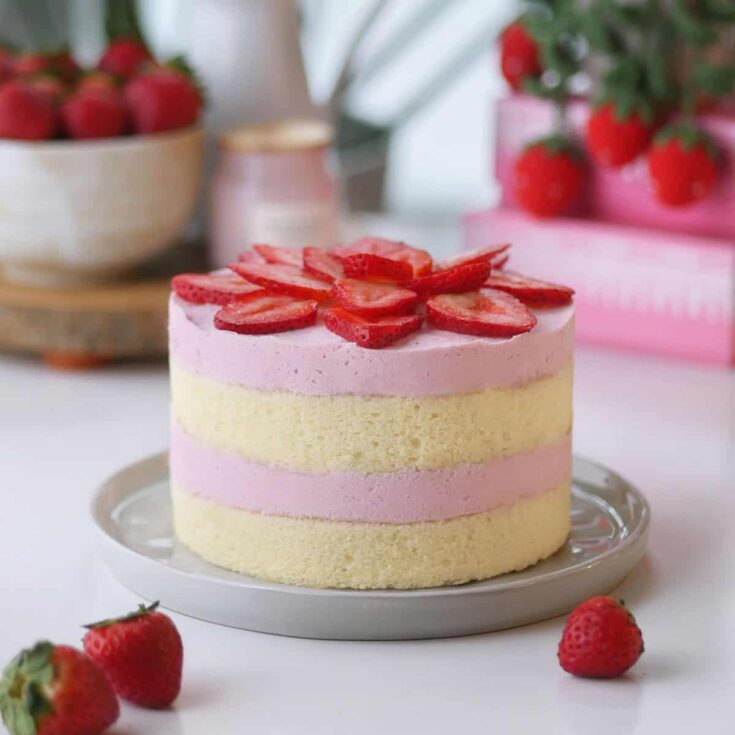
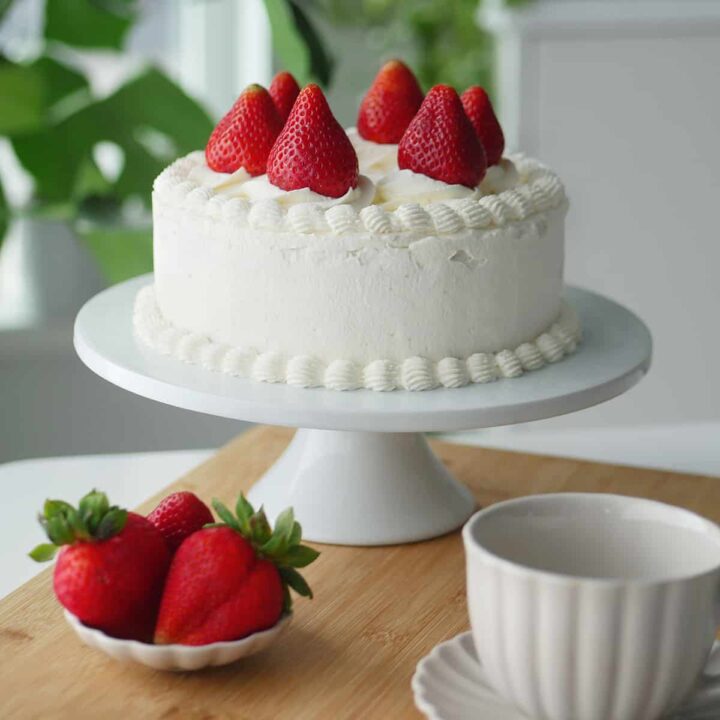
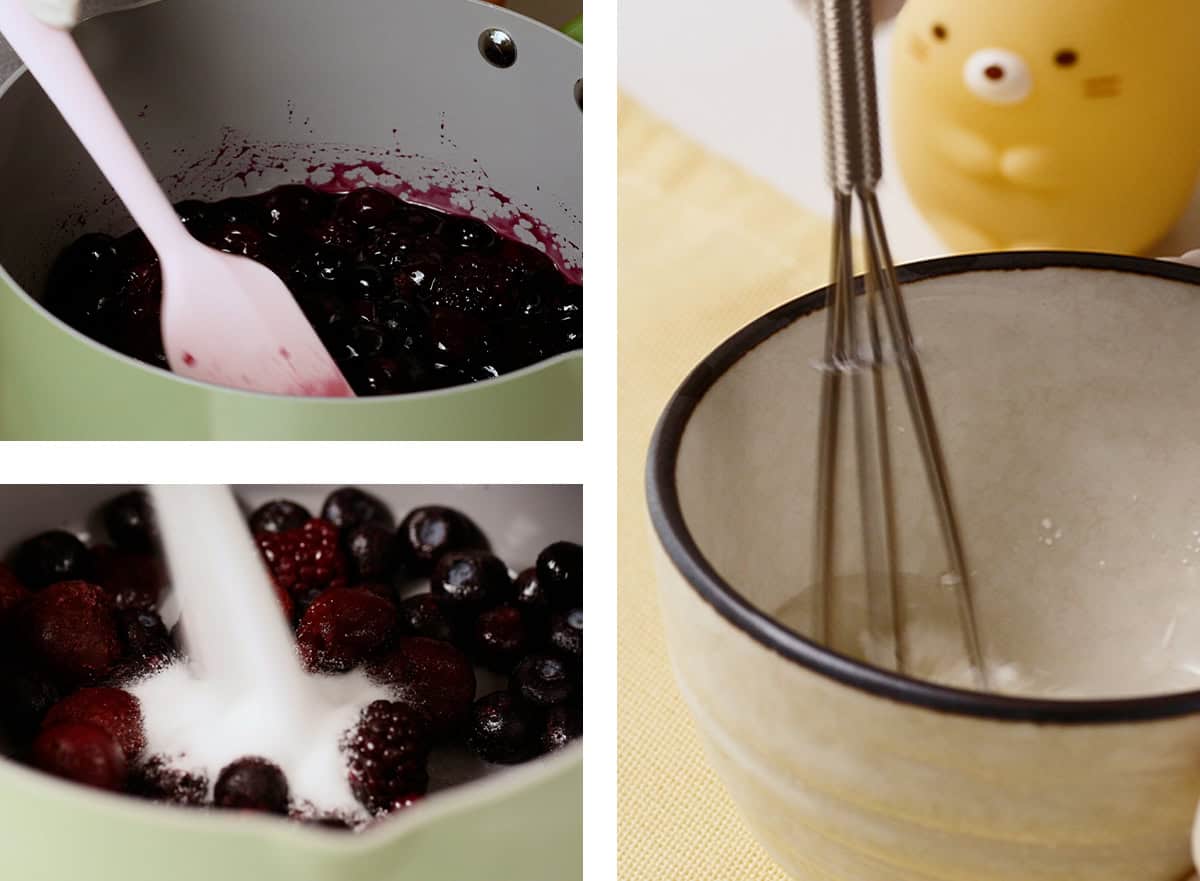
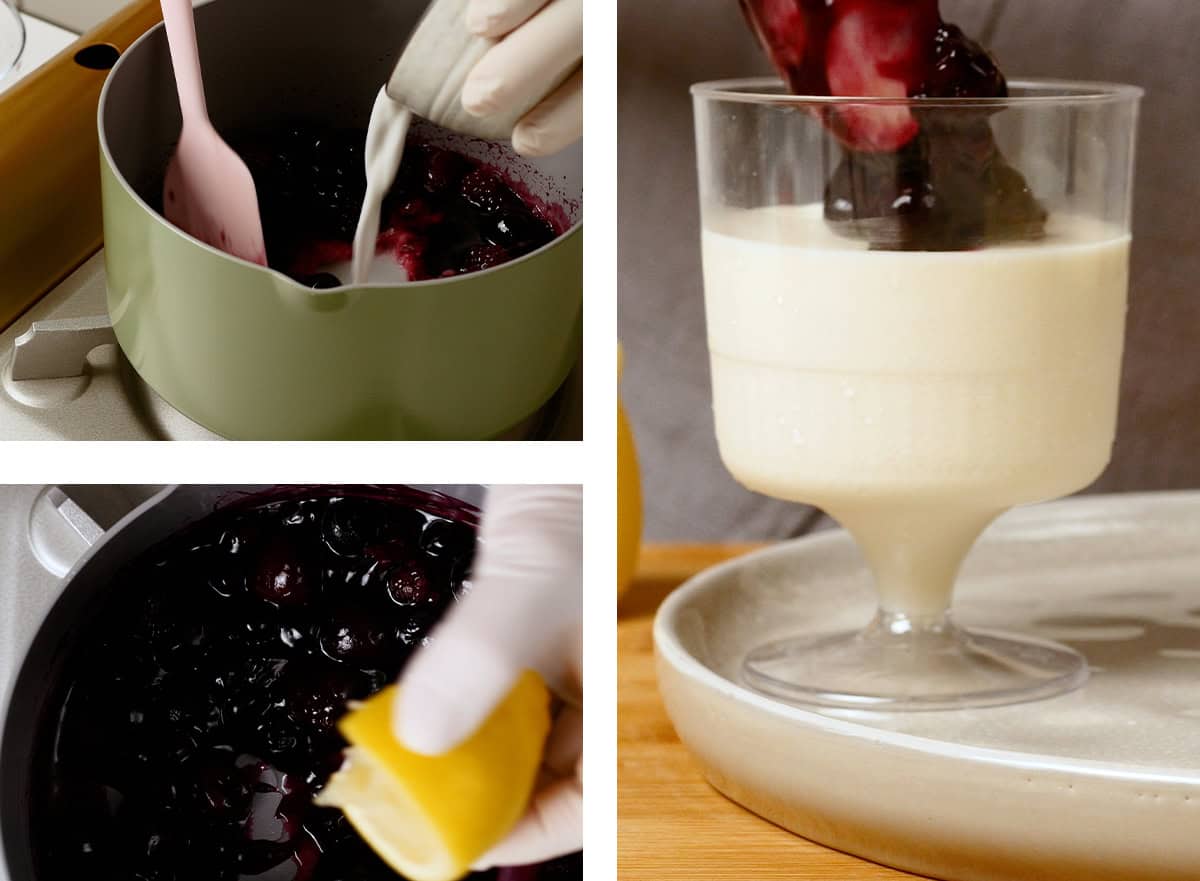
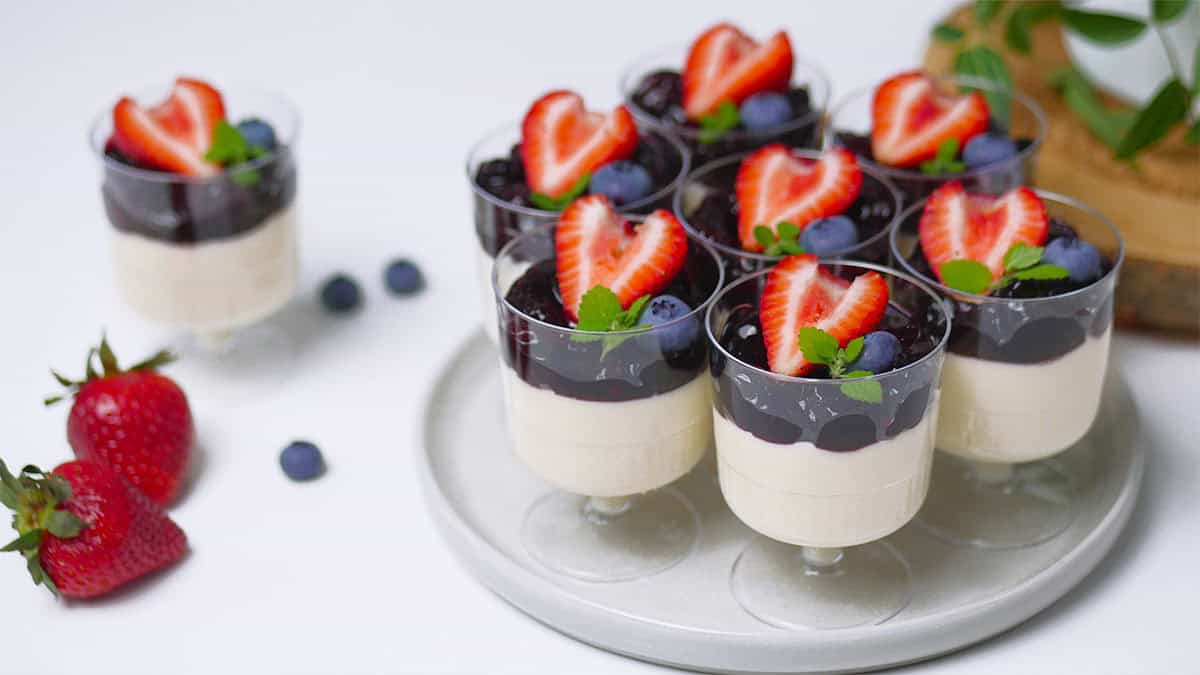
Tres Leches is usually topped with a sweetened whipped cream frosting. Some bakers use pre-made icing but I think those are generally too sweet for pairing with this naturally sweet cake. The most popular way to decorate this cake is with fresh strawberries which also happens to be a common flavor pairing for Matcha. If using other fruits, choose ones that are low-moisture or have a membrane that contains the juices like: blueberries, grapes, Maraschino cherries and raspberries. Another popular decoration is a dusting of ground spices, naturally, in this recipe Matcha powder was used. Nuts, chocolate shavings or cocoa beans also make good toppings that won't break down upon contact with whipped cream.
How to Store and Make in Advance
Matcha Tres Leches should be kept in the fridge where it will remain fresh for 2-3 days. It's best to serve it within the first two days as the moist texture will be just right. I've kept this cake for longer and it gets a little bit softer over time but it wasn't unacceptable. The amount of milk provided in the recipe keeps the texture firmer for longer. To make this cake in advance, freeze only the un-soaked cake portion. The cake body freezes exceptionally well. Wrap it with plastic wrap and then aluminum foil and freeze for up to 2 months. Defrost in the fridge the night before assembly. 2-24 hours before serving, add the milk soak and top with frosting.
Recipe
30 Minute Matcha Tres Leches with Box Cake Mix

Super easy and moist Matcha green tea Tres Leches cake using box mix. Only 30 minutes active time with simple year-round ingredients.
Ingredients
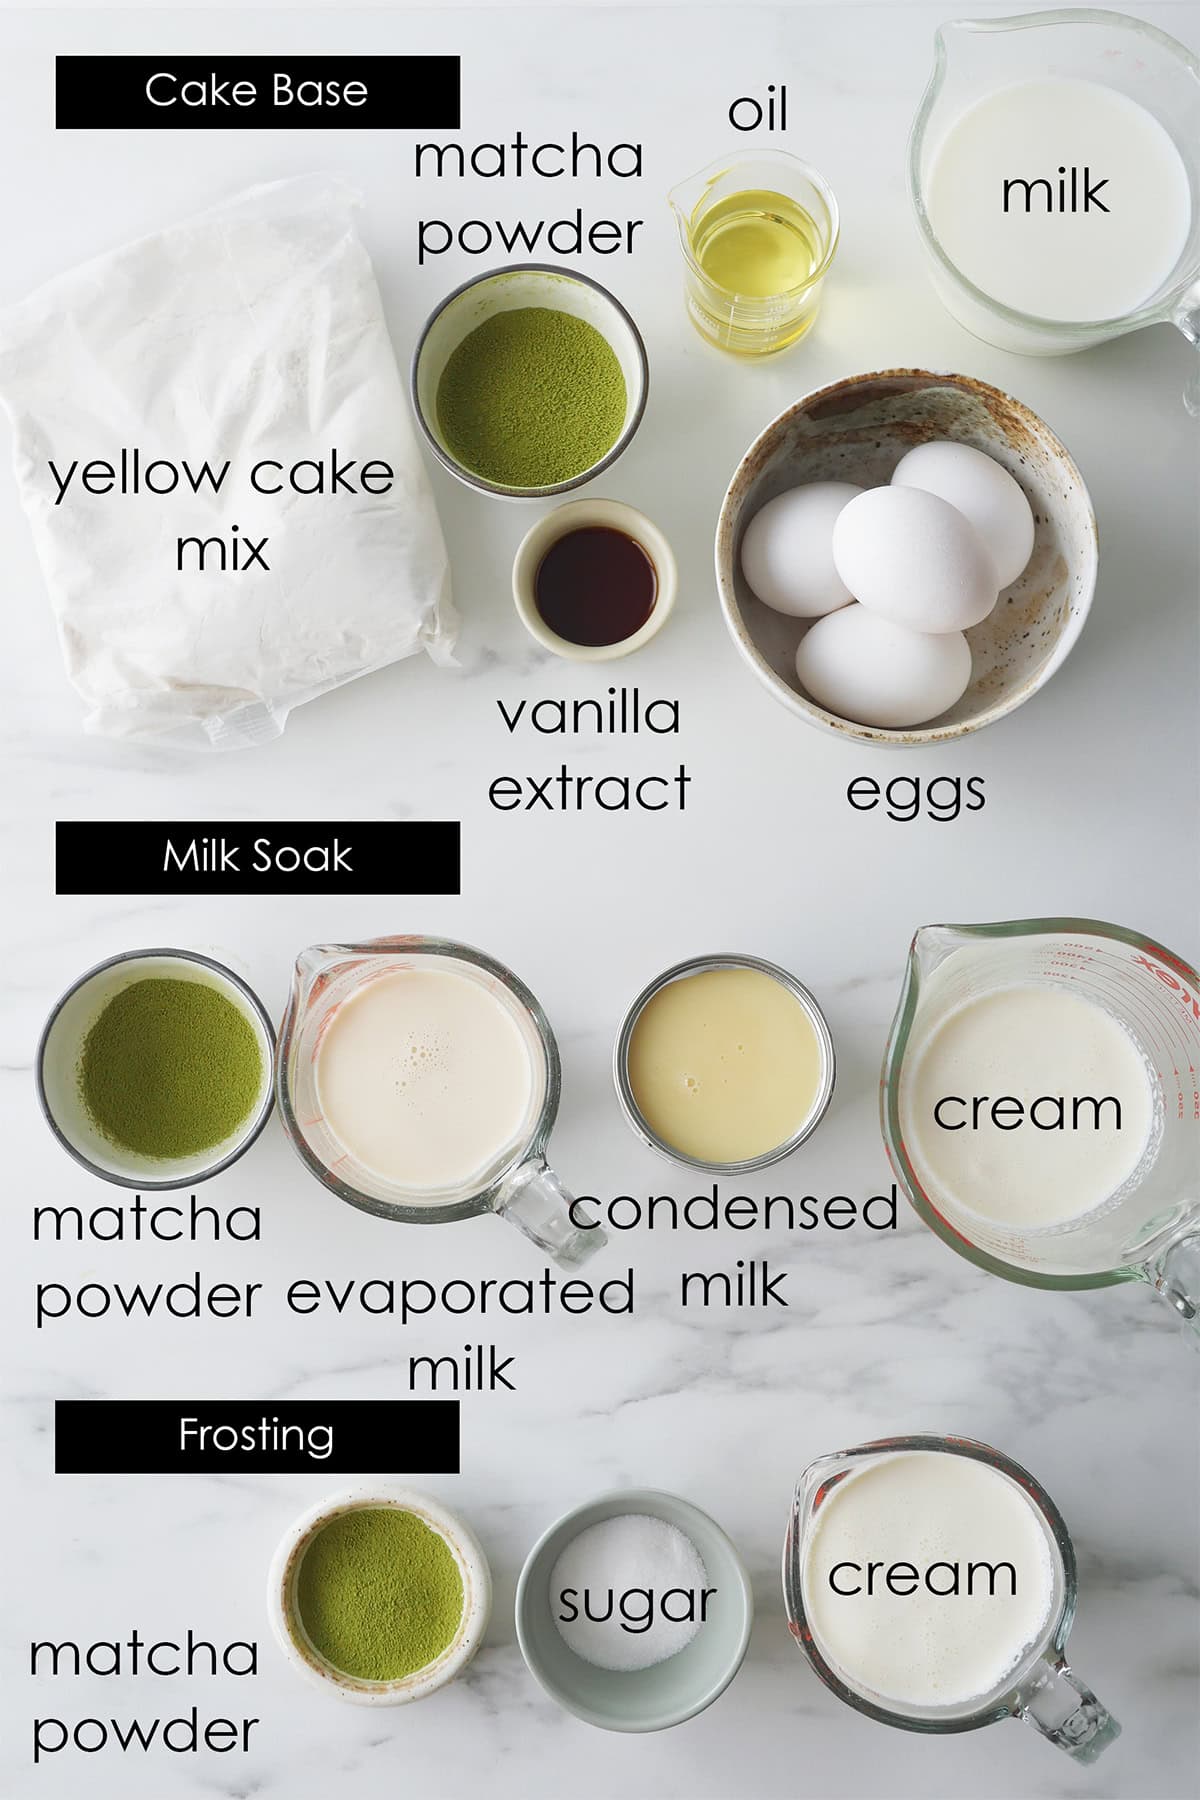
Tres Leches Cake Body
- 1 box yellow cake mix (375g)*
- 2 tablespoon Matcha green tea powder*
- 1 cup milk (per box instructions)*
- ⅓ cup vegetable oil (per box instructions)*
- 4 eggs (per box plus one extra)*
- 2 teaspoon vanilla extract
3 Milk Soak
- 1 tablespoon + 1 teaspoon Matcha powder*
- 1 ¼ cup ml condensed milk* (300ml)
- ¾ cup evaporated milk* (175 ml)
- ½ cup heavy cream*
Frosting
- 2 teaspoon Matcha powder*
- 2 cups heavy cream
- 1 tbps + 2 teaspoon granulated sugar*
Supplies
- Regular baking tools PLUS:
- 13X9 baking pan
- Handheld mixer
- Large mixing bowl, chilled
- Angled offset spatula
Optional Decoration Ideas:
- Fresh strawberries
- Maraschino canned cherries
- Matcha powder
- Coffee beans
Instructions
Matcha Tres Leches Cake Body
- Heat oven to 325F
- Grease only the bottom of the pan with a little bit of butter or oil.
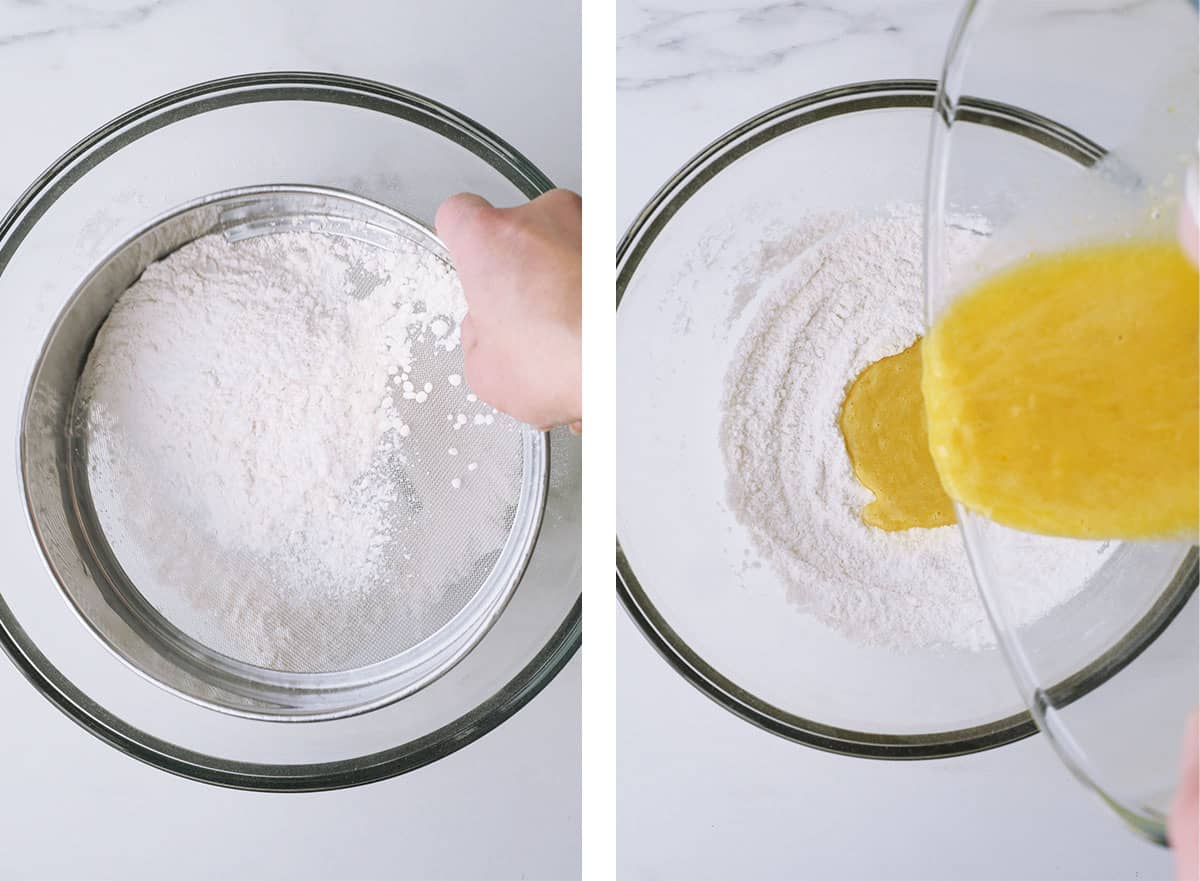
- In a large bowl, stir together the cake mix and Matcha powder.
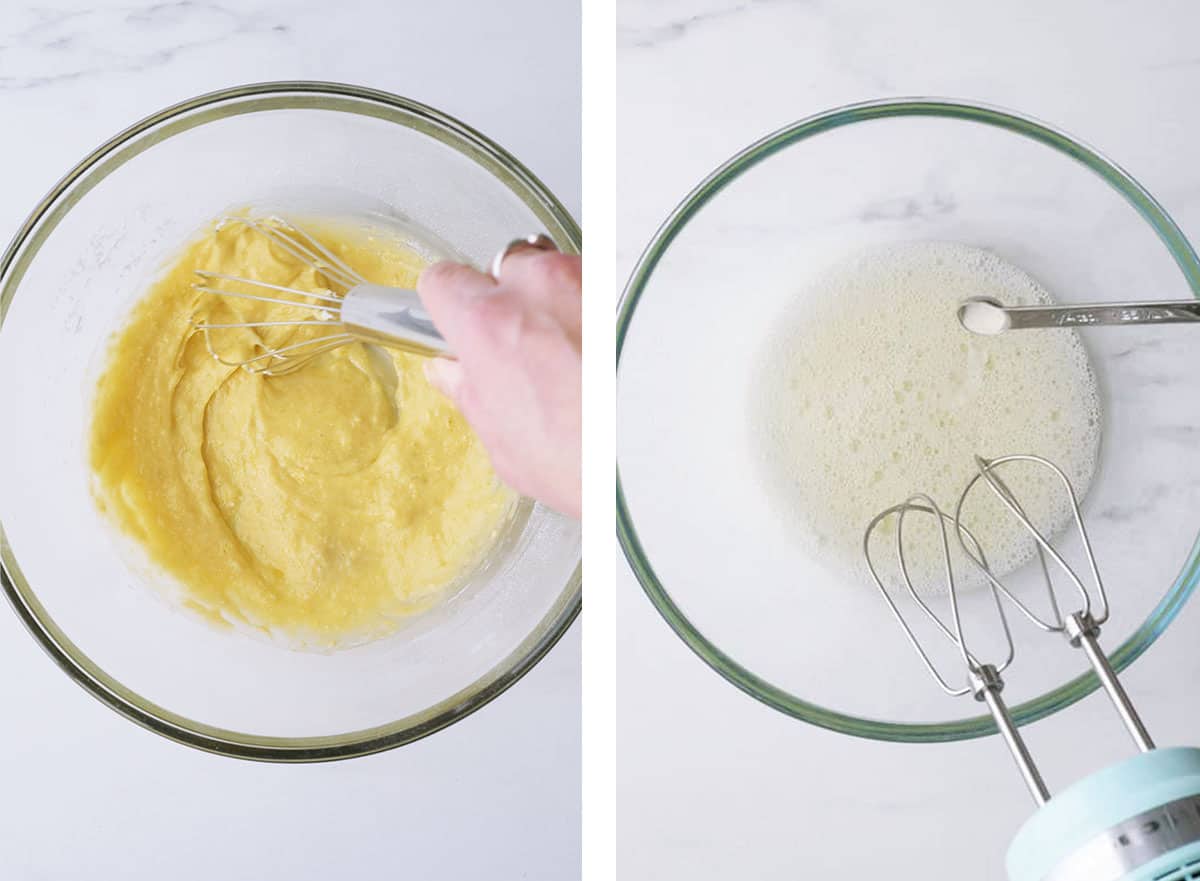
- Add in milk, oil, eggs and vanilla, beat together using a handheld mixer at medium speed for 2 minutes. It should look thick and homogenous (see Step by Step Photos in post).
- Pour batter into cake pan. Bake cake for 25-30 min. until it's golden brown and a toothpick inserted in the center comes out clean.
- Let the cake cool inside the pan as you prepare the milk soak.
Matcha 3 Milk Cake Soak
- In a small bowl, whisk together the Matcha powder with 1-2 tablespoon of heavy cream to create a wet paste. The goal is to fully dissolve the powder with vigorous whisking. There shouldn't be any clumps.
- Pour the matcha paste, condensed milk, evaporated milk and the rest of the heavy cream into a large measuring cup, stir it until it becomes homogenous. Stir well as the heavier condensed milk tends to stay at the bottom.
- Once the cake has completely cooled, use a fork to poke holes into the cake in evenly spaced rows about half inch apart.
- Pour the mixture slowly and evenly onto the cooled cake (do this only when the cake is cool). The milk will start to get absorbed into the cake through the holes. If your cake is domed, the milk will start to pool on the sides, take a spatula and gently guide the milk to all parts of the cake.
- Cover the cake and let it sit in the fridge for at least 2 hours before serving or frosting. Take this time to chill the mixing bowl and beaters in the fridge. This will help the heavy cream whip better.
Matcha Frosting
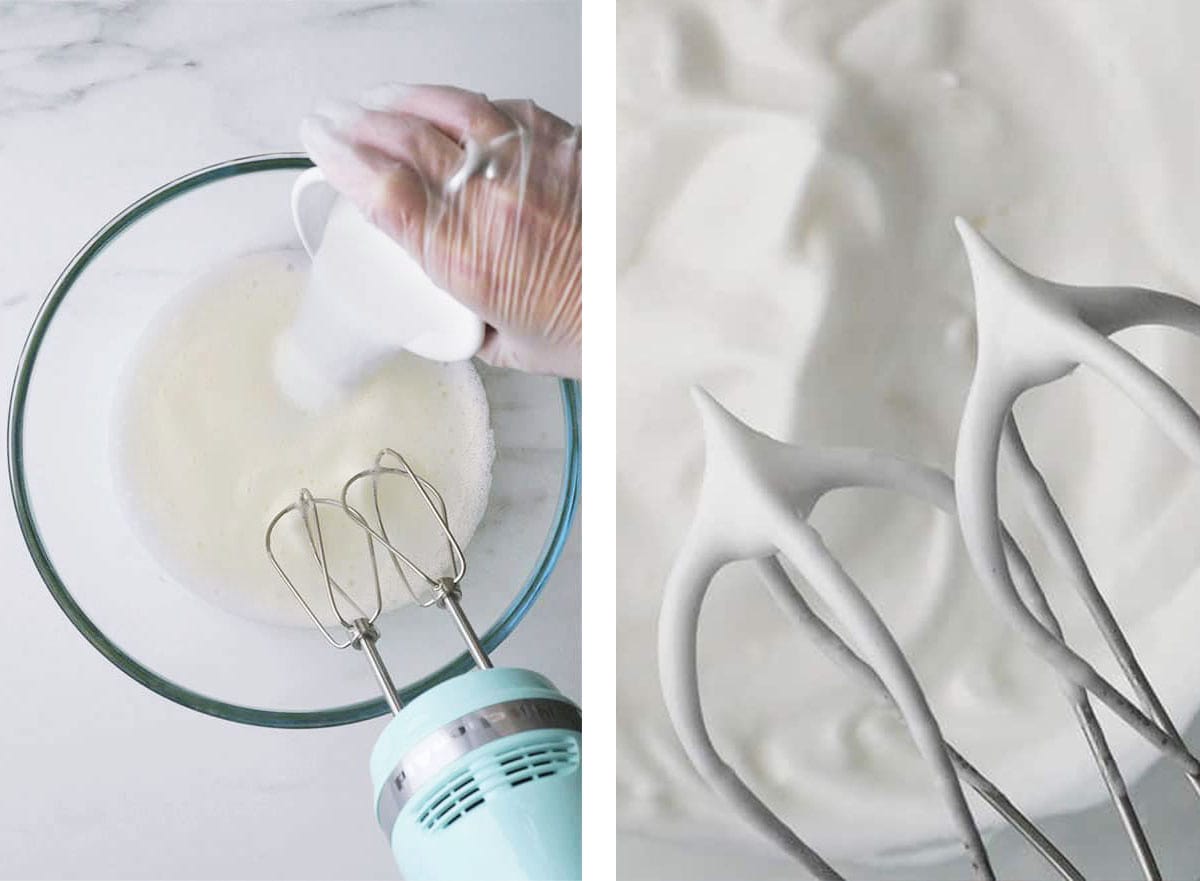
- In a small bowl, whisk together the Matcha powder with 1-2 tablespoon of heavy cream to create a wet paste. The goal is to fully dissolve the powder with vigorous whisking. There shouldn't be any clumps.
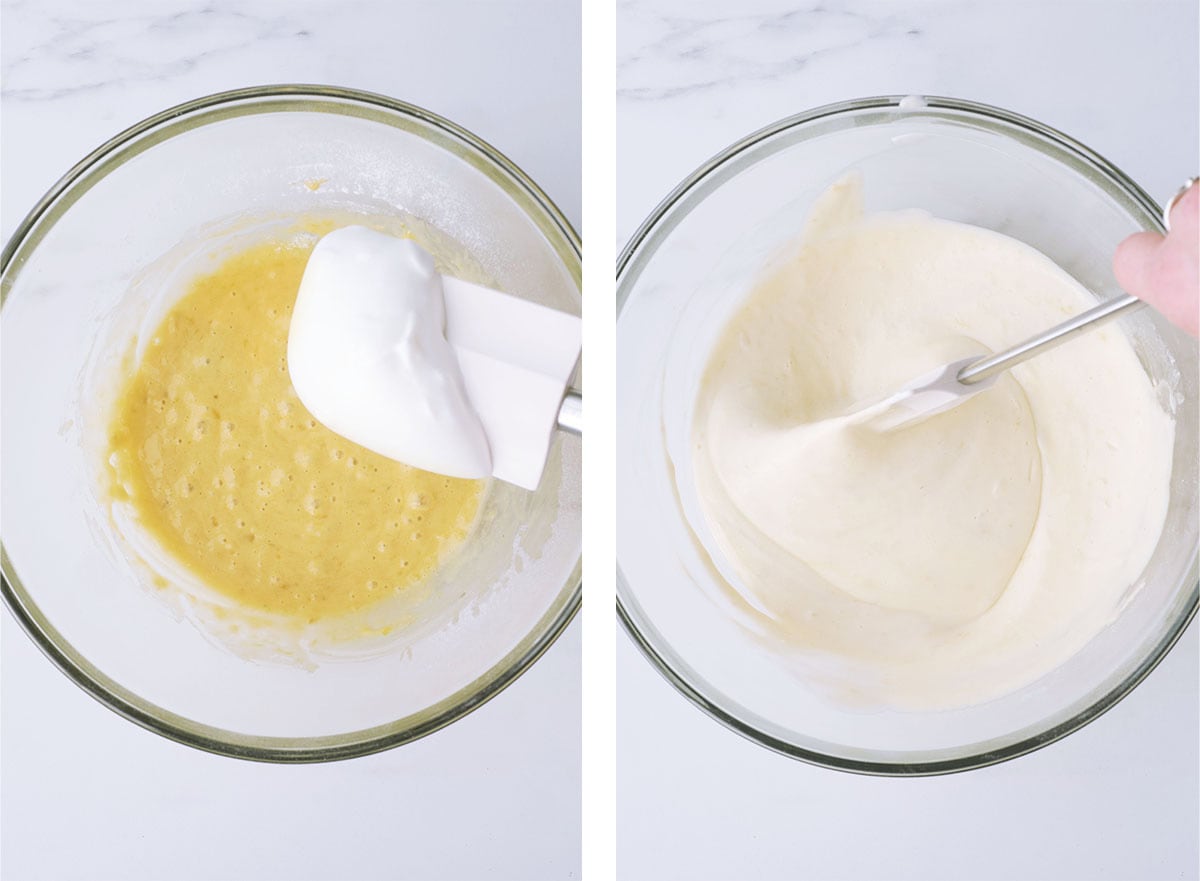
- In the chilled mixing bowl, whip the Matcha paste, the rest of the heavy cream and sugar on med-high speed until stiff peaks. Use cream immediately for assembly.
Assembly
- Add a few big dollops of cream onto one short end of the cake. Use an angled offset spatula to spread the cream in just one direction to prevent dragging off any crumbs from the top layer of the cake. The trick is to add lots of cream each time and gently spread it out in sections. An angled spatula really helps to create a flat top.
- If desired, top with fresh fruits, Maraschino cherries or a dusting of Matcha powder. Matcha Tres Leches should be kept in the fridge where it will stay fresh for 2-3 days. It's best to serve it within the first two days as the moist texture will be just right. Read post body on how to freeze and make in advance.
Notes
- Betty Crocker brand was used in this recipe. If using another cake mix that weighs more, mix the powder very well and weigh out 375 g for use in this recipe.
- Culinary grade matcha powder was used in this recipe for its bolder flavor and affordability.
- The Matcha flavor in this recipe is generally well-accepted by a broad range of palettes. If a more intense flavor is desired, add an extra teaspoon of powder to the milk soak and whipped cream.
- Provided quantity for milk, oil and eggs in the cake body are for the Betty Crocker brand cake mix. Refer to your own cake mix instructions for precise quantity required for your own brand. A general rule of thumb to elevate box mixes is to replace the required water with milk and add an extra egg than what is called for, which is what I've done in this recipe.
- Oil choices include: grapeseed, canola and avocado.
- Condensed milk is a sweetened form of milk that has water evaporated from it. It is usually sold in a can form, found in the baking aisle of the grocery store.
- Evaporated milk is a milk that has water evaporated from it but it's unsweetened. It is usually sold in a can form, found in the baking aisle of the grocery store.
- Heavy cream has a milk fat content of at least 36% (labelled as 36% M.F.) . It can be substituted with whipping cream (with minimum 33% milk fat) but heavy cream is a little more rich in flavor and produces a more stable frosting. It must be completely chilled before whipping or it won't gain volume.
- The amount of sugar in the frosting makes the cream taste mildly sweetened and creamy when paired with this naturally sweet cake. It's ideal for those who prefer a less intense sweetness level. Double the amount of sugar if you prefer a truly sweet tasting cake.
Recommended Products
As an Amazon Associate and member of other affiliate programs, I earn from qualifying purchases.
-
 PUCKWAY Angled Icing Spatula, Stainless Steel Offset Spatula, Cake Spatula Set of 2 Black 6, 8 inch Blade
 -
Jade Leaf Matcha Organic Culinary Grade Matcha Powder - Premium Second Harvest - Authentic Japanese Origin (3.53 Ounce Resealable Pouch)
-
Betty Crocker Favorites Super Moist Butter Recipe Yellow Cake Mix, 13.25 oz (Pack of 12)
-
KitchenAid 5 Ultra Power Speed Hand Mixer - KHM512, Ice Blue
-
USA Pan 1110RC-3-ABC-1 American Bakeware Classics 9 x 13-Inch Rectangular Lasagna, Cake and Brownie Pan, Aluminized Steel


Nutrition Information
Yield
15Serving Size
1Amount Per Serving Calories 458Total Fat 25gSaturated Fat 13gTrans Fat 1gUnsaturated Fat 10gCholesterol 108mgSodium 396mgCarbohydrates 51gFiber 1gSugar 35gProtein 8g
This information is provided as a courtesy and is an estimate only. This information comes from online calculators. Although indulgewithmimi.com attempts to provide accurate nutritional information, these figures are only estimates.


![[Nordic Paper] 200pcs Natural Tulip Cupcake Liners for Baking Cups Unbleached EU Parchment paper Tulip Muffin Liners, Cupcake Wrapper for Party, Christmas by Bake Choice](https://m.media-amazon.com/images/I/41yiszoImXL._SL500_.jpg)