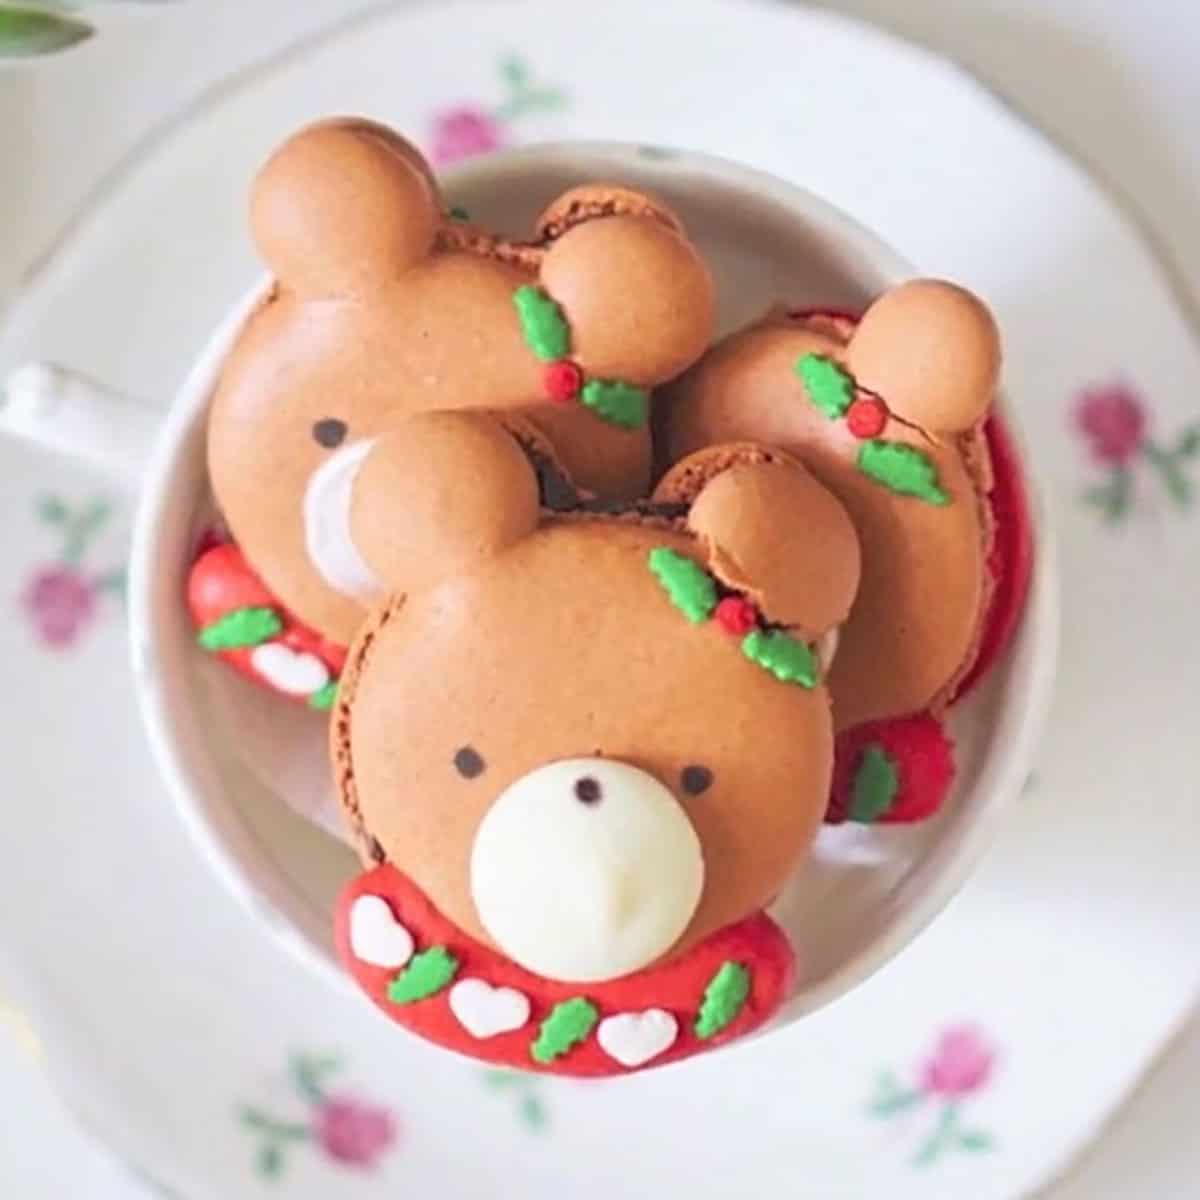

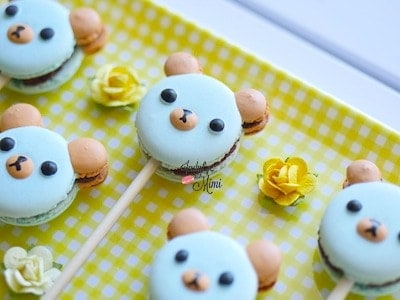
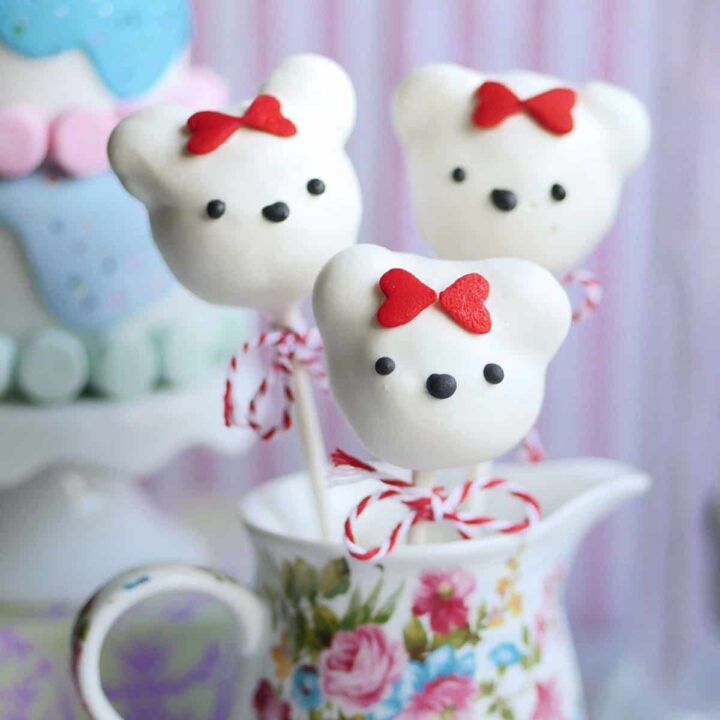
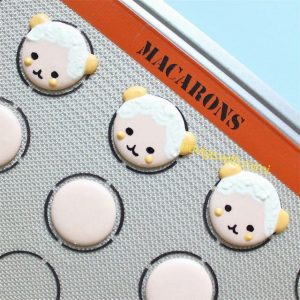
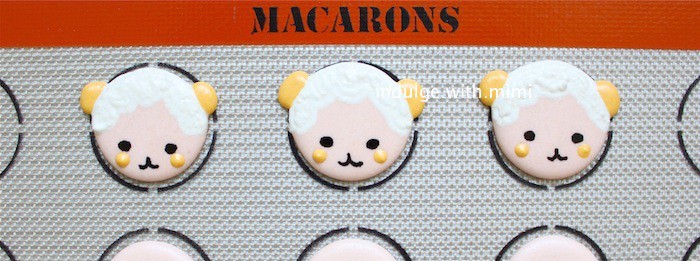
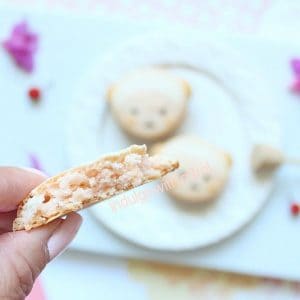
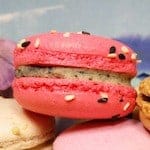
I'm sure you can tell bears are one of my favourite #macaronart animals. My love affair with teddy bears and stuffed animals, in general, started when I was young. Eventually, over the course of my life, I ended up accumulating many a bears and to hubby's consternation, our bed has slowly been invaded by little stuffed animals ever since we got married. I've always thought teddy bears are so cuddly and I love how soft and inviting they are when you give it a hug. You can't do that with a Barbie!
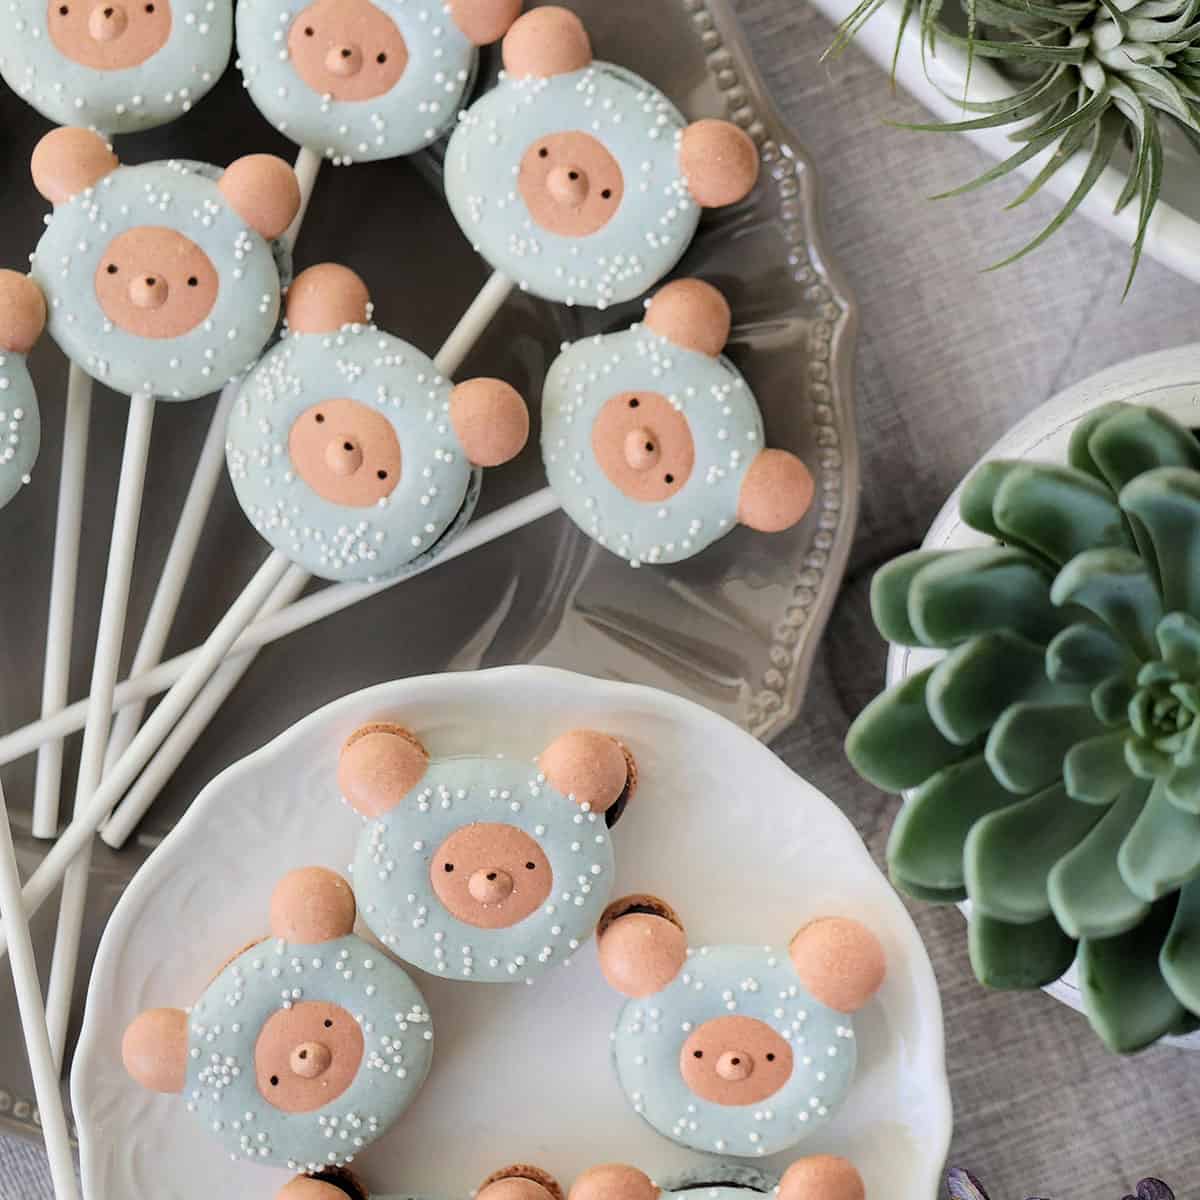
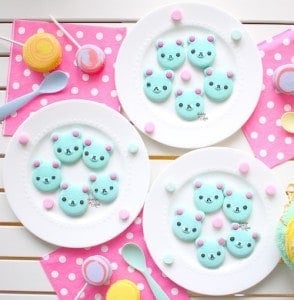
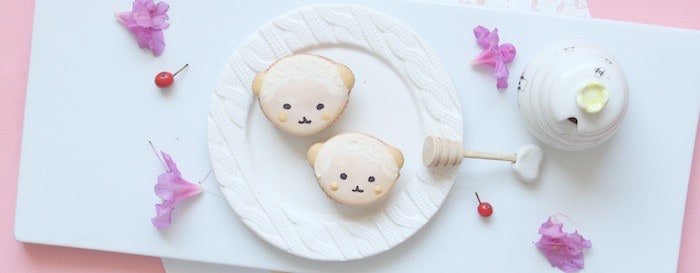
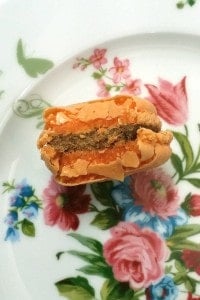
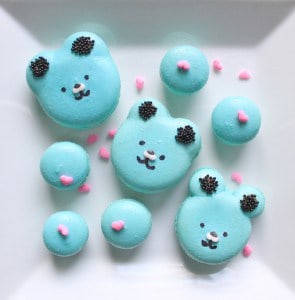
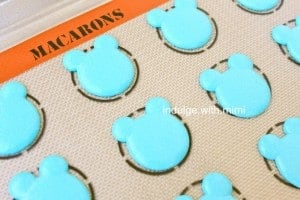
Here is another set of macarons inspired by my little furry friends. These are panda bear bears that I decided to make in a soft teal and light brown colour because I'm guessing that if I were a panda, I'd probably want some colour in my life 🙂
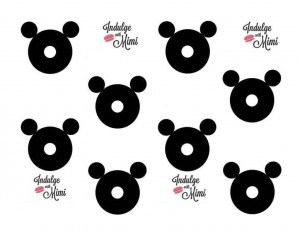
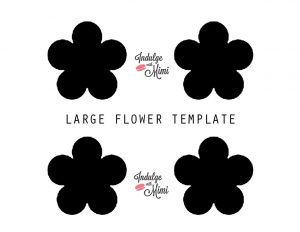
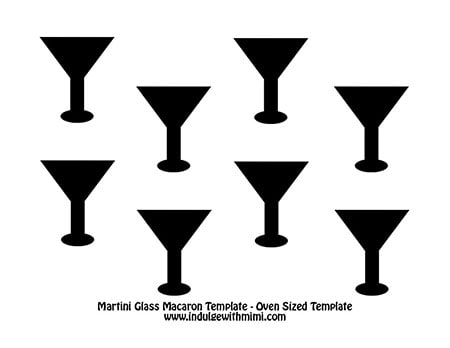
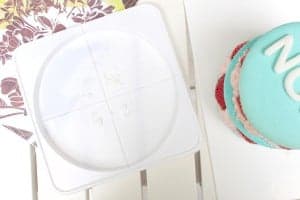
I hope you enjoy the short video and get good use of the bear template I've included below.
Have a Beary Good Day! Don't forget to subscribe for my newsletter if you want to know when I post new templates and recipes.
XOXO,
Mimi
♥ORIGINAL Best French Macaron Tutorial can be found here ♥
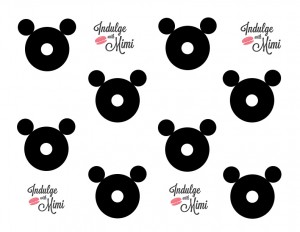
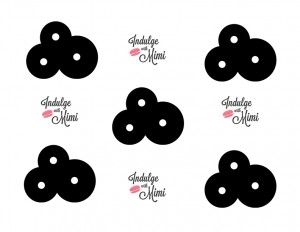
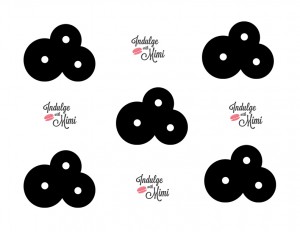
♥ MIMI'S PANDA BEAR MACARONS ♥
Makes 12 Bear Macarons
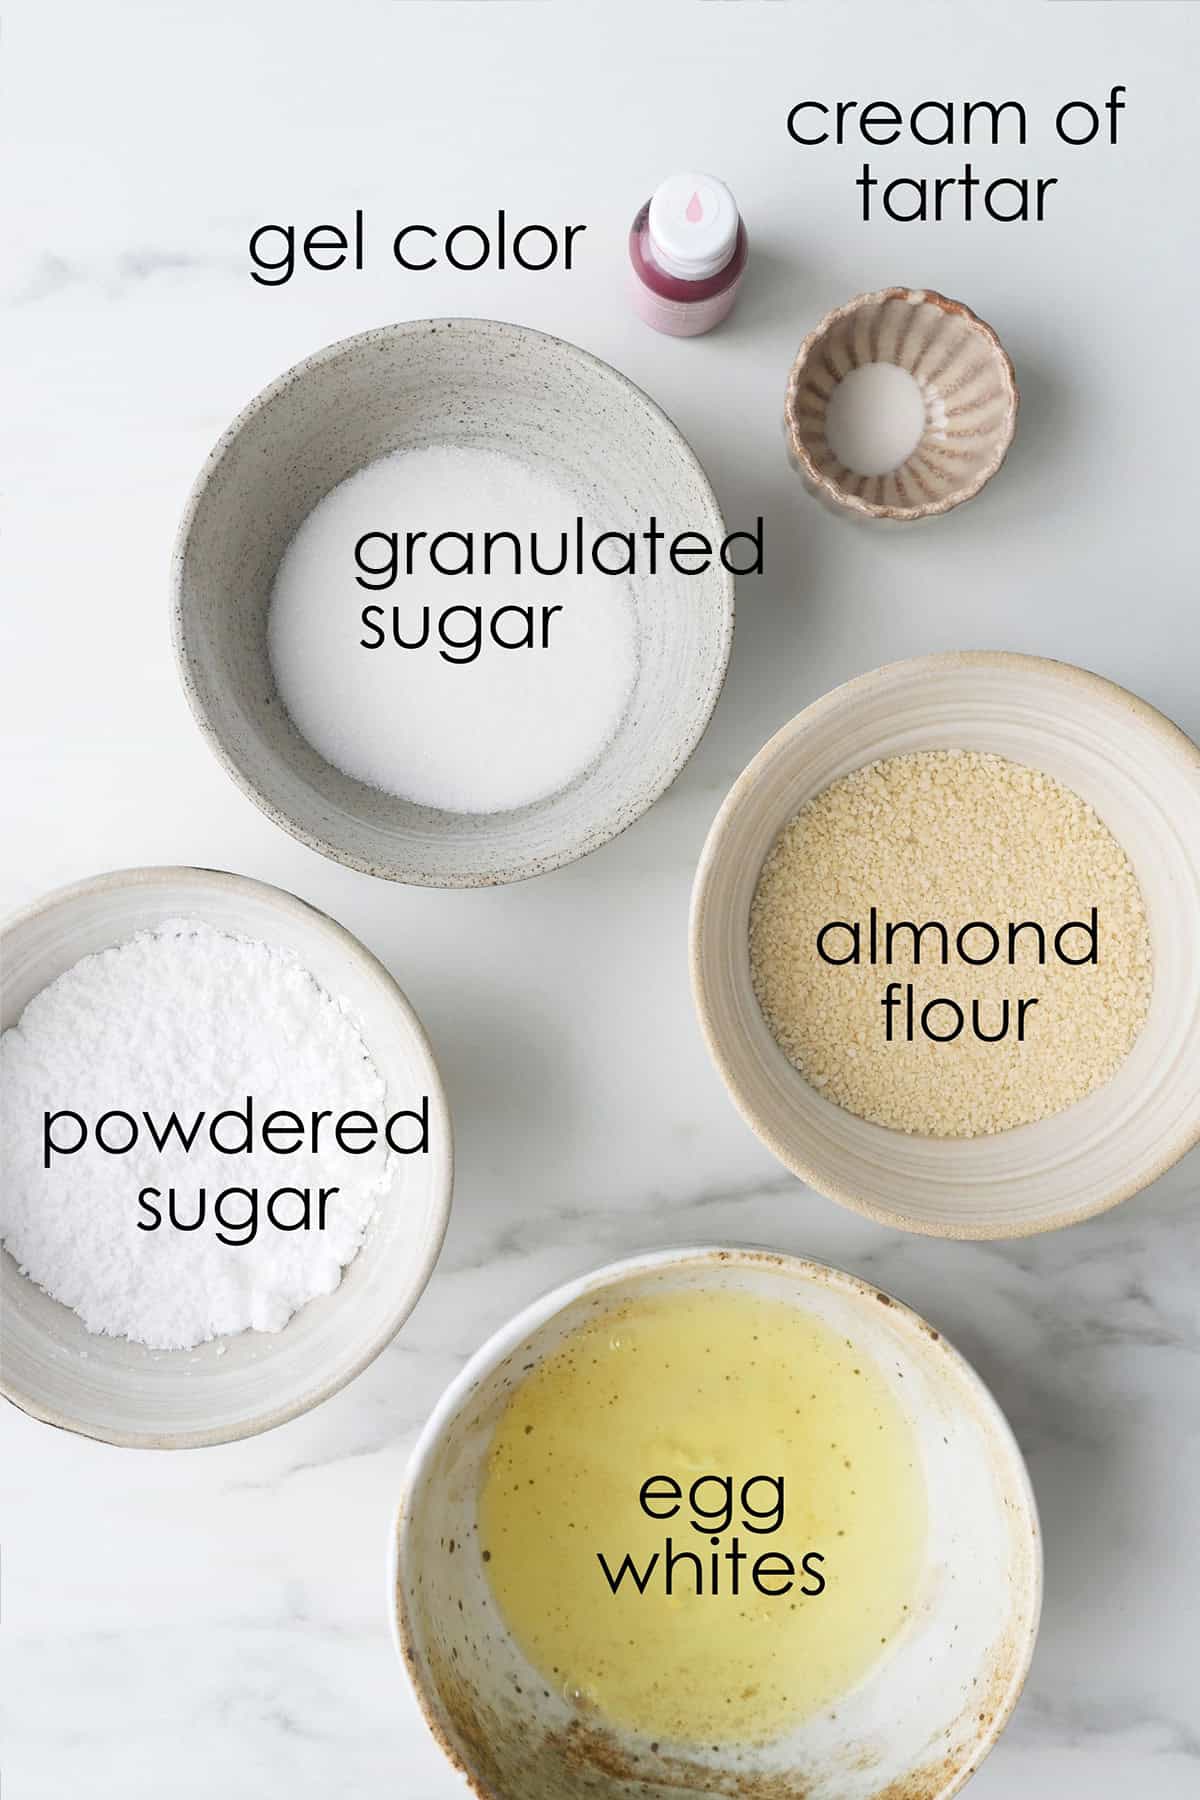
INGREDIENTS:
- 65 grams almond flour
- 65 grams icing sugar
- 45 grams castor sugar
- 50 grams aged egg whites
- ⅛ teaspoon cream of tartar
- Teal Gel Colour (½ drop of Turquoise from Americolor)
- Light Brown Gel Colour (1 drop of Light Brown from Americolor)
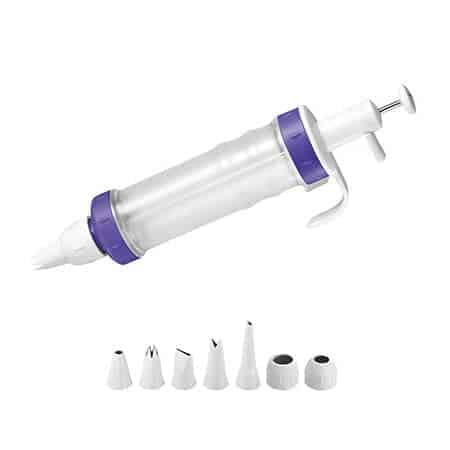
These pandas utilize the exact same techniques I used in my Rikuma Bear Macaron Tutorial. Click to see the ingredients list, methods etc.
Here's a "60 Second Macaron Magic" video to show you how I did it:

[srp post_limit='5' post_random='yes' category_include= 25 widget_title = 'Macaron How-To's']

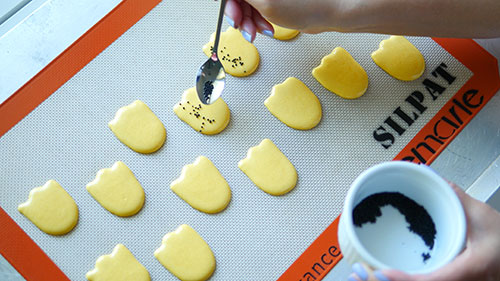
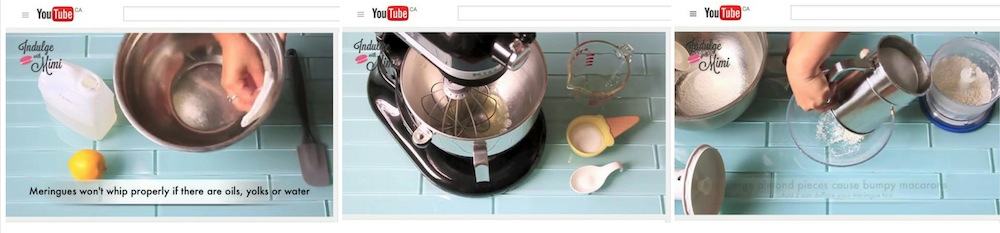
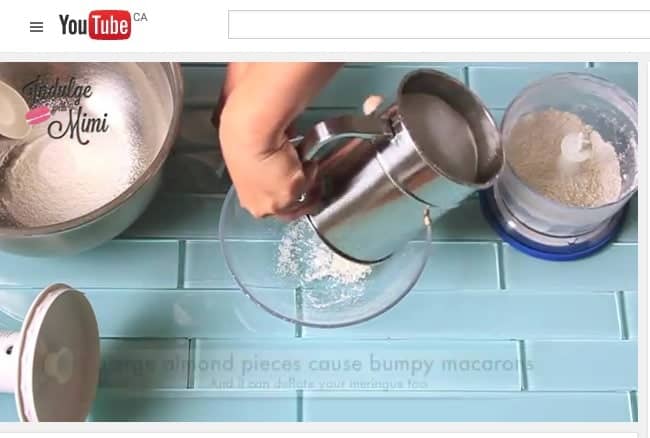
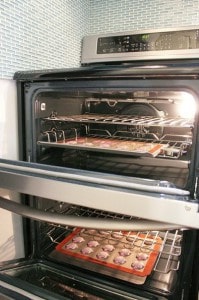
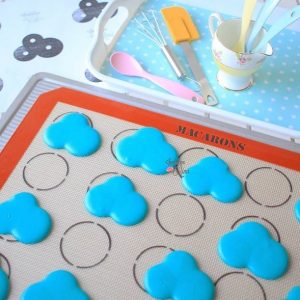 Silpat mats and I have a love hate relationship. As you already know from my


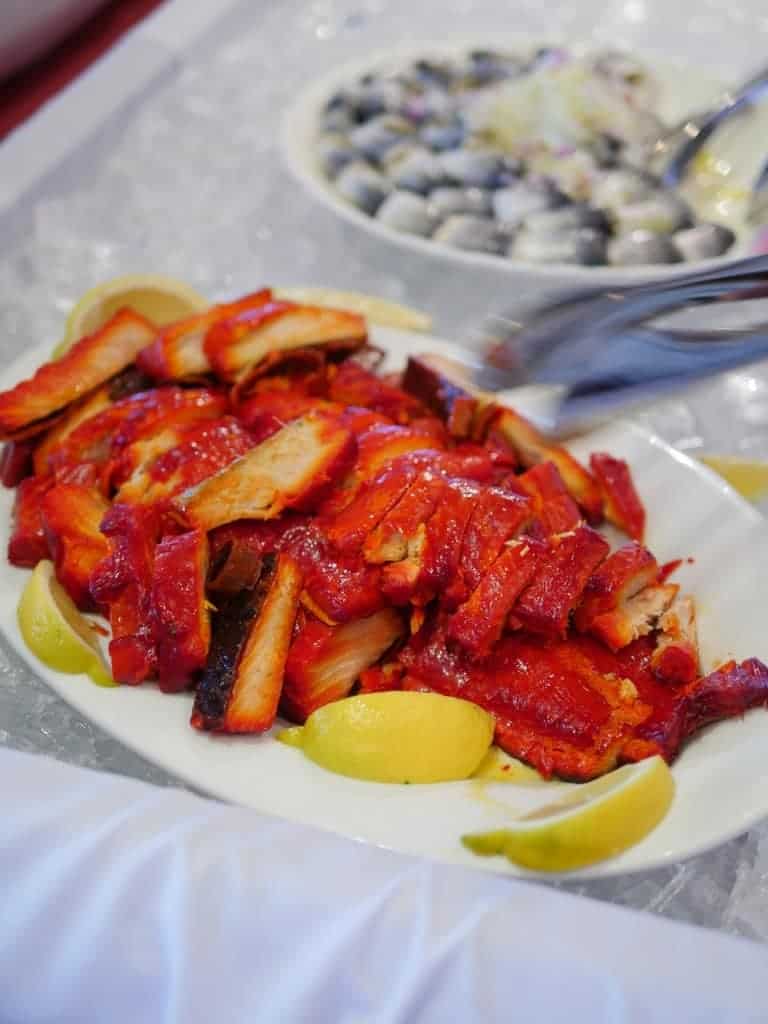


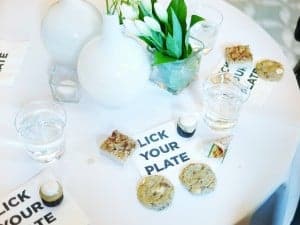
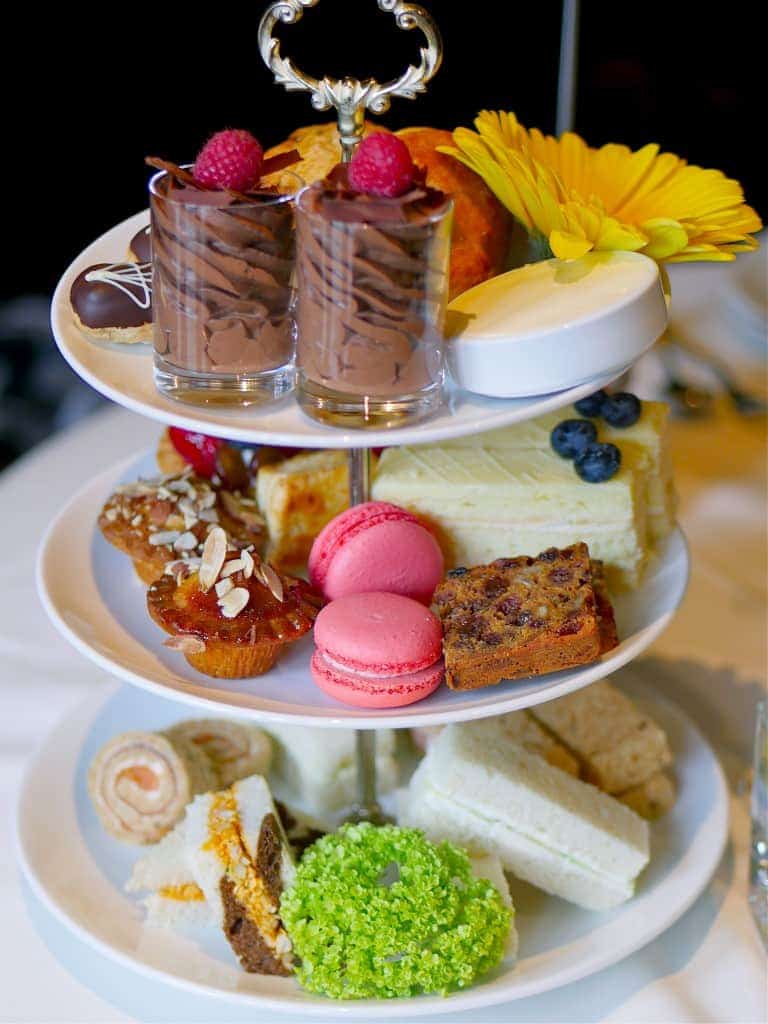
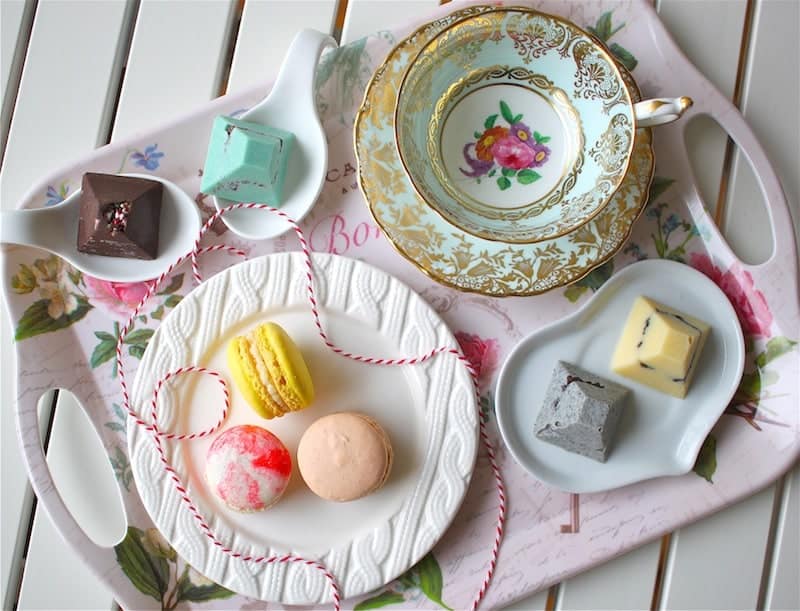
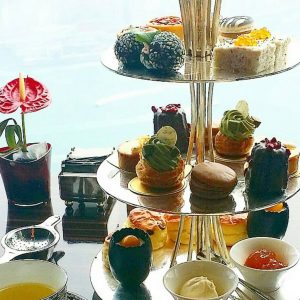
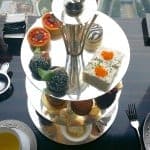
 Having been to several afternoon tea services offered by hotels, I find that the food offering is generally more traditional, the service is impeccable and the atmosphere is serene and calm. The afternoon tea service at the Wedgewood is no exception to that. Luxury and professional service seems to be the common theme amongst them and you'll notice that right away as you pull your car up to the front of the hotel where the windows to the Bacchus lounge is facing as well. There is a valet attendant dutifully on standby to help you open your car door and shield you from the elements with an umbrella. On the top of my head, I can only remember one other afternoon tea experience which had started off so grandly and that was at the Fairmont Hotel in Vancouver. It's no wonder that this establishment was awarded the Four Diamond Award from the CAA/AAA. It's obviously a good choice for hosting clients or impressing guests.
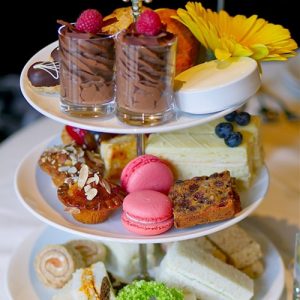
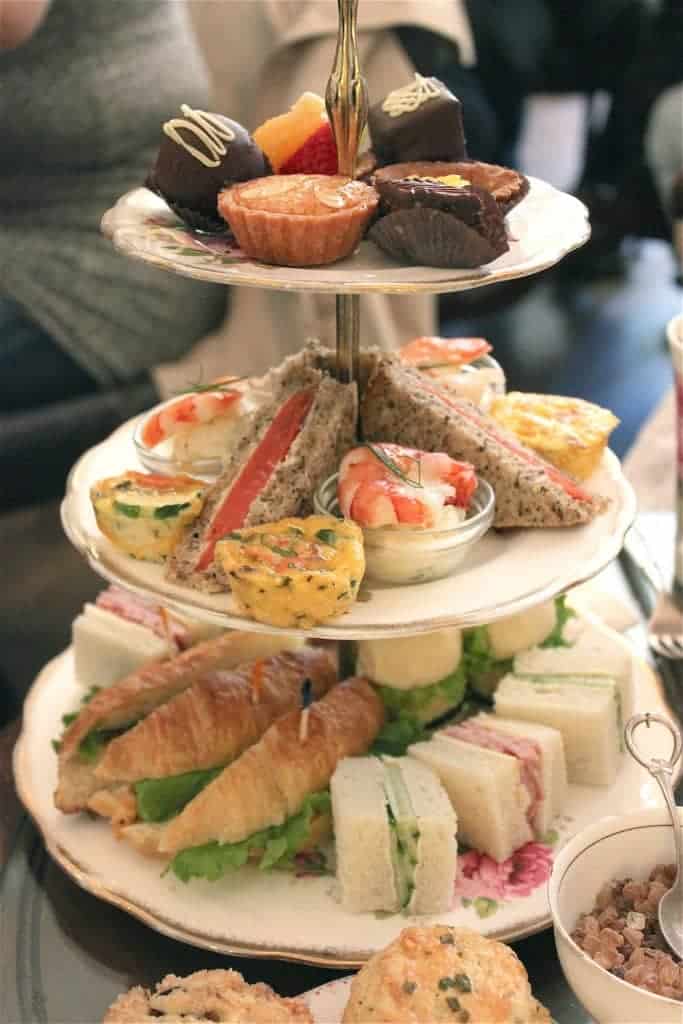
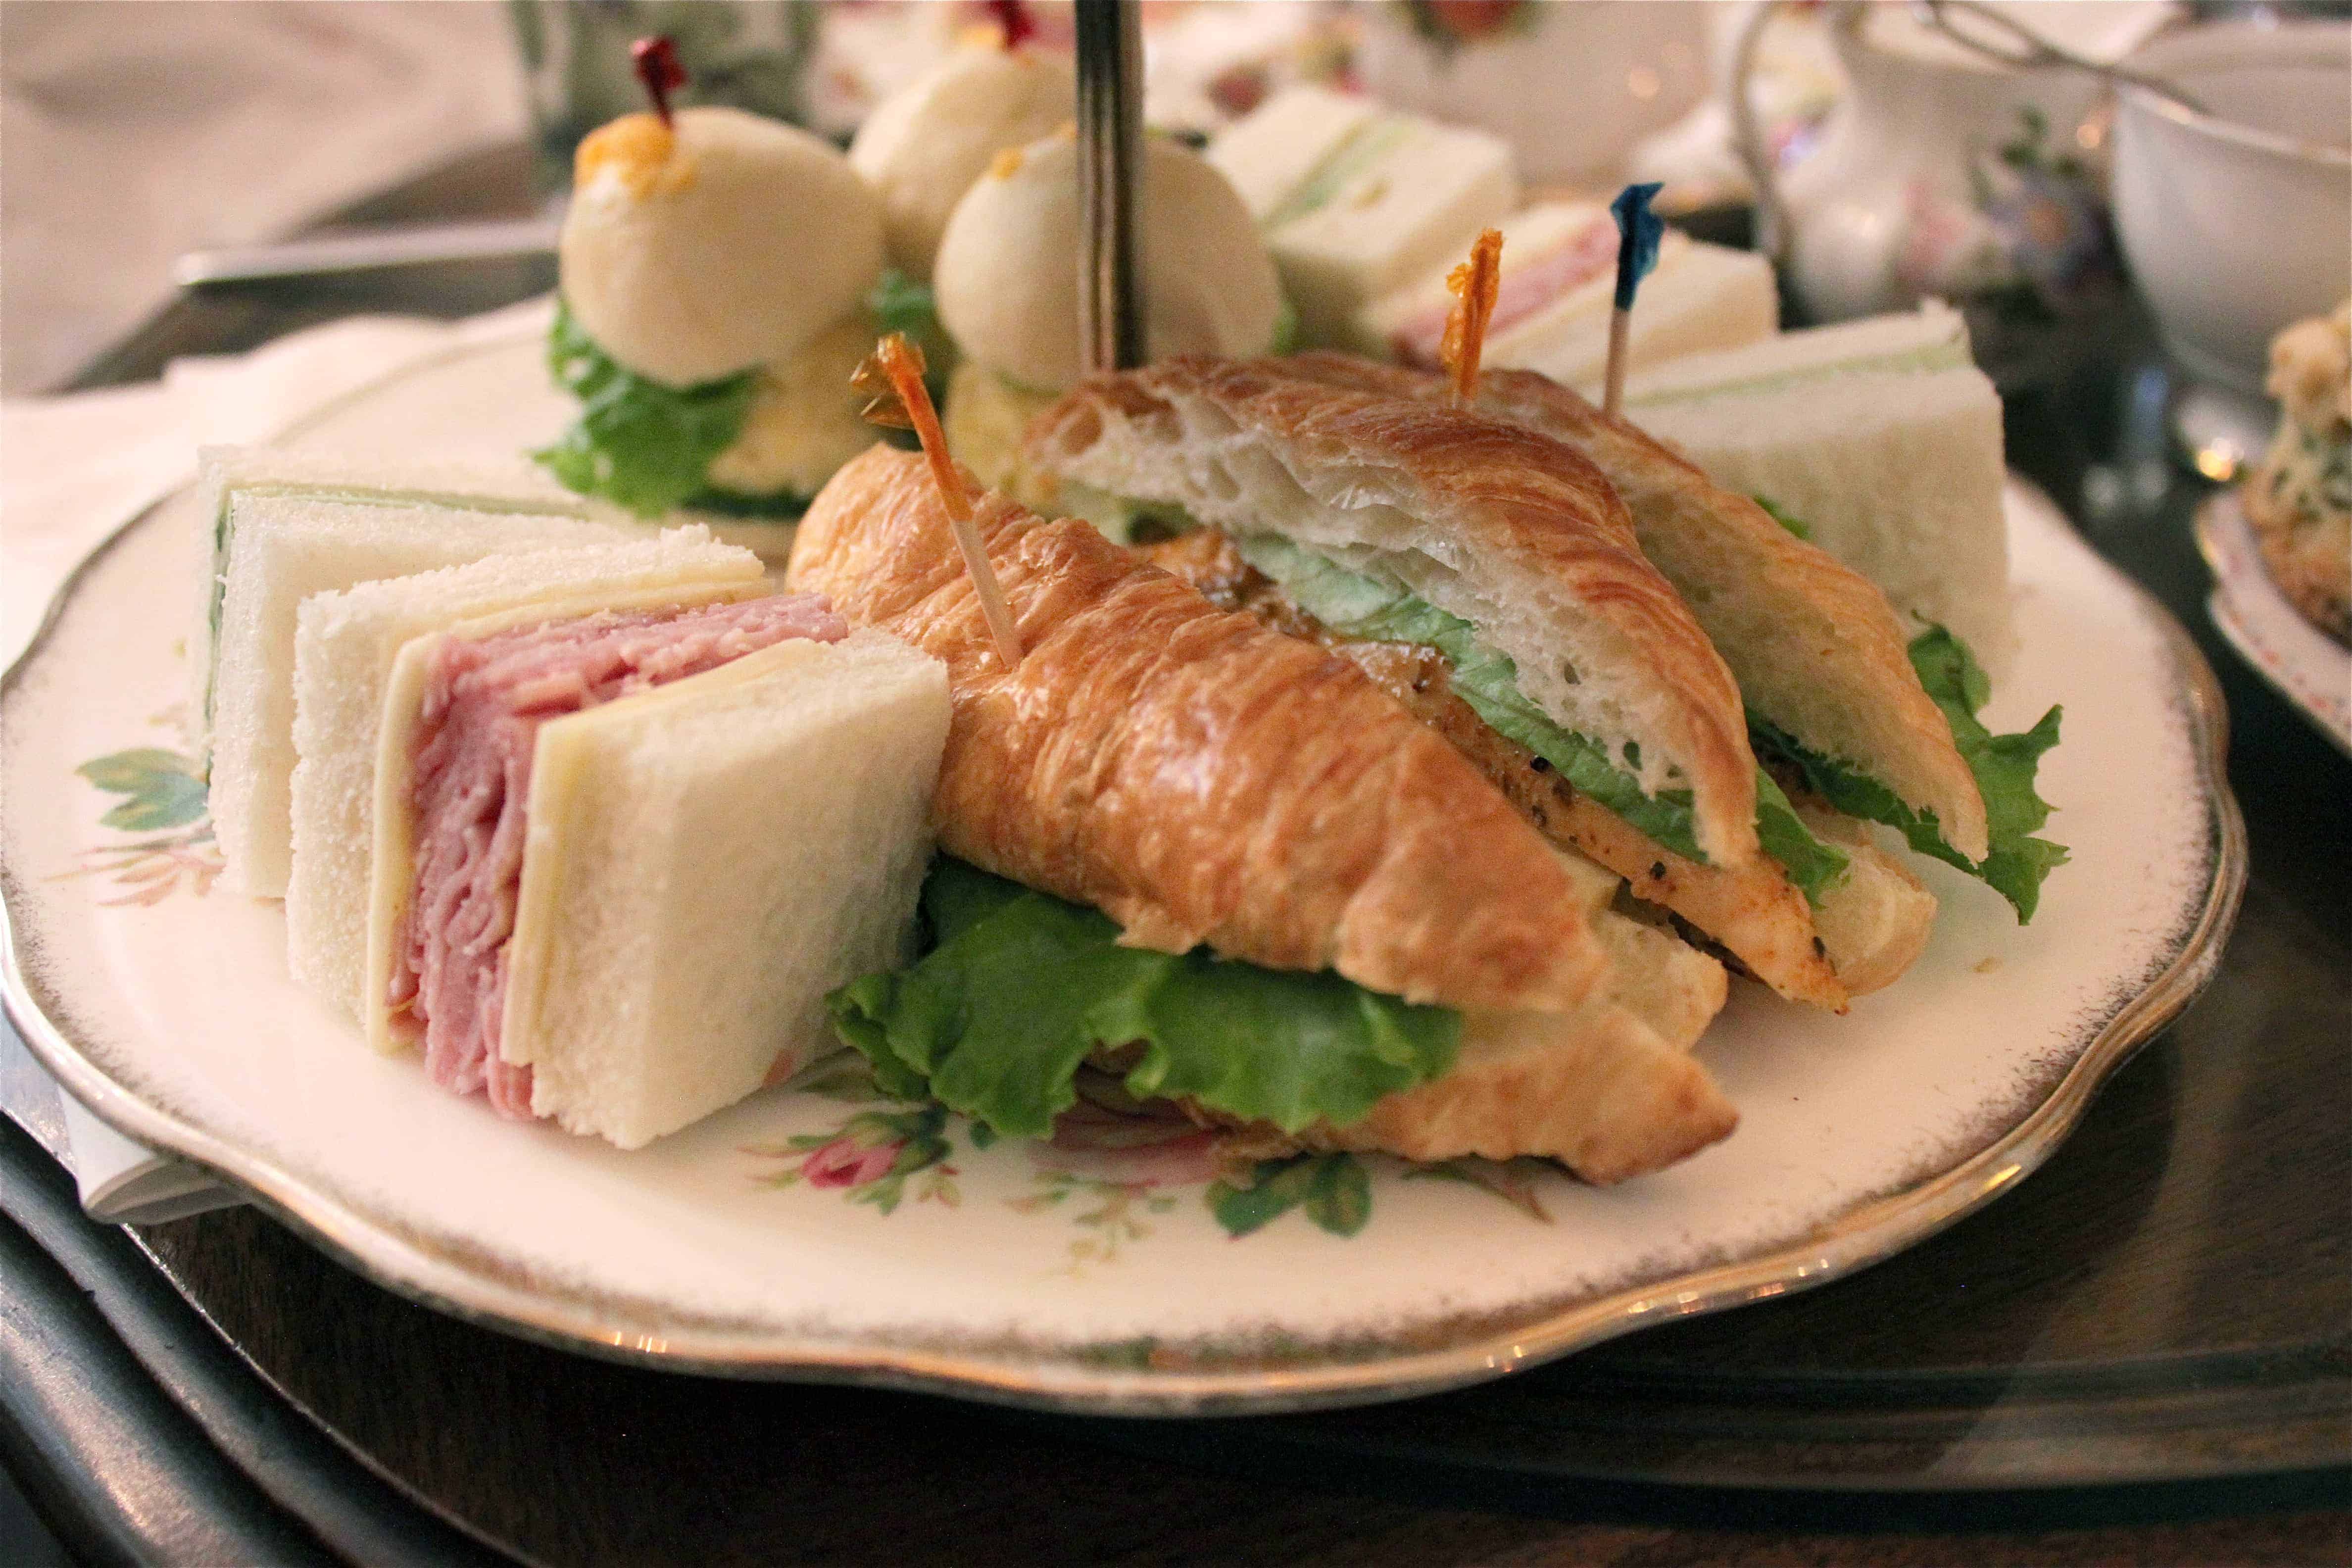
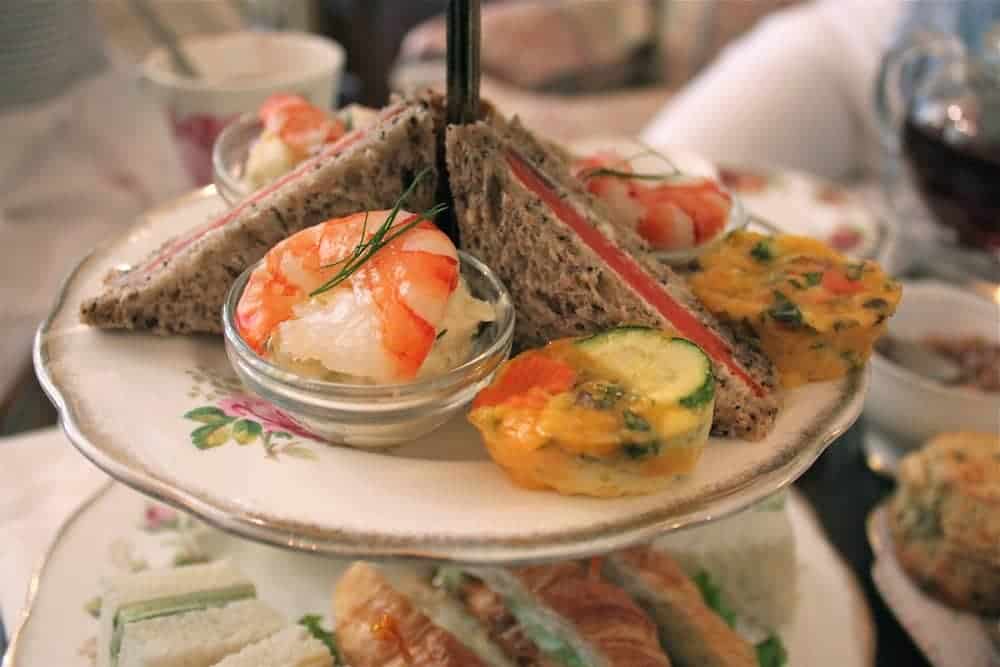
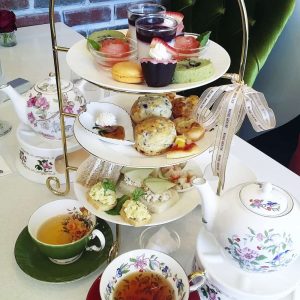
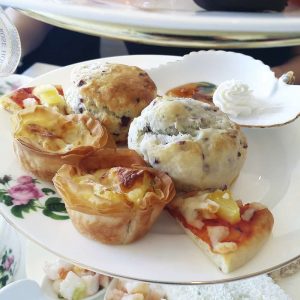
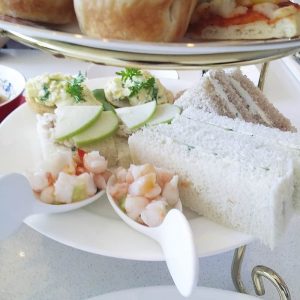
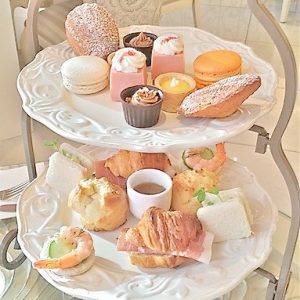
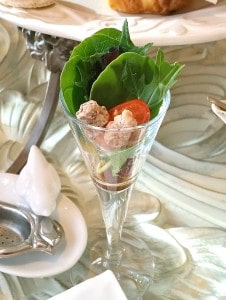
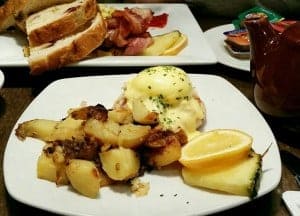
 Savoury: Good. Savouries centered around a selection of traditional finger sandwiches as opposed to puff pastry or quiches. The fillings were fresh and tasty but the outer layer of the bread was a little dry perhaps due to exposure. There were five different sandwiches to choose from and they were offered in regular afternoon tea sized portions. Not too small (like
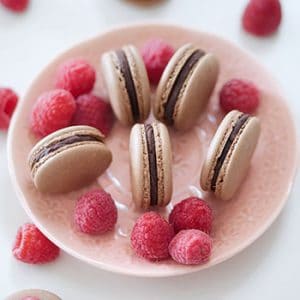
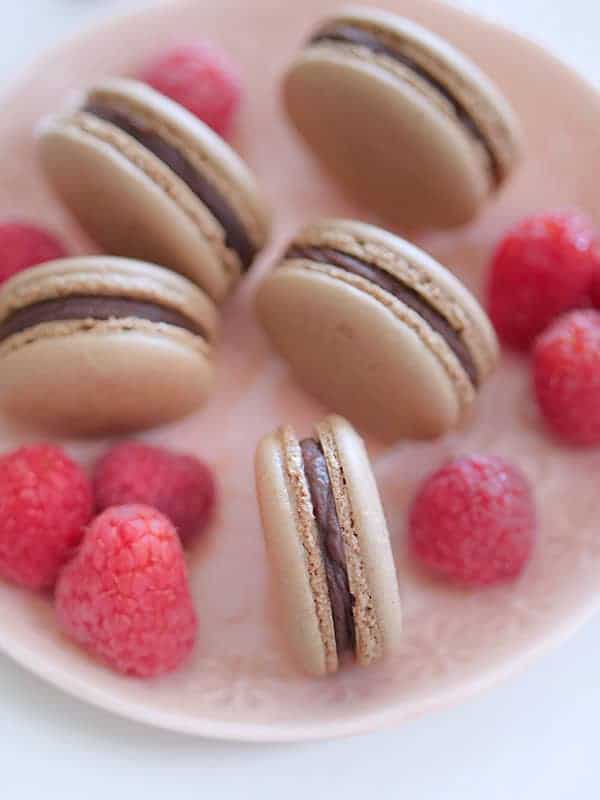
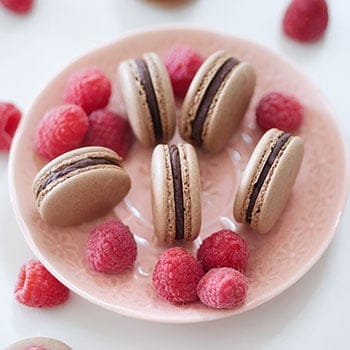
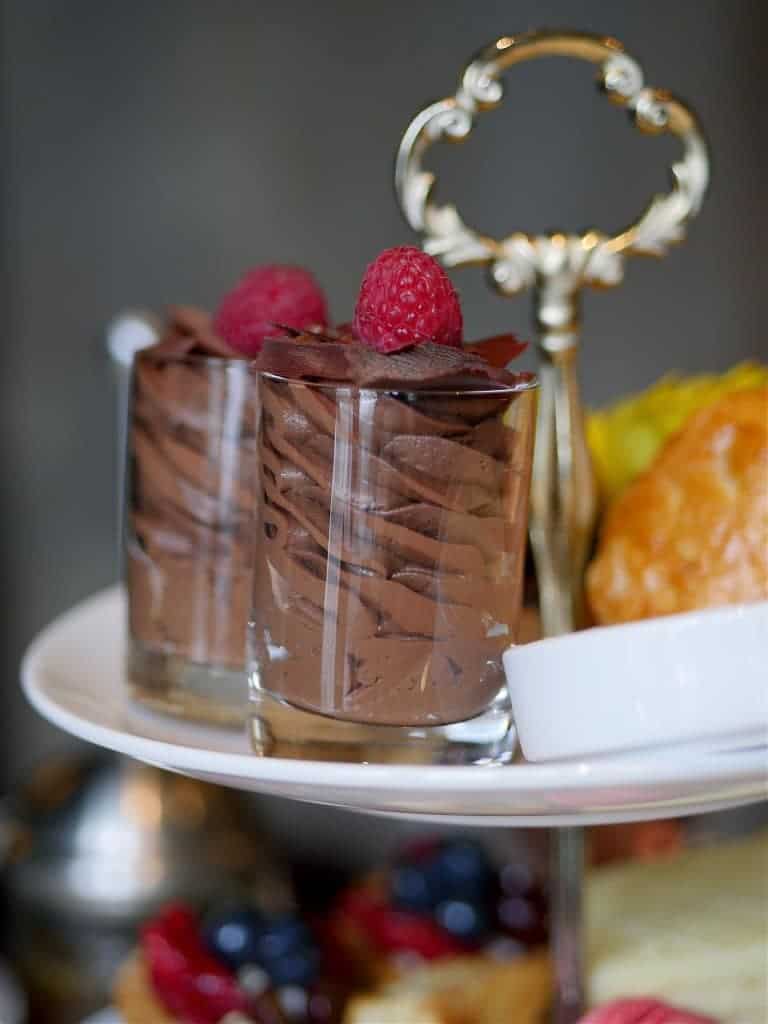
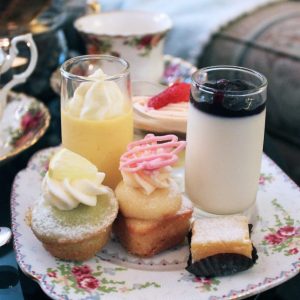
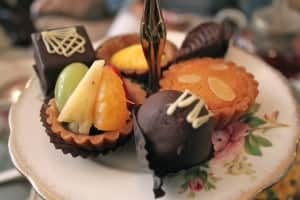
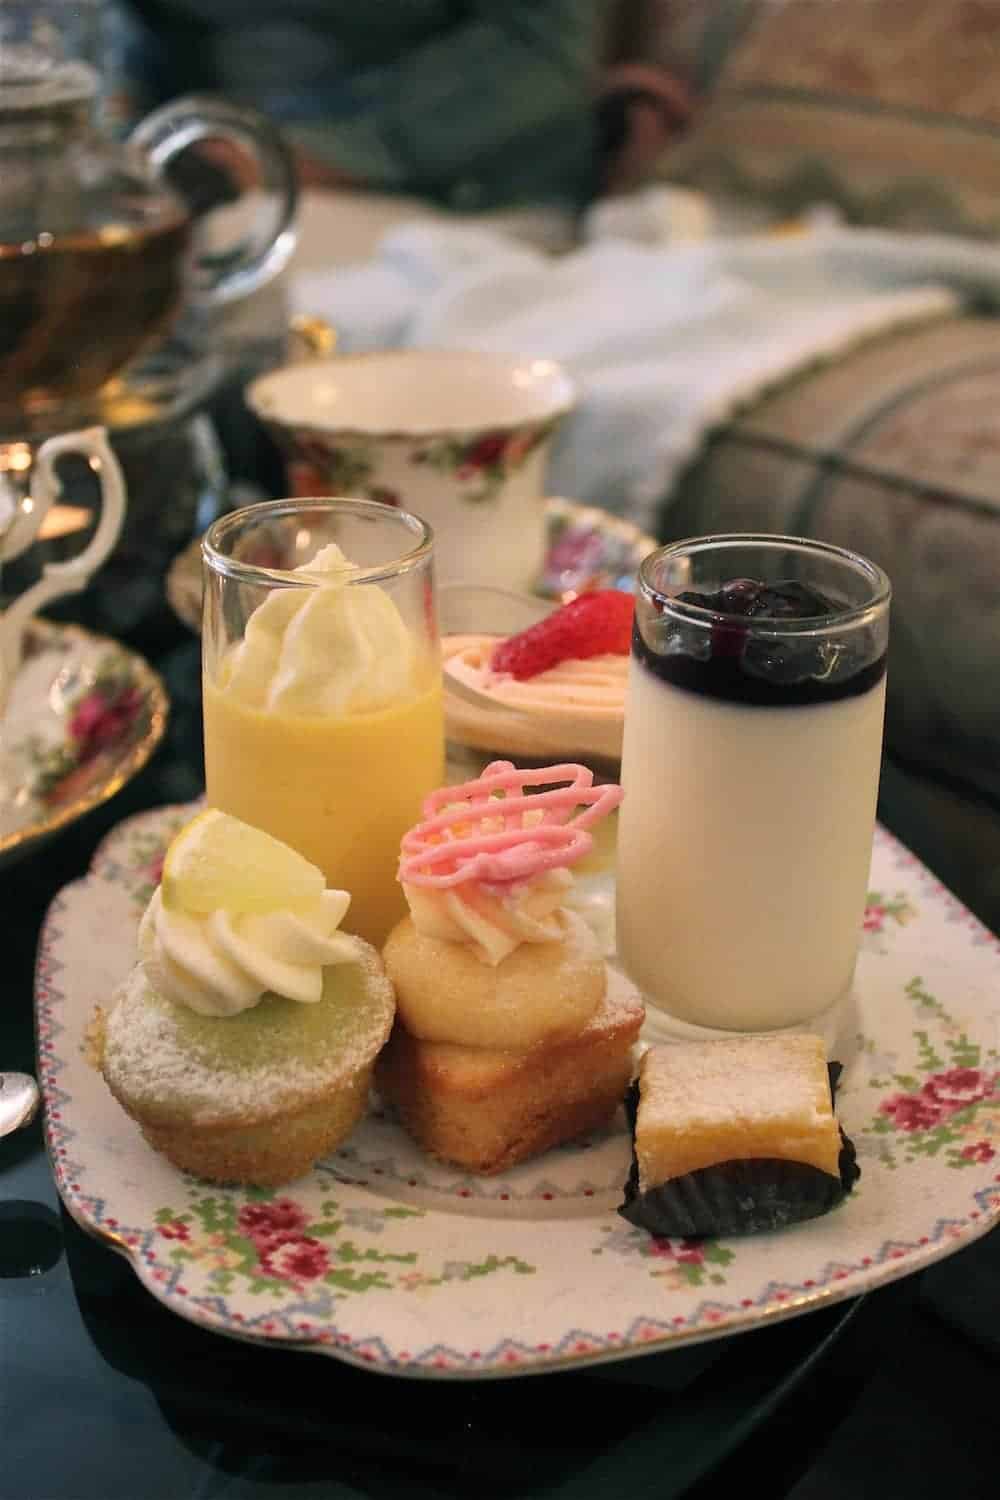
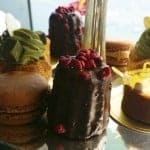
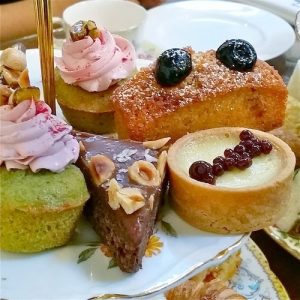
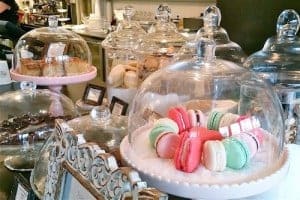
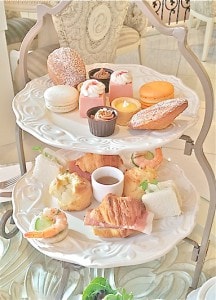
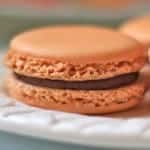
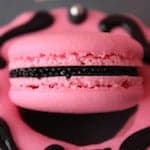
 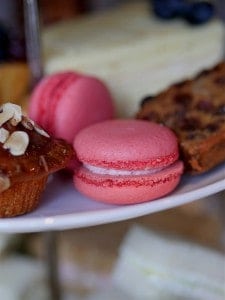 Sweets: Good. We were told they were all made in-house which surprised me as the raspberry macaron was exquisitely perfect. Most afternoon tea places often have problems with this item so I feel this is a real good reflection of the pastry team here. The rich and smooth chocolate mousse was perhaps the item I enjoyed the most and was the biggest in size compared to the other seven sweets that were not too small (like Rose House) but also not too big (like Neverland). And yes, there is indeed fruit cake and Bakewell tarts on that second tier, some guests may really appreciate these traditional pastries.
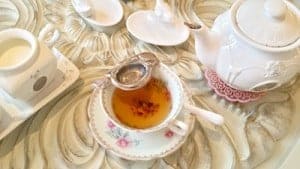
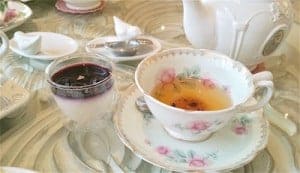
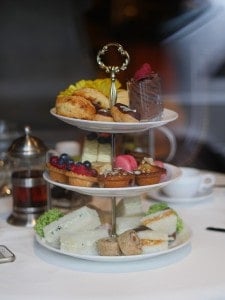 Teaware: Minimalistic white 3 tier stand and matching teacups. Tea was served in a glass teapot with infuser.


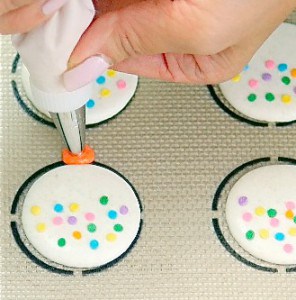
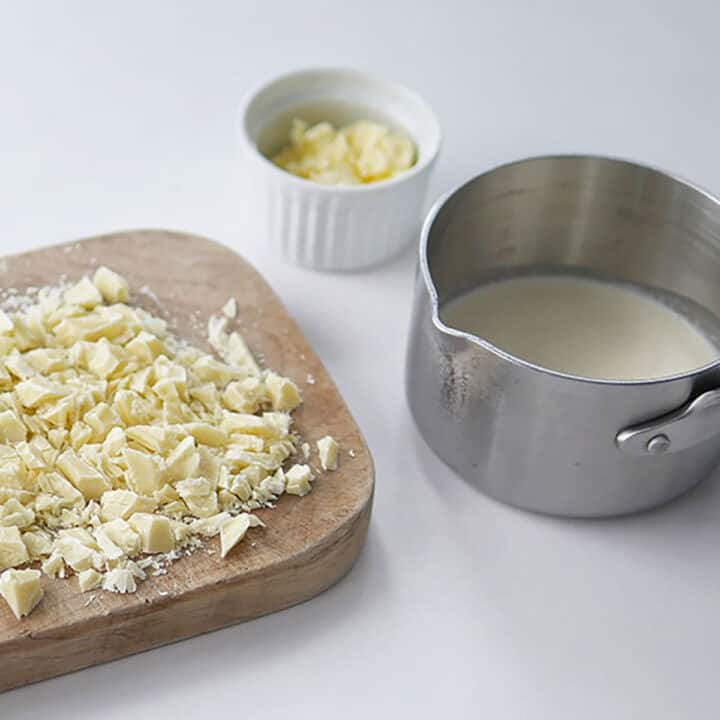
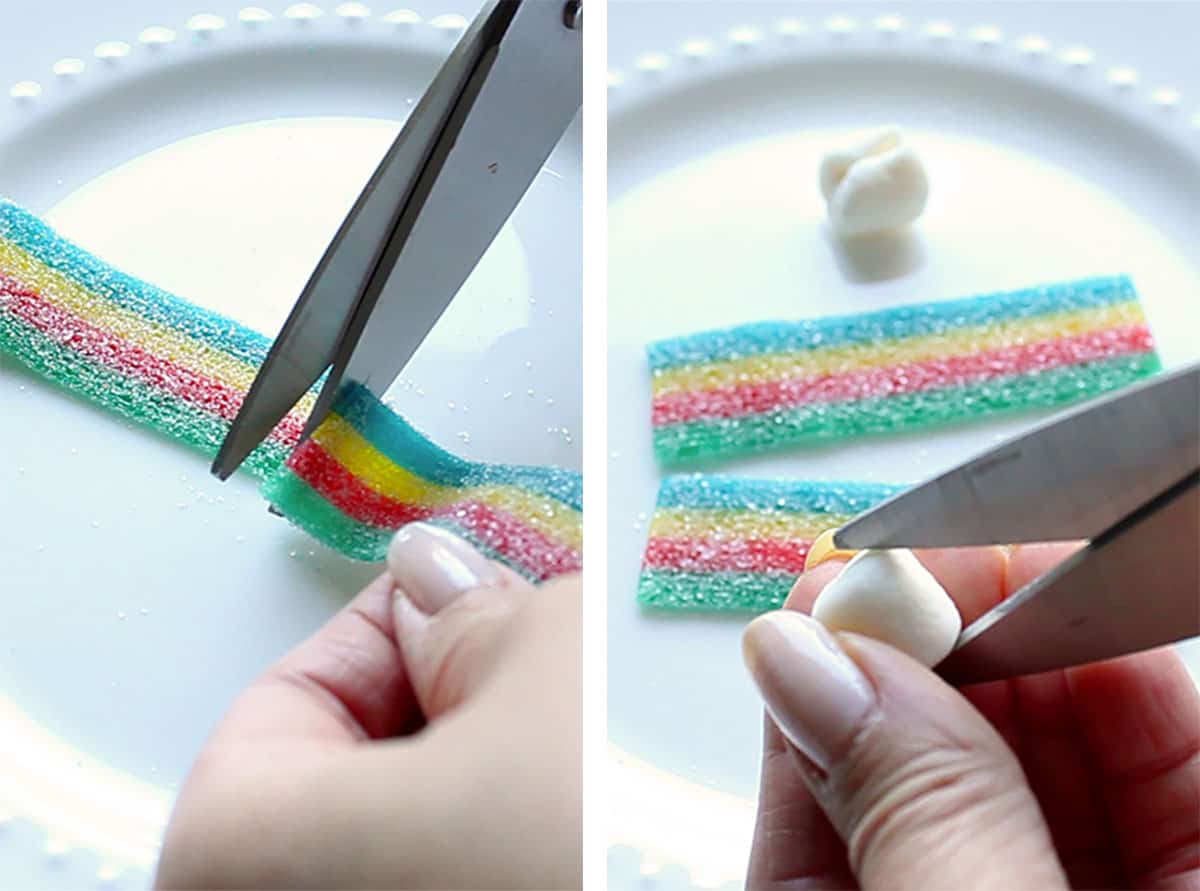
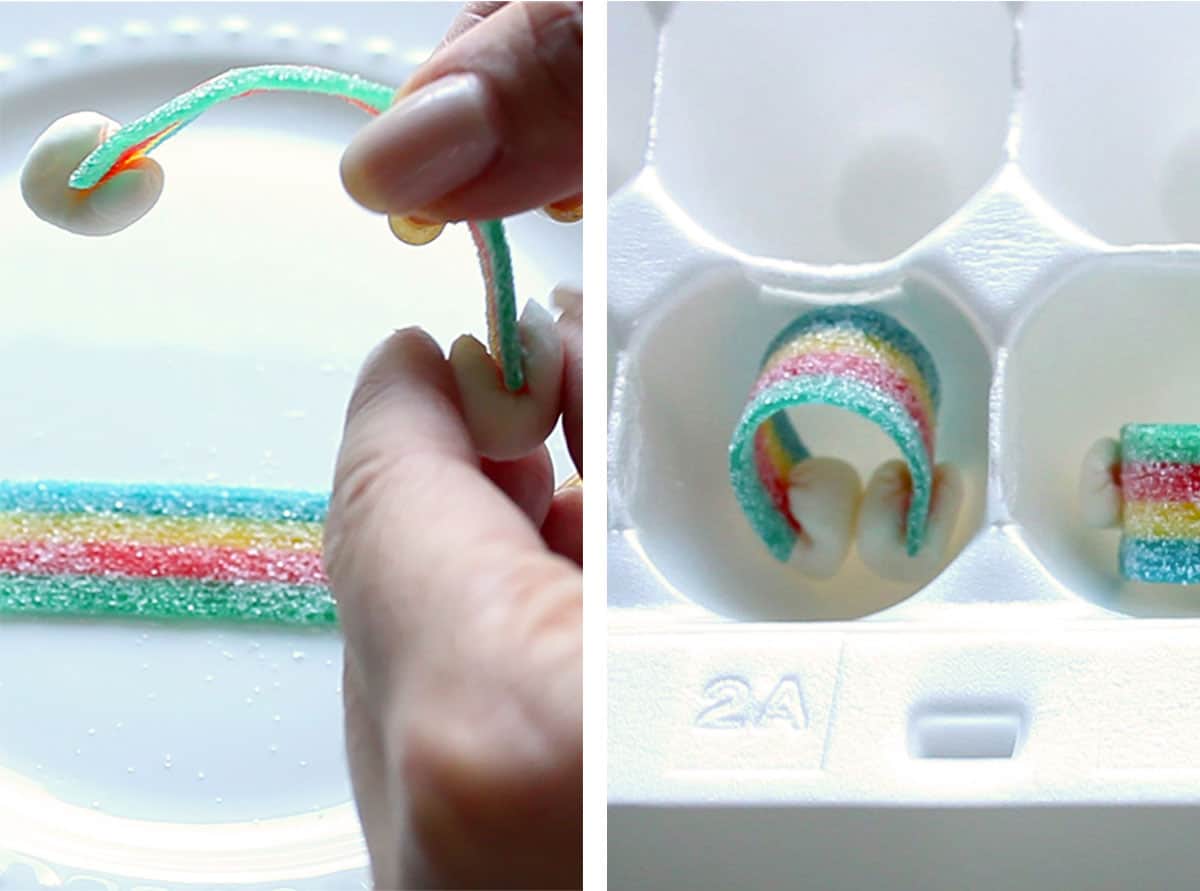
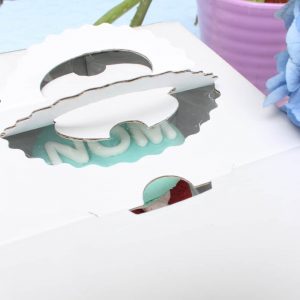
 Small Batch of Edible Glue for Applying Gumball

 This was actually my second visit to Adonia. My first visit was for my bridal shower just a few years back so I still have fond memories of a beautiful day spent there with my girlfriends and female family members. On this visit, we reserved for a Monday sitting at 12:30 pm and were surprised to find it quickly fill up to full capacity. Mind you, it's relatively small so it wasn't such a feat compared to bigger establishments like
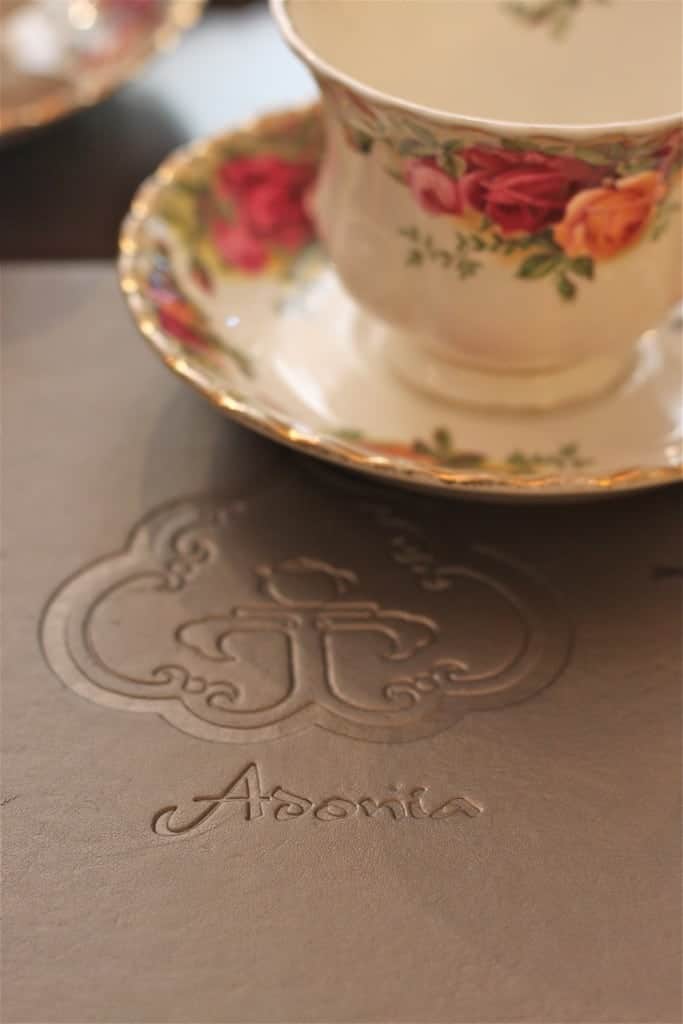


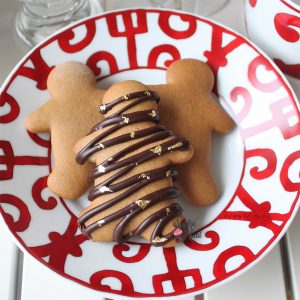
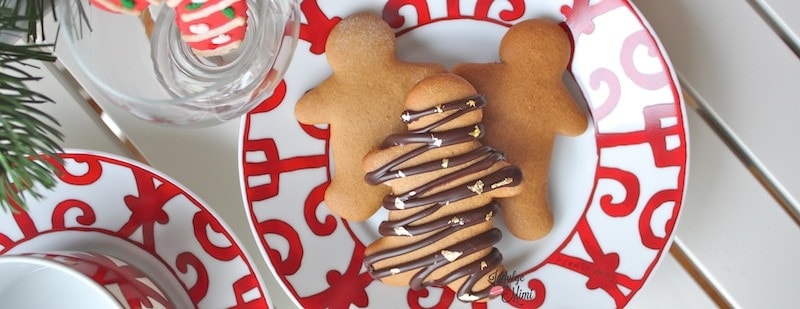
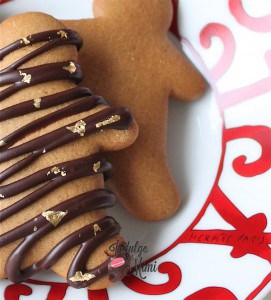 Although delicious, I would have never thought to make these as gifts since gingerbread seemed so unglamorous. Well that was until I laid eyes on
 One more thing, I love to make a big batch of this dough and keep it in the freezer until I need it. This way, you'll always have dough on hand to make holiday gifts for friends and family. Just take it out the night before, roll out the dough, cut and bake. So easy!


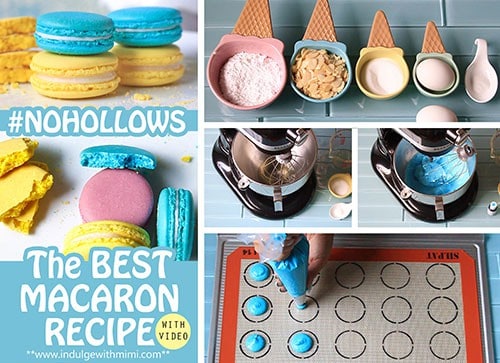
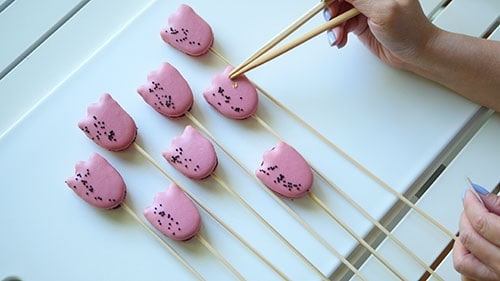
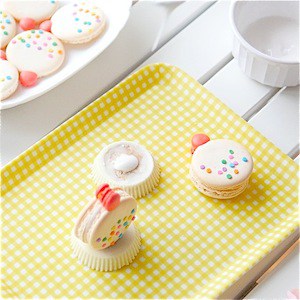
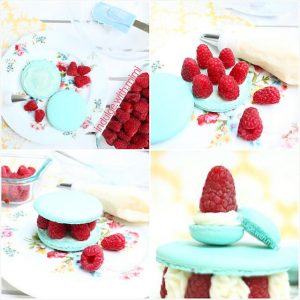
 To make these macarons, you'll need to prepare 3 batches of macaron batters in different colors but don't worry, you can save time by leaving one batch un-colored. And if you're concerned about preparing so many different colors, you can even use just two colors by putting the same color in two bags and just one color in the other bag.


 Have you noticed that the last few tutorials I wrote on #macaronart, the characters like the
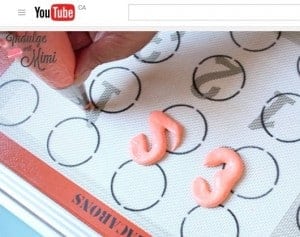


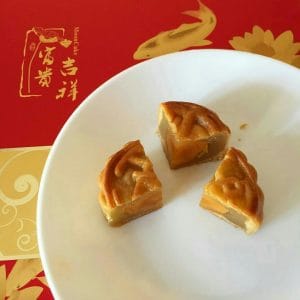
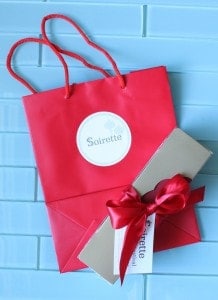
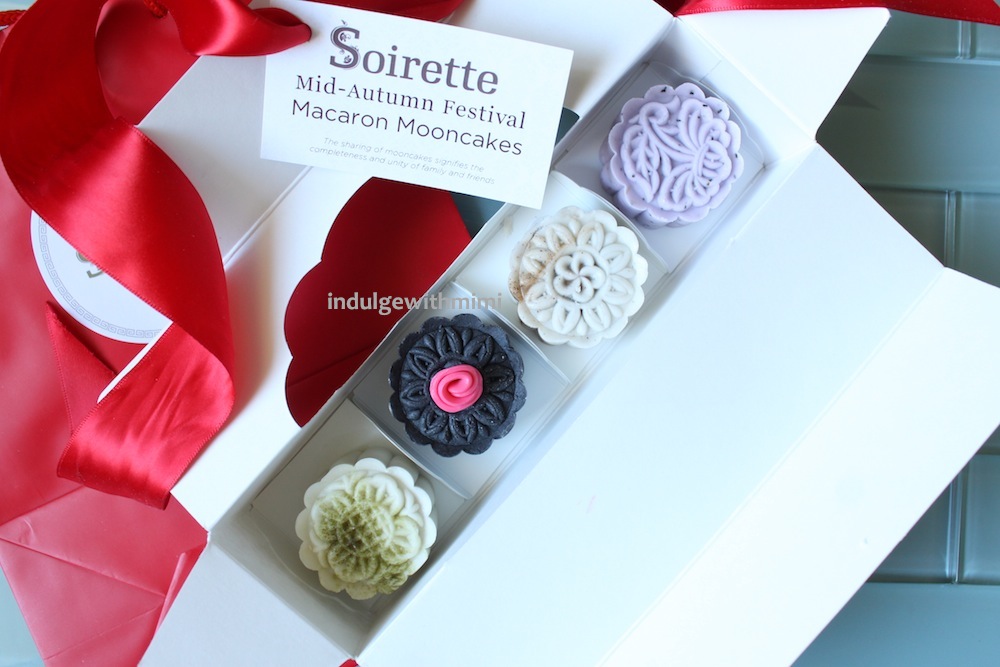
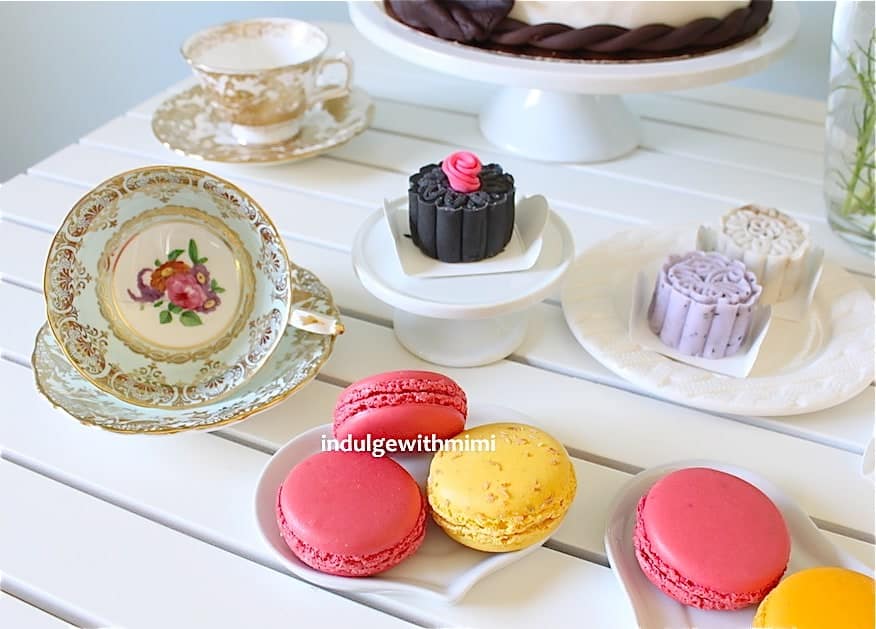
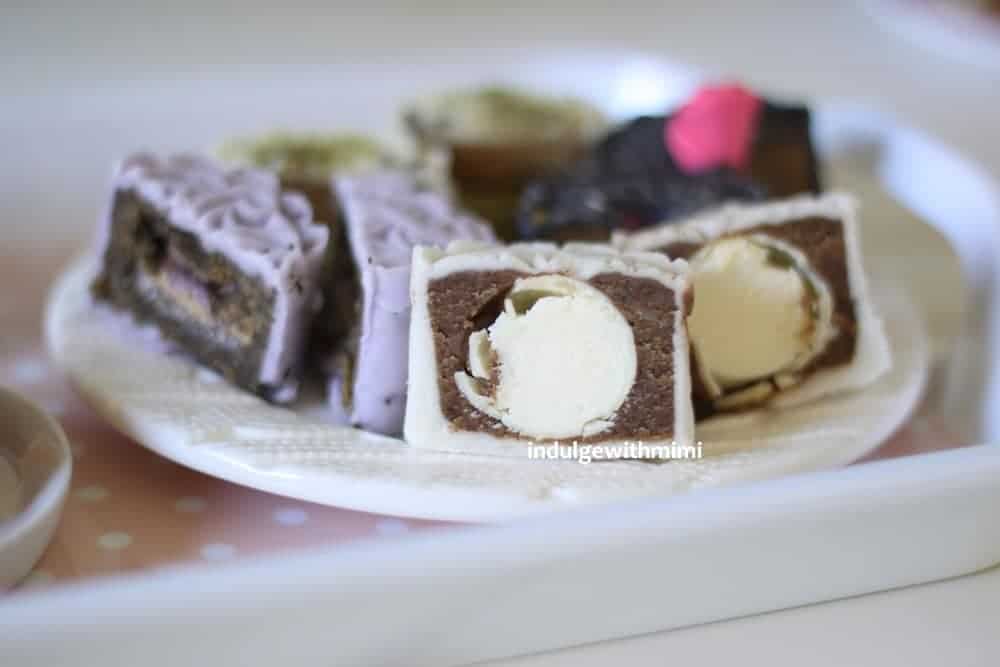
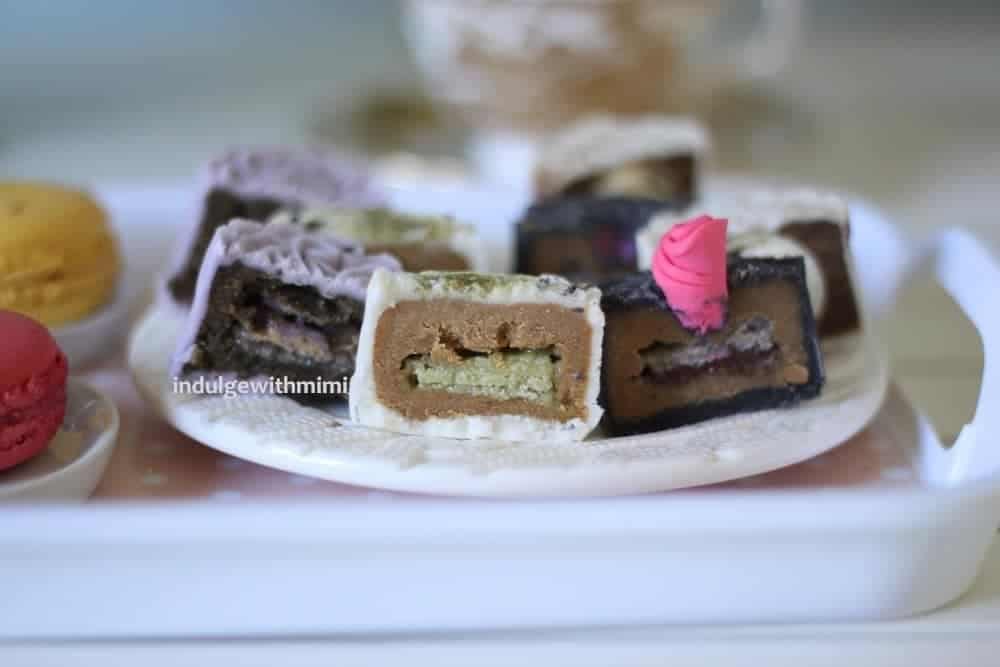
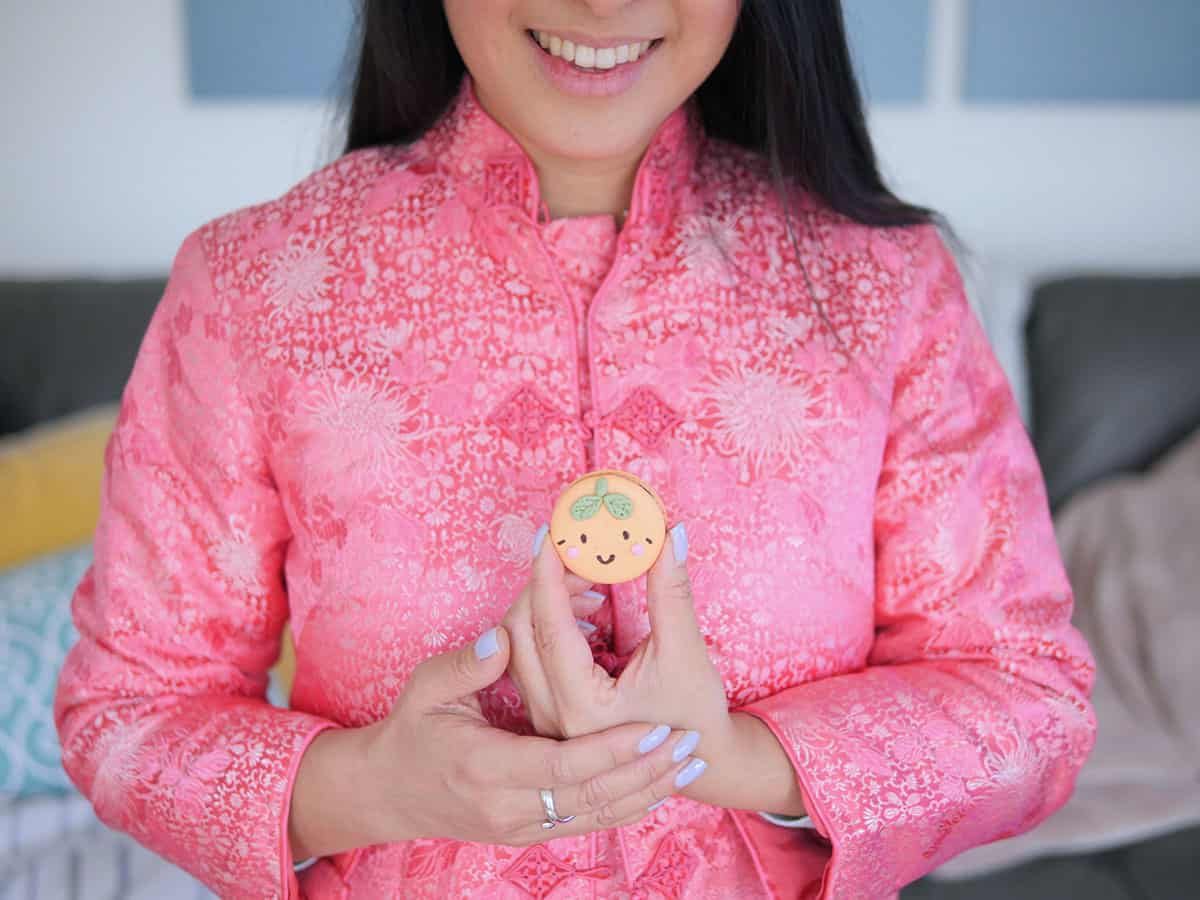
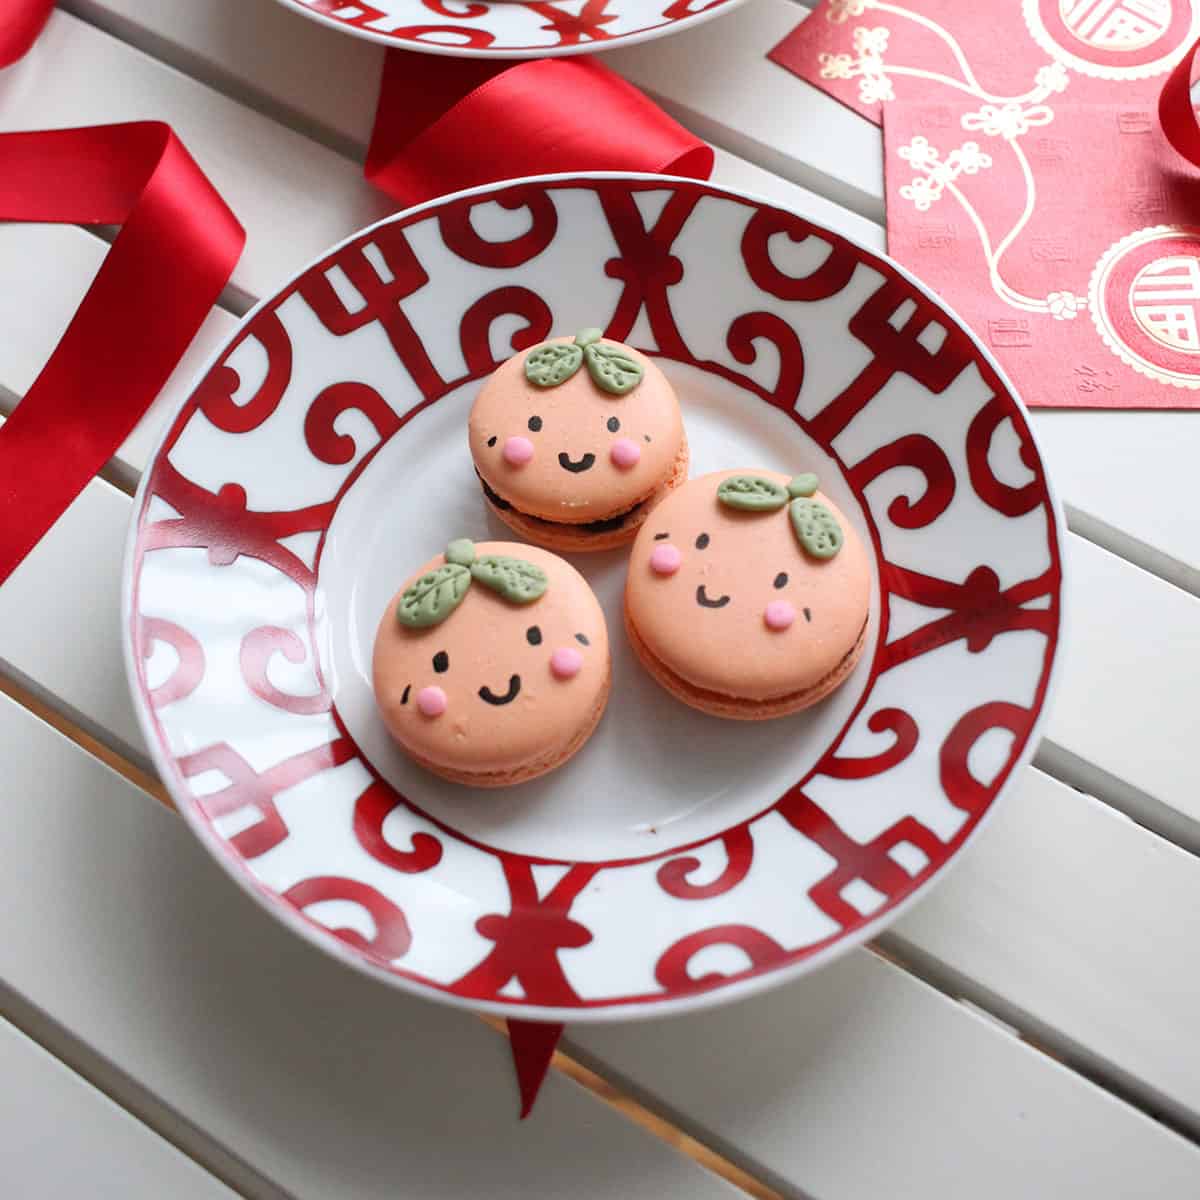
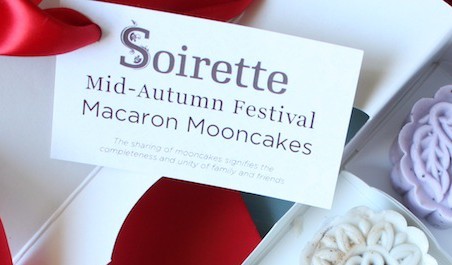 Well, the packaging is top notch so it makes a wonderful Mid-Autumn gift for those in your life who do celebrate this event. Also, it's a lovely
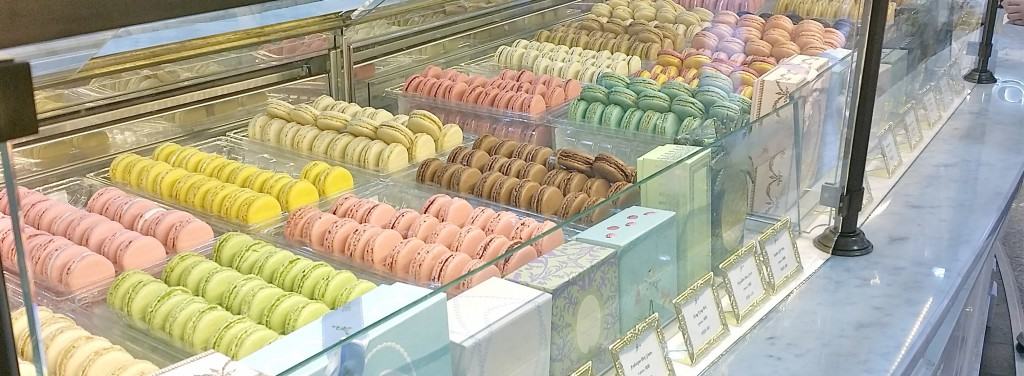
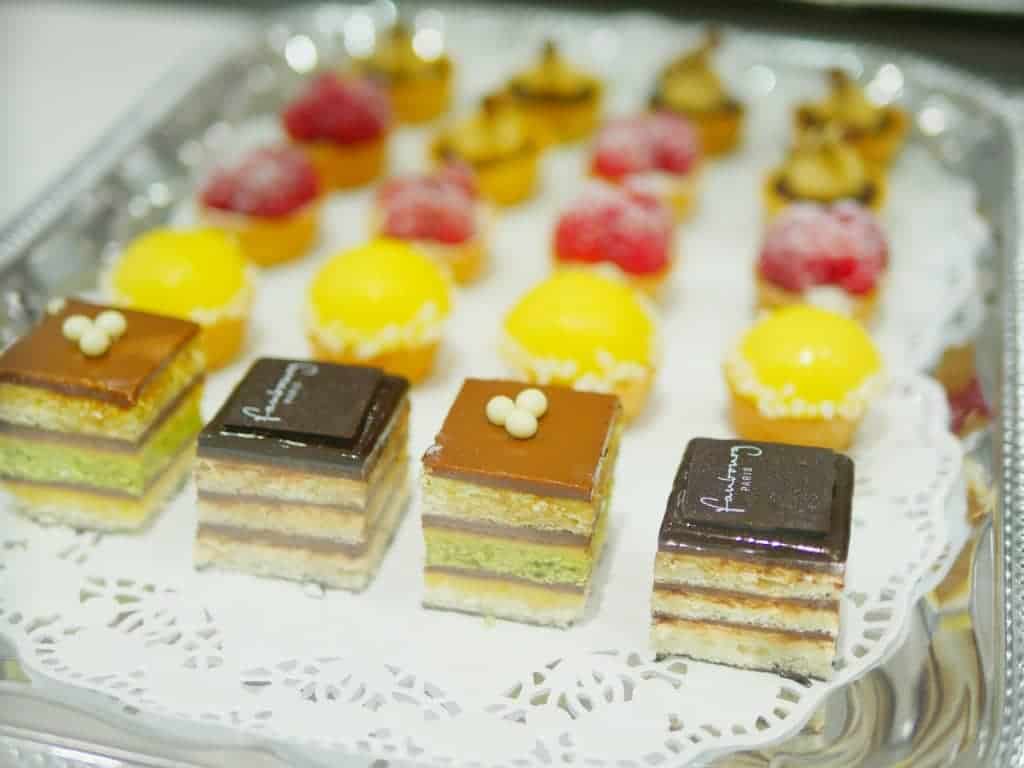
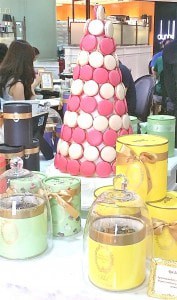
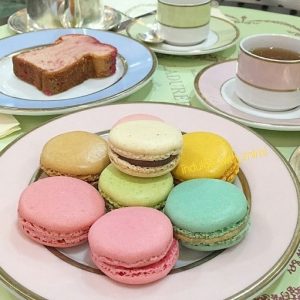
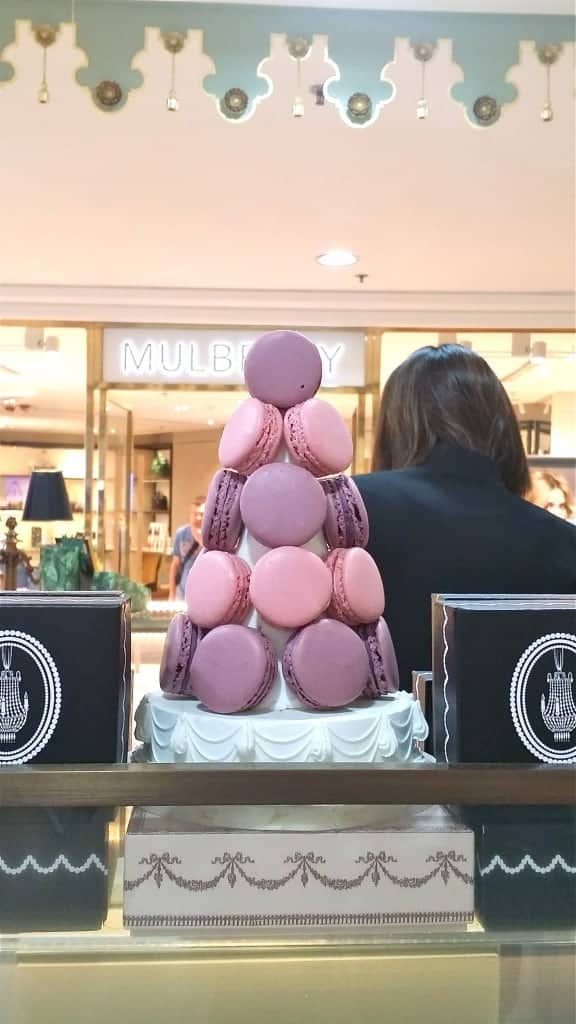
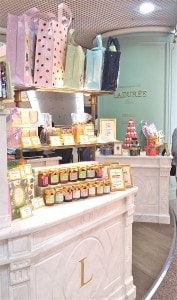
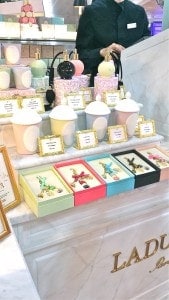
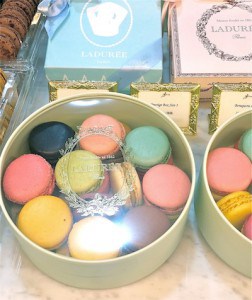
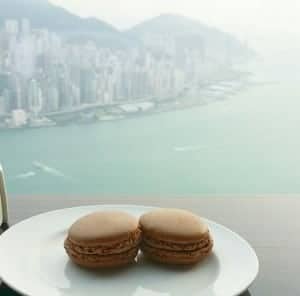
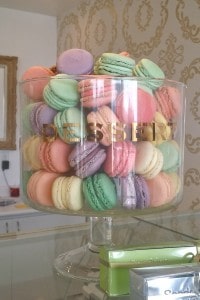
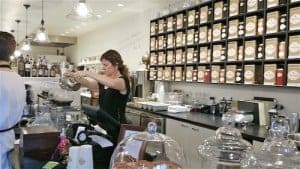
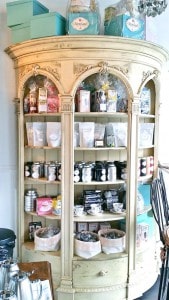
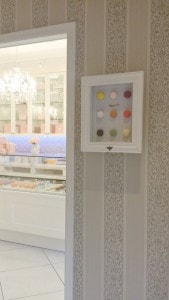
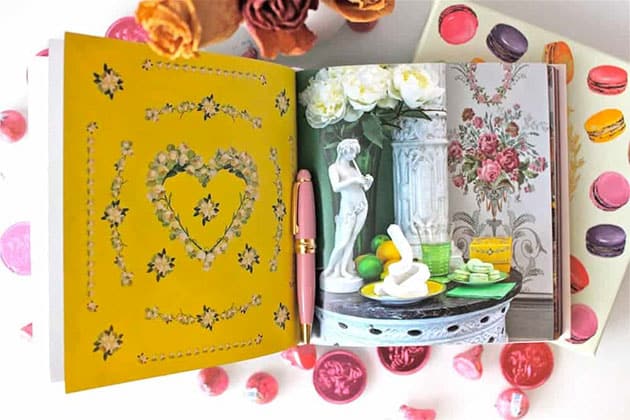
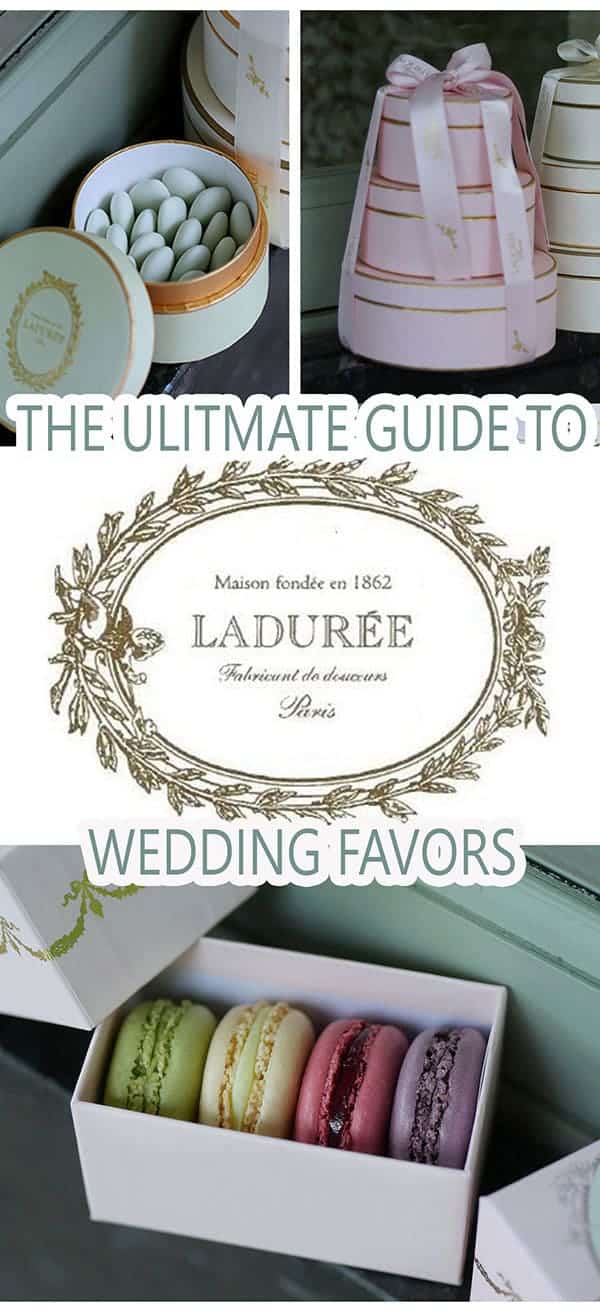
 Laduree has 3 separate locations in Hong Kong. I know, a total of three for a tiny area of just 1100 square miles! And here I am hoping that they would open just one shop in Canada so that I could potentially have their goodies shipped to me. Bestie and I chose to visit the Laduree Tea Room location in Central Hong Kong because they offer a place to sit for afternoon tea. Real estate in Hong Kong is not cheap as you can imagine when 7 million people are crammed into this tiny yet energetic place. So unlike their European locations with the iconic street front facade, this one is located inside of a glitzy cosmopolitan shopping centre.
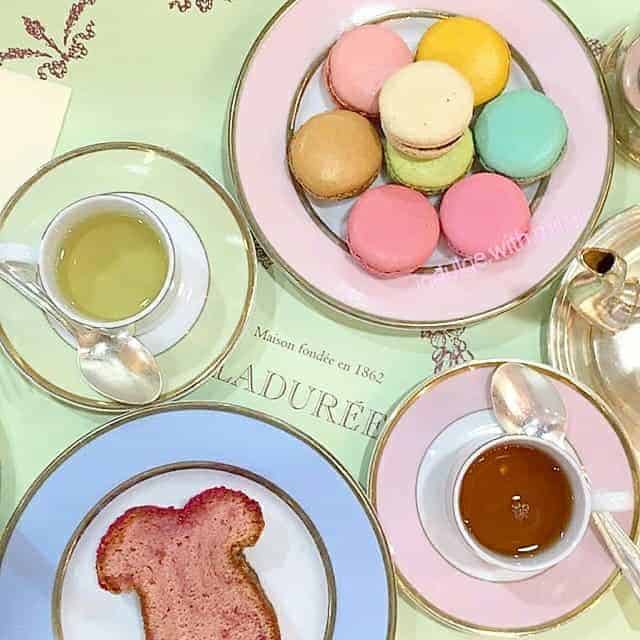
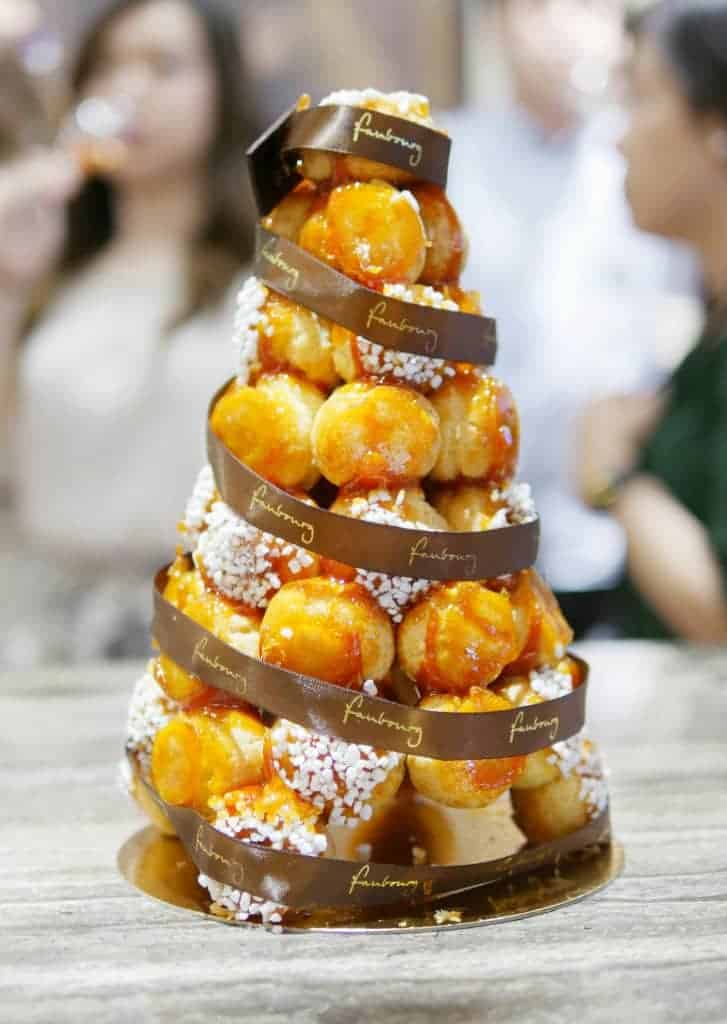
 One word description: Iconic


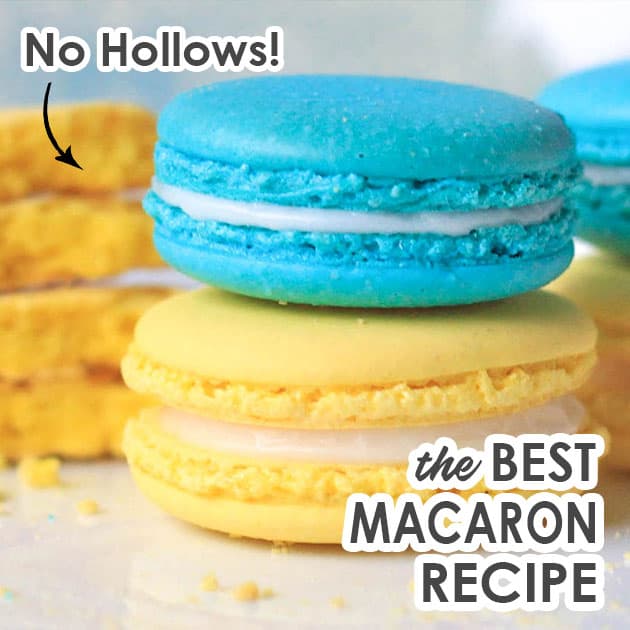
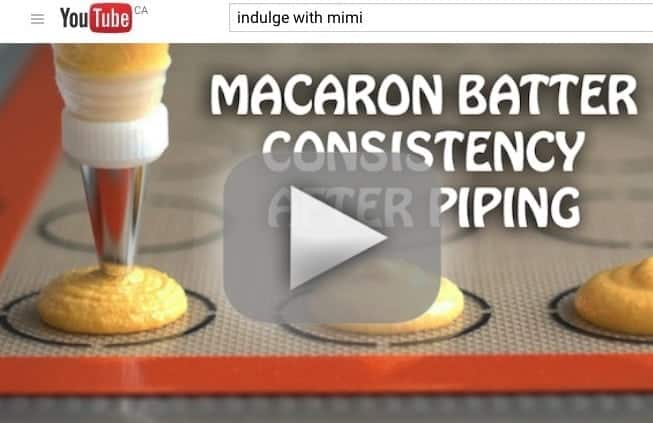
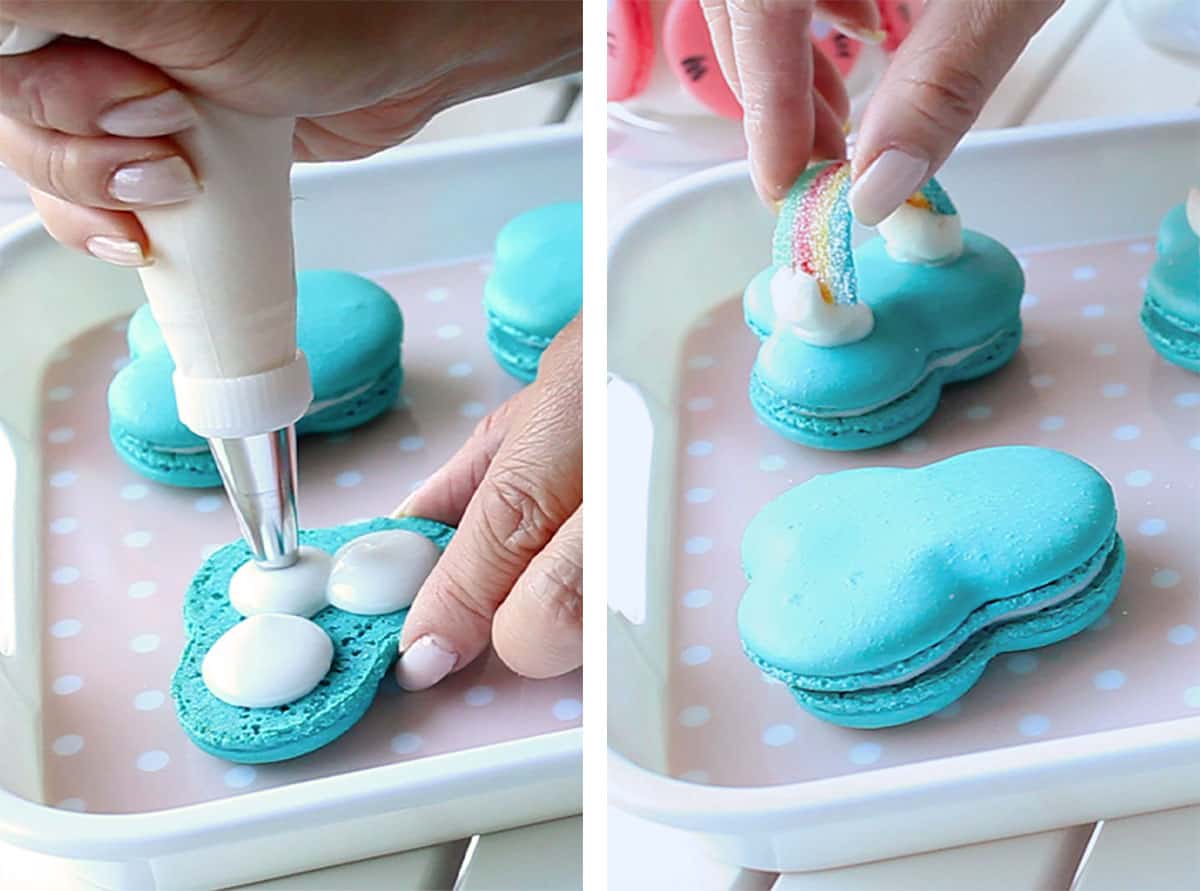
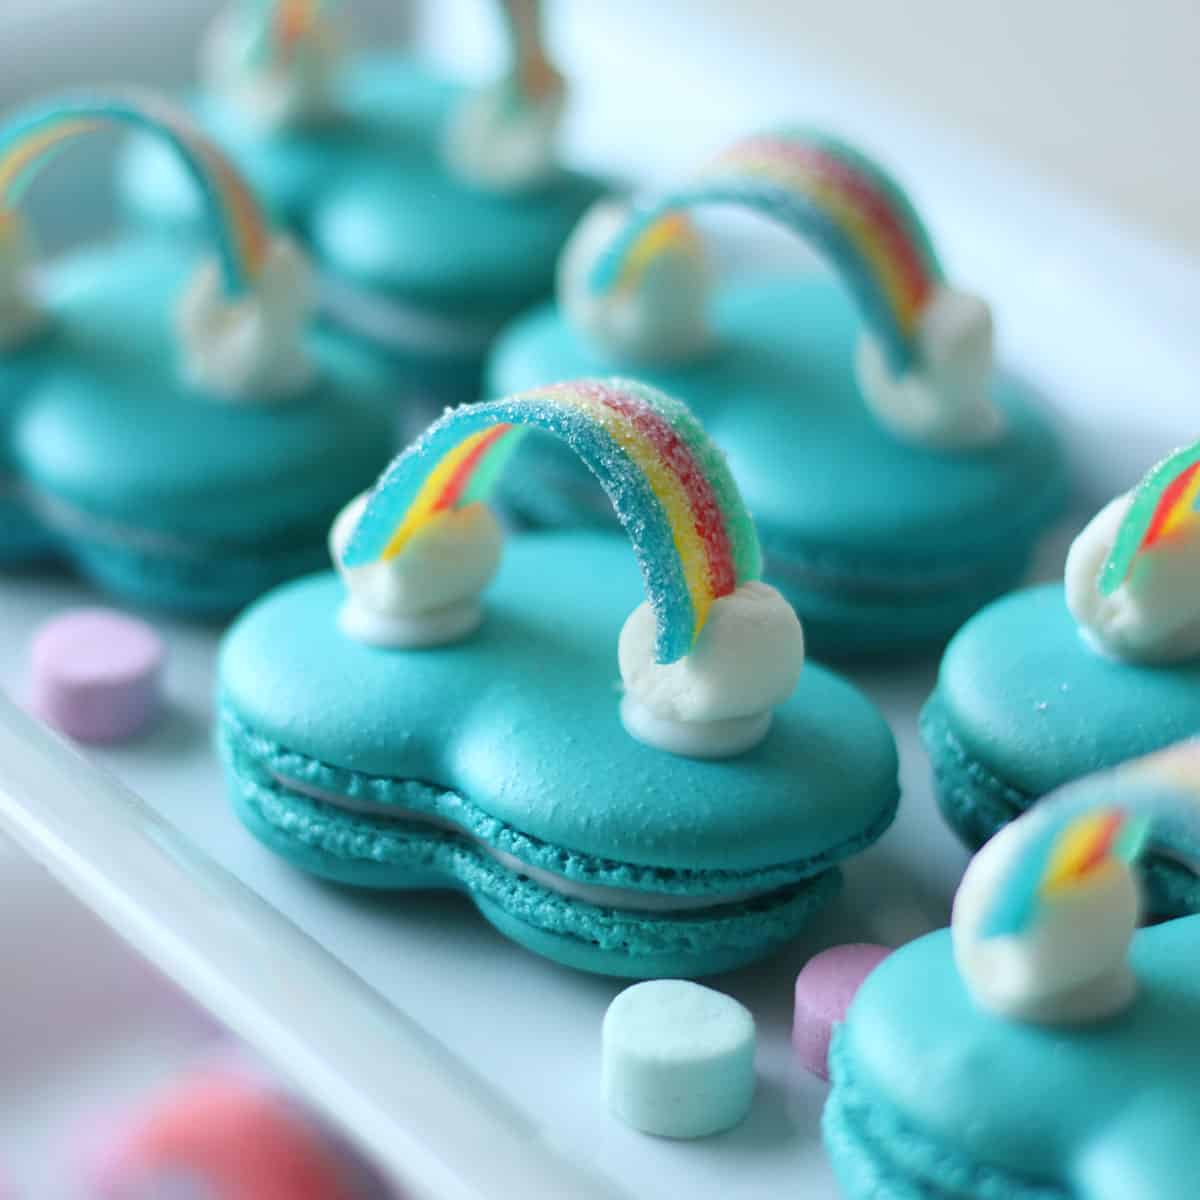
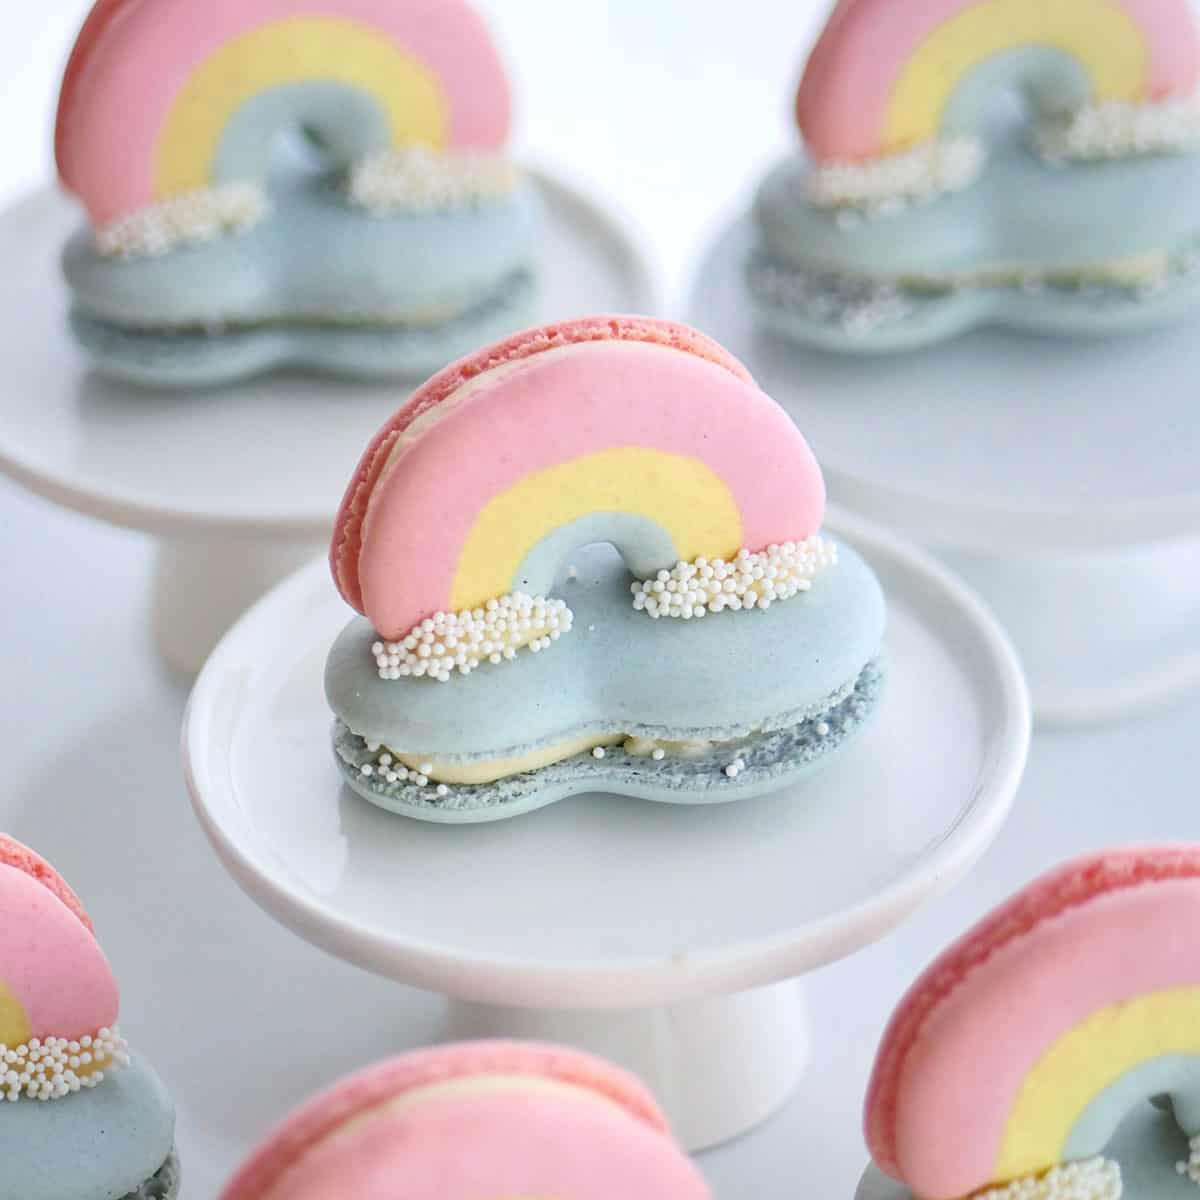
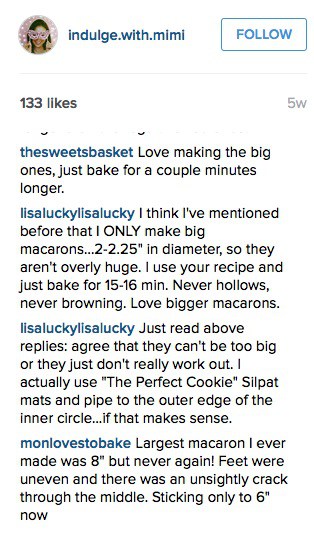
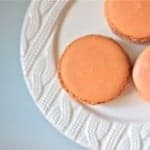
 Big macarons need more drying time:
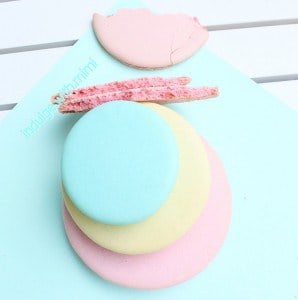 Big macarons take longer to bake:


 You may have already discovered that afternoon tea in Vancouver is not one of those dining experiences which you can casually decide on last-minute. You might run into obstacles such as full-houses, tea sets which requires 24 hours advance booking and weekend-only offerings. So on Friday morning when my friend and I decided on the spur-of-the-moment to go for afternoon tea, I was really scrambling to find one that would have us on such short notice. One place that has always been on my radar is Rose House. I remember that they close on Mondays which was why I could not visit the last time I wanted afternoon tea in Kerrisdale. This time, it was around 8 am when we decided on tea but I knew Rose House would not be open for another three hours. I took the chance hoping that when 11 am came around, they would pick up and tell us it would be okay to come down and indulge in some sweet treats. And indeed, when I called back several minutes after opening (yes, I am that neurotic client!), they enthusiastically welcomed us to come in for afternoon tea. It was a great start already.
 Rose House is located on Balsam street off of 41st in Kerrisdale. I can't believe how many times I have passed by without ever noticing it. I guess to be fair, it is situated on a side street. It is very interesting to note that this is perhaps the third tea house in Kerrisdale besides the much-hyped, Secret Garden and the classically sweet, Adonia.
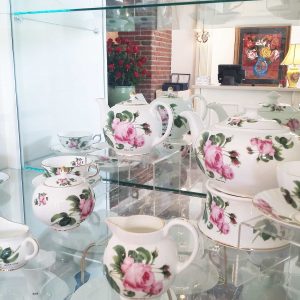
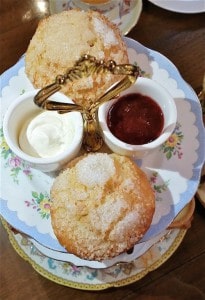
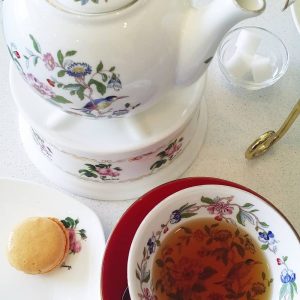 Their traditional 3 course afternoon tea is named Prince William Tea Set and includes a drink worth $7.95. If you choose a beverage item over that, you pay the difference between the two. There are even cold tea selections too, which I find refreshing. I imagine it would be really nice to have one when the weather becomes warmer. My friend and I both chose hot teas that came in exquisite tea pots that were kept warm by teapot warmers. I really like this special detail. The warmers are not only practical for keeping the tea warm but adds that special elegance to the tea time experience.
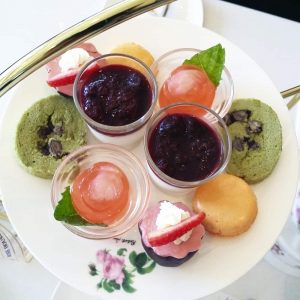
 One word description: Rose!
 Other notes:
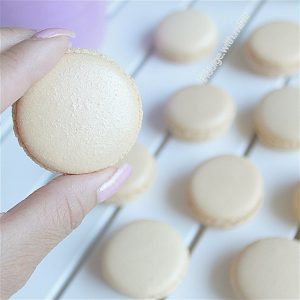
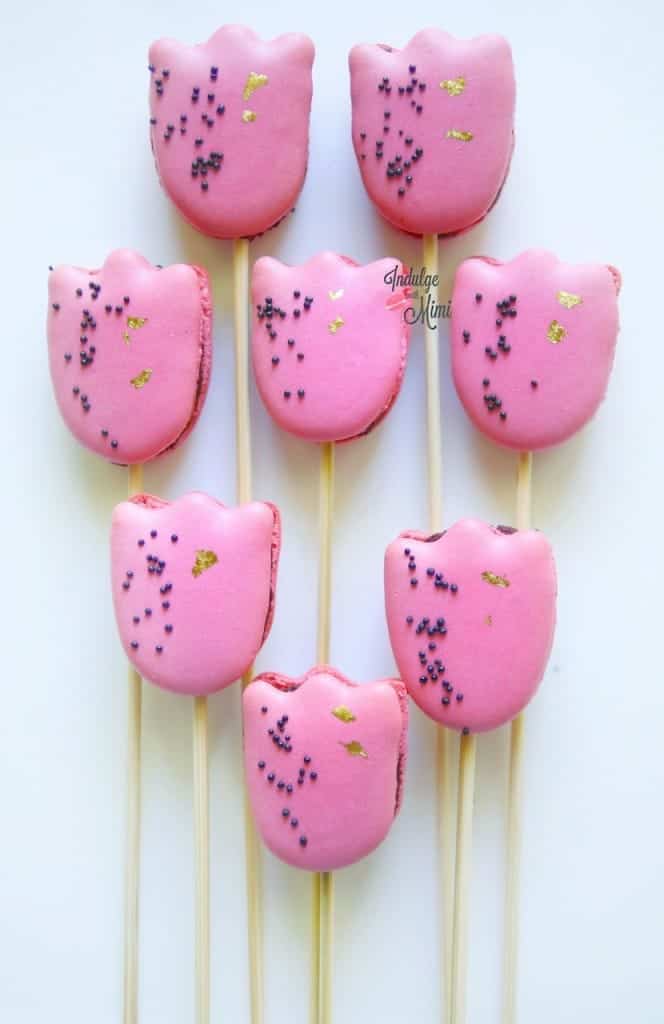
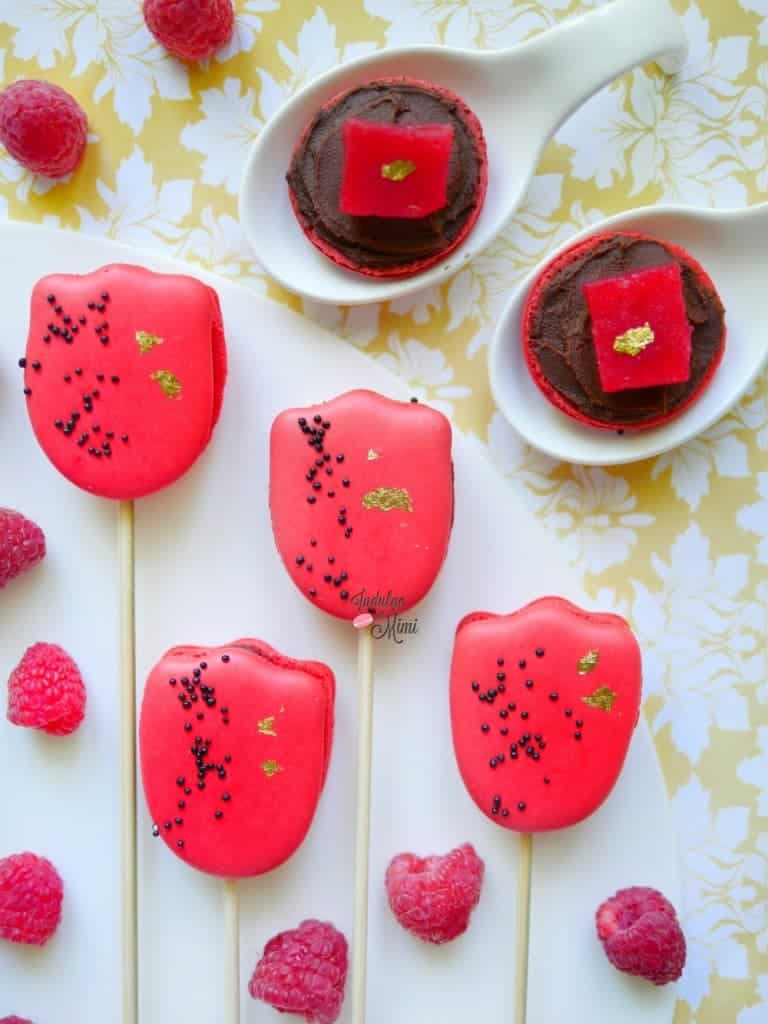
 A super easy way to up your macaron game is to incorporate the use of the warm and shimmery colour of luxurious gold. As humans, we seem hard-wired to be attracted to all that sparkle and shine. Today, I'll introduce three simple and edible items which will help you create eye-catching little goodies that will stand out from the crowd!
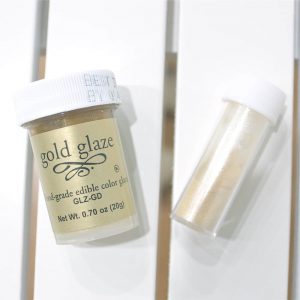 1. Americolor's Gel Colour in Gold: As you can remember from my
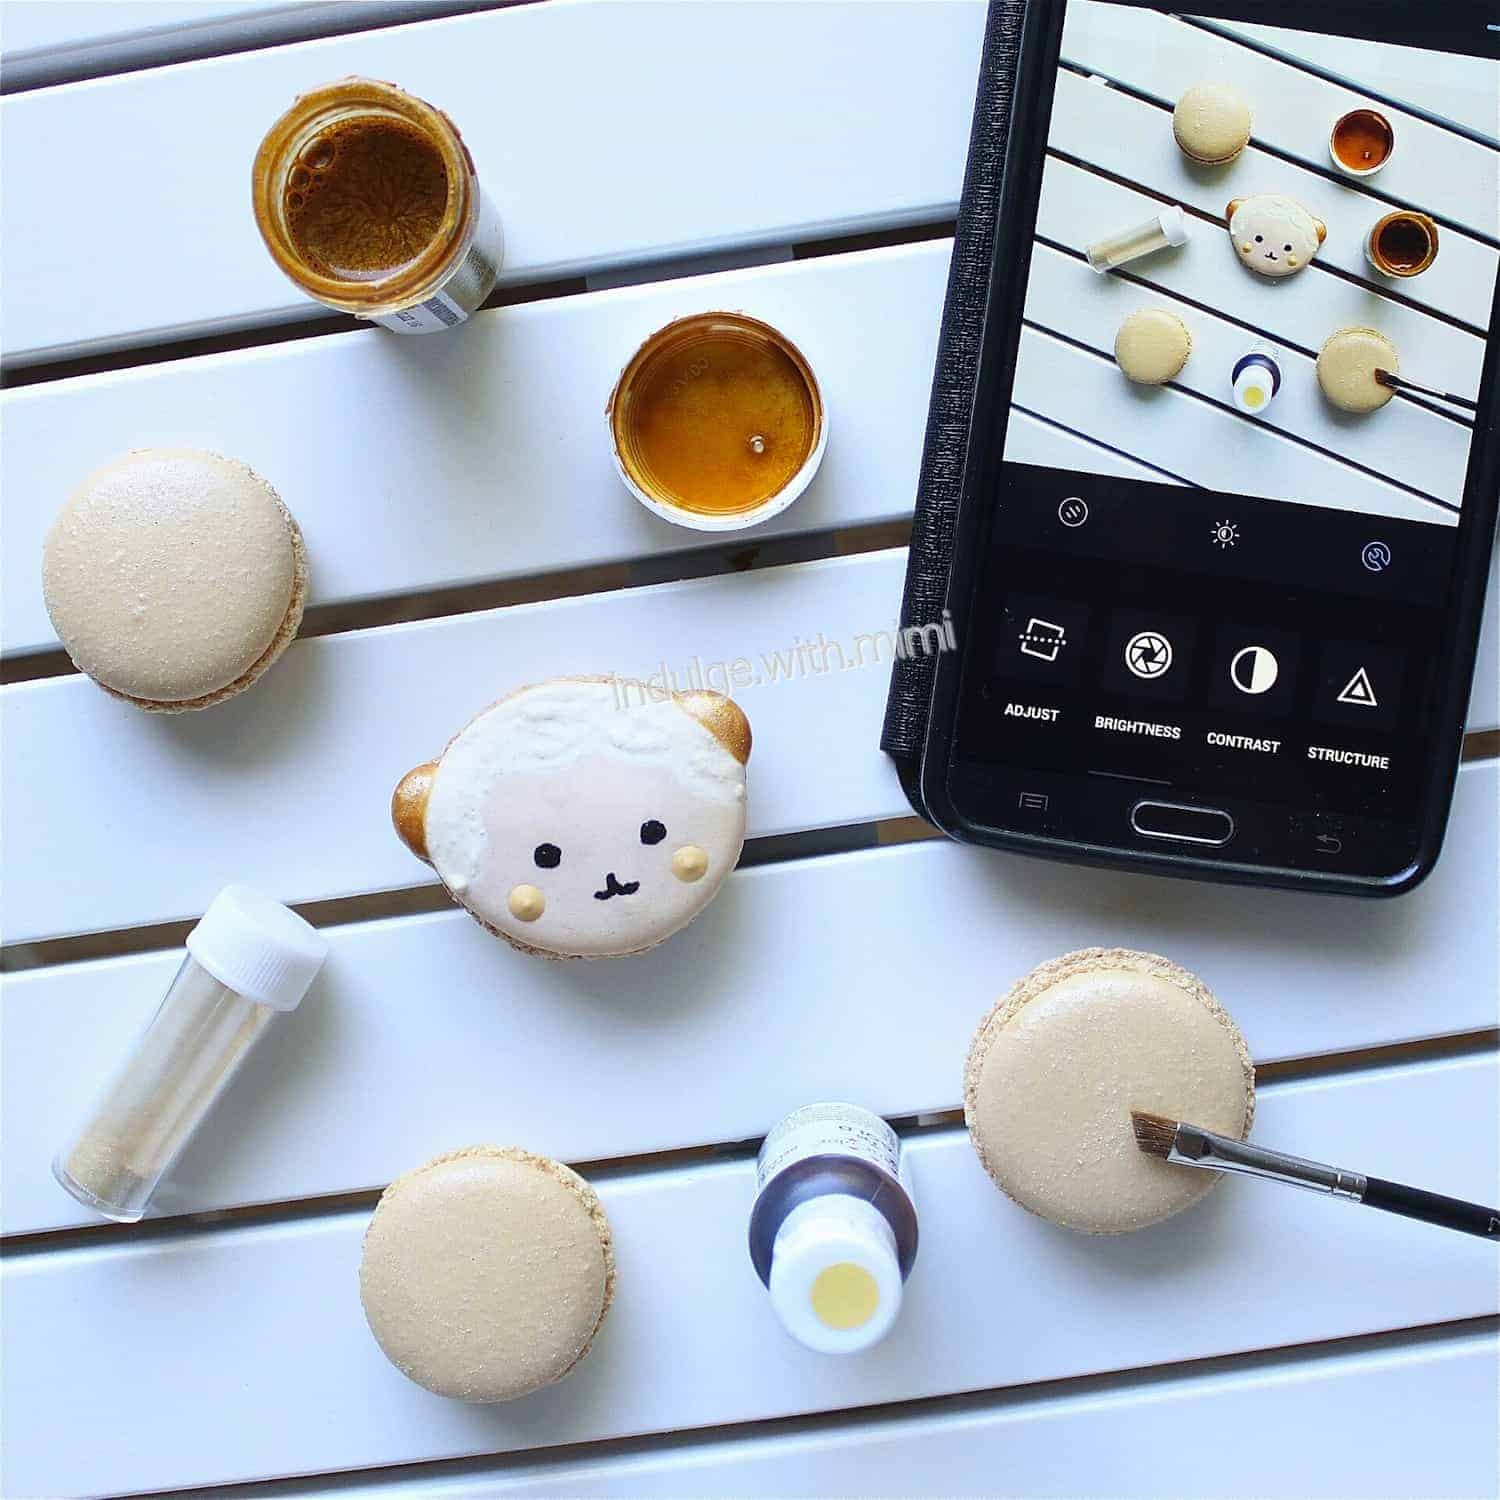
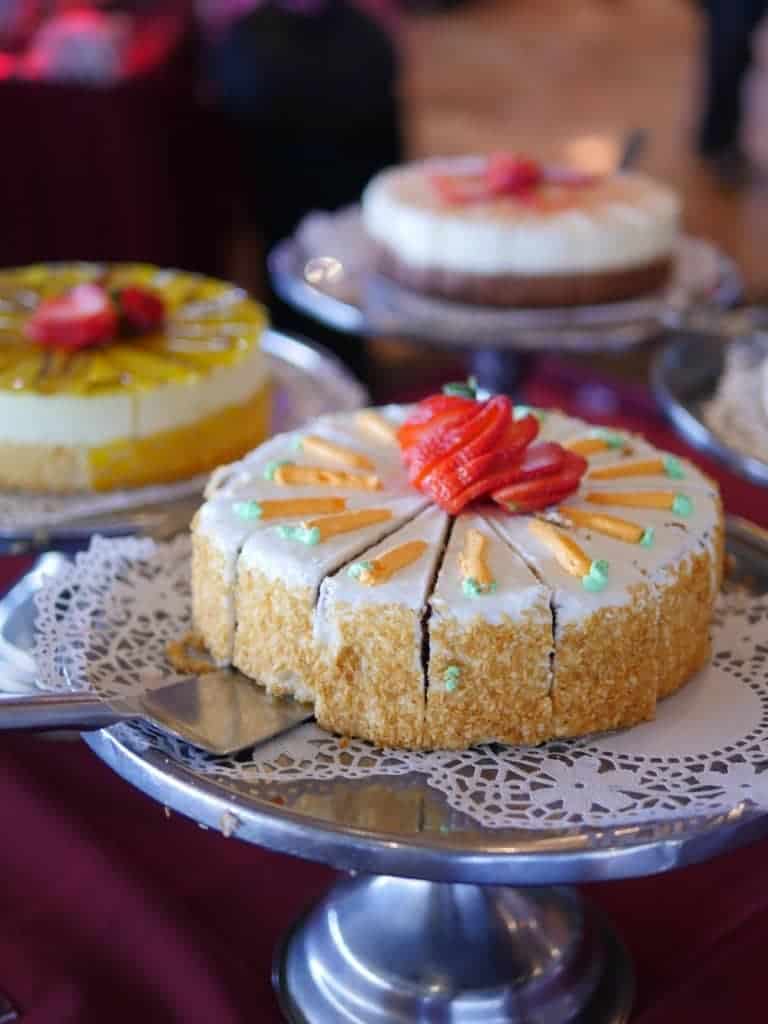
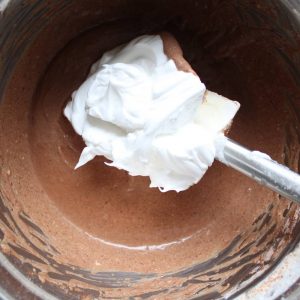
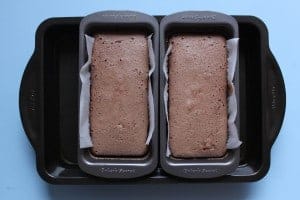
 We just finished moving into our new home and we've only been here one week. Initially, we had no plans to host a Housewarming Party so soon. However, the opportunity for us to do so came up sooner than anticipated because all our family members happened to be in town, including my favourite aunt who was visiting from Asia. Amongst all the packing, unpacking and cleaning, cooking a three-course meal for a party surely seemed like an ambitious task. Luckily, I had just learnt how to make a descent ribs and pasta dinner so my mains were covered. As for the dessert, it was very important to work with a no-fail recipe since I had very little time to spare. I chose this delicious Japanese style chocolate cheesecake that was deceptively easy to put together and turned out wonderfully.
 •
• 
 •
• •
•


 Penticton Lakeside Resort
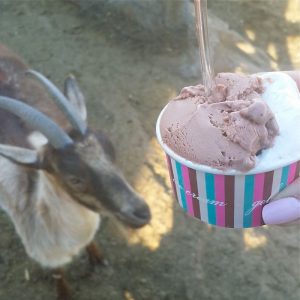 Carmeli's Goat Farm
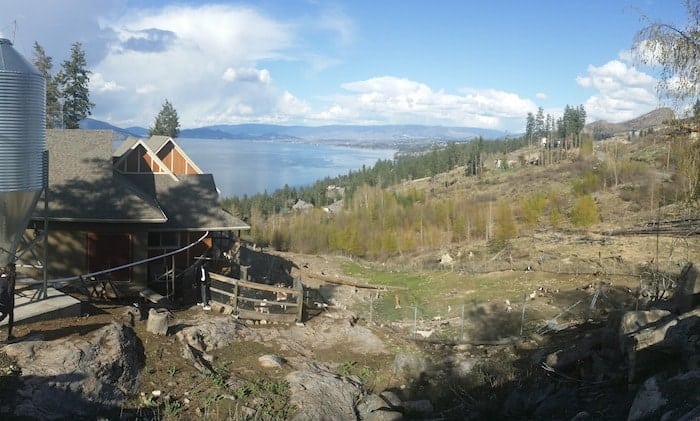
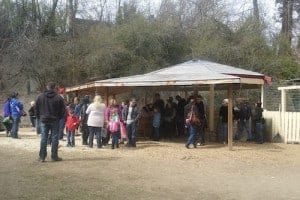
 Kangaroo Creek Farm
 Sandrine's French Patisserie
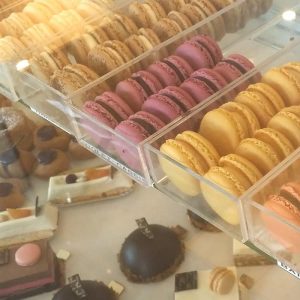

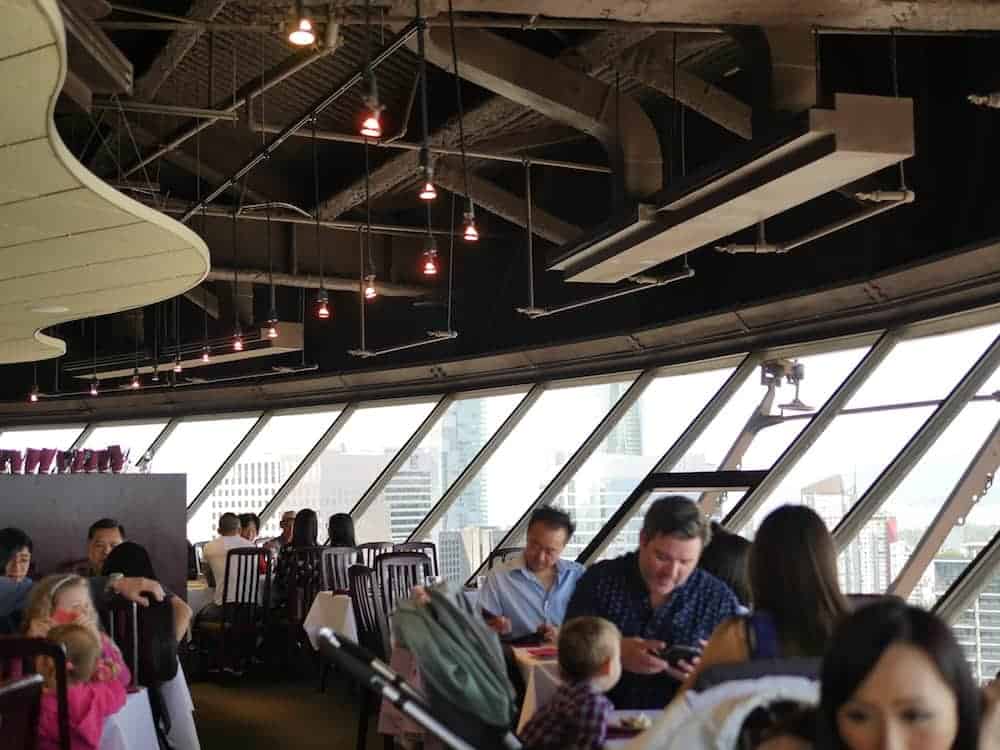
 When we arrived, the space was indeed nicely decorated with various sized chandeliers in different shapes hanging against a crisp white wall. The Feature Wall was used to display a substantial collection of the teas that they offer and it was also printed with inscriptions from the novel, Peter Pan. The furnishings were sweet and modest with the exception of a few longer pink chaise lounges in different corners of the room. The general look inside was one of simple elegance and white. It was pretty but the overall ambiance was not as "enchanting" as a place like
 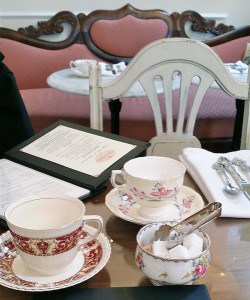 We all decided on the Afternoon Tea Set and were delighted to discover that the teas were "endless", meaning that we could try as many teas as we liked during our sitting. Although it sounded very enticing, I actually only ended up ordering one tea since I had three girlfriends with me and I had the opportunity to try all of theirs. I think it's a nice offer that would actually be much appreciated if someone were to go there with just one other guest. Sometimes, I really do want to try more than just one tea!
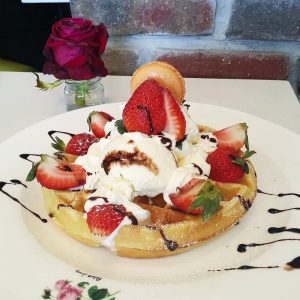
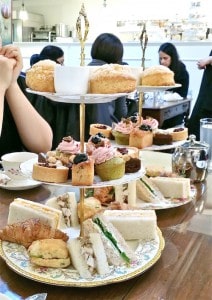 The afternoon tea sets was brought out on a three tier tray displaying the traditional three courses of afternoon tea - savouries, scones and sweets. One thing that really stood out about Neverland was their food. I was especially impressed with the fresh and very delicious savouries. Compared to the desserts which can be easily prepared in advance, I find that one area which some afternoon tea places often have trouble is with their savoury selections. This was not the case at Neverland. There were five different items including three mini sandwhiches, one sconewhich and one croissant. The chicken salad sandwhich was very well seasoned and filled with refreshing salt-roasted pears, grapes and walnuts. The buttery croissant with truffled mushroom and a creamy ripe brie was also noteworthy.
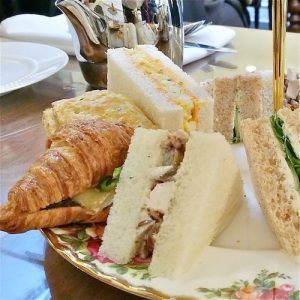
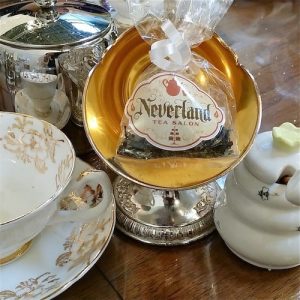 The service was professional and we had a great time. We were even sent away with a small sample of tea for brewing at home. It was an enjoyable afternoon for the four of us. Kinda like Sex and the City sans the alcohol lol. Oh.. and sans the raunchy talk too... okie... so lets just say it was like Sex and City because of the timeless friendship between good girlfriends. So here's to Neverland - the place where Peter Pan and friendships never get old.
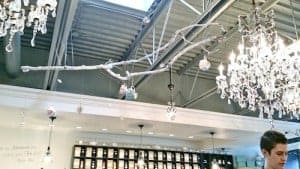
 Neither one is right nor wrong. It really depends on the look you're trying to achieve. But if your goal is to pipe a creation with distinct parts, it's important for you to plan each step and allow proper "drying" or "resting" time at each stage.
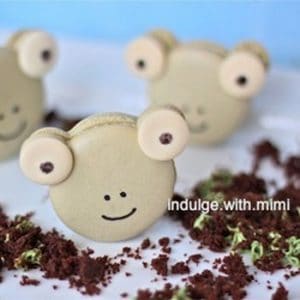
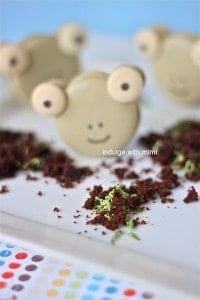
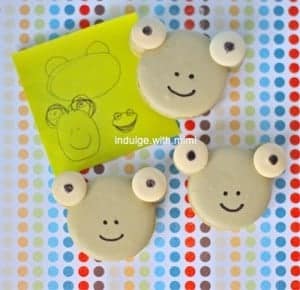
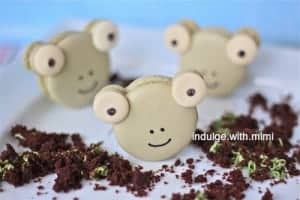 I made these froggy macarons because they were for my friend's sons and I needed them to appeal to boys. Nope,
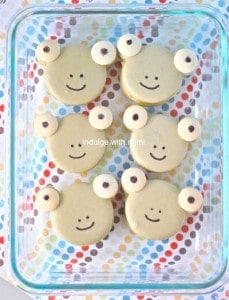
 I really love afternoon tea. I'm enamoured by every aspect of the afternoon tea experience - the decor, the ambience, the delicate finger foods, the tea selections and of course, the sweet desserts. I'm always on the lookout for a new place in Vancouver for afternoon tea. One place that has been on my list is Patisserie Fur Elise. From what I had gathered so far, the business is run in a Victorian heritage house that has been in Vancouver since 1893. It's a popular choice for hosting bridal showers and for those looking for a nice place to sit down with their girlfriends.
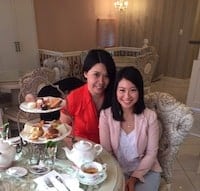 So was this going to be my very own Catfish story? LOL, no I'm just kidding - it was more like the modern equivalent of meeting a pen pal in the digital age. As soon as I saw Jo outside of the tea house, she came over to give me a HUGE hug and told me, "You look exactly the same as in your photos, Mimi". I hope it was a compliment as my first thoughts of her were that she had a strikingly beautiful voice and that she was much edgier in person - my kind of girl!
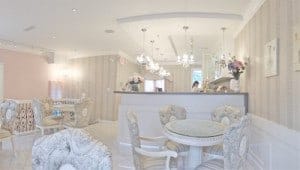
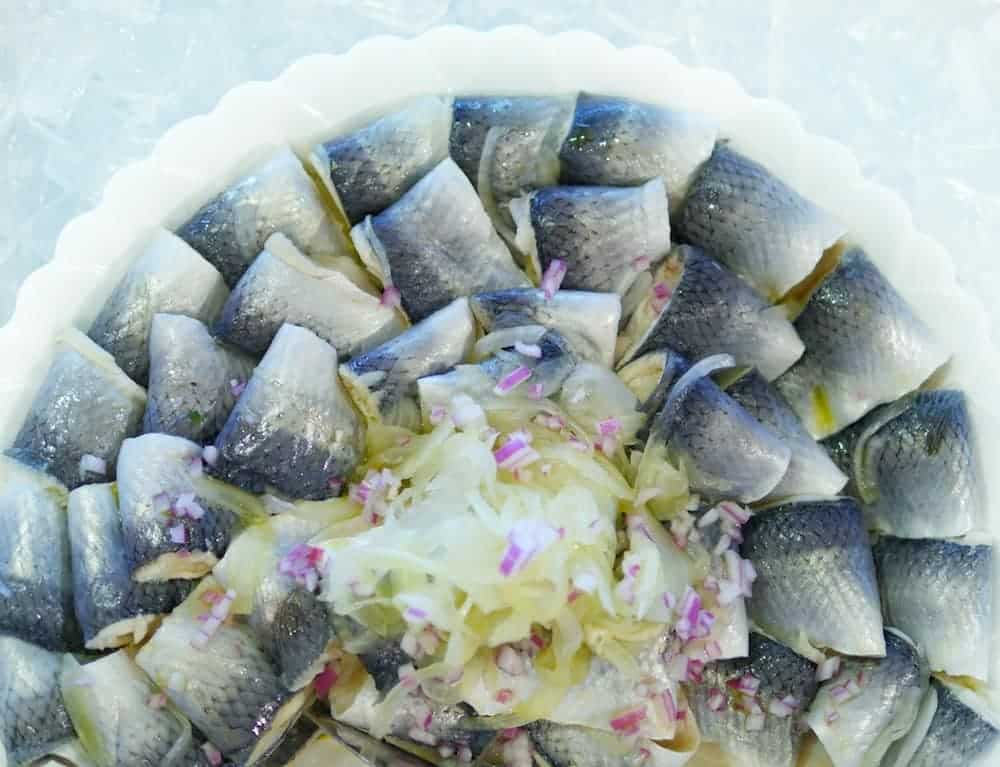
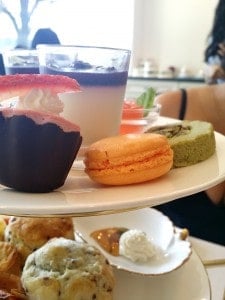
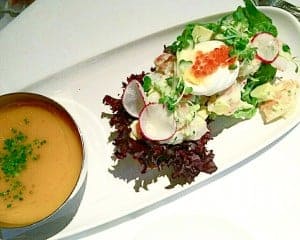
 Finally, the main tray containing the Full Tea came after that. The sweet and attentive server brought over two tiers of mini delicious delights and carefully explained each item on the tray. The savouries consisted of a croissant with prosciutto, brie and basil; a mini avocado and egg sandwich; shrimp with sakura glaze. Aside from the croissant which was very fluffy and buttery, I did not think there was anything special about the savoury selections. Besides, the prawns were also not too fresh tasting so I think it's probably best to leave out "seafood" when it cannot be properly executed.
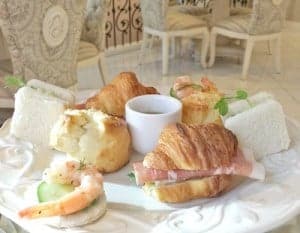
 It was my friend's housewarming party and she decided to have a potluck. As usual, I offer to bring the desserts. Not that I'm the baker in the group or anything but one thing is for sure, I'm definitely not the cook!
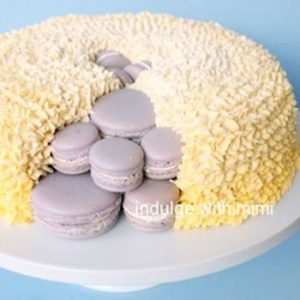
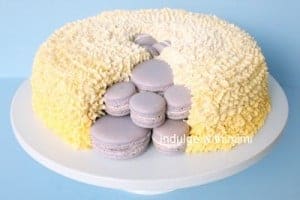
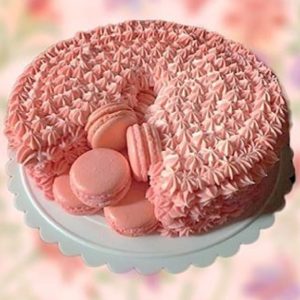
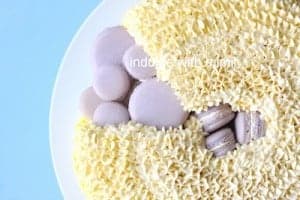 Construction
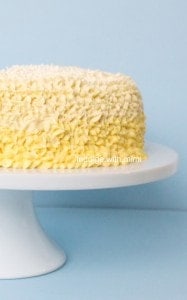 Frosting
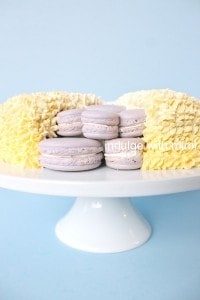 Flavors


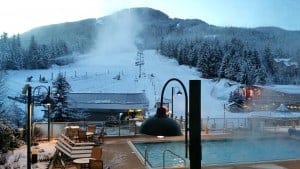
 Two weeks ago, I spent some time with my family up in Whistler during the Christmas Holiday. Just a short 1.5 hour ride from Vancouver, Whistler is a quick getaway that will immediately transform your whole entire psyche into a Winter Wonderland state of mind. It's amazing how quickly you can forget about the stresses of the city once you arrive.
 One thing for parents to keep in mind is that once your child slides down to the bottom, they will need to have the ability to get up from the tube and walk themselves and their tube to the safety of the side through a crosswalk. I didn't see many staff near the bottom so luckily, we were all around to pick up my nephew from the bottom and walk through the cross walk with him as other tubers were also sliding through the crosswalk at different times. All in all, it was a great outdoor experience that everyone could enjoy regardless of skill level.
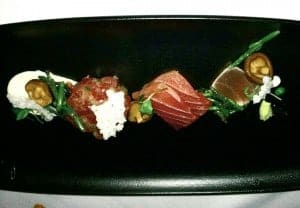


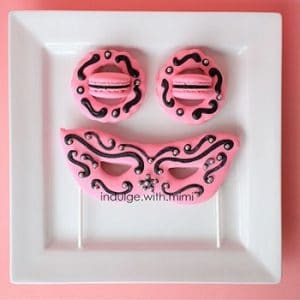
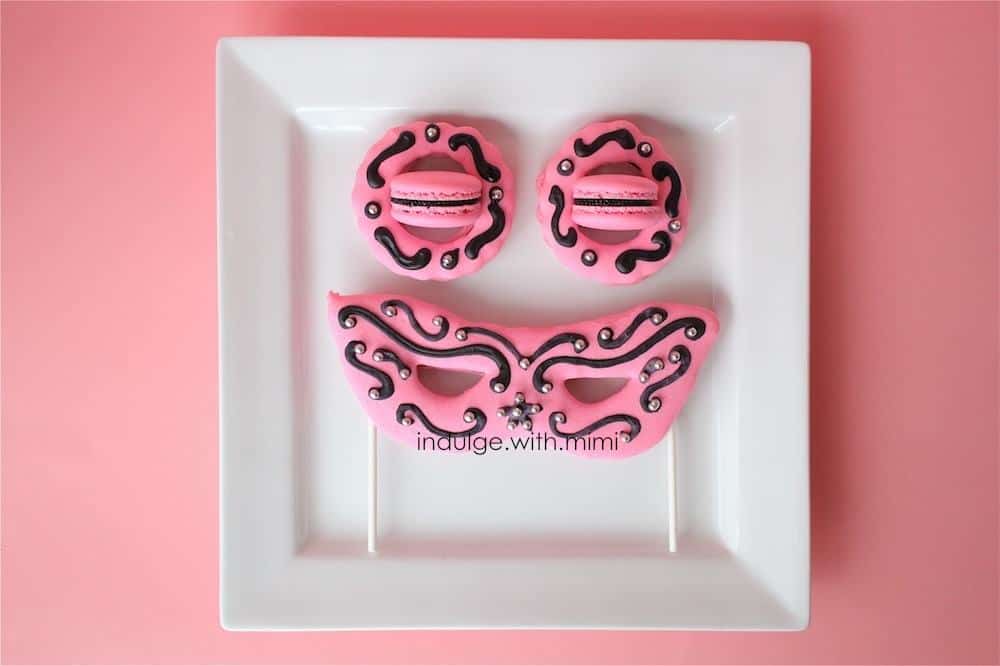
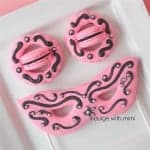
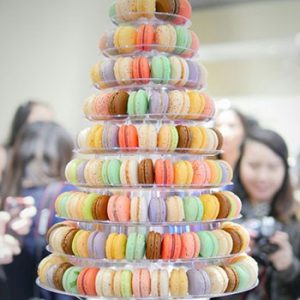
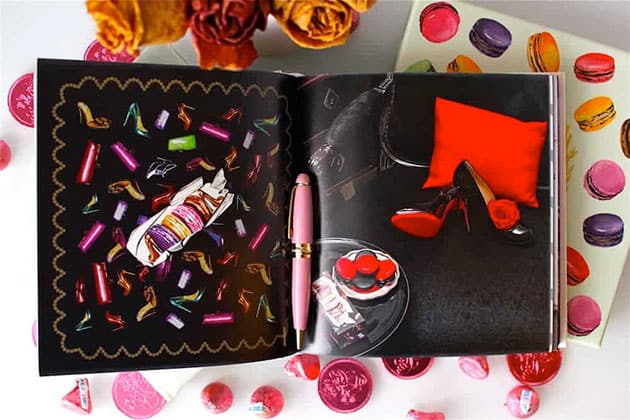
 The idea behind this macaron mask was to blur the lines between food and fashion. Food can be so beautiful. Throughout time, we've been using it as art-like show pieces. Think chocolate fondue fountains, macaron towers, sculpted wedding cakes etc... We already know we can use food as art but can we say that between food and fashion? So macaron mask, "Is it food or is it fashion?"

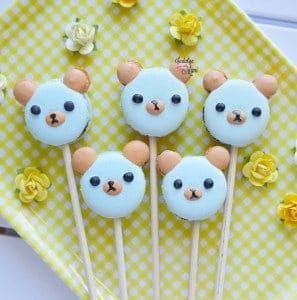
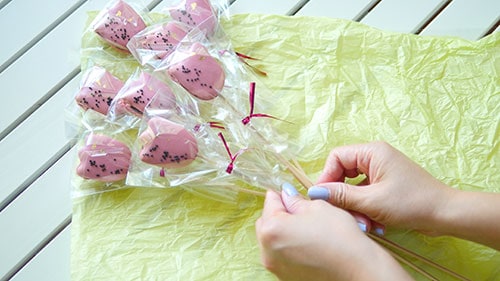
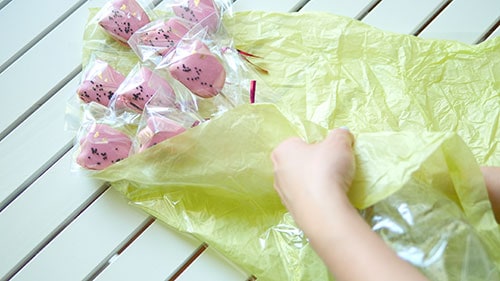
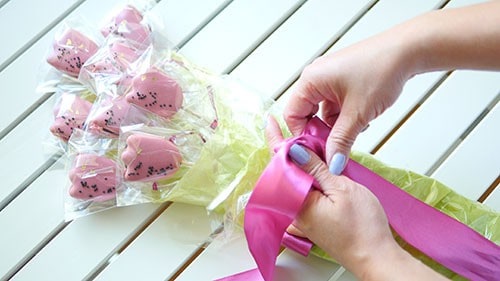
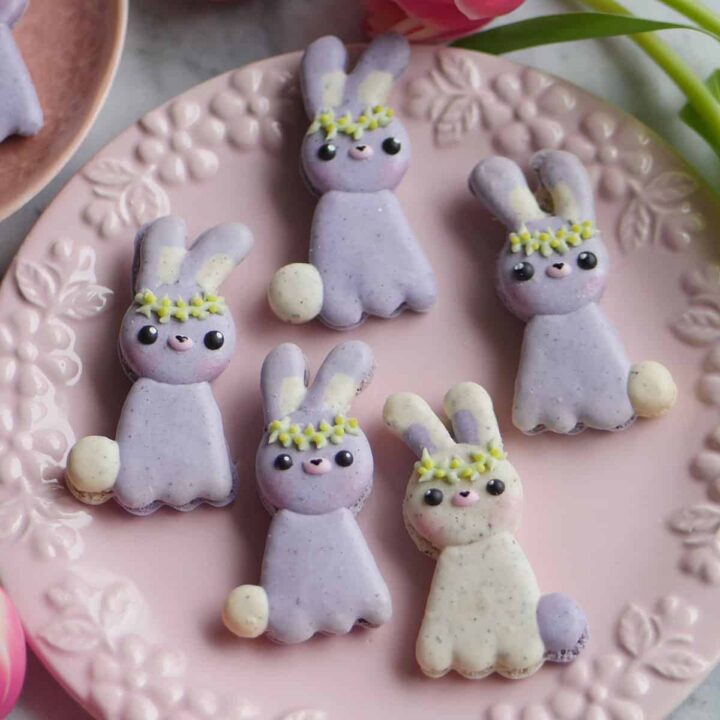
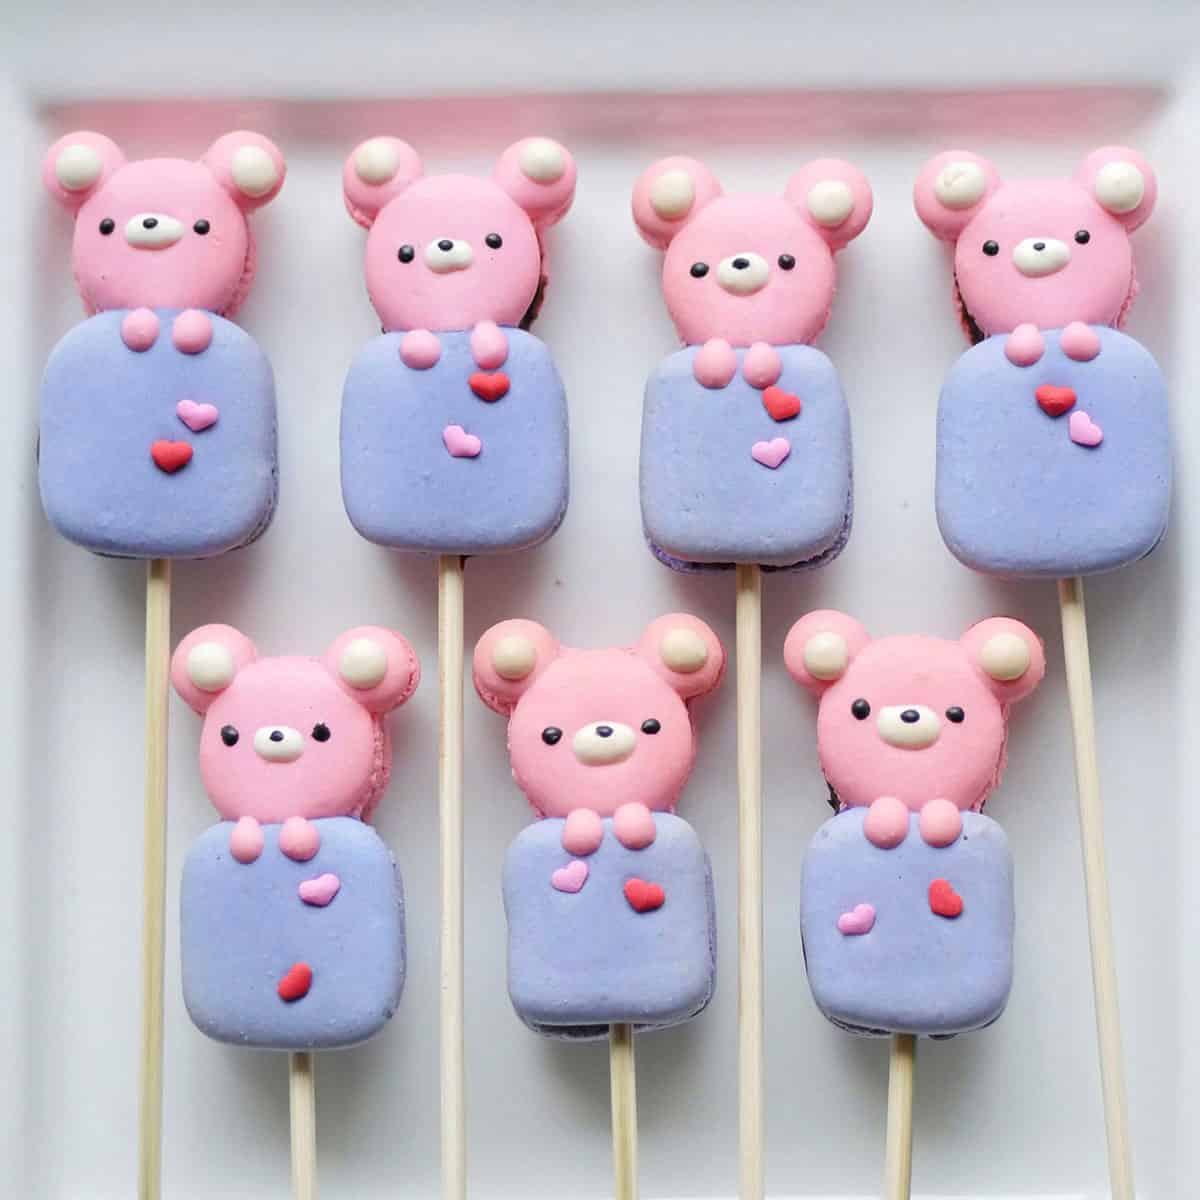
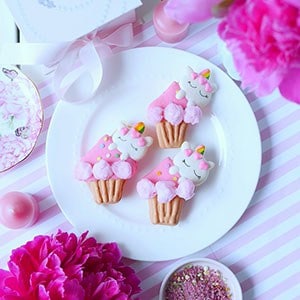
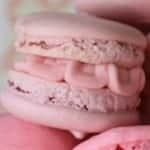
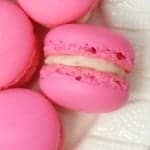
 I made these little pink bears for my friend's baby shower and as you can probably guess, it's going to be a GIRL! Woohoo!
 ♥
♥ I love making cute animal shaped macarons for gift giving. It always pleases me to see a big bright smile on someone's face when they receive them. Maybe it's a psychological thing, when someone sees a smile, they tend to smile back. And that's exactly the reaction you will get when you present a cute smiley animal macaron to your loved ones.
 Piping Unique Shapes: